Home>Garden Essentials>How To Create A Landscape Design In Canva
Garden Essentials
How To Create A Landscape Design In Canva
Modified: March 7, 2024
Learn how to design a stunning garden landscape using Canva's easy-to-use tools. Create beautiful outdoor spaces with our step-by-step guide.
(Many of the links in this article redirect to a specific reviewed product. Your purchase of these products through affiliate links helps to generate commission for Storables.com, at no extra cost. Learn more)
Introduction
Welcome to the world of landscape design! Whether you have a small backyard or a sprawling garden, creating a visually appealing and functional outdoor space can be a rewarding experience. With advances in technology, you no longer need to be a professional landscaper to bring your garden dreams to life. Canva, a popular graphic design platform, offers an array of tools and templates specifically designed for landscape design.
In this article, we will walk you through the process of creating a landscape design using Canva. From setting up your account to adding the finishing touches, we’ll cover everything you need to know to create a stunning outdoor space that reflects your style and personality.
Before we dive in, it’s important to note that while Canva provides a user-friendly interface, a basic understanding of design principles and an eye for aesthetics can greatly enhance your final results. So, grab your gardening gloves and let’s start designing!
Key Takeaways:
- Design your dream garden in Canva by setting up an account, choosing a template, customizing the canvas size, adding elements, and enhancing with colors and text. Let your creativity bloom!
- Canva makes landscape design easy and fun! Arrange elements, add text, and save your design to bring your outdoor sanctuary to life. Get ready to unleash your green thumb!
Step 1: Setting up your Canva account
Before you can begin using Canva’s landscape design tools, you’ll need to create an account. Don’t worry, it’s free and easy to do! Simply visit the Canva website and click on the “Sign up” button. You can choose to sign up with your email address or through your existing Google or Facebook account.
Once you’ve created your account, take a moment to explore the different features and options available to you. Canva offers a wide range of design templates for various purposes, including landscape design. Familiarize yourself with the platform’s interface and take a look at the design elements and tools that will help bring your vision to life.
Additionally, consider exploring Canva’s library of images, icons, and fonts. This vast collection will give you plenty of options to choose from when customizing your landscape design. You can browse through different categories, search for specific elements, and even upload your own images to personalize your design even further.
Take some time to familiarize yourself with the different functions and tools available in Canva. Understanding how to navigate the platform will make the rest of the process much smoother.
Now that your account is set up and you have a basic understanding of the Canva platform, it’s time to move on to the next step: choosing the right template for your landscape design.
Step 2: Choosing the right template
Once you’re logged into your Canva account, you’ll be presented with a wide range of templates to choose from. To find the perfect template for your landscape design, navigate to the search bar and type in keywords such as “landscape design” or “garden layout. Canva will then display a variety of templates that match your search.
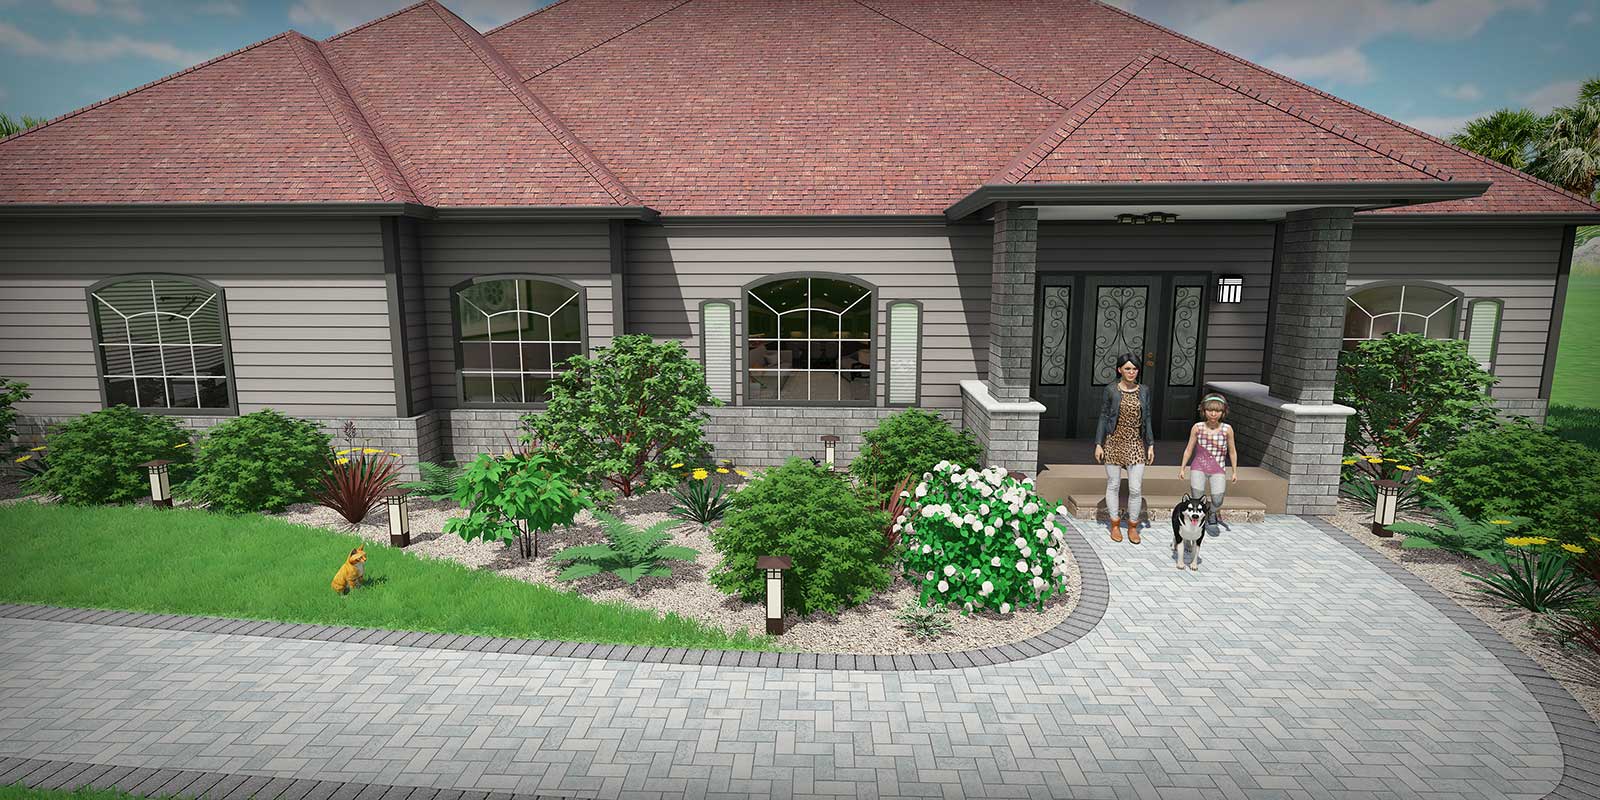
It’s important to choose a template that closely aligns with your vision and the size and shape of your outdoor space. Canva provides templates for various garden styles, including modern, tropical, rustic, and formal designs. Take your time to browse through the options and select the one that resonates with your aesthetic preferences.
Keep in mind that the template is just a starting point. You can customize and modify every aspect of the design to suit your specific needs. So don’t worry if you can’t find the exact template for your garden, as Canva gives you the flexibility to create a design that is uniquely yours.
Once you’ve chosen your preferred template, click on it to open it in the Canva design editor. Here, you’ll be able to see all the individual elements and sections of the template that you can modify and customize.
Before moving forward, familiarize yourself with the different elements within the template. Observe how the various sections, such as plots, pathways, and seating areas, are arranged. This will help you plan your own design modifications and make the most out of the template you’ve chosen.
Now that you have selected the template that suits your landscape design needs, it’s time to move on to the next step: customizing your canvas size.
Step 3: Customizing your canvas size
After you have chosen the template for your landscape design, it’s important to customize the canvas size to match the dimensions of your outdoor space. Canva provides a range of pre-set canvas sizes, or you can choose to create a custom size by specifying the exact measurements.
To customize the canvas size, navigate to the top right corner of the design editor and click on the “Resize” button. A dropdown menu will appear, displaying the available canvas size options. If none of the pre-set sizes match your requirements, click on the “Use custom dimensions” option.
In the custom dimensions settings, enter the width and height measurements that correspond to your garden layout. Keep in mind the scale and proportions when determining the size of the canvas. It’s essential to accurately represent the actual dimensions of your outdoor space to create a realistic mock-up of your landscape design.
Once you’ve inputted the custom dimensions, click on the “Apply” button to resize your canvas. You will notice that the canvas now reflects your specified measurements, providing you with an accurate representation of your garden layout.
Now that your canvas size is customized, you can proceed with adding background elements to set the tone and atmosphere of your landscape design. This brings us to the next step: adding background elements.
Step 4: Adding background elements
Adding background elements is a crucial step in creating your landscape design. These elements help establish the overall look and feel of your outdoor space. Canva offers a wide range of background options, allowing you to choose from different colors, textures, and patterns.
Start by selecting the background section of your design. In Canva, the background section is usually labeled as “Background” or “Canvas.” Click on this section to access the background customization options.
Canva provides several ways to customize the background of your landscape design. You can choose a solid color from the color palette, use a gradient effect to add dimension, or select a textured background to create visual interest.
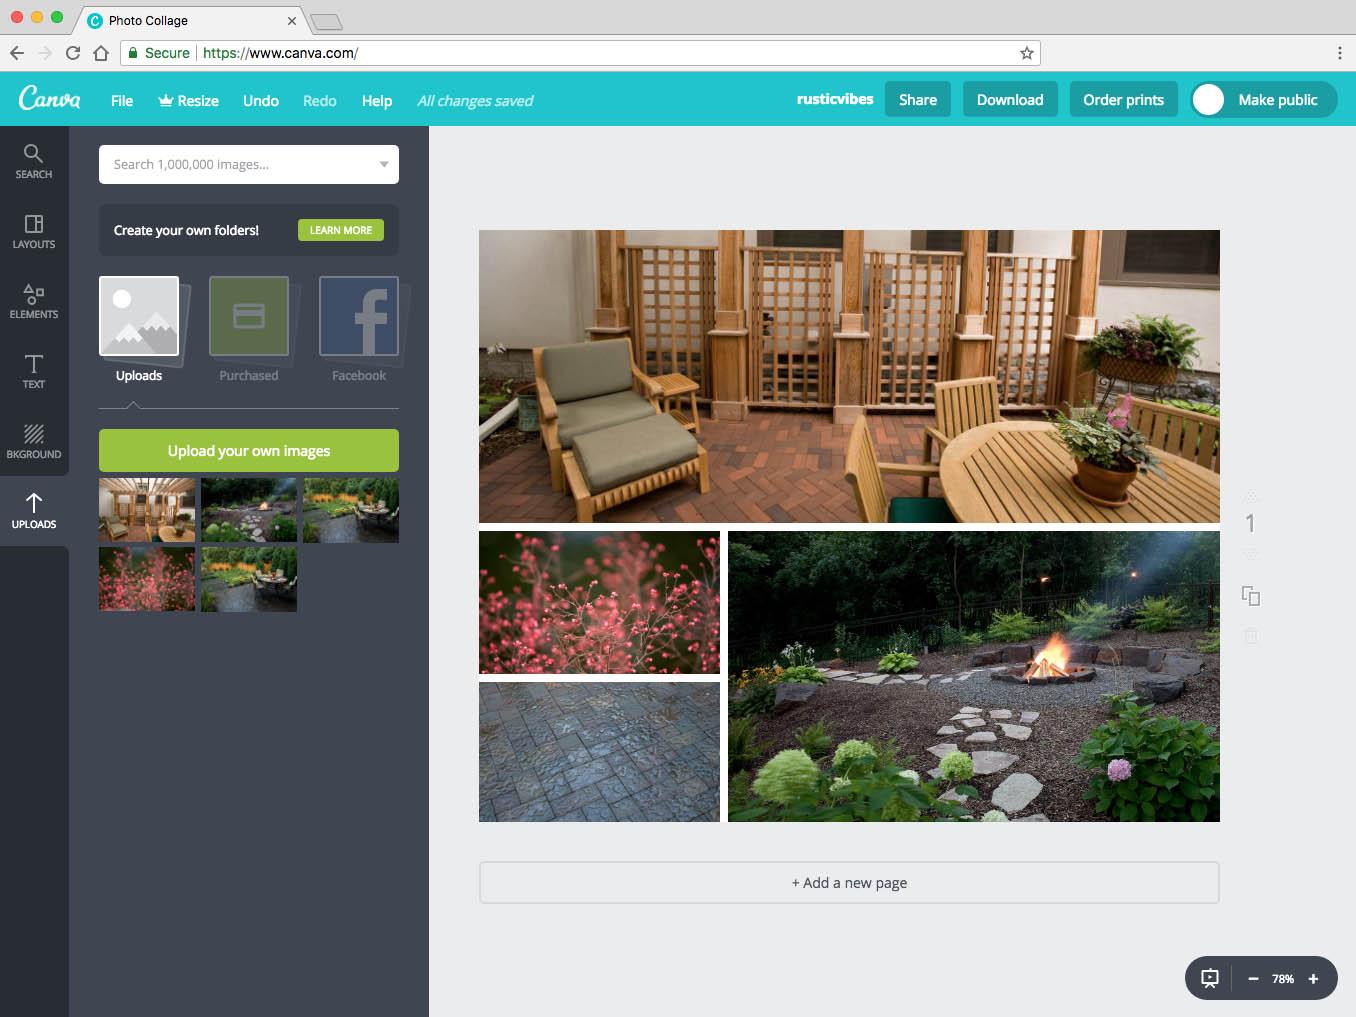
If you have a specific backdrop in mind, such as a photo of your garden or a scenic landscape, you can also upload your own image as the background. Canva allows you to seamlessly import photos from your computer or choose from their extensive library of images.
When adding a background image, ensure it is high-quality and of the appropriate resolution to avoid any pixelation or distortion. You can resize and position the image to fit your canvas using Canva’s editing tools.
Remember, the goal of the background elements is to complement and enhance your landscape design, so choose colors, textures, and patterns that will harmonize with the overall theme and style you have in mind.
Once you’re satisfied with your background selection, you can proceed to the next step: selecting and modifying landscape design elements. This is where you’ll start bringing your garden to life!
Read more: How To Design A Low-Maintenance Landscape
Step 5: Selecting and modifying landscape design elements
Now that you have customized the background of your landscape design, it’s time to select and modify the specific elements that will make up your garden layout. Canva provides a vast library of design elements, including plants, trees, flowers, hardscape features, and more.
Start by navigating to the “Elements” tab on the left-hand side of the design editor. Here, you’ll find a variety of categories to choose from, such as “Plants,” “Outdoor Furniture,” and “Hardscape.” Browse through these categories and select the elements that align with your vision for your garden.
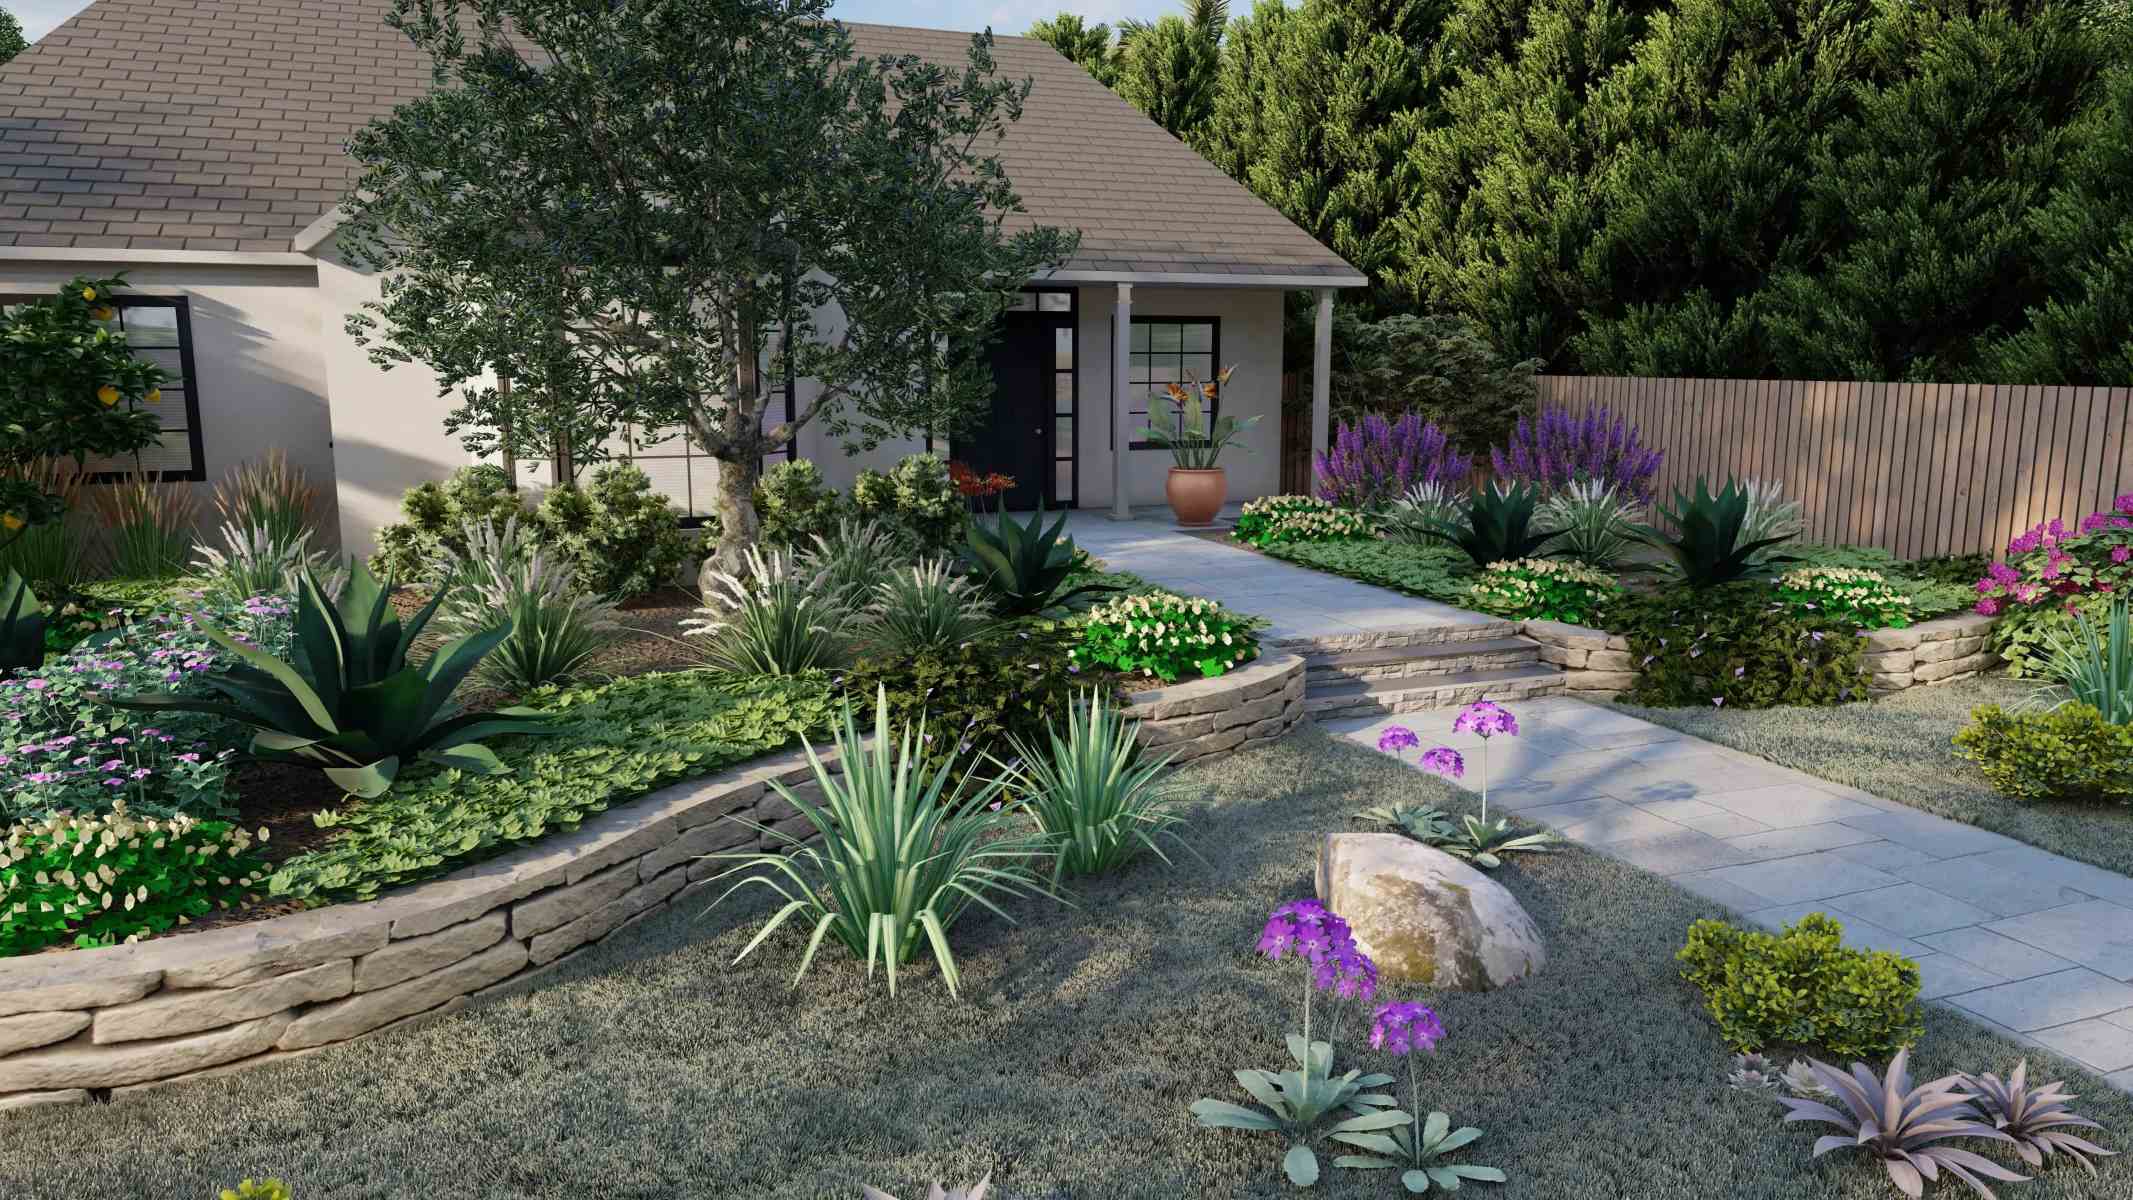
When selecting the elements, consider your garden’s style, theme, and functionality. Are you going for a tropical oasis with lush green plants and vibrant flowers, or a minimalist design with clean lines and simplicity? Choose elements that reflect your desired aesthetic and purpose.
Once you’ve selected an element, you can modify it to fit your design. Canva provides various editing options, such as resizing, rotating, and flipping elements. You can also adjust the transparency and add filters to enhance the visual effects.
Remember to maintain a sense of scale and proportion when placing elements in your design. Consider the size and growth patterns of the plants or the dimensions of furniture pieces. This will help create a realistic representation of your garden layout.
In addition to the visual elements, Canva also offers a range of line and shape tools that can be used to outline pathways, define borders, or create custom design elements. These tools allow you to add additional details and enhance the overall visual appeal of your landscape design.
As you add and modify the landscape elements, regularly step back and assess the composition of your design. Ensure that the placement and arrangement of the elements are balanced and visually pleasing. Don’t be afraid to experiment and make adjustments until you achieve the desired look.
With your landscape design elements selected and customized, it’s time to move on to the next step: incorporating text and typography. This will help add information and a personal touch to your design.
When creating a landscape design in Canva, start by choosing a background that represents the environment you want to create. Then, add elements like trees, flowers, and other natural features to bring your design to life.
Step 6: Incorporating text and typography
Incorporating text and typography into your landscape design adds an informative and personal touch to your creation. With Canva’s extensive collection of fonts and text customization options, you can easily add labels, descriptions, or even quotes to enhance the visual experience.
To begin adding text to your design, navigate to the “Text” tab on the left-hand side of the Canva editor. Here, you’ll find a wide range of text options, including pre-designed text templates, heading styles, and font variations.
Choose a text option that complements the overall style and theme of your landscape design. For example, if you’re going for a modern look, sleek and minimalistic fonts might work well. Or, if you’re aiming for a rustic garden feel, you can opt for handwritten or decorative fonts.
After selecting a text style, click on the design canvas to create a text box. Enter your desired text, whether it’s a label for a specific plant, a description of an area, or any other relevant information you want to include.
Canva provides a range of editing options to modify your text. You can adjust the font size, color, alignment, and spacing. You can also add text effects, such as shadows or outlines, to make the text stand out or blend into the design seamlessly.
Consider the placement of your text to ensure it is legible and does not obstruct any important elements in your landscape design. You can move and resize the text box as needed to achieve the desired positioning.
Don’t be afraid to get creative with typography! Experiment with different font combinations and text effects to find the perfect balance between readability and visual appeal.
Remember that text is a powerful tool for conveying information, so use it strategically to provide useful insights or bring a personal touch to your landscape design.
Now that you’ve added text and typography to your design, it’s time to move on to the next step: enhancing your landscape design with colors and filters.
Step 7: Enhancing with colors and filters
Colors play a vital role in creating a visually stunning landscape design. Canva provides various tools and options to help you enhance the color palette of your design and make it more vibrant and appealing.
To begin, explore the “Colors” tab on the left-hand side of the Canva editor. Here, you’ll find a wide range of color palettes and options to choose from. You can select a pre-designed color scheme that matches your garden’s theme or create a custom palette using the color wheel.
Consider the emotions and atmosphere you want to evoke in your landscape design. For a calming and serene garden, choose soft, pastel colors. For a bold and vibrant look, opt for vibrant hues and contrasting color combinations. Keep in mind that the colors you choose should complement the overall aesthetic and create a harmonious visual experience.
In addition to colors, Canva offers a variety of filters that can be applied to your landscape design. These filters can enhance the ambiance, add texture, or create a specific mood in your design. Experiment with different filters to find the one that best enhances your creation.
To apply a filter, click on the “Filter” tab in the editor toolbar. Canva provides a range of filter options, such as vintage, black and white, or gradient overlays. Scroll through the filters and click on the one you want to apply. You can adjust the intensity of the filter to achieve the desired effect.
Keep in mind that while colors and filters can enhance your landscape design, it’s important to use them judiciously. Avoid overwhelming the design with too many colors or excessively strong filters. Remember, the purpose is to enhance and complement the overall composition.
With your color palette selected and filters applied, you have now added a new dimension of visual appeal to your landscape design. The next step is all about arranging and organizing the elements to create a well-balanced and cohesive composition.
Step 8: Arranging and organizing elements
Arranging and organizing the elements in your landscape design is essential to create a visually pleasing and well-balanced composition. Canva offers a variety of tools that will help you position and align the different elements with precision.
To start arranging the elements, select the individual objects, such as plants, furniture, or other design elements, by clicking on them. Once selected, you can use the arrow keys or the mouse to move the elements around the canvas.
Ensure that there is enough space between elements, avoiding any overcrowding or clutter. Creating a sense of openness and balance is important for a visually appealing design. Pay attention to the relative scale and proportion of different elements to create a realistic representation of your garden layout.
You can also use Canva’s alignment tools to organize the elements precisely. Canva provides options to align objects horizontally, vertically, or according to the edges or centers. Utilize these tools to create a neat and organized layout.
In addition, Canva allows you to layer elements by adjusting their position on the canvas. Rearranging the layering order will affect how elements overlap each other, creating depth and dimension in your design.
As you arrange and organize the elements, regularly step back and evaluate the composition. Take a moment to assess how the elements interact with each other and if any adjustments are needed. The goal is to create a cohesive and visually pleasing arrangement that reflects your vision for the garden.
Once you are satisfied with the arrangement and organization of the elements, it’s time to move on to the final step: saving and exporting your landscape design.
Step 9: Saving and exporting your landscape design
Now that you have completed your landscape design using Canva, it’s time to save and export your creation. Canva offers several options for saving and sharing your design, allowing you to showcase your work or incorporate it into other projects.
To save your design, click on the “Download” button located at the top right corner of the design editor. Canva offers various file formats to choose from, including JPEG, PNG, PDF, or even GIF for animated designs. Select the format that best suits your needs and click on the “Download” button again to save the file to your computer.
If you have a Canva Pro subscription, you may also have the option to save your design directly to the cloud or share it with others through a link. This allows for easy collaboration and sharing with clients, friends, or fellow garden enthusiasts.
Before exporting, take a moment to review your design and ensure that everything looks as intended. Double-check for any typos, misplaced elements, or inconsistencies. It’s always a good idea to have a fresh set of eyes to review your design for any potential improvements.
Once you have saved or exported your landscape design, you can use it in various ways. Print it out and create a physical copy to refer to while working on your garden, share it on social media to gather feedback and inspiration, or use it as a blueprint for seeking professional advice.
Remember, your landscape design in Canva is just the starting point. As you work on your actual garden, you may make changes and adaptations based on practical considerations or new ideas that arise along the way. Let your design serve as a guide, but also be open to the creative process and the evolving nature of your garden.
Congratulations! You have successfully created a landscape design using Canva. Whether you are a gardening enthusiast, a professional landscaper, or someone looking to simply transform their outdoor space, Canva provides a user-friendly platform to experiment, visualize, and bring your garden dreams to life.
Enjoy the process of designing and growing your garden, and may your landscape design flourish into a beautiful outdoor sanctuary!
Conclusion
Creating a landscape design using Canva opens up endless possibilities for transforming your outdoor space into a visually stunning and functional garden. With its user-friendly interface, customizable templates, and extensive library of design elements, Canva empowers both professionals and gardening enthusiasts to bring their visions to life.
This article has guided you through the nine essential steps to create a landscape design in Canva. From setting up your account and choosing the right template to arranging elements and saving your design, you now have the knowledge and tools to embark on your garden transformation journey.
Remember, the key to a successful landscape design is combining aesthetics, functionality, and personal style. Take the time to plan and visualize your garden, considering factors such as plant selection, hardscaping elements, and positioning. Canva’s features allow you to experiment, customize, and modify your design until it matches your vision perfectly.
As you embark on your garden design project, be sure to consider the practical aspects, such as sunlight exposure, soil conditions, and climate. Adapt your design to suit the unique characteristics of your outdoor space, while still incorporating elements that reflect your personal taste and style.
Lastly, don’t forget to enjoy the process of creating your landscape design. Gardening is a journey of creativity, patience, and continuous learning. Use Canva as a tool to visualize your ideas and experiment with different possibilities, but also be open to the organic and evolving nature of your garden. Let it be a reflection of your personality and a source of beauty and tranquility.
Now, armed with your newfound knowledge of Canva and landscape design, it’s time to roll up your sleeves and get started! Embrace your creativity, unleash your green thumb, and let your landscape design flourish into a breathtaking outdoor sanctuary.
Frequently Asked Questions about How To Create A Landscape Design In Canva
Was this page helpful?
At Storables.com, we guarantee accurate and reliable information. Our content, validated by Expert Board Contributors, is crafted following stringent Editorial Policies. We're committed to providing you with well-researched, expert-backed insights for all your informational needs.
0 thoughts on “How To Create A Landscape Design In Canva”