Home>Garden Essentials>How To Germinate Microgreens
Garden Essentials
How To Germinate Microgreens
Modified: March 15, 2024
Learn how to germinate microgreens in your garden and enjoy fresh, nutritious greens all year round. Our step-by-step guide will help you get started!
(Many of the links in this article redirect to a specific reviewed product. Your purchase of these products through affiliate links helps to generate commission for Storables.com, at no extra cost. Learn more)
Introduction
Welcome to the world of microgreens! If you are a gardening enthusiast or a food lover, you are probably familiar with the term “microgreens.” These tiny, nutrient-packed greens have become incredibly popular in recent years due to their unique flavors, vibrant colors, and incredible health benefits.
In this article, we will delve into the fascinating world of microgreens and explore the process of germinating them. From understanding what microgreens are to the step-by-step guide on how to germinate them, this article will provide you with all the information you need to grow your own fresh and nutritious microgreens right at home.
So, what exactly are microgreens? These tiny greens are essentially young, edible plants that are harvested at the cotyledon or first true leaf stage. They are packed with flavor and contain higher concentrations of vitamins, minerals, and antioxidants than their fully grown counterparts. Microgreens come in various colors, shapes, and flavors, ranging from spicy radish and tangy arugula to vibrant purple basil and delicate cilantro.
Now, you might be wondering why germination is crucial when it comes to microgreens. Germination is the process by which a seed sprouts and begins to grow into a new plant. When you germinate microgreens, you are essentially unlocking their full potential. Germination not only increases their nutritional value but also enhances their flavor and texture.
To begin germinating microgreens, there are a few materials and equipment that you will need. These include seeds, a growing medium, trays or containers, water, and light. Choosing high-quality seeds is crucial to ensure successful germination. The growing medium provides a nutrient-rich environment for the seeds to sprout and grow. Trays or containers help contain the growing medium, while water and light are essential for the germination process.
Once you have gathered all the necessary materials, you can follow a step-by-step guide to germinating microgreens. This guide will walk you through the process from seed selection to harvesting. It will cover topics such as preparing the growing medium, planting the microgreen seeds, providing optimal growing conditions, caring for the germinating microgreens, and ultimately harvesting and using the microgreens in your culinary endeavors.
Throughout the germination process, it is important to choose the right seeds that are suitable for microgreens. Different seeds have different germination rates, flavors, and textures. By selecting the right seeds, you can ensure a successful and enjoyable microgreen growing experience.
Preparing the growing medium is another crucial step in the germination process. The growing medium provides the necessary nutrients and support for the seeds to sprout and grow. It is important to choose a growing medium that is lightweight, well-draining, and retains moisture well.
Once the growing medium is prepared, it is time to plant the microgreen seeds. Depending on the type of seeds, they may need to be soaked or pre-sprouted before planting. Proper spacing and seed density are vital for successful germination and growth.
The germinating microgreens require optimal growing conditions to thrive. This includes providing adequate watering, maintaining the right temperature and humidity levels, and ensuring proper air circulation. Light is also essential for their growth, and you can utilize natural sunlight or artificial grow lights to provide the necessary light intensity.
Caring for germinating microgreens involves regular monitoring and adjustments to meet their specific needs. This includes watering as needed, providing proper ventilation, and protecting them from pests or diseases. With proper care, your microgreens will grow into healthy and vibrant greens.
Finally, it is time to harvest and enjoy your homegrown microgreens. Harvesting is done when the microgreens have reached the desired size and have developed their first true leaves. Using a pair of sharp scissors, you can cut the microgreens just above the soil line. These freshly harvested microgreens can be used in salads, sandwiches, smoothies, or as a garnish to add flavor and elegance to your culinary creations.
While the process of germinating microgreens may seem daunting at first, with a little knowledge and practice, you can become an expert in growing these nutrient-packed gems. So, let’s get started on this exciting journey of germinating microgreens and enjoy the abundance of flavors, colors, and health benefits they offer!
Key Takeaways:
- Growing microgreens at home is a fun and rewarding way to enjoy fresh, flavorful, and nutrient-packed greens. With the right care and attention, you can harvest vibrant microgreens to enhance your meals.
- Providing optimal conditions, monitoring growth, and addressing common issues can help you successfully grow and enjoy your own homegrown microgreens. It’s a sustainable and delicious addition to your culinary adventures.
Read more: How Long Do Microgreens Take To Germinate
What are Microgreens?
Microgreens are young, tender greens that are harvested at an early stage of growth, typically when they have developed their first true leaves. These miniature greens are packed with flavor and boast an impressive nutritional profile, making them a popular choice for chefs, home cooks, and health-conscious individuals.
Unlike sprouts, which are typically harvested within a few days of germination, microgreens are allowed to grow for a slightly longer period. This extra growth time allows them to develop more complex flavors and textures. As a result, microgreens offer a wide range of tastes, from subtle and mild to peppery and tangy.
Microgreens are not a specific type of plant, but rather a stage in the growth of various herbs, vegetables, and even some edible flowers. Some popular microgreens include kale, spinach, radish, broccoli, mustard greens, amaranth, basil, cilantro, and many more.
What sets microgreens apart from their fully grown counterparts is their incredible nutritional density. Studies have shown that microgreens can contain up to 40 times more nutrients than mature plants, making them a powerhouse of vitamins, minerals, and antioxidants. The exact nutrient content varies depending on the type of microgreen, but they generally contain high levels of vitamin C, vitamin K, folate, beta-carotene, and various minerals such as potassium, iron, and magnesium.
One of the reasons microgreens are so nutrient-dense is because they are harvested at such an early stage of growth. During this stage, the plants are actively synthesizing and accumulating a wide range of compounds that contribute to their nutritional content. As a result, consuming microgreens can provide a concentrated boost of essential nutrients that can support overall health and wellbeing.
Besides their impressive nutritional profile, microgreens are also known for their vibrant colors and delicate textures. These miniature greens add a pop of color and elegance to any dish, making them a favorite garnish among chefs. Additionally, their tender leaves have a pleasing and delicate mouthfeel that can enhance the texture of salads, sandwiches, and other culinary creations.
The versatility of microgreens is another reason why they have gained so much popularity. They can be eaten raw, added to salads, used as a topping for soups and stews, or incorporated into sandwiches and wraps. Some microgreens, like basil and cilantro, possess strong aromatic qualities, which can enhance the flavors of a wide range of dishes.
Lastly, microgreens are relatively easy to grow, even for those with limited gardening experience or space. They can be grown indoors on a windowsill, in a small container garden, or even in specialized microgreen trays. The short growth cycle of microgreens, usually ranging from 1 to 3 weeks, means that you can enjoy a fresh harvest in a relatively short amount of time.
In summary, microgreens are young, flavorful, and nutrient-packed greens that are harvested at an early stage of growth. They offer an array of colors, flavors, and textures, making them a versatile ingredient in the culinary world. Whether you are a food enthusiast or a health-conscious individual, incorporating microgreens into your diet can be a delicious way to boost your nutrient intake and elevate your meals.
Why Germinate Microgreens?
Germination is a crucial step in the process of growing microgreens, and it offers several benefits that contribute to the overall quality and nutritional value of these miniature greens. Here are some reasons why germinating microgreens is important:
Increased Nutritional Value:
Germination triggers biochemical changes in the seeds, leading to the breakdown of complex nutrients into simpler forms that are more easily absorbed by our bodies. As a result, germinated microgreens are packed with higher levels of vitamins, minerals, and antioxidants compared to their ungerminated counterparts. This means that by germinating microgreens, you can maximize their nutritional benefits and provide your body with a concentrated source of essential nutrients.
Enhanced Flavor and Aroma:
Germination not only increases the nutritional content of microgreens but also enhances their flavor and aroma. During the germination process, enzymes are activated, breaking down complex carbohydrates into more easily digestible sugars. These sugars contribute to the sweet and aromatic flavors that are characteristic of germinated microgreens. By allowing seeds to germinate, you can enjoy a more flavorful and enjoyable culinary experience.
Read more: How To Store Microgreens
Better Digestibility:
The process of germination breaks down anti-nutrients present in seeds, such as phytic acid and enzyme inhibitors. These anti-nutrients can interfere with the absorption of minerals and other nutrients in the body. By germinating microgreens, you can reduce the levels of anti-nutrients, making the nutrients more bioavailable and improving their digestion and absorption.
Quicker Growth and Development:
Germinating microgreens kick-starts the growth process, allowing them to establish roots and initiate photosynthesis more efficiently. This leads to faster and more consistent growth, ensuring that your microgreens reach their desired size in a shorter amount of time. This can be particularly advantageous if you are growing microgreens for commercial purposes or if you simply want to enjoy your homegrown greens as soon as possible.
Improved Seed Viability:
Growing microgreens from germinated seeds increases the likelihood of successful growth and reduces the risk of seed failure. Seeds that have been properly germinated have already passed the critical stage of sprouting, ensuring that they are viable and ready to grow. By germinating your microgreen seeds, you can have more confidence in their ability to develop into healthy and thriving plants.
Cost-Effective and Sustainable:
Germinating your own microgreens allows you to grow a fresh and continuous supply of nutritious greens at a fraction of the cost of purchasing them from the store. Furthermore, by growing your own microgreens, you can reduce food waste and contribute to a more sustainable food system. Instead of buying pre-packaged microgreens, you can harvest them as needed, minimizing waste and maximizing freshness.
Overall, germinating microgreens offers numerous benefits, ranging from increased nutritional value and enhanced flavor to improved digestibility and quicker growth. By taking the time to germinate your microgreen seeds, you can ensure that you are getting the most out of these tiny greens and enjoying a truly rewarding gardening and culinary experience.
Read more: How To Get Seeds From Microgreens
Materials and Equipment Needed
Before you start germinating microgreens, it’s important to gather all the necessary materials and equipment. Having everything prepared and ready to go will ensure a smooth and successful germination process. Here are the essential items you’ll need:
Seeds:
The first and most crucial component is the seeds themselves. Choose high-quality microgreen seeds from a reputable source. Opt for organic and untreated seeds whenever possible to ensure the best results. Consider experimenting with different varieties to enjoy a diverse range of flavors and colors in your microgreens.
Growing Medium:
A suitable growing medium is necessary to provide the microgreen seeds with the necessary nutrients and support for germination. There are several options available, including soil-less mediums such as coco coir, peat moss, or vermiculite. These mediums should have good water retention and drainage properties to create an ideal environment for the seeds to sprout and grow.
Trays or Containers:
You will need trays or containers to hold the growing medium and the seeds. Choose shallow trays or containers that are at least 2-3 inches deep to allow for proper root development. The size of the trays will depend on the amount of microgreens you plan to grow. Plastic or food-safe materials are commonly used for microgreen trays.
Read more: What Are Microgreen Seeds
Watering Container:
A watering container with a narrow spout or a spray bottle is essential for watering the seeds and seedlings. This will allow for precise and controlled watering, preventing over-watering or damaging delicate sprouts. Make sure the container is clean and free from any residue or contaminants that could harm the microgreens.
Water Source:
Access to a clean and reliable water source is necessary for proper germination. Ensure that the water you use is free from chemicals, pollutants, or high levels of minerals that could adversely affect the microgreens’ growth. If your tap water contains chlorine or other chemicals, let it sit for at least 24 hours to allow any harmful substances to dissipate.
Light Source:
Microgreens require adequate light for photosynthesis and healthy growth. A suitable light source, such as natural sunlight or artificial grow lights, is essential. If you are growing microgreens indoors or in a location with limited natural light, consider investing in a full-spectrum grow light to provide the necessary light intensity and spectrum for optimal growth.
Labels:
Labeling is important for keeping track of different seed varieties and their growing progress. Use waterproof labels or markers to clearly identify each tray or container. This will prevent confusion and ensure you can accurately track the growth and harvest times of your microgreens.
Read more: How To Get Microgreen Seeds
Optional Equipment:
While the above items are the essential materials and equipment needed for germinating microgreens, there are a few optional tools that can be helpful:
- Heat mat: A heat mat can provide consistent warmth and help with germination in colder climates or during the winter months.
- Humidity dome: A humidity dome can create a more humid environment for the seeds, aiding in germination and early growth stages.
- Fan: A small fan can improve air circulation around the microgreens, preventing the growth of mold or fungus and promoting sturdy growth.
- Scissors or harvest knife: A sharp pair of scissors or a harvest knife will be needed for harvesting the microgreens when they reach the desired size.
By gathering these materials and equipment, you will be well-prepared to start germinating your microgreens. Having everything ready and organized will streamline the process and set you up for success in growing your own fresh and nutritious microgreens right at home.
Step-by-Step Guide to Germinating Microgreens
Germinating microgreens is an exciting and rewarding process that allows you to grow your own fresh and nutrient-packed greens. Follow this step-by-step guide to successfully germinate microgreens:
Step 1: Preparation
Start by gathering all the materials and equipment you’ll need for germination. This includes seeds, a suitable growing medium, trays or containers, a watering container, a water source, and a light source. Ensure everything is clean and ready for use.
Step 2: Seed Selection
Choose the microgreen seeds you want to germinate. Consider the flavor, color, and texture you desire. Select seeds that are specifically labeled for microgreen production to maximize your chances of success. Avoid using seeds that are treated with chemicals or fungicides.
Read more: How To Germinate A Pinecone
Step 3: Preparing the Growing Medium
If using a soil-less growing medium, follow the manufacturer’s instructions for hydration. Ensure the medium is thoroughly moistened but not excessively wet. Fill the trays or containers with the growing medium, leveling it out to create a smooth surface.
Step 4: Sowing the Seeds
Evenly distribute the seeds over the surface of the growing medium. Aim for a dense but not overcrowded arrangement. Gently press the seeds into the medium to ensure good seed-to-soil contact. Alternatively, you can pre-sow the seeds on a damp paper towel and then transfer them to the growing medium.
Step 5: Watering
Using a watering container or a spray bottle, moisten the surface of the seeds with clean water. Be careful not to oversaturate the seeds or create puddles of water. Mist the seeds regularly, keeping the growing medium consistently moist but not waterlogged. Monitor the moisture levels closely to prevent drying out or overwatering.
Step 6: Providing Light
Place the trays or containers in a location that receives adequate light. Natural sunlight is ideal, but if growing indoors, you can use a full-spectrum grow light. Position the light source about 6-12 inches above the trays to provide sufficient light intensity. Aim for 12-16 hours of light per day for optimal growth.
Read more: How To Germinate A Bean
Step 7: Ensuring Optimal Conditions
Maintain the ideal temperature and humidity conditions for germination. Most microgreens prefer temperatures between 60-75°F (15-24°C), although specific requirements may vary for different varieties. To increase humidity, you can cover the trays with a humidity dome or loosely place a plastic bag over them. Ensure proper air circulation by slightly cracking open the covers or removing them periodically.
Step 8: Caring for the Germinating Microgreens
Monitor the progress of your germinating microgreens regularly. Check the moisture levels of the growing medium and water as needed to keep it moist but not waterlogged. Avoid allowing the surface to dry out completely. Keep an eye out for any signs of mold, pests, or disease, and take appropriate measures if necessary.
Step 9: Harvesting
Once the microgreens have reached the desired size, usually within 1-3 weeks after sowing, they are ready to be harvested. Use a pair of sharp scissors or a harvest knife to cut the microgreens just above the soil line. Harvest only what you need, leaving the rest to continue growing for future harvests.
Following these steps will ensure successful germination and growth of your microgreens. Enjoy the satisfaction of growing your own fresh and flavorful greens, and use them to add a nutritious and vibrant touch to your meals.
Choosing the Right Seeds for Germination
Choosing the right seeds is crucial for successful germination and ultimately growing healthy and flavorful microgreens. Here are some factors to consider when selecting seeds for germination:
Read more: How To Germinate Okra
Seed Quality:
Start by ensuring that you are purchasing high-quality seeds from a reputable source. Look for seeds that are specifically labeled for microgreen production. These seeds are typically tested for germination rates and are specifically selected for their ability to produce tender and tasty microgreens.
Seed Variety:
Consider the flavor, color, and texture you desire in your microgreens. There is a wide range of seed varieties available, providing different tastes and appearances. From the peppery kick of radish to the subtle sweetness of sunflower, choose seeds that align with your personal preferences and culinary goals.
Growing Time:
Take into account the expected time it takes for different seed varieties to reach the desired size for harvesting. Some microgreens, like radish and arugula, grow quickly and can be harvested within a week or two. Other varieties, such as sunflower and basil, take longer. Consider your time constraints and desired harvest schedule when selecting seeds.
Growing Conditions:
Consider the optimal growing conditions for the seeds you are considering. Some microgreens prefer cooler temperatures, while others thrive in warmer environments. Check the recommended temperature ranges and growing guidelines for each seed variety to ensure you can provide the ideal conditions for successful germination and growth.
Read more: How To Germinate Pecans
Seed Source:
Opt for seeds from organic, non-GMO sources whenever possible. Organic seeds are grown without the use of synthetic chemicals, ensuring that you are starting with the cleanest and healthiest plant material. Non-GMO seeds are also important to avoid potential genetic modifications that may impact the quality and characteristics of the microgreens.
Seed Quantity:
Consider how many microgreens you plan to grow and harvest at a time. Some seed packets come in small quantities, while others offer larger quantities. The number of seeds needed will depend on the density and coverage you desire for your trays or containers. Keep in mind that microgreens are typically grown in densely populated arrangements for optimal yields.
Personal Preference:
Ultimately, choose seeds that excite you and align with your personal taste preferences. Experiment with different seed varieties to discover your favorites. This will ensure that you enjoy the process of growing and consuming your microgreens, making it a truly rewarding and enjoyable experience.
By carefully selecting the right seeds for germination, you can set yourself up for success in growing vibrant and flavorful microgreens. Pay attention to seed quality, variety, growing time, conditions, and source to ensure that you have the best selection of seeds for your microgreen growing endeavors.
Preparing the Growing Medium
The growing medium is an essential component in the germination process of microgreens. It provides the seeds with the necessary nutrients, support, and moisture retention for successful growth. Here are the steps to prepare the growing medium:
Read more: How To Germinate Lychee
1. Choose the Growing Medium:
There are various options for growing mediums, including soil and soil-less alternatives. Common soil-less options include coco coir, peat moss, vermiculite, or a combination of these. Consider factors such as water retention, nutrient content, and sustainability when selecting a growing medium.
2. Hydrate the Growing Medium:
If using a soil-less growing medium, follow the manufacturer’s instructions for hydration. Typically, this involves adding water to the medium gradually until it reaches the desired moisture level. It should be moist enough to retain water but not excessively wet or waterlogged, as this can hinder seed germination.
3. Fill the Trays or Containers:
Once the growing medium is properly hydrated, fill your trays or containers with the prepared medium. Spread it evenly, ensuring a consistent layer that is about 1-2 inches deep. Gently pat down the surface to create a smooth and even planting surface for the seeds.
4. Level the Surface:
Using a small flat board or your hand, gently level the surface of the growing medium. This will help provide a uniform and even planting surface for the seeds, ensuring consistent germination and growth. Avoid compacting the medium too much, as it can hinder the seeds’ ability to sprout and establish roots.
Read more: How To Germinate Banana
5. Moisten the Growing Medium:
Before sowing the seeds, it’s important to ensure that the growing medium is appropriately moistened. Using a watering can or spray bottle, lightly mist or water the surface of the growing medium. Ensure even moisture distribution throughout the medium, but be careful not to overwater or create puddles that can lead to root rot or seed suffocation.
6. Allow Excess Water to Drain:
If there is any excess water that accumulates in the trays or containers, allow it to drain out. Proper drainage is important to prevent waterlogged conditions, which can suffocate the seeds and lead to fungal and bacterial issues. Place a tray or saucer underneath to catch any excess water and discard it.
7. Optional Pre-soaking:
Some microgreen seeds, particularly larger ones, can benefit from pre-soaking before planting. This can help kick-start the germination process by softening the seed coat and promoting quicker sprouting. Follow the specific instructions provided by the seed supplier for pre-soaking duration and method, if applicable.
By carefully preparing the growing medium, you provide the microgreen seeds with an optimal environment to sprout and grow. Take care to choose a suitable medium, hydrate it correctly, and ensure even moisture distribution. With a well-prepared growing medium, you are on your way to successful microgreen germination and healthy growth.
Planting the Microgreen Seeds
Once you have prepared the growing medium, it’s time to plant the microgreen seeds. Proper planting techniques are essential to ensure adequate seed-to-soil contact and optimize germination rates. Let’s go through the steps of planting microgreen seeds:
Read more: How To Germinate Grape
1. Seed Spacing:
Consider the recommended seed spacing for the specific microgreen variety you are planting. Some seeds can be spread in a dense arrangement, while others require more space to allow for proper growth and airflow. Aim for an even distribution of seeds to ensure consistent germination and prevent overcrowding.
2. Sprinkle or Broadcast Seeds:
Depending on the size and quantity of the seeds, you can either sprinkle the seeds directly onto the surface of the growing medium or broadcast them by scattering them evenly. Sprinkle smaller seeds carefully with your fingers, while larger seeds can be scattered by gently tapping the seed packet or using a seed spreader.
3. Even Coverage:
Ensure that the seeds are evenly distributed for uniform germination and growth. Avoid clumping or clustering the seeds in one area, as this can result in uneven growth and competition for resources. Take your time to spread the seeds evenly over the surface of the growing medium.
4. Seed Depth:
Most microgreen seeds do not require covering with soil. They are very small and need exposure to light to germinate properly. However, some larger seeds may benefit from a light covering. Follow the recommended seed depth guidelines provided by the seed supplier for specific varieties.
Read more: How To Germinate Rice
5. Press Seeds into the Medium:
To ensure good seed-to-soil contact, lightly press the seeds into the growing medium. You can use the back of a spoon, a small handheld roller, or even your fingers to gently press the seeds down. This will help the seeds establish contact with the moisture and nutrients in the medium, promoting germination.
6. Mist the Surface:
After planting the seeds, lightly mist the surface of the growing medium with water using a spray bottle. This will provide additional moisture to aid in seed germination. Be careful not to oversaturate the surface, as excessive moisture can lead to mold growth and seed rot.
7. Label the Trays:
Labeling the trays is essential for keeping track of the different seed varieties and their specific planting dates. Use waterproof labels or write directly on the trays with a marker. Include relevant information such as the seed variety, planting date, and any additional notes you may find helpful for future reference.
8. Optional Covering:
Some microgreen varieties benefit from covering the trays with a humidity dome or plastic wrap to increase humidity and create a mini-greenhouse effect. This can aid in faster germination and promote a more favorable growing environment. Follow the specific instructions provided by the seed supplier, if applicable.
By following these steps, you can ensure proper planting of your microgreen seeds. Pay attention to seed spacing, even coverage, and gentle pressing to provide optimal conditions for germination. With careful planting, you’ll be well on your way to a successful harvest of vibrant and nutritious microgreens.
Read more: How To Germinate Seeds
Providing Optimal Growing Conditions
Creating the right growing conditions is crucial for the successful development of microgreens. Although each microgreen variety may have specific requirements, here are some general guidelines to provide optimal conditions for healthy growth:
1. Temperature:
Most microgreens thrive in temperatures between 60-75°F (15-24°C). Ensure that the growing area is within this temperature range. Avoid exposing the microgreens to extreme temperature fluctuations or drafts, as it can negatively impact their growth and overall health.
2. Light:
Microgreens require adequate light for photosynthesis and healthy growth. If growing indoors, place the trays near a bright window that receives at least 4-6 hours of sunlight daily. If natural light is limited, consider using a full-spectrum grow light. Position the light source 6-12 inches above the trays and keep it on for 12-16 hours a day to provide sufficient light energy.
3. Humidity:
Maintaining a moderate level of humidity is beneficial for germination and early growth stages. If the ambient humidity is low, cover the trays with a humidity dome or loosely place a plastic bag over them to increase humidity. This helps prevent the growing medium from drying out too quickly and provides a favorable environment for the sprouting microgreens.
Read more: How To Germinate Wheat
4. Air Circulation:
Proper air circulation is essential to prevent the development of mold or fungal issues. Providing gentle airflow around the microgreens can reduce the risk of diseases and promote stronger growth. You can achieve this by using a small fan at its lowest setting or occasionally opening a nearby window or door to allow fresh air to circulate.
5. Watering:
Water the microgreens carefully to maintain the appropriate moisture levels. Use a watering can or spray bottle with a fine mist to prevent excess water from disturbing the delicate seedlings. Ideally, water the trays from the bottom by placing them in a shallow tray filled with water. Allow the growing medium to absorb water through capillary action. Avoid overwatering or letting the trays sit in standing water, as it can lead to root rot.
6. Monitoring:
Frequently monitor the microgreens for signs of imbalances or issues. Check the moisture levels of the growing medium daily and adjust watering as needed. Inspect the trays for any signs of mold, disease, or pests. Early detection and intervention can help mitigate any potential problems and ensure the health and vitality of your microgreens.
By providing optimal growing conditions, you can ensure that your microgreens thrive and reach their full potential. Pay attention to temperature, light, humidity, air circulation, and watering to create a nurturing environment for healthy growth. With proper care and observation, you’ll soon be harvesting vibrant and nutritious microgreens for your culinary delights.
Caring for Germinating Microgreens
Proper care is essential to ensure the healthy growth and development of germinating microgreens. By providing the right conditions and monitoring their progress, you can help your microgreens thrive. Here are some important aspects of caring for germinating microgreens:
Read more: How To Germinate Mitraria
1. Watering:
Monitor the moisture levels of the growing medium regularly. It should be consistently moist but not waterlogged. Avoid allowing the surface to dry out completely or oversaturating the medium. Water the microgreens gently using a watering can or spray bottle to prevent disturbing the delicate seedlings.
2. Lighting:
Ensure that the microgreens are receiving adequate light for photosynthesis. If growing indoors, place the trays near a bright window or use a full-spectrum grow light. Adjust the position of the trays or the light source to maintain appropriate light intensity. Aim for 12-16 hours of light per day to promote healthy growth.
3. Temperature:
Maintain a consistent temperature within the recommended range for the specific microgreen variety. Sudden temperature fluctuations or extreme heat or cold can stress or damage the seedlings. Avoid placing the trays in drafty or excessively hot areas to ensure the microgreens’ well-being.
4. Ventilation:
Provide proper air circulation around the microgreens to prevent the growth of mold or fungi. Gentle air movement helps strengthen the seedlings and reduce the risk of damping off or other diseases. Use a small fan set on its lowest setting or open nearby windows or doors periodically to promote airflow.
Read more: How To Germinate Mitraria
5. Monitoring Growth:
Regularly observe and monitor the growth of the microgreens. Check for any signs of discoloration, wilting, or pests. Remove any damaged or dead seedlings to prevent the spread of diseases. Avoid overcrowding, as it can lead to stunted growth and increased risk of pathogens.
6. Thinning:
If the microgreens have been sown densely and are growing too close together, thinning may be necessary. Use scissors to carefully snip away excess seedlings, leaving an appropriate distance between each plant. Thinning ensures that each microgreen has enough space, light, and resources to grow to its full potential.
7. Protection from Pests:
Keep an eye out for common pests such as aphids, fungus gnats, or mites that can harm the microgreens. If necessary, use eco-friendly pest control methods or introduce beneficial insects to mitigate pest issues. Preventing pest attacks is crucial, as they can damage the delicate seedlings and hinder their growth.
8. Gradual Exposure to Light:
When the microgreens have developed their first true leaves, gradually expose them to more light. Start by increasing the light exposure by 1-2 hours per day over a span of a few days. This process helps the seedlings adjust to higher light intensity, preventing stress or sunburn.
By following these care guidelines, you can support the healthy growth of your germinating microgreens. Regularly water, provide sufficient light and ventilation, monitor growth, protect from pests, and gradually expose them to light. With proper care, you’ll soon be rewarded with vibrant and flavorful microgreens that are ready to be harvested and enjoyed.
Read more: How To Germinate Mitraria
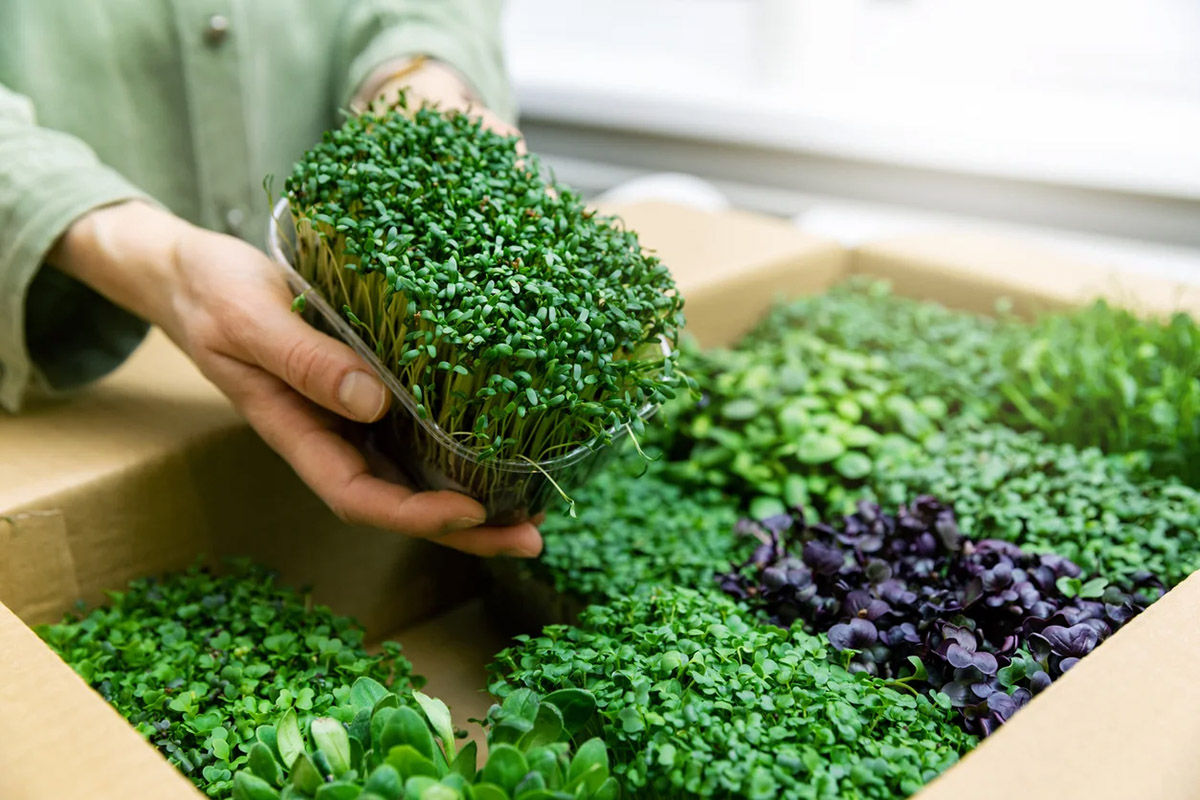
Harvesting and Using Microgreens
Harvesting microgreens at the right time is essential to enjoy their peak flavor, texture, and nutritional value. Here’s a guide for harvesting and utilizing microgreens:
1. Timing:
Microgreens are typically ready for harvest when they have developed their first true leaves. This is usually around 1-3 weeks after planting, depending on the variety. However, it’s important to refer to the specific recommendations for each type of microgreen to ensure optimal harvesting time.
2. Observation:
Observe the microgreens closely to determine their readiness for harvest. Their leaves should be well-developed, vibrant in color, and have a tender texture. Take note of any signs of yellowing or wilting, as these may indicate over-maturity or nutrient deficiencies.
3. Harvesting Method:
Using a pair of sharp scissors or a harvest knife, cut the microgreens just above the soil line. Take care not to disturb the roots or neighboring seedlings. Alternatively, you can gently pull out the entire plant, including the roots if desired. This method is suitable for microgreens with delicate roots, like radish or alfalfa.
Read more: How To Germinate Mitraria
4. Harvest in Small Batches:
Harvest microgreens in small batches as needed to ensure maximum freshness. Cut or pull only the amount of microgreens required for immediate use, leaving the rest to continue growing. This approach allows you to enjoy the microgreens at their optimum freshness while providing an ongoing supply for subsequent harvests.
5. Rinsing the Microgreens:
To remove any soil particles or debris, gently rinse the harvested microgreens under cool running water. Shake off excess moisture or use a salad spinner to dry them thoroughly. Ensure that the microgreens are completely dry before storing or using them, as moisture can lead to spoilage.
6. Storing and Shelf Life:
For maximum freshness, store the harvested microgreens in an airtight container or a resealable plastic bag lined with paper towels. Place them in the refrigerator, where they can stay fresh for up to a week. However, note that microgreens are best consumed as soon as possible after harvest to enjoy their vibrant flavors and textures.
7. Culinary Uses:
Microgreens are incredibly versatile and can be used in a variety of culinary applications. Add them to salads, sandwiches, wraps, or tacos to give a fresh burst of flavor and vibrant hues. Use microgreens as a topping for soups, stir-fries, or omelets to add an extra layer of texture and nutrition. They can also be blended into smoothies or juiced for a nutritious boost.
Read more: How To Germinate Mitraria
8. Garnishing and Plating:
Microgreens are often used as a garnish to enhance the visual appeal of a dish. Their vibrant colors and delicate shapes can add an elegant touch to any plate. Sprinkle microgreens on top of soups, pasta dishes, or roasted vegetables to elevate their presentation and create a restaurant-worthy aesthetic.
9. Experiment and Enjoy:
Don’t be afraid to experiment and get creative with incorporating microgreens into your culinary creations. Mix different varieties to create unique flavor profiles or create themed dishes with specific microgreens. Let your taste buds guide you and savor the fresh and nutrient-packed goodness of your homegrown microgreens.
By following these harvesting and usage guidelines, you can make the most of your microgreen harvest. Harvest at the right time, rinse them properly, store them correctly, and experiment with different culinary applications. Enjoy the delightful flavors and textures that microgreens bring to your meals, and relish the satisfaction of growing your own nutritious and vibrant greens.
Troubleshooting Common Issues
While growing microgreens is generally a straightforward and rewarding experience, you may encounter some common issues along the way. Here are a few troubleshooting tips to help you address and overcome these challenges:
1. Mold or Fungal Growth:
If you notice mold or fungal growth on the surface of the growing medium, it’s important to act promptly to prevent further spread. Reduce the humidity level by increasing air circulation and removing any covering that may be trapping moisture. Ensure that the growing medium is being watered appropriately, avoiding over-watering, and allowing it to dry out slightly between watering sessions. If the issue persists, consider using a natural antifungal treatment or starting anew with fresh growing medium.
Read more: How To Germinate Mitraria
2. Leggy or Stretching Seedlings:
If your microgreens are growing tall and leggy with weak stems, this is usually a sign of insufficient light. Ensure that your microgreens are receiving adequate light intensity and duration. If growing indoors, reposition the trays closer to a brighter window or increase the duration of artificial lighting. Providing a sufficient light source will help the seedlings grow strong and compact.
3. Yellowing or Wilting Leaves:
Yellowing or wilting leaves can indicate various issues, including over-watering, under-watering, or nutrient deficiencies. Check the moisture levels of the growing medium and adjust your watering routine accordingly. Ensure that the trays have proper drainage to avoid waterlogging. Additionally, ensure that the microgreens are receiving adequate nutrients by using a balanced growing medium or providing a suitable organic fertilizer if necessary.
4. Pests:
If pests, such as aphids, fungus gnats, or mites, are present, it’s important to address the issue promptly to avoid damage to the microgreens. Introduce natural predators, such as ladybugs or beneficial nematodes, to control pests biologically. If necessary, organic pest control methods, such as neem oil or insecticidal soap, can be used as a last resort. Proper sanitation practices, such as keeping the growing area clean and removing any decaying organic matter, will also help prevent pest infestations.
5. Nutrient Deficiencies:
Yellowing leaves, stunted growth, or pale coloration can be signs of nutrient deficiencies in microgreens. Make sure that the growing medium is nutrient-rich and well-balanced. Consider using organic fertilizers specifically formulated for microgreens to provide the necessary nutrients. Regularly inspect and adjust the pH levels of the growing medium to ensure optimal nutrient uptake by the microgreens.
Read more: How To Germinate Mitraria
6. Inconsistent Germination:
If you’re experiencing inconsistent germination, where some seeds sprout while others don’t, ensure that you’re using high-quality and viable seeds. Follow proper seeding techniques, including even seed distribution and adequate seed-to-soil contact. Maintain consistent moisture levels and temperature throughout the germination process. If persistent issues occur, consider using pre-soaking or pre-sprouting methods to promote more uniform germination.
7. Overcrowding:
If the microgreens are growing too densely and overcrowding each other, they may compete for nutrients and light, leading to stunted growth. Thin the microgreens by carefully snipping away excess seedlings to create proper spacing. Thinning will allow the remaining microgreens to receive adequate resources for optimal growth and development.
Remember that each microgreen variety may have specific needs and challenges, so it’s important to gather specific information for the types you are growing. Regular observation, timely intervention, and attention to growth indicators will help you troubleshoot issues effectively and ensure the success of your microgreen growing endeavors.
Conclusion
Congratulations on embarking on the journey of growing microgreens! By following the steps outlined in this guide, you have gained the knowledge and tools needed to germinate and care for these nutrient-dense greens right in the comfort of your own home. Whether you’re a gardening enthusiast, a health-conscious individual, or a culinary enthusiast, microgreens offer a multitude of benefits and possibilities.
Microgreens not only provide a burst of vibrant colors and flavors to your dishes but also pack a powerful nutritional punch. By germinating your own microgreens, you have the opportunity to harvest these tender greens at their peak, ensuring maximum freshness and nutritional value. From mixed salad greens and sandwich toppings to garnishes and additions to smoothies and juices, microgreens can be incorporated into a wide range of culinary creations.
Throughout the germination process, it’s important to provide optimal growing conditions, including the right amount of light, proper watering, adequate air circulation, and suitable temperatures. Regular monitoring and attention to the needs of your microgreens will ensure their healthy development and abundant harvest.
As with any gardening endeavor, you may encounter challenges along the way. Fortunately, with the troubleshooting tips provided, you can overcome common issues such as mold growth, leggy seedlings, or nutrient deficiencies. By staying attentive and proactive, you can maintain a thriving and thriving microgreen garden.
Remember to select high-quality seeds, choose suitable growing mediums, and follow proper planting techniques to set yourself up for success. Experiment with different microgreen varieties to discover your favorites and enjoy their unique flavors and textures. Consider sharing your harvest with friends, family, or even your local community to spread the joy and benefits of microgreens.
Growing microgreens is not only a satisfying and rewarding experience but also an environmentally friendly and sustainable way to enjoy fresh and nutritious greens year-round. By relying on your own cultivation skills, you can reduce food waste, save money, and gain a deeper understanding and appreciation for the food you consume.
So, gather your materials, prepare your growing medium, and dive into the world of growing microgreens. Embrace the process, celebrate the successes, and learn from any challenges that may arise. With patience, care, and a touch of creativity, you will soon be reaping the rewards of your own homegrown microgreens, providing yourself and your loved ones with a continuous supply of vibrant, flavorful, and incredibly nutritious greens.
Frequently Asked Questions about How To Germinate Microgreens
Was this page helpful?
At Storables.com, we guarantee accurate and reliable information. Our content, validated by Expert Board Contributors, is crafted following stringent Editorial Policies. We're committed to providing you with well-researched, expert-backed insights for all your informational needs.
0 thoughts on “How To Germinate Microgreens”