Home>Garden Essentials>How To Grow Rambutan Seeds
Garden Essentials
How To Grow Rambutan Seeds
Modified: May 6, 2024
Learn how to grow rambutan seeds in your garden and enjoy delicious, exotic fruits. Discover the best techniques for successful cultivation.
(Many of the links in this article redirect to a specific reviewed product. Your purchase of these products through affiliate links helps to generate commission for Storables.com, at no extra cost. Learn more)
Introduction
Welcome to the world of rambutans! If you’re a lover of exotic fruits and want to try your hand at growing them, you’re in for a treat. Rambutans, with their vibrant red skin and juicy, sweet flesh, are a tropical delight that can be grown from seeds. This article will guide you through the process of growing rambutan seeds into healthy trees that will eventually reward you with a bountiful harvest.
Rambutan trees belong to the Sapindaceae family and are native to Southeast Asia. They thrive in warm, tropical climates, making them a popular fruit tree in countries like Thailand, Malaysia, and Indonesia. While it may seem challenging to grow rambutans from seeds, with a little patience and care, you can successfully cultivate your own rambutan tree.
Before we dive into the steps of growing rambutan seeds, it’s essential to highlight a few key points. Firstly, rambutans are dioecious, meaning they have separate male and female flowers on different trees. This means that if you want to grow fruit-bearing trees, you’ll need both male and female trees in your garden. Secondly, rambutans are slow-growing trees, and it may take several years before they start producing fruits. Nevertheless, the process can be rewarding and enjoyable for any gardening enthusiast.
So, if you’re ready to embark on your rambutan-growing journey, let’s get started with step one: selecting ripe rambutan fruits.
Key Takeaways:
- Growing rambutan seeds requires patience and care, from selecting ripe fruits to providing ideal growing conditions. Enjoy the rewarding journey of nurturing these tropical trees and savoring their delicious fruits.
- Harvesting ripe rambutan fruits is a joyful experience, and proper handling and storage are essential for preserving their freshness. Share the delightful taste of these exotic fruits with friends and family.
Read more: How To Grow Rambutan From Seed
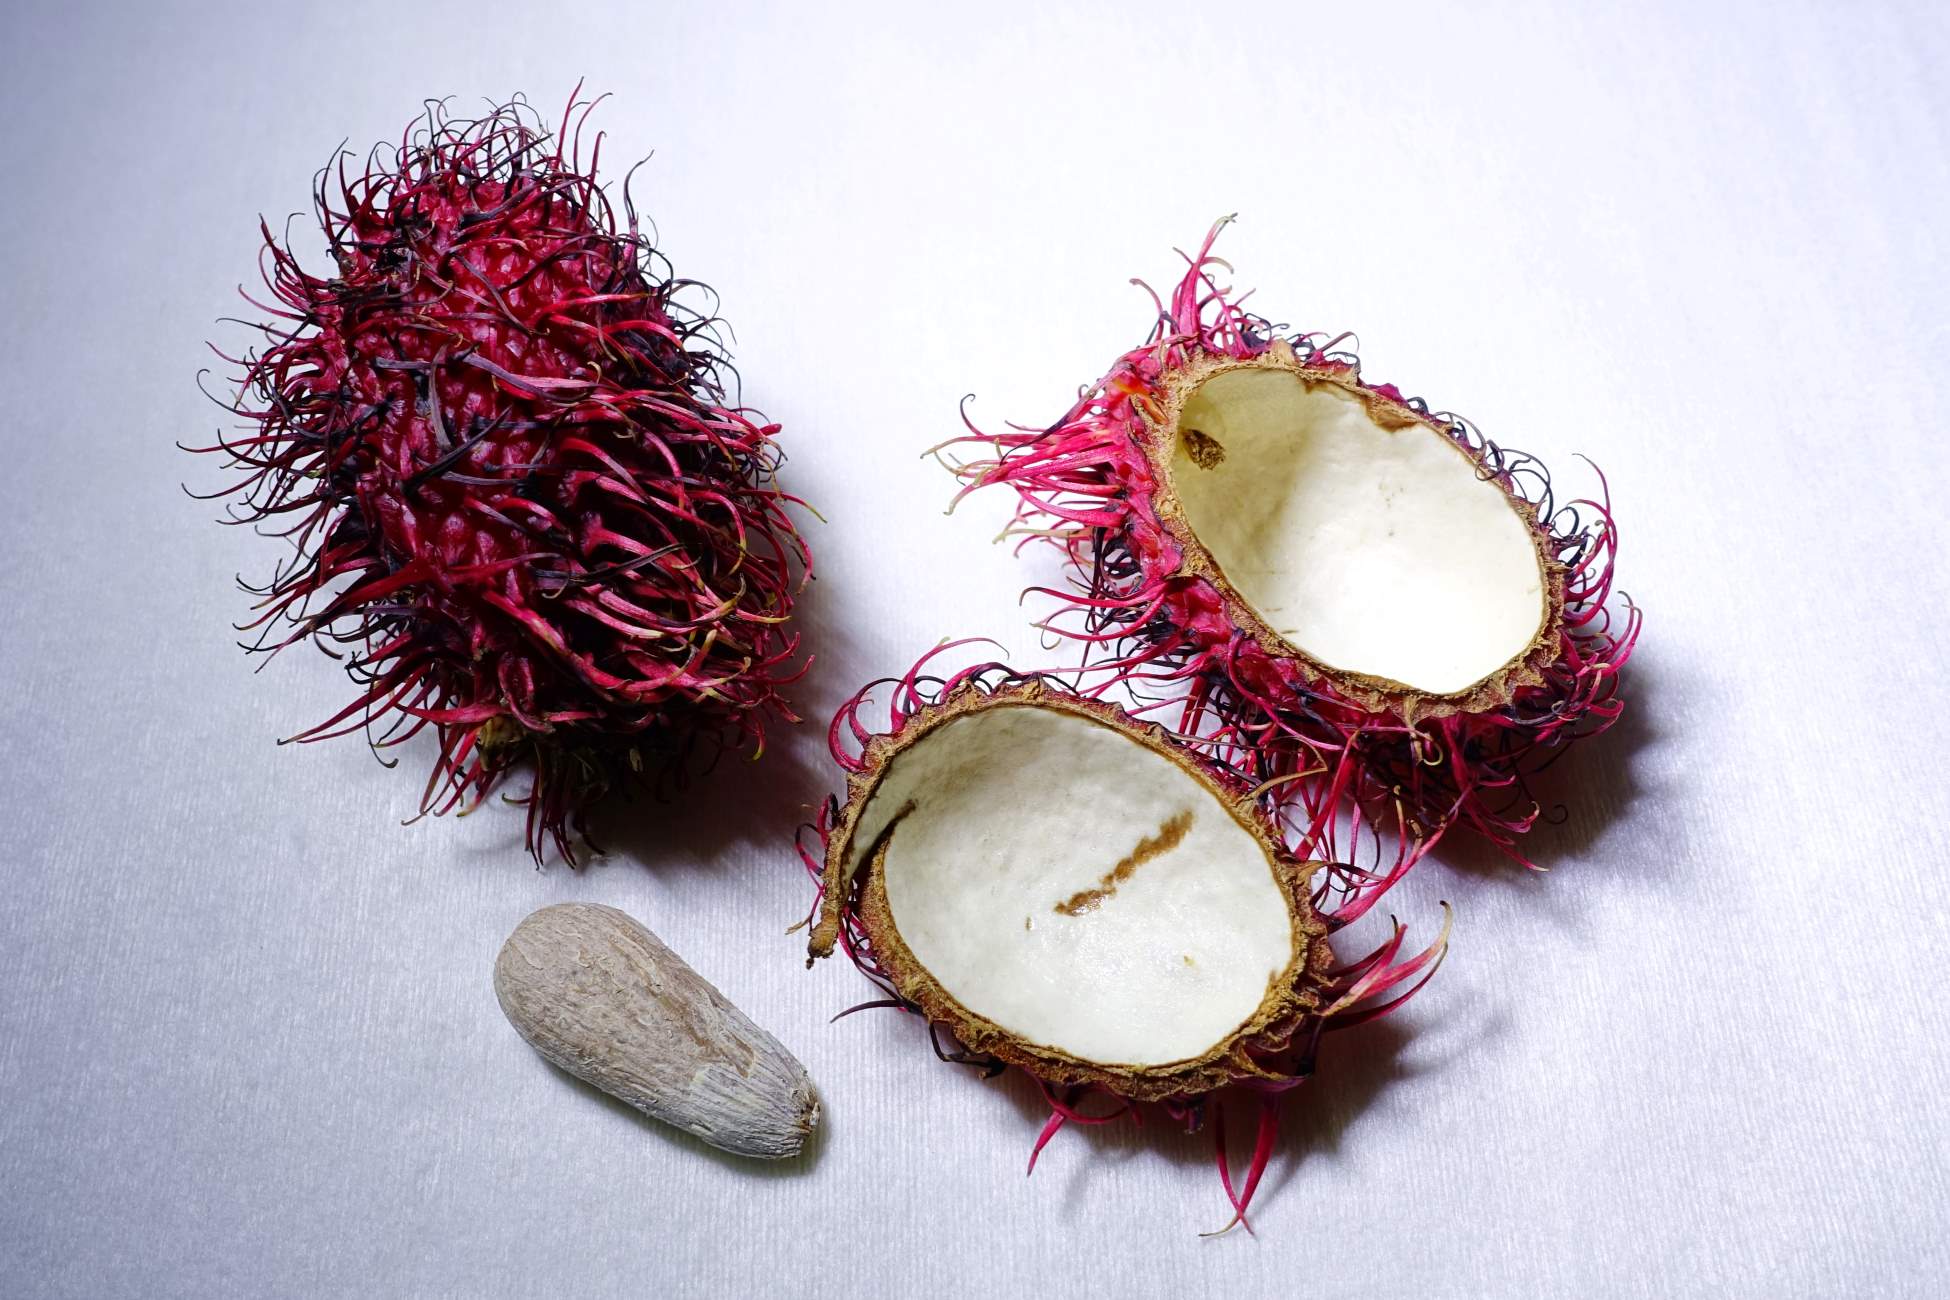
Step 1: Selecting Ripe Rambutan Fruits
The first step in growing rambutan seeds is to choose ripe and high-quality fruits for seed collection. Selecting the right fruits ensures that you have healthy and viable seeds to work with. Here’s what you need to know:
1. Look for mature rambutan fruits: Ripe rambutan fruits will have bright red or yellow skin, depending on the variety. Avoid fruits that are still green or have brown spots, as they may not be fully matured.
2. Consider the texture: Gently squeeze the fruits to check for firmness. A ripe rambutan fruit should be slightly soft and springy to the touch. If the fruit is too firm or mushy, it may not be at its optimal ripeness.
3. Examine the spines: Rambutan fruits are covered in spiky hair-like spines. These spines should be intact and not easily falling off. Avoid fruits with damaged or missing spines, as they may indicate poor quality.
4. Check for blemishes and mold: Inspect the fruit for any signs of blemishes or mold. Avoid fruits that have visible mold growth or significant bruises, as these can affect the seed’s viability.
5. Smell the fruit: Rambutans have a sweet and fragrant aroma when they are ripe. Trust your nose and choose fruits with a pleasant smell, as it often indicates good quality.
Once you’ve selected the ripe rambutan fruits, it’s time to move on to step two: extracting the seeds.
Step 2: Extracting the Seeds
Now that you have chosen ripe rambutan fruits, it’s time to extract the seeds for planting. The process requires a bit of careful handling, but with the right technique, you’ll have the seeds ready in no time. Here’s how to extract the rambutan seeds:
1. Prepare the tools: You’ll need a sharp knife or scissors and a clean cutting board to work with. Make sure your tools are sanitized to prevent any potential contamination.
2. Slice the fruit: Start by making a shallow incision around the circumference of the fruit, being careful not to cut too deep into the seed inside. Gently twist the fruit to separate the two halves.
3. Remove the flesh: Use your fingers or a spoon to scoop out the flesh surrounding the seed. Be gentle to avoid damaging the seed. It’s important to remove all the flesh, as any remaining pulp can promote fungal growth and affect seed germination.
4. Wash the seeds: Once you’ve extracted the seeds, rinse them under running water to remove any remaining residue. This step helps to prevent the growth of mold or fungi.
5. Air dry the seeds: After washing, place the seeds on a clean paper towel or a wire rack to air dry. Allow them to dry naturally for a day or two. This helps to reduce the moisture content, which can promote better germination.
Remember to handle the rambutan seeds with care, as they are delicate and can be easily damaged. Once you’ve successfully extracted the seeds, it’s time to move on to step three: preparing the seeds for planting.
Step 3: Preparing the Seeds for Planting
Now that you have extracted the rambutan seeds, it’s important to prepare them properly before planting. Preparing the seeds helps to enhance their chances of germination and ensures a healthy start for your rambutan seedlings. Here’s how to prepare the rambutan seeds for planting:
1. Soaking the seeds: Fill a bowl with lukewarm water and immerse the rambutan seeds in it. Allow them to soak for 24 to 48 hours. Soaking helps to soften the seed coat and promote germination.
2. Scarification: After soaking, you may notice that the seed coat has swollen or softened. Using a clean, sharp knife or nail file, carefully scarify the seed coat by making a small, shallow cut or abrasion. This process helps to break down the hard outer layer and enables water absorption during germination.
3. Optional stratification: Rambutan seeds benefit from a period of stratification, especially if you’re growing them in a non-tropical climate. Stratification simulates the natural conditions needed for the seeds to germinate. To stratify the seeds, place them in a sealed plastic bag with a slightly moistened paper towel. Keep the bag in the refrigerator for 4 to 6 weeks.
4. Check for viability: Before planting, it’s a good idea to check the viability of the rambutan seeds. You can do this by performing a simple float test. Fill a glass with water and gently place the seeds in it. Viable seeds will sink to the bottom, while non-viable or empty seeds will float. Discard any seeds that float as they are unlikely to germinate.
Once you have prepared the rambutan seeds, it’s time to move on to step four: planting the seeds. With proper preparation, you’ll increase the chances of successful germination and healthy seedlings.
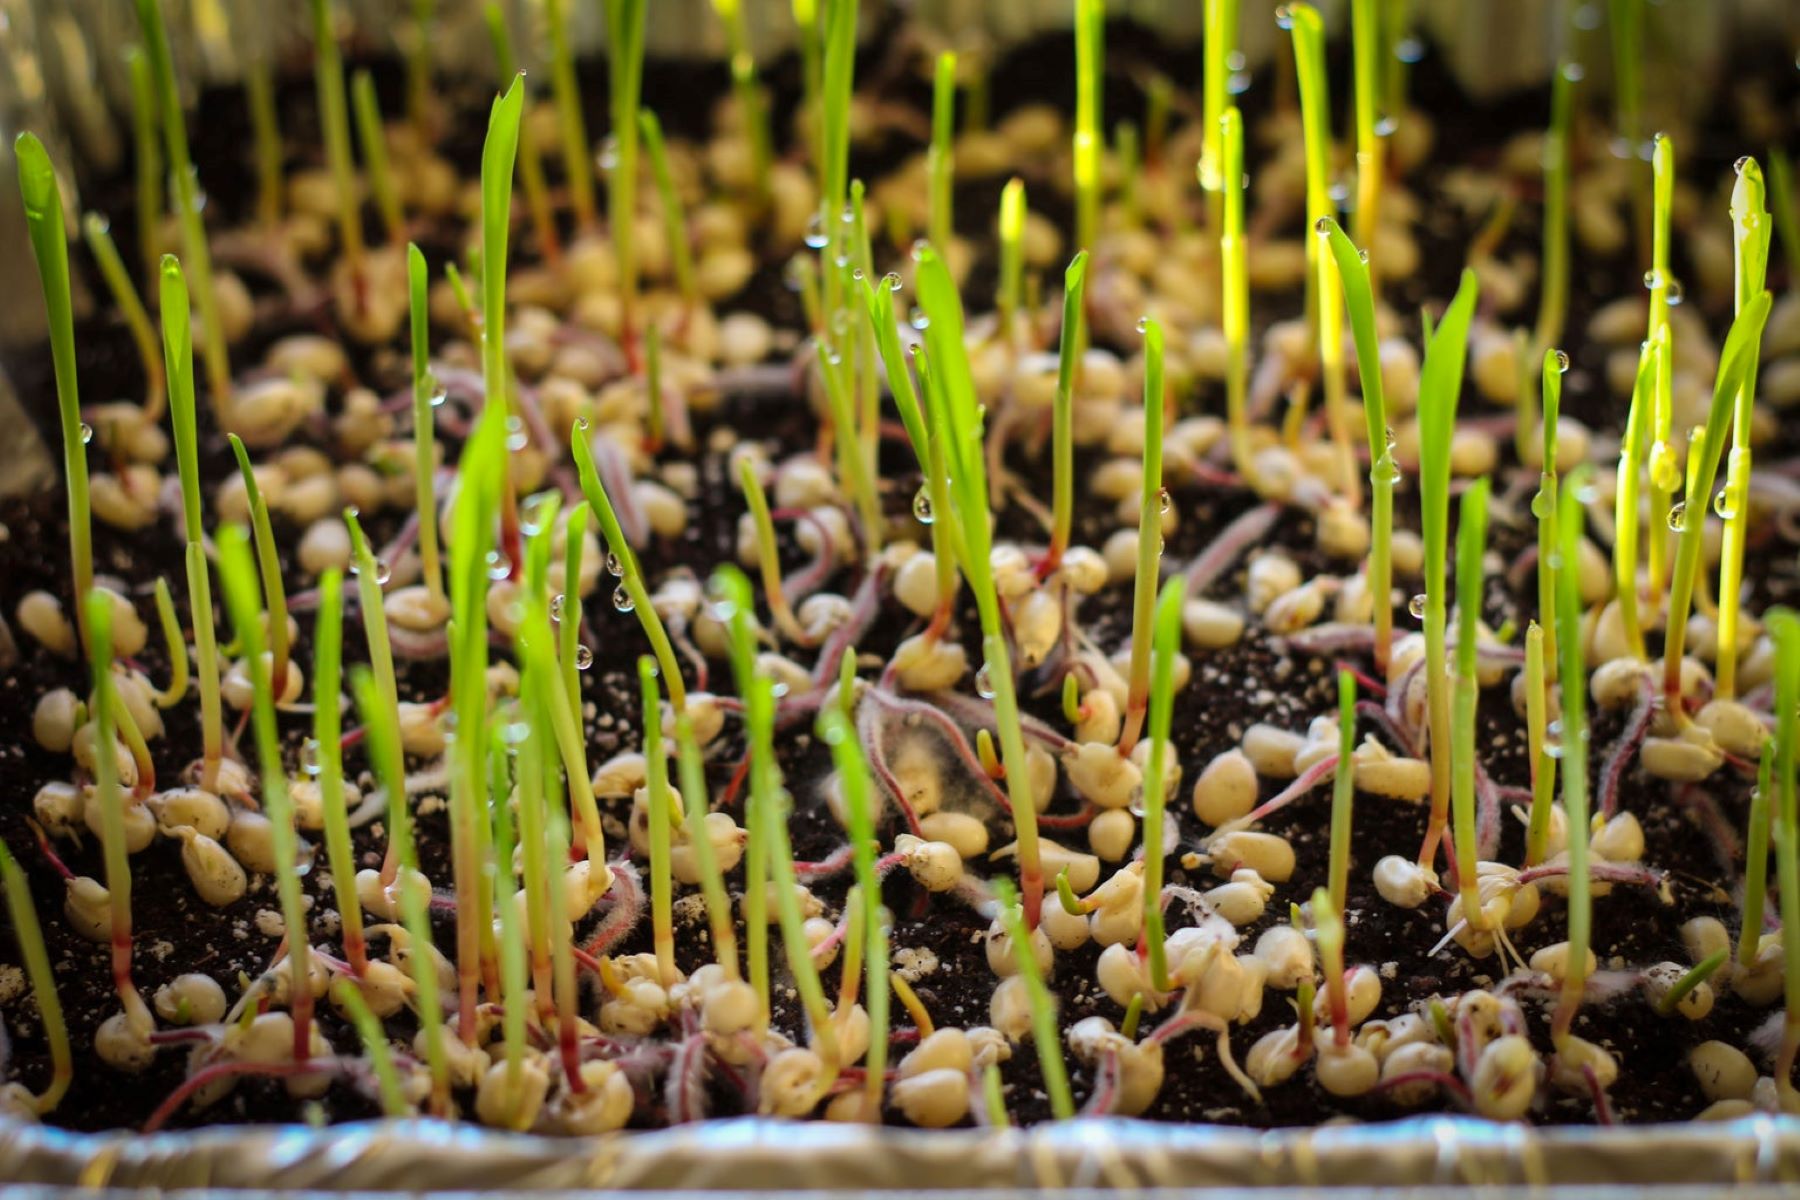
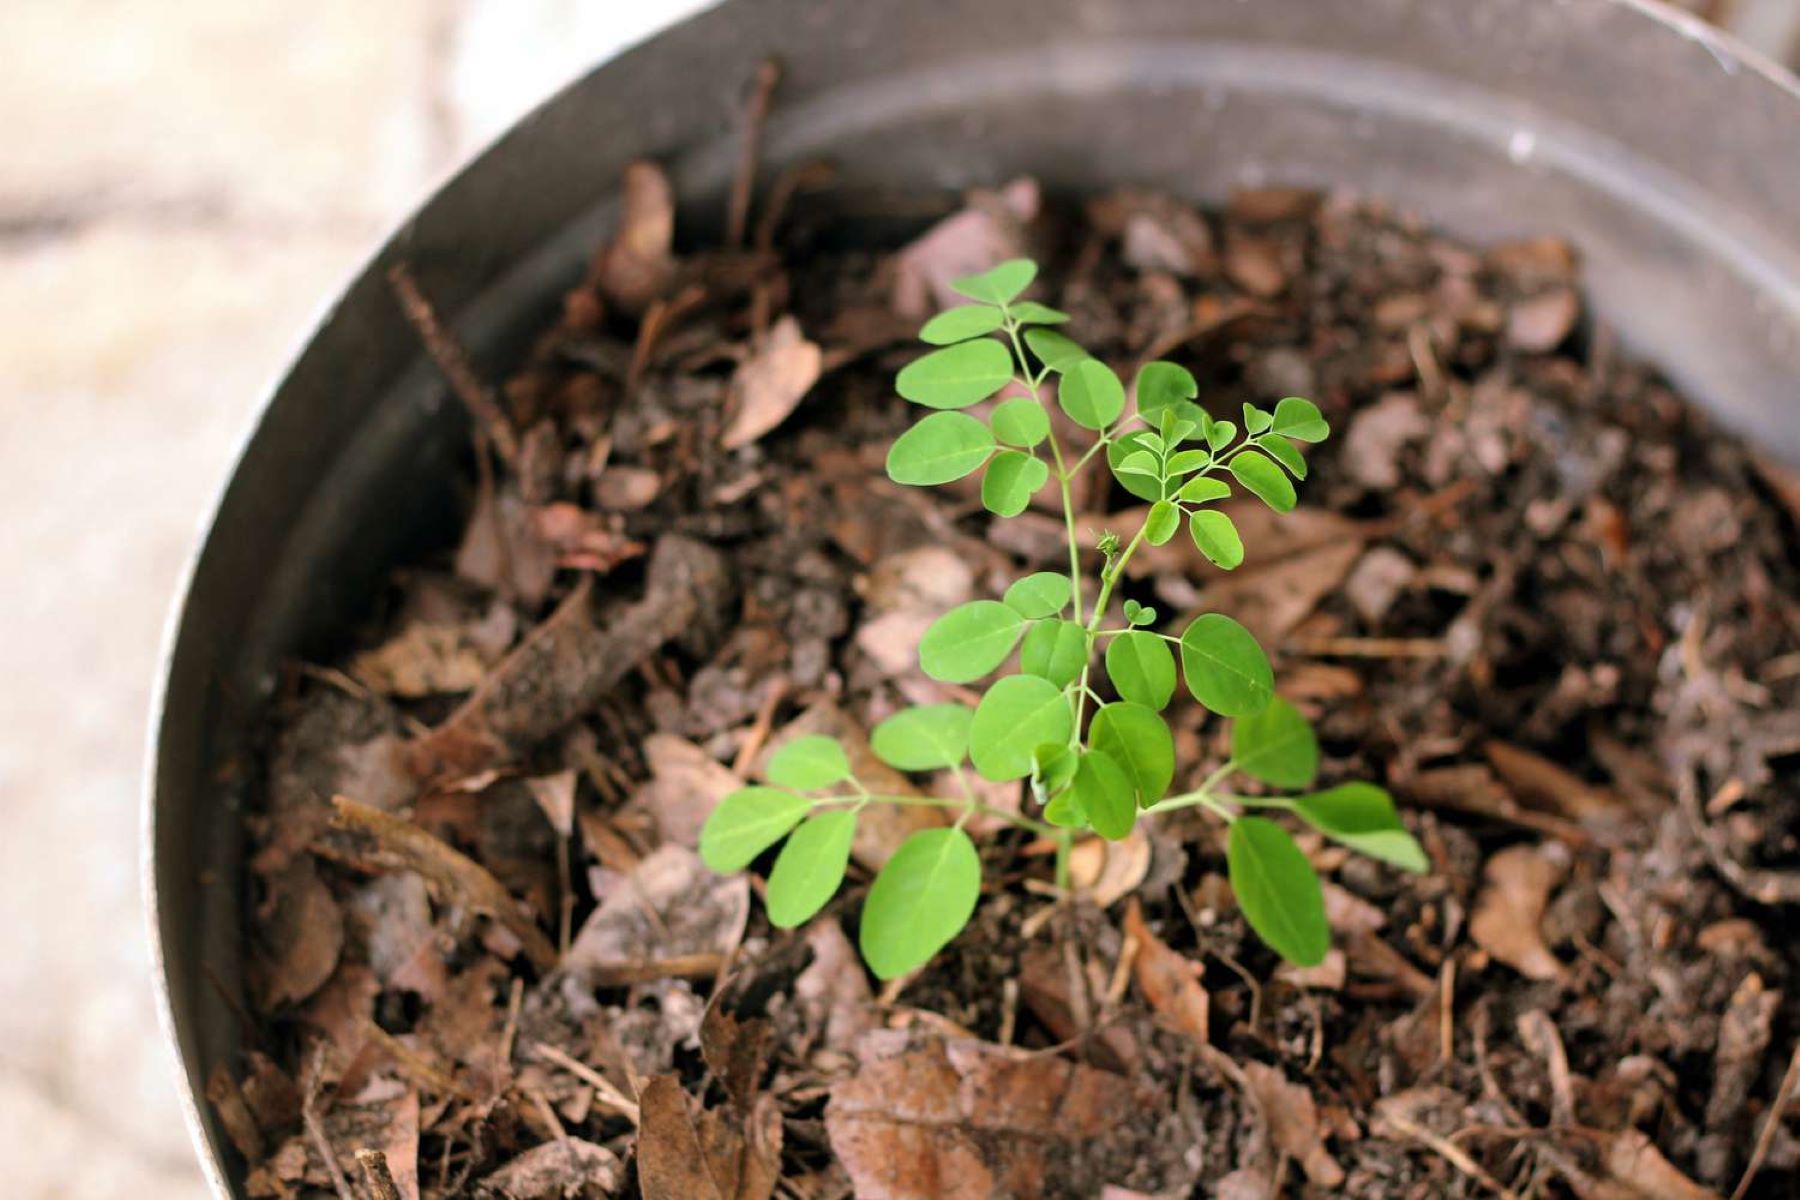
Step 4: Planting the Rambutan Seeds
With your rambutan seeds prepared and ready, it’s time to plant them and kickstart their journey towards becoming vibrant rambutan trees. Follow these steps to plant rambutan seeds successfully:
1. Choose the right container: Select a pot or container with good drainage to prevent waterlogging. It should be at least 10 inches deep and wide enough to accommodate the seedling’s roots.
2. Fill the container with potting mix: Use a well-draining potting mix that is rich in organic matter. You can also mix in a small amount of perlite or sand to improve drainage. Fill the container up to a few inches below the rim.
3. Plant the seed: Make a small hole in the center of the potting mix, about an inch deep. Gently place the rambutan seed into the hole, with the scarification facing upwards. Cover the seed with the potting mix, ensuring it is firmly planted but not too compacted.
4. Water thoroughly: After planting, water the potting mix thoroughly until it’s evenly moist. Avoid overwatering, as excessive moisture can lead to root rot. Throughout the germination process, keep the soil consistently moist but not waterlogged.
5. Provide warmth and humidity: Rambutan seeds require warm temperatures and high humidity to germinate. Place the container in a warm location, preferably with temperatures around 77-86°F (25-30°C). You can also cover the container with a transparent plastic bag or a plastic dome to create a greenhouse-like environment and trap moisture.
6. Be patient: Germination can take anywhere from 2 to 6 weeks, so be patient and regularly check the container for any signs of growth. Once the seedlings emerge, remove the plastic cover and place the container in a brightly lit area, preferably near a window with indirect sunlight.
Remember to monitor the moisture level and temperature regularly to provide optimal growing conditions. As the seedling grows, you’ll need to transition to the next steps of caring for rambutan seedlings, which we will cover in step five.
Read more: What Happens If You Eat A Rambutan Seed
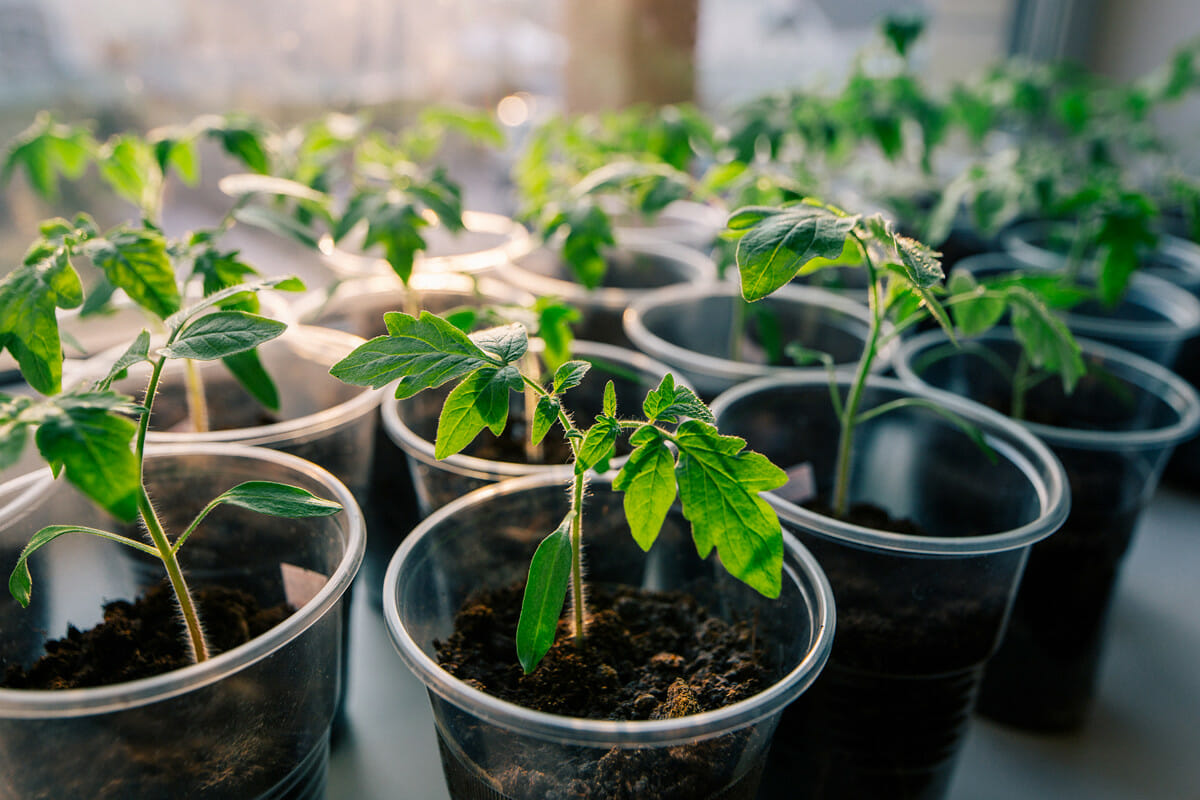
Step 5: Providing Ideal Growing Conditions
Now that your rambutan seedling has started to grow, it’s crucial to provide the ideal growing conditions to ensure its healthy development into a mature rambutan tree. Here are some key factors to consider:
1. Sunlight: Rambutan trees thrive in full sun, so it’s essential to provide them with at least 6-8 hours of direct sunlight daily. Place your seedling in a spot where it can receive ample sunlight to foster optimal growth.
2. Temperature: Rambutans are tropical plants and prefer warm temperatures between 77-95°F (25-35°C). Protect your seedling from extreme temperature fluctuations, keeping it in a stable and warm environment.
3. Watering: While it’s important to keep the soil consistently moist, overwatering can be detrimental to rambutan seedlings. Allow the top inch of soil to dry out slightly between waterings. Use filtered or rainwater if possible to avoid chlorine and other chemicals that may harm the plant.
4. Fertilization: As your rambutan seedling grows, it will benefit from regular feeding. Apply a balanced fertilizer formulated for fruit trees every two to three months during the growing season. Be sure to follow the instructions on the fertilizer packaging for the proper dosage.
5. Humidity: Rambutan trees appreciate high humidity levels. If you live in a dry climate, consider using a humidifier or misting the leaves regularly to increase humidity around the seedling. You can also place a tray of water near the plant to help maintain a humid environment.
6. Air circulation: Good airflow around the seedling is crucial to prevent the development of fungal diseases. Avoid overcrowding plants and ensure there is sufficient space for air to circulate. You can also use a small fan to improve air movement.
By providing these ideal growing conditions, your rambutan seedling will have the best chance to grow into a healthy and robust tree. As it continues to thrive, it will require proper care and maintenance, which we’ll discuss in the next steps.
To grow rambutan seeds, remove the outer seed coat and plant in a well-draining soil. Keep the soil consistently moist and place in a warm, sunny location. Germination can take 2-4 weeks.
Step 6: Caring for Rambutan Seedlings
As your rambutan seedling continues to grow, it’s important to provide proper care to ensure its healthy development into a strong and productive tree. Follow these steps to care for your rambutan seedlings:
1. Regular watering: Maintain a consistent watering schedule, ensuring the soil is consistently moist but not waterlogged. Water deeply, allowing the water to penetrate the root zone. Adjust the frequency of watering based on the plant’s needs and the moisture level of the soil.
2. Mulching: Apply a layer of organic mulch, such as wood chips or straw, around the base of the seedling. Mulching helps to retain moisture, suppress weeds, and regulate soil temperature. Leave a gap around the stem to prevent moisture buildup and potential rot.
3. Training the seedling: As your rambutan seedling grows, gently guide its main stem upwards using a stake or a trellis. This helps to promote an upright growth habit and prevents the seedling from leaning or bending.
4. Protecting from pests and diseases: Keep an eye out for common pests and diseases that can affect rambutan trees, such as aphids, mealybugs, and fungal infections. Regularly inspect your seedlings and take appropriate measures, such as using organic pest control methods or applying fungicides if necessary.
5. Pruning: Once your seedling has developed a few sets of leaves, you can start pruning to promote a well-shaped tree. Trim away any damaged or diseased branches, as well as any suckers that emerge from the base of the seedling. Pruning helps to improve airflow, reduce the risk of disease, and direct the plant’s energy towards growth and fruit production.
6. Providing support: As your rambutan tree grows taller, it may require additional support. Use stakes or a trellis to provide support and prevent the tree from leaning or collapsing under its own weight. Secure the main stem to the support structure using soft plant ties, allowing the tree to grow straight and strong.
7. Regular monitoring: Keep a close eye on your rambutan seedlings, checking for any signs of stress, nutrient deficiencies, or pest infestations. Promptly address any issues to ensure the health and vitality of your growing tree.
By following these care practices, your rambutan seedlings will receive the attention and support they need to grow into healthy and productive trees. Remember to be patient, as it may take several years before your rambutan tree reaches maturity and starts bearing fruits.
Step 7: Transplanting Seedlings to Larger Pots or Outdoors
As your rambutan seedlings grow bigger and stronger, they will eventually outgrow their initial containers and require transplanting to larger pots or planting them outdoors. The timing of this step will depend on the growth rate of your seedlings and the local climate. Here’s how to successfully transplant your rambutan seedlings:
1. Assess the size and root development: Before transplanting, check the size of your seedling’s root system. If the roots are circling around the container and filling it entirely, it’s time to transplant. This usually occurs when the seedling is around 6 to 12 months old.
2. Choose a suitable location or pot: If you plan to transplant your seedling outdoors, select a location that receives full sun and has well-draining soil. Alternatively, choose a larger pot that is at least 18 inches in diameter with good drainage holes if you prefer to keep your tree in a container.
3. Prepare the transplanting site or pot: If transplanting outdoors, prepare the planting hole by loosening the soil and incorporating organic matter such as compost. If using a larger pot, fill it with a well-draining potting mix, leaving enough space for the root ball of the seedling.
4. Gently remove the seedling from its current container: Carefully turn the container upside down and tap the bottom to loosen the seedling. Support the seedling’s base as you gently slide it out, taking care not to damage the roots.
5. Place the seedling in its new location or pot: For outdoor planting, position the seedling in the planting hole, making sure the top of the root ball is level with or slightly above the soil surface. If using a larger pot, center the seedling in the pot and add potting mix around the roots, firming it gently.
6. Backfill and water: For outdoor planting, backfill the hole with soil, gently firming it around the roots. Water the transplant thoroughly to settle the soil and eliminate any air pockets. If transplanting to a larger pot, water the potting mix well, allowing excess water to drain.
7. Provide post-transplant care: After transplanting, continue to water your seedling regularly, ensuring the soil remains evenly moist. Protect the seedling from strong winds and extreme temperatures by providing temporary shade or using windbreaks if necessary.
8. Monitor and adjust: Keep an eye on your transplanted seedling as it adjusts to its new environment. Monitor soil moisture, provide appropriate fertilization, and make any necessary adjustments to ensure the plant’s well-being.
Transplanting your rambutan seedlings to larger pots or outdoors allows them to have more space for root growth and access to natural sunlight and nutrients. With proper care and attention, your seedlings will continue to thrive and develop into beautiful rambutan trees.
Step 8: Pruning and Training Rambutan Trees
Pruning and training your rambutan trees is essential for shaping their growth, promoting better fruit production, and maintaining overall tree health. Regular pruning helps remove dead or diseased branches, improves air circulation, and encourages the development of a strong framework. Here’s how to prune and train your rambutan trees effectively:
1. Start pruning in the early years: Begin pruning your rambutan tree in its early years to establish a well-shaped structure. This usually starts after the first year of growth.
2. Remove dead and diseased branches: Inspect your tree regularly and promptly remove any dead, damaged, or diseased branches. Make clean cuts close to the base of the branch or just above a healthy bud or lateral branch.
3. Thin out crowded branches: If your rambutan tree has branches that are crossing or overcrowding each other, selectively prune them to improve airflow and reduce the risk of diseases. Remove branches that are growing towards the center of the tree or rubbing against each other.
4. Encourage a strong framework: Aim for an open and balanced canopy by selectively removing branches to create a well-spaced framework. This allows sunlight to penetrate throughout the tree, leading to better fruit production and overall health.
5. Control size and height: If your rambutan tree is growing too tall or wide, you can prune it to manage its size. Prune back long or leggy branches to encourage more compact growth. Keep in mind that excessive pruning could reduce fruit production, so strike a balance between size control and maintaining a productive tree.
6. Thin fruit clusters: When your rambutan tree starts bearing fruits, thinning the clusters can help improve fruit quality and prevent overloading. Remove some of the smaller or malformed fruits to allow the remaining ones to develop fully.
7. Train the main stem: In the early years of your rambutan tree, guide the main stem to grow upright. Use stakes or a trellis to support and train the tree’s central leader. This helps establish a strong trunk and prevents the tree from leaning or bending.
8. Pruning after fruiting: After each fruiting season, assess the tree and prune any branches that have borne fruits. This stimulates new growth and fruit production for the next season.
Remember to use clean and sharp pruning tools to make smooth cuts, and always disinfect your tools between each cut or tree to prevent the spread of diseases. Pruning and training your rambutan trees not only contribute to their aesthetic appeal but also help maintain their vigor and productivity.
Read more: How To Grow Seed
Step 9: Harvesting Rambutan Fruits
After all the hard work and patience, the time for harvesting your rambutan fruits has arrived. The harvesting period can vary depending on the rambutan variety and growing conditions, but generally, it takes place around 100 to 120 days after flowering. Follow these guidelines to ensure a successful and rewarding rambutan fruit harvest:
1. Observe the fruit color: Rambutan fruits are typically harvested when their skin color changes from bright red to a deep red or yellow, depending on the variety. The skin should be vibrant and fully developed without any visible blemishes or marks.
2. Assess fruit firmness: Gently squeeze the fruit, feeling for a slight give and firmness. Ripe rambutans should be moderately firm and spring back when lightly pressed. Avoid overripe fruits, which may feel too soft or mushy.
3. Look for fruit detachment: Ripe rambutan fruits naturally detach from the stalk with little effort. Give the fruit a gentle twist, and if it easily separates from the stalk, it’s ready for harvesting. Avoid forcefully pulling or yanking the fruit to prevent damage to the tree.
4. Harvest with care: To harvest the rambutan fruits, hold them gently at the stem and twist them until they detach. Handle the fruits delicately to avoid bruising or puncturing the skin, as this can reduce their shelf life and quality.
5. Use sterilized tools: If needed, use sterilized pruning shears or scissors to carefully snip the stalk, leaving a short stub attached to the fruit. This method can be useful for preventing stem injuries or accidental tearing of the fruit’s skin.
6. Harvest in multiple rounds: Rambutans don’t ripen all at once on a tree, so it’s best to make several rounds of harvests over several weeks as the fruits reach maturity. This allows you to pick the fruits at their optimal ripeness and extend the harvest period.
7. Handle the fruits gently: After harvesting, place the rambutan fruits in a shallow and well-ventilated container without overcrowding them. Avoid stacking or piling the fruits, as this can cause bruising and damage.
8. Store properly: Rambutan fruits have a limited shelf life and are best consumed fresh. Keep them at room temperature for a couple of days, or refrigerate them for up to 5 days to prolong their freshness. Avoid storing the fruits near strong-smelling foods, as they can absorb odors.
9. Enjoy the fruits: Once the rambutan fruits are harvested and properly stored, savor their delicious sweetness and juicy texture. Share them with friends and family or indulge in their tropical flavors on your own.
Harvesting rambutan fruits is a joyful and rewarding experience, as you reap the fruits of your labor. Enjoy the delectable taste of these exotic fruits as you relish the accomplishment of successfully growing your own rambutan tree.
Conclusion
Congratulations on completing the journey of growing rambutan seeds into flourishing trees that bear delicious fruits! We hope this comprehensive guide has equipped you with the knowledge and confidence to successfully cultivate rambutan in your garden or home. Throughout the process, you’ve learned about selecting ripe rambutan fruits, extracting and preparing seeds, planting them, providing ideal growing conditions, caring for seedlings, transplanting, pruning and training, and finally, harvesting the prized rambutan fruits.
Remember, growing rambutans from seeds requires patience and dedication. These tropical trees take time to mature and produce fruits, but the rewards are well worth it. As your rambutan trees continue to grow and thrive, you’ll witness the beauty of lush foliage and experience the delight of harvesting the vibrant, sweet, and juicy rambutan fruits.
While this guide has provided a comprehensive overview, it’s essential to adapt the information to your specific growing conditions and knowledge of gardening. Experiment, learn from your experiences, and continue to refine your techniques along the way. Connect with fellow gardeners, join online forums, or seek guidance from local horticultural experts to deepen your understanding and share your enthusiasm for rambutan cultivation.
So, roll up your sleeves, gather your tools, and embark on your rambutan-growing adventure. Enjoy the process of nurturing these remarkable trees and experiencing the joy of harvesting your own tropical fruits. May your garden be filled with the vibrant colors, sweet aromas, and delectable flavors of rambutan fruits for years to come!
Curious about how long those rambutan seeds take to sprout after planting? Our next guide dives into the nuances of seed germination, offering insights and tips to speed up the process and ensure your gardening efforts bear fruit more quickly. From understanding the optimal conditions to learning simple tweaks that can aid faster growth, this article is perfect for gardeners eager to see results.
Frequently Asked Questions about How To Grow Rambutan Seeds
Was this page helpful?
At Storables.com, we guarantee accurate and reliable information. Our content, validated by Expert Board Contributors, is crafted following stringent Editorial Policies. We're committed to providing you with well-researched, expert-backed insights for all your informational needs.

0 thoughts on “How To Grow Rambutan Seeds”