Home>Garden Essentials>How To Grow Lily Seeds
Garden Essentials
How To Grow Lily Seeds
Modified: March 15, 2024
Learn the secrets of growing lilies from seeds in your garden. Find out the step-by-step process to ensure a successful growth. Explore now!
(Many of the links in this article redirect to a specific reviewed product. Your purchase of these products through affiliate links helps to generate commission for Storables.com, at no extra cost. Learn more)
Introduction
Welcome to the world of lily gardening! Growing lilies from seeds can be a rewarding and fulfilling experience. Not only do lilies add beauty and elegance to any garden, but they also come in a wide range of colors, shapes, and sizes, allowing you to create a stunning display that reflects your personal style.
While many gardeners are familiar with propagating lilies from bulbs or dividing existing plants, starting lilies from seeds is a lesser-known method that offers its own set of benefits. Not only is it more cost-effective, but it also allows you to experiment with different varieties and potentially discover unique and rare lily cultivars. Plus, watching these delicate seeds transform into stunning blooms is a truly magical experience.
In this article, we will guide you through the process of growing lilies from seeds. From understanding the different types of lily seeds to successfully planting and caring for seedlings, we’ll cover everything you need to know to get started on your lily-growing journey.
So, let’s dive in and discover the fascinating world of lily seeds!
Key Takeaways:
- Growing lilies from seeds is a magical journey that allows you to experiment with different varieties and discover unique blooms. It’s a rewarding and fulfilling experience that brings beauty to your garden.
- Harvesting lily seeds opens the door to new and rare lily cultivars. Each seed holds the potential for a stunning and unique lily variety, making it an exciting opportunity for gardeners.
Read more: How To Grow Water Lily Seeds
Understanding Lily Seeds
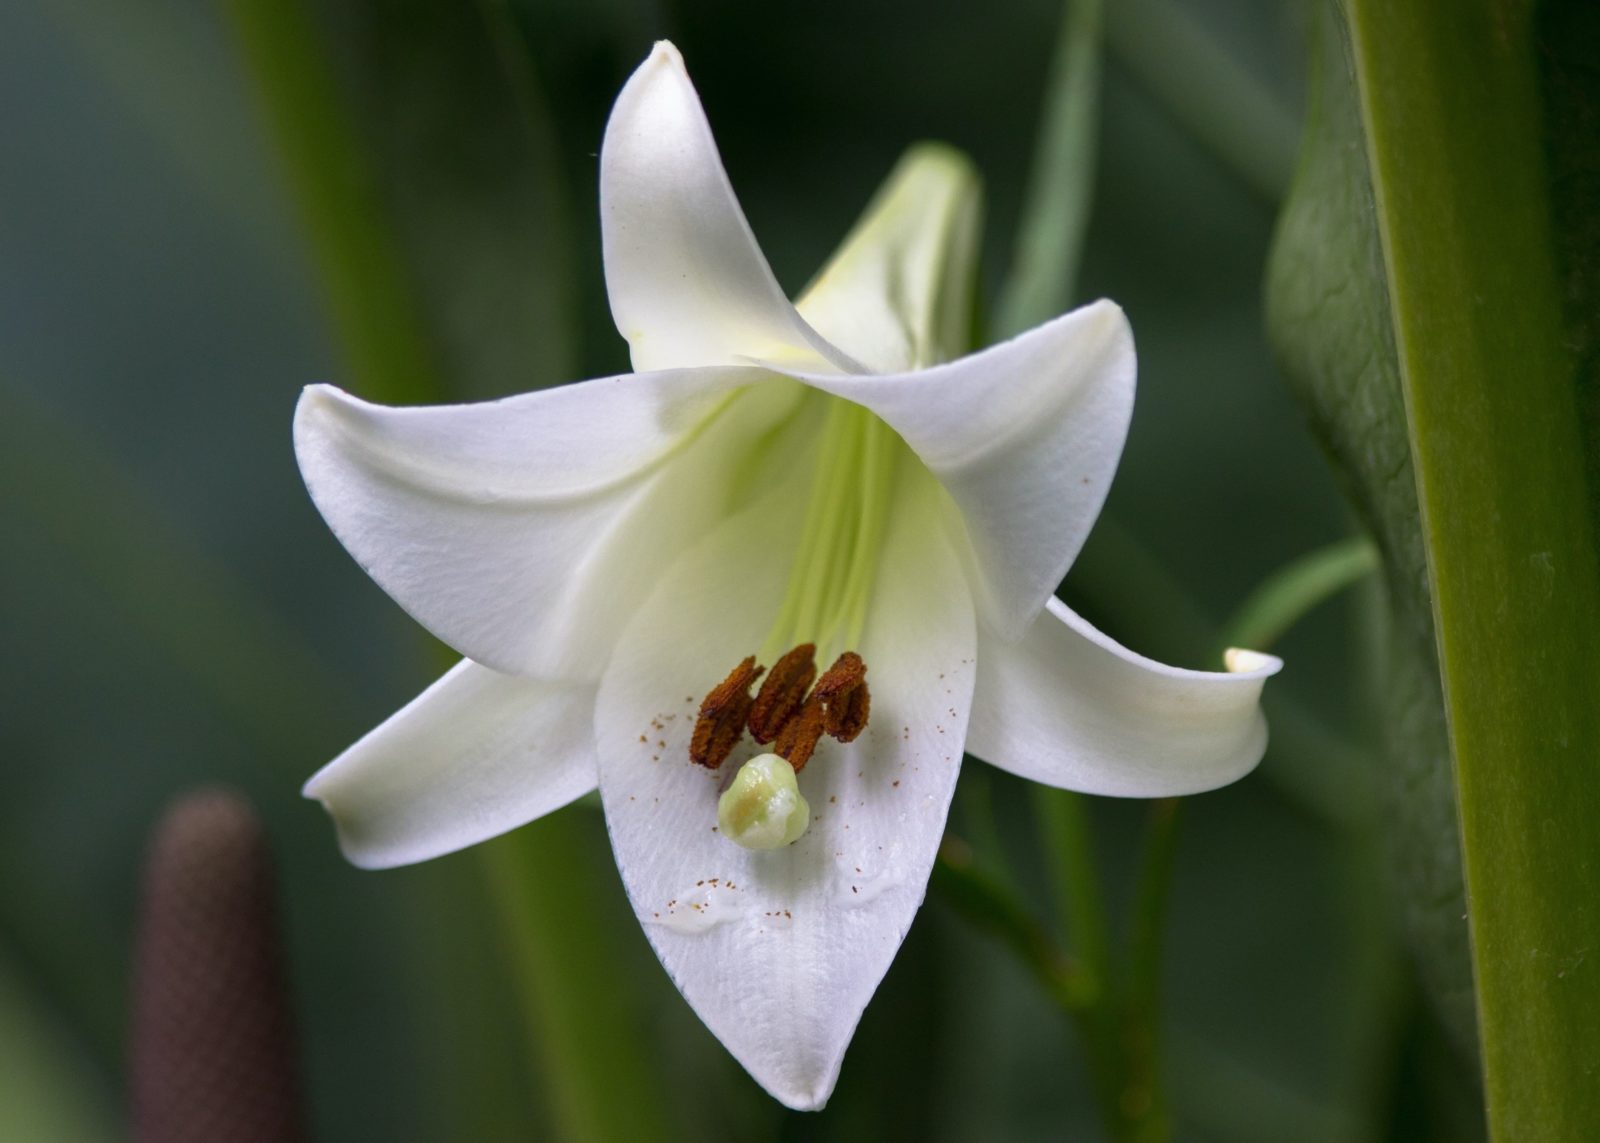
Before you embark on your journey of growing lilies from seeds, it’s important to have a basic understanding of how lily seeds work. Lily seeds are small and round, usually black or dark brown in color. Each seed is enclosed in a protective seed coat that helps regulate moisture and protect the embryo.
Lily seeds are typically produced after the pollination of lily flowers. The flowers develop seed pods that contain the seeds. These seed pods will gradually mature and split open, revealing the seeds inside. It’s important to note that not all lilies produce seeds, as some varieties are sterile and cannot be propagated through seed.
Unlike many other plants, lilies have a unique seed dormancy mechanism. Lily seeds require a period of cold stratification, which mimics their natural winter dormancy. This cold treatment is necessary to break the seed’s dormancy and trigger germination. Depending on the lily species and variety, the required cold stratification period can range from a few weeks to several months.
Some lily seeds may have a hard seed coat, known as a hard-coated seed. This hard coating can make germination challenging, as it prevents water from entering the seed. Scarification is often required to break the seed coat and enhance water absorption. Scarification can be achieved through various methods such as sanding the seed coat or soaking the seeds in warm water prior to planting.
It’s important to note that lily seeds are not always true to the parent plant. Due to cross-pollination or hybridization, the resulting plants from seeds may exhibit different characteristics than the parent plant. This can lead to exciting surprises as you discover new colors or flower forms in your garden.
Now that you have a better understanding of lily seeds, let’s move on to selecting the right varieties for your garden.
Choosing the Right Lily Varieties
When it comes to choosing lily varieties to grow from seeds, the options are virtually endless. Lilies come in a wide array of colors, shapes, and sizes, allowing you to create a truly unique and breathtaking garden display. Here are some factors to consider when choosing the right lily varieties:
1. Climate and Hardiness
Consider the climate and hardiness zone of your garden. Some lilies are more tolerant of cold or hot temperatures, while others thrive in specific climates. Make sure to choose lily varieties that are well-suited to your local climate to ensure successful growth and blooms.
2. Garden Space and Planting Conditions
Assess the space and planting conditions in your garden. Different lilies have varying growth habits, with some being more compact while others are taller and need more space. Consider the sunlight requirements, soil type, and drainage in your garden to select lilies that will thrive in those conditions.
Read more: How To Grow Calla Lily Seeds
3. Flower Characteristics
Decide on the flower characteristics that you desire. Lilies come in a variety of colors, including shades of white, pink, red, orange, yellow, and even bi-colors. They also have different flower forms, including trumpet-shaped, bowl-shaped, or star-shaped blooms. Choose lilies with flower characteristics that complement your garden aesthetic.
4. Fragrance
Consider the fragrance of the lily varieties. Some lilies have strong, intoxicating scents that can fill your garden with a delightful aroma. If fragrance is important to you, look for lily varieties known for their pleasant scent.
5. Personal Preference
Ultimately, choose lily varieties that resonate with your personal preference. Whether you prefer bold and vibrant colors or delicate and pastel hues, select lilies that speak to your taste and gardening style.
When purchasing lily seeds, look for reputable seed suppliers or specialty nurseries that offer a wide selection of lily varieties. This ensures that you are getting high-quality seeds that are true-to-type and have the best chance of germination.
Now that you have a better understanding of how to choose the right lily varieties, let’s move on to the process of collecting lily seeds.
Collecting Lily Seeds
Collecting lily seeds is an exciting part of the lily gardening process. It allows you to preserve and propagate your favorite lilies, experiment with different varieties, and potentially discover new and unique cultivars. Here’s a step-by-step guide on how to collect lily seeds:
Read more: How To Grow Calla Lilies From Seed
1. Wait for Seed Pods to Mature
Observe your lily plants closely for the formation of seed pods. Once the lily flowers have bloomed and started to fade, they will develop seed pods at the base of the flower stalk. Allow the seed pods to fully mature and turn brown before collecting the seeds. This ensures that the seeds are fully developed and have the best chance of germination.
2. Harvest the Seed Pods
When the seed pods are ripened, carefully cut them from the plant using sharp, clean scissors or pruners. Place the seed pods in a paper bag or a container to collect any seeds that may fall out during the collection process.
3. Separate the Seeds
Back at your gardening table, open up the seed pods gently and remove the black or dark brown seeds. You may find that the seed pods contain numerous seeds, so take your time to separate them and discard any damaged or discolored seeds.
4. Dry the Seeds
After collecting the seeds, it’s important to dry them thoroughly before storing or planting. Lay the seeds out on a clean paper towel or a mesh screen, ensuring that they are spread out evenly and not touching each other. Place them in a well-ventilated area away from direct sunlight and let them dry for a week or two. Proper drying helps prevent the seeds from developing mold or rotting.
Read more: How To Plant Lily Seeds
5. Store the Seeds
Once the seeds are fully dried, transfer them to an airtight container such as a seed packet or a small jar. Label the container with the variety and the collection date to keep track of your seeds. Store the container in a cool, dark, and dry place until you are ready to plant them.
Remember, collecting lily seeds allows you to preserve and propagate the diversity of lilies in your garden. It’s an amazing opportunity to have a hand in the natural reproduction of these beautiful plants.
Now that you know how to collect lily seeds, let’s move on to the process of preparing and planting the seeds for germination.
Preparing to Plant Lily Seeds
Before you sow your collected lily seeds, it’s important to prepare them properly to increase their chances of successful germination. Here are the steps to take when preparing to plant lily seeds:
1. Cold Stratification
As mentioned earlier, lily seeds have a natural dormancy mechanism that requires a period of cold stratification to break their dormancy and stimulate germination. Most lily seeds require a cold stratification period of about 8-12 weeks. To achieve this, place the seeds in a slightly moistened medium, such as damp peat moss or vermiculite, and seal them in a plastic bag or container. Keep the seeds in the refrigerator at a temperature of around 40°F (4°C).
2. Scarification (if necessary)
If you have lily seeds with hard seed coats, you may need to scarify them to improve germination rates. This process involves breaking or weakening the outer seed coat to allow moisture to penetrate the seeds. You can scarify the seeds by lightly scraping them with sandpaper or using a small knife to nick the seed coat. Be careful not to damage the seed itself.
Read more: What Are Seeds In Lily Bloom
3. Pre-soaking (optional)
Some gardeners find that pre-soaking lily seeds before sowing can help speed up germination. To pre-soak the seeds, place them in warm water for 24 hours. This can help soften the seed coat and increase water absorption.
4. Selecting a Germination Method
There are a few different methods you can choose from when it comes to germinating lily seeds. One common method is sowing them directly in seed trays or pots filled with a well-draining seed starting mix. Another option is to use the “baggy method,” where you place the seeds in a damp paper towel or a ziplock bag to germinate. Whichever method you choose, make sure to provide the seeds with a moist, yet not waterlogged, environment.
5. Providing Optimal Germination Conditions
Lily seeds germinate best when provided with consistent moisture and moderate temperatures. Keep the seeds in a warm location with temperatures around 70-75°F (21-24°C). Check the moisture levels regularly and mist the seeds with water if the soil or paper towel starts to dry out.
6. Patience and Observation
Germinating lily seeds requires patience, as some varieties can be slow to sprout. It may take several weeks or even months for the seeds to germinate and for the tiny seedlings to emerge. During this time, observe the seeds closely and be on the lookout for any signs of germination.
By properly preparing your lily seeds and providing them with the right germination conditions, you are giving them the best chance to sprout and grow. Once your lily seedlings have emerged, it’s time to move them to their own containers or transplant them into the garden. We’ll cover this process in the next section.
Read more: How To Plant Canna Lily Seeds
Planting Lily Seeds
Once your lily seeds have successfully germinated and the seedlings have emerged, it’s time to plant them in their own containers or transplant them into the garden. Here’s a step-by-step guide on how to plant lily seeds:
1. Prepare Containers
If you choose to plant your lily seedlings in containers, make sure to select containers that provide adequate drainage. Fill the containers with a well-draining potting mix or a mix of peat moss, perlite, and vermiculite. Ensure that the soil is moist but not waterlogged before planting the seedlings.
2. Transplanting Seedlings
Gently remove the lily seedlings from their germination tray or the baggy method. Handle them carefully by the leaves, making sure to avoid damaging the delicate roots. Plant the seedlings in the containers, burying them deep enough to cover the roots but leaving the leaves above the soil surface.
3. Spacing
If transplanting the seedlings in the garden, make sure to space them properly. Lily seedlings should be placed at least 6-8 inches (15-20 cm) apart to allow for proper air circulation and future growth.
Read more: When To Harvest Calla Lily Seeds
4. Watering
After planting the lily seedlings, water them thoroughly to settle the soil and ensure good root-to-soil contact. Provide them with regular watering, keeping the soil moist but not overly saturated. Avoid overhead watering, as this can cause damage to the delicate foliage and increase the risk of diseases.
5. Sun and Shade
Lilies prefer a sunny location with at least 6-8 hours of direct sunlight per day. However, they also appreciate some protection from intense midday sun in hotter regions. If planting them in the garden, choose a spot that receives adequate sunlight while offering some partial shade during the hottest part of the day.
6. Mulching
Applying a layer of organic mulch around the lily seedlings can help conserve moisture, suppress weed growth, and provide insulation. Use a layer of organic materials such as wood chips, straw, or shredded leaves. Ensure that the mulch is placed a few inches away from the base of the seedlings to prevent rotting.
7. Stake Support (if needed)
Taller lily varieties may require staking to prevent them from bending or breaking under the weight of their blooms. Place the stake near the seedling and loosely tie the stem to the stake using soft twine or plant ties. This will provide support as the lily plant grows taller.
With proper planting techniques and care, your lily seedlings will continue to grow and develop into beautiful mature plants. The next section will cover the essential care required to ensure the health and vigor of your lily seedlings.
Read more: What Do Lily Of The Valley Seeds Look Like
Caring for Lily Seedlings
Caring for lily seedlings is crucial to ensure their healthy growth and development into mature plants. Here are some essential care tips to keep in mind:
1. Watering
Proper watering is key to the success of lily seedlings. Keep the soil consistently moist but not waterlogged. Check the moisture level regularly, especially during hot and dry periods, and adjust your watering schedule accordingly. Aim to provide deep watering, allowing the water to penetrate the root zone.
2. Fertilization
Lily seedlings will benefit from regular fertilization to supply essential nutrients for growth. Begin fertilizing the seedlings approximately one month after planting, using a balanced fertilizer with a ratio such as 10-10-10 or 20-20-20. Follow the package instructions for application rates, and be careful not to over-fertilize, as this can lead to excessive foliage growth with few blooms.
3. Weed Control
Keep the area around your lily seedlings free from weeds. Weeds compete with seedlings for nutrients, water, and sunlight. Regularly inspect the planting area and remove any weeds by hand or use organic mulch to suppress weed growth.
4. Pest and Disease Management
Monitor your lily seedlings for any signs of pests or diseases. Common pests that may affect lilies include aphids, slugs, and red lily beetles. Use organic pest control methods, such as handpicking insects or applying natural pest deterrents, to protect your seedlings. If you notice any signs of diseases such as powdery mildew or botrytis, promptly remove affected leaves or treat with appropriate fungicides.
5. Support and Staking
As your lily seedlings grow taller, provide support and stake them if needed. Taller lily varieties may require staking to prevent them from bending or breaking under the weight of their blooms. Use plant stakes or bamboo canes and loosely tie the stems to provide support without causing damage.
6. Regular Inspection
Regularly inspect your lily seedlings for any signs of stress, nutrient deficiencies, or other issues. Look for yellowing leaves, stunted growth, or any abnormalities. Early detection and intervention can help prevent further damage and ensure the health of your plants.
7. Winter Protection
In colder climates, it’s important to provide winter protection for your lily seedlings. Before the first frost, apply a layer of mulch around the base of the plants to help insulate the soil and protect the roots from freezing temperatures. After the first frost, cut back the foliage to about 2-3 inches from the ground.
By following these care tips, you can provide your lily seedlings with the best conditions for healthy growth and vigor. As they mature, they will reward you with stunning blooms and add beauty to your garden.
The next section will guide you through the process of transplanting your lily seedlings into their permanent location in the garden.
Read more: What Do Canna Lily Seeds Look Like
Transplanting Lily Seedlings
Transplanting your lily seedlings from their temporary containers to their permanent location in the garden is a crucial step for their continued growth and development. Here’s a step-by-step guide on how to transplant lily seedlings:
1. Timing
Transplant your lily seedlings when they have developed a strong root system and are at least 6-8 inches (15-20 cm) tall. This usually occurs when the seedlings are around 3-4 months old. Choose a day when the weather is mild and there is no risk of frost or extreme heat. Early spring or early fall is often the ideal time for transplanting lily seedlings.
2. Site Selection
Select a suitable location in your garden for transplanting the lily seedlings. Choose a spot that receives at least 6-8 hours of direct sunlight daily and has well-draining soil. Avoid areas prone to waterlogging or where the soil tends to be too dry.
3. Soil Preparation
Prepare the soil in the planting area by removing any weeds, rocks, or debris. Incorporate organic matter such as compost or well-rotted manure to improve the soil’s fertility and drainage. Level the soil surface and create a slight mound in the center to aid in water drainage.
Read more: How To Grow Seed
4. Digging the Hole
Dig a hole in the prepared soil that is wide and deep enough to accommodate the root ball of the lily seedling. The hole should be slightly larger than the size of the seedling’s container or root ball. Make sure the hole is deep enough to allow the lily seedling to be planted at the same depth it was in its previous container.
5. Transplanting
Gently remove the lily seedling from its temporary container, taking care not to disturb or damage the roots. Place the seedling in the prepared hole, making sure it is positioned upright. Backfill the hole with soil, ensuring that the root ball is surrounded and covered completely. Press down gently to secure the seedling in place.
6. Watering and Mulching
After transplanting, water the lily seedling thoroughly to settle the soil and help eliminate air pockets around the roots. Apply a layer of organic mulch, such as straw or wood chips, around the base of the seedling to help conserve moisture, suppress weed growth, and provide insulation.
7. Continued Care
Continue to care for the transplanted lily seedlings by providing regular watering, monitoring for pests and diseases, and fertilizing as needed. Stake taller lily varieties to provide support as they grow. Maintain a weed-free environment around the seedlings to minimize competition for nutrients.
By following these steps, you can ensure a successful transplanting process for your lily seedlings. With proper care and attention, your transplanted lilies will thrive and grace your garden with their stunning blooms.
The next section will guide you through troubleshooting common issues that may arise with lily seeds to help you address any problems effectively.
Read more: How Chia Seeds Grow
Troubleshooting Common Issues with Lily Seeds
While growing lilies from seeds can be a rewarding experience, it’s important to be aware of potential issues that may arise. Here are some common problems you may encounter when growing lily seeds and how to troubleshoot them:
1. Poor Germination
If your lily seeds are not germinating or have low germination rates, there may be a few factors involved. Firstly, ensure that your seeds have undergone the required cold stratification period and have been scarified if necessary. Check the quality of the seeds to ensure they are viable and not old or damaged. Improper moisture levels or inconsistent temperatures during germination can also hinder seed germination. Review your germination method and make any necessary adjustments to provide the optimal conditions for germination.
2. Damping Off
Damping off, a fungal disease, can cause seedlings to wilt and die. To prevent damping off, make sure to use sterile soil or seed starting mix when sowing the seeds. Avoid overwatering to prevent excessive moisture that can promote fungal growth. Providing good air circulation, using proper spacing between seedlings, and allowing the soil to dry slightly between watering can also help prevent damping off.
3. Weak or Leggy Seedlings
If your lily seedlings are growing weak and leggy, it could be due to insufficient light. Lilies require ample sunlight to develop strong and sturdy stems. Make sure the seedlings are receiving at least 6-8 hours of direct sunlight daily. If growing indoors, consider using supplemental grow lights to provide adequate light intensity. You can also try rotating the seedlings to ensure all sides receive equal exposure to sunlight.
Read more: How To Grow Popcorn Seeds
4. Pest Infestations
Lilies can be susceptible to various pests, including aphids, slugs, and red lily beetles. If you notice pest infestations on your lily seedlings, remove the pests by handpicking or use organic pest control methods such as insecticidal soaps or neem oil. Regularly inspect the plants for any signs of pest activity and take appropriate measures to prevent further damage.
5. Nutrient Deficiencies
If your lily seedlings exhibit signs of nutrient deficiencies, such as yellowing leaves, stunted growth, or poor blooming, it may indicate a lack of essential nutrients. Fertilize the seedlings with a balanced fertilizer according to the package instructions. Slow-release fertilizers are also effective for providing a steady supply of nutrients over time. Additionally, incorporating organic matter into the soil prior to planting can help improve soil fertility and nutrient availability.
6. Environmental Stress
Environmental factors such as extreme heat, frost, or drought can stress lily seedlings. Protect the seedlings from harsh weather conditions by providing shade cloth during hot summer days or using row covers during colder periods. Ensure consistent watering to prevent drought stress and water the plants early in the day to allow foliage to dry before evening, reducing the risk of diseases.
By understanding and addressing these common issues, you can overcome challenges and cultivate healthy and thriving lily seedlings. With proper care and vigilance, your lilies will continue to grow and reward you with their stunning blooms.
Now that you are equipped with troubleshooting knowledge, let’s explore the process of harvesting lily seeds for future propagation.
Harvesting Lily Seeds
Harvesting lily seeds is the final stage in the life cycle of your lily plants and allows you to continue the propagation process. Here’s a step-by-step guide on how to harvest lily seeds:
Read more: How To Grow Tomatoes Seeds
1. Seed Pod Maturity
Wait for the seed pods on your lily plants to mature before harvesting the seeds. The seed pods will usually turn brown and start to split open when they’re ready for harvesting. This is an indication that the seeds inside are fully developed and ready for collection.
2. Gently Remove Seed Pods
Carefully cut or snap the mature seed pods from the lily plant using clean gardening scissors or pruners. Hold the stem of the seed pod securely to avoid damaging the plant. Place the harvested seed pods in a paper bag or a container to catch any seeds that may fall out during the process.
3. Extracting the Seeds
Once you have gathered the seed pods, it’s time to extract the seeds. Open the seed pods gently using your fingers or a small knife. Inside, you’ll find the lily seeds nestled among the pod’s chambers. Carefully remove the seeds and place them in a separate container. Discard any damaged or discolored seeds.
4. Drying the Seeds
After extracting the seeds, it’s important to dry them thoroughly to prevent mold or rot. Spread the seeds out in a single layer on a clean paper towel or a mesh screen. Place them in a well-ventilated area away from direct sunlight. Allow the seeds to air dry for about a week, or until they are completely dry to the touch.
Read more: How To Grow Moringa Seeds
5. Proper Storage
Once the seeds are fully dried, transfer them to a clean, airtight container such as a seed packet or a small jar. Label the container with the variety and the harvesting date for future reference. Store the container in a cool, dry, and dark place, such as a refrigerator or a cool basement, until you are ready to plant or share the seeds.
Harvesting lily seeds not only allows you to continue growing these beautiful flowers but also presents an opportunity for sharing and trading with fellow gardeners. Remember, each seed holds the potential for a new and unique lily variety, so have fun experimenting and discovering what surprises may bloom in your garden.
With the harvesting process complete, you have now mastered the art of growing lilies from seeds. These magnificent flowers will bring joy, color, and elegance to your garden for years to come.
Happy gardening!
Conclusion
Congratulations on your journey into the world of growing lilies from seeds! By understanding the process of collecting, preparing, planting, and caring for lily seedlings, you have equipped yourself with the knowledge and skills to embark on this rewarding gardening adventure.
From the initial fascination of exploring the diverse world of lily varieties to the joy of watching delicate seeds transform into stunning blooms, growing lilies from seeds offers a unique and fulfilling experience. It allows you to create a garden filled with your favorite lilies, experiment with different varieties, and potentially discover new and rare cultivars.
Throughout this article, we have covered each step in detail, from understanding lily seeds and choosing the right varieties to collecting, preparing, and planting the seeds. We’ve also explored essential care and troubleshooting techniques to ensure the health and vigor of your lily seedlings.
Remember, while growing lilies from seeds requires patience and attention, the rewards are worth it. You’ll witness the beauty of nature unfold right before your eyes as your seedlings develop into magnificent, blooming flowers.
As you continue your lily gardening journey, don’t forget to embrace your own creativity. Experiment with different color combinations, heights, and flower forms to create a personalized garden that reflects your unique style and preferences.
Now that you have a comprehensive understanding of growing lilies from seeds, it’s time to put your knowledge into practice. Start collecting those seed pods, preparing the seeds, and watch as your garden transforms with the beauty and elegance of lilies.
Enjoy every step of the process and take delight in the wonders of nature. Happy gardening!
Frequently Asked Questions about How To Grow Lily Seeds
Was this page helpful?
At Storables.com, we guarantee accurate and reliable information. Our content, validated by Expert Board Contributors, is crafted following stringent Editorial Policies. We're committed to providing you with well-researched, expert-backed insights for all your informational needs.

0 thoughts on “How To Grow Lily Seeds”