Home>Garden Essentials>How To Grow Seed
Garden Essentials
How To Grow Seed
Modified: March 15, 2024
Learn how to grow seeds in your garden with our step-by-step guide. Maximize your plant's growth potential and enjoy a beautiful, thriving garden.
(Many of the links in this article redirect to a specific reviewed product. Your purchase of these products through affiliate links helps to generate commission for Storables.com, at no extra cost. Learn more)
Introduction
Starting a garden from seed can be a rewarding and fulfilling journey. Whether you’re a seasoned gardener or a beginner looking to get your hands dirty, growing plants from seed offers a sense of accomplishment and a deeper connection to nature. Not only is it cost-effective, but it also allows you to choose from a wide variety of plant species, including heirloom and rare varieties that may not be readily available at your local nursery.
In this article, we will walk you through the step-by-step process of growing seeds into thriving plants. From selecting the right seeds to harvesting the fruits of your labor, each stage of the journey requires careful attention and practice. So, roll up your sleeves, grab your gardening tools, and let’s get started on this exciting adventure.
Key Takeaways:
- Choose seeds based on your climate, space, interests, and growing conditions. Research and select high-quality seeds to start a fulfilling journey of growing your own plants from seed.
- Provide proper soil preparation, watering, sunlight, and care to nurture seedlings into healthy plants. Protect and maintain your garden to enjoy the rewards of harvesting seeds or fruits.
Read more: How Chia Seeds Grow
Step 1: Choosing the Right Seeds
Choosing the right seeds is crucial for a successful gardening experience. Before you start browsing through catalogs or visiting seed stores, consider the following factors:
- Climate and Zone: Take into account your local climate and the hardiness zone you’re in. Different plants thrive in different environments, so choose seeds that are suitable for your climate.
- Space Available: Assess the space available in your garden or the containers you plan to use for growing. Some plants require more room to spread out, while others can be grown in tight spaces.
- Interest and Purpose: Determine your interests and goals for your garden. Are you looking to grow flowers for visual appeal, herbs for culinary purposes, or vegetables for a bountiful harvest? Choose seeds based on your personal preferences and the purpose of your garden.
- Growing Conditions: Evaluate the growing conditions in your garden, such as the amount of sunlight, soil type, and drainage. Some plants require full sun, while others prefer partial shade. Consider these factors when selecting seeds to ensure the best chances of success.
- Seed Quality: Purchase seeds from reputable suppliers to ensure high-quality seeds. Check for the seed packet’s expiration date, as fresh seeds have a higher germination rate.
- Organic or Non-Organic: Decide whether you want to grow organic plants. If so, look for seeds labeled as organic to avoid any exposure to chemicals.
Once you have considered these factors, it’s time to start exploring different seed options. Whether you prefer a colorful flower garden, a selection of flavorful herbs, or a thriving vegetable patch, there are countless varieties available to suit your needs and preferences. Take your time to research and choose the seeds that align with your gardening goals, and get ready to embark on a fulfilling journey of growing your own plants from seed.
Step 2: Preparing the Soil
Preparing the soil is a crucial step in setting the foundation for healthy plant growth. It provides the necessary nutrients and a suitable environment for the seeds to germinate and develop. Follow these steps to prepare your soil:
- Clear the Area: Start by removing any weeds, rocks, or debris from the area where you plan to sow the seeds. This helps create a clean and clutter-free space for new growth.
- Loosen the Soil: Use a garden fork or a tiller to loosen the soil. This allows for better aeration and prevents compaction, promoting healthy root growth.
- Amend the Soil: Assess the quality of your soil and make any necessary amendments. Adding organic matter such as compost, well-rotted manure, or peat moss enriches the soil with nutrients and improves its texture and drainage.
- Test the pH: It’s important to test the pH level of your soil to ensure it’s within the optimal range for the plants you intend to grow. Most plants prefer a slightly acidic to neutral pH, around 6.0 to 7.0. If the pH is too high or too low, you can make adjustments by adding lime to raise the pH or sulfur to lower it.
- Level and Rake: After adding amendments, level the soil surface using a rake. This creates a smooth and even surface for sowing the seeds.
Remember to consider the specific requirements of the plants you’re growing. Some plants, like vegetables, prefer fertile and well-drained soil, while others, like certain flower varieties, may thrive in specific soil types or conditions. Research the needs of your chosen plants and amend the soil accordingly to provide them with an optimal growing environment.
By taking the time to properly prepare the soil, you are setting the stage for strong and healthy plant growth. Remember, healthy soil leads to healthy plants, so invest the effort into this essential step for a successful gardening journey.
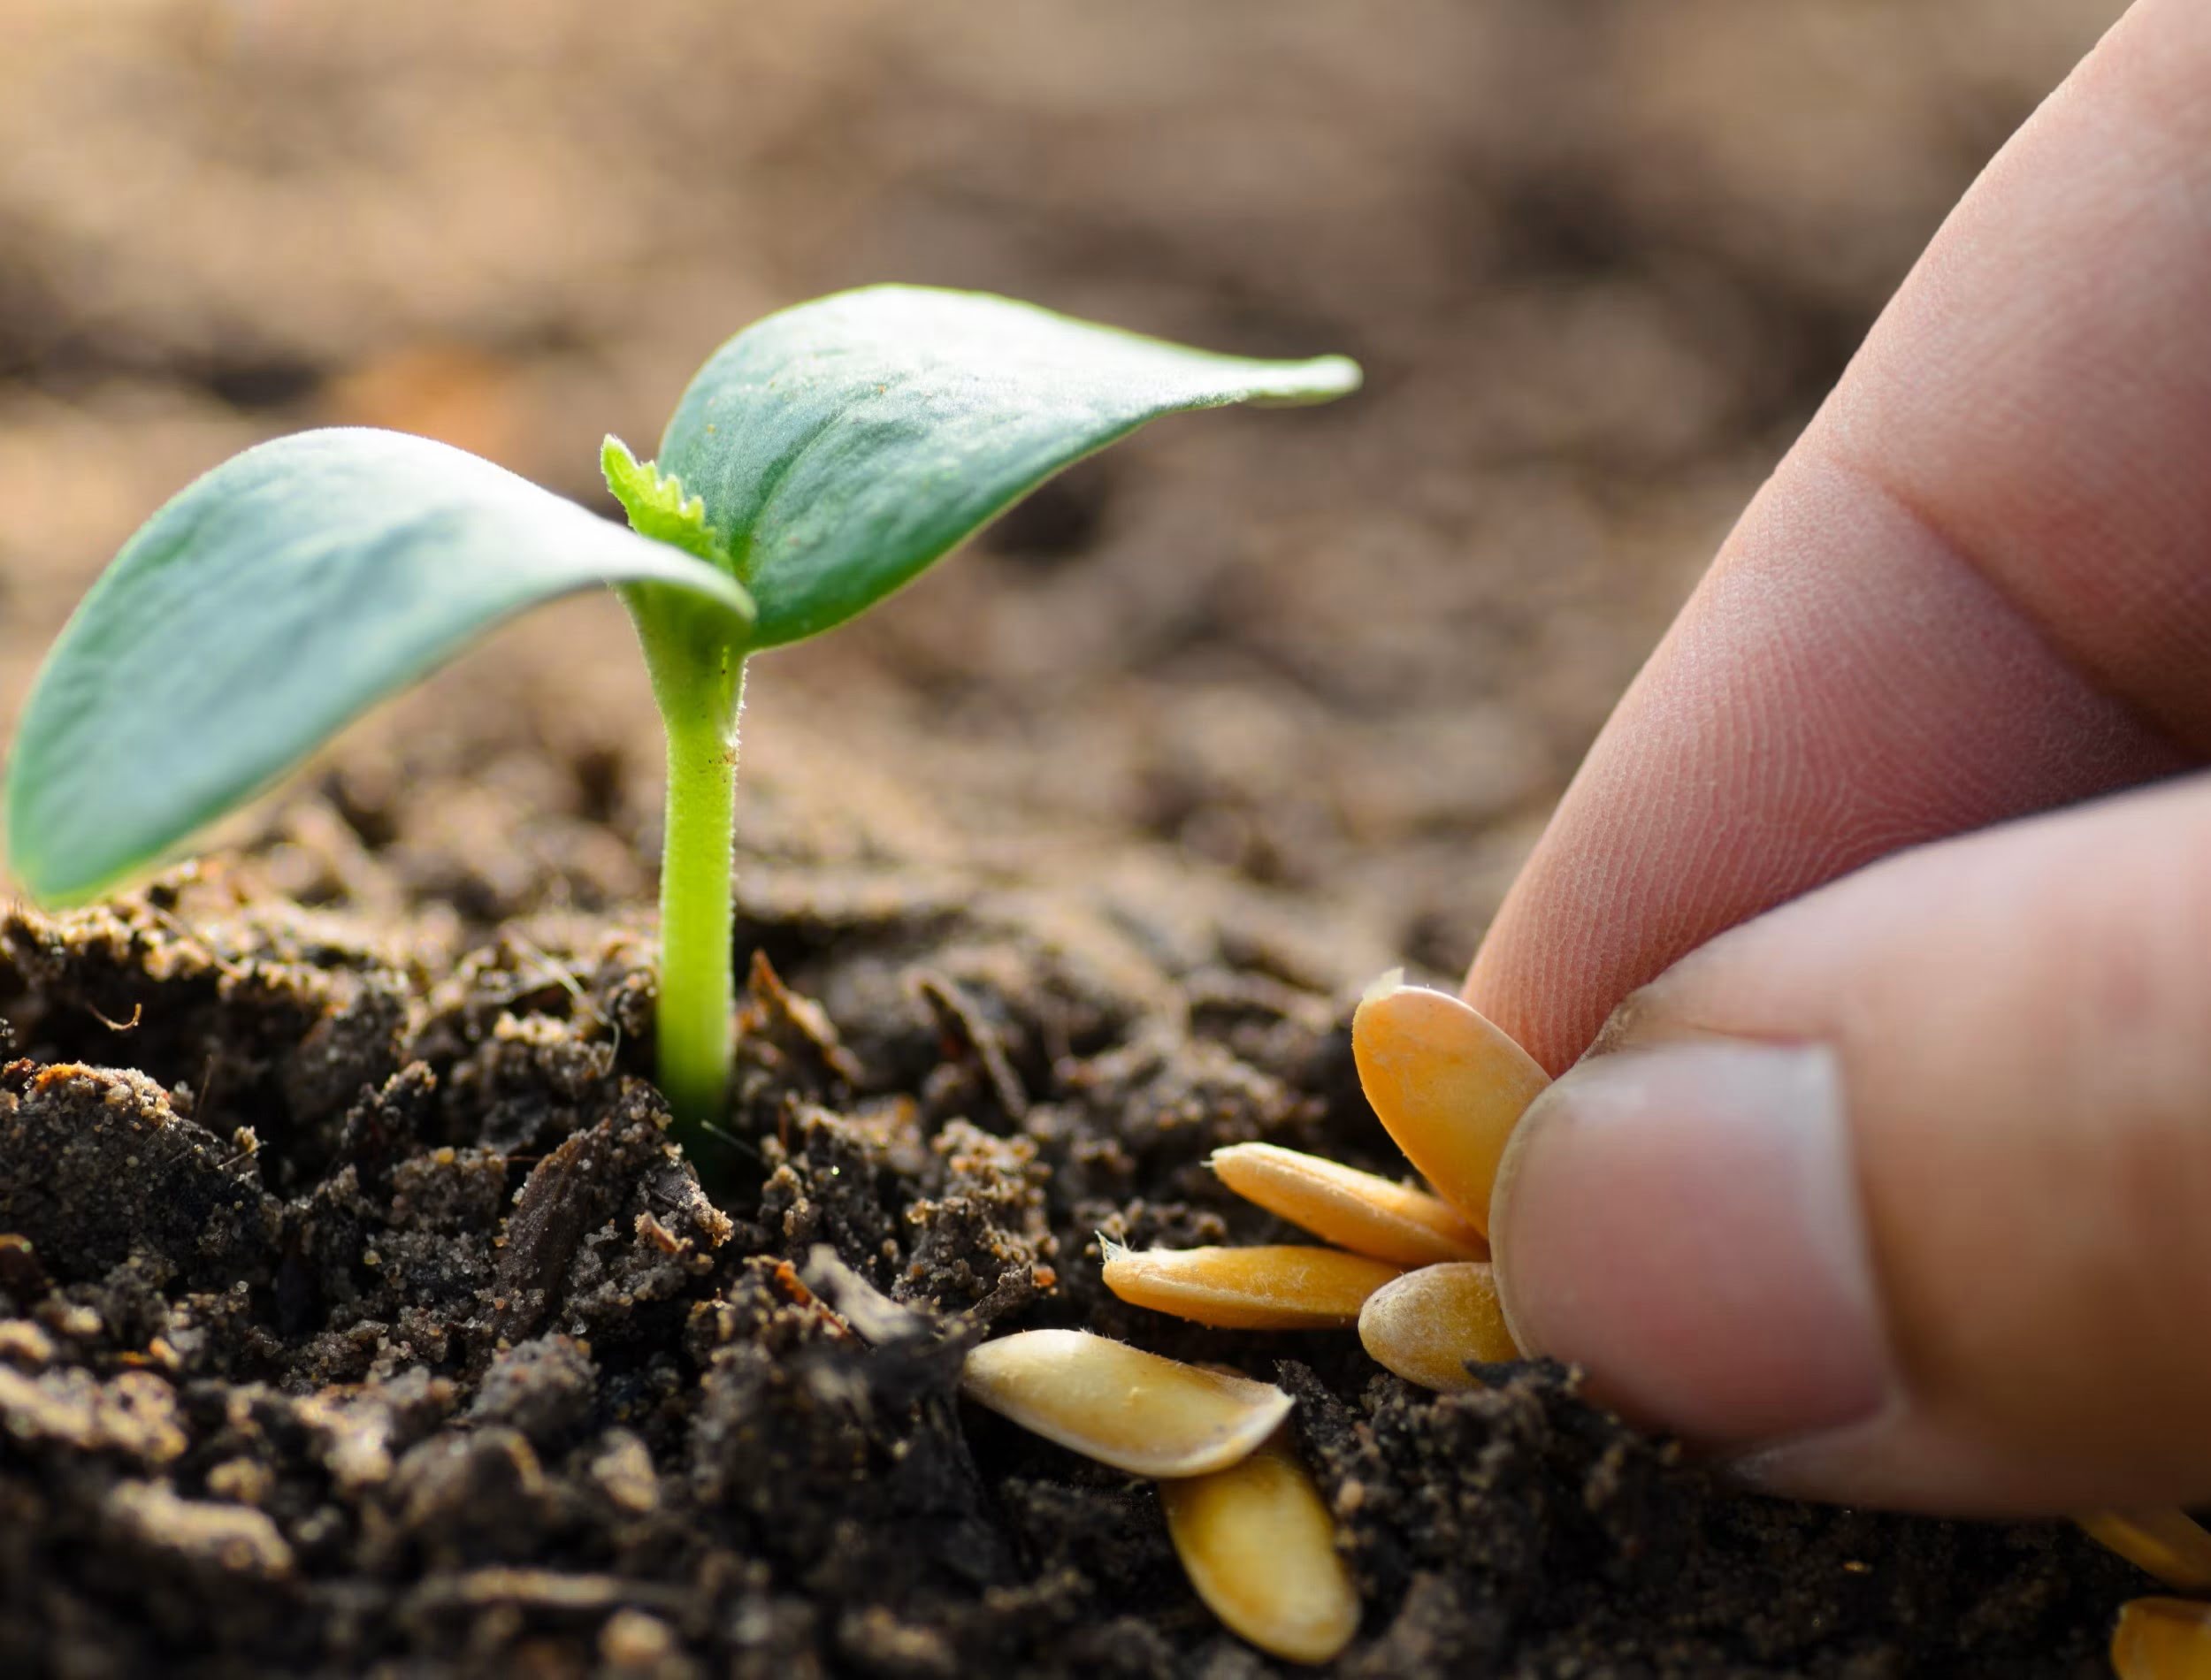
Step 3: Planting the Seeds
Now that you’ve chosen the right seeds and prepared the soil, it’s time to sow the seeds and kickstart the growth of your plants. Follow these steps for successful seed planting:
- Read the Seed Packet: Each seed packet contains important information. Read the packet carefully to learn about the ideal planting depth, spacing, and any specific instructions for that particular plant.
- Mark the Planting Areas: Use stakes, twine, or garden markers to mark the planting areas. This helps you remember where the seeds were sown, especially if you’re planting different varieties or multiple types of plants.
- Planting Depth: Plant the seeds at the recommended depth mentioned on the seed packet. As a general rule, larger seeds are planted deeper than smaller seeds. Gently press the soil over the seeds to ensure good seed-to-soil contact.
- Spacing: Follow the spacing guidelines mentioned on the seed packet to provide adequate space for the plants to grow. Proper spacing ensures they have enough room to develop and access essential resources.
- Watering: After planting, give the soil a thorough watering. This helps settle the soil around the seeds and provides moisture to kickstart germination. Be careful not to overwater, as excessive moisture can lead to rotting or damping-off of young seedlings.
Remember to keep a record of the planting date and the location of different seeds. This will help you track the progress of your plants and plan for future care accordingly.
Depending on the plant species, some seeds may require pre-treatment before planting, such as soaking, scarification, or stratification. If your chosen seeds have specific pre-treatment requirements, be sure to follow them for best results.
Now that the seeds are in the ground, it’s time to be patient and let nature work its magic. Pay attention to the environmental conditions and follow the next steps to provide the necessary care for your seedlings as they emerge and grow into beautiful plants.
Step 4: Providing Adequate Water and Sunlight
Water and sunlight are essential for the healthy growth of your seedlings. Providing the right amount of each is crucial to ensure their proper development. Here’s what you need to know:
Watering:
After planting the seeds, it’s important to keep the soil consistently moist until the seeds germinate and the seedlings start to grow. Here are some watering tips to follow:
- Even Moisture: Aim for even moisture in the soil by providing a light misting or gentle watering. Avoid overwatering, as it can lead to waterlogged soil and root rot. Underwatering can cause the seeds to dry out and lead to poor germination.
- Watering Frequency: Water the soil whenever the top layer feels dry, but be careful not to let it completely dry out. Use your finger to feel the soil moisture, and adjust the watering frequency accordingly.
- Watering Technique: To prevent dislodging the seeds or young seedlings, water gently using a watering can with a fine nozzle or a hose attachment with a gentle spray. Water at the base of the plants to avoid wetting the foliage excessively, as this can lead to diseases.
- Time of Day: Water in the morning or early afternoon to allow the leaves and soil to dry before nighttime. This helps prevent fungal diseases that thrive in moist conditions.
Sunlight:
Proper sunlight exposure is crucial for the growth and development of your seedlings. Most plants require at least 6-8 hours of direct sunlight per day. Here are some tips for providing adequate sunlight:
- Observation: Observe the sunlight patterns in your garden or the area where you’re growing your plants. Take note of the areas that receive the most sunlight throughout the day.
- Positioning: Place your seed trays or containers in areas that receive ample sunlight. If you have limited space or areas with shade, consider using reflective surfaces or portable grow lights to supplement sunlight.
- Rotate: If you notice that your seedlings are growing unevenly or leaning towards a particular direction, rotate the containers or trays regularly to ensure even exposure to sunlight. This helps promote upright growth and prevents leggy plants.
Remember to monitor the temperature and humidity levels in your garden or growing area. Some plants may require specific conditions, such as higher humidity for tropical plants or cooler temperatures for specific crops. Make adjustments as needed to create an optimal growing environment.
By providing adequate water and sunlight, you are giving your seedlings the best chance at healthy growth. Pay attention to their needs and make adjustments as necessary to ensure their overall well-being.
Read more: How To Grow Popcorn Seeds
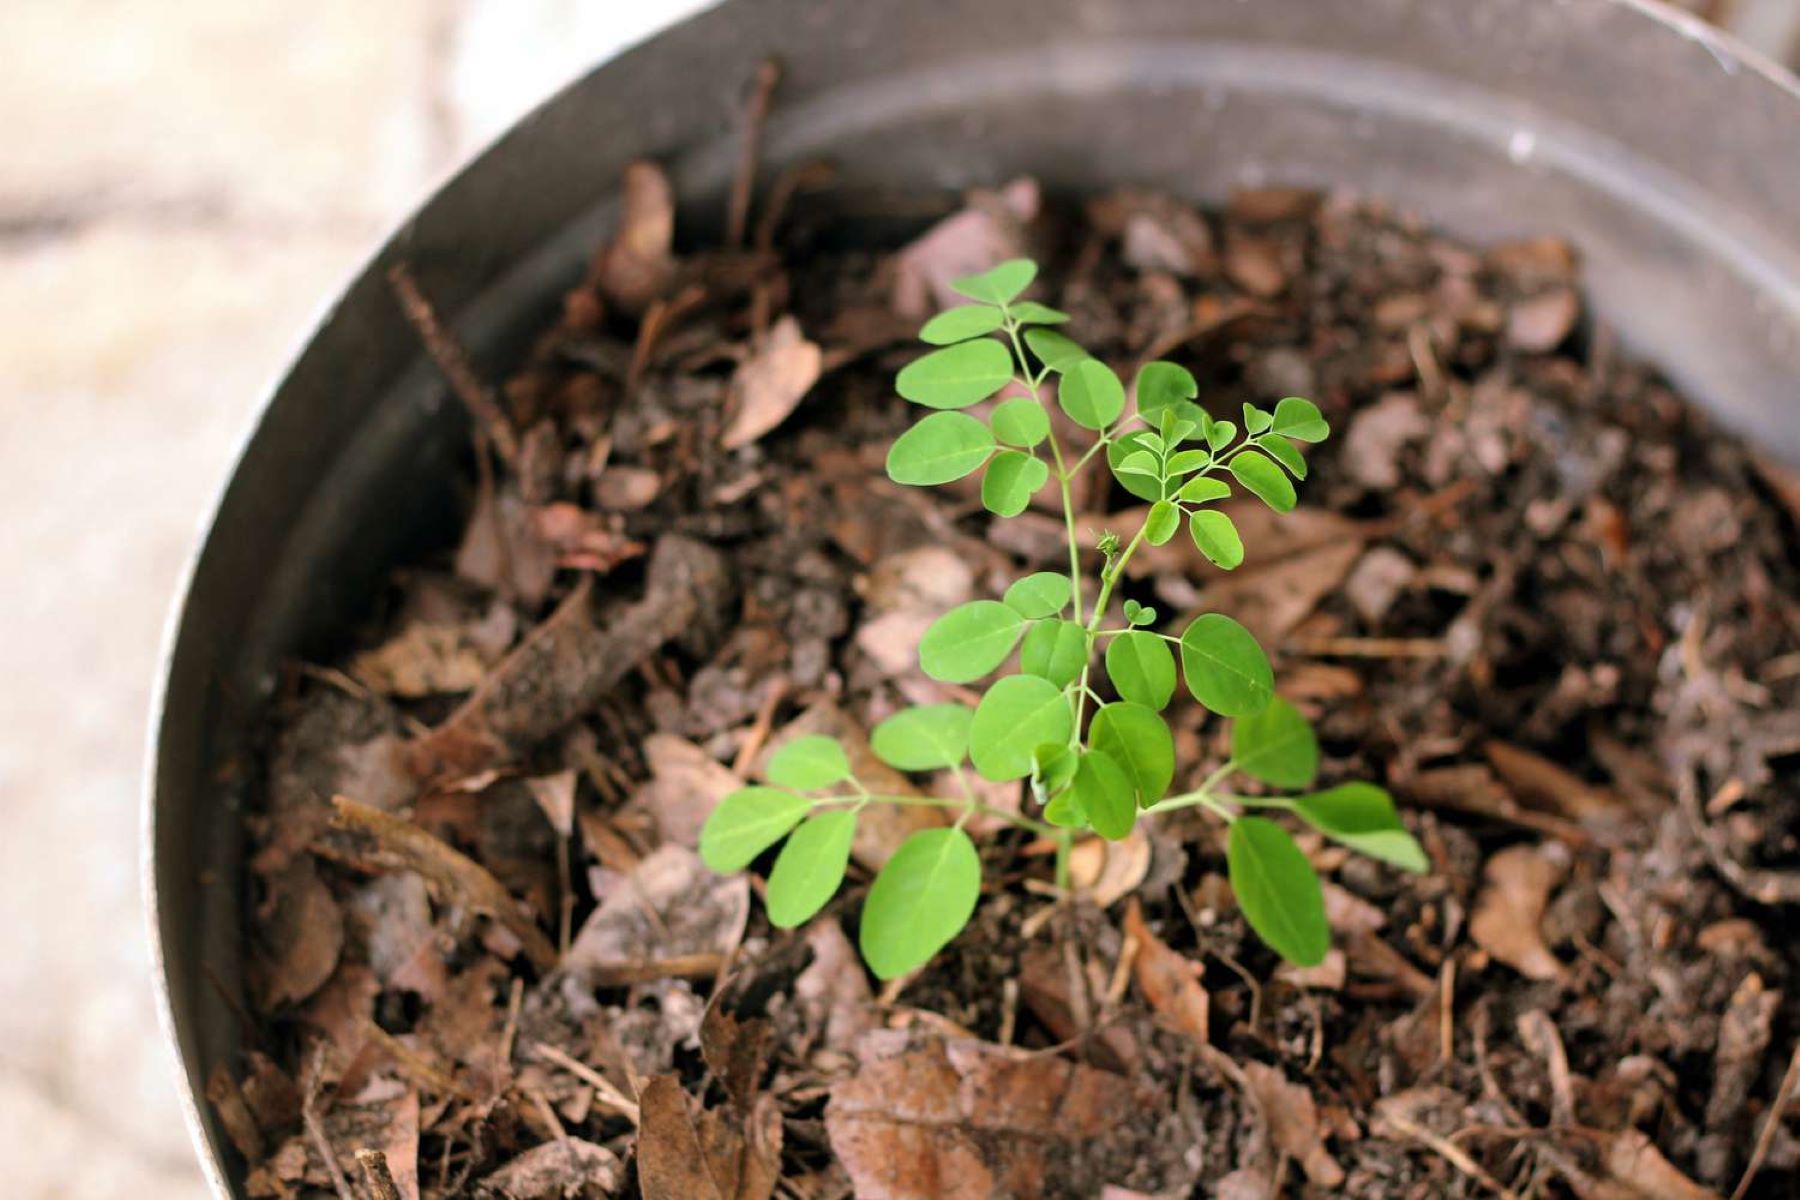
Step 5: Nurturing the Seedlings
Once your seedlings start emerging from the soil, it’s crucial to provide them with the necessary care and attention to ensure their healthy growth. Here are some tips for nurturing your seedlings:
- Thinning: If you have multiple seedlings growing closely together, thin them out by removing the weaker seedlings. This provides more space and resources for the remaining seedlings to thrive.
- Support: For tall and vining plants, provide support such as stakes or trellises to prevent them from bending or breaking. This helps them grow vertically and optimizes space.
- Fertilization: As your seedlings grow, they will require additional nutrients. Start feeding them with a balanced fertilizer, following the recommended dosage on the package. Organic alternatives like compost tea or fish emulsion are also effective for nourishing young plants.
- Monitoring: Keep a close eye on your seedlings for any signs of pests, diseases, or nutrient deficiencies. Early intervention is crucial to prevent any major issues. Remove any damaged or diseased leaves to prevent the spread of diseases.
- Watering: Adjust your watering routine as the seedlings grow. Water them deeply and less frequently to encourage the development of a strong root system. Aim to keep the soil slightly moist but not overly saturated.
- Hardening Off: About a week before transplanting your seedlings outdoors, gradually expose them to outdoor conditions by placing them outside for short periods each day. This process, known as hardening off, helps acclimate the seedlings to the outdoor environment.
Remember that each plant has different needs, so research the specific requirements of the plants you’re growing to provide them with the best care. Monitor their growth, respond to their needs, and make adjustments along the way.
As your seedlings continue to develop and strengthen, they are preparing for the next phase of their journey: transplanting into the garden or larger containers. In the following step, we will guide you through the process of transplanting, if applicable to your gardening plans.
To grow seeds successfully, make sure to provide the right amount of water, sunlight, and nutrients for the specific type of plant. Also, ensure the soil is well-draining and keep an eye on the temperature for optimal growth.
Step 6: Transplanting the Seedlings (if applicable)
If you’re growing your seedlings with the intention of transplanting them into your garden or larger containers, it’s important to follow the proper transplanting process to ensure their successful transition. Here are the key steps to transplant your seedlings:
- Timing: Plan your transplanting based on the specific requirements of the plants and the local climate. Typically, seedlings are ready for transplanting when they have developed a few sets of true leaves and have sturdy stems.
- Prepare the Planting Area: Clear the planting area of any weeds or unwanted vegetation. Ensure that the soil is properly prepared with amendments and that it is moist but not waterlogged.
- Dig the Hole: Dig a hole slightly larger than the size of the seedling’s root ball. Gently loosen the soil around the hole to ensure good root penetration.
- Remove the Seedling: Carefully remove the seedling from its container, ensuring that the roots remain intact. You can gently squeeze the container or tap it to loosen the root ball and facilitate removal.
- Plant at the Right Depth: Place the seedling in the hole, making sure to plant it at the same depth as it was growing in its original container. Firmly press the soil around the roots to eliminate any air pockets.
- Water Thoroughly: Immediately after transplanting, water the seedling thoroughly to settle the soil and help the roots establish. Provide enough water to moisten the entire root zone.
- Provide Support: If the transplanted seedlings are tall or prone to bending, you may need to provide support such as stakes or cages to help them stay upright.
After transplanting, monitor your seedlings closely to ensure they adapt well to their new growing environment. Keep the soil consistently moist and provide protection from intense sunlight or harsh weather conditions, if necessary.
Remember that the transplant shock may cause temporary stress to the seedlings. They may exhibit some wilting or slow growth initially. However, with proper care and time, they will recover and thrive in their new location.
If you’re not transplanting your seedlings, skip this step and proceed to the next step to learn how to protect your plants as they continue to grow.
Step 7: Protecting the Plants
Once your seedlings are in the ground or larger containers, it’s important to protect them from potential threats that can hinder their growth and health. Here are some key tips for protecting your plants:
- Pest Prevention: Monitor your plants regularly for any signs of pests such as aphids, caterpillars, or snails. Use organic pest control methods like hand-picking, companion planting, or introducing beneficial insects to keep pest populations in check.
- Weed Control: Keep the area around your plants free from weeds, as they compete for nutrients, water, and sunlight. Regularly remove weeds by hand or use mulch to suppress weed growth and conserve moisture.
- Protection from Extreme Weather: Extreme weather conditions like frost, strong winds, or heavy rain can damage or stress your plants. Cover them with fabric or use protective cloches during colder nights or severe weather events. Provide support like stakes or trellises to prevent breakage from strong winds.
- Disease Prevention: Practice good hygiene by removing any diseased plant material and disposing of it properly. Avoid overhead watering, as it can create favorable conditions for fungal diseases. Use preventive measures like crop rotation, spacing plants adequately, and applying organic fungicides, if necessary.
- Consider Netting or Fencing: If you have problems with birds, squirrels, or other animals damaging your plants, consider using netting or installing fencing to protect them. This will prevent animals from accessing your crops or digging in your garden beds.
- Monitor Nutrient Levels: Regularly check the nutrient levels of your soil and make necessary amendments to ensure your plants receive the required nutrients. Use organic fertilizers or compost to replenish nutrients naturally and support healthy plant growth.
- Stay Vigilant: Continuously observe your plants for any signs of stress, disease, or nutrient deficiencies. Early detection and prompt action can save your plants from significant damage.
Remember, prevention is key when it comes to protecting your plants. Providing a suitable growing environment and practicing good garden maintenance will go a long way in keeping your plants healthy and vibrant.
Continue to the next step to learn about the important maintenance and care tasks necessary to ensure the long-term success of your garden.
Step 8: Regular Maintenance and Care
Maintaining your garden requires regular care and attention to keep your plants healthy and thriving. By following these key maintenance tasks, you can ensure the long-term success of your garden:
- Watering: Continually monitor the moisture levels in the soil and water your plants as needed. Be mindful not to overwater, as it can lead to root rot, but also avoid underwatering. Adjust your watering schedule based on the weather and specific requirements of the plants.
- Mulching: Apply a layer of organic mulch around your plants to retain soil moisture, suppress weed growth, and regulate soil temperature. Mulching also helps improve soil fertility as it breaks down over time.
- Pruning and Trimming: Regularly prune your plants to remove dead or diseased branches, promote better air circulation, and shape the plant’s overall growth. Pruning can also encourage new growth and increase flower and fruit production.
- Support and Training: If you’re growing vining or climbing plants, provide adequate support such as stakes, trellises, or cages to guide their growth and prevent damage from heavy fruits or strong winds.
- Fertilizing: Feed your plants with organic fertilizers or compost to replenish nutrients in the soil. Follow the recommended application rates and timings to avoid over-fertilization, which can be harmful to the plants.
- Deadheading: Remove spent flowers regularly to encourage continuous blooming and prevent the plant from diverting energy into producing seeds. Deadheading also helps maintain a neat and tidy appearance in your garden.
- Weeding: Stay on top of weeds by regularly removing them from your garden. Weeds compete with your plants for resources and can negatively impact their growth. Hand-pull weeds or use tools to remove them, ensuring you remove the entire root system.
- Monitoring Pests and Diseases: Keep a watchful eye on your plants for any signs of pest infestations or disease symptoms. Early detection allows for prompt treatment and minimizes the potential damage to your plants.
- Harvesting: When your plants start producing fruits, vegetables, or flowers, harvest them at the appropriate time to enjoy the best flavor, quality, and yield. Regularly harvest mature produce to encourage continued production.
By staying consistent with these maintenance tasks, you can create a garden that is healthy, productive, and visually appealing. Regular care and attention will help your plants flourish, ensuring you reap the rewards of your hard work and enjoy a beautiful garden throughout the growing season.
Now, let’s move on to the final step, where we’ll explore the process of harvesting the seeds or fruits from your plants.
Read more: How To Grow Tomatoes Seeds
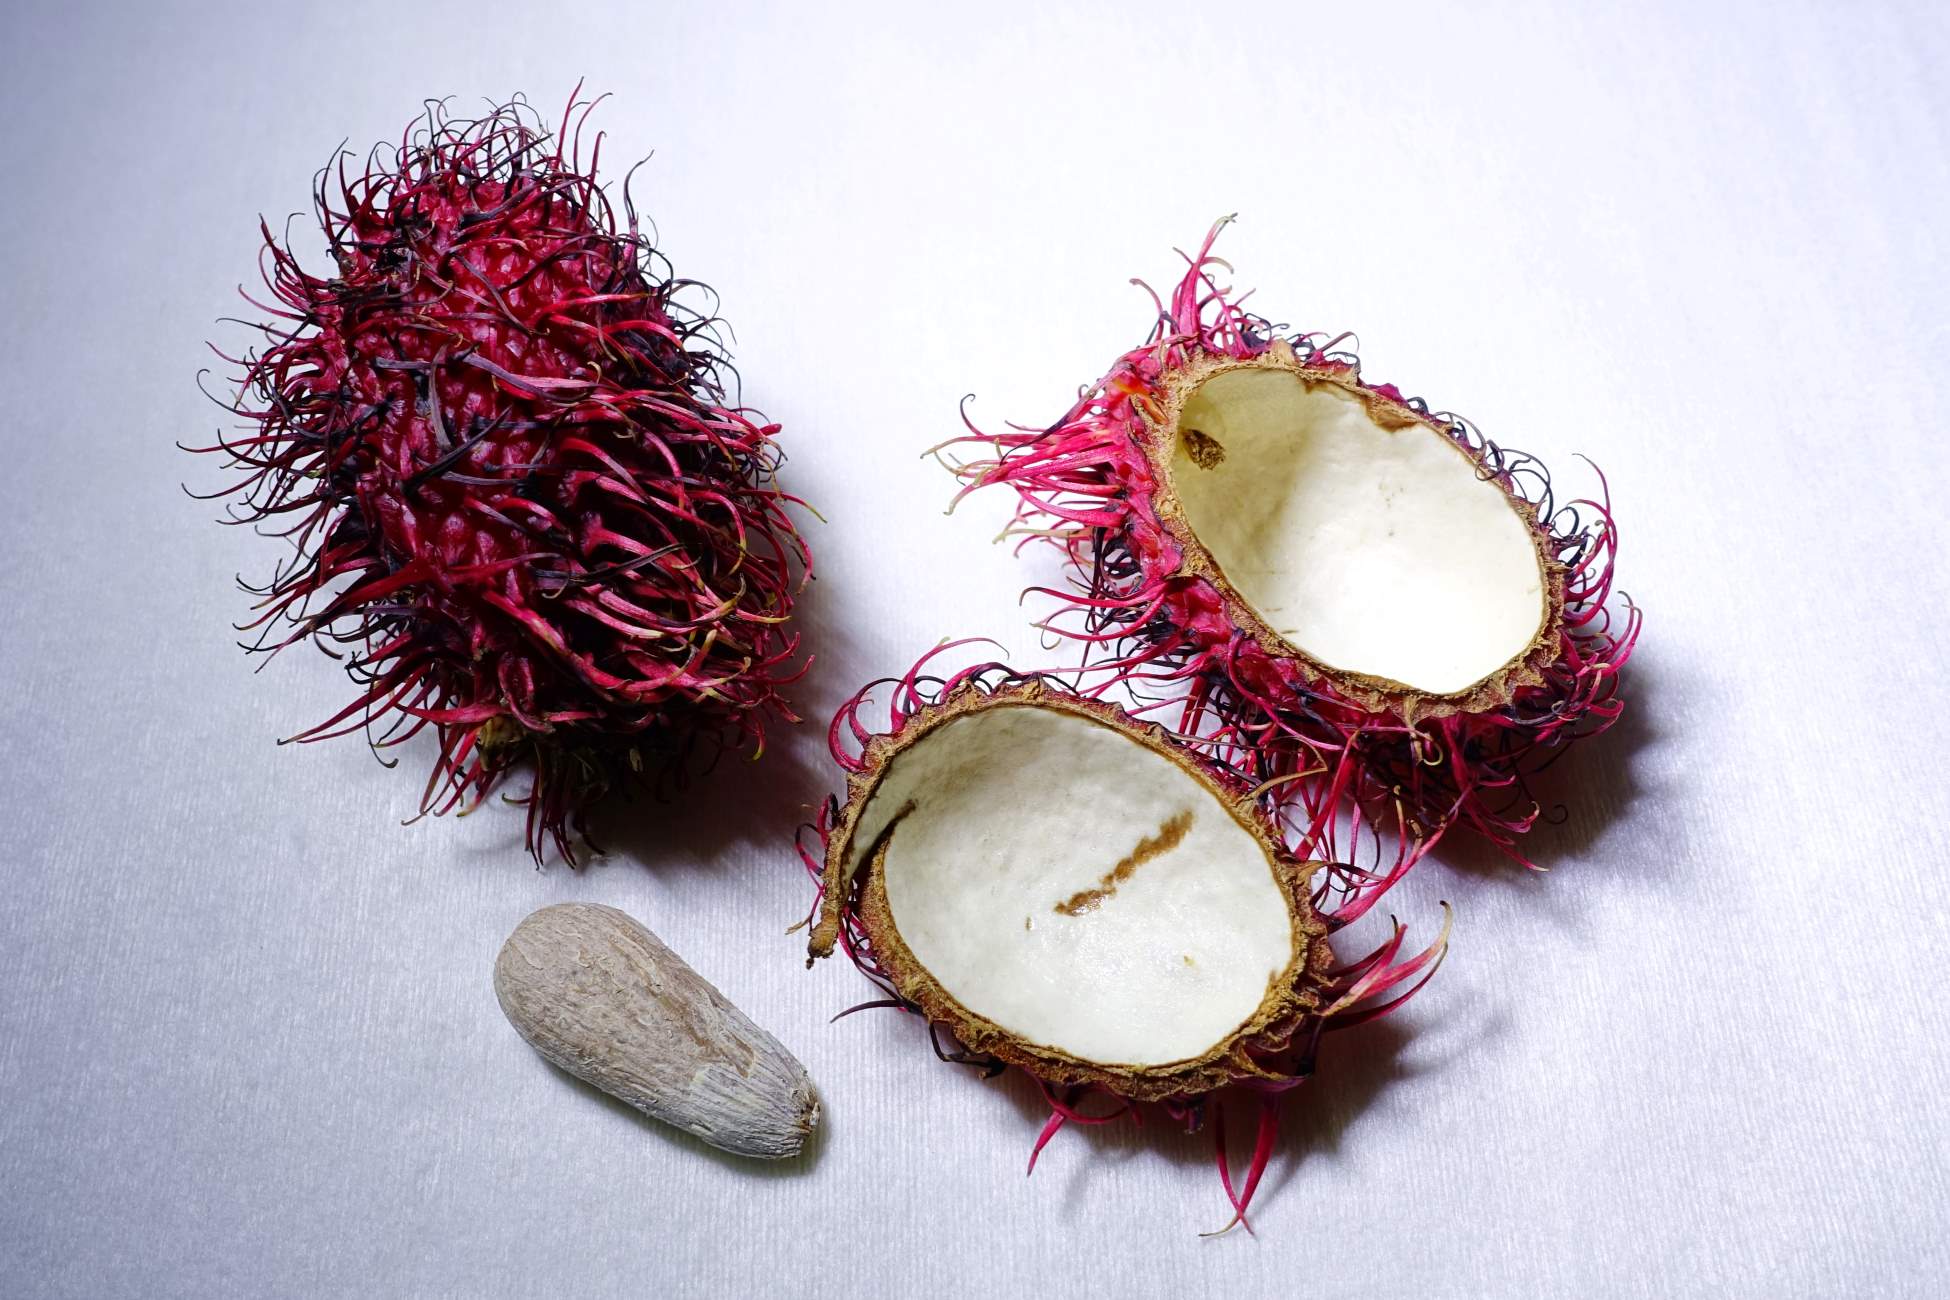
Step 9: Harvesting the Seeds or Fruits
After dedicating time and effort to grow your plants from seed, the final step is reaping the rewards of your labor by harvesting the seeds or fruits. Here’s how you can effectively harvest and save seeds or enjoy the fruits of your garden:
- Seed Harvesting:
- Allow the plant to mature fully, letting the flowers fade and dry naturally on the plant.
- Remove the seed heads or pods from the plant and place them in a clean, dry container.
- Allow the seeds to dry completely in a well-ventilated area, away from direct sunlight.
- Thoroughly clean and remove any remaining debris from the seeds.
- Store the seeds in a cool, dry, and airtight container. Label each container with the seed variety and the date of harvesting.
- Fruit Harvesting:
- Observe the changes in color, size, and texture of the fruits as indicators of ripeness.
- Gently harvest the fruits by using sharp garden shears, a knife, or by twisting them off the plant.
- Handle the fruits with care to prevent bruising or damage.
- Enjoy the fruits fresh or use them in your favorite recipes. If you have an abundance of fruits, consider preserving them through canning, freezing, or making jams and jellies.
- Seed Saving Tips:
- Ensure the seeds are fully mature before harvesting, as immature seeds may not germinate well.
- Save seeds from open-pollinated or heirloom varieties to ensure the next generation will retain the desired traits.
- Store seeds in a cool and dry location to maintain their viability for future use.
- Properly label and organize your seed collection for easy identification and planning for future planting seasons.
If you want to save seeds for future plantings, follow these general steps:
For plants that produce edible fruits or vegetables, harvest at the optimal time for peak flavor and texture:
When saving seeds, keep these considerations in mind:
Harvesting the seeds or fruits from your garden is an exciting culmination of your gardening journey. It allows you to enjoy the fruits of your labor and provides an opportunity to continue the cycle of growth in future seasons.
Congratulations on completing the steps to grow seeds into thriving plants! By following this comprehensive guide, you can continue to expand your gardening skills and create a flourishing garden for years to come.
Conclusion
Growing plants from seeds is a truly rewarding experience that connects us to the wonders of nature. By following the steps outlined in this guide, you can successfully nurture seeds into vibrant and flourishing plants, whether you’re starting from scratch or expanding your existing garden.
From choosing the right seeds to preparing the soil, planting, and providing adequate water and sunlight, each step plays a vital role in the growth and development of your plants. Nurturing the seedlings, transplanting if needed, protecting your plants, and maintaining their health contribute to their long-term success.
It’s important to remember that gardening is not just about the end result; it’s about the journey itself. Embrace the learning process, adapt to challenges, and take joy in the small victories along the way.
By investing time, effort, and care into your garden, you can create a vibrant and thriving oasis that brings beauty and nourishment to your environment. Whether you’re growing flowers, herbs, or vegetables, the satisfaction of witnessing your plants thrive and eventually harvest their seeds or fruits is truly gratifying.
So, grab your gardening tools, roll up your sleeves, and let the magic of seed gardening unfold. Enjoy the process of nurturing life, connecting with nature, and reaping the bountiful rewards of your own garden.
Frequently Asked Questions about How To Grow Seed
Was this page helpful?
At Storables.com, we guarantee accurate and reliable information. Our content, validated by Expert Board Contributors, is crafted following stringent Editorial Policies. We're committed to providing you with well-researched, expert-backed insights for all your informational needs.

0 thoughts on “How To Grow Seed”