Home>Garden Essentials>How To Plant Milkweed Seeds
Garden Essentials
How To Plant Milkweed Seeds
Modified: August 28, 2024
Learn how to plant milkweed seeds in your garden and attract beautiful butterflies. Find step-by-step instructions and tips for successful milkweed cultivation.
(Many of the links in this article redirect to a specific reviewed product. Your purchase of these products through affiliate links helps to generate commission for Storables.com, at no extra cost. Learn more)
Introduction
Welcome to the wonderful world of milkweed seeds! If you’re a gardening enthusiast or an aspiring monarch butterfly conservationist, planting milkweed seeds is an excellent choice. Milkweed plants are not only beautiful additions to your garden but also vital for the survival and reproduction of monarch butterflies.
In this article, we will explore the step-by-step process of planting milkweed seeds and caring for the resulting plants. We’ll also discuss common issues and troubleshooting tips, as well as how to harvest and collect milkweed seeds for future planting.
Before we dive into the details, let’s familiarize ourselves with milkweed and its incredible benefits. Milkweed is a wildflower that belongs to the Asclepias genus, consisting of around 100 distinct species. These plants are native to North America and play a crucial role in supporting pollinators, especially monarch butterflies.
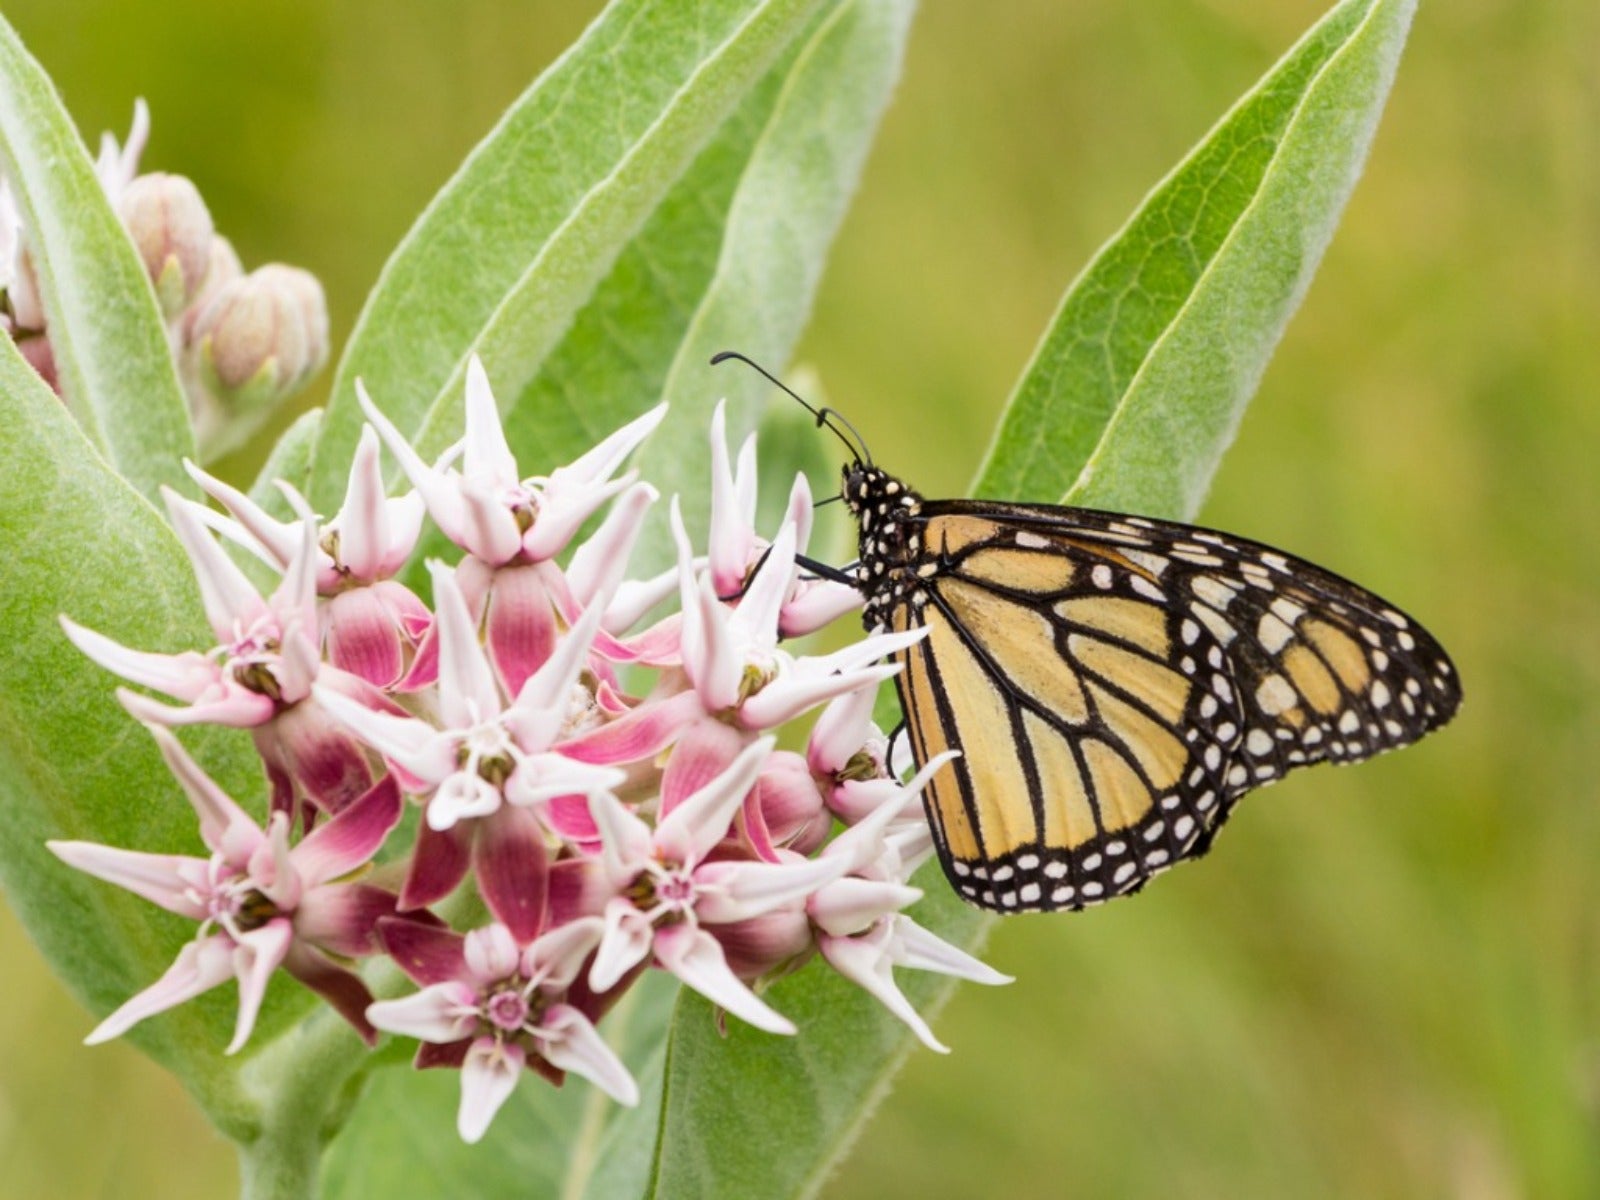
Monarch butterflies rely on milkweed plants for their entire life cycle. The adult butterflies lay their eggs exclusively on milkweed leaves, and the emerging caterpillars feed solely on milkweed foliage. By planting milkweed seeds, you not only create a beautiful garden but also provide essential habitat and food for these magnificent creatures.
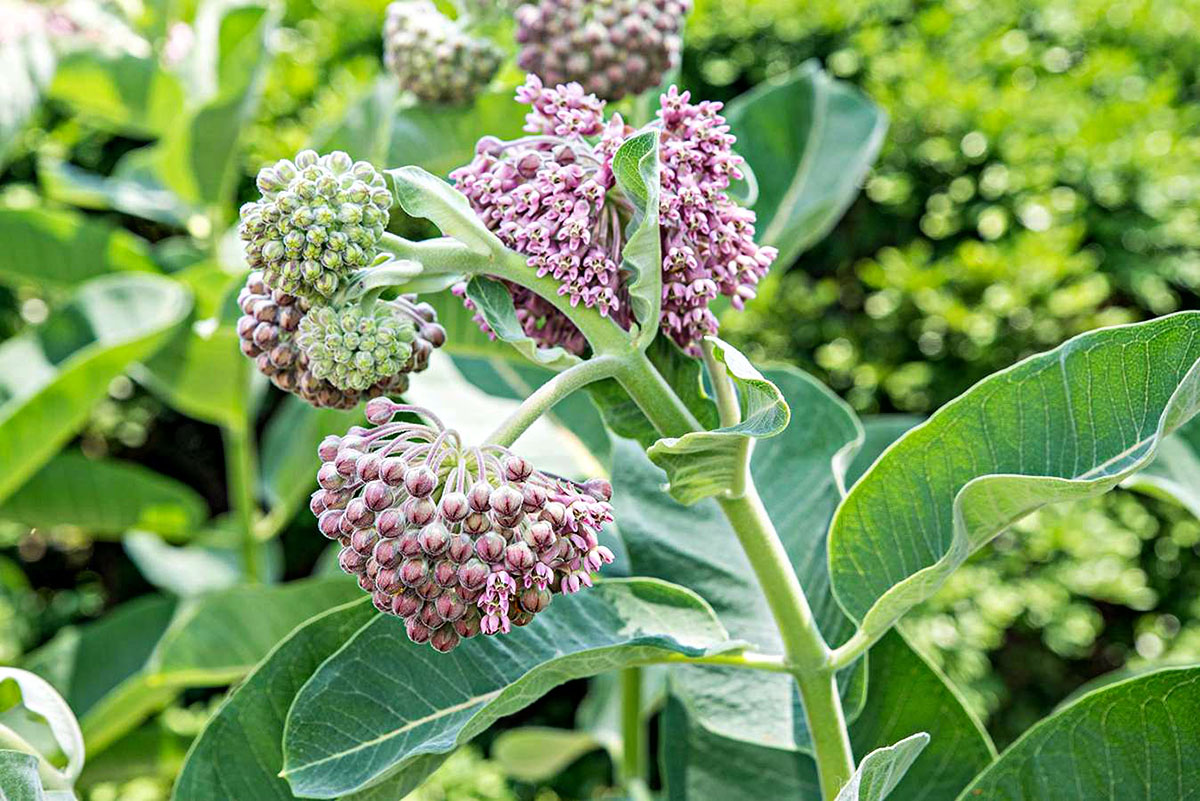
There are a few different varieties of milkweed seeds available, each with unique characteristics. Common milkweed (Asclepias syriaca) is a popular choice, known for its vibrant pink flowers and thick, sturdy stems. If you prefer a more compact plant, butterfly weed (Asclepias tuberosa) is an excellent option, with its bright orange flowers that attract a wide variety of pollinators.
Now that you understand the importance and diversity of milkweed plants, let’s go over the steps to successfully plant and nurture them in your garden. Whether you have a large backyard or a small balcony space, the process of planting milkweed seeds is relatively simple and rewarding.
Join us as we embark on this exciting journey of nurturing milkweed seeds, watching them grow into beautiful plants, and creating a sanctuary for monarch butterflies and other pollinators!
Key Takeaways:
- Planting milkweed seeds creates a beautiful garden and supports monarch butterflies throughout their life cycle, making a positive impact on the environment and conservation efforts.
- Selecting the right milkweed variety, preparing the planting area, and providing proper care are essential for successful growth, attracting butterflies, and creating a thriving habitat.
Read more: How To Grow Milkweed Plants From Seed
Selecting Milkweed Seeds
The first step in planting milkweed seeds is selecting the right variety for your garden. With so many options available, it’s essential to choose a variety that suits your climate, soil type, and available space.
When selecting milkweed seeds, consider the following factors:
- Climate: Milkweed plants are native to different regions across North America and have varying climatic requirements. Some varieties thrive in hot and dry conditions, while others prefer cooler and more humid climates. Research the specific needs of the milkweed variety you’re interested in to ensure its compatibility with your local climate.
- Soil Type: Milkweed plants generally prefer well-draining soil. However, some varieties are more adaptable to different soil types than others. For example, swamp milkweed (Asclepias incarnata) tolerates wetter conditions, while prairie milkweed (Asclepias sullivantii) prefers well-drained soil. Consider the soil type in your garden and choose a milkweed variety that will thrive in that environment.
- Space: The available space in your garden will also influence your choice of milkweed seeds. Some varieties, like common milkweed, can grow quite large and may require ample room to spread. If you have limited space, consider smaller varieties like butterfly weed or whorled milkweed (Asclepias verticillata) that are more compact and suitable for containers or smaller garden beds.
- Disease Resistance: Certain milkweed varieties are more resistant to common diseases and pests than others. Research the disease resistance of different varieties to choose ones that are less prone to issues such as powdery mildew or aphids.
- Monarch Butterfly Habitat: If your primary goal is to create a habitat for monarch butterflies, consider selecting milkweed varieties that are known to be preferred host plants for monarch caterpillars. Common milkweed is a popular choice in this regard, but other species like swamp milkweed and showy milkweed (Asclepias speciosa) are also excellent options.
Once you’ve considered these factors, you can make an informed decision about which milkweed seeds to purchase. You can obtain milkweed seeds from local nurseries, seed exchanges, or reputable online seed suppliers. Remember to choose seeds from reliable sources to ensure their quality and avoid introducing invasive species.
Now that you’ve selected your milkweed seeds, it’s time to prepare the planting area and get ready to sow them in the ground or in containers.
Preparing the Planting Area
Before planting milkweed seeds, it’s crucial to prepare the planting area properly. This will help create an optimal environment for the seeds to germinate and the milkweed plants to thrive.
Follow these steps to prepare the planting area:
- Choose a Sunny Spot: Milkweed plants require at least six hours of direct sunlight per day to grow and bloom vigorously. Select a location in your garden that receives ample sunlight throughout the day. If you have limited sunlight, consider planting milkweed varieties that can tolerate partial shade.
- Clear the Area: Remove any weeds, grass, or debris from the planting area. Competing plants can hinder the growth of milkweed seeds, so ensure the area is clear before proceeding. You can manually pull out the weeds or use a garden hoe or tiller to break up the soil and remove any unwanted vegetation.
- Improve the Soil: Milkweed plants perform best in well-drained soil with a slightly acidic to neutral pH level (around 6 to 7). If your soil is too heavy or clay-like, you can improve drainage by adding organic matter such as compost or well-rotted manure. Incorporate the organic matter into the top few inches of soil to enhance its fertility and structure.
- Consider Raised Beds or Containers: If your garden has poor soil or limited space, consider planting milkweed seeds in raised beds or containers. This allows you to have more control over the soil composition and ensures proper drainage. Use a high-quality potting mix or a blend of compost and garden soil for container planting.
- Water the Area: Before sowing the milkweed seeds, water the planting area thoroughly. This will ensure that the soil is moist and ready to receive the seeds. Avoid overwatering, as excessive moisture can lead to seed rot or fungal diseases.
- Provide Protection: If you live in an area with high wind or intense sun exposure, consider providing some protection to the young milkweed plants. Erecting a temporary windbreak or using shade cloth can prevent the seeds from drying out or getting damaged during their early growth stages.
By properly preparing the planting area, you create a favorable environment for milkweed seeds to germinate and develop into healthy, thriving plants. Now that the area is ready, it’s time to sow the milkweed seeds and start their journey towards becoming beautiful additions to your garden.
Planting Milkweed Seeds
Planting milkweed seeds is an exciting and rewarding process that requires careful attention to detail to ensure successful germination and growth. Follow these steps to plant your milkweed seeds:
- Choose the Right Time: Milkweed seeds are best planted in early spring or late fall, depending on your climate. Avoid planting during extreme temperatures or when the soil is waterlogged. Ensure that the risk of frost has passed if you’re planting in spring.
- Sow the Seeds: There are two methods for sowing milkweed seeds: direct sowing and starting seeds indoors. Direct sowing involves scattering the seeds directly in the planting area, while starting seeds indoors allows you to control the early growth environment. Choose the method that works best for you and the milkweed variety you have selected.
- Direct Sowing: If you decide to directly sow the milkweed seeds, scatter them evenly over the prepared planting area. Try to space the seeds about 6 inches apart to give the plants ample room to grow. Lightly press the seeds into the soil, but avoid burying them too deep. A depth of ¼ inch to ½ inch is generally sufficient.
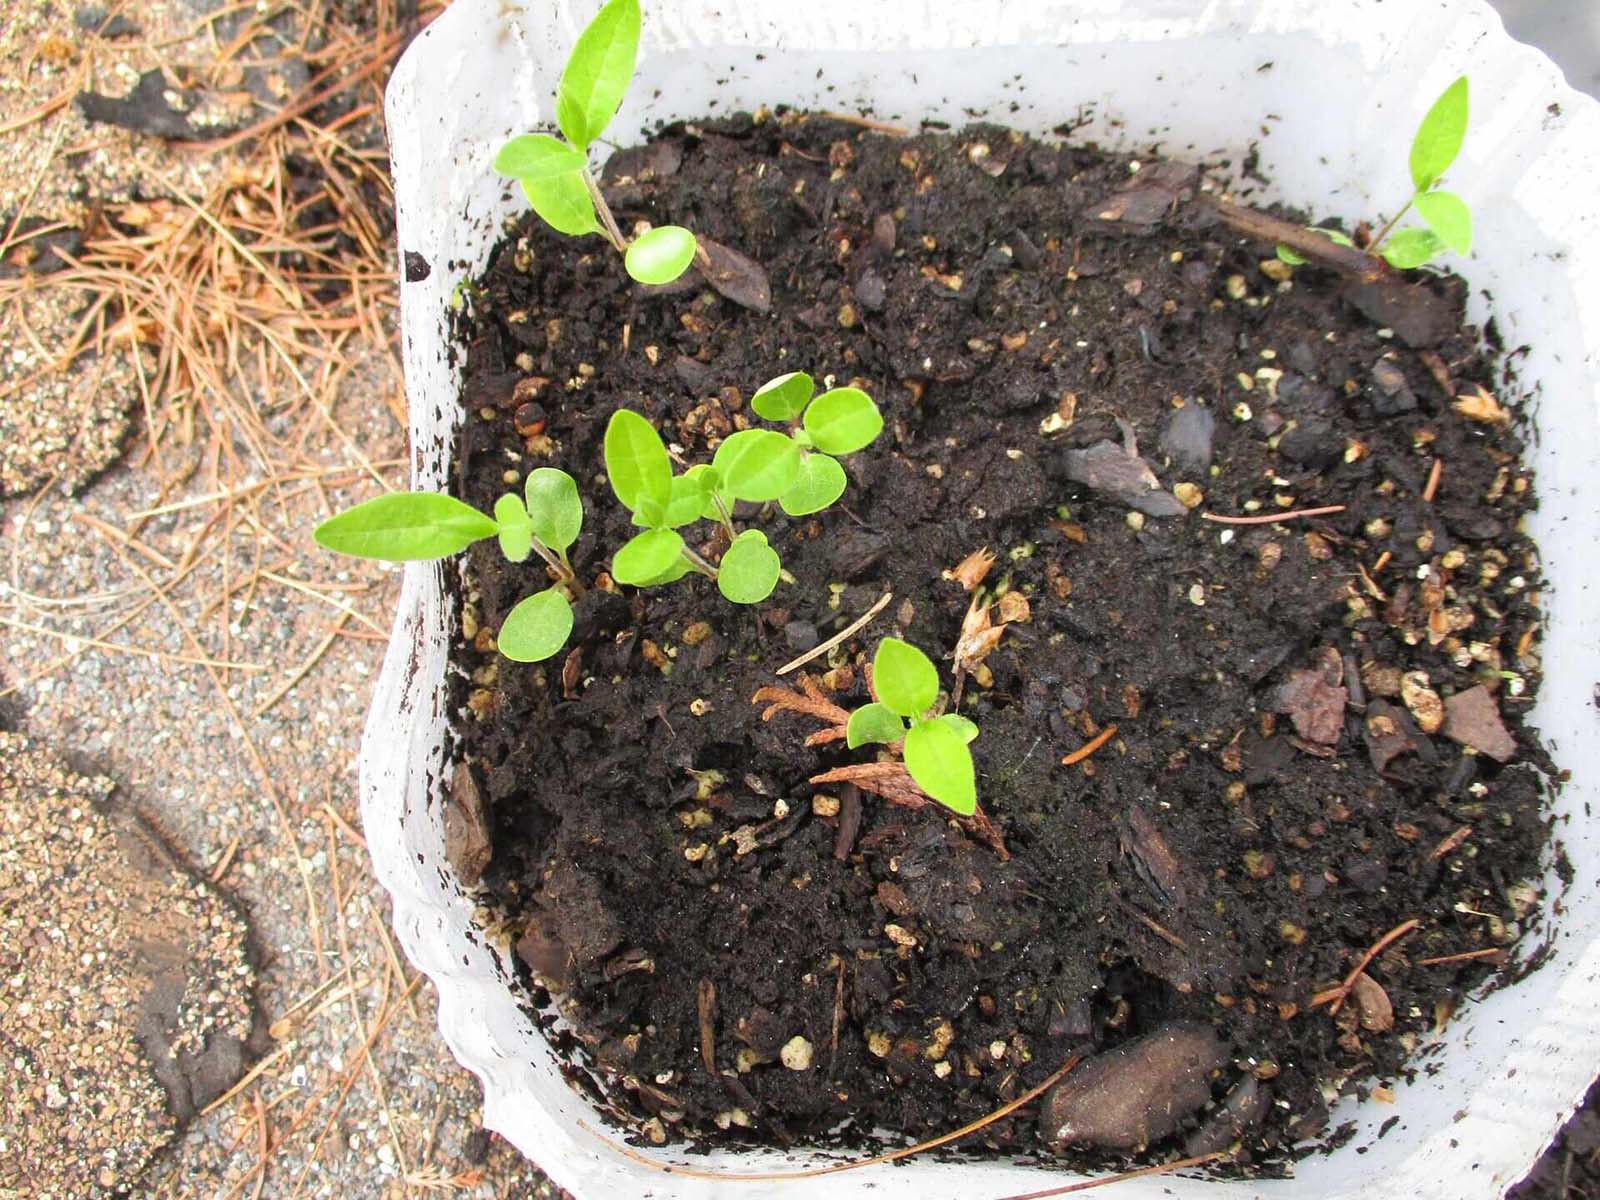
- Starting Seeds Indoors: If you choose to start the seeds indoors, fill trays or pots with a well-draining seed starting mix. Moisten the mix before sowing the seeds. Plant one or two seeds per container, placing them half an inch deep. Keep the seed trays or pots in a warm location, around 70-75°F (21-24°C), and provide ample sunlight or artificial light.
- Watering: After sowing the seeds, water the area gently to ensure that the soil is evenly moist. Avoid overwatering, as it can lead to fungal diseases or rot. As the seeds germinate and the plants grow, provide regular but moderate watering, keeping the soil consistently moist but not waterlogged.
- Thin and Transplant: If you have sown the seeds densely or if multiple plants emerge from a single container, thin them out once they develop a few sets of true leaves. Leave the strongest, healthiest seedlings and carefully remove the extra ones. If you started the seeds indoors, transplant the young milkweed plants outdoors once the danger of frost has passed and they have grown to a suitable size.
Remember to label your milkweed plants to keep track of the different varieties you have planted, especially if you have started seeds indoors. This will help you identify and care for each variety accordingly.
Milkweed seeds generally germinate within 10 to 14 days, but it can take longer for some varieties. Be patient and provide the necessary care to ensure successful germination and healthy growth. With time and proper care, you’ll have a garden filled with vibrant milkweed plants, attracting pollinators and providing essential habitat for monarch butterflies and other beneficial insects.
Now that you have planted your milkweed seeds, it’s time to learn how to care for the growing plants to ensure their long-term health and beauty.
Plant milkweed seeds in well-draining soil, 1/4 inch deep, and keep them moist. Choose a sunny spot and space the seeds 12 inches apart. Watch for sprouts in 7-14 days.
Caring for Milkweed Plants
Once your milkweed seeds have sprouted and the plants have started growing, it’s important to provide proper care to ensure their health and vitality. Here are some essential tips for caring for milkweed plants:
- Watering: Milkweed plants prefer moderate and consistent moisture levels. Water the plants regularly, especially during dry spells or prolonged periods without rain. Avoid overwatering, as standing water can lead to root rot or other diseases. Aim to keep the soil evenly moist, but not waterlogged.
- Mulching: Apply a layer of organic mulch around the base of the milkweed plants. Mulch helps retain moisture, control weed growth, and regulate soil temperature. Use materials like straw, wood chips, or shredded leaves, ensuring the mulch does not touch the stems of the plants to prevent stem rot.
- Fertilizing: Milkweed plants generally do not require heavy fertilization. If the soil in your garden is low in nutrients, you can add a slow-release, low-nitrogen fertilizer during the spring. Choose a fertilizer with a balanced ratio of nutrients, such as 10-10-10 or 5-10-5, to support healthy growth.
- Pest Control: While milkweed plants are generally resistant to pests, some common insects like aphids and milkweed beetles may occasionally feed on the plants. Monitor your plants regularly and manually remove any pests you come across. If the infestation is severe, consider using organic pest control methods like neem oil or insecticidal soap.
- Support Structures: As milkweed plants grow, they may require some support to prevent them from flopping over. Install stakes or a trellis near the plants to keep them upright. Tie the stems gently to the support structure using soft twine or plant ties.
- Deadheading: To promote continuous blooming and prevent the plants from going to seed too early, consider deadheading the spent flowers. Remove the faded flowers by snipping them off just above a pair of healthy leaves or buds. This encourages the milkweed plants to produce more blooms.
- Watching for Diseases: While milkweed plants are generally robust, they can sometimes be susceptible to diseases like powdery mildew. Monitor your plants for any signs of disease, such as white powdery patches on the leaves. If you notice any issues, promptly remove any affected leaves and ensure good air circulation around the plants.
- Overwintering: In cold climates, some milkweed species die back to the ground during winter. Mulch the base of the plants with a thick layer of straw or leaves to provide insulation. This helps protect the roots and promote healthy regrowth in the following spring.
By following these care tips, you can ensure that your milkweed plants thrive and provide essential habitat for monarch butterflies and other pollinators. Remember to keep an eye on the plants throughout the growing season, providing the necessary care and attention they need.
In the next section, we will delve into common issues that you may encounter while growing milkweed plants and provide troubleshooting tips to help you overcome them.
Read more: How Long For Milkweed To Germinate
Common Issues and Troubleshooting
While milkweed plants are generally resilient and low-maintenance, they may encounter a few common issues. Here are some potential problems you may encounter while growing milkweed plants and troubleshooting tips to address them:
- Powdery Mildew: Powdery mildew is a fungal disease that appears as a white, powdery coating on the leaves. To prevent powdery mildew, ensure there is good airflow around the plants by properly spacing them. If you notice signs of powdery mildew, remove the infected leaves and apply an organic fungicide recommended for mildew control.
- Aphids: Aphids are small, sap-sucking insects that can infest milkweed plants. To control aphids, spray the plants with a strong stream of water to dislodge the pests. You can also introduce natural predators like ladybugs or lacewings to help control the aphid population. If necessary, use an organic insecticidal soap or neem oil to further treat the infestation.
- Milkweed Beetle: Milkweed beetles are common insects that feed on the leaves and stems of milkweed plants. Handpick the beetles and remove them from your plants. Encouraging natural predators like birds or introducing nematodes can also help control the beetle population. If the infestation is severe, you may use an insecticidal soap or neem oil to treat the affected plants.
- Drowned or Waterlogged Soil: Overwatering or poor drainage can lead to waterlogged soil, which can cause root rot or other issues. Ensure that the soil is well-draining and avoid excessive watering. If you notice waterlogged soil, improve drainage by adding organic matter or transplant the plants to a raised bed or container with better drainage.
- Lack of Blooming: If your milkweed plants are not blooming, it could be due to several factors. Lack of sunlight, improper pruning, or nutrient deficiencies can inhibit blooming. Ensure that the plants receive adequate sunlight, deadhead spent flowers regularly, and consider fertilizing if needed.
- Monarch Caterpillar Predation: While it’s exciting to attract monarch butterflies, there is a chance of caterpillar predation by birds or other insects. Monitor your milkweed plants and take measures to protect the caterpillars if necessary, such as using fine netting or creating a cage around the plants.
- Poor Germination: If your milkweed seeds are not germinating, it could be due to factors like improper planting depth, low soil temperatures, or poor seed quality. Ensure that the seeds are planted at the recommended depth, provide adequate warmth, and source high-quality seeds from reputable suppliers.
- Invasive Spread: Some milkweed varieties have invasive tendencies and can spread aggressively. To prevent invasive spread, regularly monitor your milkweed plants and remove any unwanted seedlings or root sprouts that may emerge outside the desired area. Consider planting non-invasive milkweed species or use containers to limit their spread.
By keeping an eye out for these common issues and taking appropriate action, you can help ensure that your milkweed plants thrive and provide a thriving habitat for pollinators.
In the next section, we will explore how to harvest and collect milkweed seeds, allowing you to propagate and share these important plants.
Harvesting and Collecting Milkweed Seeds
One of the joys of growing milkweed plants is the ability to harvest and collect their seeds for future planting. Harvesting milkweed seeds allows you to propagate and share these beneficial plants, supporting monarch butterflies and other pollinators. Follow these steps to harvest and collect milkweed seeds:
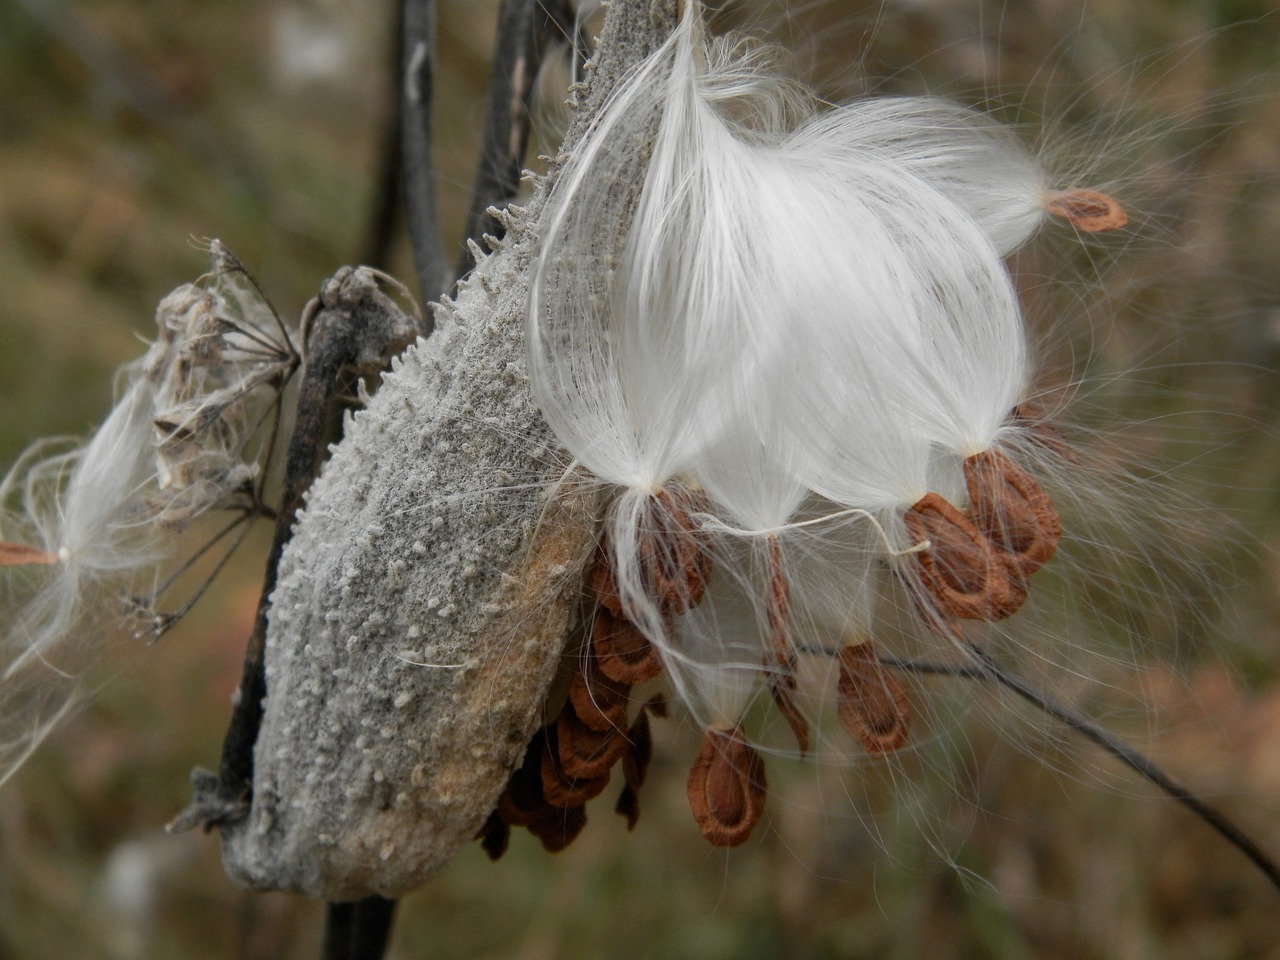
- Timing: It’s essential to harvest milkweed seeds at the right time to ensure their viability. Wait until the seed pods have turned brown and dry on the plant. The pods will start to split open, revealing the silky white seeds inside. This usually occurs in late summer or early fall, depending on your location.
- Gather Tools: To harvest milkweed seeds, you’ll need a few simple tools:
- Pruning shears or scissors
- A container or paper bag
- Gloves (optional) to protect your hands from any irritants in the seed pods
- Collect the Seeds: Approach the milkweed plant and carefully trim the seed pods from the plant using the pruning shears or scissors. Place the trimmed seed pods into a container or paper bag. Make sure to avoid crushing the pods, as this may damage the seeds.
- Dry the Seeds: Once you have collected the seed pods, it’s time to dry them and extract the seeds. You can do this by spreading the seed pods out on a tray or drying rack in a cool, dry, and well-ventilated area. Allow the pods to dry completely for about a week or until they are brittle and easily break apart.
- Extract the Seeds: Once the seed pods are dry, gently open them and remove the silky white seeds. You can do this by either using your hands to break the pods apart or by carefully pulling them open. Separate any chaff or debris from the seeds, ensuring that only clean and intact seeds remain.
- Store the Seeds: Store the milkweed seeds in a dry, airtight container such as a glass jar or a seed envelope. Label the container with the variety and the year of harvest. Place the container in a cool and dark location, such as a refrigerator or a cool basement. Properly stored milkweed seeds can remain viable for several years.
It’s worth noting that not all milkweed seeds require cold stratification (exposure to cool temperatures) for successful germination. However, if you’re uncertain about the seed’s germination requirements, you can mimic the natural process by placing the seeds in a plastic bag with a slightly moistened paper towel and refrigerating them for 30-60 days before sowing.
By harvesting and collecting milkweed seeds, you can continue to propagate these essential plants, expanding their presence in your garden or sharing them with fellow gardeners. Let’s conclude our journey with some final thoughts.
Conclusion
Congratulations on your journey into the world of milkweed seeds and their cultivation! By planting milkweed, you have not only added beauty to your garden but also created a vital habitat for monarch butterflies and other pollinators. Let’s recap what we’ve learned:
We started by understanding the importance of milkweed plants for monarch butterflies. These native wildflowers provide food and shelter for these magnificent creatures throughout their life cycle.
We then dove into the process of selecting the right milkweed seeds, considering factors such as climate, soil type, and available space. Choosing the appropriate variety ensures that the plants will thrive in your garden.
Preparing the planting area is a crucial step in creating an optimal environment for the seeds to germinate. Clearing the area, improving soil drainage and fertility, and providing adequate sunlight are all essential preparations.
Planting milkweed seeds can be done through direct sowing or starting seeds indoors. Remember to follow proper depth guidelines and provide consistent moisture for successful germination.
Caring for milkweed plants involves proper watering, mulching, and providing support structures when needed. Regular monitoring for pests and diseases and taking appropriate measures to address them is vital for maintaining plant health.
Harvesting and collecting milkweed seeds allows you to propagate these important plants and share them with others. Proper drying and storage techniques ensure the viability of the seeds for future planting.
Throughout this journey, we’ve explored common issues and troubleshooting tips, empowering you to overcome challenges that may arise while growing milkweed plants.
By dedicating your time and effort to planting and caring for milkweed, you have made a positive impact on the environment and contributed to the conservation of monarch butterflies and other pollinators.
So, go forth and create a garden full of vibrant milkweed plants, attracting these beautiful butterflies and supporting the delicate balance of nature. Enjoy the beauty of the flowers, the dance of the butterflies, and the knowledge that you are making a difference in the world, one seed at a time.
Happy gardening!
Frequently Asked Questions about How To Plant Milkweed Seeds
Was this page helpful?
At Storables.com, we guarantee accurate and reliable information. Our content, validated by Expert Board Contributors, is crafted following stringent Editorial Policies. We're committed to providing you with well-researched, expert-backed insights for all your informational needs.


0 thoughts on “How To Plant Milkweed Seeds”