Home>Garden Essentials>How To Stratify Milkweed Seeds
Garden Essentials
How To Stratify Milkweed Seeds
Modified: March 16, 2024
Learn how to stratify milkweed seeds in your garden for successful germination and healthy plant growth. Step-by-step guide and expert tips provided for optimum results.
(Many of the links in this article redirect to a specific reviewed product. Your purchase of these products through affiliate links helps to generate commission for Storables.com, at no extra cost. Learn more)
Introduction
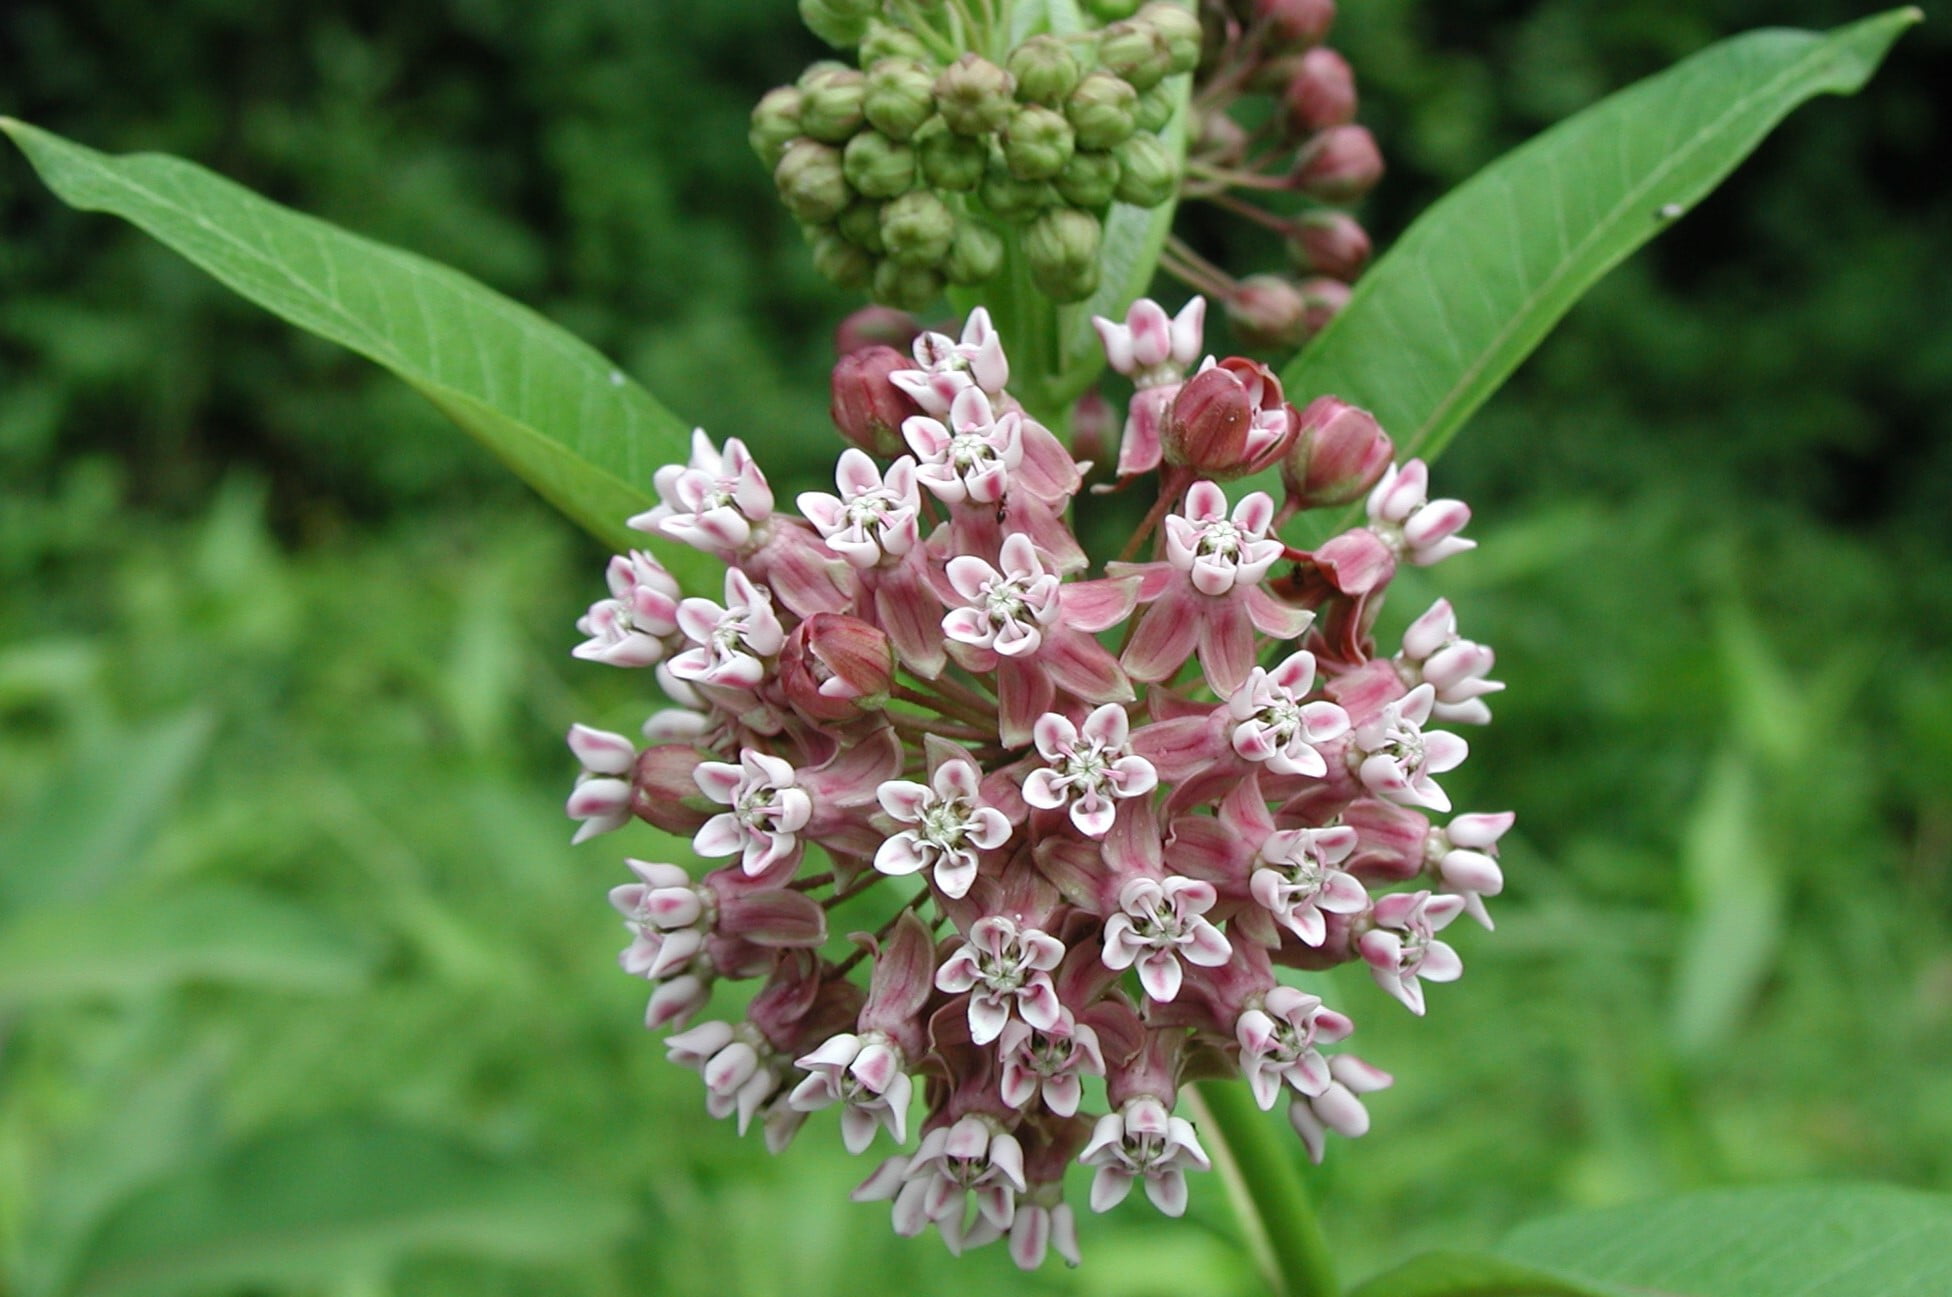
Welcome to the fascinating world of seed stratification, where we unlock the secrets of successful milkweed seed germination. If you’re a gardener or nature enthusiast, you’ve likely encountered milkweed, a plant that holds great importance for pollinators, particularly monarch butterflies. But did you know that milkweed seeds require stratification before they can sprout? In this article, we’ll explore the ins and outs of seed stratification and provide you with valuable tips to help you successfully stratify milkweed seeds in your garden.
So, what exactly is seed stratification? Seed stratification is a process that mimics the conditions found in nature, where seeds go through a period of cold, warm, or moist treatment to break dormancy and trigger germination. Many seeds, including those of milkweed, have a hard outer coating that needs to be softened or broken down before the seed can sprout. Stratification helps to weaken the seed coat and stimulate the embryo’s growth.
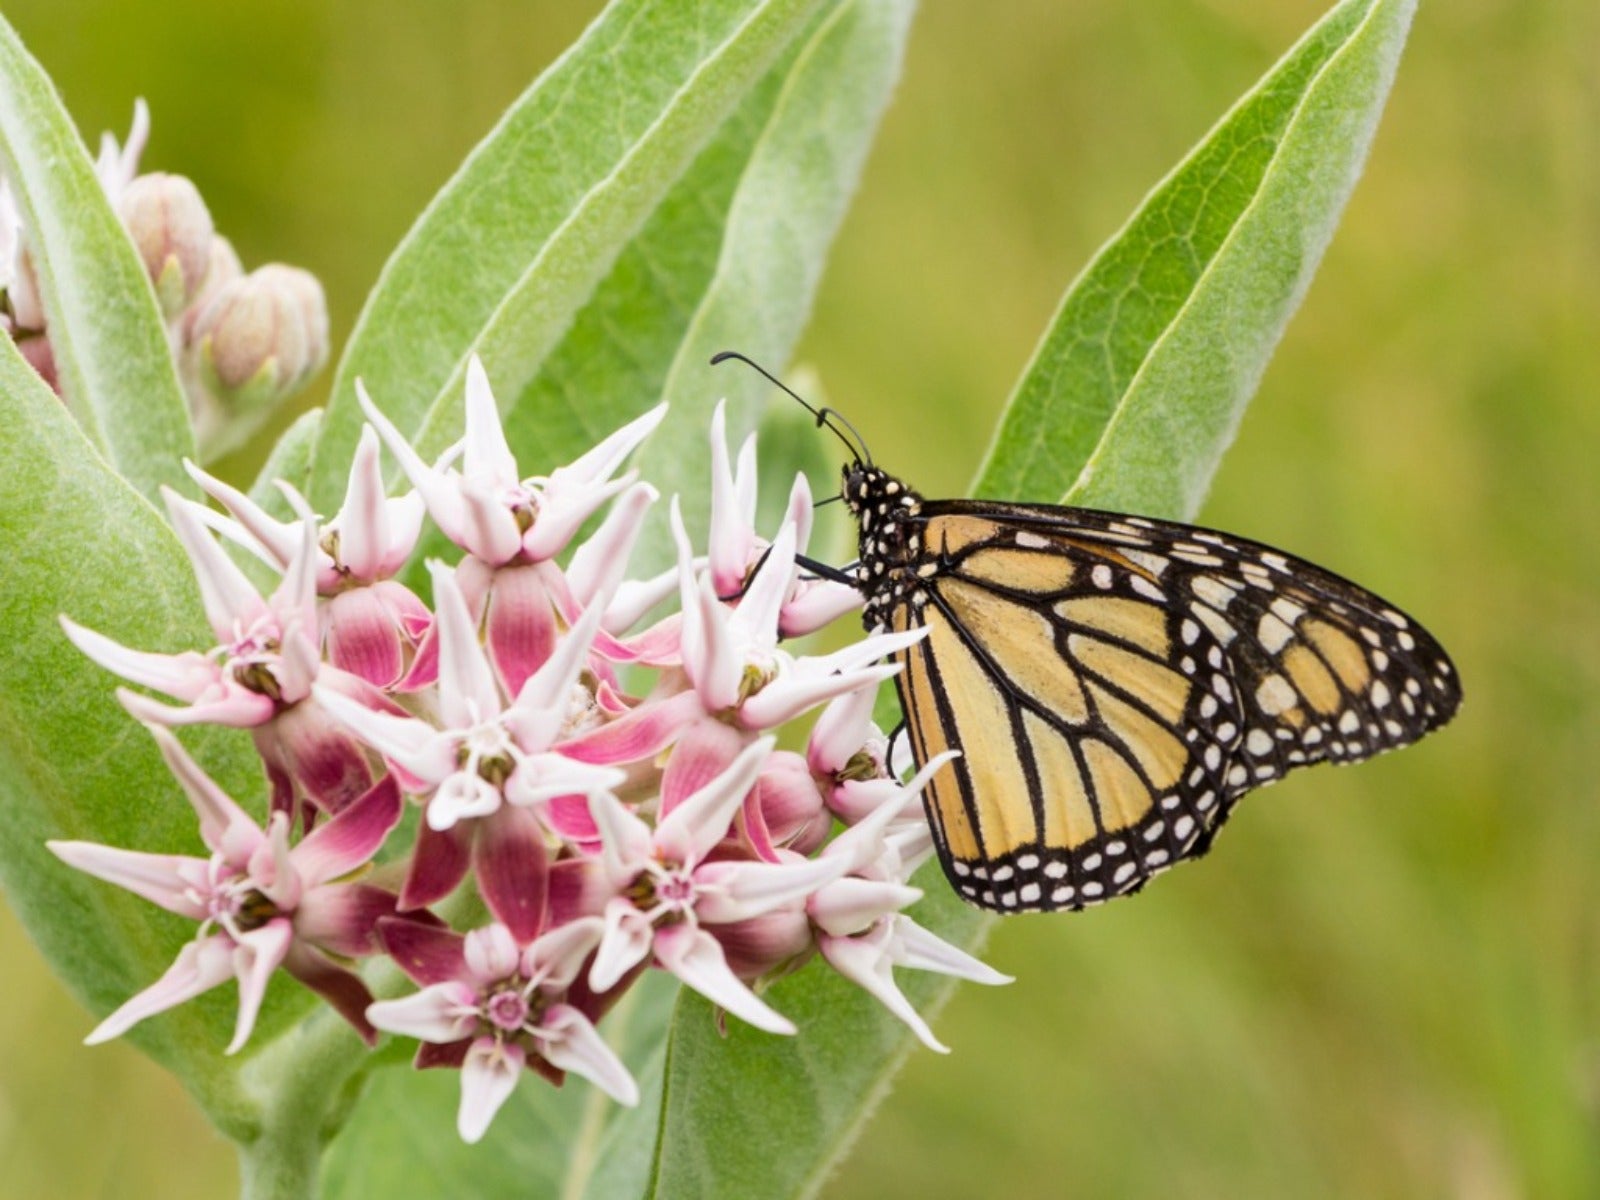
You might be wondering, why go through the trouble of stratifying milkweed seeds? Well, milkweed plays a vital role in supporting the lifecycle of monarch butterflies. These beautiful insects rely on milkweed plants as their primary food source and breeding grounds. By growing milkweed, you can provide essential habitat and sustenance for monarchs and help reverse the decline of their populations.
When it comes to stratifying milkweed seeds, timing is crucial. The best time to stratify milkweed seeds depends on the species and your geographic location. Generally, it’s recommended to stratify the seeds in late winter or early spring, a few months before the last frost date. This timing allows for optimal seed germination once the growing season begins.
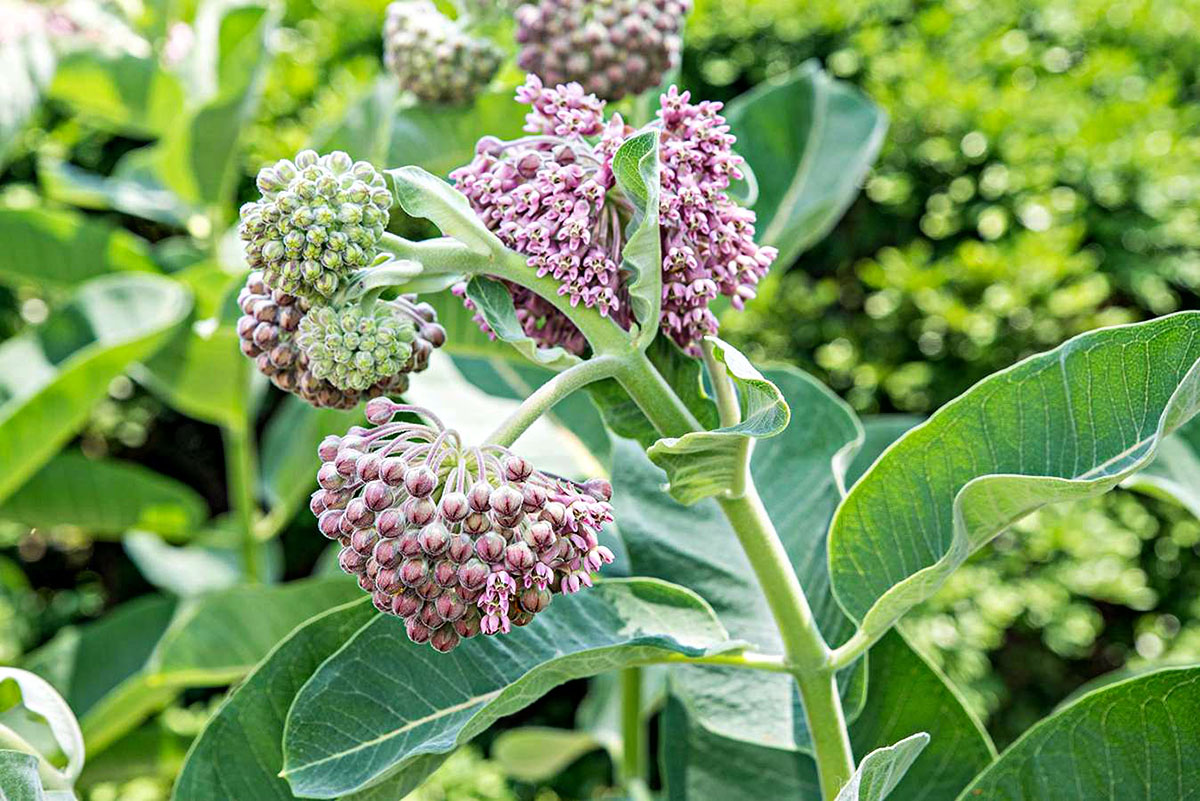
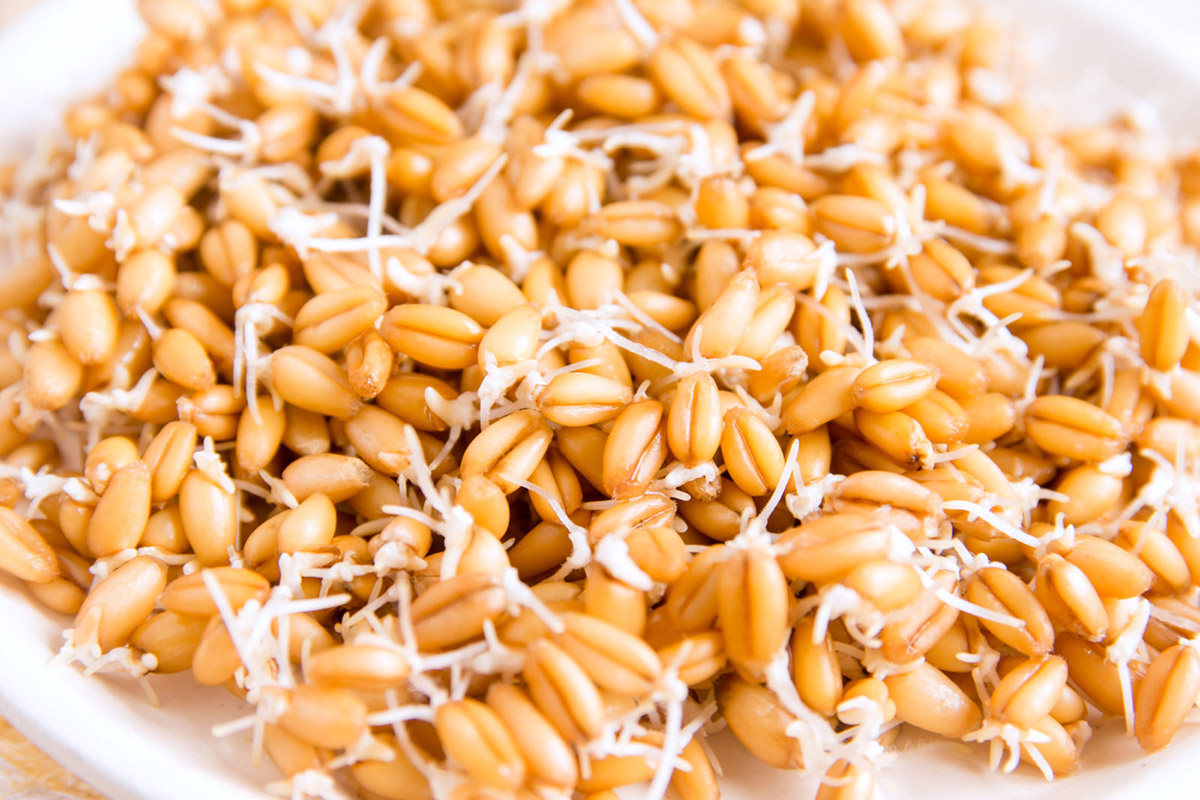
Before you start stratifying your milkweed seeds, you’ll need to gather them. Milkweed seeds are typically found in the pods that develop after the flowers fade. Look for mature pods that have turned brown or gray and feel dry. Gently twist or pull the pods to extract the seeds, being careful not to damage them.
Key Takeaways:
- Milkweed seeds need stratification to wake up from dormancy and start growing. Mimicking natural conditions like cold, warm, or moist treatments helps the seeds sprout and supports pollinators like monarch butterflies.
- After stratification, sow the seeds in a suitable medium, provide light, warmth, and moisture, and care for the seedlings as they grow. Growing milkweed supports pollinators and contributes to conservation efforts.
Read more: How To Stratify Poppy Seeds
What is seed stratification?
Seed stratification is a process used to break seed dormancy and promote germination by exposing seeds to specific conditions that simulate the natural environment. Many plant species, including milkweed, have evolved mechanisms to protect their seeds from germinating prematurely. These mechanisms can include hard seed coats or chemical inhibitors that prevent germination until the optimal conditions are met.
When we stratify seeds, we are essentially replicating the natural processes that seeds would undergo in their native habitats. In the wild, seeds may experience a period of cold winter temperatures, fluctuating temperatures, or exposure to moisture before germination can occur. By providing these conditions artificially, we can bypass the natural dormancy mechanisms and improve the chances of successful germination.
There are different methods of seed stratification, and the choice of method will depend on the specific requirements of the seed species. In the case of milkweed, cold stratification is most commonly used. Cold stratification involves subjecting the seeds to a period of cold temperatures to break down the seed coat and initiate the germination process.
The cold stratification process can be summarized in a few simple steps. First, the milkweed seeds are placed in a damp medium, such as peat moss or vermiculite, to provide moisture for the seeds. The seeds are then placed in a plastic bag or container and stored in the refrigerator for a specific period of time, typically ranging from a few weeks to a few months. This exposure to cold temperatures mimics the winter season and triggers the endogenous changes within the seed that promote germination.
During the cold stratification period, it’s important to periodically check the moisture levels of the medium to ensure it remains damp. If it becomes too dry, the seeds may not receive the necessary moisture for germination. Additionally, it’s essential to avoid exposing the seeds to freezing temperatures, as extreme cold can damage the seeds.
After the cold stratification period is complete, the milkweed seeds are ready to be sown into the desired growing medium. The softened seed coat and stimulated embryo make it easier for the seeds to sprout and establish themselves in the soil.
By utilizing seed stratification techniques, gardeners and enthusiasts can improve germination rates and ensure the successful growth of milkweed plants. This is especially important for milkweed, as it plays a crucial role in supporting pollinators like monarch butterflies. Incorporating seed stratification into your gardening practices is a rewarding way to contribute to the conservation efforts of these remarkable creatures.
Why stratify milkweed seeds?
Milkweed seeds require stratification to overcome their natural dormancy mechanisms and achieve successful germination. There are several reasons why stratifying milkweed seeds is essential for their growth and establishment. Let’s explore why stratification is crucial for milkweed seeds:
- Seed Coat Hardness: Milkweed seeds have a hard outer coating that acts as a protective barrier. This seed coat can be impermeable to water and gases, making it difficult for the embryo inside to absorb necessary nutrients and initiate germination. Stratification helps to soften the seed coat, allowing moisture and oxygen to penetrate and reach the embryo.
- Overcoming Chemical Inhibitors: Milkweed seeds often contain chemical inhibitors that prevent them from germinating under unfavorable conditions. These inhibitors can be leached out or broken down during the stratification process, enabling germination to occur.
- Mimicking Natural Conditions: Milkweed seeds have evolved to germinate under specific environmental conditions found in their native habitats. By stratifying the seeds, we replicate these natural conditions, ensuring that they receive the cues necessary for germination. This is especially important for milkweed species that experience cold winters, as cold stratification simulates the chilling period required to break dormancy.
- Enhancing Germination Rates: The stratification process significantly enhances germination rates for milkweed seeds. By softening the seed coat and removing dormancy inhibitors, stratification increases the likelihood of successful germination and establishment of healthy seedlings. This is particularly crucial for milkweed, as it helps to replenish the diminishing populations that are vital to supporting monarch butterflies and other pollinators.
- Timing for Optimal Growth: Stratifying milkweed seeds allows you to control the timing of germination. By properly timing the stratification process, you can ensure that the seeds begin to germinate when favorable conditions for growth are present. This strategic approach maximizes the chances of successful seedling establishment and promotes vigorous plant growth.
Stratifying milkweed seeds is a vital step in cultivating these remarkable plants and creating essential habitat for monarch butterflies and other pollinators. By understanding the reasons behind stratification and employing the appropriate methods, gardeners and nature enthusiasts can contribute to the conservation efforts of these valuable species. So, don’t skip the stratification process when working with milkweed seeds, and prepare to witness the beauty and ecological importance that these plants bring to your garden.
When to stratify milkweed seeds?
The timing for stratifying milkweed seeds is an important factor in ensuring successful germination and healthy plant growth. The optimal time to stratify milkweed seeds can vary depending on the species and your specific geographical location. Here are some key considerations to keep in mind when deciding when to stratify milkweed seeds:
- Vernalization: Most milkweed species require a period of vernalization, which is exposure to cold temperatures, to break dormancy and promote germination. This mimics the natural winter conditions that the seeds would experience in their native habitats. It’s essential to provide this chilling period by stratifying the seeds in order to stimulate the necessary physiological changes for germination.
- Regional Climate: The best time to stratify milkweed seeds depends on the climate of your region. It’s important to consider the average last frost date in your area. Stratification is typically done a few months before the last frost date, as it ensures that the seeds will be ready to germinate once the risk of frost has passed and the conditions are favorable for growth.
- Milkweed Species: Different milkweed species have different stratification requirements. Some species have a shorter stratification period, while others may require a longer duration. It’s essential to research the specific requirements of the milkweed species you are working with to determine the ideal timing for stratification.
- Seed Collection Time: The time of year when you collect the milkweed seeds can also impact the timing of stratification. It’s important to gather the seeds when they are fully mature and have naturally dispersed from the pods. This ensures that the seeds are at their optimal stage for stratification and subsequent germination.
As a general guideline, stratifying milkweed seeds is often done in late winter or early spring, a few months before the last frost date. This timing allows for sufficient exposure to cold temperatures and prepares the seeds for germination when the weather conditions are suitable for growth. However, it’s crucial to research the specific requirements of the milkweed species you are working with, as the timing may vary.
It’s important to note that stratifying milkweed seeds too early may lead to premature germination, as the seedlings may not have enough time to establish before being exposed to harsh weather conditions. On the other hand, stratifying the seeds too late may delay or hinder germination, as the chilling period may not be adequate. Finding the right balance and following the recommended timing for each species will increase the chances of successful germination and healthy plant growth.
By considering vernalization requirements, regional climate, milkweed species, and seed collection time, you can determine the most suitable time to stratify milkweed seeds in your specific gardening context. Following proper timing guidelines ensures that your milkweed seeds have the best chance of successfully germinating and thriving, contributing to the conservation efforts of these magnificent plants and the pollinators they support.
Gathering Milkweed Seeds
Gathering milkweed seeds is an exciting and rewarding process that allows you to collect the seeds for stratification and future planting. Harvesting seeds from mature milkweed plants ensures that you have a fresh supply of viable seeds to work with. Here are some essential tips to keep in mind when gathering milkweed seeds:
- Timing: It’s crucial to wait until the milkweed pods are fully mature before harvesting the seeds. The timing may vary depending on the specific milkweed species you are working with, but generally, you can start looking for mature pods in late summer or early fall. As the pods mature, they will begin to turn brown or gray and may even split open to reveal the seeds inside. This signals that the seeds are ripe and ready for collection.
- Pod Inspection: Before harvesting the seeds, it’s important to inspect the pods to ensure they are fully mature and the seeds are viable. Gently squeeze the pods to check if they are dry and brittle. Avoid collecting pods that are still green or show any signs of mold or disease. Selecting healthy, mature pods will increase the chances of obtaining viable seeds for successful germination.
- Seed Extraction: To extract the seeds from the milkweed pods, hold the pod firmly and gently twist or pull it. If the pod is fully mature, it should easily come apart, releasing the seeds. Be careful not to damage the seeds while extracting them from the pod. You can also use a small pair of scissors or a knife to carefully open the pod and remove the seeds.
- Seed Cleaning: After extracting the seeds, it’s a good idea to clean them to remove any debris or excess plant material. You can do this by gently blowing on the seeds or using a fine-mesh sieve to separate the seeds from any unwanted particles. Cleaning the seeds helps ensure that you have a pure batch of seeds for stratification and planting.
- Seed Storage: If you’re not planning to stratify the seeds immediately, it’s important to store them properly to maintain their viability. Place the cleaned seeds in a dry, airtight container such as a paper envelope or a glass jar. Label the container with the milkweed species and collection date to keep track of the seeds. Store the container in a cool, dark place, away from direct sunlight and extreme temperature fluctuations.
By following these tips, you can successfully gather milkweed seeds for stratification and future planting. Picking mature pods, extracting the seeds carefully, and cleaning and storing them properly will ensure the best chances of seed viability and successful germination. With a fresh supply of milkweed seeds, you’ll be well on your way to creating a pollinator-friendly garden and supporting the conservation of important plant species.
Read more: How Long For Milkweed To Germinate
Preparing Milkweed Seeds for Stratification
Once you have gathered milkweed seeds, it’s important to properly prepare them for stratification. Preparing the seeds ensures that they are in the best condition to successfully germinate and grow into healthy milkweed plants. Here are the essential steps to follow when preparing milkweed seeds for stratification:
- Clean the Seeds: Before stratifying the seeds, it’s important to clean them to remove any remaining debris or plant material. Thoroughly inspect the seeds and discard any damaged or discolored ones. You can use a fine-mesh sieve or blow gently on the seeds to eliminate any unwanted particles. Cleaning the seeds helps improve germination rates and ensures that you’re working with a pure batch of seeds.
- Scarify (Optional): Some milkweed species have hard seed coats that may benefit from scarification, a process that scratches or weakens the seed coat to enhance water absorption and germination. Scarification can be done by lightly sanding the seed coat with fine-grit sandpaper or nicking it with a small knife or scalpel. However, not all milkweed species require scarification, so be sure to research the specific requirements of the species you are working with before attempting scarification.
- Moisten the Seeds: Milkweed seeds typically benefit from being moistened before stratification. You can achieve this by placing the cleaned and scarified seeds in a damp paper towel or cloth for a few hours. It’s important not to soak the seeds in water, as excessive moisture can cause them to rot or develop fungal growth. A light dampness is sufficient to prepare the seeds for stratification.
- Select the Stratification Method: There are different methods of stratification, including cold stratification, warm stratification, and moist stratification. The choice of method depends on the specific milkweed species and its natural germination requirements. Research the recommended stratification method for the milkweed species you are working with to ensure the best results.
- Container Selection: Choose an appropriate container for stratifying the milkweed seeds. Options include plastic bags, glass jars, or plastic containers with lids. Ensure that the container is clean and sterile to avoid introducing any harmful pathogens that could affect seed viability.
- Label and Date the Container: Before placing the seeds in the container, label it with the milkweed species and the date of stratification. This will help you keep track of the duration of stratification and ensure that you use the seeds within the appropriate timeframe.
- Place the Seeds in the Container: Once you have prepared the container, carefully transfer the moistened seeds into it. Spread the seeds out evenly, making sure they are not clumped together or overlapping. This ensures that each seed has sufficient room for air circulation and prevents mold or fungal growth.
- Seal the Container: Seal the container tightly to create a controlled microclimate for the seeds. This helps maintain the necessary moisture levels and temperature required for stratification. You can tape the edges of a plastic bag or secure the lid of a container to ensure a tight seal.
By following these steps, you can adequately prepare milkweed seeds for stratification. Cleaning, scarifying (if necessary), moistening, selecting the appropriate stratification method, choosing the right container, and labeling the container are essential tasks to ensure the success of the stratification process. With well-prepared seeds, you’ll be on your way to successfully germinating milkweed and creating a vibrant habitat for pollinators like monarch butterflies.
Stratification Methods
When it comes to stratifying milkweed seeds, there are various methods to choose from. The specific method you use will depend on the milkweed species and its natural germination requirements. Here are the three main stratification methods used for milkweed seeds:
- Cold Stratification: Cold stratification is the most common and widely used method for stratifying milkweed seeds. It involves subjecting the seeds to a period of cold temperatures to break dormancy and initiate germination. To cold stratify milkweed seeds, follow these steps:
- Moisten the cleaned seeds using a damp paper towel or cloth.
- Place the moistened seeds in a plastic bag or container, ensuring they are spread out and not clumped together.
- Seal the bag or container tightly to create a controlled microclimate for the seeds.
- Store the container in the refrigerator at a temperature between 33-40°F (0-5°C) for a recommended period of time, which can vary depending on the milkweed species.
- Periodically check the moisture levels in the container and ensure it remains damp but not soaking wet.
- Warm Stratification: Warm stratification is used for certain milkweed species that naturally germinate under warm conditions. This method can be useful for species that come from regions with a warm climate. To warm stratify milkweed seeds, follow these steps:
- Moisten the cleaned seeds using a damp paper towel or cloth, similar to cold stratification.
- Place the moistened seeds in a plastic bag or container, ensuring they are spread out and not clumped together.
- Seal the bag or container tightly to create a controlled microclimate.
- Store the container in a warm location, such as a heated greenhouse or on top of a refrigerator, at a temperature between 68-86°F (20-30°C).
- Check the moisture levels regularly and ensure that the seeds do not become too dry or too wet.
- Moist Stratification: Moist stratification is a method that involves subjecting the seeds to a constant level of moisture without exposure to extreme temperatures, mimicking the conditions found in damp soil or forest floor environments. This method can be particularly suitable for certain milkweed species. To moist stratify milkweed seeds, follow these steps:
- Moisten the cleaned seeds using a damp paper towel or cloth, similar to the previous methods.
- Place the moistened seeds in a plastic bag or container, ensuring they are spread out evenly.
- Seal the bag or container tightly to maintain a controlled moisture level.
- Store the container in a location with a stable temperature, typically between 50-70°F (10-20°C).
- Check the moisture levels regularly to ensure that the seeds remain damp but not overly wet.
It’s essential to research the specific stratification requirements for the milkweed species you are working with. Some milkweed species may require a combination of stratification methods or a specific duration for each method. Understanding the natural germination patterns of the milkweed species will help you choose the most suitable stratification method and increase the chances of successful germination.
By carefully selecting and implementing the appropriate stratification method, you can provide milkweed seeds with the optimal conditions to overcome dormancy and germinate successfully. Stratification is a vital step in growing healthy milkweed plants and supporting pollinators like monarch butterflies in your garden.
To stratify milkweed seeds, place them in a damp paper towel in a plastic bag and refrigerate for 4-6 weeks. This mimics winter conditions and helps the seeds germinate.
Cold Stratification
Cold stratification is the most commonly used method for stratifying milkweed seeds. It involves subjecting the seeds to a period of cold temperatures, mimicking the natural winter conditions that the seeds would experience in their native habitats. Cold stratification is particularly useful for milkweed species that require a vernalization period, which breaks dormancy and prepares the seeds for germination. Here’s a step-by-step guide on cold stratifying milkweed seeds:
- Moisten the seeds: Begin by moistening the cleaned milkweed seeds. You can place them on a damp paper towel or cloth to provide the necessary moisture. It’s important to avoid soaking the seeds, as excessive moisture can lead to rotting.
- Prepare the container: Choose a suitable container for cold stratification, such as a plastic bag or a sealable plastic container. Make sure the container is clean and sterile to prevent any contamination.
- Place the seeds in the container: Transfer the moistened milkweed seeds to the container. Spread them out evenly to ensure proper air circulation and prevent mold or fungal growth. If you are stratifying multiple milkweed species, label the container accordingly.
- Seal the container: Close the container tightly to create a controlled microclimate for the seeds. This helps maintain the necessary moisture levels and protects the seeds from drying out.
- Store in the refrigerator: Put the sealed container in the refrigerator, where the temperature is typically between 33-40°F (0-5°C). The cold temperatures simulate winter conditions and initiate the processes required to break seed dormancy.
- Monitor moisture levels: Check the moisture levels inside the container regularly. You want to ensure that the seeds remain damp throughout the stratification period. If the medium becomes dry, you can lightly mist it with water to maintain the desired moisture level.
- Stratification duration: The duration of cold stratification can vary depending on the milkweed species. Research the specific requirements of the species you are working with to determine the recommended length of time. For some milkweed species, a stratification period of 4-8 weeks is sufficient, while others may require several months.
- Transition to germination: After the recommended stratification period has passed, the seeds are ready to be transitioned to the germination phase. Plant the stratified milkweed seeds in a suitable growing medium, following the specific instructions for that species. Provide the seeds with appropriate light, temperature, and moisture conditions to promote successful germination and seedling growth.
Remember, different milkweed species have different stratification requirements, so it’s crucial to research the specific needs of the species you are working with. Cold stratification is a valuable technique to break seed dormancy and enhance the germination of milkweed seeds, ensuring the successful growth of these important pollinator plants.
Warm Stratification
While cold stratification is the most commonly used method for milkweed seed stratification, certain milkweed species have different requirements and naturally germinate under warm conditions. Warm stratification involves subjecting the seeds to a period of consistent warmth to break dormancy and stimulate germination. Here’s a step-by-step guide on warm stratifying milkweed seeds:
- Moisten the seeds: Start by moistening the cleaned milkweed seeds. Place them on a damp paper towel or cloth, ensuring they are lightly moistened. Be careful not to oversaturate the seeds, as excessive moisture can lead to rotting.
- Choose a container: Select a suitable container for warm stratification, such as a plastic bag or a sealable plastic container. Ensure the container is clean and sterile to prevent contamination.
- Transfer seeds to the container: Place the moistened milkweed seeds in the container, spreading them out evenly. This allows for good air circulation and reduces the risk of mold or fungal growth. It’s a good practice to label the container with the milkweed species you are stratifying.
- Seal the container: Close the container tightly to create a controlled microclimate for the seeds. This helps maintain the necessary moisture levels and protects the seeds from drying out.
- Provide consistent warmth: Place the sealed container in a warm location, such as a heated greenhouse or on top of a refrigerator. The temperature should be kept between 68-86°F (20-30°C) throughout the stratification period. This temperature range stimulates the natural germination requirements of warm-growing milkweed species.
- Monitor moisture levels: Regularly check the moisture levels inside the container. It’s important to maintain the desired level of moisture without allowing the seeds to become overly wet. If the medium becomes dry, lightly mist it with water to ensure sufficient moisture.
- Stratification duration: The duration of warm stratification can vary depending on the milkweed species. Research the specific requirements of the species you are working with to determine the recommended length of time. Some warm-growing milkweed species require a period of 4-6 weeks, while others may need several months.
- Transition to germination: After the recommended stratification period has been completed, transition the warm-stratified seeds to the germination phase. Sow the stratified milkweed seeds in a suitable growing medium, following the specific instructions for that species. Provide them with appropriate light, temperature, and moisture conditions to promote successful germination and seedling development.
Remember to research the specific stratification requirements for the species of milkweed you are working with. Warm stratification is a useful technique for milkweed species that naturally germinate under warm conditions. By providing the necessary warmth and moisture, you can enhance seed germination and foster the growth of healthy milkweed plants, making a valuable contribution to pollinator habitats and conservation efforts.
Read more: How To Plant Milkweed Seeds
Moist Stratification
Moist stratification is an alternative method used to stratify milkweed seeds, especially for species that prefer consistent moisture levels rather than specific temperature requirements. This method involves subjecting the seeds to a constant level of moisture without exposure to extreme temperatures. Moist stratification replicates the conditions found in damp soil or forest floor environments and helps break seed dormancy. Here’s a step-by-step guide on moist stratifying milkweed seeds:
- Moisten the seeds: Begin by moistening the cleaned milkweed seeds. Place the seeds on a damp paper towel or cloth to provide the necessary moisture. Ensure that the seeds are lightly moistened and avoid soaking them, as excessive moisture can cause rotting.
- Choose a container: Select a suitable container for moist stratification, such as a plastic bag or a sealable plastic container. Make sure the container is clean and sterile to prevent contamination.
- Transfer seeds to the container: Place the moistened milkweed seeds in the container, spreading them out evenly. This ensures proper air circulation and reduces the risk of mold or fungal growth. It’s recommended to label the container with the milkweed species being stratified.
- Seal the container: Close the container tightly to create a controlled microclimate for the seeds. This helps maintain the necessary moisture levels and protects the seeds from drying out.
- Maintain a stable moisture level: Unlike cold or warm stratification, the aim of moist stratification is to keep the seeds consistently moist. Regularly check the moisture levels inside the container and ensure that the seeds remain damp but not overly wet. If necessary, mist the seeds with water to maintain the desired moisture level.
- Choose a suitable storage location: Find a location with a stable temperature, typically between 50-70°F (10-20°C), and place the sealed container there. Avoid exposing the container to direct sunlight or extreme temperature fluctuations.
- Determine the stratification duration: The length of time for moist stratification can vary depending on the milkweed species. Research the specific requirements of the species you are working with to determine the recommended duration. Generally, moist stratification periods can range from a few weeks to a few months.
- Transition to germination: Once the recommended stratification period is complete, transfer the moist-stratified seeds to the germination phase. Plant them in a suitable growing medium following the specific instructions for that species. Provide adequate light, temperature, and moisture to facilitate successful germination and seedling growth.
It’s important to note that moist stratification may not be suitable for all milkweed species. Research the specific stratification requirements for the milkweed species you are working with to ensure successful germination. Moist stratification provides an alternative approach to breaking seed dormancy, especially for species that thrive in consistently moist environments. By following this method, you can increase the chances of successful germination and contribute to the growth of healthy milkweed plants, supporting pollinators and biodiversity in your garden.
Container Options for Seed Stratification
Choosing the right container for seed stratification is essential in creating an optimal environment for the seeds to break dormancy and germinate successfully. The container should provide adequate moisture retention, airflow, and space for the seeds. Here are some container options to consider when stratifying milkweed seeds:
- Plastic Bags: Plastic bags are commonly used for seed stratification due to their versatility and availability. Use zip-lock or resealable bags to ensure a secure seal and prevent moisture loss. Place the moistened seeds inside the bag, spread them out evenly, and seal it tightly. Plastic bags are convenient for monitoring moisture levels and can be stacked or placed flat in the refrigerator or stratification area.
- Plastic Containers with Lids: Clear plastic containers with tight-fitting lids provide an excellent option for stratifying seeds. These containers allow for better visibility and easy observation of seed conditions. Select containers that are large enough to accommodate the seeds, leaving some space for air circulation. The lid should create a tight seal to maintain consistent moisture levels inside.
- Seed Trays: Seed trays or flats with individual cells or compartments can be used for stratifying milkweed seeds. These trays provide organization and allow for better control of individual seeds. Fill each cell with a suitable stratification medium, place a few seeds in each cell, and cover them lightly. Seed trays are particularly useful when stratifying a large number of seeds or when working with different varieties or species.
- Mesh Bags: Mesh bags or mesh containers provide good airflow and moisture retention for stratified seeds. These bags are typically made of a fine mesh material that allows air circulation while preventing the seeds from being displaced. Place the seeds inside the mesh bag, ensuring they are evenly distributed, and secure the opening tightly. Mesh bags are especially beneficial for moist stratification, as they allow consistent moisture levels to be maintained.
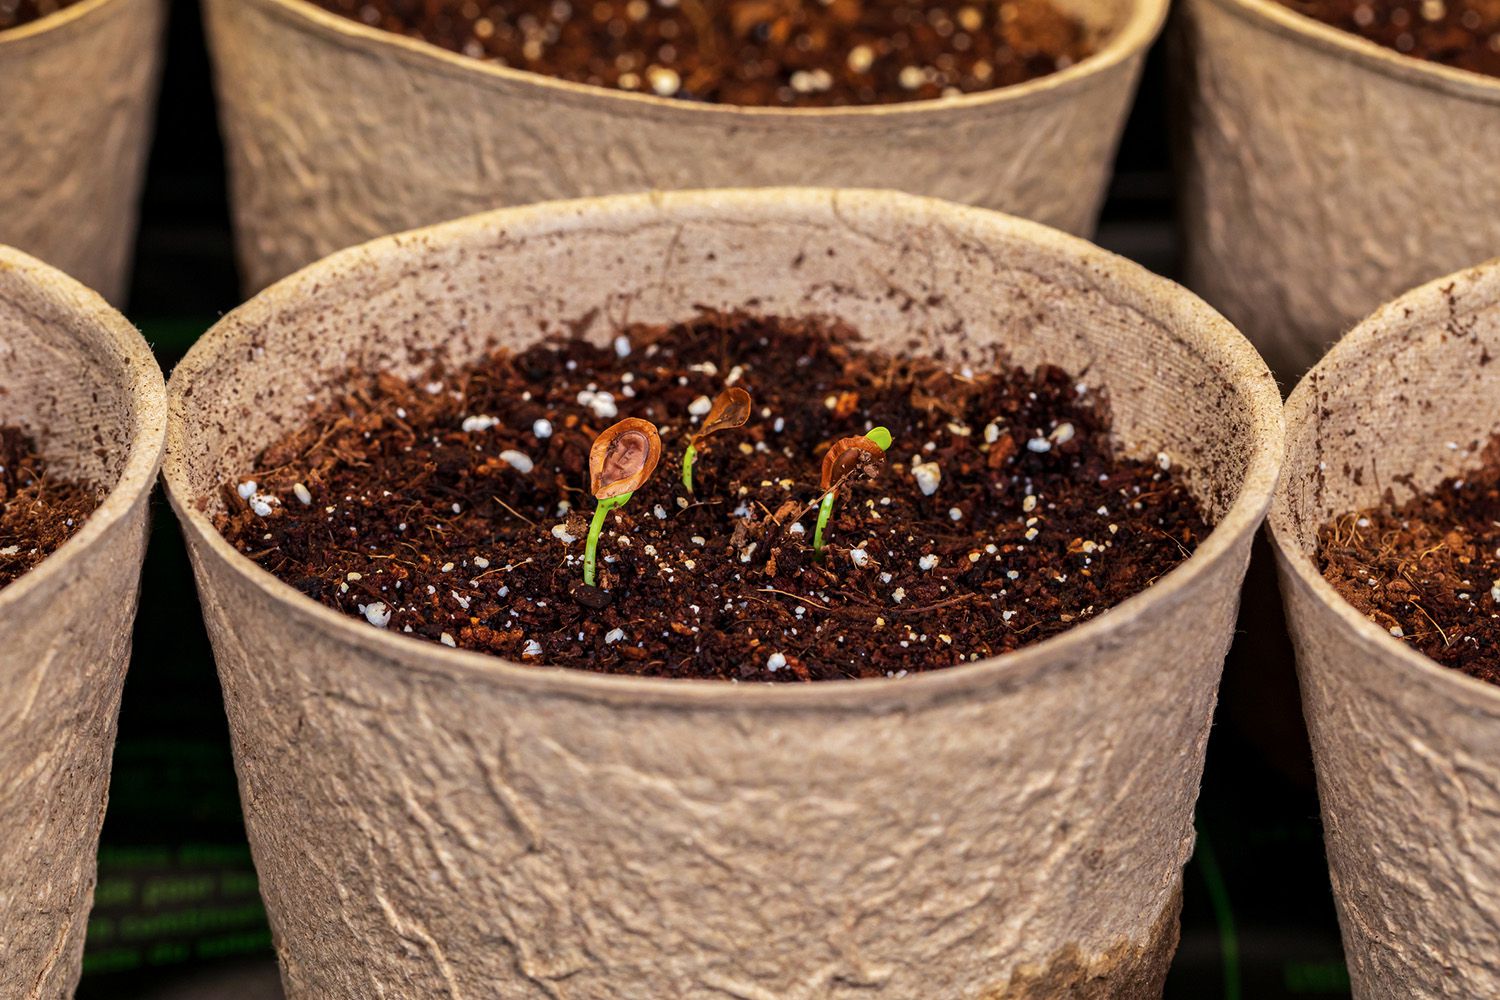
- Biodegradable Pots: Biodegradable pots made from materials like peat or coconut fiber offer an eco-friendly option for stratifying seeds. These pots can be filled with a suitable stratification medium, and the seeds can be planted directly in them. This eliminates the need for transplanting, as the pots can be planted directly into the ground or a larger container once germination occurs.
Regardless of the container option chosen, it’s important to ensure that it is clean and sterile to minimize the risk of disease or contamination. Labeling the container with the milkweed species and date of stratification is also recommended for easy identification and tracking.
Consider the specific needs of the milkweed seeds and the available resources when selecting a container for seed stratification. The chosen container should provide the necessary conditions for successful germination, including moisture retention, airflow, and space for the seeds to expand and develop. By choosing the right container, you’ll be well on your way to providing the optimal environment for stratifying milkweed seeds and supporting the growth of healthy plants.
Stratification Duration
The duration of seed stratification refers to the length of time seeds need to be subjected to specific stratification conditions to break dormancy and stimulate germination. The required stratification duration varies depending on the milkweed species and their natural germination requirements. Here are some key factors to consider when determining the appropriate stratification duration:
- Milkweed Species: Different milkweed species have different stratification requirements. Some species may have a relatively short stratification period, typically ranging from a few weeks to a couple of months, while others may require a longer duration. Research the specific needs of the milkweed species you are working with to ensure you provide the correct stratification duration.
- Seed Dormancy Mechanisms: Milkweed seeds have various dormancy mechanisms that are controlled by factors such as the seed coat hardness, chemical inhibitors, or the physiological state of the embryo. The stratification duration aims to break these dormancy mechanisms and initiate germination. The specific stratification conditions and duration help in weakening the seed coat, leaching out inhibitors, and preparing the embryo for growth.
- Germination Requirements: Understanding the germination requirements of the milkweed species is crucial in determining the stratification duration. Some milkweeds require exposure to cold temperatures, mimicking winter conditions, to break dormancy, while others may require consistent warmth or moisture. The stratification duration should align with these specific germination requirements to maximize successful seed germination.
- Climate and Geographic Location: The climate and geographic location where the milkweed seeds are being stratified can impact the duration needed for successful germination. Factors such as temperature variations, light conditions, and seasonal patterns can influence seed dormancy and germination requirements. Consider the regional climate and characteristics of your location to determine the appropriate stratification duration for your milkweed seeds.
- Seed Viability: The viability of the milkweed seeds, or how likely they are to germinate, can also influence the stratification duration. Freshly gathered seeds typically have higher viability and may require shorter stratification periods compared to older or less viable seeds. It’s essential to collect seeds when they are fully mature and viable to increase the chances of successful germination.
It’s important to follow specific guidelines and recommendations provided for the milkweed species you are working with. These guidelines often suggest the optimal stratification duration based on the known requirements and characteristics of the species. However, keep in mind that there can be some variability within each species, and adjustments to the duration may be required based on observed outcomes or individual seed lot characteristics.
Regular monitoring of the stratification process is essential. Check the moisture levels, inspect for any signs of mold or rot, and assess the progress of the seeds throughout the stratification duration. This monitoring allows you to make any necessary adjustments and ensure that the seeds are progressing towards successful germination.
By understanding the specific needs of the milkweed species and considering factors such as seed dormancy mechanisms, germination requirements, climate, and seed viability, you can determine the appropriate stratification duration. Following these guidelines will optimize the chances of successful germination and aid in the growth of healthy milkweed plants, contributing to the conservation efforts of these important pollinator species.
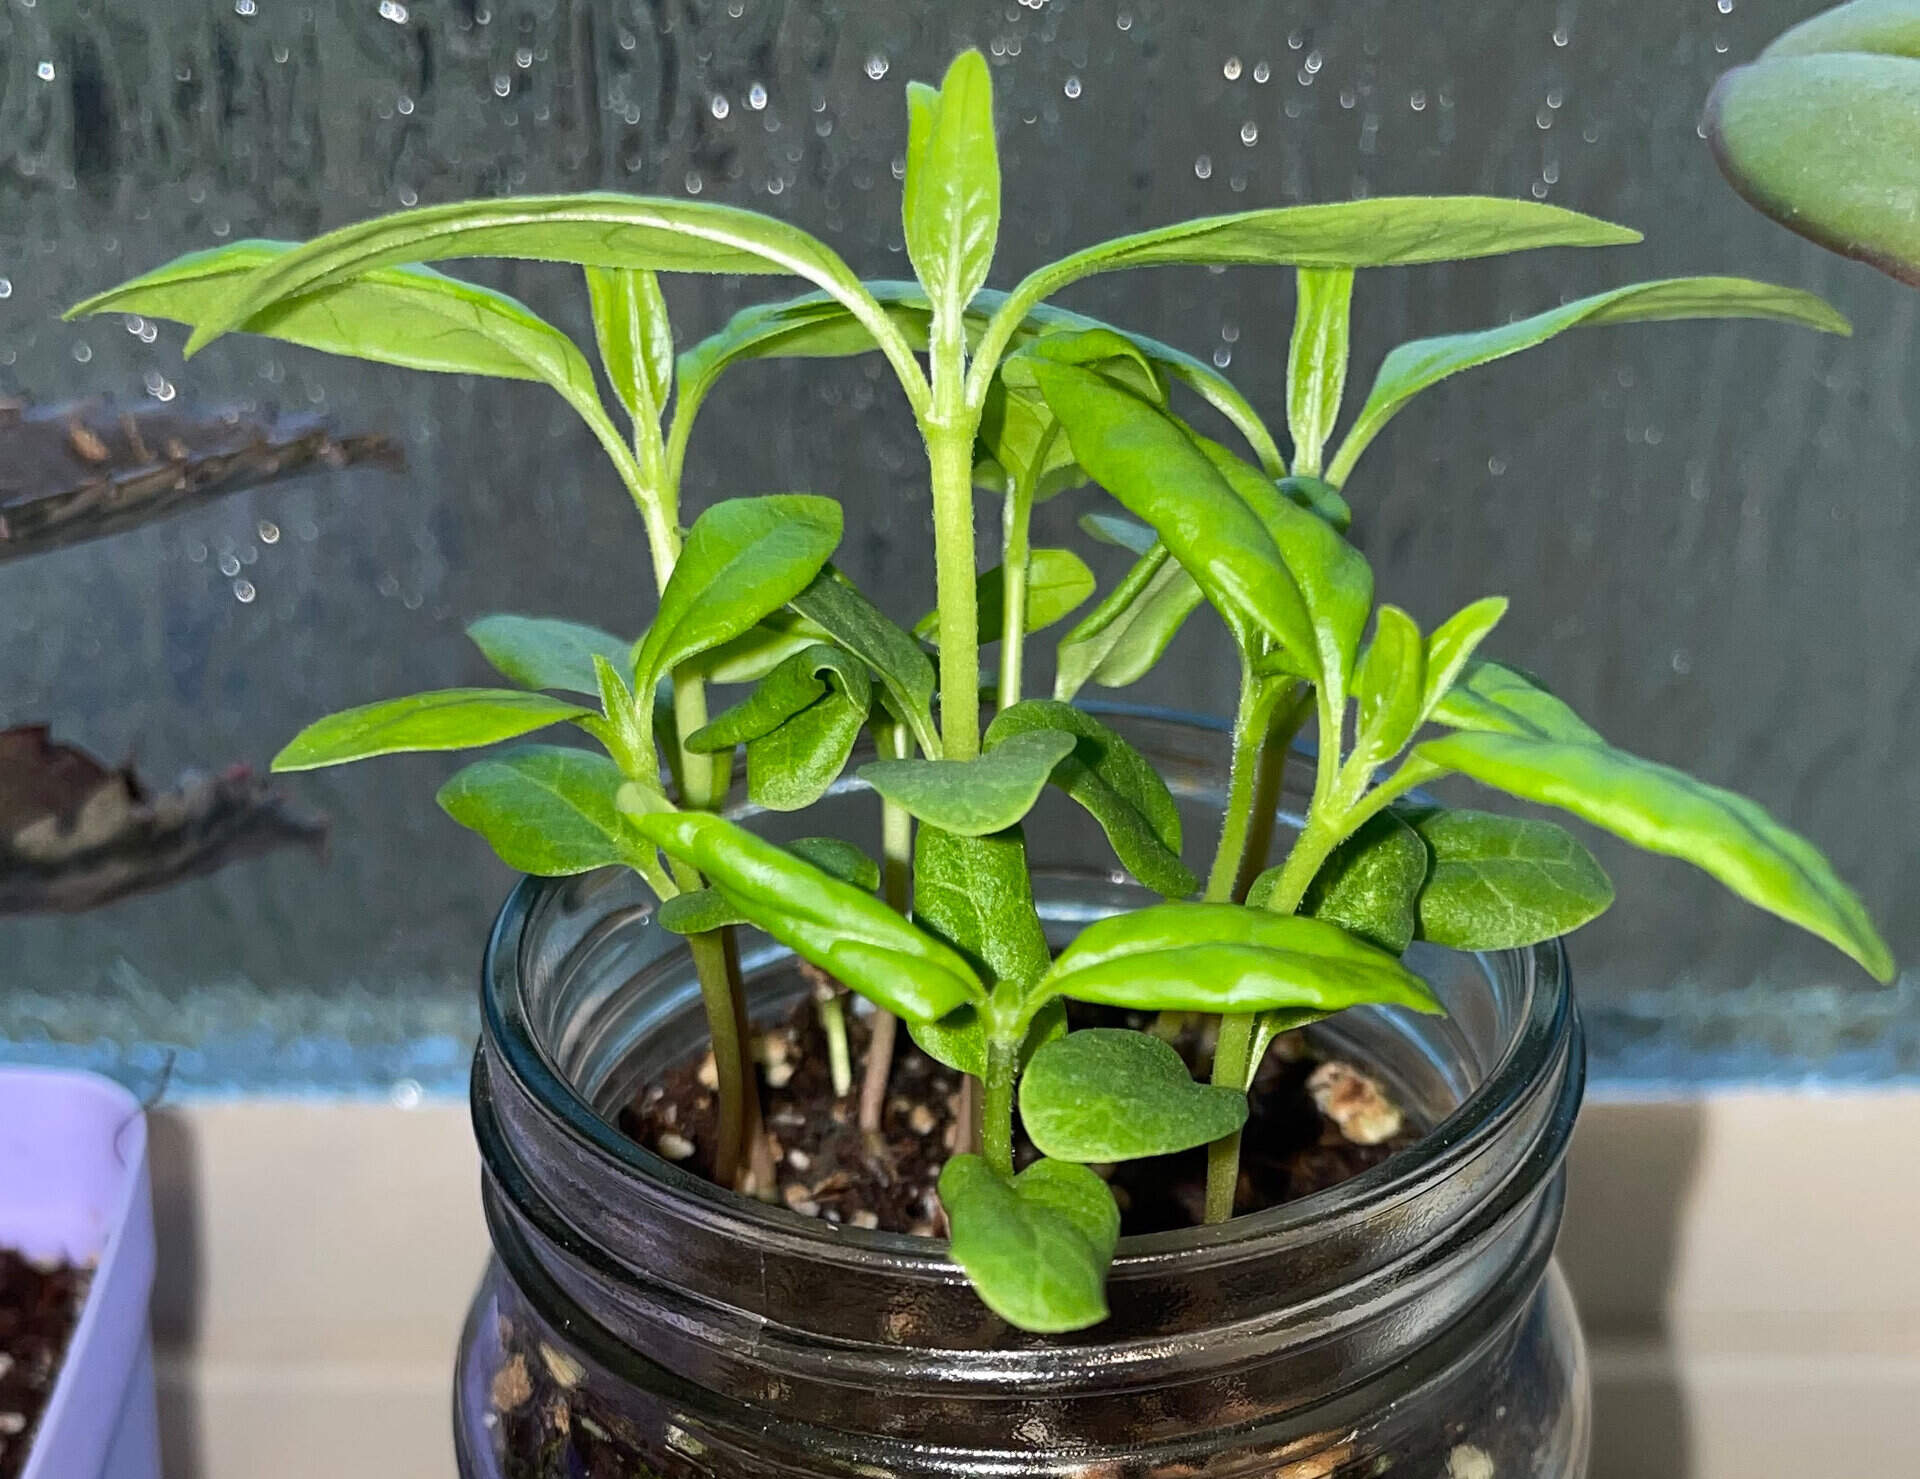
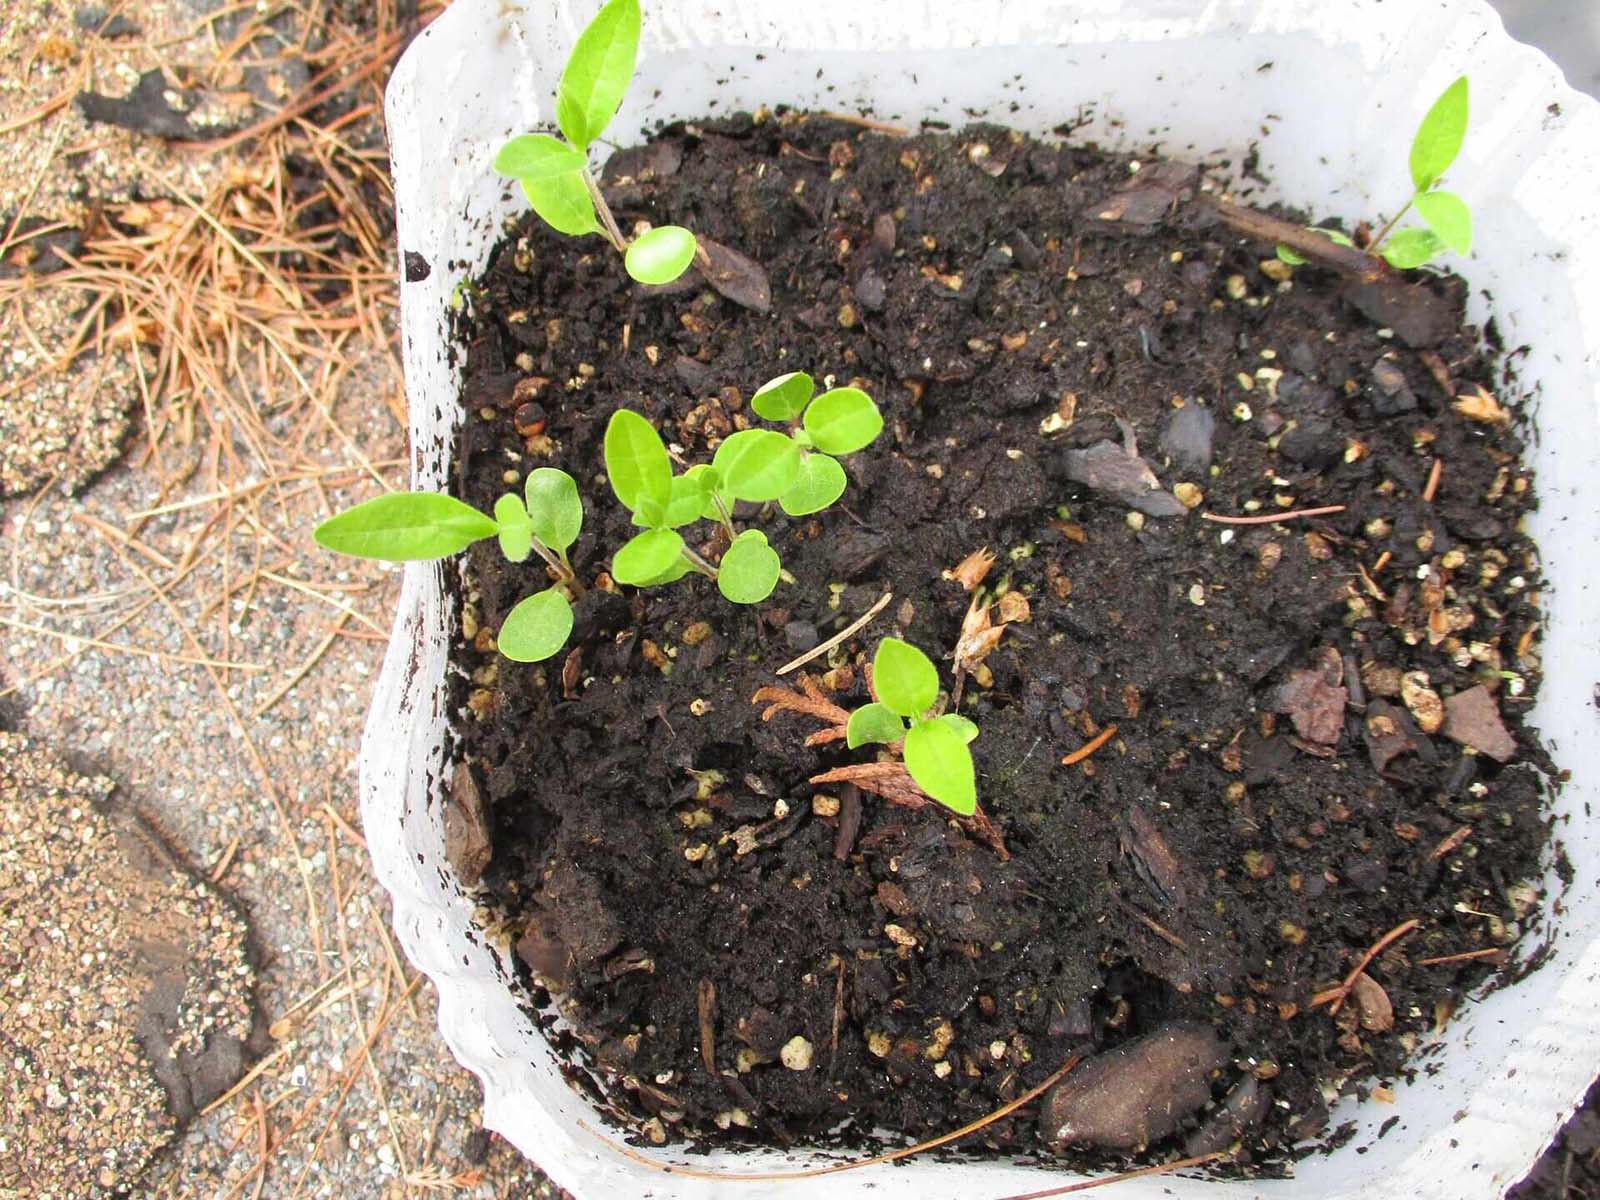
After Stratification
After the stratification period is complete, it’s time to transition the stratified milkweed seeds to the germination phase. The seeds have undergone the necessary conditions to break dormancy, and now they are ready to sprout and grow. Here are some key steps to take after the stratification process:
- Prepare the Planting Medium: Choose a suitable planting medium for your milkweed seeds. Depending on your preference and the specific requirements of the milkweed species, you can use a seed-starting mix, a well-draining soil, or a soilless medium like vermiculite or perlite. Ensure that the medium is moist but not overly wet to provide the ideal conditions for seedling growth.
- Sow the Stratified Seeds: Place the stratified milkweed seeds in the prepared planting medium. Make small indentations or holes in the medium and gently press the seeds into them. Space the seeds adequately to allow room for individual seedlings to grow and develop.
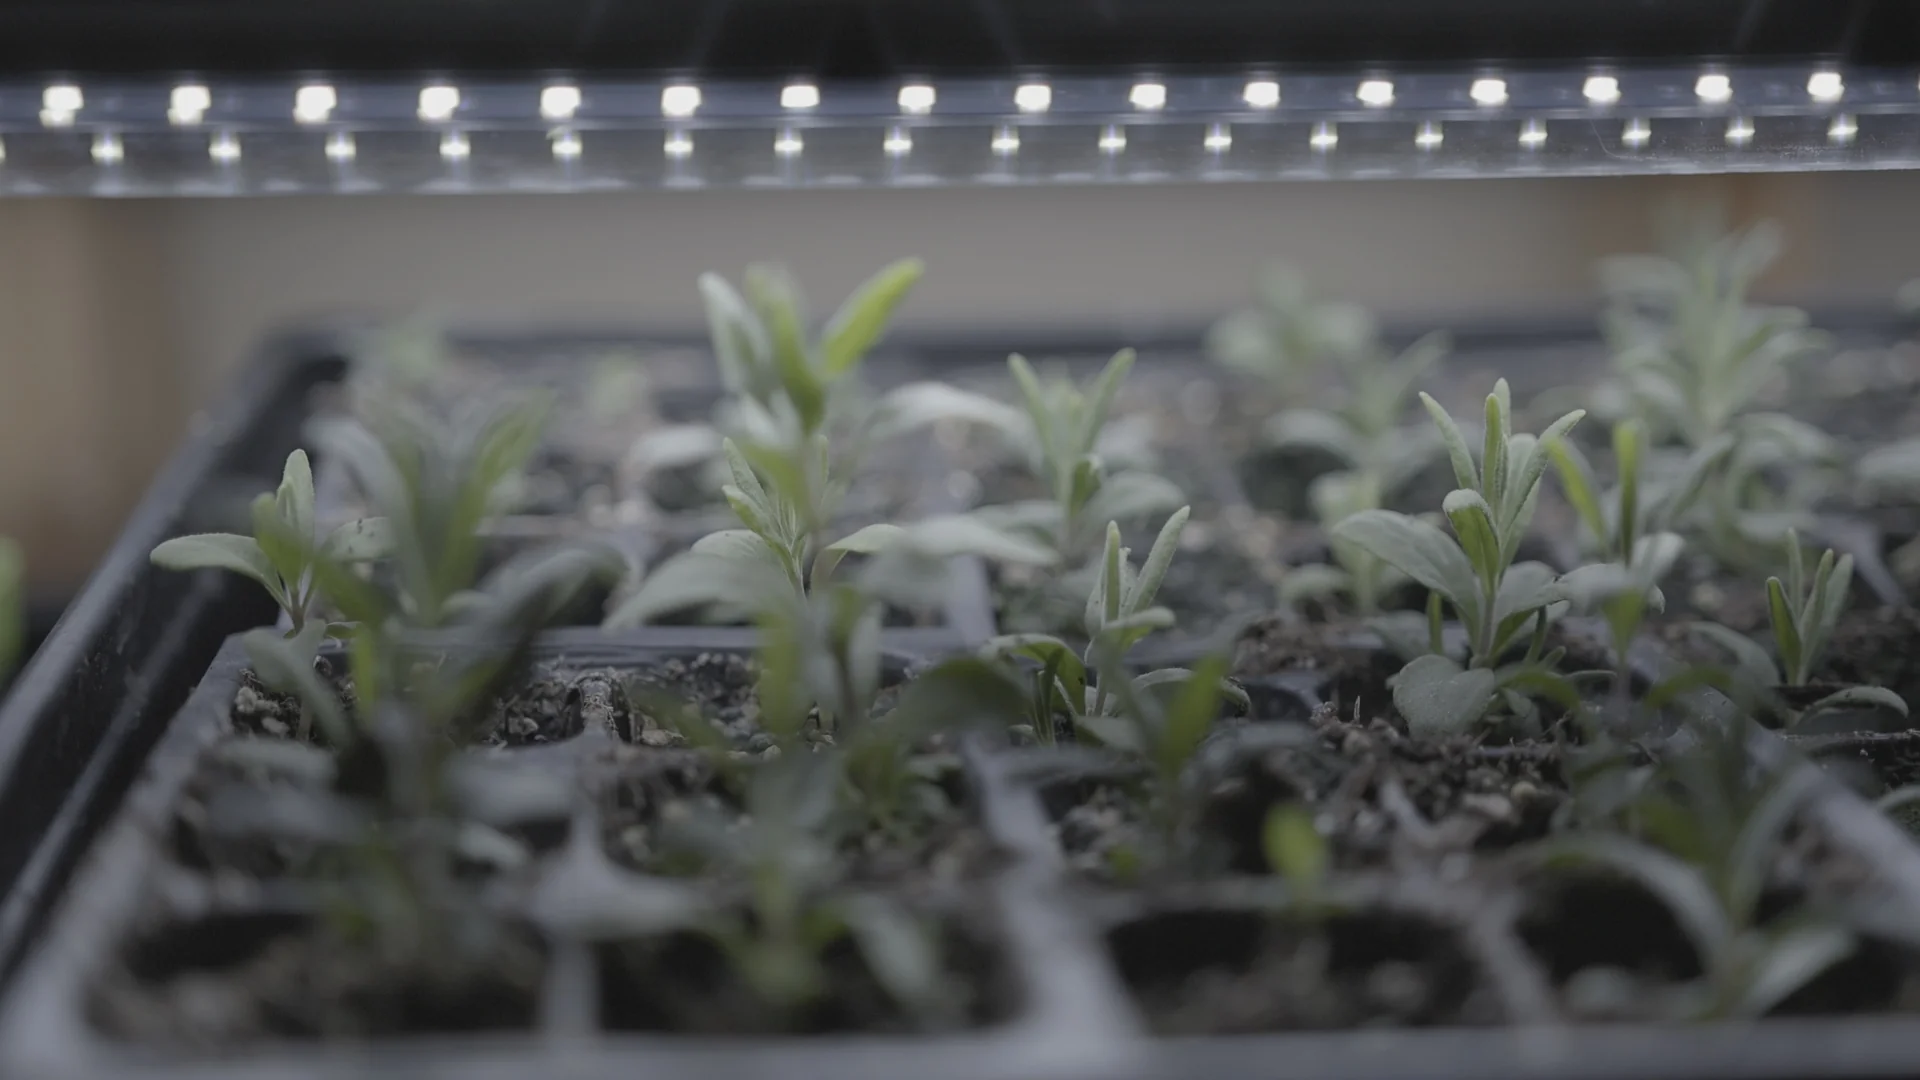
- Light and Temperature: Provide the newly sown seeds with appropriate light and temperature conditions. Most milkweed species prefer full sun, so place the seeds in a location where they can receive direct sunlight for at least 6-8 hours a day. Maintain a consistent temperature range suitable for seed germination, which varies depending on the species. Aim for temperatures between 70-85°F (21-29°C).
- Moisture: Proper moisture levels are crucial for seed germination. Ensure that the planting medium remains consistently moist but not waterlogged. Use a misting spray bottle or carefully water the seeds from below to avoid disturbing the seedlings. Maintain the moisture levels until the seedlings have established, at which point you can adjust the watering schedule according to the specific needs of the milkweed species.
- Thin and Transplant: Once the seedlings have grown to a suitable size and developed their first true leaves, thin them out if necessary. Remove any weaker or overcrowded seedlings, allowing the strongest ones to thrive. If you started the seeds in individual pots or cells, transplant the seedlings into larger containers or the desired planting location, ensuring adequate spacing between plants.
- Care and Maintenance: Continue to care for the milkweed seedlings as they grow. Provide them with regular watering, sufficient sunlight, and protection from extreme weather conditions or pests. Depending on the milkweed species, you may need to support the plants with stakes or cages as they mature. Monitor the soil moisture levels and adjust the watering schedule accordingly.
- Pollinator Support: Milkweed is known for its importance in supporting pollinators, particularly monarch butterflies. Creating a pollinator-friendly garden by growing milkweed not only benefits monarchs but also attracts other beneficial pollinators like bees and butterflies. Provide additional nectar and habitat resources to support the pollinators as they visit the milkweed plants.
Remember that each milkweed species has its own specific requirements and growth habits. Research the specific needs of the milkweed species you are working with to ensure that you provide the appropriate care and maintenance throughout their growth cycle. By nurturing the stratified milkweed seeds into healthy plants, you actively contribute to supporting pollinators and conserving these vital plant species in your garden.
Read more: How To Plant Milkweed Seeds Outside
Conclusion
Stratifying milkweed seeds is an essential step in successfully germinating and growing these important pollinator plants. By understanding the stratification process and following the appropriate methods, you can enhance seed viability and promote the growth of healthy milkweed plants in your garden. Here’s a recap of the key points discussed:
Seed stratification is the process of mimicking the natural conditions that milkweed seeds go through to break dormancy and stimulate germination. Different milkweed species have varied stratification requirements, including cold, warm, or moist treatments, depending on their natural germination patterns.
To stratify milkweed seeds, gather mature seeds from fully developed pods. Clean the seeds to remove debris and potentially scarify them if required. Then, choose a suitable container and follow the recommended stratification method—whether cold, warm, or moist—to provide the necessary conditions for seed viability.
After the stratification period, transition the stratified seeds to the germination phase by sowing them in a suitable planting medium. Ensure they receive adequate light, temperature, and moisture. Care for the seedlings as they grow, and provide support and proper maintenance to enable healthy plant development.
Stratifying milkweed seeds not only contributes to the growth of beautiful plants but also plays a crucial role in supporting pollinators such as monarch butterflies and other beneficial insects. By growing milkweed, you create habitat and a valuable food source for these important creatures, contributing to their conservation.
Remember to research the specific requirements of the milkweed species you are working with, as each species may have unique needs. Pay attention to timing, stratification methods, container options, and stratification duration to optimize the chances of successful germination and plant growth.
By incorporating stratification techniques into your gardening practices, you can enjoy the beauty of milkweed in your garden while actively supporting pollinators and contributing to the conservation of these remarkable plants. So, roll up your sleeves, gather those seeds, and embark on your milkweed stratification journey!
Frequently Asked Questions about How To Stratify Milkweed Seeds
Was this page helpful?
At Storables.com, we guarantee accurate and reliable information. Our content, validated by Expert Board Contributors, is crafted following stringent Editorial Policies. We're committed to providing you with well-researched, expert-backed insights for all your informational needs.


0 thoughts on “How To Stratify Milkweed Seeds”