Home>Garden Essentials>How To Plant Carnation Seeds
Garden Essentials
How To Plant Carnation Seeds
Modified: October 20, 2024
Learn how to plant carnation seeds in your garden and enjoy the beautiful blooms. Find step-by-step instructions and tips for a successful gardening experience.
(Many of the links in this article redirect to a specific reviewed product. Your purchase of these products through affiliate links helps to generate commission for Storables.com, at no extra cost. Learn more)
Introduction
Welcome to the world of gardening! Whether you have a green thumb or you’re just beginning your gardening journey, growing plants from seeds can be a fulfilling and rewarding experience. In this article, we will explore the process of planting carnation seeds and guide you through each step to ensure successful growth.
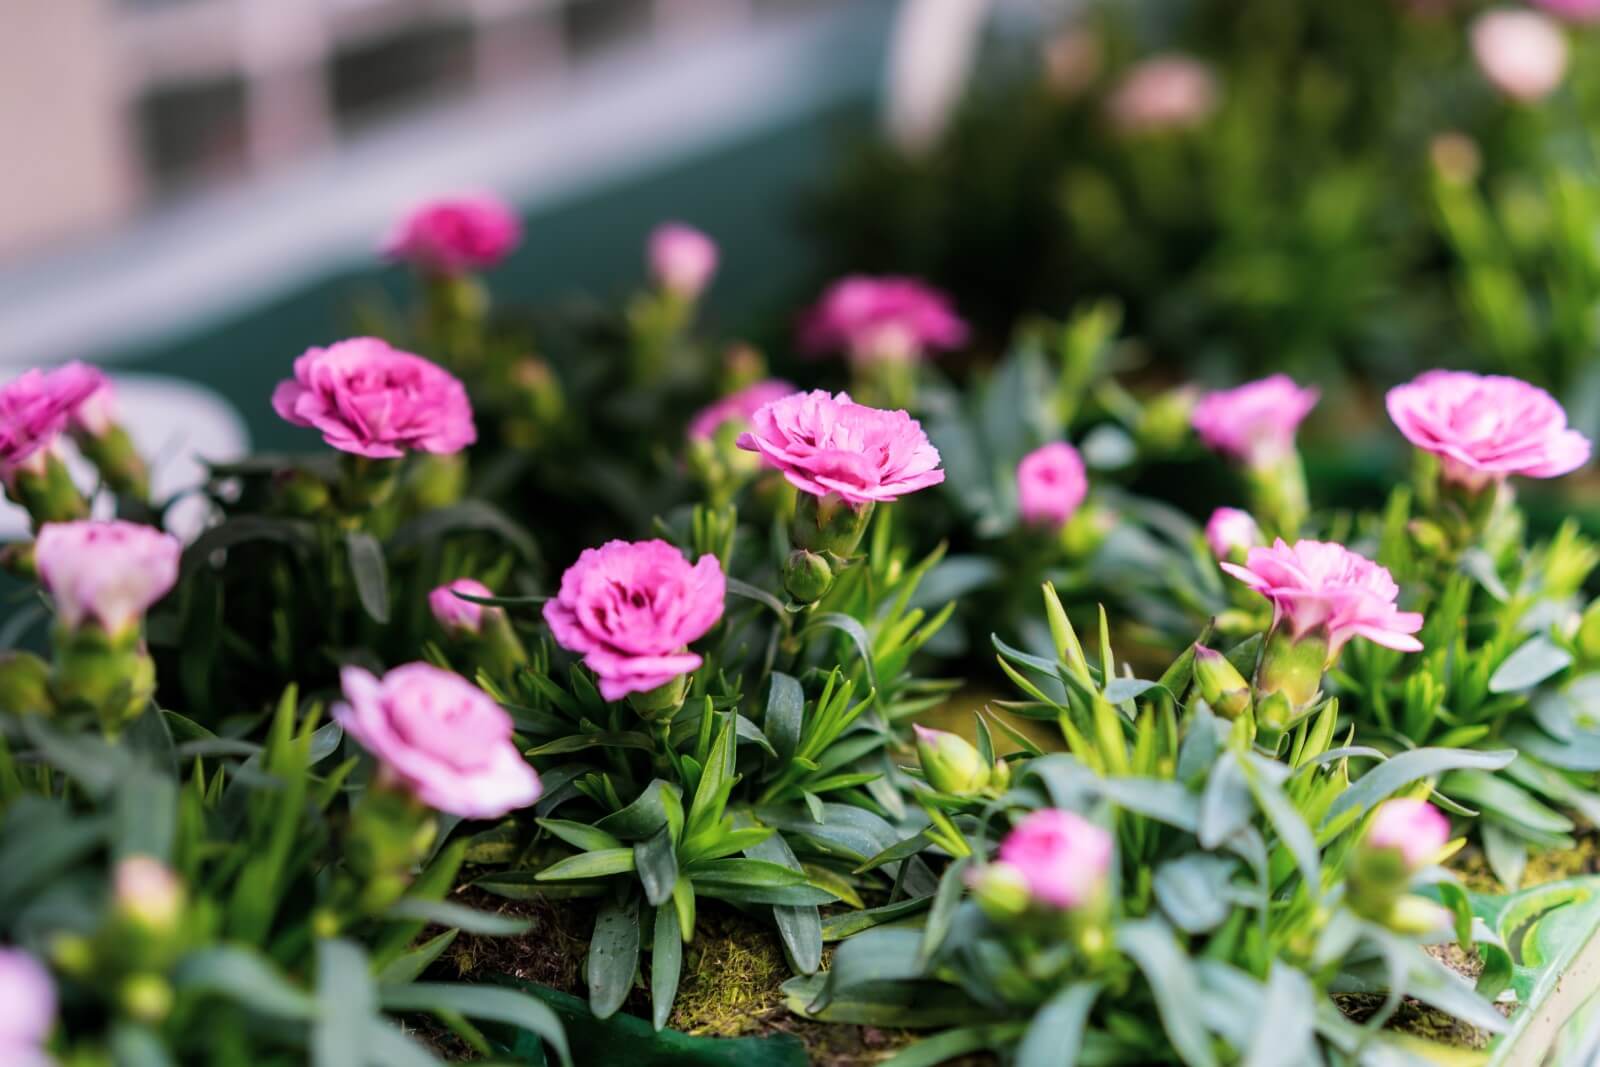
Carnations, also known as Dianthus, are beautiful perennials that come in a variety of colors and have a lovely fragrance. They make stunning additions to gardens, flower beds, and even as cut flowers for bouquets. By starting with seeds, you have the opportunity to witness the entire lifecycle of these enchanting flowers.
Before we dive into the step-by-step process of planting carnation seeds, it’s essential to understand a few key factors. Carnations thrive in well-draining soil with a slightly alkaline pH level. They require plenty of sunlight, at least six hours a day, to encourage healthy growth. It’s also essential to provide regular watering but avoid overwatering, as excessive moisture can lead to root rot.
Now that we have a basic understanding of carnation plant requirements, let’s get started on the journey of planting and growing these lovely flowers from seeds.
Key Takeaways:
- Planting carnation seeds requires proper preparation, watering, and sunlight. Follow the steps to witness the beautiful transformation from tiny seeds to vibrant, fragrant flowers.
- Caring for mature carnation plants involves regular watering, fertilization, and maintenance. Enjoy the beauty of fully matured carnation plants in your garden or as cut flowers indoors.
Read more: How To Germinate A Plant
Step 1: Preparing the Seeds
Before you can plant your carnation seeds, it’s crucial to prepare them properly. This involves a process called scarification, which helps to break down the seeds’ hard outer coating and promotes germination. Here’s how you can prepare your carnation seeds:
- Gather the seeds: If you already have carnation seeds, great! If not, you can purchase them from a reputable nursery or online seed store. Make sure to choose fresh, high-quality seeds for better chances of successful germination.
- Soak the seeds: To scarify the seeds, start by soaking them in warm water overnight. This process softens the seed coat and aids in germination. Use a shallow container and fill it with warm water. Place the seeds in the container and let them soak for 24 hours.
- Remove the outer coat (optional): After soaking, you can gently rub the seeds between your fingers to remove the softened outer coating. This step is optional, but it can help speed up germination. Just be careful not to damage the fragile embryos inside.
By following these steps, you’ll ensure that your carnation seeds are adequately prepared for germination. Now that the seeds are ready, let’s move on to selecting the planting container in the next step.
Step 2: Selecting the Planting Container
Choosing the right planting container is essential for the successful growth of your carnation seeds. Here are some factors to consider when selecting a container:
- Size: Carnation seeds need enough space to develop healthy roots and grow into strong seedlings. Opt for a container that provides ample room for the seeds to spread their roots. A container with a depth of at least 2-3 inches should be sufficient.
- Drainage: Good drainage is crucial to prevent waterlogging, which can lead to root rot. Look for a container with drainage holes at the bottom to ensure excess water can escape freely.
- Material: There are various options for container materials, such as plastic, ceramic, or clay pots. Each has its pros and cons. Plastic containers are lightweight and retain moisture well, while clay pots are porous and allow for better airflow. Choose a material that suits your specific needs and preferences.
- Number of seeds: Consider the number of carnation seeds you want to plant. If you have a significant number of seeds, you may need multiple containers or a larger size planter to accommodate them all.
Once you have chosen the right container, it’s time to move on to the next step: planting the prepared carnation seeds.
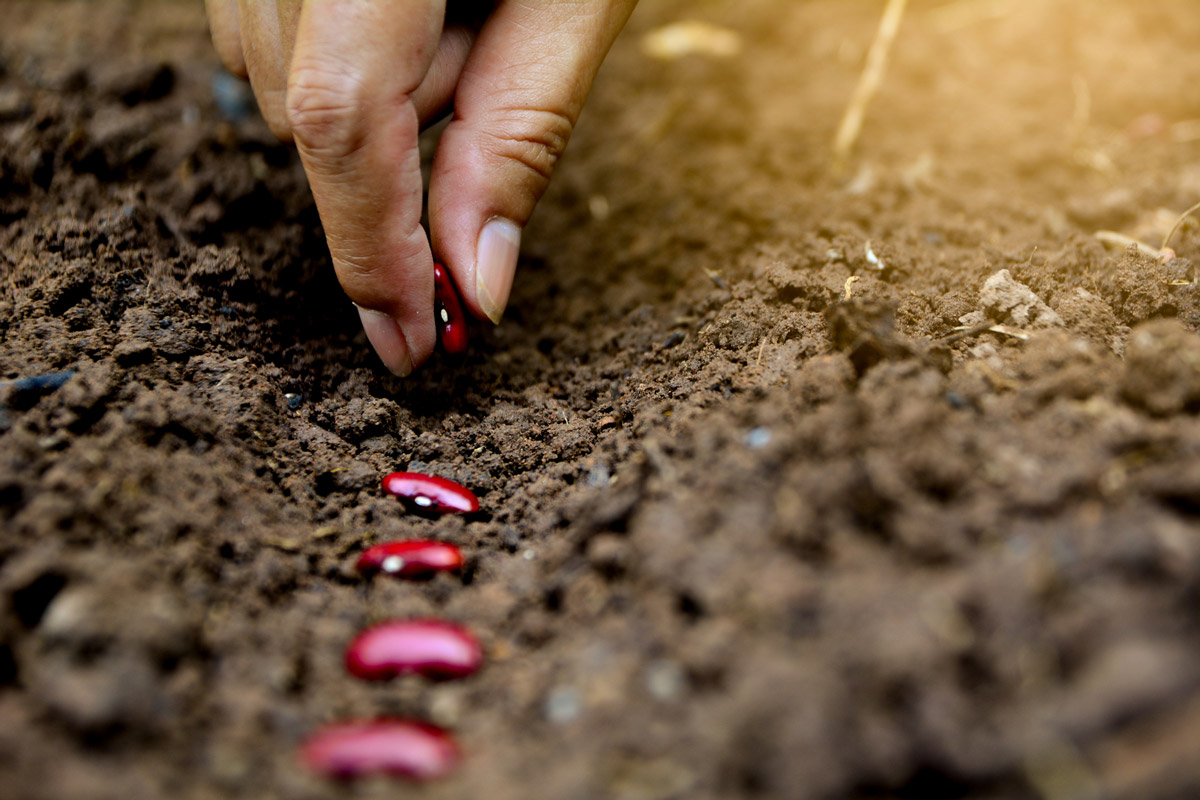
Step 3: Planting the Seeds
Now that you’ve prepared the carnation seeds and selected a suitable planting container, it’s time to plant the seeds. Follow these steps to ensure proper planting:
- Fill the container: Start by filling the planting container with a well-draining potting mix. You can use a commercial potting mix or create your own by combining equal parts of peat moss, perlite, and compost. Fill the container about three-fourths full, leaving enough space for the seeds and future growth.
- Sow the seeds: Take the prepared carnation seeds and gently press them into the potting mix, ensuring they are evenly spaced and not overcrowded. Plant the seeds at a depth of about 1/4 inch, covering them lightly with soil.
- Label the container: To keep track of the variety and planting date, it’s helpful to label the container with the name of the carnation variety and the date of planting. This information will come in handy as the seeds start to germinate and grow.
- Water gently: After planting the seeds, water the container gently using a watering can or spray bottle. Be careful not to wash away the seeds or disturb their position. The soil should be kept moist but not soaking wet during the germination process.
Now that your carnation seeds are planted, it’s time to move on to the next step: providing proper watering to support their growth.
Step 4: Providing Proper Watering
Proper watering is essential for the successful germination and growth of your carnation seeds. Here are some guidelines to follow when watering your newly planted seeds:
- Monitor moisture levels: Pay close attention to the moisture levels in the soil. Carnation seeds need consistent moisture to germinate, but overwatering can lead to root rot. Use your finger to test the soil’s moisture level. If it feels dry about an inch below the surface, it’s time to water.
- Water gently: When watering your carnation seeds, do it gently to avoid displacing the seeds or causing damage to the delicate seedlings. Use a watering can or a spray bottle with a fine mist setting to evenly distribute water over the soil surface.
- Avoid waterlogging: Ensure proper drainage in the container to prevent waterlogging. Excessive water retention can suffocate the roots and lead to fungal diseases. If you notice water pooling at the bottom of the container, adjust the drainage holes or remove excess water.
- Consistency is key: Establish a consistent watering routine to provide the optimal amount of moisture for your carnation seeds. Aim to keep the soil evenly moist but not overly saturated. Avoid allowing the soil to dry out completely, as this can hinder germination.
- Observe seedling growth: As the seedlings start to emerge, adjust your watering accordingly. Gradually increase the amount of water to support their growing needs. However, always monitor the soil’s moisture level and avoid overwatering.
Remember, providing appropriate watering is crucial for the healthy development of your carnation seeds. Now that your seeds are well-watered, let’s move on to discussing the importance of adequate sunlight in the next step.
When planting carnation seeds, make sure to use well-draining soil and keep the seeds moist but not waterlogged. Plant the seeds at a depth of 1/8 inch and place them in a sunny location. Keep the soil consistently moist until the seeds germinate.
Read more: How To Plant Seed
Step 5: Ensuring Adequate Sunlight
Adequate sunlight is essential for the proper growth and development of your carnation seeds. Here’s how you can ensure your seeds receive the right amount of sunlight:
- Find the right location: Choose a location that receives at least six hours of direct sunlight each day. Ideally, this spot should be well-drained and have good air circulation to prevent fungal diseases.
- Indoor vs. outdoor: Depending on the climate and season, you can choose to grow your carnation seeds indoors or outdoors. If starting indoors, place the container near a south-facing window or use grow lights to provide sufficient light for the seeds.
- Rotate the container: If growing your carnation seeds indoors, consider rotating the container every few days. This will ensure that all sides of the seedlings receive equal exposure to sunlight, promoting even growth.
- Protect from extreme heat: While carnations love sunlight, they can be sensitive to extreme heat, especially if grown outdoors during the peak summer months. In such cases, provide some shade or use light shade cloth to protect the seedlings from intense sunlight.
Light is a vital factor in the growth and flowering process of carnations. It helps in photosynthesis, which provides energy for the plants. By ensuring adequate sunlight, you’ll give your carnation seeds the best chance to thrive. In the next step, we’ll discuss monitoring and maintaining the growth of your seedlings.
Step 6: Monitoring and Maintaining Seedling Growth
Monitoring and maintaining the growth of your carnation seedlings is crucial to ensure their healthy development. Here are some important steps to follow:
- Observe seedling emergence: After a couple of weeks, you should start to see the tiny seedlings sprouting from the soil. Take note of their growth rate and appearance. Healthy seedlings will have bright green leaves and sturdy stems.
- Thin out overcrowded seedlings: If you notice overcrowding in the container, it’s important to thin out the seedlings. Gently remove the weaker or overcrowded seedlings, leaving only the strongest ones. This will give them enough space and resources to grow properly.
- Maintain consistent moisture: Continue to monitor the moisture levels in the soil and water as needed. As the seedlings grow, they may require more water to support their increased size and water uptake. Still, avoid overwatering or letting the soil dry out completely.
- Fertilize judiciously: Once the seedlings have a few sets of true leaves, you can introduce a diluted balanced liquid fertilizer. Follow the instructions on the fertilizer package and apply it sparingly to avoid overfeeding the seedlings.
- Provide support: As the carnation seedlings grow taller, they may need support to prevent them from toppling over or bending. Use small stakes or plant supports to gently prop up the seedlings, allowing them to grow vertically and develop strong stems.
- Protect from pests: Keep an eye out for common pests such as aphids or snails, which can damage the seedlings. Remove any pests manually or use organic pest control methods to protect your carnation seedlings.
By closely monitoring and providing necessary care, you’ll ensure the healthy growth of your carnation seedlings. In the next step, we’ll discuss the process of transplanting the seedlings once they are ready.
Step 7: Transplanting the Seedlings
Transplanting your carnation seedlings is an important step in their growth journey, allowing them to establish themselves in a more permanent location. Here are the key steps to follow when transplanting the seedlings:
- Choose the right timing: Wait until the seedlings have grown a few inches tall and have developed a good root system. This usually takes around 6-8 weeks from planting the seeds. Transplant them outdoors when the threat of frost has passed and the weather is consistently mild.
- Select the transplant location: Find a well-drained area in your garden that receives plenty of sunlight. Carnations prefer slightly alkaline soil, so if needed, amend the soil with lime to adjust the pH level before transplanting.
- Prepare the planting hole: Dig a hole in the transplant location that is slightly larger than the root ball of the seedling. Gently remove the seedling from the container, being careful not to damage the roots.
- Place the seedling: Lower the seedling into the planting hole, ensuring the top of the root ball is level with the soil surface. Backfill the hole with soil and gently press it down to secure the seedling in place.
- Water thoroughly: After transplanting, give the seedling a thorough watering to help settle the soil around the roots. This will aid in the establishment of the young plant in its new location.
- Provide post-transplant care: Protect the newly transplanted seedlings from harsh weather conditions. Shade them with a light cloth or use a temporary shelter to shield them from intense sun or heavy rain until they are well-established.
Transplanting the seedlings allows them to spread their roots and grow into mature carnation plants. With proper care and attention, they will thrive in their new outdoor environment. In the next step, we’ll discuss caring for mature carnation plants.
Step 8: Caring for Mature Carnation Plants
Once your carnation plants have reached maturity, they require ongoing care and maintenance to ensure their health and longevity. Here are the essential steps for caring for mature carnation plants:
- Watering: Provide regular watering to keep the soil consistently moist, but not waterlogged. Deep watering once a week is generally sufficient, but adjust based on weather conditions and the moisture needs of the specific carnation variety.
- Fertilization: Feed your carnation plants with a balanced slow-release fertilizer several times during the growing season. Follow the instructions on the fertilizer package and avoid overfertilization, as it can lead to excessive foliage growth and fewer flowers.
- Deadheading: Remove faded or spent flowers regularly through a process called deadheading. This not only improves the plant’s appearance but also encourages continued blooming by redirecting energy towards new growth and flower production.
- Pruning: Prune your carnation plants in early spring to maintain their shape and promote bushier growth. Trim back any dead or damaged stems and remove any weak or overcrowded shoots. This will improve air circulation and help prevent disease.
- Weed control: Keep the area around your carnation plants free from weeds. Weeds compete with the plants for nutrients and water, so regular weeding is essential to ensure optimal growth and reduce the risk of pests and diseases.
- Protection from pests and diseases: Monitor your carnation plants for any signs of pests or diseases, such as aphids, powdery mildew, or rust. Use organic pest control methods or consult with a local garden center for appropriate treatments if necessary.
- Winter protection: In colder climates, provide winter protection for your carnation plants. Apply a layer of mulch around the base of the plants to insulate the roots and protect them from freezing temperatures. You can also cover the plants with a frost cloth or move potted plants indoors during extreme winter conditions.
By following these care guidelines, your mature carnation plants will continue to bloom beautifully and provide enjoyment year after year. Remember to observe your plants regularly and address any issues promptly to maintain their health and vigor.
Congratulations! You’ve completed all the steps necessary to plant, grow, and care for carnation seeds from start to finish. With your newfound knowledge and dedication, you’ll be rewarded with a stunning display of colorful and fragrant carnation blooms. Enjoy the beauty and fulfillment that gardening brings!
Happy gardening!
Read more: How To Plant Seeds Indoors
Conclusion
Planting and growing carnations from seeds is a rewarding and fulfilling experience for any gardening enthusiast. By following the step-by-step process outlined in this article, you can successfully plant, nurture, and care for your carnation seeds, leading to the beautiful emergence of these captivating flowers.
From preparing the seeds through scarification to selecting the right planting container, providing proper watering, ensuring adequate sunlight, and monitoring seedling growth, each step plays a vital role in the success of your carnation plants. Transplanting the seedlings and caring for mature carnation plants are equally important in maintaining their health and promoting prolific blooming.
Through regular observation, attention to detail, and taking appropriate actions, including watering, fertilizing, pruning, and protecting against pests and diseases, you can enjoy the beauty of fully matured carnation plants that brighten your garden or bring joy indoors as cut flowers.
Remember, gardening is not just about following a set of instructions. It’s about nurturing and connecting with nature. Take the time to appreciate the unique growth of each plant, understand its specific needs, and adapt your care accordingly. Gardening is a continuous learning process, and with each success and even failure, you deepen your knowledge and enjoyment of this fulfilling hobby.
So, roll up your sleeves, get your hands dirty, and embark on the wonderful journey of planting carnation seeds. Witness the transformation from tiny seeds to vibrant, fragrant flowers, and let the joy and beauty they bring fill your life and surroundings. Happy gardening!
Ready to spruce up your garden further? If you're keen on adding some charm with barriers, our article on garden fence ideas offers creative solutions that might just fit your style. On another note, for those interested in broadening types of blossoms, our guide on planting a flower garden provides practical advice to enrich your gardening journey. Both reads promise to be engaging and filled with useful tips, perfect for garden lovers looking to enhance their outdoor spaces.
Frequently Asked Questions about How To Plant Carnation Seeds
Was this page helpful?
At Storables.com, we guarantee accurate and reliable information. Our content, validated by Expert Board Contributors, is crafted following stringent Editorial Policies. We're committed to providing you with well-researched, expert-backed insights for all your informational needs.


0 thoughts on “How To Plant Carnation Seeds”