Home>Garden Essentials>How To Shell Pumpkin Seeds
Garden Essentials
How To Shell Pumpkin Seeds
Modified: March 24, 2024
Learn how to shell pumpkin seeds in your garden and enjoy a delicious and healthy snack. Find easy-to-follow techniques and tips for a successful harvest.
(Many of the links in this article redirect to a specific reviewed product. Your purchase of these products through affiliate links helps to generate commission for Storables.com, at no extra cost. Learn more)
Introduction
Welcome to the wonderful world of pumpkin seeds! Whether you’re a seasoned gardener or a curious amateur, there’s something special about harvesting and enjoying your own pumpkin seeds. Not only are they nutritious and delicious, but they also provide a rewarding experience that connects you to nature and the cycle of life.
In this article, we will guide you through the process of shelling pumpkin seeds right from your very own garden. We’ll cover everything from harvesting the seeds to seasoning and roasting them to perfection. So put on your gardening gloves and get ready to embark on a journey of flavors and textures that will delight your taste buds and impress your friends and family.
Before we dive into the step-by-step process, let’s take a moment to appreciate the beauty and versatility of pumpkin seeds. These small, oval-shaped gems are packed with essential nutrients such as protein, fiber, healthy fats, and a wide range of vitamins and minerals. They offer a wide array of health benefits, from improving digestion and boosting the immune system to promoting heart health and reducing inflammation.
Not only are pumpkin seeds a nutritional powerhouse, they also add a delightful crunch and nuttiness to a variety of dishes. Whether sprinkled over salads, stirred into granola or yogurt, used as a topping for soups or stews, or simply enjoyed as a snack on their own, pumpkin seeds lend a unique flavor and texture that can elevate any recipe.
Now that we have a deep appreciation for the incredible potential of pumpkin seeds, it’s time to gather our supplies and get started on the shelling process. Don’t worry, it’s easier than you might think, and soon you’ll be enjoying the fruits of your labor in the form of homemade, freshly shelled pumpkin seeds.
So grab your pumpkin and let’s dive into the step-by-step process of harvesting, cleaning, boiling, draining, seasoning, and roasting these delightful seeds. Get excited for a culinary adventure that will not only tantalize your taste buds, but also fill your home with the comforting aroma of roasted pumpkin seeds.
Key Takeaways:
- Harvesting and shelling pumpkin seeds is a fun and rewarding process that connects you to nature. Enjoy the journey from picking a ripe pumpkin to roasting the seeds for a delicious and nutritious snack.
- Pumpkin seeds are packed with nutrients and can be enjoyed in many ways. Whether as a snack, salad topper, or baking ingredient, homemade pumpkin seeds offer a tasty and versatile treat that you can share with others.
Read more: How To Remove Pumpkin Seed Shell
Supplies Needed
Before we get started with shelling pumpkin seeds, let’s make sure we have all the necessary supplies on hand. Here’s a list of items you’ll need:
- A ripe pumpkin
- A cutting knife
- A spoon or scoop
- A large bowl or colander
- A pot for boiling
- A baking sheet
- Parchment paper or silicone baking mat
- Olive oil or melted butter
- Seasonings of your choice (salt, garlic powder, paprika, etc.)
- Airtight containers for storage
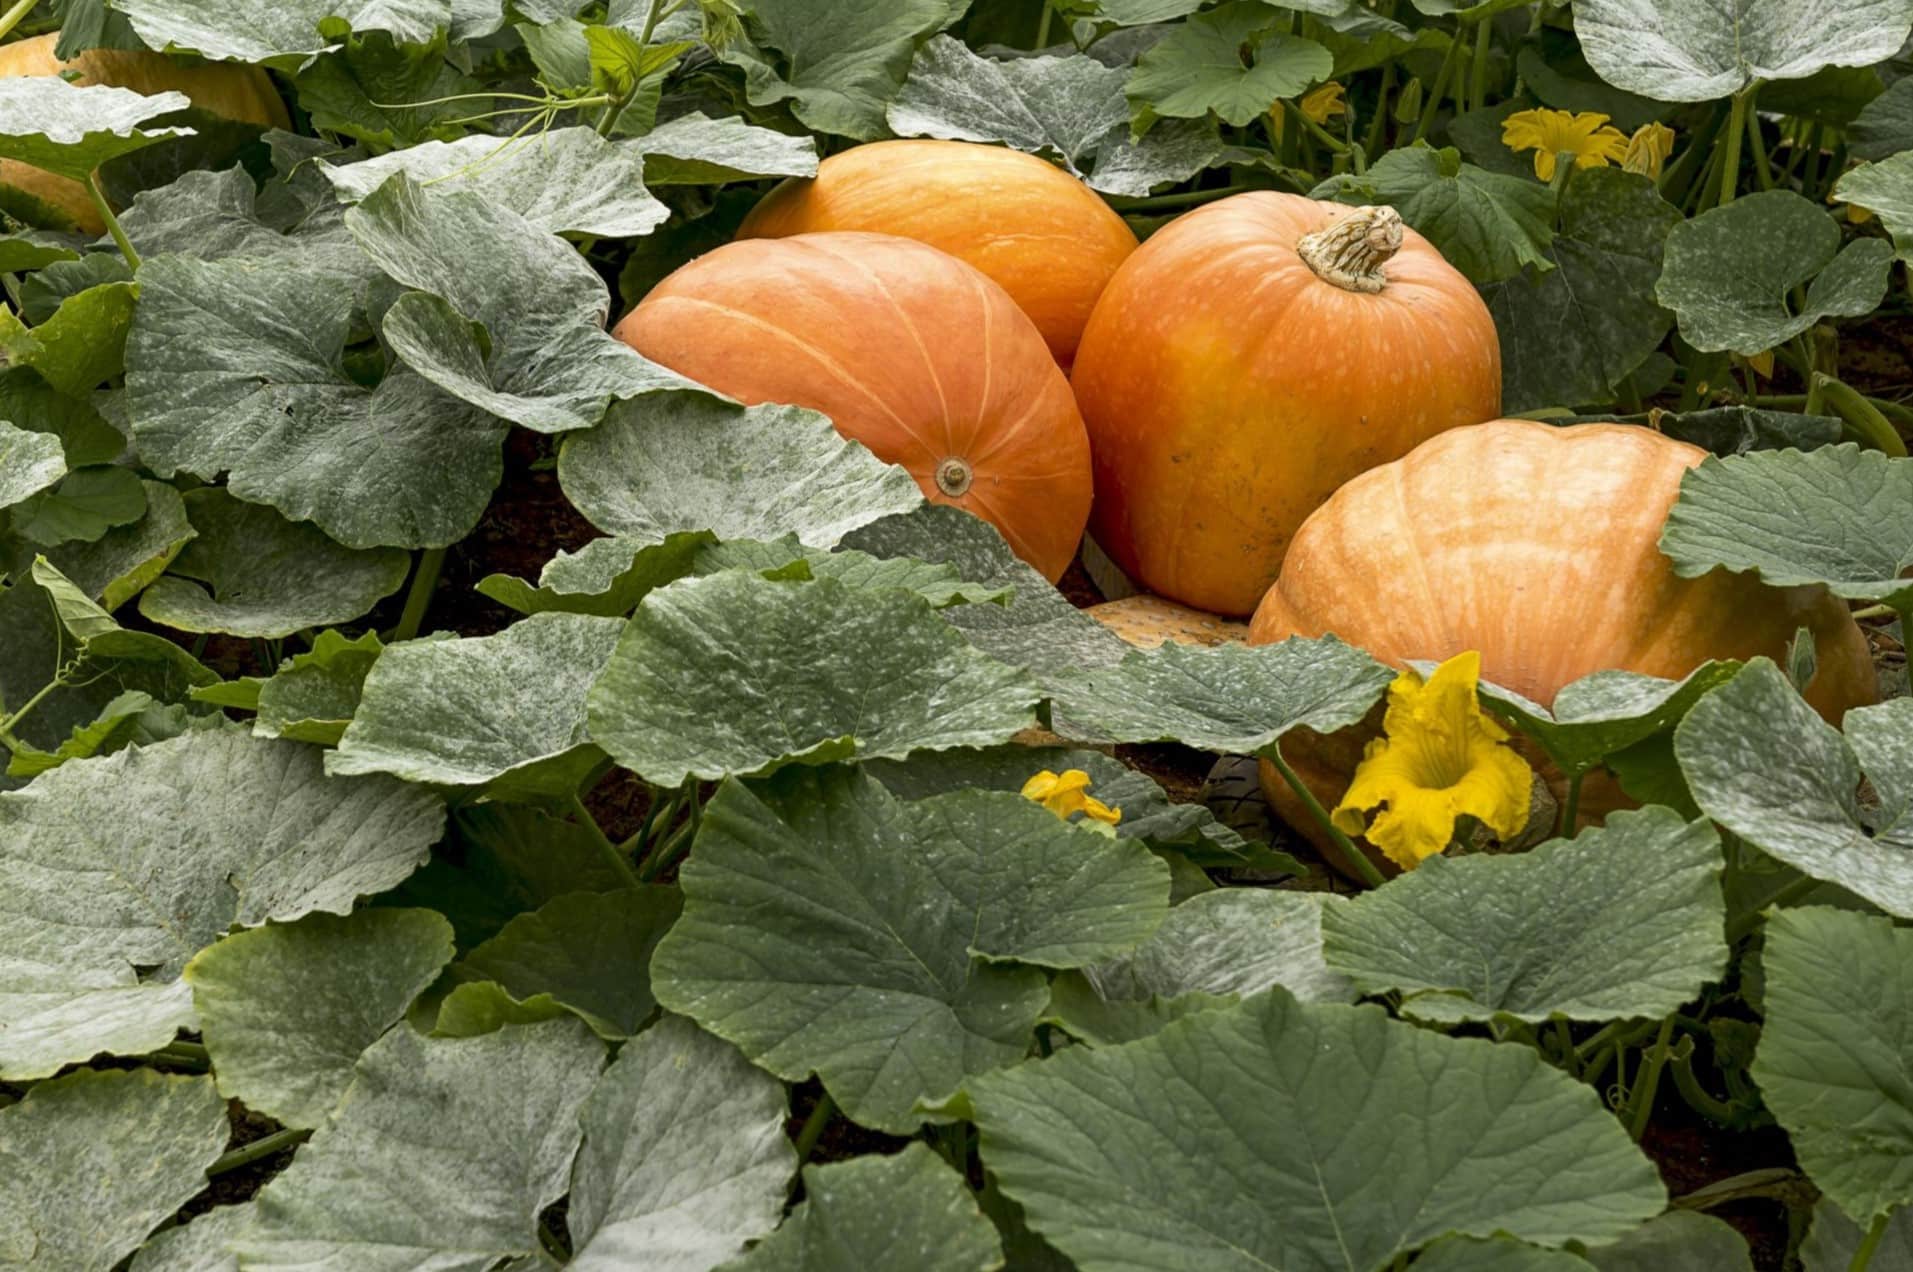
Now that you have gathered all the necessary supplies, you’re ready to begin the process of shelling your pumpkin seeds. Make sure to choose a ripe pumpkin that is fully orange and has a hard skin. This will ensure that the seeds inside are mature and ready for harvesting.
Once you have your pumpkin and supplies ready, find a clean and spacious workspace where you can carry out the shelling process comfortably. It’s also a good idea to have a trash bin or compost bucket nearby to dispose of any pumpkin scraps or debris.
Now that we’re fully equipped, let’s move on to the exciting steps of harvesting and preparing our pumpkin seeds for delicious snacking or cooking adventures!
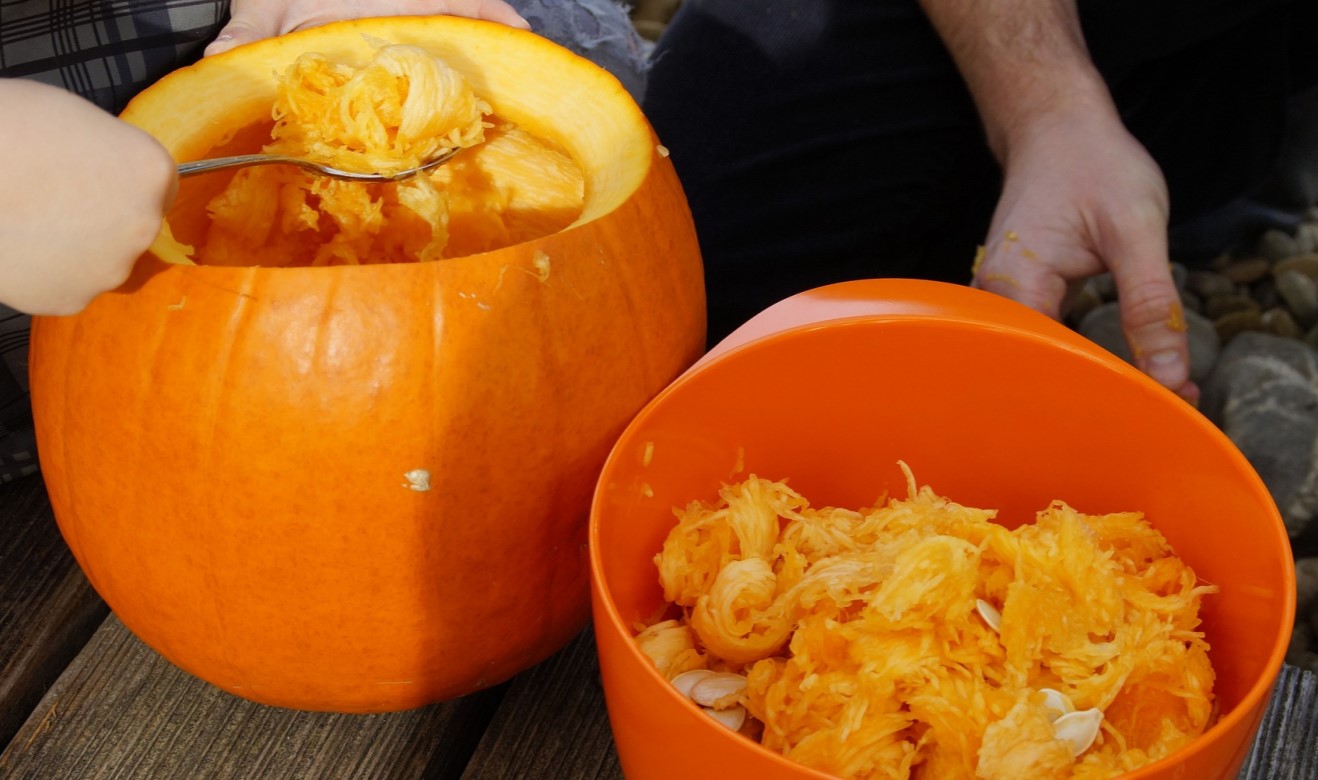
Step 1: Harvesting the Pumpkin Seeds
The first step in shelling pumpkin seeds is to harvest them from the pumpkin itself. Follow these simple instructions to ensure a successful and efficient harvesting process:
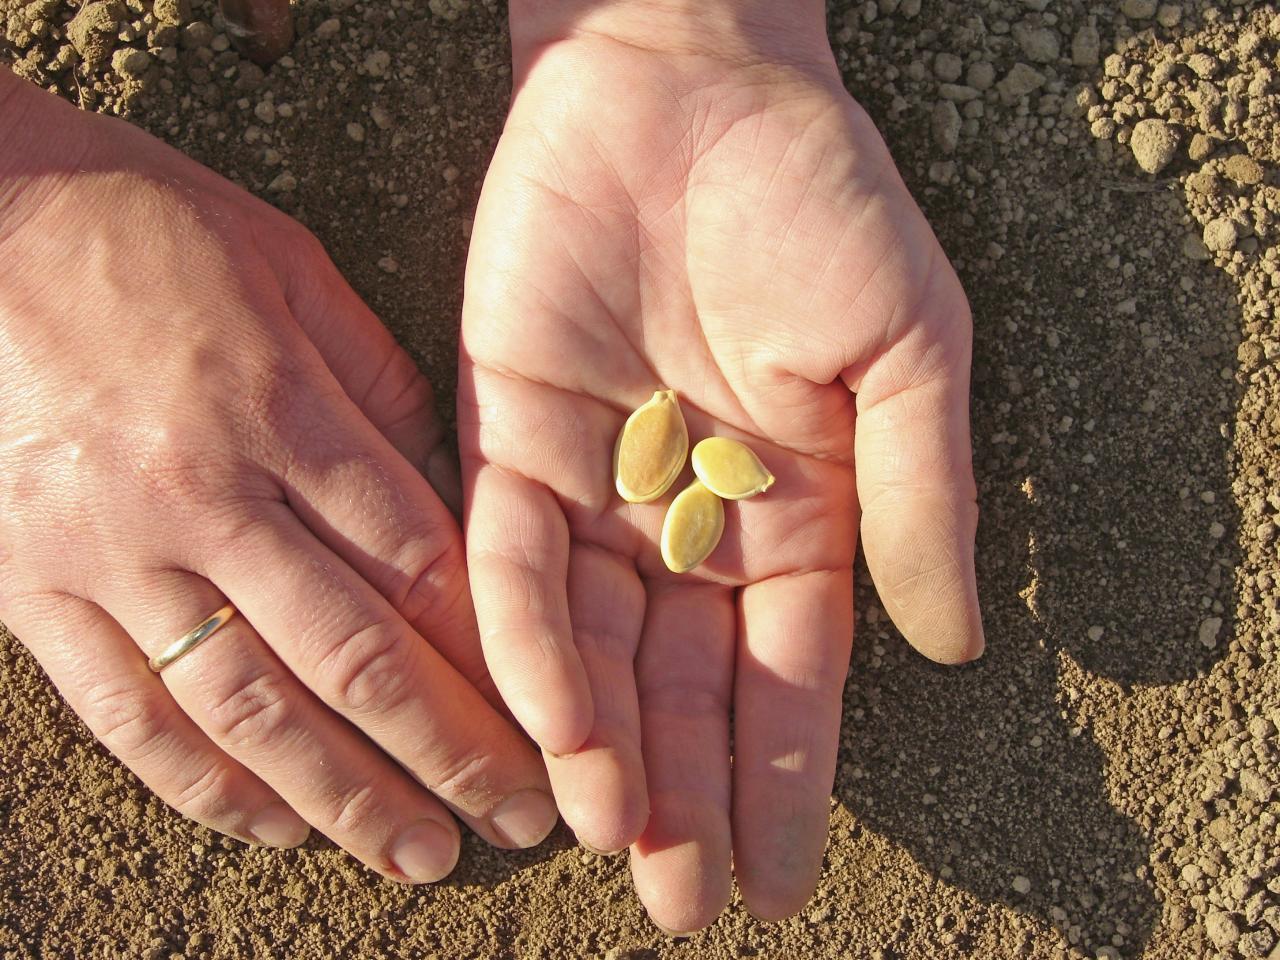
- Choose a ripe pumpkin: Select a pumpkin that is fully mature and has an even, deep orange color. Avoid pumpkins that are green or have soft spots, as they may not have fully developed seeds.
- Prepare the pumpkin: Place the pumpkin on a stable surface and use a sharp knife to carefully cut off the stem, creating a flat surface to work with.
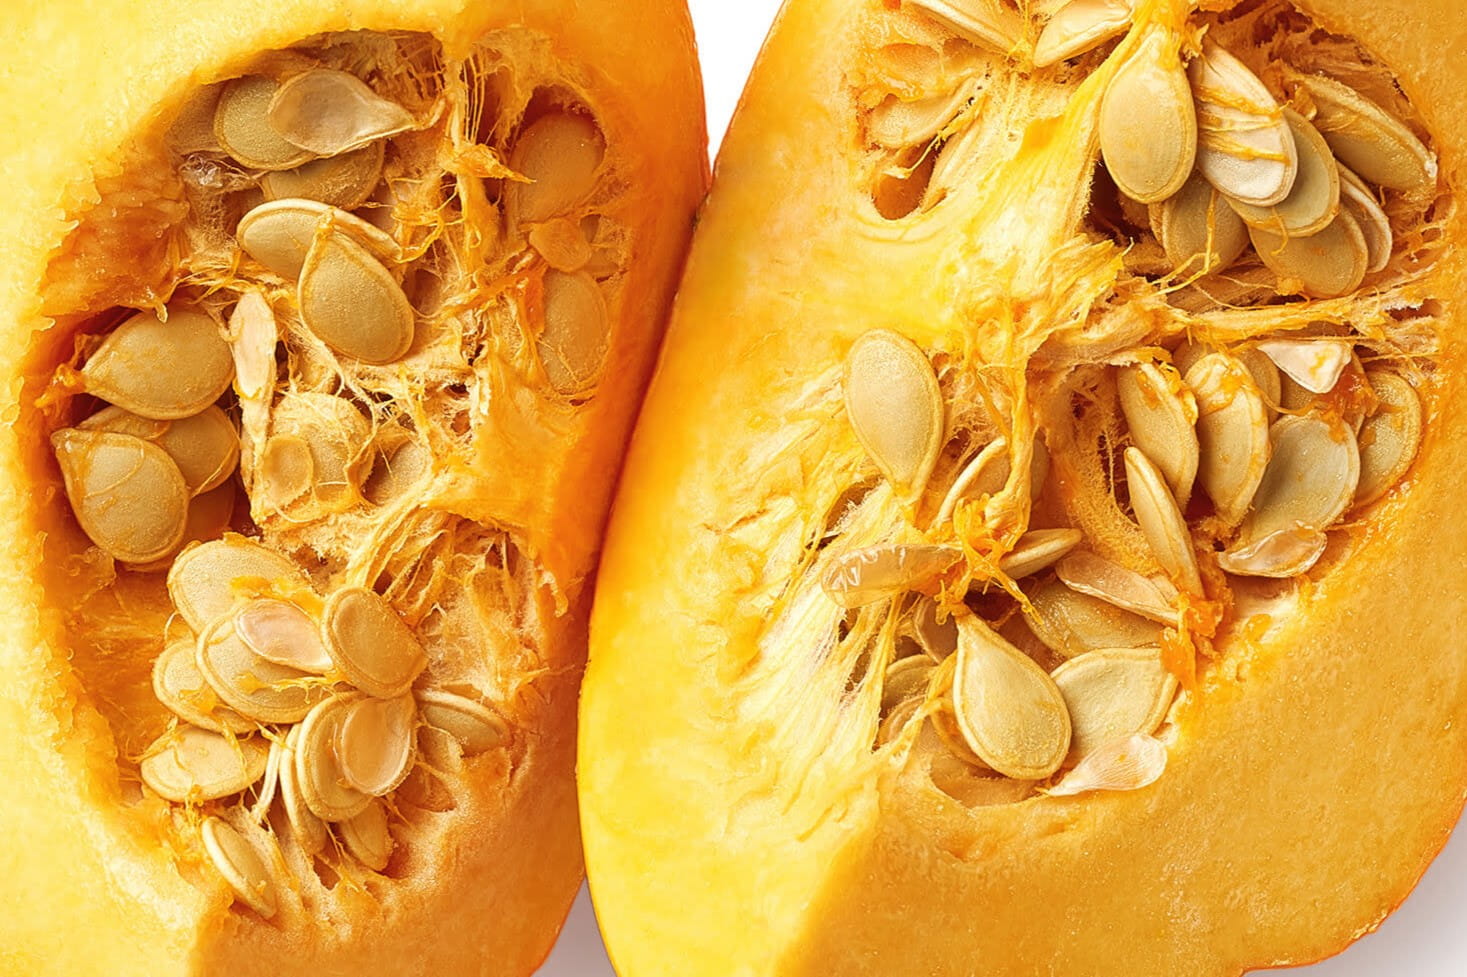
- Cut open the pumpkin: With the stem removed, slice the pumpkin in half from top to bottom. Take your time and use a steady hand to ensure an even cut.
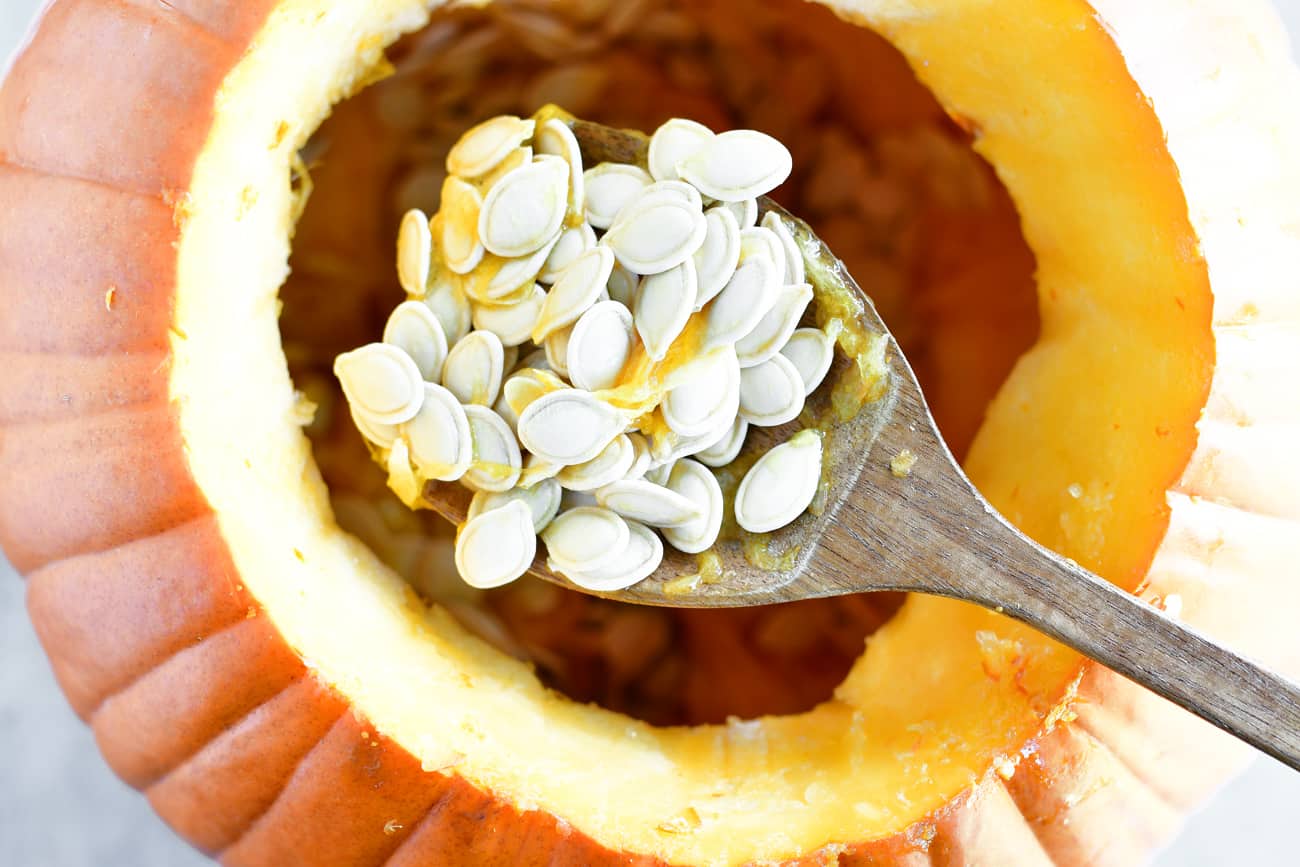
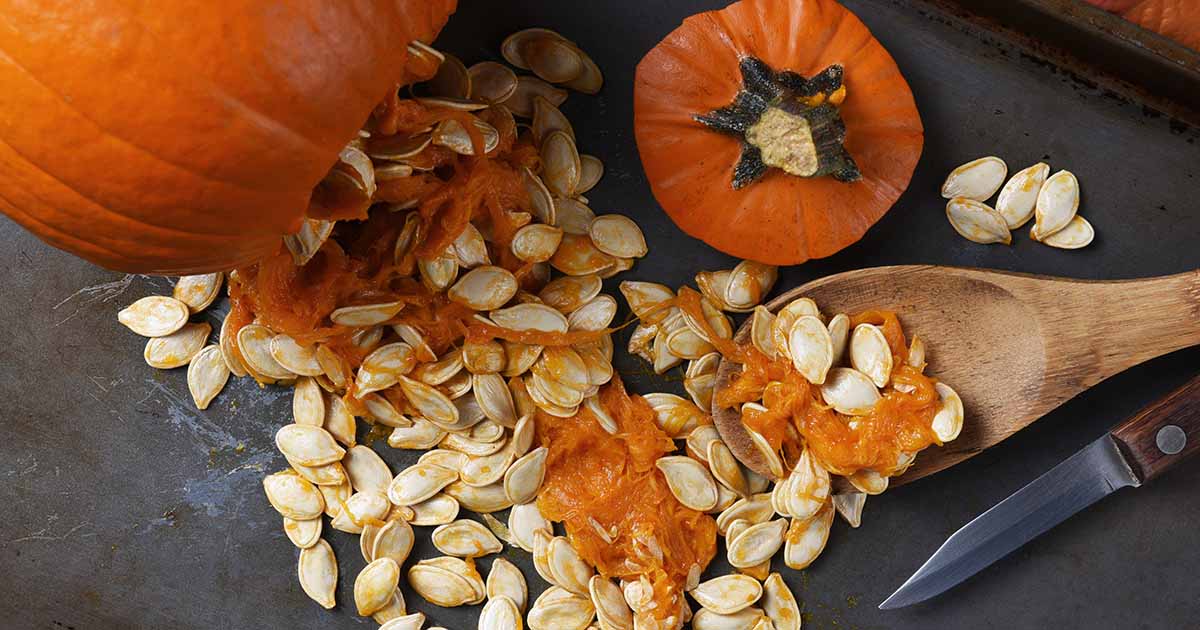
- Remove the seeds: Use a spoon or scoop to scrape out the seeds from the pumpkin’s interior. Start from the top of the pumpkin and work your way down, gently loosening the seeds from the stringy pulp as you go.
- Separate the seeds: Collect the seeds in a large bowl or colander, making sure to remove any remaining pulp or flesh. You can use your hands or a spoon to gently separate the seeds from any clinging strands.
As you harvest the pumpkin seeds, take a moment to enjoy the sensory experience. The sight of the plump seeds tumbling into the bowl, the touch of the slimy pulp between your fingers, and the earthy smell of the pumpkin’s interior all contribute to the joy and satisfaction of growing and harvesting your own food.
Once you have successfully harvested the pumpkin seeds, it’s time to move on to the next step: cleaning and preparing the seeds for optimal shelling and cooking.
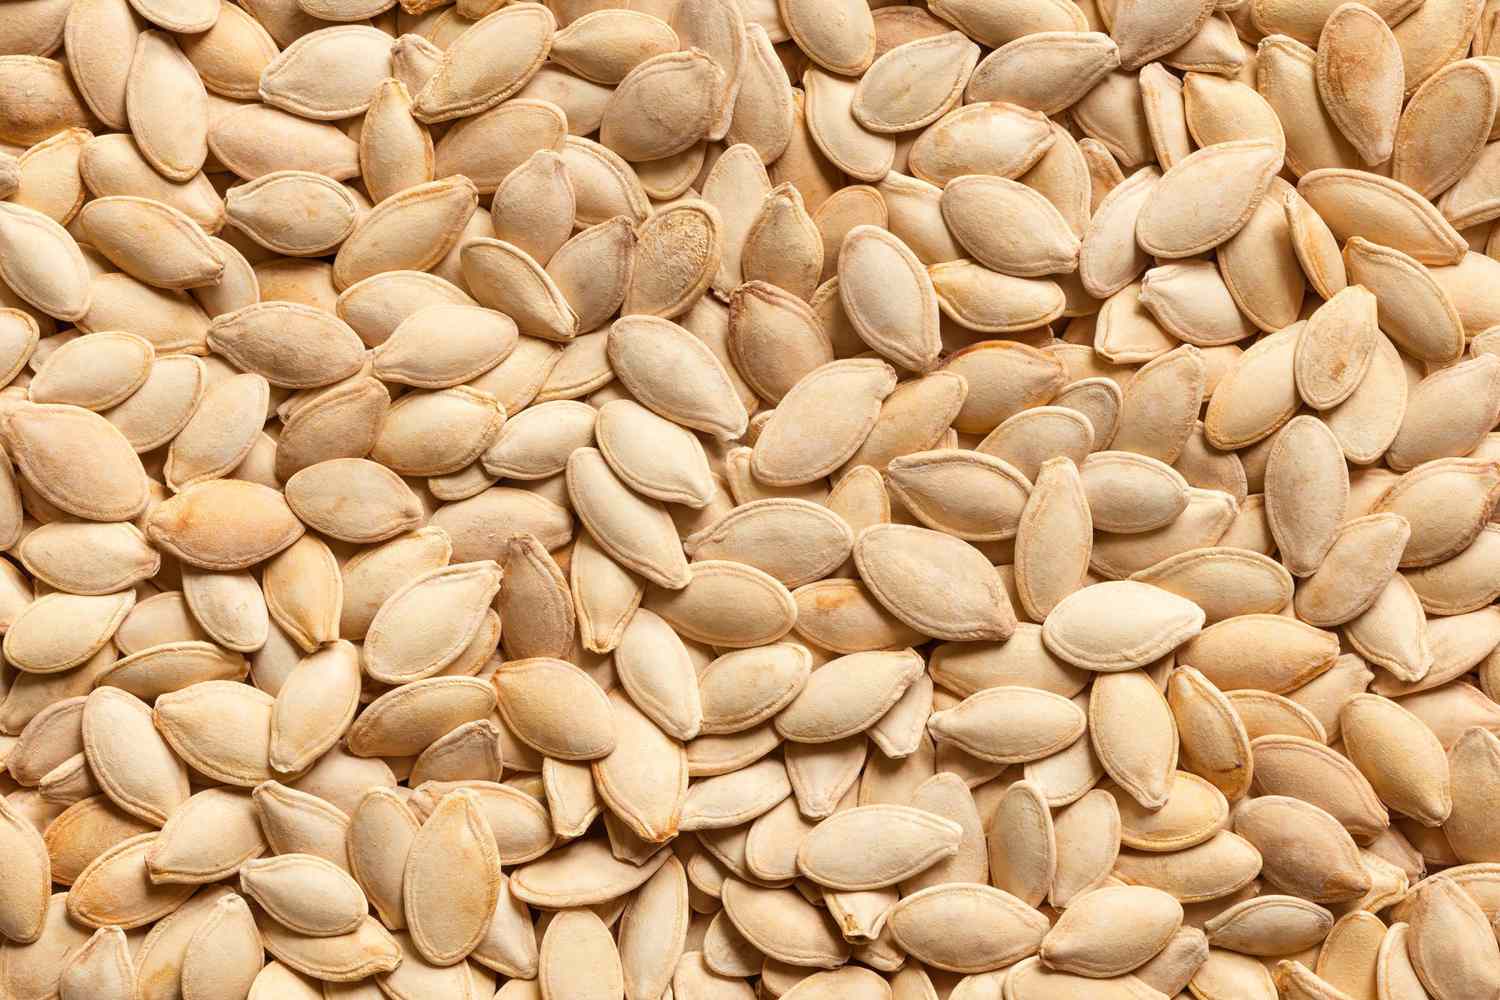
Step 2: Cleaning the Pumpkin Seeds
Now that you have harvested the pumpkin seeds, it’s important to clean them thoroughly to remove any remaining pulp or residue. Follow these simple steps to ensure your pumpkin seeds are clean and ready for the next stage of the shelling process:
- Rinse the seeds: Place the harvested pumpkin seeds in a colander or strainer and rinse them under cool running water. Use your hands to swish the seeds around, making sure to remove any clinging pulp or debris. Continue rinsing until the water runs clear.
- Pick out any remaining pulp: As you rinse the pumpkin seeds, examine them closely and use your fingers or a spoon to pick out any stubborn pieces of pulp that may still be attached. Removing all traces of pulp will ensure that your seeds are clean and ready for cooking or roasting.
- Pat dry the seeds: Once the seeds are clean, transfer them to a clean, dry kitchen towel or paper towels. Gently pat them dry to remove excess moisture. It’s important for the seeds to be as dry as possible to ensure a crisp and even texture when roasted.
Cleaning the pumpkin seeds not only helps remove unwanted debris, but it also prepares the seeds for optimal shelling and roasting. By taking the time to clean them properly, you’ll ensure that your final product is of the highest quality.
Now that your pumpkin seeds are clean and dry, it’s time to move on to the next step: boiling the pumpkin seeds to further enhance their texture and flavor.
Step 3: Boiling the Pumpkin Seeds
Boiling the pumpkin seeds is a crucial step in the shelling process, as it helps to soften the outer shell, making it easier to remove. Follow these simple instructions to boil the pumpkin seeds to perfection:
- Transfer the cleaned and dried pumpkin seeds to a pot filled with water. Make sure there is enough water to fully submerge the seeds.
- Add salt or seasonings (optional): If desired, you can add salt or other seasonings to the water to infuse the pumpkin seeds with extra flavor. A teaspoon of salt for every cup of water is a good starting point, but feel free to experiment with different spices and herbs to suit your taste preferences.
- Bring the water to a boil: Place the pot with the pumpkin seeds and seasoned water on the stovetop and bring it to a rolling boil over medium-high heat.
- Reduce heat and simmer: Once the water reaches a boil, reduce the heat to medium-low and let the seeds simmer for about 10 minutes. This simmering process will soften the outer shell, making it easier to remove later on.
- Test for doneness: After 10 minutes, remove a few seeds from the pot using a slotted spoon or a strainer. Allow them to cool slightly, then taste and evaluate their texture. The seeds should be soft with a slight crunch, and the shell should be easy to remove.
- If the seeds are not fully cooked, continue simmering for an additional 2-3 minutes and test again. Repeat this process until the seeds are cooked to your desired level of tenderness.
- Once the seeds are cooked, remove the pot from the heat and drain the seeds in a colander or strainer. Rinse them briefly with cool water to remove any excess salt or seasonings.
Now that your pumpkin seeds have been boiled to perfection, it’s time to move on to the next step: draining and drying the seeds before seasoning and roasting them to perfection.
After removing the seeds from the pumpkin, rinse them to remove any pulp. Then, spread them out on a baking sheet, drizzle with oil and sprinkle with salt. Bake at 300°F for 30 minutes, stirring occasionally, until golden brown. Enjoy as a tasty snack!
Read more: How To Toast Shelled Pumpkin Seeds
Step 4: Draining and Drying the Pumpkin Seeds
After boiling the pumpkin seeds, it’s important to drain and dry them thoroughly before proceeding with the shelling process. This step helps remove excess moisture and ensures the seeds roast evenly and become delightfully crispy. Follow these simple steps to drain and dry your pumpkin seeds:
- Transfer the boiled pumpkin seeds into a colander or strainer to drain the remaining water. Allow the seeds to sit in the colander for a few minutes, ensuring that most of the water has been drained off.
- Pat dry the seeds: Transfer the drained pumpkin seeds onto clean kitchen towels or paper towels. Gently pat them dry to remove any remaining moisture. It’s essential for the seeds to be as dry as possible to achieve the desired crispy texture during roasting.
- Spread the seeds for air-drying: Once the seeds are patted dry, spread them out in a single layer on a baking sheet or large plate. Allow them to air-dry for at least 1 to 2 hours, or until they are completely dry to the touch. This process will further remove any moisture and ensure even roasting.
During the drying process, you may notice that the pumpkin seeds become slightly sticky. This is normal, as the natural oils in the seeds can surface during drying. However, once roasted, these oils will add a delicious richness and depth of flavor to the final product.
While the pumpkin seeds are air-drying, this is a perfect time to preheat your oven and gather your seasoning ingredients. Once the seeds are dry and the oven is ready, we can move on to the exciting step of seasoning the pumpkin seeds for ultimate taste satisfaction!
Step 5: Seasoning the Pumpkin Seeds
Seasoning the pumpkin seeds is where you can get creative and add your own unique flavors to this delicious snack. Whether you prefer a classic combination of salt and pepper or want to experiment with different seasonings, this step allows you to tailor the taste to your liking. Follow these simple steps to season your pumpkin seeds:
- Preheat your oven: Before you begin seasoning the pumpkin seeds, preheat your oven to 325°F (163°C). This will ensure that the seeds get evenly roasted and crispy.
- Transfer the dried pumpkin seeds to a bowl: Once the pumpkin seeds are completely dry, transfer them to a mixing bowl.
- Add oil or melted butter: Drizzle a tablespoon of olive oil or melted butter over the pumpkin seeds. This will help the seasonings adhere and contribute to a delicious crispy texture.
- Choose your seasonings: Sprinkle your desired seasonings over the pumpkin seeds. You can keep it simple with just salt and pepper, or get adventurous and experiment with garlic powder, paprika, cumin, chili powder, or any other spice that you enjoy.
- Toss to evenly coat: Using a spoon or your hands, toss the pumpkin seeds in the bowl to ensure that they are evenly coated with the oil or melted butter and seasonings. Make sure all the seeds are well covered for maximum flavor.
Remember, the amount of seasonings you use can vary based on your preferences. Start with a small amount and add more if needed, tasting as you go to achieve the perfect balance of flavors.
Now that your pumpkin seeds are seasoned to perfection, it’s time to move on to the exciting step of roasting them in the oven. Get ready to fill your kitchen with the irresistible aroma of freshly roasted pumpkin seeds!
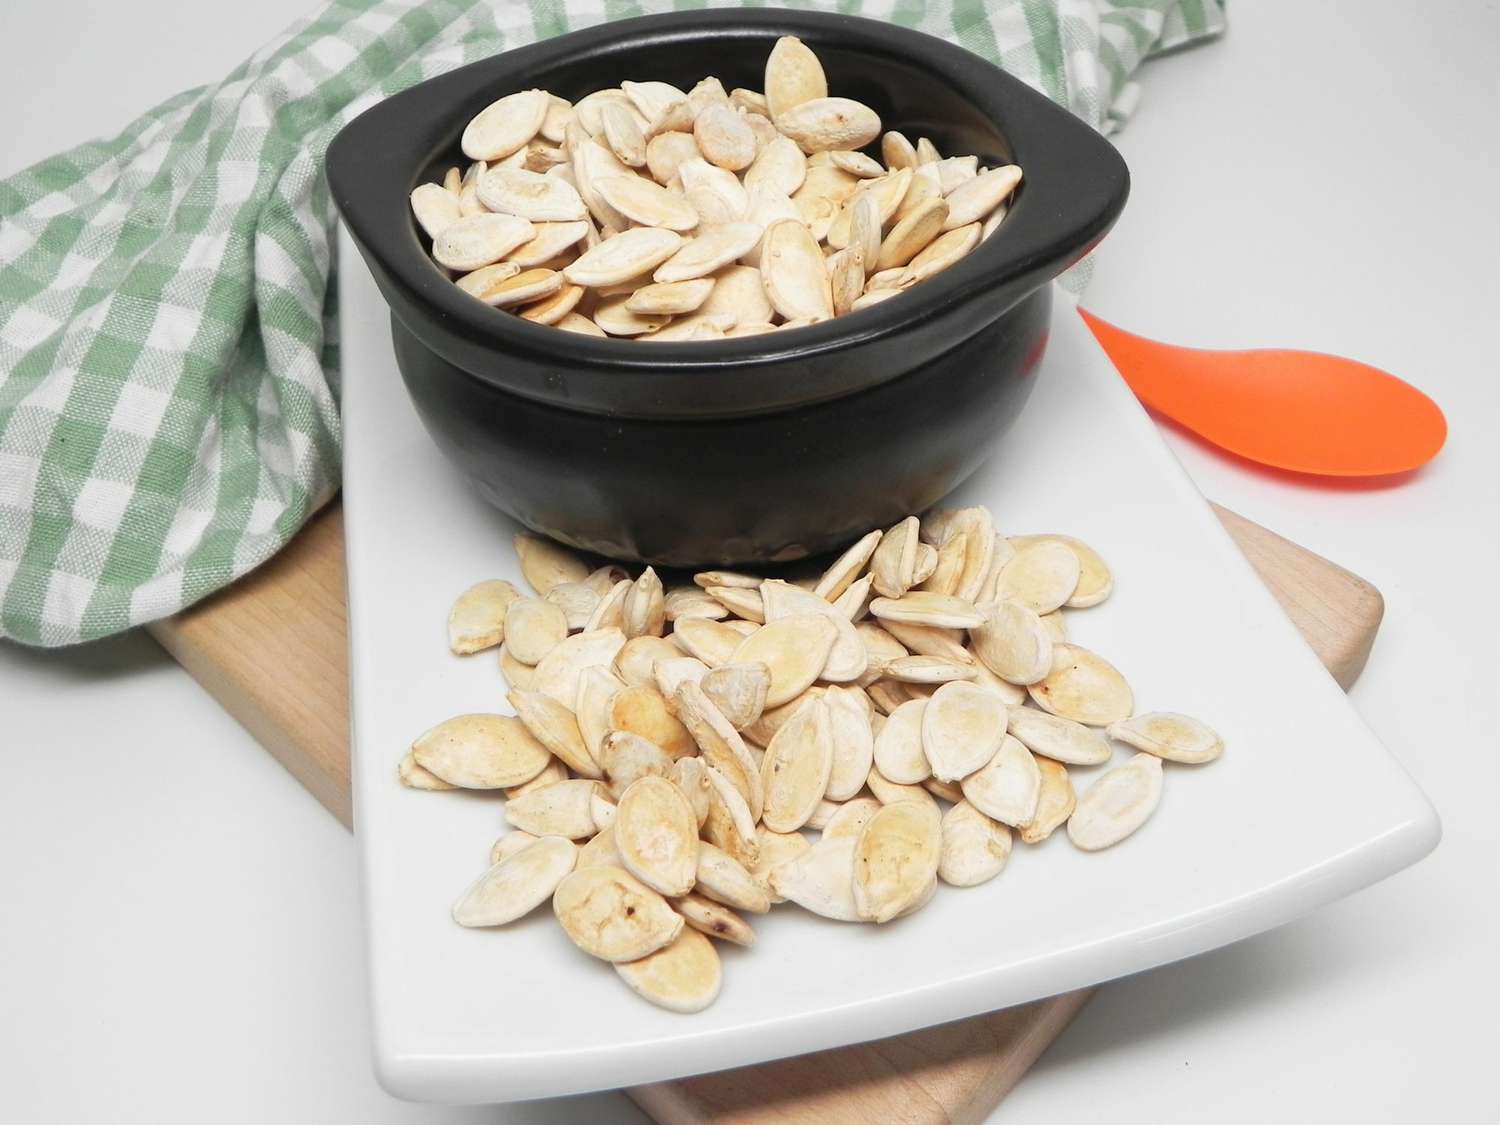
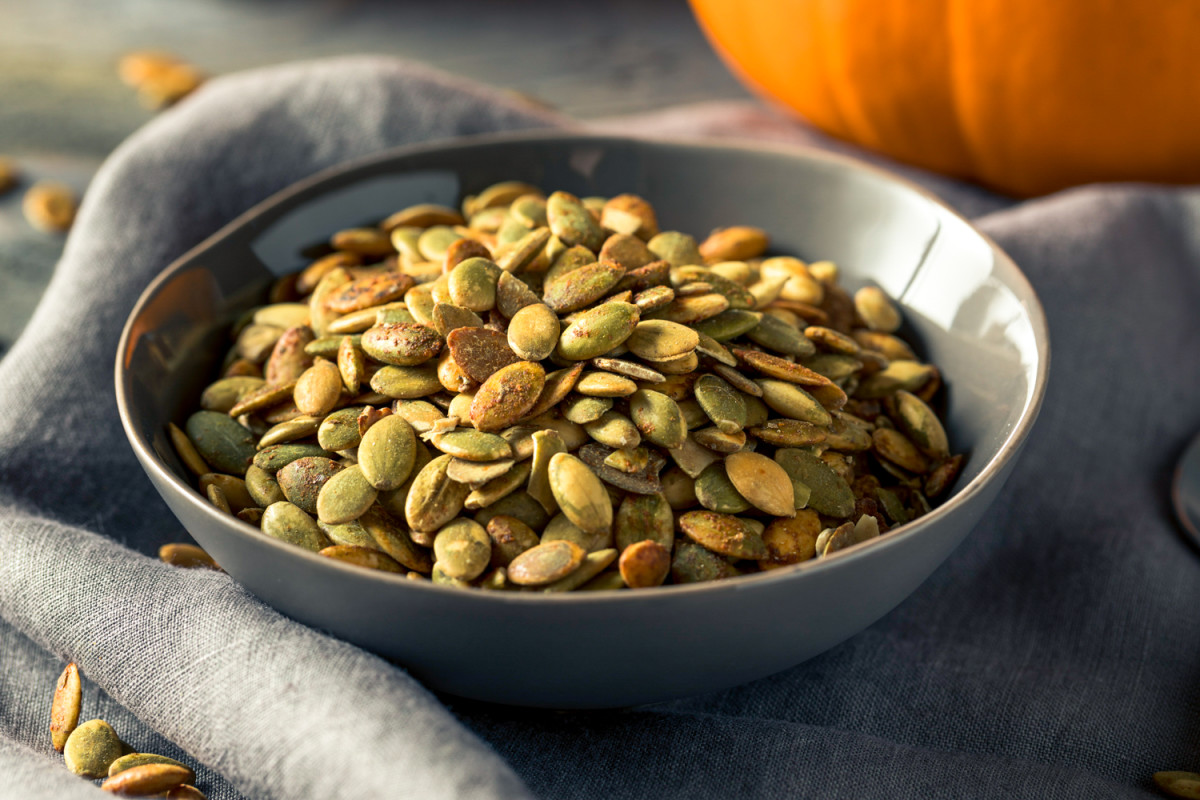
Step 6: Roasting the Pumpkin Seeds
Roasting the pumpkin seeds brings out their natural nutty flavor and creates a deliciously crispy texture. Follow these simple steps to roast your seasoned pumpkin seeds to perfection:
- Transfer the seasoned pumpkin seeds to a baking sheet: Spread the seasoned pumpkin seeds in a single layer on a baking sheet lined with parchment paper or a silicone baking mat. This will prevent the seeds from sticking and help with easy cleanup later on.
- Place the baking sheet in the preheated oven: Carefully place the baking sheet in the preheated oven and let the pumpkin seeds roast for about 15-20 minutes. Keep a close eye on them to prevent burning. Rotate the baking sheet and shake it gently halfway through the cooking time to ensure even and consistent roasting.
- Check for doneness: After 15 minutes, remove a few seeds from the oven and allow them to cool slightly. Taste and evaluate their texture. The seeds should be golden brown and have a crisp, crunchy texture. If they are not yet crispy, place them back in the oven for a few more minutes, checking frequently to avoid overcooking.
- Remove from the oven: Once the pumpkin seeds are roasted to your desired level of crispiness, carefully remove the baking sheet from the oven and place it on a heat-safe surface. Allow the seeds to cool completely before handling or eating, as they will be very hot.
As the pumpkin seeds cool, they will continue to firm up, so don’t be alarmed if they seem slightly soft when first removed from the oven. Once cooled, you can break apart any clusters and separate the individual seeds for easier snacking and storage.
Now that your pumpkin seeds are beautifully roasted, it’s time to move on to the final step: enjoying the fruits of your labor by indulging in homemade, perfectly shelled pumpkin seeds!
Step 7: Enjoying Your Homemade Pumpkin Seeds
Congratulations! You have successfully shelled, cleaned, boiled, seasoned, and roasted your own pumpkin seeds. Now it’s time to sit back, relax, and enjoy the fruits of your labor. Here are some ideas for savoring your homemade pumpkin seeds:
- Snack time: Pumpkin seeds make a delicious and nutritious snack all on their own. Pour a handful into a bowl and enjoy them as a quick and satisfying snack throughout the day.
- Trail mix: Incorporate your homemade pumpkin seeds into a homemade trail mix by combining them with nuts, dried fruits, and dark chocolate chunks. It’s a perfect on-the-go snack for hikes or long days.
- Sprinkle over salads: Add a crunchy element to your salads by sprinkling a handful of pumpkin seeds on top. They’ll provide a delightful texture and nutty flavor that pairs well with fresh greens and vinaigrettes.
- Topping for soups and stews: Enhance your favorite soups and stews by using pumpkin seeds as a topping. They will add a delightful crunch and elevate the overall taste and presentation of your dish.
- Garnish for yogurt or oatmeal: Sprinkle some roasted pumpkin seeds over your morning yogurt or breakfast oatmeal for an extra dose of nutrients and a satisfying crunch.
- Baking ingredient: Incorporate your homemade pumpkin seeds into baked goods like bread, muffins, or granola bars. They’ll add a delightful nutty flavor and provide a hint of crunch to your creations.
Remember to store your leftover pumpkin seeds in an airtight container in a cool, dry place. Properly stored, they can stay fresh and maintain their crispness for several weeks, allowing you to savor the deliciousness over time.
Enjoy the satisfaction of knowing that you’ve transformed a simple pumpkin into a delectable and versatile snack. Your homemade pumpkin seeds are not only a tasty treat, but they also represent the joy of gardening, the art of cooking, and the joy of sharing the fruits of your labor with loved ones.
Now go ahead and indulge in the deliciousness of your homemade pumpkin seeds. You deserve it!
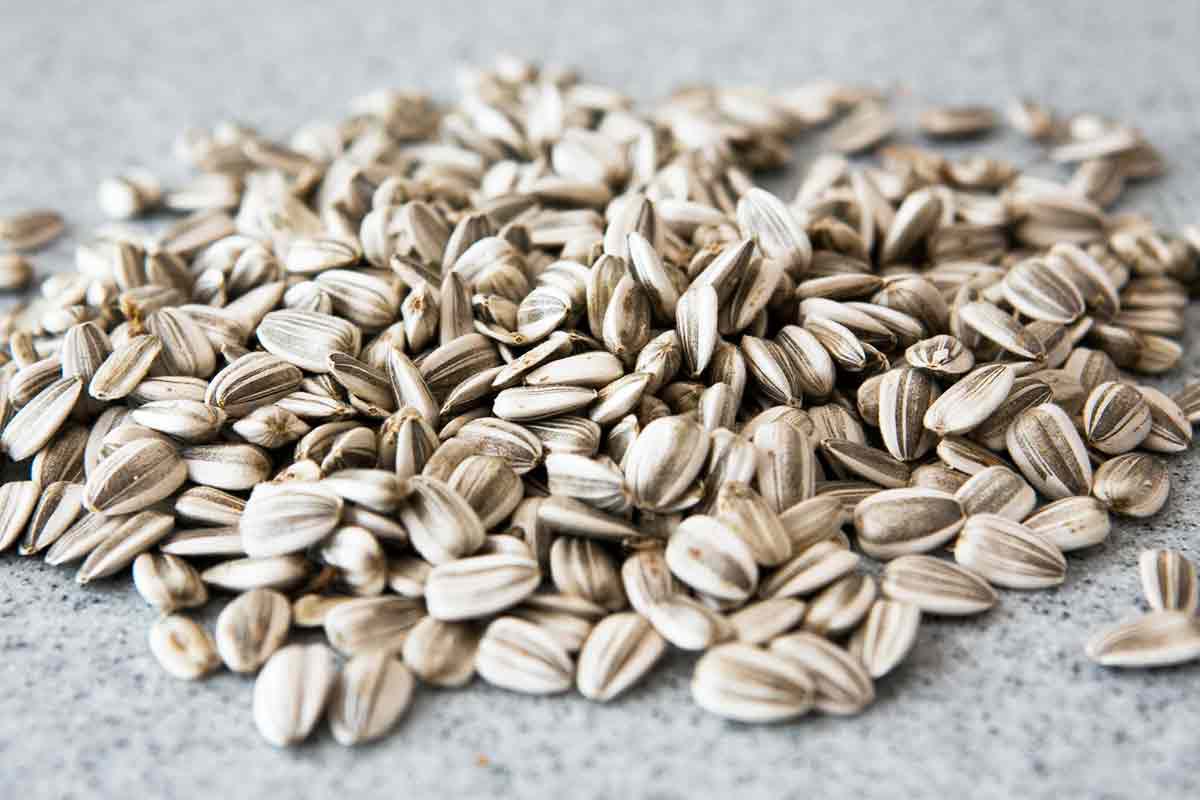
Read more: How To Shell Sunflower Seeds
Conclusion
Shelling your own pumpkin seeds is not only a rewarding process but also a delightful culinary adventure. From the moment you harvest the seeds to the final step of enjoying the roasted goodness, every stage is filled with anticipation and satisfaction.
Throughout this article, we have guided you through the step-by-step process of shelling pumpkin seeds. From choosing the ripe pumpkin to cleaning, boiling, seasoning, and roasting the seeds, each step contributes to a delicious end result.
By taking the time to shell your own pumpkin seeds, you not only have full control over the quality and freshness of your snack but also gain a deeper appreciation for the wonders of nature and the joy of gardening. It’s a beautiful way to connect with the earth and embrace the cycle of growth and nourishment.
Furthermore, homemade pumpkin seeds offer a plethora of culinary possibilities. Whether enjoyed as a healthy, on-the-go snack, added to salads or soups, incorporated into baked goods, or mixed into trail mixes, they provide a flavorful and nutritious addition to a variety of dishes.
So, the next time you find yourself in possession of a ripe pumpkin, put on your gardening gloves and embark on the journey of shelling your own pumpkin seeds. Let the anticipation build as you harvest, clean, boil, season, and roast these delightful treats. Taste the crispness, savor the nuttiness, and relish in the satisfaction of knowing that you created something delicious and nourishing with your own hands.
Remember, the process of shelling pumpkin seeds is not only about the end result but also about the enjoyment of the journey. Embrace the experience, experiment with flavors, and share the joy of your homemade pumpkin seeds with others. Happy shelling!
Frequently Asked Questions about How To Shell Pumpkin Seeds
Was this page helpful?
At Storables.com, we guarantee accurate and reliable information. Our content, validated by Expert Board Contributors, is crafted following stringent Editorial Policies. We're committed to providing you with well-researched, expert-backed insights for all your informational needs.


0 thoughts on “How To Shell Pumpkin Seeds”