Home>Garden Essentials>How To Plant Pumpkin Seed
Garden Essentials
How To Plant Pumpkin Seed
Modified: August 27, 2024
Learn how to plant pumpkin seeds in your garden and enjoy a bountiful harvest. Follow our expert tips for a successful pumpkin growing season.
(Many of the links in this article redirect to a specific reviewed product. Your purchase of these products through affiliate links helps to generate commission for Storables.com, at no extra cost. Learn more)
Introduction
Welcome to the wonderful world of gardening! If you’re a fan of bountiful harvests, vibrant colors, and endless possibilities, then planting pumpkin seeds is the perfect venture for you. Whether you have a sprawling backyard or a petite urban garden, growing your own pumpkins can be a rewarding experience that adds a touch of autumn charm to any landscape.
From jack-o’-lanterns to delicious pumpkin pies, these versatile and iconic fruits have captured the hearts of gardeners and food enthusiasts alike. But successfully planting pumpkin seeds requires a bit of know-how and preparation to ensure optimal growth and yield. In this article, we’ll guide you through the process, step by step, of how to plant pumpkin seeds effectively and set yourself up for a successful harvest.
Before we dive into the nitty-gritty of pumpkin seed planting, it’s essential to understand the importance of selecting the right pumpkin seeds. There are many varieties to choose from – each with its distinctive characteristics and purposes. Whether you’re aiming for the classic orange pumpkins for Halloween or smaller varieties for cooking and baking, selecting quality seeds is the first step towards a thriving pumpkin patch.
Once you have your pumpkin seeds in hand, it’s time to prepare the planting area. Whether you plan on growing your pumpkins in containers or directly in the ground, creating the ideal environment is crucial for their growth and development. We’ll explore the key factors to consider when preparing your pumpkin patch, including soil quality, sunlight requirements, and spacing.
Starting indoor seedlings is a helpful technique to get a head start on your pumpkin-growing journey. This method allows you to control and monitor the growth of the seedlings until they are ready to be transplanted outdoors. We’ll walk you through the process of starting pumpkin seeds indoors, including the necessary supplies and care instructions.
Transplanting seedlings outdoors is a pivotal step in the pumpkin-growing process. Moving your seedlings from their indoor containers to the outdoor garden requires proper timing and technique to ensure minimum shock and promote healthy growth. We’ll share tips on when and how to transplant your seedlings, as well as how to acclimatize them to their new surroundings.
Watering is essential for the healthy development of your pumpkin plants. However, finding the right balance between underwatering and overwatering can be a challenge. We’ll provide guidelines for proper watering techniques, including the frequency and amount of water needed to keep your pumpkin plants happy and hydrated.
Feeding your pumpkin plants with the right nutrients is crucial for their growth and fruit production. We’ll discuss the importance of fertilizing and share recommendations for suitable fertilizers to maximize your pumpkin harvest.
In addition to watering and fertilizing, mulching your pumpkin patch can provide numerous benefits. Mulch helps retain moisture, suppresses weeds, and regulates soil temperature. We’ll explain how to properly apply mulch around your pumpkin plants for optimal results.
Just like any other plant, pumpkins are susceptible to pests and diseases. Regular monitoring is necessary to catch any issues early on and take appropriate measures to prevent damage. We’ll highlight common pumpkin pests and diseases and provide organic solutions to keep your pumpkin patch thriving.
Finally, the culmination of your efforts – harvest time! We’ll guide you on when and how to harvest your pumpkins, as well as tips for storing them to extend their shelf life. Whether you’re carving your pumpkins for decorations or utilizing them in delicious recipes, knowing when they’re ready to be picked is crucial.
Now that you have a clear roadmap on how to plant pumpkin seeds, it’s time to roll up your sleeves and get your hands dirty. By following these steps and providing the necessary care, you’ll soon be rewarded with an abundant harvest of pumpkins that you can proudly call your own. Happy planting!
Key Takeaways:
- Choose the right pumpkin seeds based on variety, growing season, and space. Quality seeds lead to a successful pumpkin patch with vibrant colors and delicious flavors.
- Prepare the planting area with proper soil, sunlight, and spacing for healthy pumpkin growth. Mulching, watering, and monitoring pests and diseases are essential for a thriving pumpkin patch.
Read more: How To Plant Pumpkin Seeds
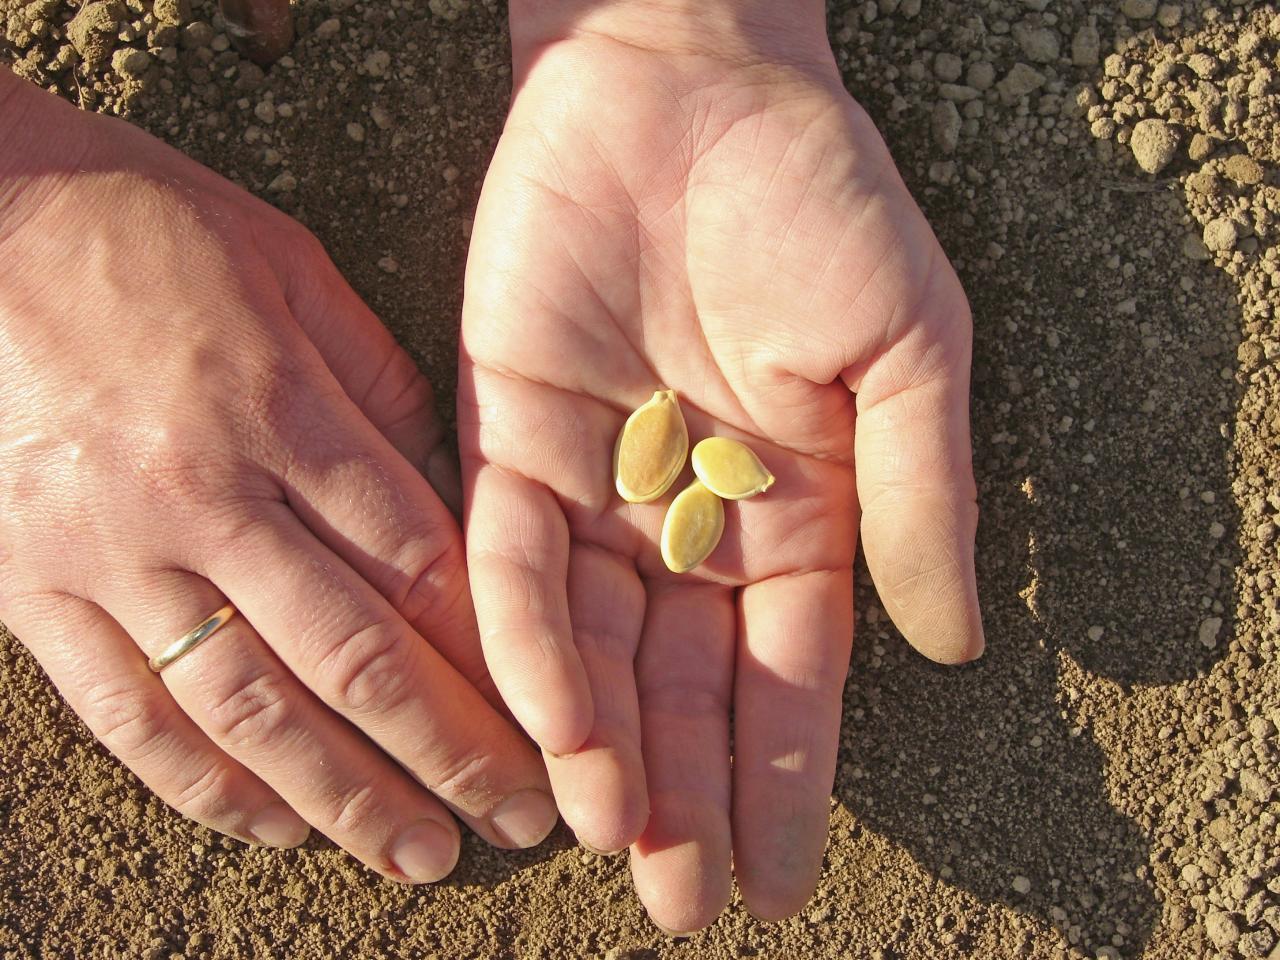
Step 1: Choose the Right Pumpkin Seeds
Before embarking on your pumpkin-growing journey, it’s important to select the right pumpkin seeds for your desired outcome. With a wide variety of pumpkin cultivars available, each with its own unique characteristics, it’s crucial to consider your specific needs and preferences.
When choosing pumpkin seeds, consider the following factors:
- Pumpkin variety: Determine the type of pumpkin you want to grow. Are you looking for large jack-o’-lantern pumpkins, mini decorative pumpkins, or small-to-medium-sized varieties for cooking and baking? Each variety has its own distinctive flavor, texture, and appearance, so do some research and select the right one for your taste and purpose.
- Growing season: Take into account the length of your growing season. Some pumpkin varieties require a longer growing period, while others are more suitable for shorter seasons. Make sure to choose a variety that can thrive within your region’s climate and growing conditions.
- Seed source: Purchase seeds from reliable sources, such as reputable nurseries, seed catalogs, or online seed sellers. This ensures quality seeds that have been properly stored and have a higher chance of germination success. Avoid saving seeds from hybrid pumpkins, as they may not produce the same traits as the parent plant.
- Plant size: Consider the space you have available for your pumpkin plants. If you have limited space, opt for compact or bush varieties that won’t overrun your garden. If space is not a concern, larger vining pumpkins can create a stunning visual display.
- Resistance to pests and diseases: Some pumpkin varieties are more resilient to common pests and diseases, which can save you time and effort in pest management. Look for varieties that are known to have a natural resistance to common pumpkin ailments to minimize potential issues.
Once you have gathered all the necessary information and preferences, it’s time to choose your pumpkin seeds. Consider purchasing a few different varieties to experiment and discover your favorites. Remember to check the seed packet for specific planting instructions, as different varieties may have varying requirements for spacing, sunlight, and soil conditions.
When storing your pumpkin seeds, keep them in a cool, dry place to maintain their viability. It’s a good practice to label the seed packets with the variety and date of purchase to ensure proper organization and tracking.
By carefully selecting your pumpkin seeds, you’re setting yourself up for a successful growing experience. The right variety can make a world of difference in terms of taste, appearance, and overall satisfaction. So take your time, explore different options, and let your pumpkin patch shine with the perfect pumpkin seeds.
Step 2: Prepare the Planting Area
Now that you have your chosen pumpkin seeds in hand, it’s time to prepare the planting area where your pumpkins will thrive. Creating the ideal environment for your pumpkin plants is essential for their growth and overall productivity. Here are some key steps to follow when preparing the planting area:
- Select a sunny location: Pumpkins require plenty of sunlight to grow and develop properly. Choose a spot in your garden that receives at least 6-8 hours of direct sunlight each day. Avoid areas that are consistently shaded or overcrowded by trees or other tall plants, as this can hinder pumpkin growth.
- Clear the area: Remove any existing weeds, rocks, or debris from the chosen planting area. Weeds can compete with your pumpkin plants for nutrients and moisture, so it’s important to clear the area thoroughly. If necessary, consider using a garden tiller or manual digging tools to loosen and prepare the soil.
- Improve the soil: Pumpkins prefer well-draining soil that is rich in organic matter. Before planting, amend the soil with compost or well-rotted manure to improve its fertility and structure. This helps provide the necessary nutrients for your pumpkin plants and encourages healthy root development.
- Test the pH level: Pumpkins grow best in slightly acidic to neutral soil with a pH range between 6.0 and 7.0. Test the pH level of your soil using a soil testing kit, and make the necessary adjustments if needed. Adding lime to raise the pH or sulfur to lower the pH can help create the optimal growing conditions for your pumpkins.
- Ensure proper drainage: Adequate drainage is crucial for preventing waterlogged soil, which can lead to root rot and other fungal diseases. If your soil tends to retain water, consider improving drainage by working in organic matter or creating raised beds.
- Provide spacing: Pumpkins need ample space to spread out and grow. Determine the desired spacing between pumpkin plants based on the variety you’re growing. Vining varieties generally require 6-10 feet between plants, while bush varieties can be spaced 2-4 feet apart. Check the seed packet or consult planting guides for specific spacing recommendations.
- Consider trellising: If space is limited, or if you want to keep pumpkin vines off the ground to prevent diseases and save space, you can consider using trellises or supports. This vertical growing technique allows for better air circulation and easier maintenance of the vines.
By following these steps to prepare the planting area, you’ll create an ideal environment for your pumpkin plants to thrive. Adequate sunlight, well-draining soil, and proper spacing are essential for healthy growth and abundant pumpkin production. Take the time to prepare the planting area properly, and you’ll reap the rewards of a flourishing pumpkin patch.
Step 3: Start Indoor Seedlings
Starting pumpkin seeds indoors is a great way to get a jumpstart on the growing season and give your plants a head start before transplanting them outdoors. By starting seedlings indoors, you have more control over their environment and can ensure optimal growing conditions. Here is a step-by-step guide on how to start pumpkin seedlings indoors:
- Timing: Start your pumpkin seeds indoors about 2-3 weeks before the last expected frost date in your area. This will give the seedlings enough time to establish before they are ready to be transplanted outdoors. Refer to your local frost dates or gardening resources to determine the best time to start your pumpkin seeds.
- Containers: Choose containers that are at least 3-4 inches deep and have drainage holes at the bottom. This allows excess moisture to drain away and prevents waterlogged soil, which can lead to root rot. You can use individual seed-starting pots or trays with divided cells to sow multiple seeds at once.
- Seed starting mix: Use a high-quality seed starting mix that is light, well-drained, and sterile. This type of soilless mix provides the right balance of moisture retention and aeration for seedling development. Avoid using regular garden soil, as it may contain pathogens or be too heavy for young seedlings.
- Sowing seeds: Fill the containers with the seed starting mix, leaving about a ½-inch space from the top. Make small holes or depressions in the soil with your finger, about 1 inch deep, and place 2-3 pumpkin seeds in each hole. Cover the seeds with a thin layer of the seed starting mix and gently pat it down to ensure good seed-to-soil contact.
- Moisture and warmth: After sowing the seeds, water the containers gently to moisten the soil. It’s important to keep the soil consistently moist but not waterlogged. Place a clear plastic cover or plastic wrap over the containers to create a mini greenhouse effect and help retain moisture. Keep the containers in a warm location, ideally around 70-85°F (21-29°C).
- Germination: Pumpkin seeds typically germinate within 5-10 days, but it can take longer depending on the variety and environmental conditions. Once the seeds have germinated and you see the seedlings emerging, remove the plastic cover and place the containers in a location with bright, indirect sunlight.
- Lighting: If your seedlings are not receiving enough natural sunlight, supplemental light may be necessary. Fluorescent grow lights placed a few inches above the seedlings can provide the necessary light intensity for healthy growth. Keep the lights on for about 12-16 hours a day to mimic natural daylight.
- Thinning: Once the seedlings have grown their first true leaves, you may need to thin them out to ensure proper spacing and prevent overcrowding. Choose the healthiest and strongest seedling in each container and carefully snip off the others at soil level. This allows the remaining seedling to have ample space and resources to grow.
- Care and maintenance: Continue to water the seedlings as needed, keeping the soil consistently moist but not saturated. Monitor the seedlings for signs of pests, diseases, or nutrient deficiencies, and take appropriate action if necessary. Use a fan or gentle air circulation to strengthen the seedlings’ stems and prepare them for the outdoor wind.
Starting pumpkin seedlings indoors not only helps extend the growing season but also gives you control over the early stages of growth. By following these steps and providing the right conditions, you will have robust and healthy pumpkin seedlings ready for transplanting into the garden.
Step 4: Transplant Seedlings Outdoors
Once your pumpkin seedlings have grown and developed a few sets of true leaves, they are ready to be transplanted outdoors. Transplanting seedlings allows them to establish their roots in the garden soil and continue their growth journey. Here are the steps to successfully transplant your pumpkin seedlings:
- Timing: Choose a day to transplant when the threat of frost has passed, and the soil has warmed up. Pumpkins thrive in warm soil and air temperatures, so it’s important to wait until all risk of cold temperatures has subsided.
- Prepare the soil: Before transplanting, prepare the soil in your chosen pumpkin patch area. Remove any weeds or debris and loosen the soil to allow for root penetration. Incorporate compost or organic matter into the soil to improve its fertility and structure.
- Water the seedlings: Before removing the seedlings from their containers, water them thoroughly. This helps hydrate the soil and makes it easier to gently separate the seedlings without damaging their delicate roots.
- Spacin: Carefully remove the pumpkin seedlings from their containers, taking care not to disturb the root system. Plant each seedling at the desired spacing, which can vary depending on the variety. Vining pumpkins generally require 6-10 feet between plants, while bush varieties can be spaced 2-4 feet apart.
- Digging holes: Dig holes that are slightly larger than the root ball of each seedling. This gives the roots room to spread out and establish themselves in the soil. Gently place each seedling in a hole and backfill with soil, making sure to firm it around the base of the plant to provide stability.
- Watering: After transplanting, water the seedlings thoroughly to help settle the soil and eliminate any air pockets around the roots. Aim to keep the soil consistently moist in the following weeks as the seedlings acclimate to their new surroundings.
- Provide shelter: If there is still a risk of strong winds or intense sun after transplanting, consider providing temporary shelter for your seedlings. This can be achieved by using row covers, shade cloth, or even small plant cages, which protect the young plants from extreme conditions.
- Monitor and care: Keep a close eye on the seedlings as they adjust to their new outdoor environment. Water as needed to keep the soil consistently moist but not soaked. Remove any weeds that compete with the pumpkin plants for nutrients and monitor for pests or diseases. Take appropriate action if any issues arise.
Transplanting your pumpkin seedlings is a critical step in their growth process. By providing them with the right conditions, proper spacing, and attentive care, you are setting them up for success in the garden. With time and nurturing, your pumpkin plants will flourish and reward you with vibrant foliage and, ultimately, beautifully formed pumpkins.
Read more: When To Plant Pumpkin Seeds
Step 5: Provide Adequate Watering
Watering is a crucial aspect of growing pumpkins, as it plays a vital role in the overall health and productivity of the plants. Adequate and consistent watering ensures that your pumpkin plants receive the necessary moisture to thrive and produce abundant fruit. Here are some key considerations when it comes to watering your pumpkins:
- Consistency: Pumpkin plants require consistent moisture throughout their growing season. Irregular watering can lead to stress, poor growth, and a decrease in fruit production. Aim to water your pumpkin patch evenly and consistently, ensuring that the soil remains moist without being waterlogged.
- Deep watering: When watering your pumpkins, it’s important to provide deep watering sessions rather than a quick sprinkle. Deep watering encourages the development of a robust root system by allowing the water to penetrate into the soil deeply. This helps the roots access water at lower soil levels, which is particularly important during hot and dry periods.
- Frequency: The frequency of watering depends on several factors, including weather conditions, soil type, and the stage of growth. Generally, pumpkins require about 1-2 inches of water per week. However, during hot and dry periods, you may need to increase the frequency to maintain adequate moisture levels.
- Watering technique: When watering your pumpkins, it’s best to use a gentle and slow watering technique. Avoid using high-pressure sprayers or sprinklers, as they may lead to soil erosion or shallow watering. Instead, use a watering can or a soaker hose that allows water to soak directly into the soil and reach the root zone.
- Timing: Water your pumpkins early in the morning or late in the evening when the temperatures are cooler. This helps minimize water loss due to evaporation and allows the plants to absorb the moisture more effectively. Avoid watering during the peak heat of the day, as the water can quickly evaporate before the plants can benefit from it.
- Monitoring soil moisture: Regularly monitor the moisture levels of the soil in your pumpkin patch. Stick your finger or a garden tool a few inches into the soil to determine if it feels moist or dry. Adjust your watering schedule accordingly to ensure that the soil remains consistently moist.
- Avoid overwatering: While it’s important to provide adequate moisture, overwatering can be detrimental to pumpkin plants. Excessively soggy soil can lead to root rot and other fungal diseases. Avoid overwatering by ensuring proper drainage in the planting area and allowing the top few inches of soil to dry out slightly between watering sessions.
- Adjust for rainfall: Take into account any rainfall your pumpkin patch receives when determining the watering schedule. If your area has received significant rainfall, you may need to adjust your watering frequency accordingly to avoid overwatering the plants.
- Mulching: Applying a layer of organic mulch around your pumpkin plants can help retain soil moisture by reducing evaporation. Mulch also helps suppress weed growth, which can compete with your pumpkins for water and nutrients. Apply a 2-3 inch layer of straw, wood chips, or shredded leaves around the base of your plants, taking care to keep the mulch a few inches away from the stems.
By providing adequate and consistent watering to your pumpkin plants, you are ensuring their health and vitality. The right amount of moisture will support robust growth, vibrant foliage, and a bountiful harvest of pumpkins. Pay attention to the needs of your plants, adjust watering as necessary, and your pumpkins will thrive in the garden.
Plant pumpkin seeds in well-draining soil, 1 inch deep and 2-3 feet apart. Choose a sunny spot and water regularly. Watch out for pests and diseases.
Step 6: Apply Fertilizer
Applying fertilizer to your pumpkin plants is an important step in ensuring they have the nutrients they need to grow strong, healthy, and productive. Fertilizers provide essential elements that may be lacking in the soil, promoting vigorous growth, and maximizing fruit production. Here are some key considerations when it comes to fertilizing your pumpkins:
- Soil testing: Before applying fertilizer, it is advisable to conduct a soil test to determine the nutrient levels and pH of your soil. This will help you make informed decisions about the types and amounts of fertilizers your pumpkins need. Soil test kits can be purchased from garden centers or you can send a sample to a local agricultural extension office for analysis.
- Nutrient requirements: Pumpkins have specific nutrient requirements at different stages of growth. During the early stages, when the plants are establishing roots and foliage, they require a fertilizer high in nitrogen (N) to promote vigorous growth. As the plants begin to develop flowers and fruit, they will benefit from a fertilizer higher in phosphorus (P) and potassium (K) to support flowering, fruit formation, and overall plant health.
- Organic vs. synthetic fertilizers: You have the option to choose between organic or synthetic fertilizers for your pumpkin plants. Organic fertilizers, such as compost, well-rotted manure, or fish emulsion, provide a slow-release source of nutrients and also improve soil structure. Synthetic or chemical fertilizers are readily available and provide specific nutrient formulations. Consider your preference, gardening practices, and environmental impact when selecting the type of fertilizer.
- Application method: There are several methods to apply fertilizer to your pumpkin plants. You can broadcast granular fertilizer around the base of each plant, ensuring it is spread evenly. Alternatively, you can use liquid fertilizers to deliver nutrients directly to the plants’ root zone. Follow the manufacturer’s instructions for the appropriate application rates and frequency.
- Timing: It’s crucial to fertilize your pumpkins at the right time to maximize their benefits. Start by incorporating a balanced fertilizer or compost into the soil before planting to provide a good foundation of nutrients. Once the plants have established and started producing true leaves, you can begin applying additional fertilizer according to the specific needs of your pumpkin variety. Avoid over-fertilizing, as this can lead to excessive foliage growth at the expense of fruit development.
- Side-dressing: As your pumpkin plants grow, you can provide additional nutrients by side-dressing them with fertilizer. This involves applying a small amount of fertilizer alongside the plants, a few inches away from the stems, and gently working it into the soil. This gives the plants a boost of nutrients during their active growth phases.
- Watering after fertilization: After applying fertilizer, it’s important to water your pumpkin plants thoroughly. This helps dissolve and distribute the nutrients into the soil and ensures they are readily available to the plants’ roots. Watering also prevents fertilizer burn by diluting any excess fertilizer that may come into contact with the plant foliage or roots.
- Organic alternatives: If you prefer organic gardening methods, you can supplement your pumpkins with organic alternatives such as compost, aged manure, worm castings, or seaweed extracts. These natural amendments provide a rich source of nutrients while improving soil health and fertility.
By properly fertilizing your pumpkin plants, you are giving them the nutritional boost they need for optimal growth and productivity. Remember, each plant may have slightly different nutrient requirements, so it’s important to monitor their development and adjust fertilization accordingly. With proper fertilization, your pumpkin plants will thrive and reward you with a bountiful harvest of beautiful pumpkins.
Step 7: Mulch the Pumpkin Patch
Mulching your pumpkin patch is a beneficial practice that can improve soil moisture retention, suppress weed growth, and regulate soil temperature. By applying mulch around your pumpkin plants, you create a favorable environment that promotes healthy growth and enhances the overall productivity of your plants. Here’s how to effectively mulch your pumpkin patch:
- Select the right mulch: Choose a mulching material that suits your needs and the growing conditions of your pumpkin patch. Organic mulches such as straw, wood chips, leaves, or shredded bark are preferred. These materials break down over time, enriching the soil with organic matter. Avoid synthetic mulches, as they may not provide the same benefits.
- Prepare the soil: Before applying mulch, prepare the soil by removing any weeds or debris from the pumpkin patch. This ensures that the mulch does not inadvertently cover existing weeds, which can compete with the pumpkin plants for nutrients and water.
- Apply a layer of mulch: Spread a layer of mulch around the base of each pumpkin plant, taking care not to cover the stems or foliage. Apply the mulch at a thickness of 2-3 inches, ensuring that it extends outward to cover the entire root zone of the plants. Leave a small gap around the stem to prevent trapping moisture against the plant, which can lead to rot or disease.
- Don’t smother the plants: Avoid piling mulch too close to the stems or stems, as this can create a moist environment that encourages rot or disease. Maintaining a small gap around the base of each plant allows for airflow and prevents excess moisture from accumulating.
- Benefits of mulching: Mulching provides numerous benefits to your pumpkin plants. The layer of mulch acts as insulation, keeping the soil temperature more stable and protecting the roots during temperature fluctuations. It also helps conserve moisture by reducing evaporation from the soil surface, allowing the plants to access water more effectively. Additionally, mulch suppresses weed growth, reducing competition for resources and minimizing the need for excessive hand weeding.
- Monitor moisture levels: While mulch helps retain moisture, it’s important to monitor the soil moisture levels regularly. Lift the mulch and check the soil beneath to ensure it remains evenly moist but not waterlogged. Adjust your watering schedule accordingly to maintain ideal moisture levels for your pumpkin plants.
- Renew mulch as needed: Over time, organic mulches break down and decompose. As a result, they may become thinner and less effective at retaining moisture and suppressing weeds. Monitor the thickness of the mulch layer periodically and replenish it as needed to maintain the desired depth and benefits.
- Consider mulch alternatives: If you prefer not to mulch, you can opt for other methods to achieve similar benefits. For example, you can use landscape fabric or black plastic mulch to suppress weeds and conserve moisture. However, these options may not provide the same organic matter enrichment as organic mulches do.
By mulching your pumpkin patch, you create a favorable growing environment that promotes healthy growth and reduces maintenance tasks. The added benefits of moisture retention, weed suppression, and regulated soil temperature can greatly contribute to the success and productivity of your pumpkin plants. Take the time to apply mulch properly, and you’ll reap the rewards of a thriving and vibrant pumpkin patch.
Step 8: Monitor for Pests and Diseases
Just like any other plants, pumpkins are susceptible to various pests and diseases that can damage their foliage, hinder their growth, and reduce their productivity. Monitoring your pumpkin patch regularly for signs of pests and diseases allows you to take prompt action and prevent potential damage. Here’s how to effectively monitor for pests and diseases:
- Inspect your plants: Regularly examine your pumpkin plants for any visible signs of pests, such as chewed leaves, webs, or discolored foliage. Pay attention to the undersides of leaves, where pests often hide. Look for any unusual spots, lesions, or wilting, as these can indicate the presence of diseases.
- Identify common pests: Familiarize yourself with the common pests that attack pumpkin plants. Some of the most common culprits include squash bugs, cucumber beetles, aphids, and vine borers. Identify the pests based on their appearance, damage patterns, or the symptoms they cause on the plants.
- Research common diseases: Learn about the common diseases that can affect pumpkin plants, such as powdery mildew, downy mildew, or bacterial wilt. Understand the symptoms displayed by infected plants, including yellowing leaves, spotting, wilting, or mold-like growth, so you can identify and address diseases in their early stages.
- Implement preventive measures: Take preventive steps to minimize pest and disease infestations. This includes practicing good garden hygiene, such as cleaning up debris and removing plant residues at the end of each season. Additionally, avoid overwatering your pumpkin plants, as excess moisture can create a conducive environment for diseases.
- Use physical barriers: Employ physical barriers, such as row covers or nets, to protect your pumpkin plants from flying pests like cucumber beetles or vine borers. These barriers create a physical barrier, preventing the pests from reaching the plants and laying eggs or causing damage.
- Encourage beneficial insects: Attract beneficial insects, such as ladybugs, lacewings, or predatory wasps, to your garden. These insects prey on common garden pests and can help keep their populations in check. Planting companion flowers and herbs or providing suitable habitats, such as insect hotels, can attract these beneficial insects.
- Implement organic pest control methods: If pest infestations occur, consider organic pest control methods before resorting to chemical treatments. For instance, using insecticidal soaps, neem oil, or diatomaceous earth can help control pests without harming beneficial insects or the environment. Follow the instructions on the product labels carefully.
- Address diseases promptly: If you identify signs of diseases, take immediate action to prevent their spread. Remove and destroy any infected plant material, and avoid handling healthy plants after touching diseased ones. Consider using organic fungicides, such as copper-based products, to control fungal diseases if needed.
- Regularly monitor and intervene: Keep a close eye on your pumpkin plants throughout the growing season. Monitor for any changes in foliage color or texture, pest activity, or disease symptoms. By regularly intervening and addressing issues as soon as they arise, you can minimize the damage and promote the overall health of your pumpkin plants.
Monitoring your pumpkin patch for pests and diseases is an essential step in maintaining the health and productivity of your plants. By being vigilant, taking preventive measures, and intervening promptly when necessary, you can keep your pumpkin plants thriving and protect them from potential threats. A healthy and pest-free pumpkin patch will reward you with robust plants and plentiful harvests.
Step 9: Harvesting and Storing Pumpkins
Congratulations! After all your hard work, it’s time to harvest your pumpkins and reap the rewards of a successful growing season. Harvesting your pumpkins at the right time and storing them properly ensures that they remain in good condition for future use. Here’s how to harvest and store your pumpkins:
- Determine maturity: Assess the maturity of your pumpkins before harvesting. Different pumpkin varieties have different signs of maturity, but a general indication is when the rinds are hard and cannot be easily penetrated by a fingernail. The stem should also be dry and brown, indicating that the pumpkin is detached from the vine.
- Timing: Harvest your pumpkins before the first frost. Cold temperatures can damage the fruit and hinder proper storage. Keep an eye on the weather forecast and plan your harvest accordingly.
- Harvesting: Cut the stems of the pumpkins with a sharp knife or pruning shears, leaving a few inches of stem attached. This helps prevent rot and prolongs the shelf life of the pumpkins. Avoid pulling or twisting the pumpkins off the vine, as this can damage the fruit or the plant.
- Curing: Curing the pumpkins helps to harden the skin and prolong their storage life. Place the harvested pumpkins in a warm and well-ventilated area, such as a sunny porch, for about 1-2 weeks. This allows any minor cuts or bruises on the skin to heal and helps the pumpkins develop a protective layer.
- Cleaning: Before storing, gently wipe the pumpkins with a soft cloth or sponge to remove any dirt or debris. Do not wash them with water, as excess moisture can promote decay.
- Storage conditions: Store your pumpkins in a cool and dry location. Ideally, the temperature should be around 50-55°F (10-13°C) with a humidity level of 50-70%. Avoid storing them near ethylene-producing fruits, such as apples or pears, as this can accelerate their ripening process and shorten their shelf life.
- Individual wrapping: For longer storage, you can individually wrap each pumpkin in newspaper or place them in paper bags to protect them from direct contact with each other. This helps prevent any potential spread of rot or decay in case one pumpkin begins to deteriorate.
- Regular inspection: Check your stored pumpkins periodically for any signs of decay, mold, or soft spots. Remove any pumpkins that show signs of damage to prevent them from spoiling the others.
- Utilize harvested pumpkins: As you enjoy your bountiful harvest of pumpkins, consider utilizing them in various ways. Carve them for Halloween decorations, bake delicious pumpkin pies, make savory soups, or simply display them as autumnal decor. There are countless possibilities to enjoy the fruits of your labor!
By following these steps to harvest and store your pumpkins, you can ensure their longevity and make the most of your hard work. With proper harvesting, curing, and storage, you can enjoy your harvested pumpkins for an extended period and savor the flavors of autumn throughout the year. Happy harvesting and enjoy the fruits of your labor!
Conclusion
Congratulations on successfully navigating the process of planting and growing your own pumpkins! By following the steps outlined in this guide, you have gained valuable knowledge on choosing the right pumpkin seeds, preparing the planting area, starting indoor seedlings, transplanting, providing adequate watering and fertilization, mulching the patch, monitoring for pests and diseases, and finally, harvesting and storing your pumpkins.
Growing pumpkins can be a rewarding and fulfilling experience that allows you to connect with nature, foster your gardening skills, and enjoy the fruits of your labor. From the excitement of watching your pumpkin seeds sprout and grow into thriving plants to the satisfaction of finally harvesting and utilizing your homegrown pumpkins for culinary delights or festive decorations, the entire process is truly gratifying.
Throughout your journey, you have learned about the importance of selecting the right pumpkin varieties, creating a suitable environment for growth, providing necessary care and nourishment, and protecting your plants from potential threats. Your efforts have yielded an abundant harvest and a beautiful pumpkin patch that brings joy and a sense of accomplishment.
Remember, gardening is an ongoing learning experience, and each season presents new opportunities and challenges. Reflect on your experiences, keep observing and experimenting, and continue to expand your knowledge and skills in the world of gardening. Share your success and newfound expertise with others, inspiring them to embark on their own pumpkin-growing adventures.
Now, gather your friends and family, carve some creative jack-o’-lanterns, savor homemade pumpkin pies, or simply enjoy the beauty of your harvest as autumn blankets the landscape. Embrace the autumn season with the warmth and abundance of your pumpkin patch.
By combining your passion for gardening with the knowledge gained from this guide and your personal experiences, you are sure to continue cultivating a thriving garden, one pumpkin at a time.
Frequently Asked Questions about How To Plant Pumpkin Seed
Was this page helpful?
At Storables.com, we guarantee accurate and reliable information. Our content, validated by Expert Board Contributors, is crafted following stringent Editorial Policies. We're committed to providing you with well-researched, expert-backed insights for all your informational needs.


0 thoughts on “How To Plant Pumpkin Seed”