Home>Garden Essentials>How To Start Cactus Seeds
Garden Essentials
How To Start Cactus Seeds
Modified: March 15, 2024
Learn how to start cactus seeds in your garden and grow your own beautiful and unique cacti. Step-by-step guide for beginners.
(Many of the links in this article redirect to a specific reviewed product. Your purchase of these products through affiliate links helps to generate commission for Storables.com, at no extra cost. Learn more)
Introduction
Welcome to the world of cactus gardening! If you’ve ever wanted to grow cacti from seeds, you’ve come to the right place. Starting cactus seeds is a rewarding endeavor that allows you to witness the growth and development of these unique plants from the very beginning.
Cacti are fascinating plants known for their ability to thrive in arid and desert-like conditions. With their distinct shapes, sizes, and vibrant flowers, they add a touch of beauty to any garden or indoor space. While many people choose to propagate cacti through cuttings, growing them from seeds offers a truly fulfilling and educational experience.
In this article, we will guide you through the process of starting cactus seeds. From understanding the nature of cactus seeds to providing the ideal growing conditions, we will cover everything you need to know to successfully start your own cactus garden.
So, let’s dive in and discover the wonderful world of cactus seeds!
Key Takeaways:
- Starting cactus seeds is a rewarding journey that requires understanding their unique characteristics, gathering the right supplies, and providing optimal growing conditions for successful germination.
- Caring for cactus seedlings involves attentive watering, proper lighting, and addressing common issues like overwatering, stretching, pests, and diseases to ensure their healthy growth and development.
Read more: What Is A Cactus Soil Mix
Understanding Cactus Seeds
Before we delve into the process of starting cactus seeds, it’s important to understand the unique characteristics of these tiny powerhouses of life. Cactus seeds may vary in size and appearance depending on the species, but they all share some common traits.
Cactus seeds are generally small, ranging from the size of a pinhead to a grain of rice. They have a hard outer coating that protects the embryo inside. This hard coating, called the seed coat, often requires some degree of scarification or stratification to help the seeds germinate effectively.
Another interesting aspect of cactus seeds is their viability. While some seeds may remain dormant for an extended period of time, others may lose their viability quickly. It’s crucial to use fresh and viable seeds to increase the chances of successful germination.
Additionally, cactus seeds come in a variety of colors, shapes, and textures. Some seeds have a smooth surface, while others may be covered in fine hairs or spines. These unique characteristics add to the allure of growing cacti from seeds and make each variety a wonder to behold.
It’s worth noting that cactus seeds also have specific requirements when it comes to germination. Some species require a period of cold stratification, mimicking the natural conditions they would experience in their native habitats. Others may require exposure to light or specific moisture levels to initiate germination.
By understanding these characteristics, you can better prepare yourself for the process of starting cactus seeds and ensure that you provide the optimal conditions for their successful growth.
Gathering the Necessary Supplies
Before you begin the exciting journey of starting cactus seeds, it’s essential to gather all the necessary supplies. Having the right tools and materials on hand will ensure that you are well-prepared and can provide the ideal environment for your cactus seeds to thrive.
Here are the key supplies you will need:
- Cactus Seeds: The most crucial ingredient for starting your cactus garden is, of course, the cactus seeds themselves. You can find a wide variety of cactus seeds online or at specialized nurseries. Make sure to choose seeds from reputable sources to ensure their viability and quality.
- Seed Starting Mix: Cactus seeds require a well-draining medium to prevent waterlogged conditions that can lead to rot. Look for a specialized cactus or succulent seed starting mix or create your own by combining peat moss, perlite, and sand in the ratio of 2:1:1.
- Containers: You will need small containers or trays with drainage holes to sow your cactus seeds. These can range from seedling trays, cell packs, or even repurposed containers like yogurt cups or egg cartons.
- Transparent Dome or Plastic Wrap: To create a mini greenhouse effect and maintain humidity around the seeds, cover the containers with a transparent dome or plastic wrap. This helps to retain moisture and promote healthy germination.
- Grow Lights or a Sunny Window: Cactus seeds require ample light to kickstart their growth. If you don’t have access to a sunny window, consider investing in fluorescent grow lights or LED plant lights to provide adequate illumination for your seedlings.
- Misting Spray Bottle: Maintaining the right level of moisture is essential for successful cactus seed germination. A misting spray bottle will allow you to evenly distribute water without causing any disturbance to the delicate seeds.
- Labeling Materials: It’s important to label your containers to keep track of the different cactus species you are growing. Use waterproof markers or stick small labels in each container to avoid confusion.
- Watering Can or Spray Nozzle: In addition to misting, you will also need a watering can or spray nozzle attachment to gently water your cactus seedlings as they grow. Make sure to use water at room temperature to avoid shocking the young plants.
- Heat Mat (Optional): Some cactus seeds benefit from bottom heat to stimulate germination. If you are growing heat-loving cacti, consider investing in a heat mat to provide consistent warmth to your seeds.
By gathering these supplies, you will be equipped with everything you need to start your cactus seeds and provide them with the best chance of success. Once you have everything ready, it’s time to move on to preparing the seed starting mix.
Preparing the Seed Starting Mix
Now that you have all the necessary supplies, it’s time to prepare the perfect seed starting mix for your cactus seeds. Creating a well-draining and nutrient-rich mix is crucial to provide the ideal growing conditions for your seeds.
Here’s a step-by-step guide to preparing the seed starting mix:
- Choose a Container: Select a clean container that is large enough to hold the desired amount of seed starting mix. You can use a bucket, a plastic tub, or any other suitable container.
- Measure Ingredients: For a basic cactus seed starting mix, combine equal parts peat moss and perlite. The peat moss helps retain moisture, while the perlite provides excellent drainage. Use a measuring cup or scale to ensure accurate proportions.
- Add Sand (Optional): If you want to improve the drainage further and mimic the natural growing conditions of cacti, you can add coarse sand to the mix. Use around one part sand for every two parts of the peat moss and perlite mixture.
- Mix Thoroughly: Pour the measured ingredients into the container and mix them together until well combined. Break up any clumps and ensure an even distribution of materials.
- Moisten the Mix: Slowly add water to the mix while stirring. The goal is to achieve a damp, crumbly texture. Avoid soaking the mix, as excessive moisture can lead to rot and fungal growth.
- Test the Moisture Level: Grab a handful of the mix and squeeze it gently. It should hold its shape but easily crumble when touched. Adjust the moisture level by adding more water or more dry mix, if needed.
- Transfer to Containers: Fill your seedling trays or containers with the prepared seed starting mix, leaving a small gap at the top for watering and airflow.
- Label Containers: Before sowing your cactus seeds, label each container with the appropriate plant name or variety. This will help you keep track of your seedlings as they grow.
Once your seed starting mix is ready, you are one step closer to starting your cactus seeds. In the next section, we will explore the process of sowing the cactus seeds and kickstarting their germination journey.
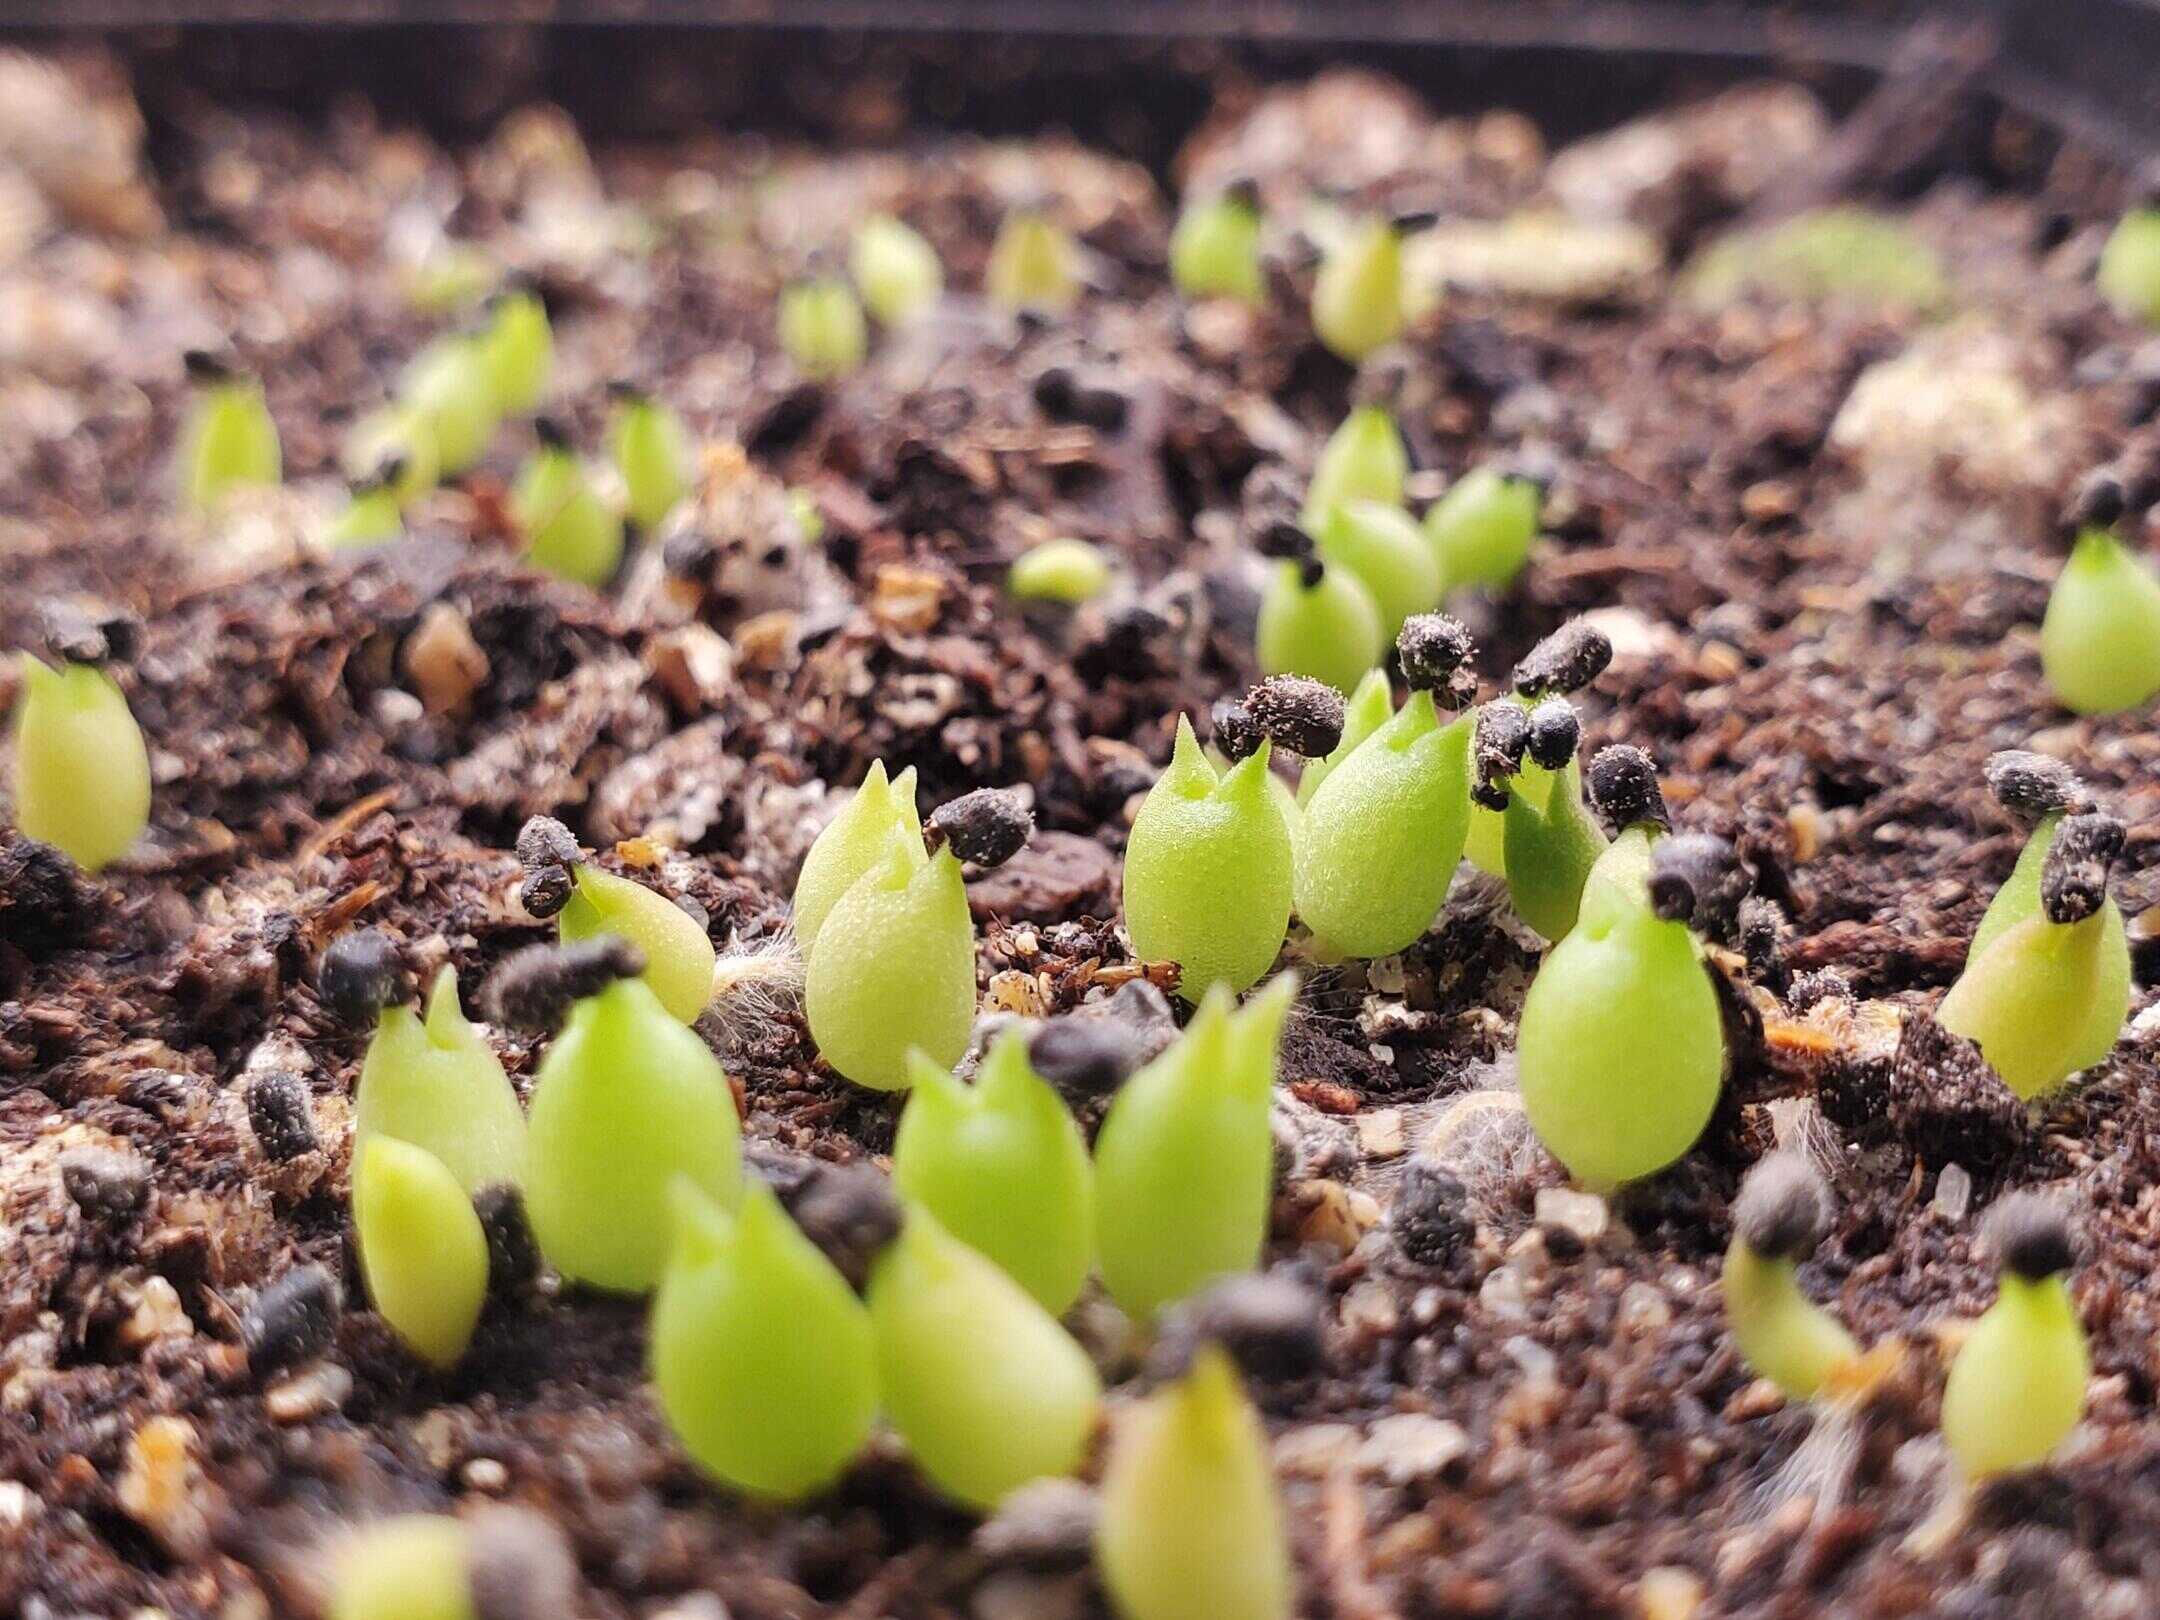
Sowing the Cactus Seeds
Now that you have your seed starting mix prepared, it’s time to sow the cactus seeds and set them on their path to germination. Here’s a step-by-step guide to help you sow your cactus seeds:
- Prepare the Containers: Ensure that the containers you will be using are clean and have drainage holes at the bottom to prevent waterlogging. If using recycled containers, make sure to sterilize them beforehand.
- Moisten the Seed Starting Mix: Before sowing the seeds, mist the seed starting mix lightly with water to provide a slightly moist environment for the seeds.
- Sprinkle the Seeds: Carefully sprinkle the cactus seeds on top of the moistened seed starting mix. Be mindful of the size and density of the seeds, as some may require spacing while others can be sown more densely.
- Lightly Press the Seeds: Gently press the seeds into the surface of the mix using either the back of a spoon or your fingertips. This ensures good seed-to-soil contact for optimal germination.
- Cover and Seal: If using seedling trays or containers with clear covers, simply close the lids to create a mini greenhouse effect. If using other containers, cover them with plastic wrap and secure it with rubber bands or clips to retain moisture.
- Place in the Ideal Location: Find a suitable location for the containers, preferably in a warm area with indirect sunlight. Avoid placing them in direct sunlight, as it can cause excessive heat buildup and damage the delicate seeds.
- Provide Bottom Heat (Optional): If you are growing heat-loving cacti, consider placing the containers on a heat mat to provide gentle bottom heat. This can help stimulate germination for seeds that require warmer temperatures.
- Maintain Moisture: Periodically check the moisture levels of the seed starting mix. If it appears dry, mist it lightly with water to maintain the desired level of moisture. Avoid overwatering, as it can lead to fungal growth.
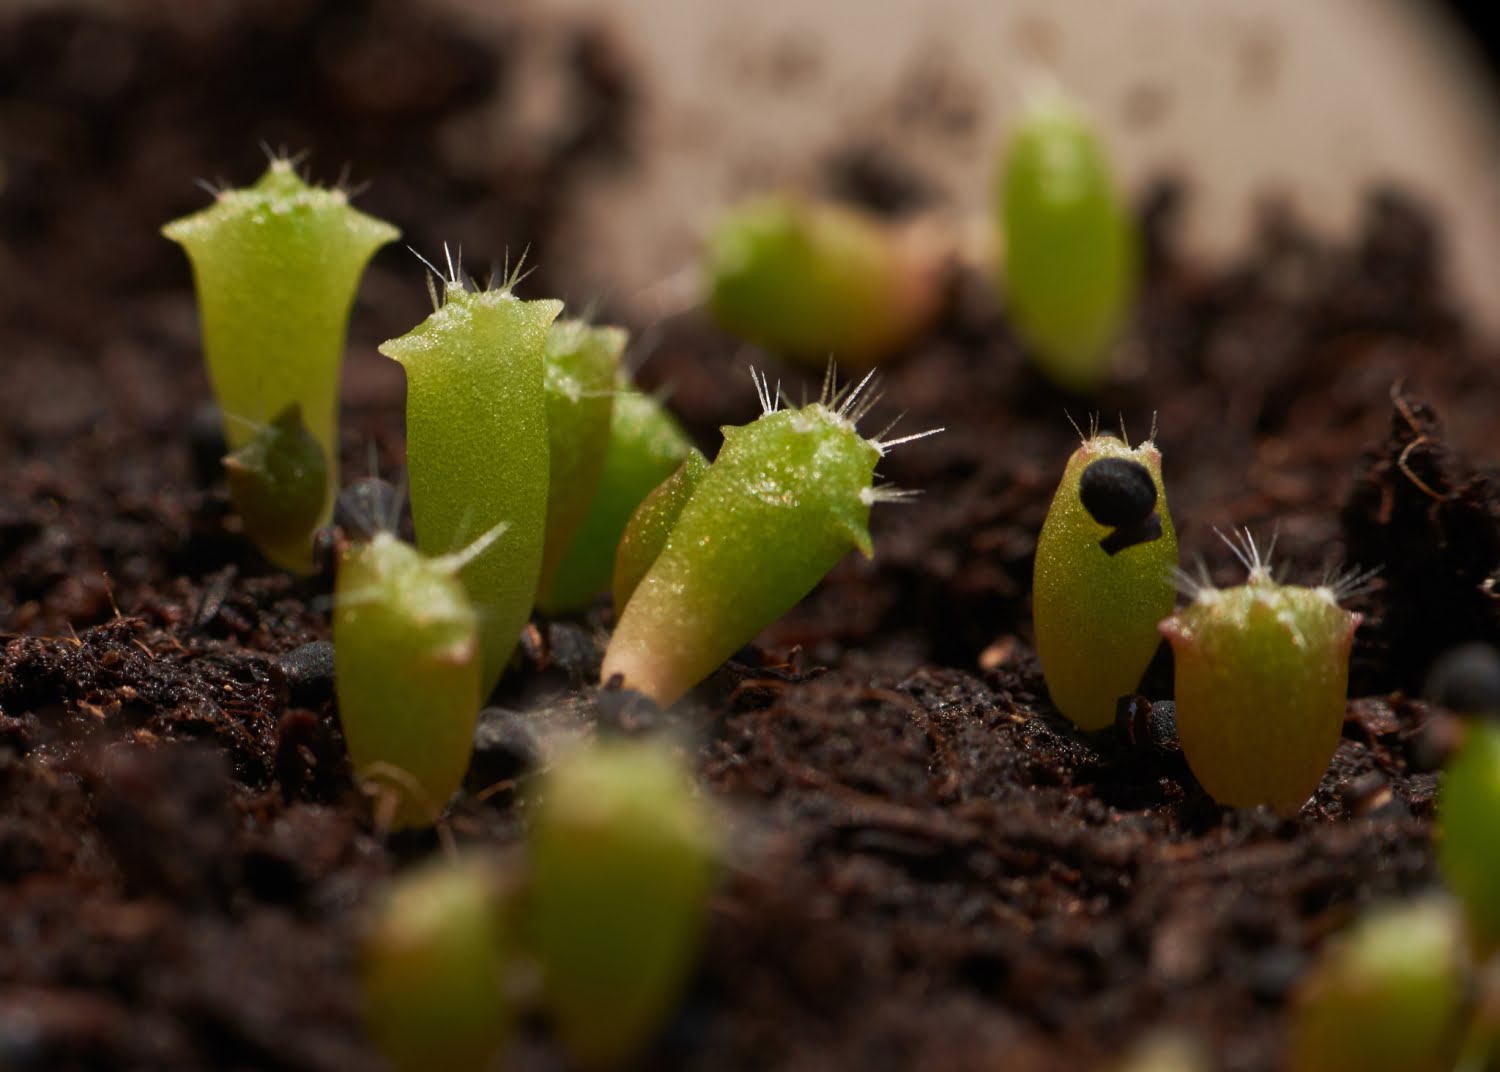
- Be Patient: Germination times can vary greatly depending on the cactus species. Some may sprout within days, while others may take weeks or even months. Be patient and monitor the containers for any signs of sprouting.
- Remove Cover and Adjust Lighting: Once the seeds have sprouted and developed into seedlings, remove the covers or plastic wrap and adjust the lighting to provide direct sunlight or sufficient artificial lighting. This helps the seedlings develop strong and healthy growth.
Sowing the cactus seeds is an exciting process, but it’s important to handle them with care and provide the right conditions for their germination. With patience and proper care, you will soon witness the emergence of tiny cactus seedlings. In the next section, we will discuss the ideal growing conditions for your cactus seedlings to thrive.
Tip: To start cactus seeds, use well-draining soil and plant the seeds shallowly. Keep the soil moist but not waterlogged, and provide plenty of sunlight. Cactus seeds typically germinate within 1-3 weeks.
Read more: How To Germinate A Prickly Pear Cactus
Providing the Ideal Growing Conditions
Once your cactus seeds have sprouted and are on their way to becoming seedlings, it’s crucial to provide them with the ideal growing conditions to support their healthy development. Here are key factors to consider:
- Light: Cacti are sun-loving plants and require bright light to thrive. Place your seedlings in a location that receives at least 6-8 hours of indirect sunlight each day. If natural light is limited, consider using fluorescent grow lights or LED plant lights to supplement the lighting.
- Temperature: Cacti prefer warm temperatures, with the ideal range varying between species. However, most cacti thrive in temperatures between 70-85°F (21-29°C) during the day and slightly cooler temperatures at night. Avoid exposing your seedlings to extreme cold or heat, as it can hinder their growth.
- Air Circulation: Good air circulation is essential for preventing issues like fungal diseases. Avoid overcrowding your seedlings and ensure there is adequate space between each plant. If growing indoors, use a fan to gently circulate the air around the seedlings.
- Watering: Cactus seedlings have delicate root systems and are susceptible to root rot if overwatered. Allow the top layer of the soil to dry out before watering, and always water from the bottom to avoid wetting the leaves. Aim for a deep, thorough watering once the soil has completely dried out.
- Humidity: While cacti are adapted to arid environments, the humidity levels during the seedling stage play a crucial role. A humidity level of around 40-50% is ideal for most cacti. If the air is too dry, you can increase humidity by placing a tray filled with water near the seedlings or using a humidifier.
- Fertilization: Once the seedlings develop their first set of true leaves, you can start fertilizing them. Use a diluted liquid fertilizer specifically formulated for cacti and succulents. Follow the instructions on the label and fertilize every 2-4 weeks during the growing season.
- Pest Control: Keep an eye out for common pests like aphids, mealybugs, or spider mites, which can attack cactus seedlings. Inspect your plants regularly and take appropriate measures such as using insecticidal soap or natural remedies to prevent and control infestations.
By providing these ideal growing conditions, you are giving your cactus seedlings the best chance of thriving and developing into mature plants. Keep a close eye on their progress, make any necessary adjustments, and enjoy watching them flourish.
In the next section, we will explore essential tips for caring for cactus seedlings and ensuring their long-term health and vitality.
Caring for Cactus Seedlings
Caring for your cactus seedlings is crucial to ensure their proper growth and development into healthy, mature plants. Here are some essential tips to help you care for your cactus seedlings:
- Watering: As your cactus seedlings grow, adjust your watering routine. Water thoroughly when the soil is completely dry, allowing any excess water to drain out of the container. Remember, overwatering can lead to root rot, so it’s essential to strike a balance and avoid waterlogged conditions.
- Lighting: As your seedlings grow, they will need more light to support their development. Gradually increase the exposure to sunlight or adjust the artificial lighting to provide at least 6-8 hours of direct or bright indirect light per day. Monitor your seedlings for any signs of stretching or etiolation, which indicate insufficient light.
- Temperature: Cacti generally prefer warm temperatures, but as seedlings, they can be more sensitive. Protect them from extreme temperature fluctuations and avoid exposing them to drafts or cold windowsills. Aim for a stable temperature range that is suitable for the specific cactus species you are growing.
- Transplanting: As your cactus seedlings grow, they will outgrow their initial containers. Once they have developed a robust root system, you can transplant them into larger containers or individual pots. Choose containers with drainage holes and use a well-draining cactus potting mix. Handle the seedlings with care during transplantation to avoid damaging their delicate roots.
- Spacing: When transplanting or arranging your seedlings, provide adequate spacing between each plant. Overcrowding can lead to competition for nutrients, restricted air circulation, and increased chances of pests and diseases. Follow the spacing recommendations specific to the cactus species you are growing.
- Support: Some cactus species may require support as they grow taller and develop larger stems. Use stakes or gently tie them to supports to keep them upright and prevent leaning or damage.
- Pruning: Prune any damaged or unhealthy growth on your seedlings. This includes yellowing or withering stems and any signs of disease or pest infestation. Use clean, sterilized pruning shears and make clean cuts to promote healing and prevent further damage.
- Observation: Regularly observe your seedlings for any signs of stress, disease, or pests. Look for changes in color, texture, or growth patterns. Early detection and intervention can help prevent further issues and ensure the overall health of your cactus seedlings.
- Patience: Growing cacti from seedlings requires patience. It takes time for them to establish their root systems, grow, and develop into mature plants. Be patient, provide the necessary care, and enjoy the journey of watching your seedlings transform into stunning cacti.
By following these care tips, you can provide the optimal conditions for your cactus seedlings to thrive and grow into strong, resilient plants. With time and attention, your efforts will be rewarded with a beautiful collection of cacti.
In the next section, we will address common issues that may arise during the process of growing cactus seedlings and provide troubleshooting solutions to help you overcome them.
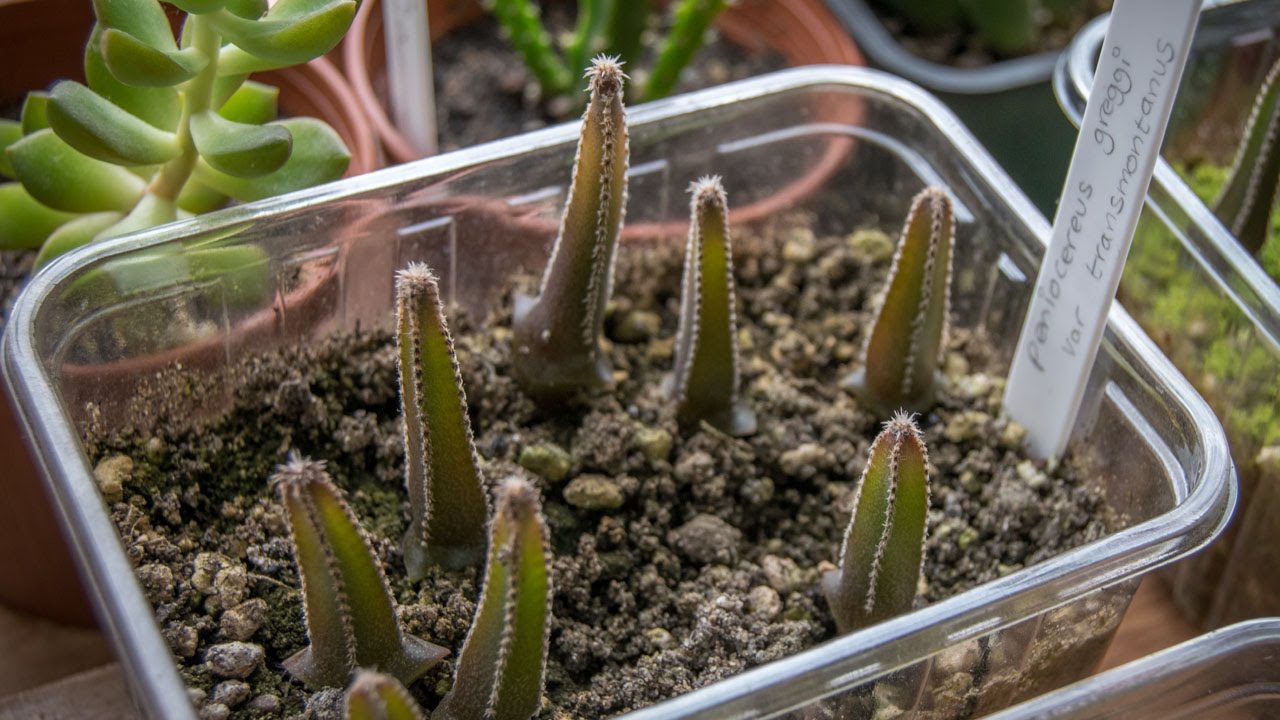
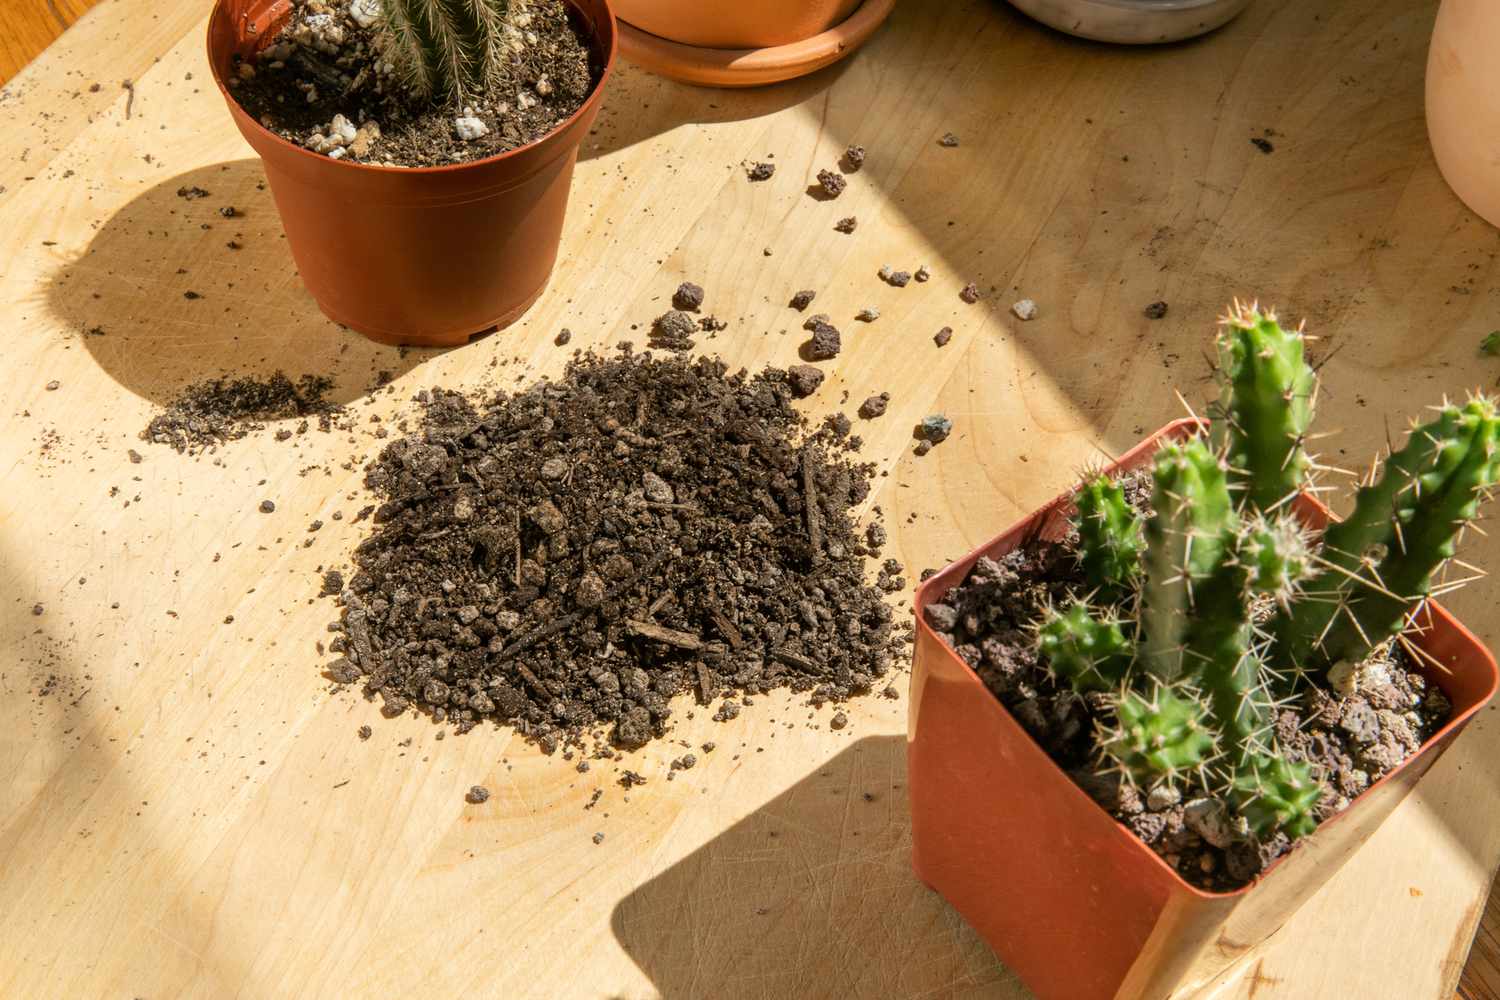
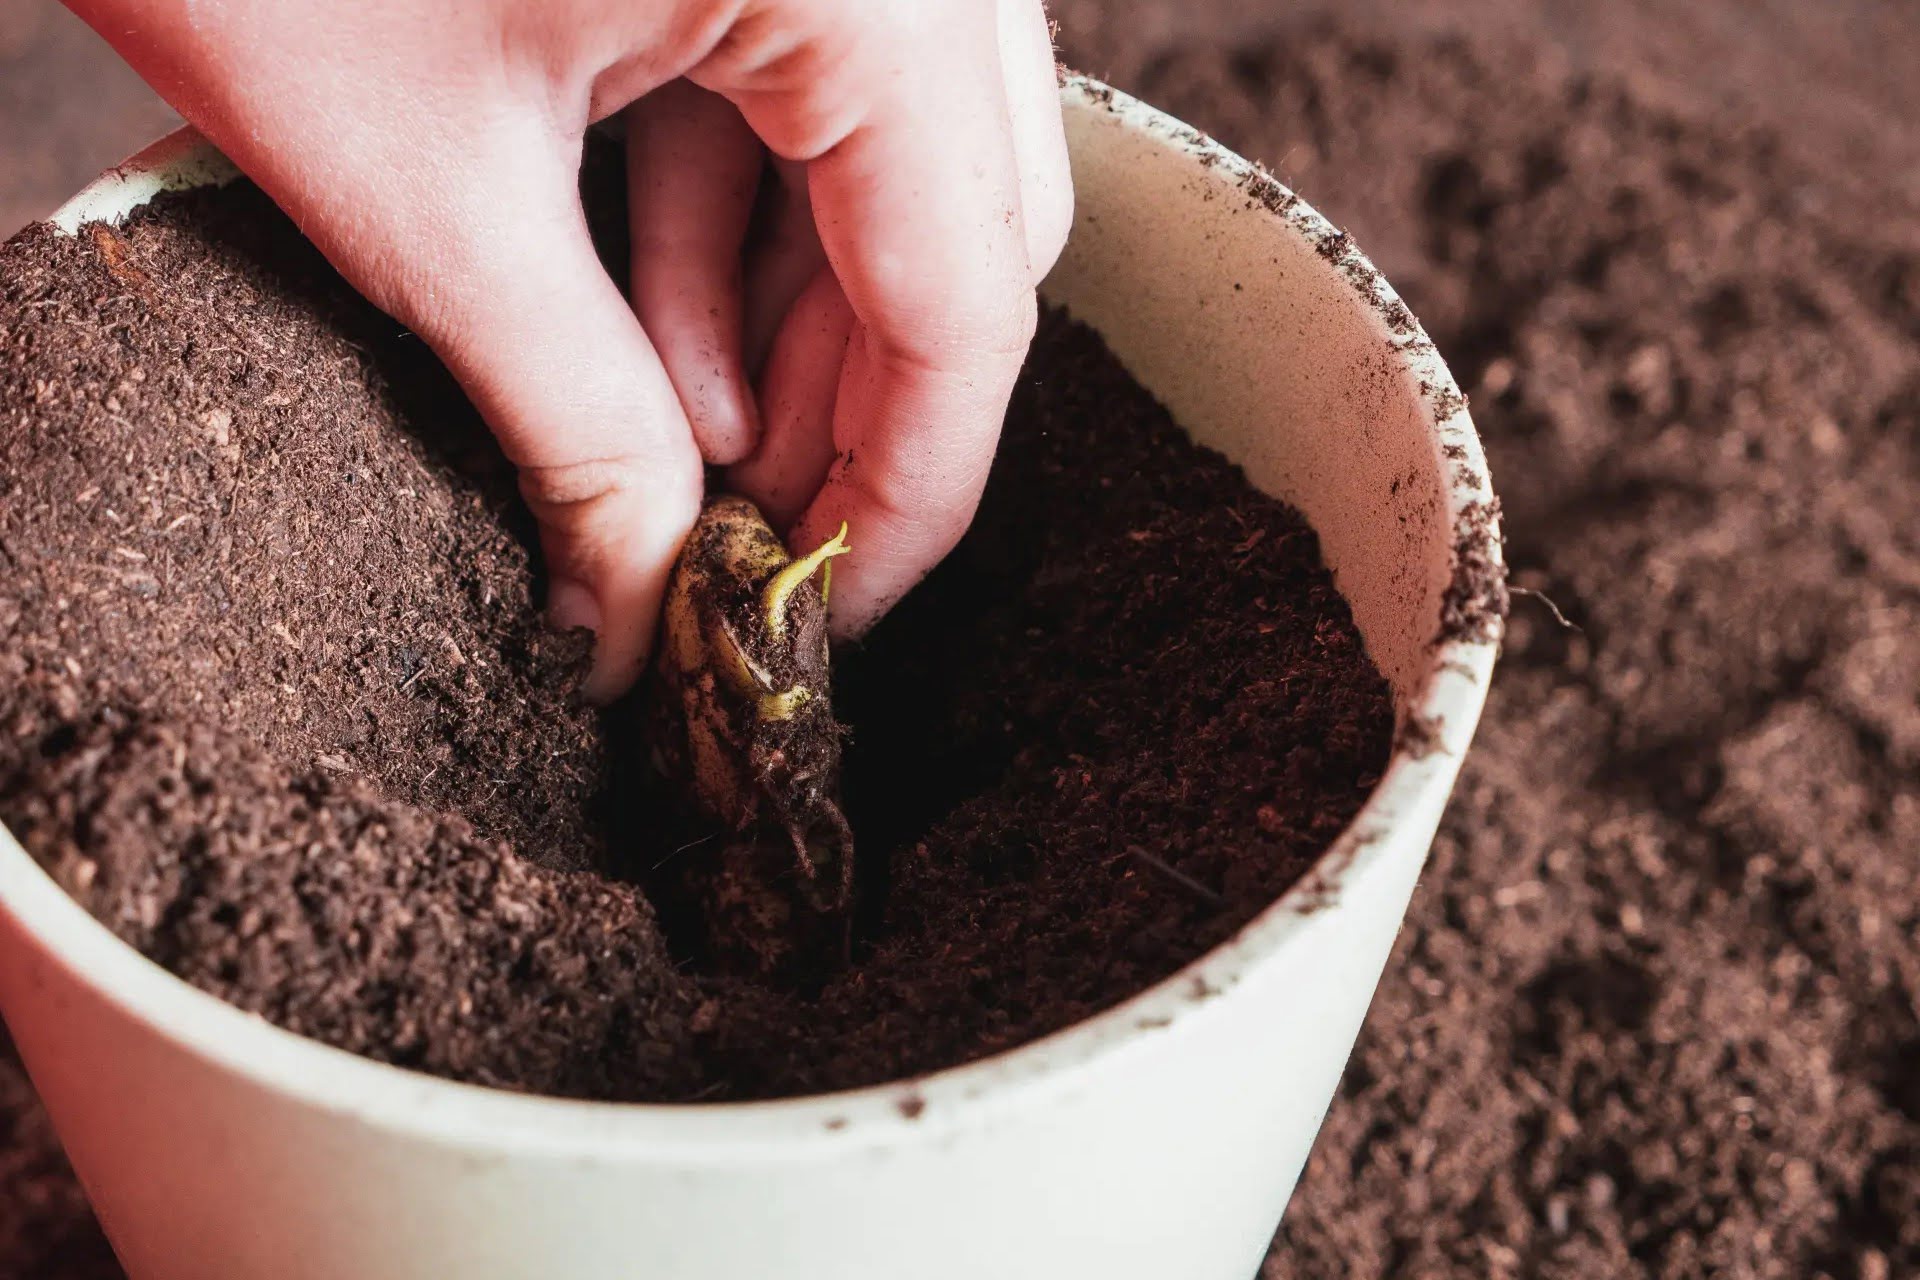
Transplanting the Cactus Seedlings
As your cactus seedlings continue to grow, they will eventually outgrow their initial containers and require transplantation into larger pots or individual containers. Transplanting cactus seedlings is an important step in their development, as it provides them with more space for their growing roots and allows for continued growth and maturity. Here’s a guide to help you successfully transplant your cactus seedlings:
- Select the Right Time: It’s best to transplant cactus seedlings when they have developed a strong root system but are still small enough to be easily handled. This is usually when they have outgrown their current containers or when the roots start becoming visible at the drainage holes.
- Choose Suitable Containers: Select pots or containers that are slightly larger than the current ones, providing enough room for their roots to spread. Ensure the new containers have drainage holes to prevent waterlogging.
- Prepare the Transplanting Mix: Use a well-draining cactus potting mix or create your own by combining a combination of regular potting soil, perlite, and coarse sand. This mix will provide the right balance of nutrients and drainage for the cactus seedlings.
- Gently Remove Seedlings: Carefully loosen the seedlings from their current containers by lightly squeezing the sides and tapping the bottom. Be gentle to avoid damaging the roots. If needed, you can use a clean, sterilized tool such as a spoon or wooden skewer to assist in lifting the seedlings out.
- Inspect and Trim: Take this opportunity to inspect the roots and remove any damaged or rotting ones. If any of the seedling stems appear weak or damaged, trim them back to encourage healthy growth. Make clean cuts using sterilized pruning shears.
- Prepare the New Containers: Fill the new containers with the prepared transplanting mix, leaving enough space at the top for watering. Gently tamp down the mix to remove any air pockets and create a stable base for the seedlings.
- Plant the Seedlings: Make a small hole in the center of the new container and carefully place the seedling into it. Arrange the roots without overcrowding or bending them and gently cover them with the transplanting mix. Ensure the seedlings are planted at the same level as they were in the previous containers.
- Water and Settle: After transplanting, give the seedlings a thorough watering to help settle the transplanting mix and eliminate any air pockets. Allow excess water to drain out completely. Avoid overwatering in the first few weeks after transplanting as the seedlings adjust to their new containers.
- Provide Adequate Care: Place the newly transplanted seedlings in a location with bright, indirect sunlight and moderate temperatures. Avoid direct sunlight during the initial days to prevent excessive stress on the seedlings. Gradually expose them to brighter conditions over time.
- Monitor and Adapt: Keep a close eye on the transplanted seedlings, checking for signs of stress or drying out. Adjust watering and care as needed, making sure not to overwater or underwater them. As they grow, continue to provide the ideal growing conditions for your cactus seedlings.
Successfully transplanting your cactus seedlings sets them on the path to becoming established, mature plants. With proper care and attention, your transplanted seedlings will continue to grow and flourish, adding beauty to your cactus garden or indoor space.
In the next section, we will discuss common issues that may arise during the process of growing cactus seedlings and provide troubleshooting solutions to help you overcome them.
Troubleshooting Common Issues
While caring for your cactus seedlings, you may encounter certain issues that can hinder their growth and development. It’s important to address these issues promptly to ensure the health and vitality of your cactus seedlings. Here are some common issues and troubleshooting solutions:
- Overwatering: One of the most common problems with cactus seedlings is overwatering, which can lead to root rot and fungal infections. To prevent this, allow the top layer of the soil to dry out before watering and ensure your containers have good drainage. Adjust your watering frequency based on the specific needs of your cactus species.
- Underwatering: If your cactus seedlings appear shriveled and dry, it may be a sign of underwatering. Water your seedlings thoroughly and ensure the soil is evenly moist, but not saturated. Remember, cacti are succulent plants that can store water in their tissues, so it’s better to underwater than to overwater.
- Stretching/Etiolation: If your cactus seedlings are growing tall and thin, with large gaps between their nodes, it indicates a lack of sufficient light. Move the seedlings to a brighter location with more direct sunlight or adjust your artificial lighting setup to provide adequate illumination for healthy growth.
- Pests: Keep an eye out for common pests like aphids, mealybugs, spider mites, or scale insects, which can attack your cactus seedlings. If you notice any pests, promptly remove them manually or use an appropriate insecticidal soap or natural remedies to control the infestation.
- Disease: Cactus seedlings are generally resilient, but they can be susceptible to fungal diseases such as damping-off or root rot. To prevent these issues, maintain proper hygiene, ensure good airflow around the seedlings, and avoid overcrowding. If you identify any signs of disease, remove the affected seedlings and adjust your care routine to prevent further spread.
- Improper Transplanting: If your cactus seedlings show signs of stress after transplanting, such as wilting or yellowing, it may indicate inadequate acclimation or root damage. Ensure proper acclimation by gradually exposing the seedlings to their new environment. Be gentle during transplanting, handling the roots with care, and providing appropriate post-transplanting care.
- Inadequate Air Circulation: Insufficient air circulation can increase the risk of fungal diseases and hinder the growth of your cactus seedlings. Ensure proper spacing between seedlings to promote airflow and use a gentle fan to improve circulation, especially in indoor growing environments.
- Nutrient Deficiencies: Cacti have specific nutrient requirements. If your seedlings show signs of nutrient deficiencies, such as yellowing or stunted growth, it may indicate a lack of essential nutrients. Consider using a balanced, diluted fertilizer specifically formulated for cacti to provide the necessary nutrients for healthy growth.
- Environmental Stress: Excessive heat, cold drafts, or sudden temperature fluctuations can stress your cactus seedlings. Protect them from extreme conditions and provide consistent temperatures within the optimal range for their specific species.
By being proactive and addressing these common issues, you can ensure the overall health and well-being of your cactus seedlings. Regular observation, proper care, and timely troubleshooting will help you overcome any challenges and cultivate vibrant, thriving cacti.
Congratulations on successfully growing and caring for your cactus seedlings! With time and dedication, you will have a stunning collection of mature cacti that you can enjoy for years to come.
Before we conclude, it’s important to remember that individual cactus species may have specific care requirements. Always research and understand the needs of the particular cacti you are growing to provide them with the best care possible.
Happy gardening!
Read more: How To Grow Cactus From Seed
Conclusion
Congratulations on embarking on the journey of starting cactus seeds and growing your own cactus garden! By understanding the unique characteristics of cactus seeds, gathering the necessary supplies, and providing the ideal growing conditions, you are well on your way to cultivating a thriving collection of cacti.
We explored the process of sowing cactus seeds, from preparing the seed starting mix to providing the optimal environment for germination. Caring for the cactus seedlings, including transplanting them into larger containers, is crucial for their continued growth and development.
Throughout the growing process, it’s important to monitor your cactus seedlings for any issues or common challenges. With proper care and timely troubleshooting, you can prevent and overcome problems such as overwatering, stretching, pests, diseases, and inadequate lighting.
Remember, cacti are resilient plants that can adapt to a variety of conditions. However, it’s important to understand the specific needs of each cactus species you are growing to ensure their long-term health and vitality.
As you continue to care for your cactus garden, enjoy the beauty and diversity of these fascinating plants. Witnessing the growth and development of your cactus seedlings into mature plants will bring you joy and a sense of accomplishment.
Stay curious, keep learning, and explore the fascinating world of cacti. Happy gardening!
Frequently Asked Questions about How To Start Cactus Seeds
Was this page helpful?
At Storables.com, we guarantee accurate and reliable information. Our content, validated by Expert Board Contributors, is crafted following stringent Editorial Policies. We're committed to providing you with well-researched, expert-backed insights for all your informational needs.


0 thoughts on “How To Start Cactus Seeds”