Home>Garden Essentials>How To Use Egg Cartons To Start Seeds
Garden Essentials
How To Use Egg Cartons To Start Seeds
Modified: March 15, 2024
Learn how to start seeds in your garden using egg cartons. Discover this simple and eco-friendly method for successful seed germination.
(Many of the links in this article redirect to a specific reviewed product. Your purchase of these products through affiliate links helps to generate commission for Storables.com, at no extra cost. Learn more)
Introduction
Welcome to the wonderful world of gardening! If you’re a beginner or an experienced gardener, starting seeds is an essential part of the process. While there are plenty of options for seed starting containers, one cost-effective and eco-friendly choice is using egg cartons. Not only can you save money by repurposing materials you may already have at home, but you’ll also be giving those little seedlings a cozy and nurturing environment to get a head start.
In this article, we will guide you through the step-by-step process of using egg cartons to start seeds. From preparing the cartons to caring for your seedlings, you’ll learn everything you need to know to successfully begin your gardening journey.
But before we dive into the details, let’s take a look at the materials you’ll need:
Key Takeaways:
- Start seeds using egg cartons for a cost-effective and eco-friendly option. Follow simple steps from preparing the carton to caring for seedlings to grow healthy plants.
- Repurpose egg cartons to create a nurturing environment for seedlings. Follow step-by-step instructions for successful seed starting and enjoy the gardening journey.
Read more: How To Plant Seeds In Egg Cartons
Materials Needed
- Empty egg cartons (preferably cardboard)
- High-quality potting soil
- Seeds of your choice
- A spray bottle filled with water
- Plastic wrap or a clear plastic dome
- A waterproof tray or saucer to place the egg carton on
- Optional: a grow light or a sunny window sill
Now that you have gathered all the necessary materials, let’s dive into the step-by-step instructions on how to use egg cartons to start seeds.
Step-by-Step Instructions
Follow these simple steps to start your seeds using egg cartons:
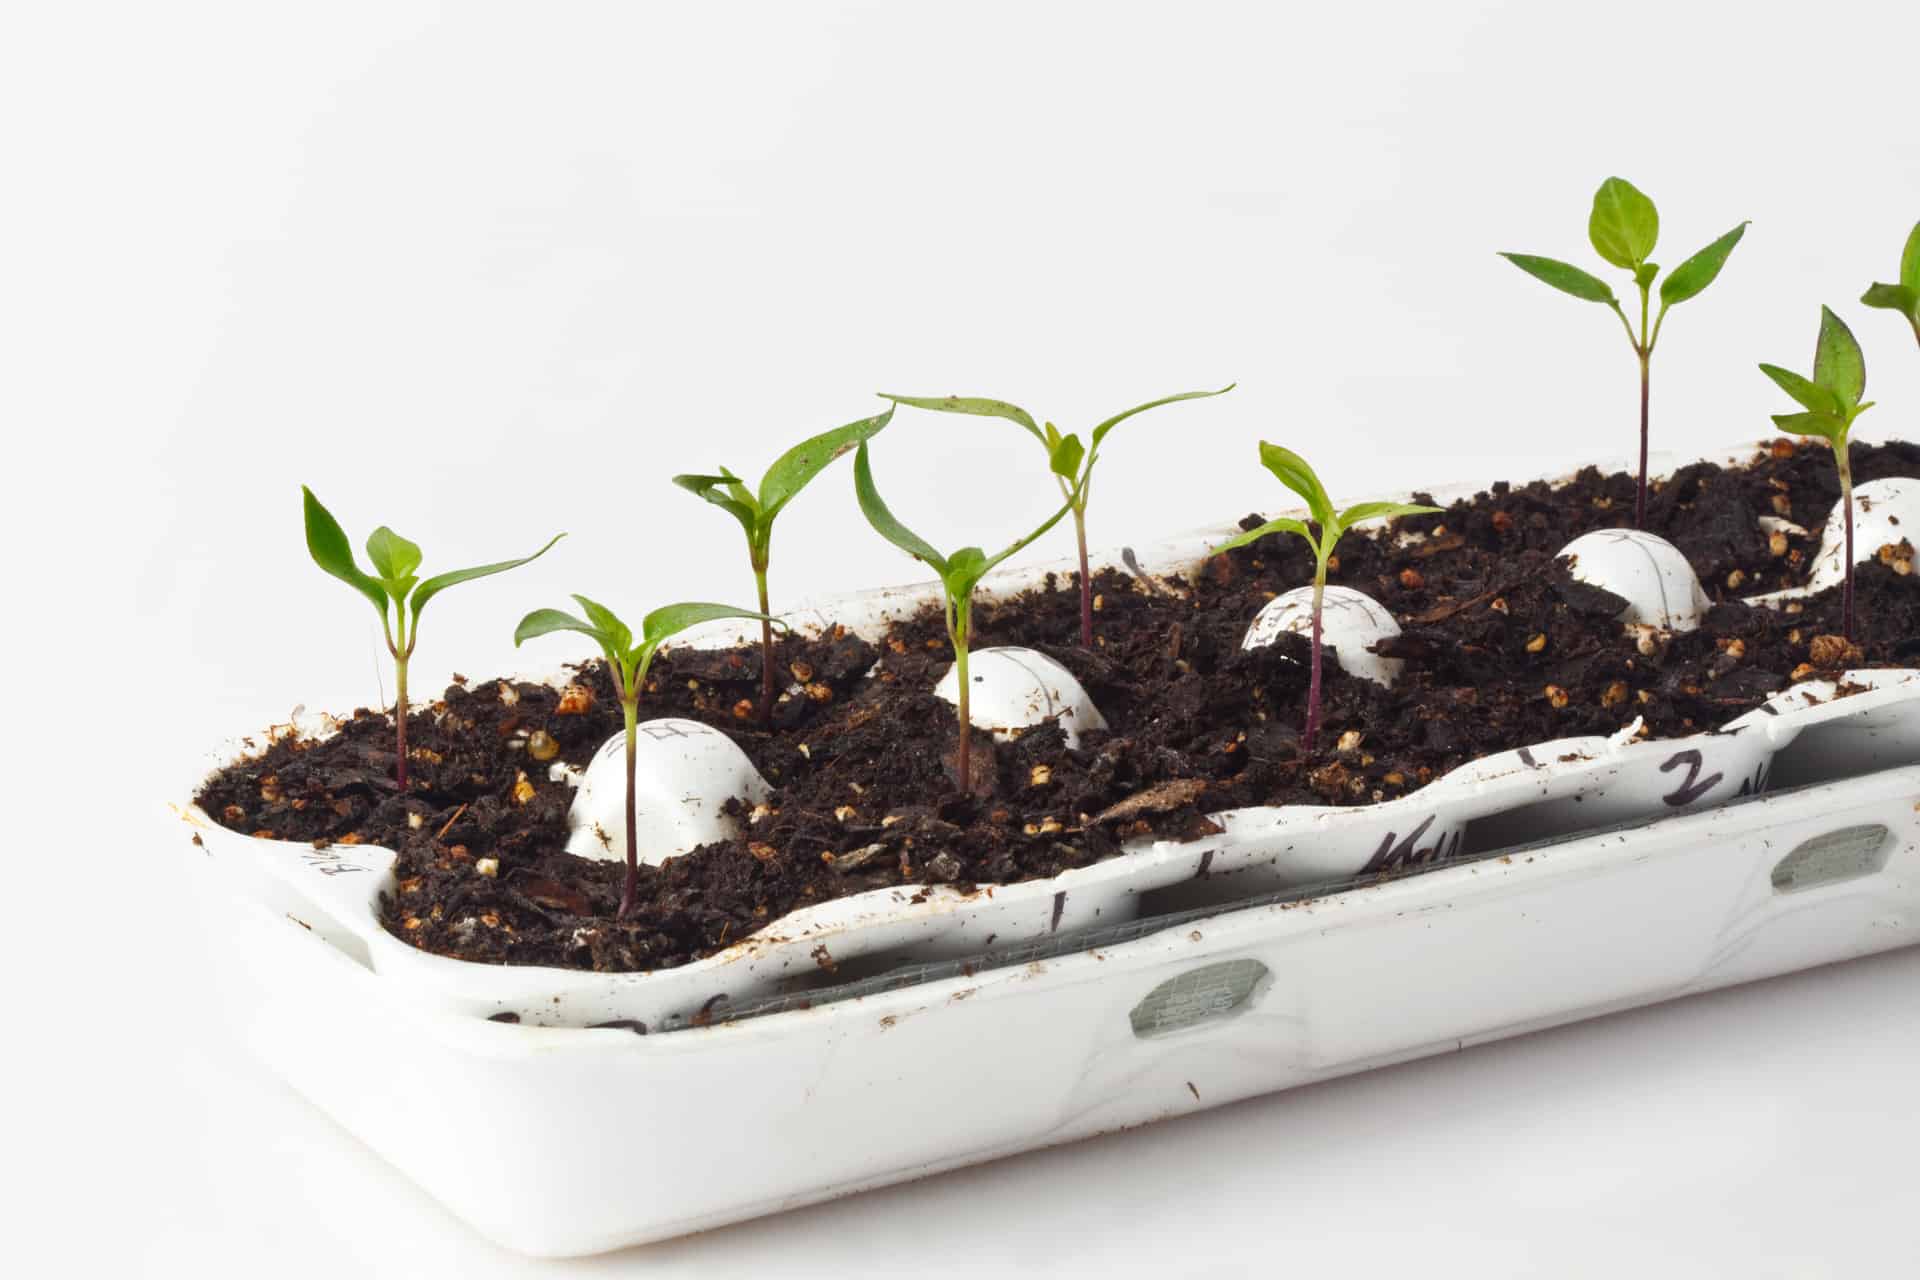
- Prepare the Egg Carton: Begin by collecting empty egg cartons, preferably made of cardboard. Cut the lid off the carton and set it aside. Make sure the carton is clean and free from any debris. If using a carton with individual egg cups, gently remove the cups from the bottom tray, keeping them intact.
- Add Soil to the Carton: Fill each egg cup with high-quality potting soil, leaving about half an inch of space at the top. Press the soil gently to ensure it is compact but not too tightly packed. This will provide a firm foundation for your seeds to germinate.
- Plant the Seeds: Make a small indentation in the center of each cup, about half an inch deep. Place one or two seeds in each indentation, following the recommended spacing for the particular plant variety. Cover the seeds with a thin layer of soil, gently patting it down to secure them in place.
- Water the Seeds: Using a spray bottle filled with water, moisten the soil in each cup. Be careful not to overwater, as excessive moisture can lead to fungal growth or rot. The goal is to keep the soil consistently moist, but not waterlogged.
- Care for the Seedlings: Place the plastic wrap or clear plastic dome over the egg carton to create a mini greenhouse effect. This will help retain moisture and increase humidity, promoting seed germination. Keep the carton in a warm location, away from direct sunlight, until the seeds begin to sprout. Once the seedlings emerge, remove the plastic cover.
- Transplant the Seedlings: As the seedlings grow, they will outgrow the confines of the egg carton. Once they have developed a few sets of true leaves and are strong enough, it’s time to transplant them into larger individual pots or directly into your garden. Gently remove each seedling from the egg carton, being careful not to damage the delicate roots, and plant them in their new homes.
Congratulations! You have successfully started your seeds using egg cartons. With proper care and attention, your seedlings will grow into healthy plants, ready to brighten up your garden.
Remember, each plant has unique needs, so be sure to research the specific care instructions for the varieties you’re growing. Happy gardening!
Preparing the Egg Carton
The first step in using egg cartons to start seeds is to prepare the carton itself. Follow these steps to ensure your egg carton is ready for planting:
- Collect an Empty Egg Carton: Choose a cardboard egg carton rather than a plastic one, as cardboard is more biodegradable and will allow for better moisture retention.
- Cut the Lid Off: Using a pair of scissors or a sharp knife, carefully cut off the lid of the egg carton. Set it aside; it may come in handy for other gardening purposes.
- Clean the Carton: Check the egg cups for any stray pieces of eggshell or residue. Gently tap the carton to remove any debris or loose material. Run water over the carton if needed to ensure it is clean and free from any potential contaminants.
- Optional: Poke Holes: If your egg carton doesn’t already have drainage holes, consider using a small sharp tool or a nail to poke a few holes in each cup. This will prevent waterlogging and promote proper drainage.
- Place the Carton in a Waterproof Tray: Set the prepared egg carton in a waterproof tray or saucer. This will catch any excess water that drains from the bottom of the carton, preventing a mess.
Once your egg carton is clean and trimmed, it’s ready to be filled with potting soil and your selected seeds. The process of preparing the egg carton is simple, yet crucial for ensuring a successful seed starting experience.
Now that you’ve properly prepared the egg carton, we can move on to the next step: adding soil to the carton.
Adding Soil to the Carton
The next step in using egg cartons to start seeds is to fill each cup with high-quality potting soil. Follow these steps to ensure your seedlings receive the best growing medium:
- Gather Your Potting Soil: Use a high-quality potting mix specifically formulated for seed starting. Avoid using garden soil, as it may contain pests, diseases, or weed seeds that can harm your seedlings.
- Fill Each Egg Cup: With clean hands or a small scoop, carefully fill each egg cup with potting soil, leaving about half an inch of space at the top. Ensure that the soil is evenly distributed and level so that the seeds will have a consistent planting medium.
- Press the Soil Gently: Using your fingers or the back of a spoon, lightly press the soil down in each cup. This will help create a slightly compacted, firm surface for the seeds to rest on. Avoid pressing too hard, as it can make it difficult for the seeds to germinate.
- Ensure Proper Moisture: Before moving on to the next step, make sure the potting soil is slightly moist. If it feels dry, lightly mist it with water using a spray bottle. It should be damp, but not soaking wet, as excessive moisture can lead to fungal issues.
Adding soil to the egg carton is an important step as it provides the necessary nutrients and a secure environment for the seeds to germinate and grow. Once the soil is properly prepared, it’s time to move on to the exciting task of planting the seeds.
Note: If you’re using egg cartons without individual egg cups, you can still follow these steps by sectioning off each cell with small strips of cardboard or paper to create individual compartments for planting.
When using egg cartons to start seeds, make sure to poke small holes in the bottom of each section for drainage. This will prevent water from pooling and help the seeds to grow healthy roots.
Read more: How To Store Fresh Eggs In Carton
Planting the Seeds
Now that you have prepared the egg carton and filled it with potting soil, it’s time to plant the seeds. Follow these steps to ensure successful germination:
- Choose the Seeds: Select the seeds you want to plant, whether they are flowers, vegetables, or herbs. Make sure to choose seeds that are appropriate for your growing zone and the specific conditions of your garden.
- Read the Seed Packet: Before planting, carefully read the instructions on the seed packet. It will provide important information on seed depth, spacing, and any specific requirements for successful germination.
- Create Indentations: Using your finger or a small tool, create a shallow indentation in the center of each potting soil-filled egg cup. The depth of the indentation will vary depending on the size of the seeds, so refer to the seed packet for guidance.
- Place the Seeds: Drop one or two seeds into each indentation. If the seeds are very small, it can be helpful to use tweezers or a toothpick to handle them and ensure precise placement.
- Cover the Seeds: Gently cover the seeds with a thin layer of potting soil. The general rule of thumb is to cover seeds with a layer of soil that is about two to three times the thickness of the seed. This will provide enough protection and contact with the soil for successful germination.
- Label the Carton: To avoid confusion, label your egg carton with the name of the plant variety and the date of planting. This is especially important if you are starting multiple types of seeds.
Once you have planted the seeds, it’s time to move on to the next crucial step: watering the seeds to initiate germination.
Watering the Seeds
Proper watering is vital for seed germination and healthy seedling growth. Follow these steps to ensure your seeds receive the right amount of moisture:
- Get a Spray Bottle: Fill a spray bottle with water. Using a spray bottle helps control the amount of water you apply to the seeds, preventing excessive saturation.
- Mist the Soil: Gently mist the soil in each egg cup, making sure to moisten it evenly. Avoid using a stream of water that can disrupt the seeds or displace the soil. The goal is to moisten the soil, but not to soak it.
- Keep the Soil Moist: Check the soil regularly and keep it consistently moist throughout the germination process. Avoid allowing the soil to dry out completely or become overly saturated. Too much water can lead to seed rot or the development of diseases.
- Avoid Overwatering: Be mindful not to overwater the seeds or seedlings. Overwatering can lead to damping-off, a fungal disease that can cause the seedlings to wither and die. If you notice excessive moisture or mold growth, adjust your watering routine accordingly.
- Provide Bottom Watering: As an alternative to misting, you can also place the egg carton in a tray or saucer filled with water. The soil will absorb the water from the bottom, ensuring thorough and gentle hydration.
Remember that different plant varieties have different water needs, so it’s essential to research the specific requirements for the seeds you’re planting. Consistent and appropriate watering will help the seeds germinate and give them the best chance of becoming strong, healthy seedlings.
Now that you’ve successfully watered the seeds, it’s time to move on to the next step: caring for the seedlings as they sprout and grow.
Caring for the Seedlings
Once your seeds have germinated and the seedlings have emerged, it’s important to provide them with proper care to ensure healthy growth. Follow these steps to nurture your seedlings:
- Remove the Plastic Cover: If you’ve been using a plastic wrap or clear plastic dome to create a mini greenhouse effect, it’s time to remove it now that the seedlings have sprouted. This allows for proper airflow and reduces the risk of mold or fungal growth.
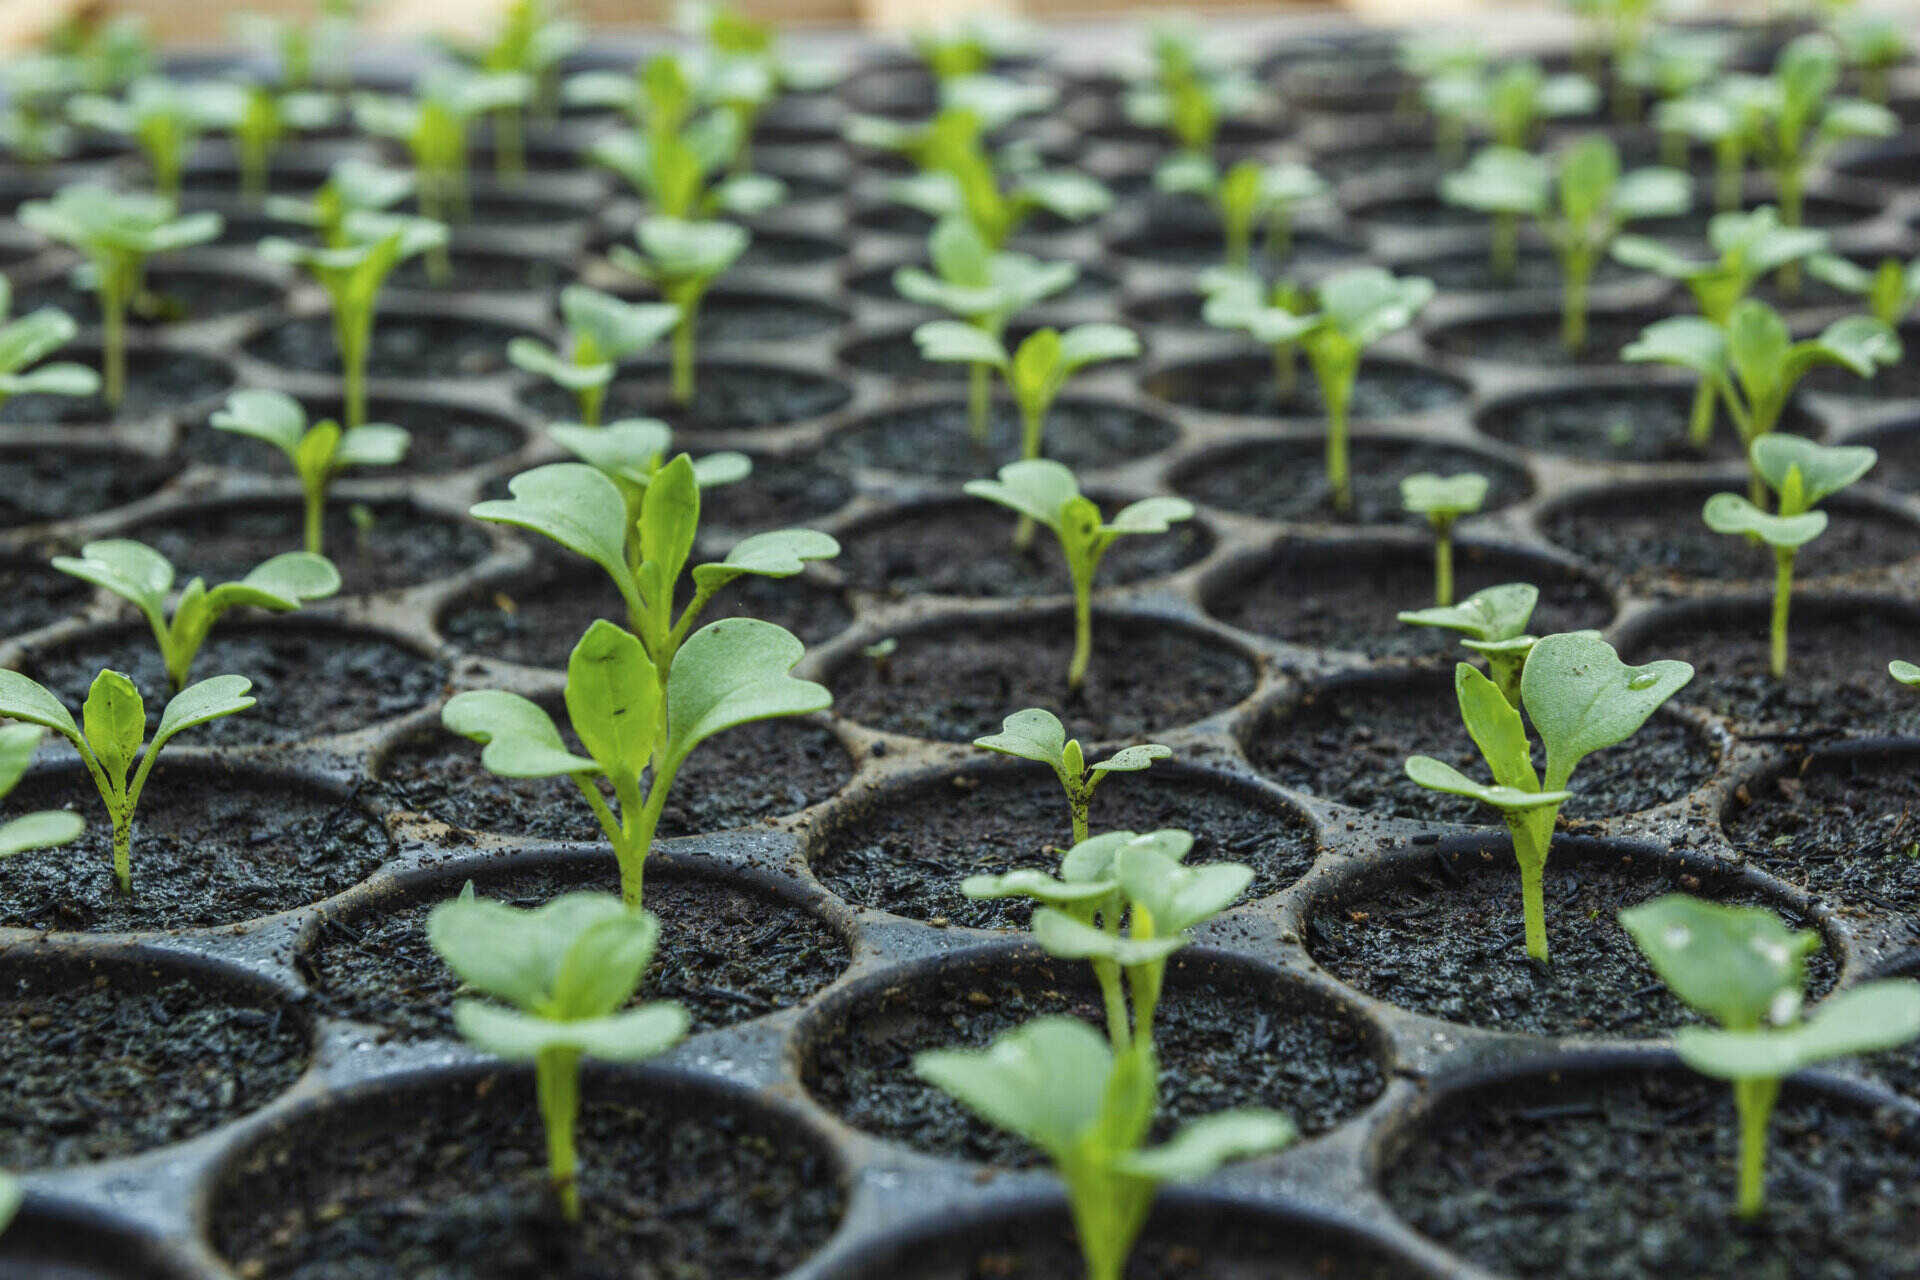
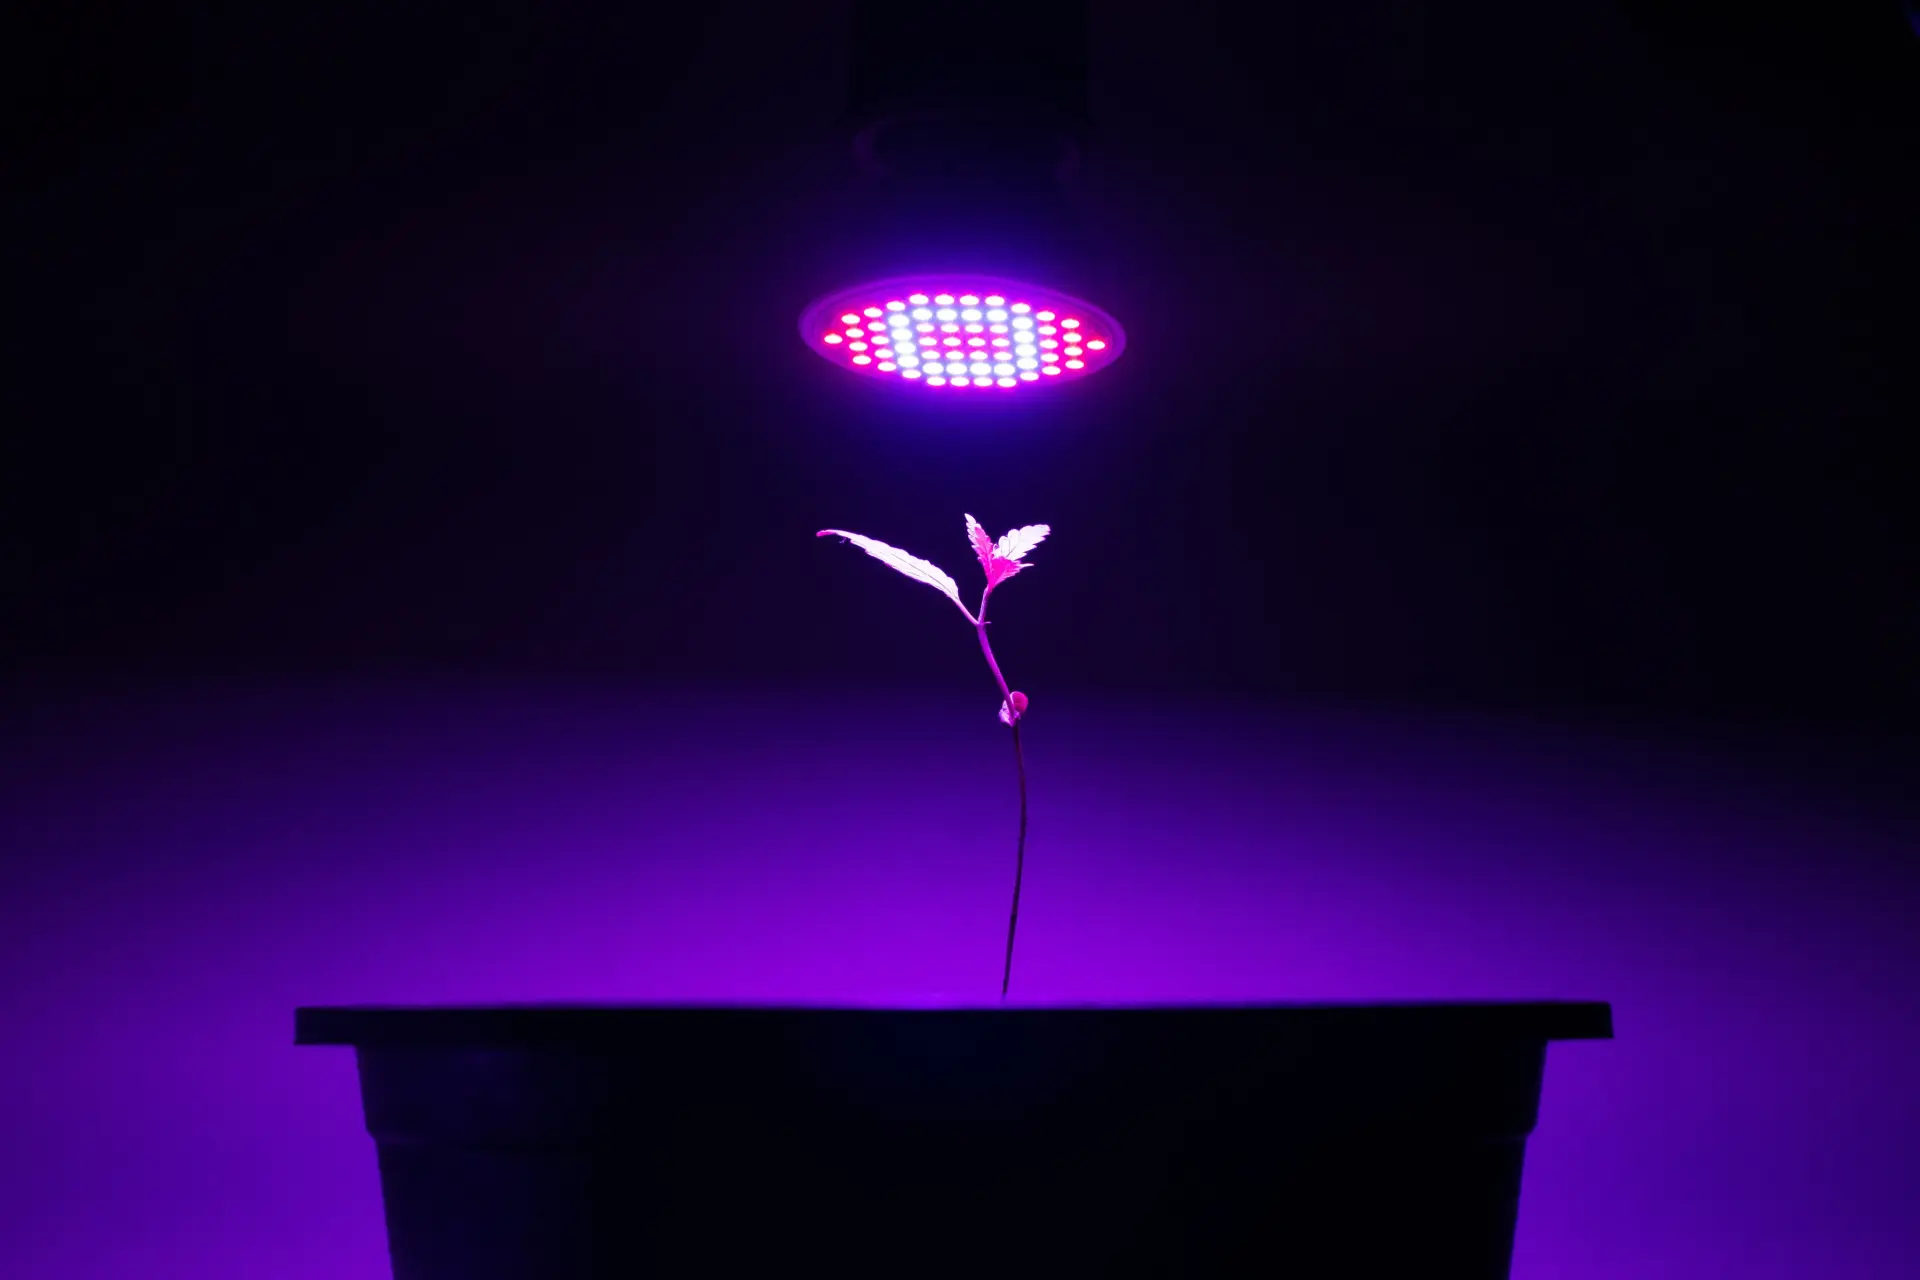
- Provide Ample Light: Place the seedlings in a location where they can receive adequate light. If you don’t have access to natural sunlight, consider using a grow light. The seedlings will need at least 12-16 hours of light each day to promote healthy growth.
- Monitor Temperature: Maintain a consistent temperature for the seedlings, ideally between 60-75°F (15-24°C). Avoid exposing them to extreme temperature fluctuations or drafts that can stress the young plants.
- Water Regularly: Continue to monitor the moisture levels in the soil and water the seedlings regularly. Make sure the soil remains evenly moist, but not waterlogged. Adjust the watering schedule as needed, keeping in mind that seedlings in smaller containers may dry out faster.
- Fertilize Appropriately: Once the seedlings develop their first true leaves, you can start fertilizing them with a diluted organic liquid fertilizer. Follow the instructions on the fertilizer package and avoid overfertilizing, as it can damage the delicate roots.
- Thin the Seedlings: If you have planted more than one seed per cup and multiple seedlings have emerged, it is essential to thin them out. Snip off the weaker seedlings at the soil level, allowing the remaining seedling to have adequate space and resources to grow.
- Provide Support (if needed): Some seedlings may require support as they grow taller. Use small stakes or plant supports to prevent them from bending or collapsing under their own weight.
- Rotate the Carton: To promote even growth, rotate the egg carton periodically. This prevents the seedlings from leaning or growing towards the light source and encourages balanced development.
By following these care instructions, your seedlings will thrive and be ready for the next stage of their journey: transplanting into larger pots or directly into the garden. Pay attention to each plant’s specific needs, and enjoy watching your seedlings grow into beautiful, mature plants!
Now that you’ve learned how to care for your seedlings, let’s move on to the final step: transplanting them when they are ready.
Transplanting the Seedlings
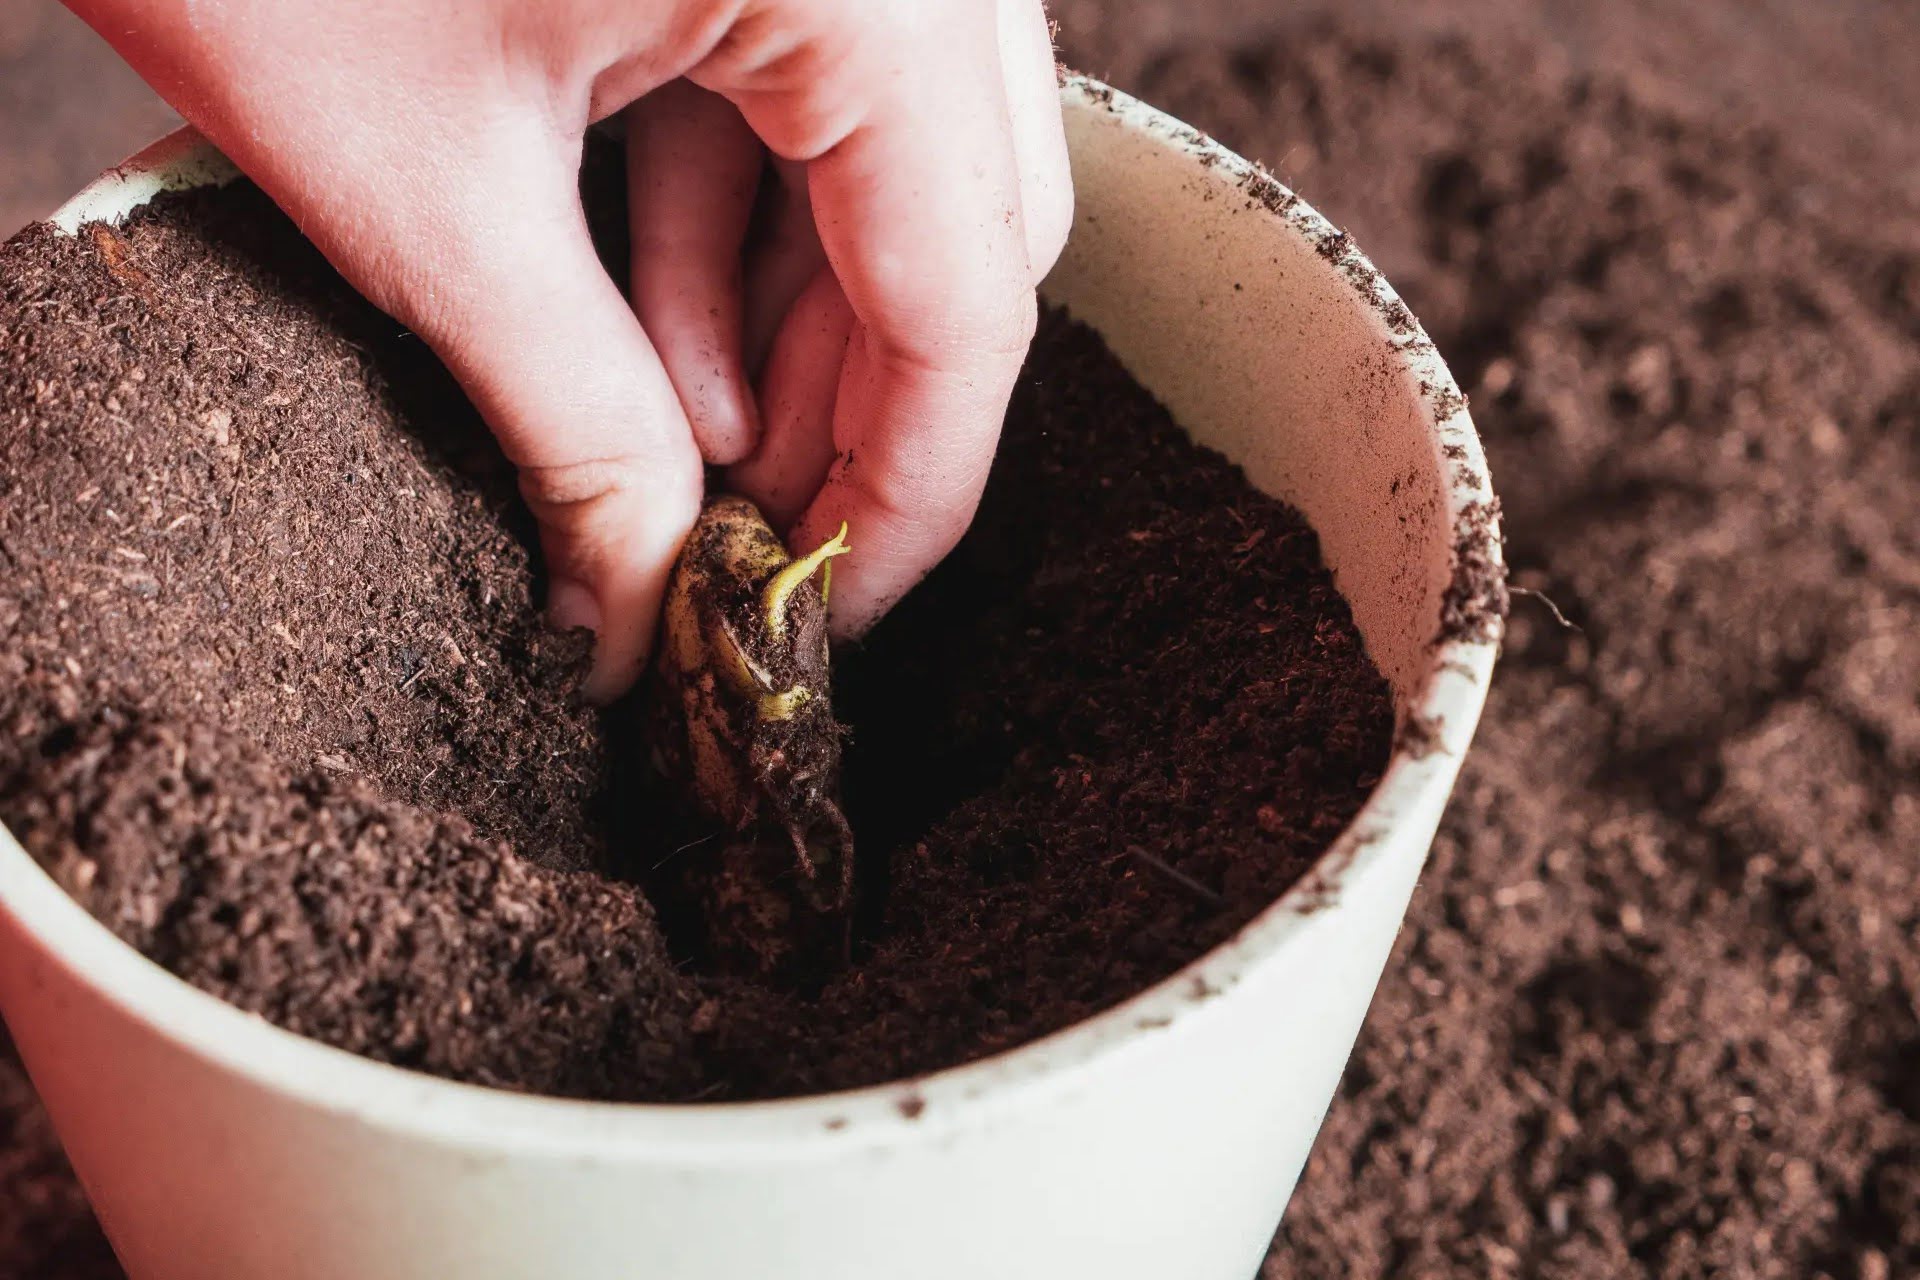
When your seedlings have grown strong and developed a few sets of true leaves, it’s time to transplant them into their permanent homes. Follow these steps to ensure a successful transition:
- Prepare the New Containers: Choose the appropriate-sized containers for your seedlings’ future growth. Make sure the containers have drainage holes at the bottom to prevent waterlogging.
- Moisten the Soil: Before transplanting, water the soil in the new containers to ensure it is moist but not overly saturated.
- Remove the Seedlings: Gently remove each seedling from the egg carton, being careful not to damage the delicate roots. You can use a spoon or your fingers to carefully lift the seedlings from the soil.
- Separate Roots (if needed): If the roots of multiple seedlings are intertwined, carefully separate them by gently teasing them apart. This will give each seedling its own space and prevent root competition.
- Plant the Seedlings: Dig a small hole in the new container’s soil that is deep enough to accommodate the seedling’s root system. Place the seedling in the hole and gently firm the soil around it, ensuring the seedling is upright and secure.
- Water Thoroughly: Give the newly transplanted seedlings a thorough watering to help settle the soil and ensure good root-to-soil contact. Maintain regular watering to keep the soil moist as the seedlings establish themselves in their new containers.
- Provide Optimal Growing Conditions: Place the newly transplanted seedlings in a suitable location, whether indoors or outdoors, based on their specific light and temperature requirements. Continue to monitor their progress and provide the necessary care such as appropriate lighting, watering, and fertilization.
- Harden Off the Seedlings: If you are transplanting the seedlings to an outdoor garden, gradually acclimate them to the outdoor conditions. Start by placing them outside for a few hours each day, gradually increasing the time over a week or two. This process, known as hardening off, helps the seedlings adjust to outdoor elements and reduces transplant shock.
Transplanting seedlings is a crucial step in their journey toward becoming mature plants. With proper care during the transplant process, your seedlings will continue to grow and flourish in their new containers or in your garden.
Now that you know how to transplant your seedlings, it’s time to watch them thrive and enjoy the fruits of your labor. Happy gardening!
Don’t forget to continue providing regular care to your newly transplanted seedlings and monitor their progress as they adapt to their new environment. With proper care, your seedlings will continue to grow and flourish on their journey to becoming mature plants. Enjoy the satisfaction of nurturing your plants and reaping the rewards of your efforts!
Now that you are equipped with the knowledge and skills to start seeds using egg cartons, it’s time to put it into practice. Whether you’re growing flowers, vegetables, or herbs, this cost-effective and sustainable method is a great way to kickstart your garden. Embrace the joy of seed starting and revel in the beauty and abundance that will soon grace your garden!
Read more: How To Store Eggs Without Carton
Conclusion
Starting seeds using egg cartons is a fantastic way to save money, repurpose materials, and create a nurturing environment for your seedlings. In this article, we have learned step-by-step instructions on how to use egg cartons for seed starting, from preparing the carton to transplanting the seedlings.
By following these guidelines, you can successfully grow a wide variety of plants, whether they are vibrant flowers, delicious vegetables, or aromatic herbs. The process begins with preparing the egg carton, filling it with high-quality potting soil, and planting the seeds at the appropriate depth. Proper watering, light, and care help the seeds germinate and develop into healthy seedlings.
As the seedlings grow, it is important to provide the necessary care, including monitoring moisture levels, providing adequate light, correct temperature, and fertilization when needed. Once the seedlings are ready, transplant them into larger containers or directly into your garden, ensuring they have enough space for further growth.
Remember, gardening is a journey of patience and knowledge. Each plant has its own requirements, so be sure to research the specific care instructions for the varieties you’re growing. Adjust your gardening practices accordingly, taking into account factors such as your local climate, sunlight exposure, and soil conditions.
By using egg cartons to start seeds, you not only save money but also contribute to a more sustainable and eco-friendly approach to gardening. You’re repurposing materials that would otherwise go to waste and reducing your ecological footprint.
So, whether you’re an experienced gardener or just starting out, give egg carton seed starting a try. Embrace the joy of nurturing and watching your seedlings grow into beautiful, thriving plants. Happy gardening!
Frequently Asked Questions about How To Use Egg Cartons To Start Seeds
Was this page helpful?
At Storables.com, we guarantee accurate and reliable information. Our content, validated by Expert Board Contributors, is crafted following stringent Editorial Policies. We're committed to providing you with well-researched, expert-backed insights for all your informational needs.


0 thoughts on “How To Use Egg Cartons To Start Seeds”