Home>Garden Essentials>How To Use Jiffy Seed Starting Greenhouse Kit
Garden Essentials
How To Use Jiffy Seed Starting Greenhouse Kit
Modified: September 1, 2024
Discover the easiest way to start your garden with the Jiffy Seed Starting Greenhouse Kit. Learn how to use this kit and grow your own garden in no time!
(Many of the links in this article redirect to a specific reviewed product. Your purchase of these products through affiliate links helps to generate commission for Storables.com, at no extra cost. Learn more)
Introduction
Gardening is a delightful and rewarding hobby that allows us to connect with nature and create our own little slice of paradise. Whether you have a spacious backyard or a cozy balcony, starting plants from seeds is a great way to kickstart your gardening journey. And when it comes to starting seeds indoors, a Jiffy Seed Starting Greenhouse Kit can be your best friend.
But what exactly is a Jiffy Seed Starting Greenhouse Kit? This innovative system provides all the essentials you need to successfully germinate and nurture your seeds. It includes peat pellets, a greenhouse tray, a dome cover, and even plant labels. With this kit, you can create a controlled environment for your seeds to thrive, giving them a head start before they are transplanted into the garden.
In this article, we will guide you through the process of using a Jiffy Seed Starting Greenhouse Kit, from understanding its components to providing optimal growing conditions, and finally transplanting the seedlings. We will also provide troubleshooting tips to help you overcome common challenges along the way.
So, get ready to put on your gardening gloves and let’s dive into the wonderful world of Jiffy Seed Starting Greenhouse Kits!
Key Takeaways:
- Starting seeds with a Jiffy Seed Starting Greenhouse Kit creates a perfect environment for seed germination and growth, providing a fun and rewarding experience for gardeners of all levels.
- Proper care, from preparing the kit to transplanting seedlings, ensures healthy plant development. Troubleshooting common issues like mold and pests helps set the stage for gardening success.
Read more: When To Start Seeds In Greenhouse
What is a Jiffy Seed Starting Greenhouse Kit?
A Jiffy Seed Starting Greenhouse Kit is a convenient and user-friendly system designed to simplify the process of starting seeds indoors. It provides an ideal environment for germination and early growth, ensuring your plants get a strong start before being moved outdoors.
The key components of a Jiffy Seed Starting Greenhouse Kit include peat pellets, a greenhouse tray, a dome cover, and plant labels. Let’s take a closer look at each of these components:
- Peat Pellets: These small, compressed discs are made of biodegradable peat moss. When soaked in water, they expand and become a nutrient-rich medium for seed germination. The peat pellets provide an excellent balance of moisture retention and aeration for healthy root development.
- Greenhouse Tray: The greenhouse tray serves as the base of the seed starting kit. It is usually made of plastic and has multiple compartments to hold the peat pellets. The tray provides stability and ensures proper water drainage.
- Dome Cover: The dome cover, typically made of clear plastic, fits snugly over the greenhouse tray. It creates a mini greenhouse-like environment by trapping heat and moisture. The dome cover helps create ideal conditions for seed germination by maintaining consistent humidity levels and preventing excessive moisture loss.
- Plant Labels: Included in the kit are small, reusable labels that can be inserted into the peat pellets to identify the types of seeds planted. These labels help keep track of your seedlings and make it easier to distinguish different plants as they grow.
These components work together to create a controlled environment that mimics the conditions required for successful seed germination and early growth. The Jiffy Seed Starting Greenhouse Kit is suitable for a wide variety of plants, including flowers, vegetables, herbs, and even some woody plants.
Now that we understand the components of a Jiffy Seed Starting Greenhouse Kit, let’s move on to preparing the kit for use.
Understanding the Components
A Jiffy Seed Starting Greenhouse Kit is comprised of several essential components that work together to create an optimal environment for seed germination and early growth. Let’s dive into each of these components:
Peat Pellets
Peat pellets are small, biodegradable discs made from compressed peat moss. They serve as the growing medium for your seeds. When soaked in water, the peat pellets expand and provide a nutrient-rich environment for seeds to germinate and develop their root systems. The peat pellets have excellent water retention properties while also allowing for proper aeration.
Greenhouse Tray
The greenhouse tray is the foundation of the Jiffy Seed Starting Greenhouse Kit. It is usually made of durable plastic and serves as the container for the peat pellets. The tray is designed with separate compartments to hold each peat pellet, keeping them organized and preventing cross-contamination. Additionally, the tray facilitates proper drainage, ensuring excess water can freely escape.
Read more: How To Use Egg Cartons To Start Seeds
Dome Cover
The dome cover is a transparent plastic lid that fits snugly over the greenhouse tray. This cover plays a crucial role in creating a mini-greenhouse environment for the seeds. By trapping heat and moisture, the dome cover helps maintain consistent temperature and humidity levels, promoting optimal conditions for seed germination. It also prevents excessive moisture loss, reducing the need for frequent watering.
Plant Labels
Plant labels are small and reusable markers included in the Jiffy Seed Starting Greenhouse Kit. These labels are used to identify the seeds planted in each peat pellet. By labeling the plants, you can keep track of different varieties and easily identify them as they grow. This is particularly helpful when transplanting the seedlings or if you have multiple trays of seeds. The plant labels can be inserted directly into the peat pellets, ensuring they stay securely in place.
Understanding the components of the Jiffy Seed Starting Greenhouse Kit is essential to get started on the right foot. Now that you know what each component does, let’s move on to the process of preparing the kit for use.
Preparing the Kit for Use
Before you can start sowing your seeds, it’s important to properly prepare your Jiffy Seed Starting Greenhouse Kit. This involves soaking the peat pellets, assembling the greenhouse tray, and placing the dome cover.
Soaking the Peat Pellets
The first step in preparing the kit is to soak the peat pellets. Place them in a tray or shallow container and pour warm water over them. The pellets will start to absorb the water and expand within a few minutes. Ensure that the pellets are fully saturated, but avoid over-soaking, as this can lead to excessive moisture retention. Once the peat pellets have expanded, gently press down on them to remove any excess water.
Read more: When To Plant Seeds In A Greenhouse
Assembling the Greenhouse Tray
After the peat pellets have been properly soaked, it’s time to assemble the greenhouse tray. Take the expanded peat pellets and place one in each compartment of the tray. Press them down slightly to make sure they are secure. The greenhouse tray ensures that the peat pellets remain in place and provides stability for your seedlings as they grow.
Placing the Dome Cover
Once the peat pellets are in place, it’s time to place the dome cover over the greenhouse tray. The dome cover creates a controlled environment by trapping heat and moisture. This mimics the conditions of a mini-greenhouse, promoting optimal seed germination. Make sure the dome cover fits securely over the tray, sealing in the moisture while still allowing for proper airflow.
With the Jiffy Seed Starting Greenhouse Kit properly prepared, you are now ready to start planting your seeds. In the next section, we will guide you through the process of selecting the right seeds and sowing them in the peat pellets.
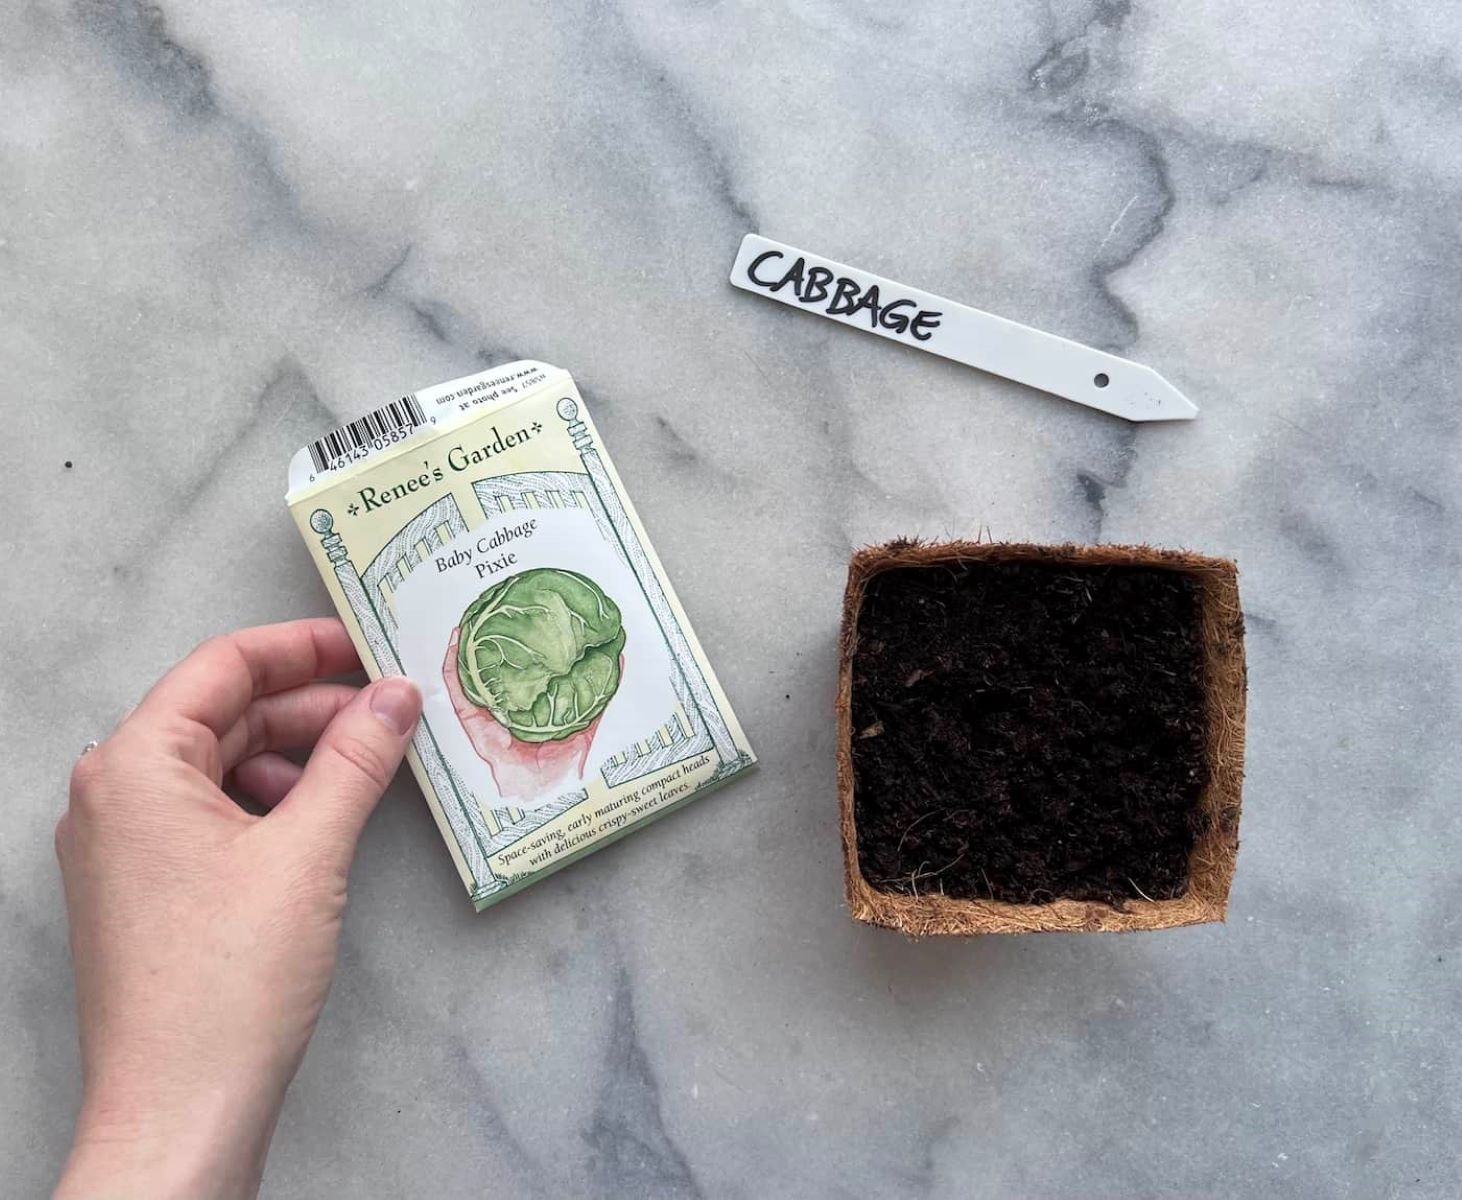
Planting Seeds
Now that your Jiffy Seed Starting Greenhouse Kit is prepared, it’s time to plant your seeds and kickstart the germination process. This section will guide you through choosing the right seeds, filling the peat pellets, sowing the seeds, and labeling the plants.
Choosing the Right Seeds
When selecting seeds for your seed starting greenhouse kit, consider the specific requirements of each plant. Some plants thrive in cooler temperatures, while others prefer warmer climates. Additionally, take into account the space requirements of each plant and the amount of sunlight they need. Choose seeds that are suitable for starting indoors and align with your local climate and growing conditions.
Filling the Peat Pellets
Once you have selected the seeds you want to grow, it’s time to fill the peat pellets. With the peat pellets already placed in the compartments of the greenhouse tray, gently create a small hole in the center of each pellet using your finger or a pencil. The hole should be deep enough to accommodate the seed. Repeat this process for each pellet in the tray.
Sowing the Seeds
Take one seed at a time and place it in the hole you created in the peat pellet. Carefully cover the seed with a thin layer of peat, ensuring it is adequately covered but not buried too deeply. Follow the instructions on the seed packet regarding the recommended planting depth for each type of seed. Repeat this process for all the seeds you are planting.
Labeling the Plants
It is essential to label your plants to keep track of the seed varieties you have planted in each peat pellet. Using the included plant labels, write the name or variety of the seeds and insert the label into the corresponding peat pellet. This will help you identify and differentiate the plants as they grow, making it easier to care for them and ensure they receive the right conditions and treatment.
Now that your seeds are planted and labeled, it’s time to provide them with the optimal growing conditions. In the next section, we will explore temperature, humidity, watering, and lighting requirements for successful seed germination and growth.
Providing Optimal Growing Conditions
To ensure successful germination and healthy growth of your seedlings, it’s crucial to provide them with optimal growing conditions. This section will guide you through the key factors to consider, including temperature and humidity, watering, and adequate light.
Read more: How To Start Mint Seeds
Temperature and Humidity
Seeds require specific temperature ranges for germination, so it’s important to maintain the right environment. Most seeds germinate best at temperatures between 65°F and 75°F (18°C and 24°C). Place your Jiffy Seed Starting Greenhouse Kit in a warm location, away from drafts or extreme temperature fluctuations. The dome cover helps retain moisture, creating a humid environment that aids in seed germination. However, it’s important to periodically check the moisture levels and provide adequate ventilation to prevent excessive humidity, which can cause mold or damping-off.
Watering the Plants
Proper watering is essential for the healthy growth of your seedlings. As the peat pellets provide good water retention, it’s important not to overwater, as this can lead to root rot. Water the peat pellets thoroughly when they start to dry out, but avoid waterlogging. The best way to water is from the bottom. Add water to the greenhouse tray, and the peat pellets will absorb it from below. This encourages the roots to grow downward and helps prevent excess moisture on the foliage, reducing the risk of disease. Regularly check the moisture level and adjust your watering schedule accordingly.
Providing Adequate Light
Light is crucial for photosynthesis and healthy growth of your seedlings. Place your Jiffy Seed Starting Greenhouse Kit in a location that receives bright, indirect sunlight. If natural light is insufficient, you can supplement with fluorescent grow lights or LED grow lights. Position the lights about 2-3 inches (5-7.5 cm) above the seedlings and adjust the height as they grow. Aim for 12-16 hours of light per day, mimicking the intensity and duration of sunlight during the growing season. Regularly check the seedlings for signs of legginess, which indicate insufficient light, and adjust the light source as needed.
By providing the right temperature and humidity, watering schedule, and adequate light, you create the best conditions for your seedlings to grow strong and healthy. In the next section, we will talk about monitoring and maintaining the seedlings as they progress through their growth stages.
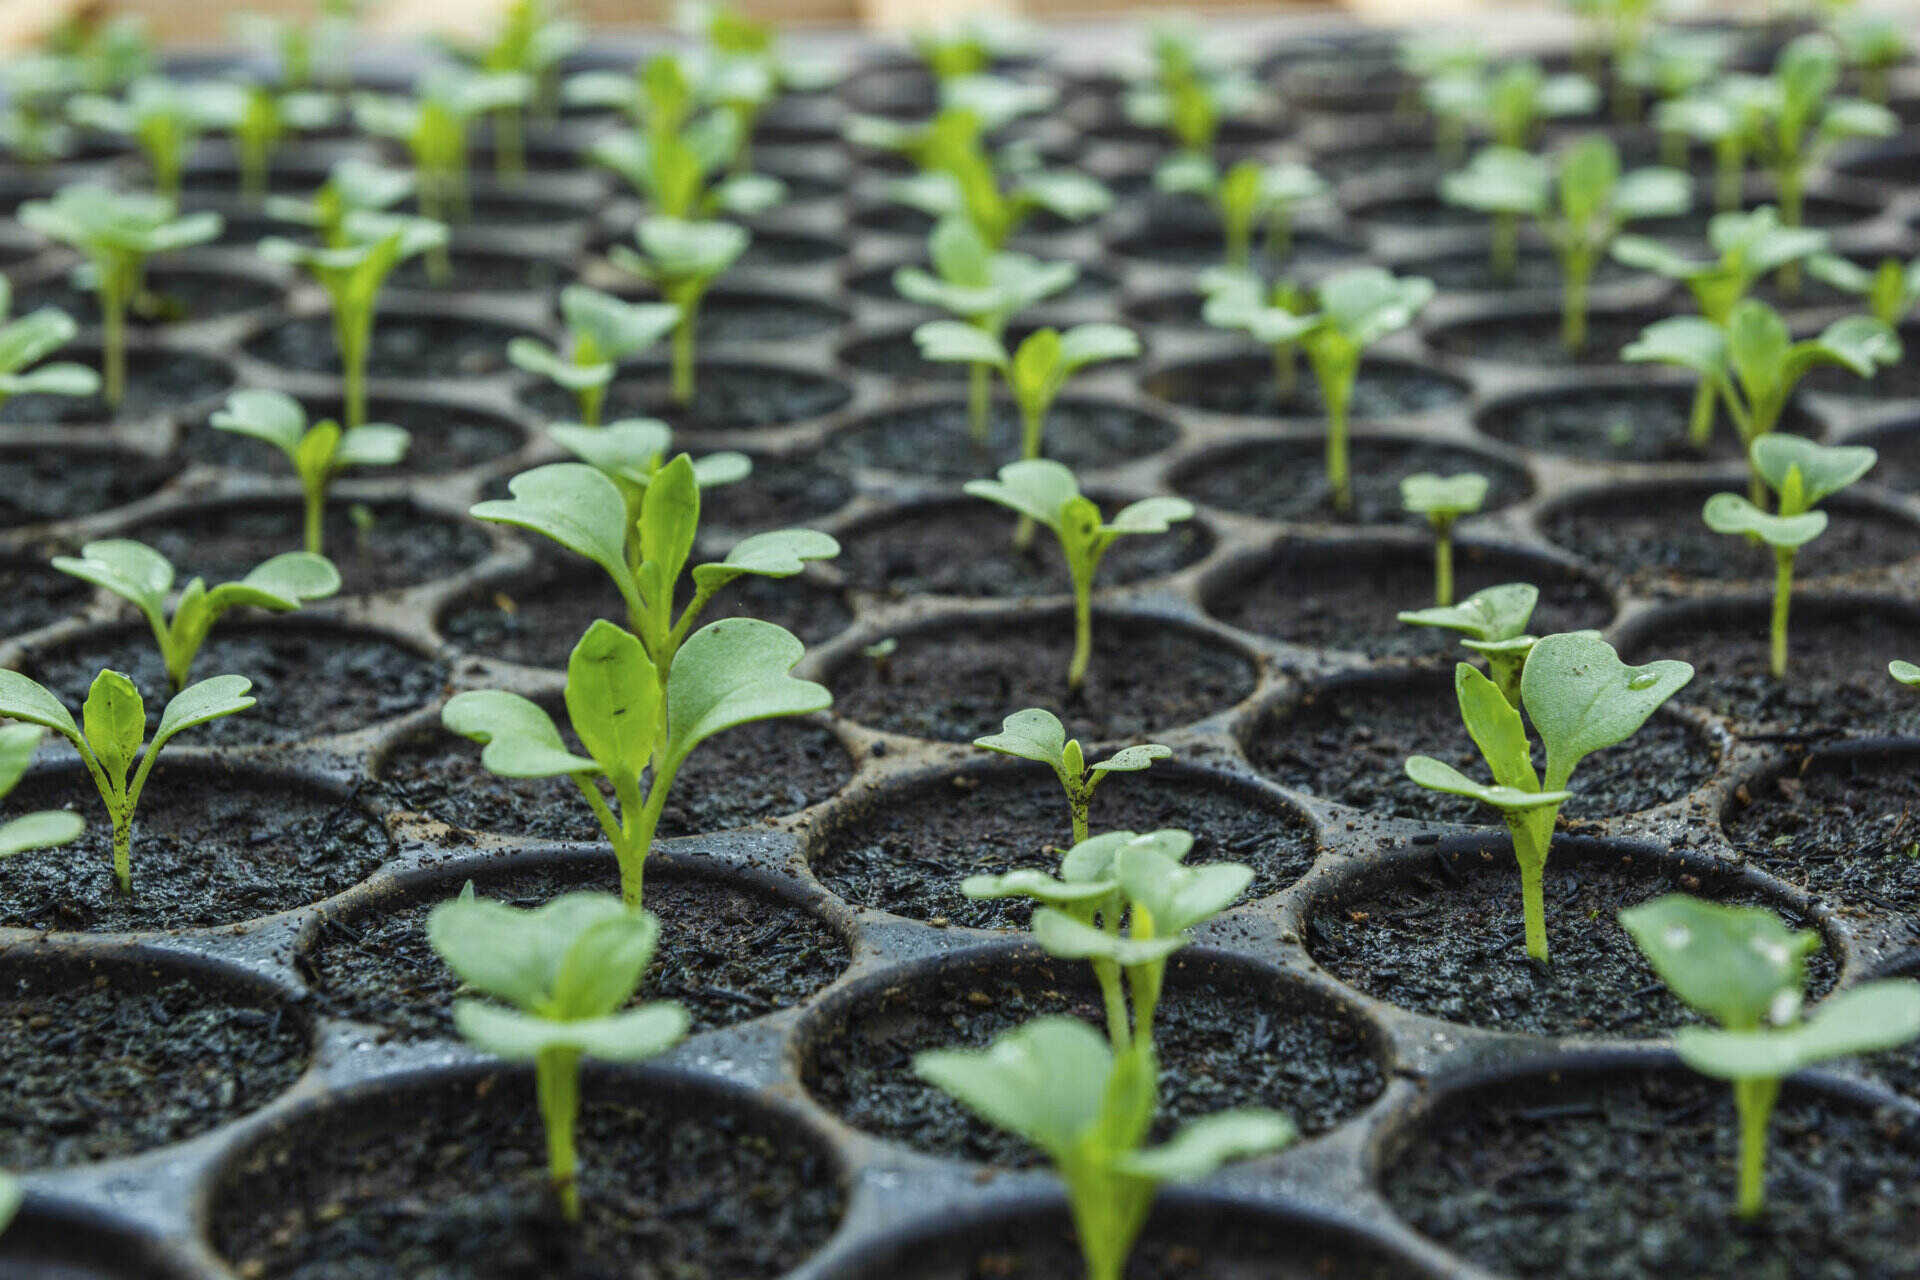
Monitoring and Maintaining the Seedlings
As your seedlings start to grow, it’s important to monitor their progress and provide the necessary care for their continued development. This section will cover key aspects of monitoring and maintaining your seedlings, including the germination period, removing the dome cover, regular watering and fertilizing, and thinning out seedlings if necessary.
Read more: How To Start Seeds For Hydroponics
Germination Period
Each seed type has a specific germination period, which is the time it takes for the seeds to sprout. Refer to the instructions on the seed packet to determine the expected germination period for your specific seeds. You may notice some variations in germination time depending on the seed variety. During this period, ensure that the environment remains consistent in terms of temperature, humidity, and light. Be patient, as some seeds may take longer to germinate than others.
Removing the Dome Cover
Once the majority of your seedlings have emerged and are a few inches tall, it’s time to remove the dome cover. Removing the cover gradually acclimates the seedlings to the surrounding environment. Start by propping open the cover slightly for a few hours each day, gradually increasing the time over a few days. Eventually, remove the dome cover entirely. This will allow for better airflow and reduce the risk of mold or damping-off.
Regular Watering and Fertilizing
Continued care and attention to watering are crucial throughout the growth stages of your seedlings. Monitor the moisture levels of the peat pellets and water when they start to dry out. Aim to keep the soil consistently moist, but not waterlogged. Along with regular watering, consider fertilizing your seedlings to provide them with additional nutrients. Use a balanced liquid fertilizer diluted according to the package instructions. Begin fertilizing after the cotyledon leaves (seed leaves) have fully developed, and continue on a weekly basis or as directed by the fertilizer manufacturer.
Thin Out Seedlings if Necessary
As your seedlings grow, you may find that they become crowded within the peat pellets. If multiple seedlings have sprouted in one pellet, it’s important to thin them out to avoid overcrowding. Overcrowding can lead to stunted growth and competition for resources. Gently remove the weaker seedlings, leaving the strongest, healthiest one in each pellet. Ensure that there is enough space for the remaining seedlings to grow and develop without obstruction.
By closely monitoring the germination period, removing the dome cover gradually, providing regular watering and fertilizing, and thinning out seedlings if necessary, you are ensuring the best care for your developing seedlings. In the next section, we will explore the process of transplanting the seedlings into larger containers or garden beds.
Read more: How To Start Petunia Seeds
Transplanting the Seedlings
As your seedlings grow stronger and more mature, it will eventually be time to transplant them into larger containers or directly into your garden beds. This section will guide you through the process of preparing the transplanting site, hardening off the seedlings, and transplanting them for continued growth.
Preparing the Transplanting Site
Before transplanting your seedlings, it’s important to prepare the transplanting site. If you are transplanting them into larger containers, choose containers with drainage holes and fill them with a well-draining potting mix. If you plan to transplant them into your garden beds, prepare the soil by removing any weeds, loosening the soil, and incorporating organic matter such as compost or aged manure. Ensure that the site receives adequate sunlight and that there is enough space for the plants to grow and spread out.
Hardening off the Seedlings
Hardening off is a crucial step in transitioning your seedlings from their protected indoor environment to the harsher outdoor conditions. Start a week or two before your planned transplanting date. Gradually expose the seedlings to outdoor conditions by placing them outside for a few hours each day, gradually increasing their exposure time over several days. Choose a sheltered location initially and gradually expose them to more direct sunlight, wind, and fluctuating temperatures. This process helps acclimate the seedlings to the outdoor environment, reducing the risk of transplant shock.
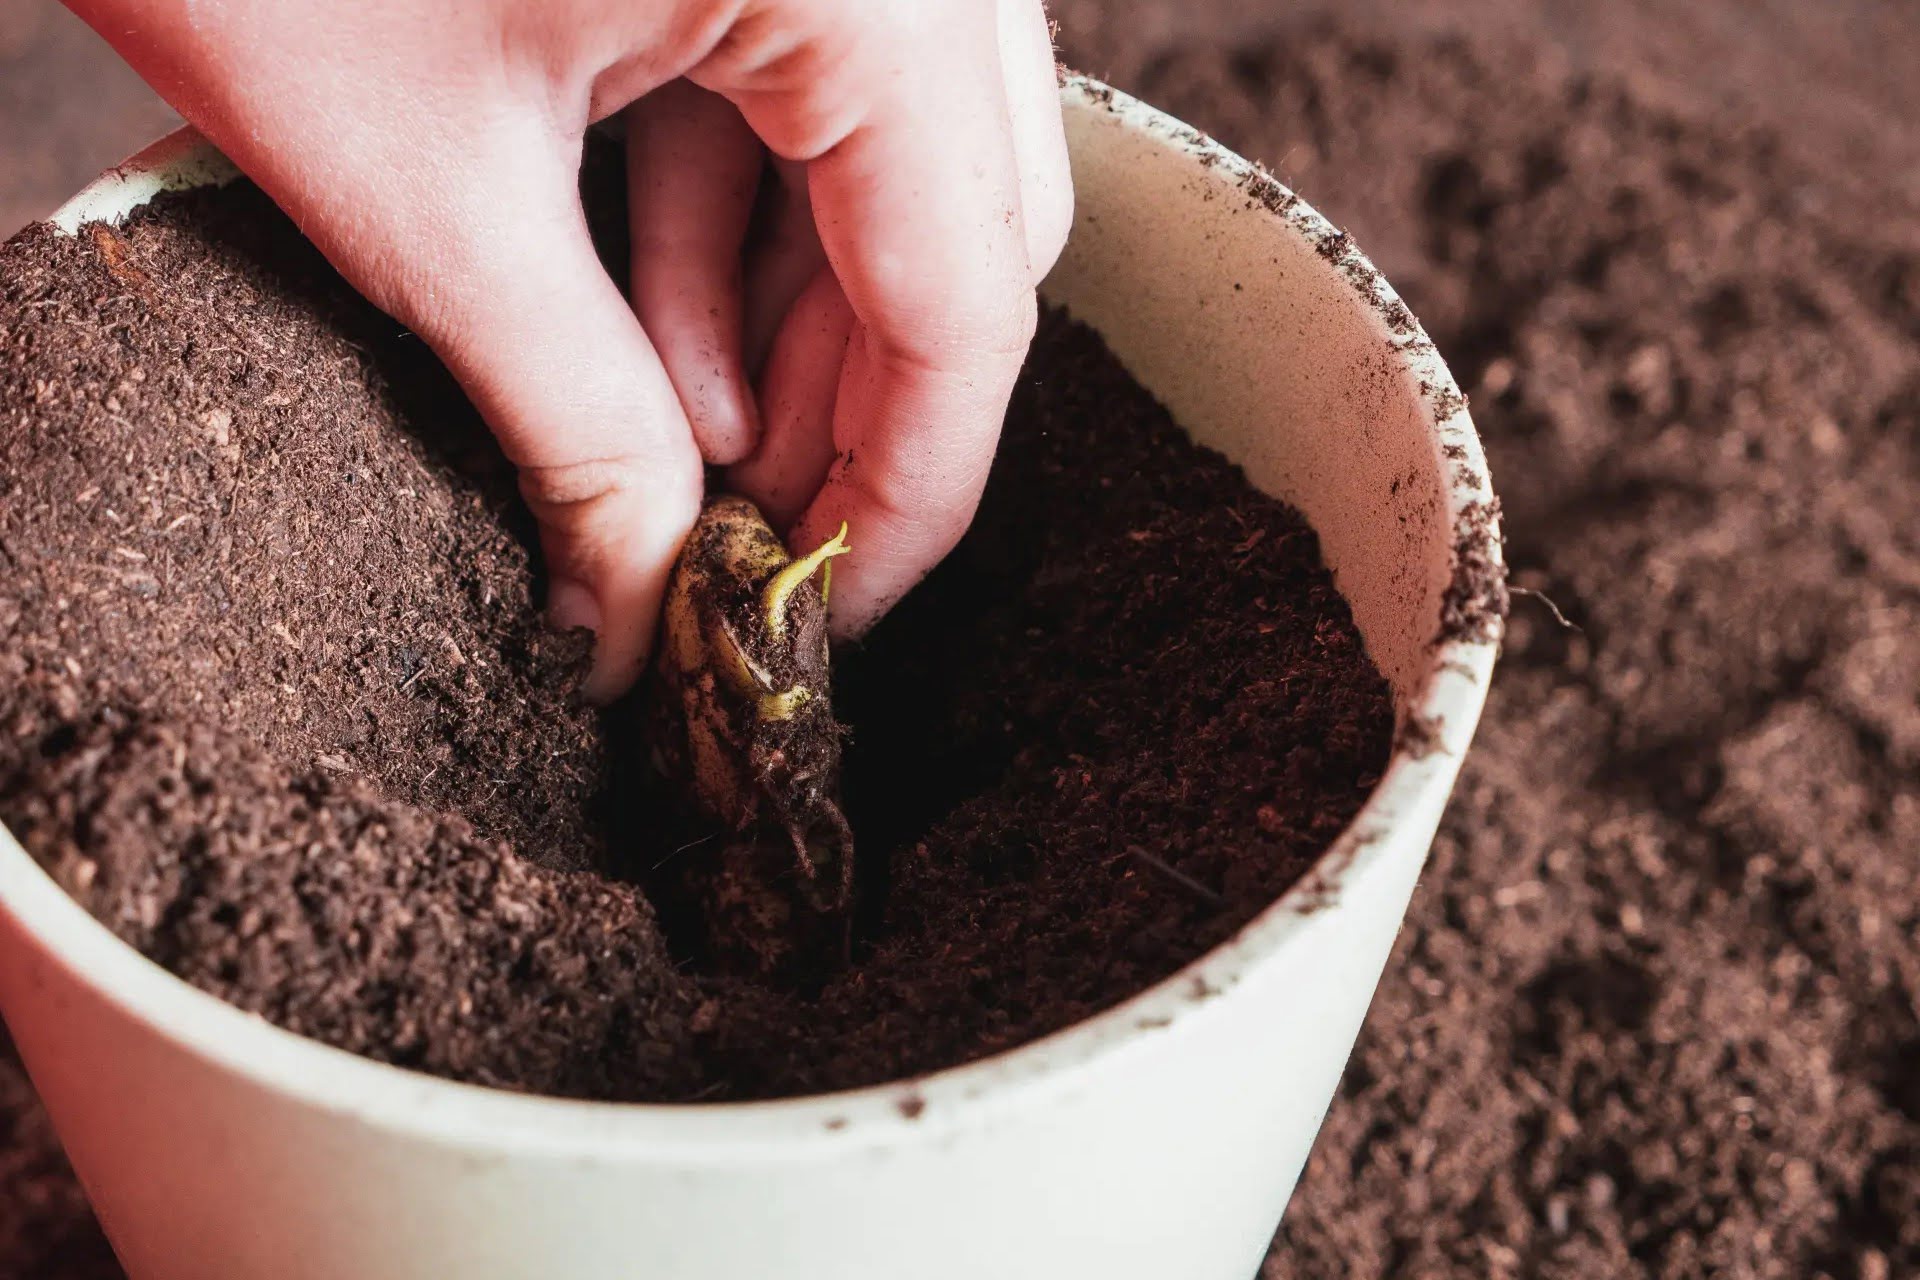
Transplanting into Larger Containers or Garden Beds
Once your seedlings are hardened off and the transplanting site is prepared, it’s time to transplant them. Gently remove each seedling from its peat pellet, being careful not to damage the delicate roots. If transplanting into larger containers, dig a hole in the soil of the container slightly larger than the root ball of the seedling. Place the seedling in the hole, ensuring that the top of the root ball is level with the soil surface. Gently fill in the surrounding soil and lightly firm it around the seedling. If transplanting into garden beds, dig a hole slightly larger than the root ball, gently place the seedling in the hole, backfill, and lightly firm the soil around it.
Water the newly transplanted seedlings gently but thoroughly, and keep the soil consistently moist during the first few weeks to promote root establishment. Gradually reduce watering frequency as the seedlings become established, allowing the soil to slightly dry out between waterings. Provide regular care and maintenance, including regular watering, fertilizing as needed, and protecting the seedlings from pests and adverse weather conditions.
Transplanting your seedlings marks an exciting milestone in your gardening journey. With the proper preparation and care, your seedlings will continue to thrive and grow into beautiful, bountiful plants. In the next section, we will provide some troubleshooting tips to help you address common issues that may arise during the seed starting process.
Read more: How To Start Catnip Seeds
Troubleshooting Tips
While seed starting can be a rewarding experience, it’s not without its challenges. This section will provide you with some troubleshooting tips to help you address common issues that may arise during the seed starting process, including dealing with mold or damping-off, addressing pest infestations, and handling leggy seedlings.
Dealing with Mold or Damping-off
Mold or damping-off is a fungal disease that can affect young seedlings, causing them to wilt and eventually die. To prevent mold or damping-off, ensure proper ventilation by gradually removing the dome cover once the seedlings emerge. Avoid overwatering, as excessive moisture can create a favorable environment for fungal growth. Allow the soil to dry out slightly between waterings. If you notice any signs of mold or damping-off, promptly remove the affected seedlings and improve air circulation by using a small fan or opening a nearby window. Additionally, you can apply a natural anti-fungal treatment, such as a mixture of chamomile tea or cinnamon powder diluted in water, to help inhibit fungal growth.
Addressing Pest Infestations
Pests can pose a threat to your seedlings, causing damage or stunting their growth. Inspect your seedlings regularly for signs of pest infestations, such as chewed leaves or insect activity. If you notice pests, take immediate action to address the issue. Some common organic methods to control pests include handpicking insects, using insecticidal soaps or neem oil, and applying physical barriers like row covers or netting to prevent pest access. Proper sanitation, such as cleaning trays and tools between uses, can also help prevent pest infestations. In severe cases, you may need to consider using approved chemical pesticides as a last resort, following the instructions carefully and considering the impacts on beneficial insects and the environment.
Handling Leggy Seedlings
Leggy seedlings are characterized by long, weak stems and sparse, pale leaves. This condition occurs when seedlings experience insufficient light. To prevent leggy seedlings, ensure that they receive adequate light from the start. If you notice legginess, adjust the light source by moving it closer to the seedlings. Supplementing with fluorescent or LED grow lights can also help provide the necessary intensity and duration of light. It’s important to act quickly, as leggy seedlings may struggle to support themselves and can be more prone to disease or damage. If the seedlings are too weak, you may need to gently transplant them deeper into the soil, burying part of the elongated stem to provide additional support.
By being proactive and addressing these common issues, you can help ensure the success of your seed starting endeavors. Remember that gardening is a learning process, and each season presents opportunities for growth and improvement. Embrace challenges as learning experiences and adapt your techniques as needed. Happy gardening!
For more gardening tips and inspiration, visit our website [yourwebsite.com].
Read more: How To Start Cactus Seeds
Conclusion
Starting your own plants from seeds using a Jiffy Seed Starting Greenhouse Kit can be a highly rewarding and fulfilling experience. It allows you to witness the entire lifecycle of your plants, from the tiny seeds to vibrant seedlings ready to be transplanted into your garden. By understanding the components of the kit, preparing it properly, and providing optimal growing conditions, you are giving your seeds the best chance to thrive and grow into healthy plants.
The peat pellets serve as the ideal medium for seed germination, while the greenhouse tray and dome cover create a controlled environment that promotes growth. The included plant labels help you keep track of your plants, ensuring they receive the appropriate care and attention. Through regular monitoring and maintenance, such as checking the germination period, removing the dome cover, and providing proper watering, fertilizing, and lighting, you will foster strong and resilient seedlings ready for transplanting.
When it’s time to transplant the seedlings, prepare the transplanting site and ensure the seedlings are properly hardened off for the transition. Whether you choose to transplant into larger containers or directly into your garden beds, provide the adequate space, soil conditions, and care they need to continue flourishing. Additionally, be prepared to troubleshoot common issues that may arise, such as mold or damping-off, pest infestations, or leggy seedlings. By addressing these challenges promptly and employing appropriate measures, you can help set your plants on the path to success.
Remember, gardening is a journey of learning and discovery. As you gain experience and experiment with different techniques, you will become more confident and adept at starting seeds using a Jiffy Seed Starting Greenhouse Kit. Don’t be afraid to get your hands dirty, try new varieties, and embrace the ever-changing nature of tending to your plants. The joy and satisfaction of nurturing a tiny seed into a thriving plant far outweigh any challenges you may encounter along the way.
So, grab your Jiffy Seed Starting Greenhouse Kit, choose your favorite seeds, and embark on your gardening adventure. Enjoy the process of watching your seedlings grow, and soon enough, you’ll be reaping the rewards of your efforts with a bountiful garden full of beautiful and vibrant plants.
Happy gardening!
Frequently Asked Questions about How To Use Jiffy Seed Starting Greenhouse Kit
Was this page helpful?
At Storables.com, we guarantee accurate and reliable information. Our content, validated by Expert Board Contributors, is crafted following stringent Editorial Policies. We're committed to providing you with well-researched, expert-backed insights for all your informational needs.


0 thoughts on “How To Use Jiffy Seed Starting Greenhouse Kit”