Home>Garden Essentials>Garden Storage>Garden Path Ideas: Brick Walkways
Garden Storage
Garden Path Ideas: Brick Walkways
Modified: December 7, 2023
Discover creative garden path ideas with brick walkways for storage options. Create a functional and stylish outdoor space with these innovative storage solutions.
(Many of the links in this article redirect to a specific reviewed product. Your purchase of these products through affiliate links helps to generate commission for Storables.com, at no extra cost. Learn more)
Introduction
When it comes to creating an inviting and beautiful garden, the details matter. One key element that can make a significant difference in the overall aesthetic appeal of your outdoor space is the garden path. A well-designed garden path not only provides a practical way to navigate through your garden but also adds a touch of charm and elegance to the landscape.
Among the various options available for garden paths, brick walkways have long been a popular choice. The timeless beauty and durability of brick make it an excellent material for creating aesthetically pleasing and long-lasting paths. Whether you have a traditional garden or a modern landscape, brick walkways can effortlessly complement any design style.
In this article, we will explore the benefits of brick walkways, the different types of brick walkway designs, and helpful tips for planning, installing, and maintaining brick walkways. Additionally, we will discuss creative garden path ideas to enhance the beauty of your brick walkway.
Let’s dive in and discover how brick walkways can transform your garden, adding both functionality and aesthetics to your outdoor space.
Key Takeaways:
- Create a lasting and charming garden path with brick walkways, offering durability, timeless appeal, and versatile design options to elevate the aesthetic and functionality of your outdoor space.
- Enhance your brick walkway with creative garden path ideas, such as flower bed borders, pathway lighting, and mosaic inlays, to add color, texture, and personality, transforming your outdoor space into a captivating and enjoyable journey.
Read more: Garden Path Ideas: Cut Stone Walkways
Benefits of Brick Walkways
Brick walkways offer a wide range of benefits that make them a popular choice among homeowners and landscape designers. Here are some of the advantages of opting for brick as your garden path material:
- Durability: Brick is known for its exceptional durability. It can withstand heavy foot traffic, varying weather conditions, and is resistant to cracking and chipping. A brick walkway can last for decades, making it a long-term investment for your garden.
- Timeless Appeal: Brick has a classic and timeless charm that can enhance the beauty of any garden or outdoor space. Its warm tones and textures create a welcoming atmosphere and can complement a variety of architectural styles.
- Versatility: Brick walkways offer endless design possibilities. With an array of colors, sizes, and patterns available, you can customize your brick walkway to match your personal style and the overall theme of your garden. Whether you prefer a traditional, rustic look or a more contemporary feel, brick can adapt to your design vision.
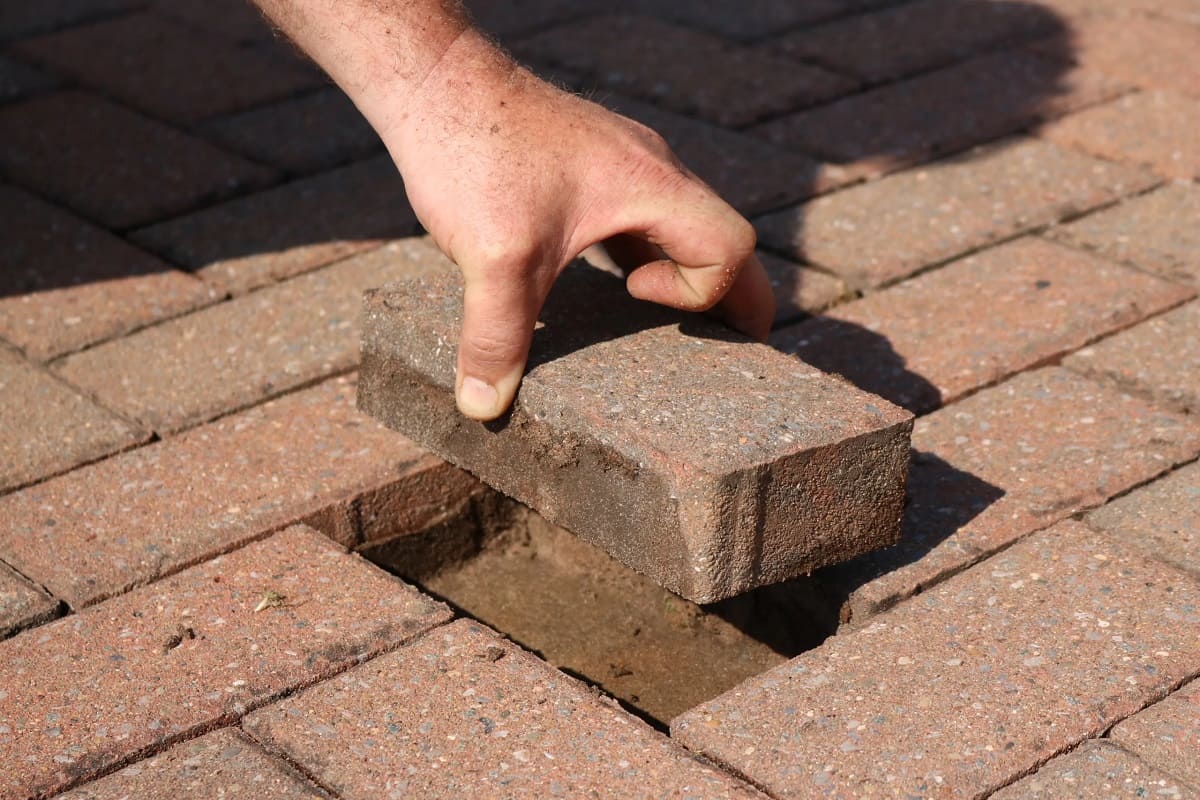
- Ease of Maintenance: Brick walkways are relatively low-maintenance. They require occasional sweeping to remove debris and can be easily cleaned with mild detergent and water. Additionally, if a brick becomes damaged or stained, it can be replaced individually without having to redo the entire walkway.
- Environmentally Friendly: Brick is a sustainable and eco-friendly material. It is made from natural clay and requires minimal energy for production, reducing its carbon footprint. Brick walkways also allow water to penetrate the soil, minimizing runoff and promoting healthier plant growth.
- Increase Property Value: A well-designed brick walkway can significantly enhance the curb appeal and value of your property. Prospective buyers are often drawn to homes with beautiful outdoor spaces, and a well-maintained brick walkway adds an element of sophistication.
These benefits make brick walkways an attractive choice for homeowners who want to create a beautiful, durable, and practical garden path. Whether you have a small garden or a sprawling landscape, a brick walkway can elevate the overall aesthetic and functionality of your outdoor space.
Types of Brick Walkways
Brick walkways come in various designs and patterns, allowing you to choose the style that best suits your garden and personal preferences. Here are some of the most popular types of brick walkways:
- Traditional Straight Walkway: A classic and straightforward option, the traditional straight walkway features bricks laid in a straight line. This design is perfect for formal gardens or to create a defined and direct path to a specific area in your outdoor space.
- Curved Walkway Design: A curved brick walkway adds a touch of elegance and flow to your garden. By incorporating gentle curves, the walkway can complement the natural curves of your landscape and create a more organic and inviting pathway.
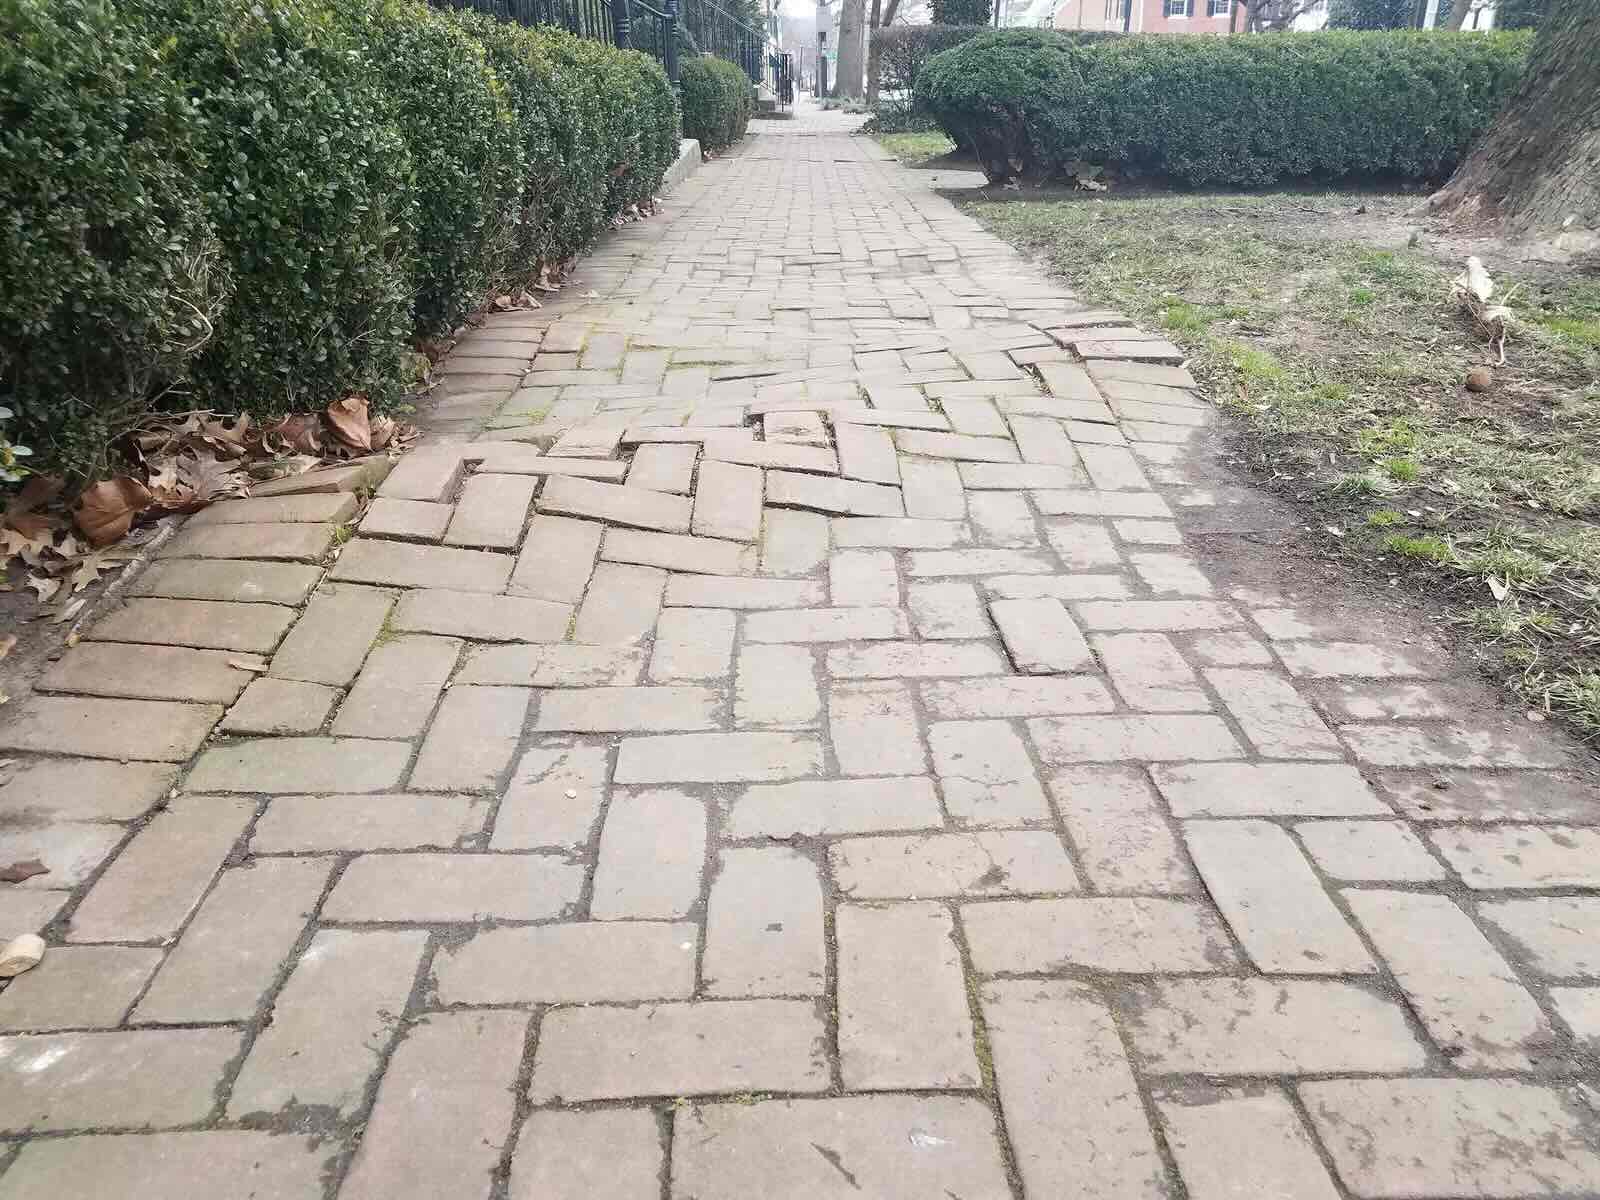
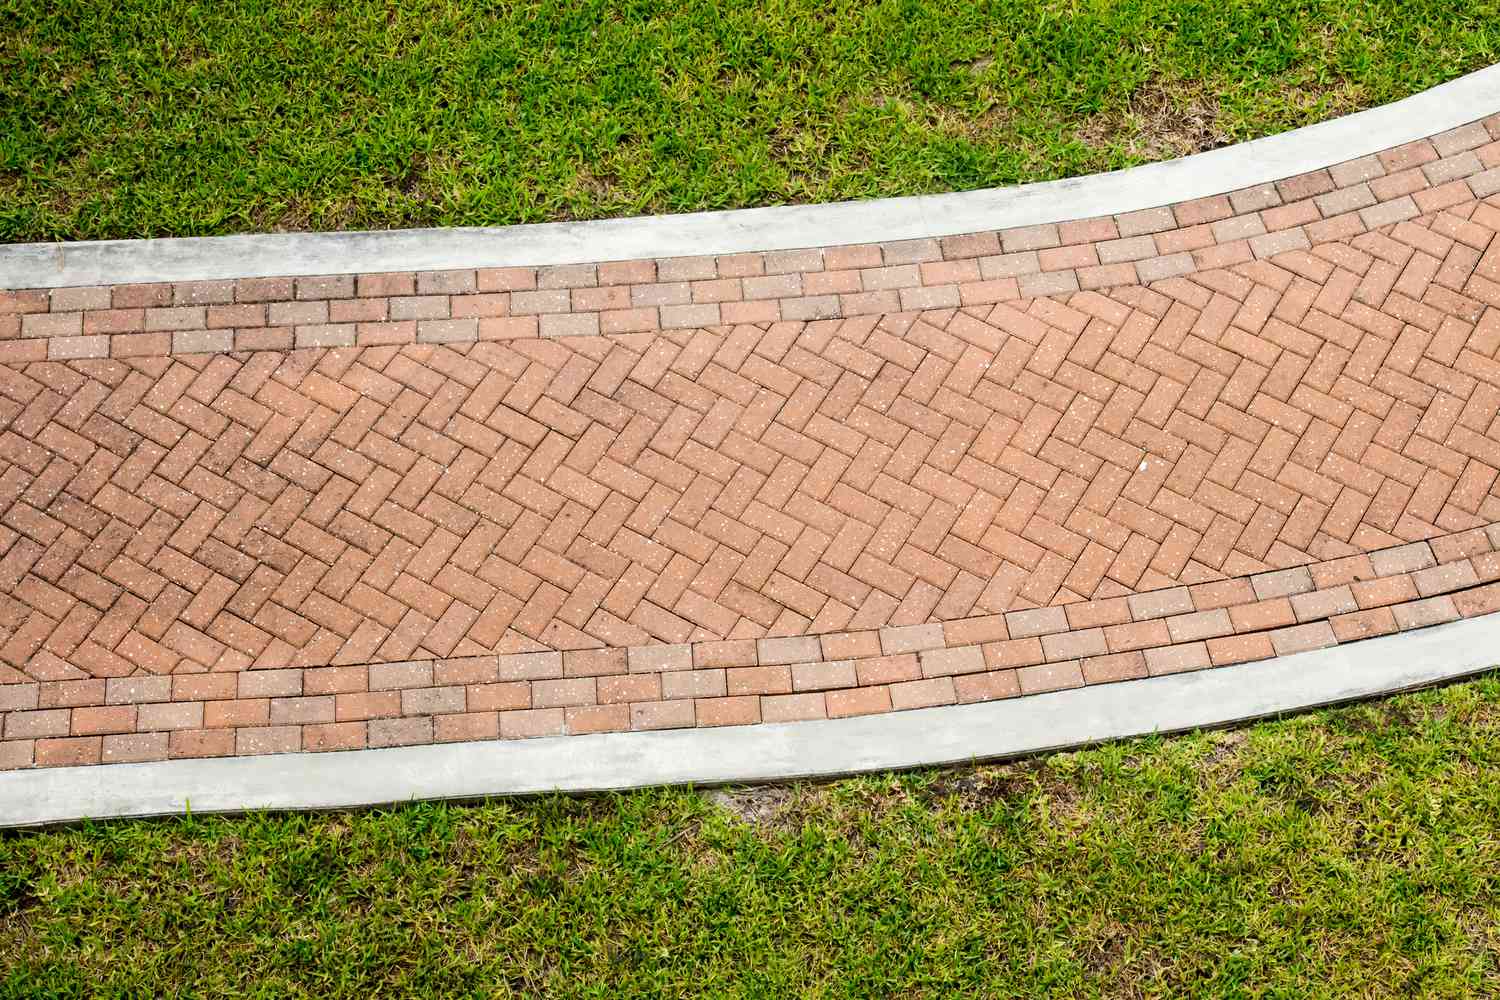
- Herringbone Pattern Walkway: The herringbone pattern consists of bricks placed diagonally in a zigzag pattern. This design creates a visually interesting and decorative effect and is often used to add a unique touch to garden paths and patio areas.
- Basket Weave Walkway: Similar to the herringbone pattern, the basket weave pattern involves bricks placed in a crisscross arrangement for a woven look. This design adds texture and depth to your walkway, creating a visually appealing focal point in your garden.
- Running Bond Walkway: In a running bond pattern, bricks are laid side by side in a row, with each subsequent row offset by half a brick. This simple yet effective design is popular for both traditional and contemporary garden styles.
- Diagonal Pattern Walkway: For a distinctive look, consider a diagonal pattern walkway, where the bricks are placed diagonally to create a diamond-like pattern. This design adds visual interest and can make a small garden appear more spacious.
- Combination Walkway Designs: Feel free to mix and match different patterns to create a unique and personalized walkway. For example, you can incorporate a straight section with a herringbone pattern or combine a running bond with a curved design. Get creative and find a combination that suits your style.
Before selecting a specific brick walkway design, take into consideration the overall style of your garden and the desired aesthetic. Consider elements such as the surrounding landscaping, the architecture of your home, and the function of the walkway to ensure a cohesive and harmonious design.
Now that we have explored the different types of brick walkways, you can choose the design that best complements your garden and reflects your unique style.
Traditional Straight Walkway
The traditional straight walkway is a classic and timeless design for brick walkways. It offers a simple yet elegant look that suits various garden styles and architectural themes. A straight walkway provides a direct path from one point to another, making it an ideal choice for creating a defined route through your garden or leading to a specific area, such as a patio or a focal point.
To create a traditional straight walkway, follow these steps:
- Plan and Measure: Start by mapping out the path of your walkway. Consider the dimensions and layout of your garden, ensuring that the straight walkway aligns with the overall design. Measure the desired width and length of the path to determine how many bricks you will need.
- Prepare the Ground: Clear the area where the walkway will be placed. Remove any existing plants, grass, or debris and level the ground using a shovel or garden rake. Ensure that the area is compacted and firm to provide a stable foundation for the bricks.
- Mark the Edges: Use stakes and string to mark the edges of the walkway. This will serve as a guide when laying the bricks and help maintain a straight and consistent path.
- Excavate the Soil: Dig a trench along the marked edges of the walkway. The depth of the trench will depend on the thickness of the bricks and the base materials you will be using. Typically, a depth of about 4 to 6 inches should be sufficient.
- Add Base Materials: Fill the trench with a layer of crushed stone or gravel to create a stable base for the bricks. Use a rake or tamper to level and compact the base layer, ensuring that it is evenly distributed and has a solid foundation.
- Lay the Bricks: Start at one end of the walkway and begin laying the bricks in a straight line, following the marked edges. Place each brick firmly in the desired position, leaving a small gap (about ¼ inch) between each brick for jointing material.
- Fill the Joints: Once all the bricks are in place, fill the gaps between them with sand, fine gravel, or polymeric sand. Use a broom or brush to sweep the filling material into the joints, ensuring that they are fully packed.
- Compact and Finish: Use a plate compactor or a hand tamper to gently compact the walkway, ensuring that the bricks are firmly set in place. Add additional jointing material if needed and sweep off any excess material from the surface of the walkway.
- Finish Touches: Consider adding edging stones or landscape borders along the edges of the walkway to provide a clean and polished look. You can also incorporate plants, flowers, or lighting along the sides of the path to enhance its visual appeal.
A traditional straight walkway offers a classic and straightforward design that can enhance the beauty and functionality of your garden. Whether you have a formal or informal garden style, a straight walkway provides a visually pleasing path and directs guests through your outdoor space with ease.
Take the time to plan and execute the installation carefully, ensuring that the dimensions, alignment, and materials are well-suited to your garden. With proper preparation and attention to detail, you can create a beautiful straight walkway that will stand the test of time and add charm to your garden for years to come.
Curved Walkway Design
A curved walkway design adds a touch of elegance and visual interest to your garden. It offers a more organic and natural flow compared to a traditional straight walkway. The gentle curves can complement the existing landscape features, such as flower beds, trees, or a meandering stream, creating a harmonious and inviting path through your garden.
To create a curved walkway design using bricks, follow these steps:
- Plan the Curves: Start by visualizing the desired curves and pathways in your garden. Consider the natural contours of your landscape and how you want the walkway to interact with the existing elements. Use stakes and string to mark the boundaries and outline the curves of your walkway.
- Prepare the Ground: Clear the area where the walkway will be installed, removing any plants, grass, or debris. Ensure that the ground is level and compacted, providing a solid foundation for the bricks.
- Excavate the Soil: Dig a trench along the marked edges of the walkway. The depth of the trench should be sufficient to accommodate the bricks and allow for a base layer of crushed stone or gravel.
- Add Base Materials: Fill the trench with a layer of crushed stone or gravel. Use a rake or tamper to level and compact the base layer, ensuring it is evenly distributed and provides a stable foundation for the bricks.
- Lay the Bricks: Start at one end of the walkway and begin laying the bricks, following the curved path you have outlined. Place the bricks firmly and snugly against each other, leaving a small gap between each brick for jointing material.
- Create Smooth Curves: As you lay the bricks, make small adjustments to create smooth and gentle curves. Pay attention to the alignment and spacing, ensuring that the curves flow gracefully and maintain a consistent width for comfortable walking.
- Fill the Joints: Once all the bricks are in place, fill the gaps between them with sand, fine gravel, or polymeric sand. Use a broom or brush to sweep the filling material into the joints, making sure they are fully packed.
- Compact and Finish: Use a plate compactor or hand tamper to gently compact the walkway, ensuring that the bricks are firmly set in place. Add additional jointing material if needed and sweep off any excess material from the surface of the walkway.
- Enhance with Landscaping: Consider adding landscaping elements such as plants, flowers, or decorative rocks alongside the curved walkway to enhance its beauty. This can create a seamless transition between the path and the surrounding garden.
A curved walkway design can create a sense of wonder as it meanders through your garden, inviting exploration and offering a more relaxed and inviting ambiance. By carefully planning and executing the installation, you can achieve a stunning curved walkway that enhances the overall aesthetic of your outdoor space.
Remember to consider the dimensions and flow of your garden, as well as the desired walking path when planning the curves. With attention to detail and a keen eye for design, you can create a breathtaking curved walkway that adds a touch of sophistication and charm to your garden.
Read more: How To Lay Brick Walkway
Herringbone Pattern Walkway
The herringbone pattern is a popular choice for creating a unique and visually striking brick walkway. This pattern involves laying the bricks diagonally in a zigzag arrangement, resulting in a distinctive and decorative effect. The herringbone pattern adds texture and interest to your walkway, making it a focal point in your garden.
To create a herringbone pattern walkway using bricks, follow these steps:
- Plan and Prepare: Determine the dimensions of your walkway and mark the boundaries. Clear the area of any plants, debris, or grass. Ensure that the ground is level and compacted, providing a solid base for the walkway.
- Lay the Foundation: Start by laying a base layer of crushed stone or gravel to create a stable foundation. Use a rake or tamper to level and compact the base layer, ensuring it is evenly distributed and properly prepared.
- Start with a Diagonal Line: Begin at one corner of the walkway and start laying the bricks diagonally, forming a straight line. Place the first brick at a 45-degree angle to the path, pointing towards the desired direction of the walkway.
- Create Zigzag Rows: Lay the next row of bricks parallel to the first row, but in the opposite direction. The end of each brick should fit snugly against the previous row, creating a zigzag pattern. Repeat this process, forming additional rows and maintaining the herringbone pattern.
- Cut Bricks if Needed: You may need to cut some bricks to fit irregular edges or to achieve a specific design. Use a brick chisel or a wet saw to carefully cut the bricks to the desired size and shape.
- Continue the Pattern: Keep laying the bricks in the herringbone pattern, maintaining consistency in spacing and alignment. Pay attention to the angle of each brick to ensure they are uniformly positioned.
- Fill the Joints: Once all the bricks are in place, fill the joints with sand, fine gravel, or polymeric sand. Use a broom or brush to sweep the filling material into the joints, ensuring they are fully packed and visually pleasing.
- Compact and Finish: Gently compact the walkway using a plate compactor or hand tamper. This will ensure that the bricks are firmly set in place and create a more stable and durable walkway. Sweep off any excess filling material from the surface for a clean and finished look.
- Enjoy Your Herringbone Walkway: Once the walkway is complete, step back and admire the stunning herringbone pattern you have created. This design adds character and a touch of elegance to your garden, making it a focal point in your outdoor space.
A herringbone pattern walkway is a sure way to make a statement in your garden. Its intricate design and timeless appeal can elevate the overall aesthetic and create a visually interesting path for guests to admire.
Remember to take your time during the installation process, ensuring that the bricks are properly positioned, and the pattern is maintained. With patience and attention to detail, you can create a herringbone pattern walkway that adds a touch of sophistication and elegance to your garden.
Basket Weave Walkway
The basket weave pattern is a visually appealing and intricate design choice for a brick walkway. By placing the bricks in a crisscross or woven arrangement, it creates a textured and decorative look that adds depth and character to your outdoor space. A basket weave walkway is a classic and timeless option that can complement various garden styles and architectural themes.
Here’s how you can create a basket weave walkway using bricks:
- Measure and Plan: Determine the size and dimensions of your walkway. Mark the boundaries and clear the area of any vegetation or debris. Ensure that the ground is level and compacted, providing a solid foundation for the walkway.
- Lay the Base Layer: Start by placing a base layer of crushed stone or gravel. Use a rake or tamper to level and compact the base layer to ensure stability and durability.
- Start with Vertical Rows: Begin by laying the first row of bricks vertically, side by side. Place them in the desired position, leaving a small gap (about ¼ inch) between each brick for jointing material.
- Create Horizontal Rows: For the second row, lay the bricks horizontally in a crisscross pattern, weaving them through the vertical rows. The end of each brick should fit snugly against the previous row, creating a woven effect.
- Continue the Pattern: Alternate between vertical and horizontal rows, ensuring that the bricks interlock with each other to create the basket weave pattern. Pay attention to the alignment and spacing to maintain consistency throughout the walkway.
- Cut Bricks if Needed: Use a brick chisel or a wet saw to cut bricks to fit any irregular edges or to achieve the desired design. Take care when cutting bricks and wear proper safety equipment.
- Fill the Joints: Once all the bricks are in place, fill the gaps between them with sand, fine gravel, or polymeric sand. Use a broom or brush to sweep the filling material into the joints, ensuring they are fully packed and visually pleasing.
- Compact and Finish: Gently compact the walkway using a plate compactor or hand tamper to ensure the bricks are firmly set in place. Sweep off any excess filling material from the surface to create a clean and finished look.
- Enjoy Your Basket Weave Walkway: Step back and admire the intricately woven pattern of your walkway. The basket weave design adds texture and charm to your garden, creating a visually striking and inviting path for you and your guests.
A basket weave walkway is an excellent choice for those who appreciate a more detailed and decorative brick pattern. Its timeless appeal and intricate design can elevate the overall aesthetic of your outdoor space, making it a focal point in your garden.
Remember to take your time during the installation process, ensuring that the bricks are properly positioned and the pattern is maintained. With patience and attention to detail, you can create a beautiful basket weave walkway that adds a touch of elegance and sophistication to your garden.
Running Bond Walkway
The running bond pattern is a versatile and popular choice for creating a brick walkway. This simple yet effective design involves laying the bricks side by side in a row, with each subsequent row offset by half a brick. The running bond pattern offers a clean and classic look that can complement various garden styles and architectural themes.
To create a running bond walkway using bricks, follow these steps:
- Measure and Plan: Determine the dimensions and layout of your walkway. Mark the boundaries and clear the area of any plants or debris. Ensure that the ground is level and compacted, providing a solid base for the walkway.
- Lay the Base Layer: Start by placing a base layer of crushed stone or gravel. Use a rake or tamper to level and compact the base layer to ensure stability and durability.
- Start with the First Row: Begin by laying the first row of bricks in a running bond pattern. Place the bricks side by side, ensuring they are level and properly aligned. Use a rubber mallet or wooden block to tap the bricks into place.
- Offset the Second Row: For the second row, offset the bricks by half the width of a brick. This will create the running bond pattern. Place the bricks tightly against the previous row, ensuring they are level and properly aligned.
- Continue the Pattern: Repeat the process for each subsequent row, alternating the offset pattern. Stagger the bricks in a way that creates a visually appealing and cohesive design. Ensure that the bricks are properly positioned and maintain consistent spacing between each brick.
- Cut Bricks if Needed: Use a brick chisel or a wet saw to cut bricks to fit any irregular edges or to achieve the desired design. Take care when cutting bricks and wear proper safety equipment.
- Fill the Joints: Once all the bricks are in place, fill the gaps between them with sand, fine gravel, or polymeric sand. Use a broom or brush to sweep the filling material into the joints, making sure they are fully packed and visually pleasing.
- Compact and Finish: Gently compact the walkway using a plate compactor or hand tamper to ensure that the bricks are firmly set in place. Sweep off any excess filling material from the surface to create a clean and finished look.
- Enjoy Your Running Bond Walkway: Step back and enjoy the timeless beauty of your running bond walkway. The clean and classic design adds a touch of elegance and sophistication to your garden, making it an inviting path for you and your guests.
A running bond walkway offers a simple yet visually appealing pattern that can enhance various garden styles. Its versatility and clean lines make it an ideal choice for those seeking a classic and timeless look for their garden path.
Pay attention to the alignment and spacing of the bricks as you lay each row to ensure a consistent and properly installed walkway. With patience and attention to detail, you can create a stunning running bond walkway that will enhance the beauty of your outdoor space for years to come.
When designing a brick walkway for your garden, consider using a herringbone or basketweave pattern for added visual interest and durability.
Diagonal Pattern Walkway
A diagonal pattern walkway is an eye-catching and unique design choice for a brick walkway. By placing the bricks diagonally, creating a diamond-like pattern, it adds a sense of movement and visual interest to your garden. A diagonal pattern walkway can make your outdoor space appear larger and adds a touch of sophistication to your path.
To create a diagonal pattern walkway using bricks, follow these steps:
- Measure and Plan: Determine the dimensions of your walkway and mark the boundaries. Clear the area of any vegetation or debris. Ensure that the ground is level and compacted, providing a solid base for the walkway.
- Lay the Base Layer: Start by placing a base layer of crushed stone or gravel. Use a rake or tamper to level and compact the base layer, ensuring stability and durability.
- Start with a Diagonal Line: Begin at one corner of the walkway and lay the first row of bricks diagonally, creating a straight line. Place the first brick at a 45-degree angle to the path, pointing towards the desired direction of the walkway.
- Create the Diamond Pattern: For each subsequent row, continue laying the bricks diagonally, interlocking with the previous row to create the diamond pattern. Ensure that the bricks fit snugly against each other and maintain a consistent width for comfortable walking.
- Continue the Diagonal Rows: Repeat the process, laying each row of bricks diagonally, interlocking them to create the diamond pattern. Pay attention to the alignment and spacing of the bricks to maintain consistency throughout the walkway.
- Cut Bricks if Needed: Use a brick chisel or a wet saw to cut bricks to fit any irregular edges or to achieve the desired design. Take care when cutting bricks and wear proper safety equipment.
- Fill the Joints: Once all the bricks are in place, fill the gaps between them with sand, fine gravel, or polymeric sand. Use a broom or brush to sweep the filling material into the joints, ensuring they are fully packed and visually pleasing.
- Compact and Finish: Gently compact the walkway using a plate compactor or hand tamper to ensure that the bricks are firmly set in place. Sweep off any excess filling material from the surface to create a clean and finished look.
- Enjoy Your Diagonal Pattern Walkway: Step back and admire the beautiful diamond pattern of your walkway. The diagonal design adds a touch of sophistication and creates a visually interesting path through your garden.
A diagonal pattern walkway is a striking choice that adds a unique element to your outdoor space. The diamond pattern creates a sense of movement and makes your garden path visually captivating.
Ensure that the bricks are properly positioned and the pattern is maintained as you lay each row. With attention to detail and careful planning, you can create a stunning diagonal pattern walkway that adds a touch of elegance and enhances the overall aesthetic of your garden.
Combination Walkway Designs
Combining different patterns and designs can create a truly unique and personalized walkway that reflects your individual style. By incorporating multiple patterns, you can add visual interest, depth, and texture to your brick walkway. Here are some ideas for combination walkway designs:
- Straight Path with Decorative Insets: Create a straight walkway using the traditional straight pattern, and insert sections of herringbone, basket weave, or other decorative patterns at regular intervals. This combination adds a pop of interest and breaks up the straight lines, creating a visually striking walkway.
- Curved Walkway with Running Bond Border: Design a curved walkway using a smooth and flowing curve pattern, and complement it with a border of running bond. This combination adds a stylish contrast between the curves and the linear pattern, resulting in a visually appealing walkway design.
- Diagonal Diamond Center with Straight Bands: Create a center portion of the walkway using a diagonal diamond pattern, and then add straight bands (such as running bond or herringbone) along either side of the center. This combination creates a captivating focal point while maintaining a clean and well-defined walkway.
- Herringbone Intersections with Straight Lines: Incorporate intersections of herringbone patterns within a straight walkway design. By adding these herringbone sections at regular intervals along the walkway, you can infuse the pattern with visual interest and complexity.
- Random Inset Patterns: Break up the main pattern of your walkway by randomly inserting smaller areas of different designs. This combination of various patterns creates a playful and eclectic walkway that adds artistic flair to your garden.
- Transition from One Pattern to Another: Gradually transition from one pattern to another within your walkway. For example, start with a herringbone pattern at the beginning, transition into a running bond, and end with a diagonal pattern. This combination creates a visually dynamic and engaging walkway.
When combining different walkway designs, it’s important to consider the overall aesthetic and flow of your garden. Ensure that the patterns complement each other and create a cohesive look. Careful planning and attention to detail will result in a combination walkway design that adds a unique and personal touch to your outdoor space.
Remember to take into account the dimensions, proportions, and spacing of each pattern to ensure a harmonious transition between them. With a thoughtful approach and a bit of creative flair, you can create a one-of-a-kind combination walkway that becomes a standout feature in your garden.
Planning and Preparing for a Brick Walkway
Before embarking on the installation of a brick walkway, it’s essential to plan and prepare adequately. Proper preparation will ensure a successful and long-lasting result. Here are some key steps to consider:
- Design and Layout: Determine the design and layout of your walkway. Consider the dimensions, shape, and the overall style that you want to achieve. Take into account the existing landscape, architectural features, and the function of the walkway.
- Mark the Path: Use stakes and string to mark the boundaries and desired route of your walkway. This visual guide will help ensure consistency and accuracy during the installation process.
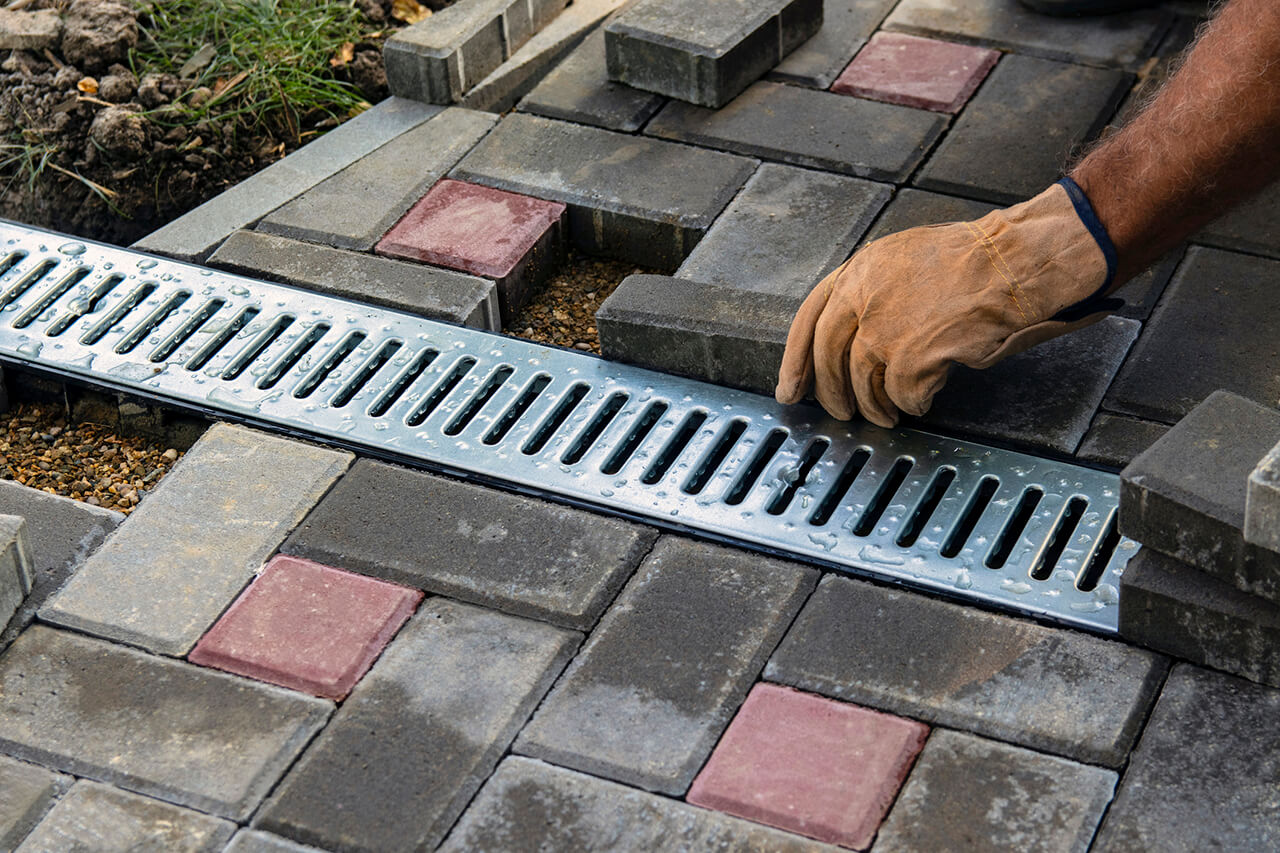
- Consider Drainage: Assess the natural slope and drainage patterns of your garden. If necessary, incorporate proper drainage measures to prevent water accumulation on the walkway. This may include adding a slight slope or installing drainage channels along the path.
- Prepare the Ground: Clear the area by removing any plants, grass, or debris. Ensure that the ground is level and compacted. Use a shovel or garden rake to even out the soil and remove any bumps or hollows.
- Excavate the Trench: Dig a trench along the marked path, following the desired width and depth for the walkway. The depth will depend on factors such as the thickness of the bricks, base materials, and any additional layers you plan to include.
- Add Base Materials: Fill the trench with a layer of crushed stone or gravel. This base layer provides stability, aids in drainage, and helps prevent the bricks from shifting over time. Use a rake or tamper to level and compact the base layer.
- Select the Right Bricks: Choose high-quality bricks that are suitable for outdoor use and can withstand varying weather conditions. Consider the color, size, and texture of the bricks to ensure they complement the overall design of your garden.
- Calculate the Quantity of Bricks: Determine the number of bricks needed for your walkway by considering the length, width, and desired pattern. It’s always a good idea to purchase some extra bricks to account for any mistakes or replacements in the future.
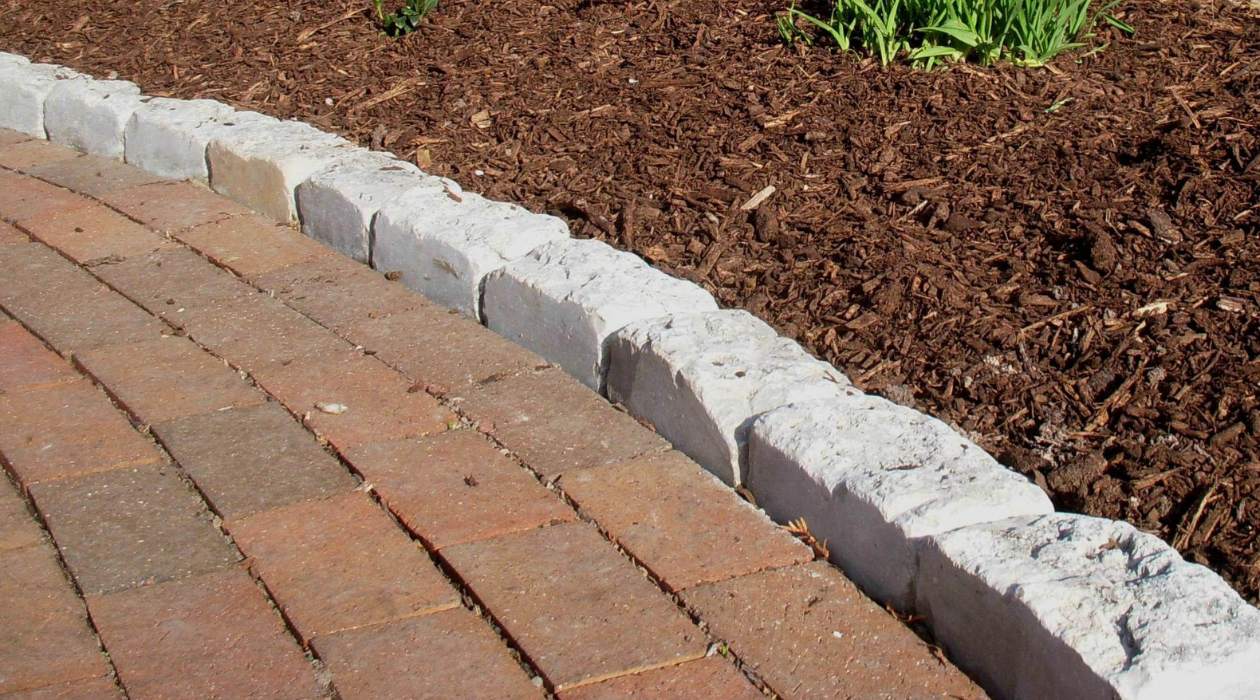
- Plan for Edging and Borders: Decide on any edging or borders you want to include along the sides of your walkway. This can provide a clean and finished look, and help keep the bricks in place. Options include materials such as stone, concrete, or metal edging.
- Secure Perimeter and Layout: Use stakes and string to create a perimeter for your walkway. This will help ensure straight lines and correct spacing. Lay out a few rows of bricks without permanently fixing them to visualize the final design and make any necessary adjustments.
By taking the time to plan and prepare, you can set a solid foundation for your brick walkway project. Proper planning ensures that the walkway aligns with your vision and functions well within your garden. It also helps you gather the necessary materials and create a clear roadmap for the installation process.
Remember that careful preparation and attention to detail are key to achieving a successful and visually pleasing walkway that you can enjoy for years to come.
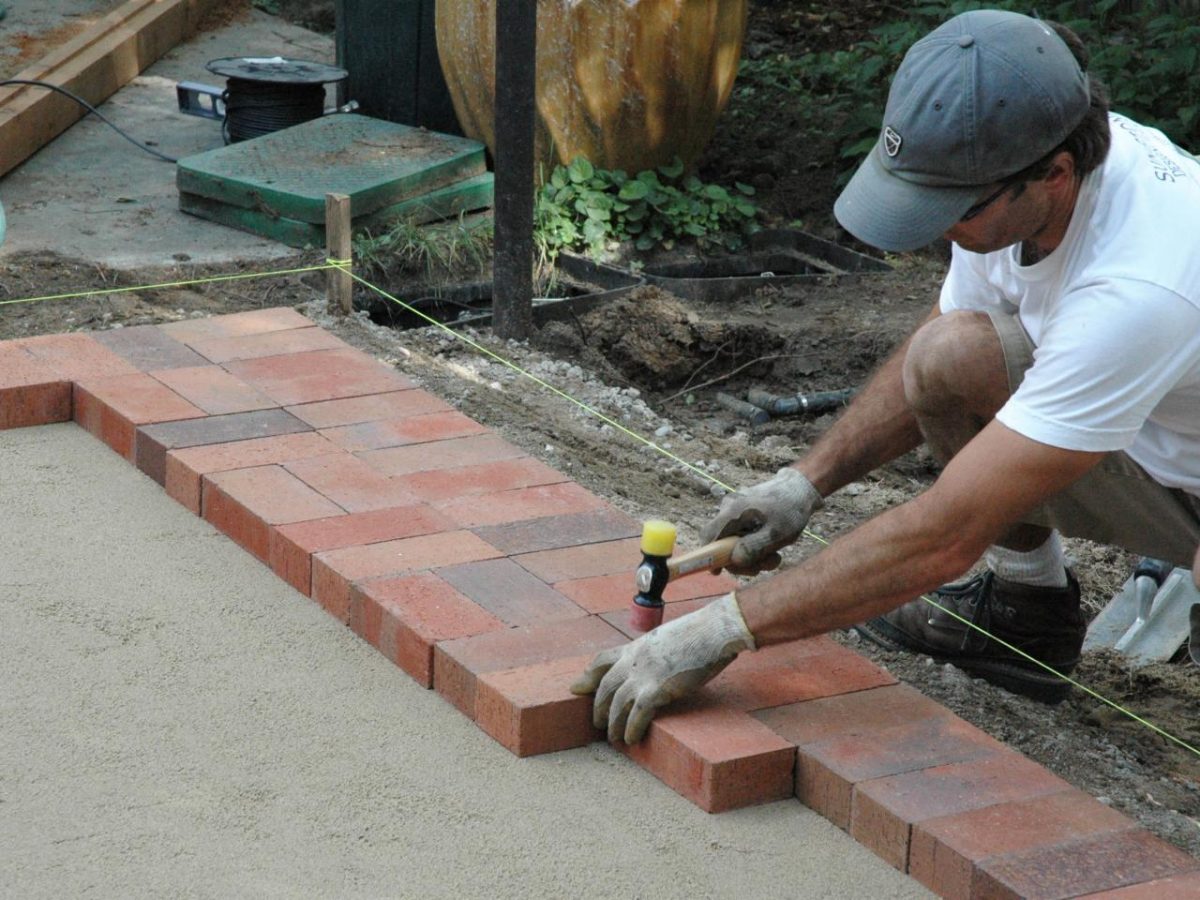
Step-by-Step Installation Guide
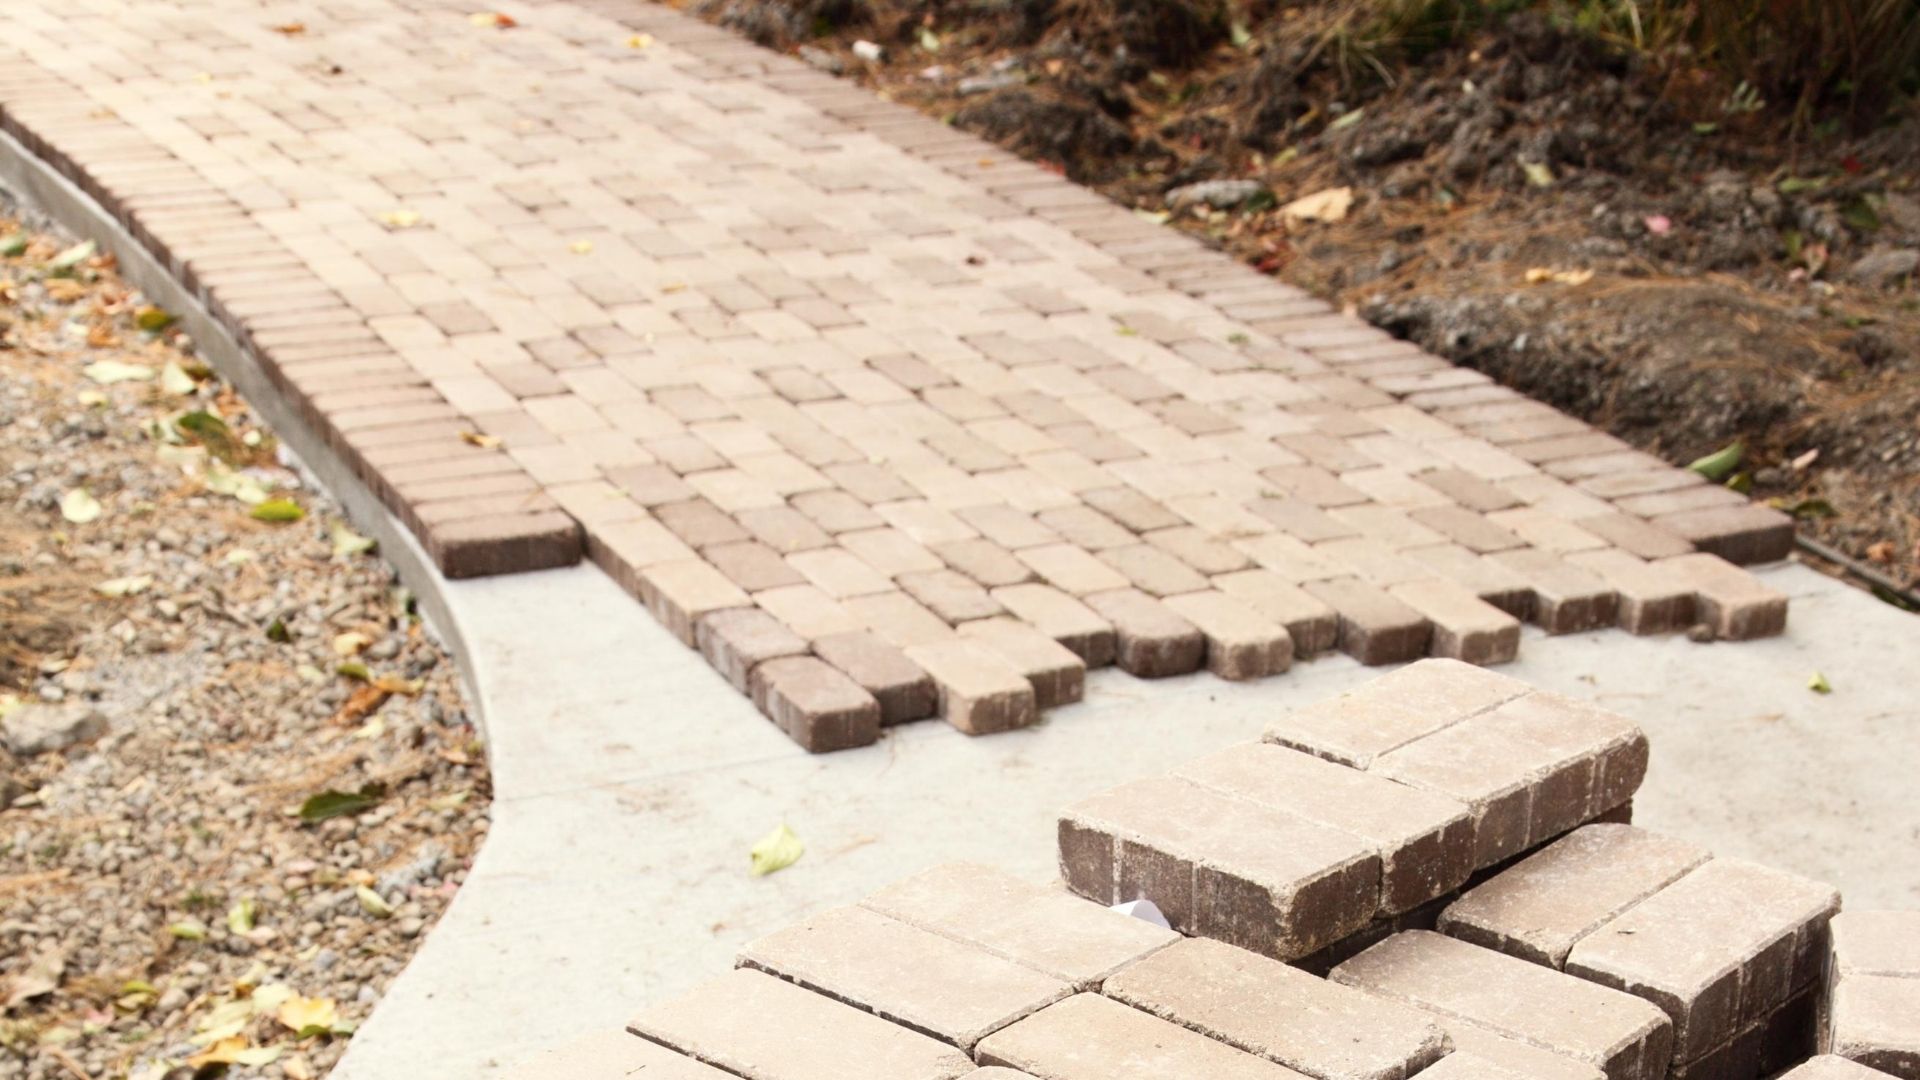
Installing a brick walkway is a rewarding DIY project that can enhance the beauty and functionality of your outdoor space. Follow this step-by-step guide to ensure a successful installation:
- Prepare the Ground: Clear the area by removing any vegetation or debris. Ensure that the ground is level and compacted.
- Excavate the Trench: Dig a trench along the marked path, following the desired width and depth for the walkway.
- Add Base Material: Fill the trench with a layer of crushed stone or gravel. Use a rake or tamper to level and compact the base layer.
- Install Edging: If desired, install edging or borders along the sides of the walkway for added stability and aesthetics.
- Mix Mortar: If you plan to use mortar to secure the bricks, follow the instructions on the packaging to mix the mortar to the desired consistency.
- Start Laying Bricks: Begin at one end of the walkway and place the first brick. If using mortar, apply a small amount to the bottom of the brick and press it into place. If not using mortar, lay the brick directly on the base material.
- Continue the Pattern: Lay subsequent bricks, following the chosen pattern (such as straight, curved, herringbone, etc.), ensuring proper alignment and spacing. You may need to make adjustments to ensure a smooth and visually pleasing layout.
- Trim Bricks as Needed: Use a brick chisel or a wet saw to cut bricks to fit any irregular edges or to achieve the desired design. Take care when cutting bricks and wear proper safety equipment.
- Fill Joints: Once all the bricks are in place, fill the gaps between them with sand, fine gravel, or polymeric sand. Use a broom or brush to sweep the filling material into the joints, ensuring they are fully packed.
- Compact the Walkway: Gently compact the walkway using a plate compactor or hand tamper to ensure that the bricks are firmly set in place.
- Check for Level: Use a level to ensure that the walkway is evenly sloped and there are no high or low spots. Make adjustments as needed before proceeding.
- Remove Excess Material: Sweep off any excess filling material from the surface of the walkway. This will create a clean and finished look.
- Allow for Settling: Let the walkway settle for a few days to allow the bricks and filling material to naturally settle into place.
- Perform Regular Maintenance: Regularly sweep and clean the walkway to prevent the buildup of debris. If using mortar, inspect the joints periodically for any signs of cracks or deterioration, and repair as needed.
Following this step-by-step installation guide will help you create a beautiful and durable brick walkway that enhances the beauty and functionality of your outdoor space. Take your time during each step to ensure proper alignment, spacing, and leveling, and enjoy the rewarding process of installing your own beautiful walkway.
Maintaining and Caring for Brick Walkways
Proper maintenance and regular care are essential to ensure the longevity and beauty of your brick walkway. By following these maintenance guidelines, you can keep your walkway in great condition for years to come:
- Sweep Regularly: Sweep your brick walkway regularly to remove leaves, dirt, and debris. This simple step helps prevent the buildup of dirt and keeps the walkway looking clean and presentable.
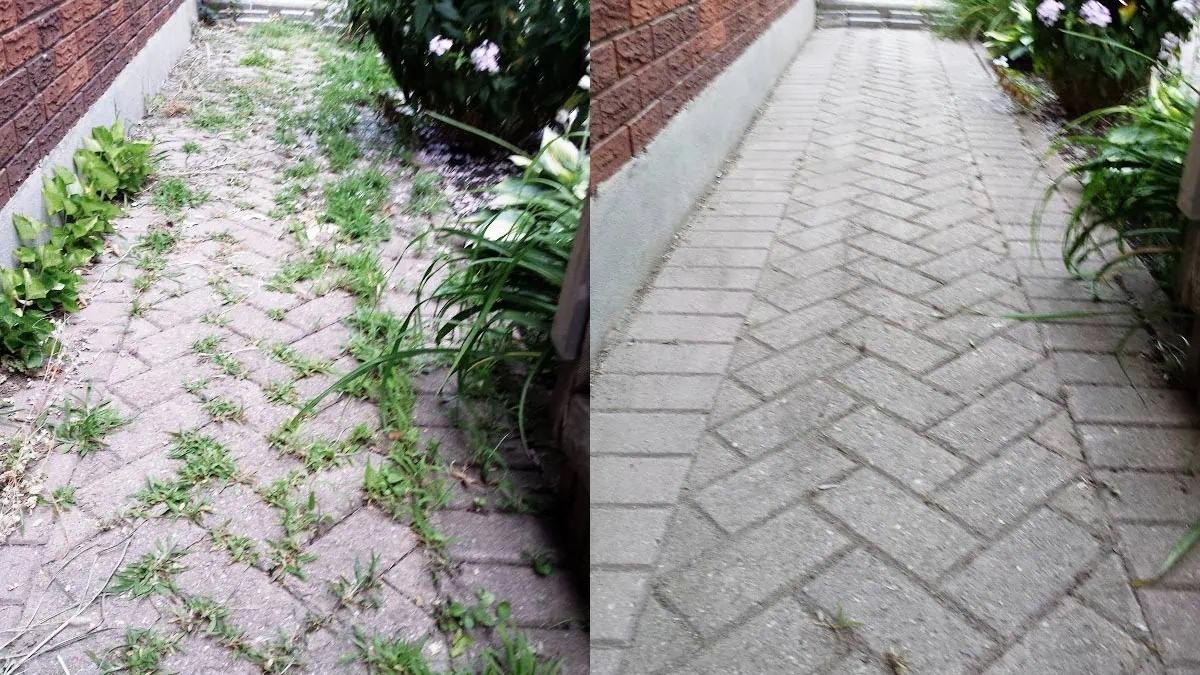
- Remove Weeds: Periodically check for weeds that may grow between the cracks of your walkway. Use a weed remover tool or hands to carefully remove the weeds and their roots to prevent them from spreading further.
- Clean Spills and Stains: Promptly clean any spills or stains on your brick walkway to prevent them from becoming permanent. Use a mild detergent mixed with water and scrub the affected area with a brush. Rinse with clean water and allow the walkway to dry.
- Seal the Bricks: Consider applying a sealant to your brick walkway to enhance its durability and protect it from stains and damage. Consult with a professional or your local home improvement store for guidance on the best sealant for your specific type of bricks and climate.
- Inspect for Damage: Regularly inspect your walkway for any signs of damage, such as cracked or loose bricks. Replace any damaged bricks promptly to maintain the integrity of the walkway and prevent further issues.
- Repoint the Joints: If you have a mortar-based brick walkway, inspect the joints periodically for any signs of cracking or deterioration. Repoint any damaged joints by carefully removing the old mortar and replacing it with fresh mortar. Consult with a professional if you are unsure about repointing techniques.
- Protect from Heavy Loads: Avoid placing heavy objects or driving vehicles over your brick walkway. Excessive weight can cause the bricks to crack or shift, compromising the integrity of the walkway. Use caution when moving heavy items to prevent unnecessary damage.
- Prevent Prolonged Moisture: Ensure proper drainage around your walkway to prevent excessive moisture buildup. Avoid overwatering plants or redirecting water from downspouts directly onto the walkway. Prolonged moisture can deteriorate the bricks and lead to mold or moss growth.
- Winter Protection: Take precautions during the winter months to protect your brick walkway from damage caused by freezing temperatures and ice. Use caution when using de-icing chemicals, as some may be corrosive to the bricks. Instead, consider using sand or salt alternatives for traction on icy surfaces.
- Regularly Reapply Sealant: If you have sealed your walkway, reapply the sealant according to the manufacturer’s instructions. This will help maintain the protective layer and keep your brick walkway in excellent condition.
By following these maintenance tips, you can extend the lifespan of your brick walkway and keep it looking beautiful. Regular care and attention will ensure that it remains a focal point of your outdoor space, providing a durable and aesthetically pleasing pathway for years to come.
Read more: How To Clean Brick Walkway
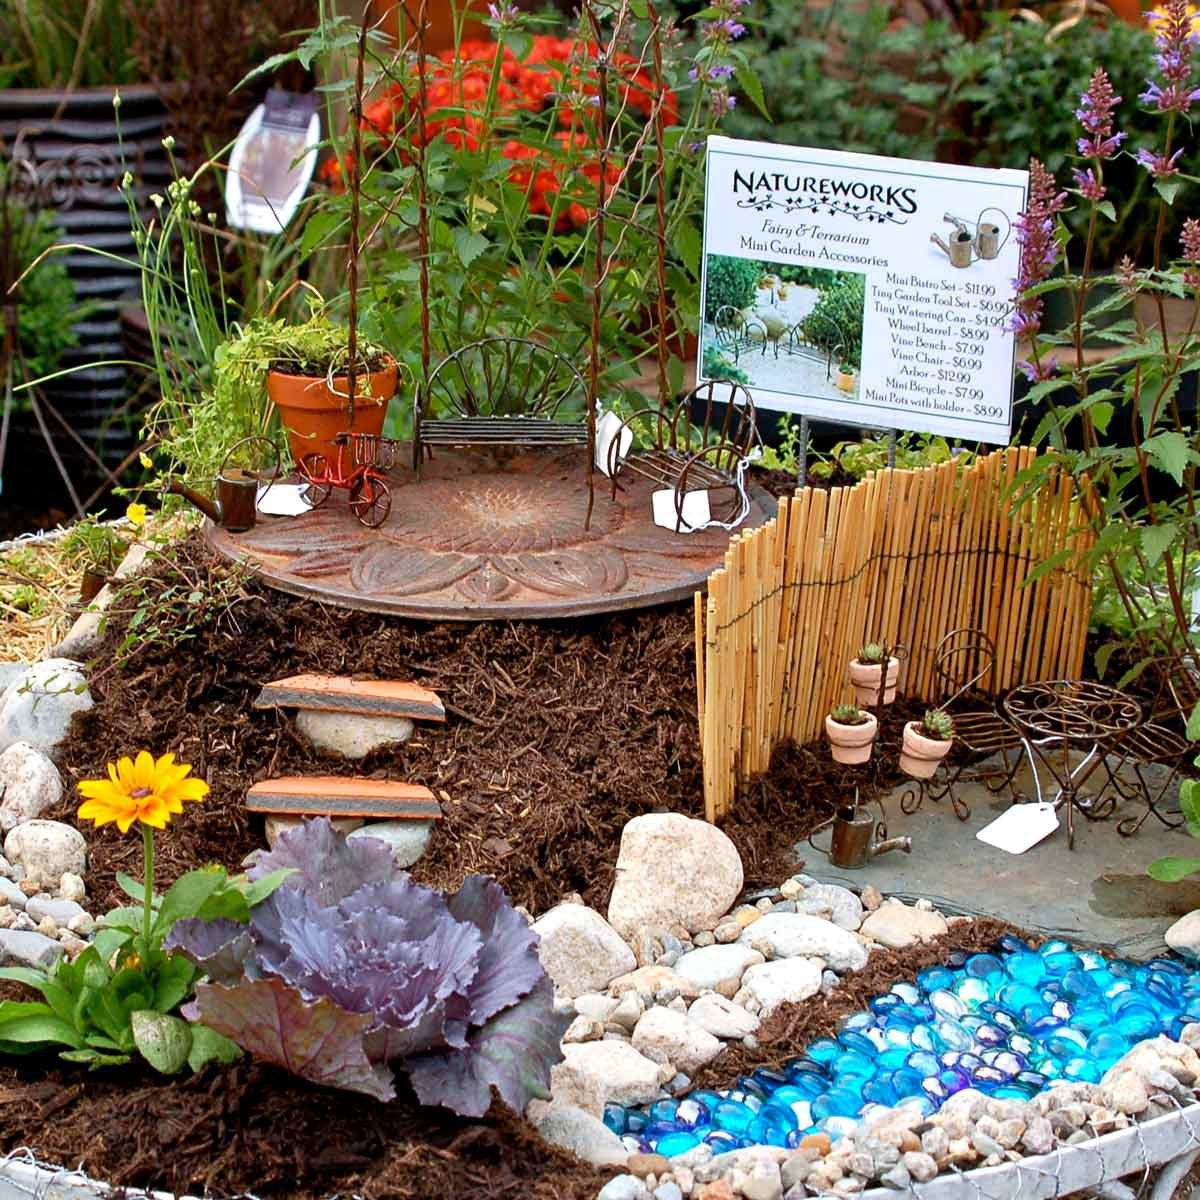
Enhancing Brick Walkways with Garden Path Ideas
Brick walkways provide a solid foundation for navigating your garden, but they also offer opportunities for creative enhancements that can elevate the overall aesthetic and charm of your outdoor space. Here are some garden path ideas to enhance your brick walkway:
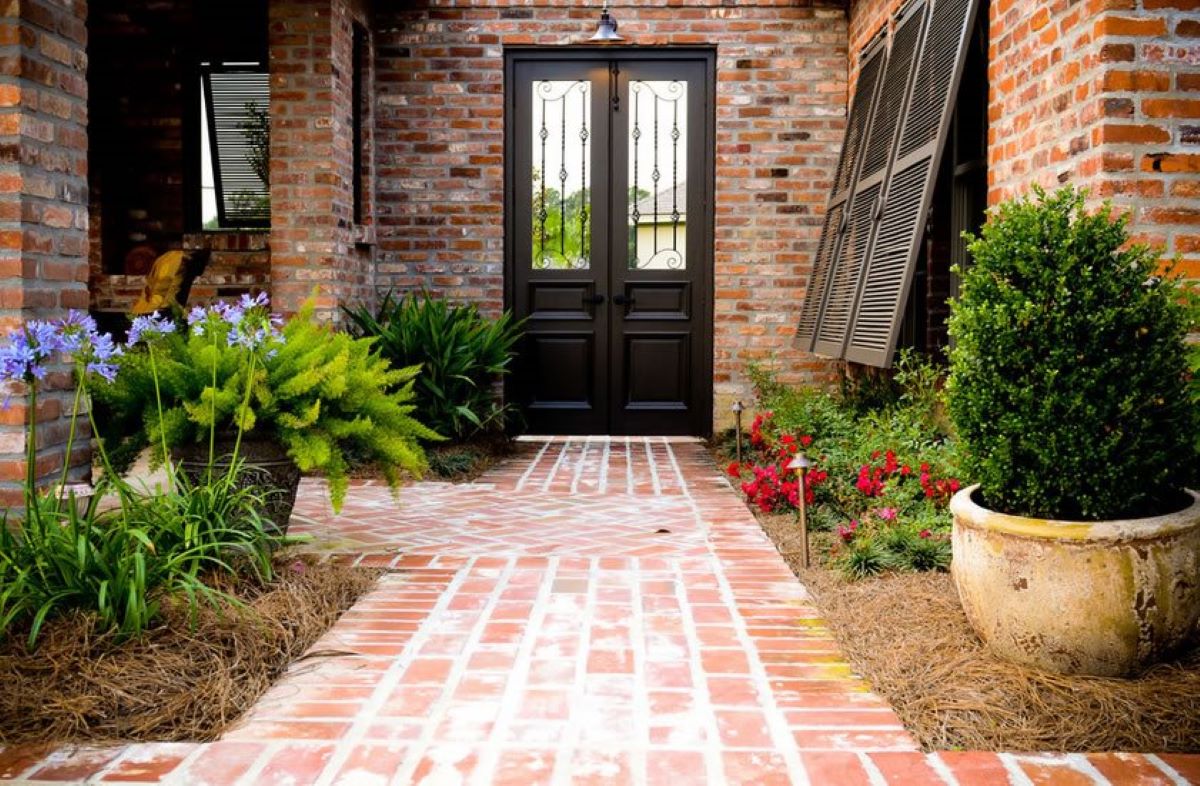
- Flower Bed Borders: Add a touch of color and fragrance to your walkway by planting vibrant flowers along the edges. Create a border of flower beds that complements the colors and style of your garden, accentuating the beauty of the brick walkway.
- Stone Accents: Incorporate natural stone accents along the sides of your brick walkway. This can add visual interest and create a seamless transition between your walkway and the surrounding garden, giving it a more natural and organic feel.
- Pathway Lighting: Illuminate your brick walkway with strategically placed pathway lighting. This not only provides safety and visibility at night but also adds a warm and inviting ambiance to your garden. Choose lighting fixtures that complement the style and mood of your outdoor space.
- Stepping Stones: Integrate stepping stones within your brick walkway to create visual breaks or to guide the path. Choose stones of varying shapes and sizes to add texture and a whimsical touch to the overall design.
- Mosaic Inlays: Consider adding mosaic inlays to your brick walkway to create intricate patterns or artistic designs. These colorful and decorative elements can showcase your creativity and become an eye-catching feature in your garden.
- Arbors or Pergolas: Frame the entrance or key points of your brick walkway with arbors or pergolas. These structures not only provide shade but also add architectural interest, creating a grand entrance or a focal point along the path.
- Water Features: Incorporate a water element, such as a small fountain or a bubbling rock, near your brick walkway. The soothing sound of flowing water adds a calming and tranquil atmosphere, enhancing the overall sensory experience of your garden.
- Seating Areas: Create cozy seating areas along your brick walkway, allowing you to pause and appreciate the surroundings. Place benches, garden chairs, or even a swing, inviting you and your guests to relax and enjoy the beauty of your garden.
- Container Gardens: Add potted plants and container gardens alongside your brick walkway to bring color and versatility to the space. Experiment with different plant combinations and styles to create a dynamic and ever-changing display along the path.
- Art Installations: Showcase sculptures, art installations, or other creative elements along your brick walkway. These unique features can become conversation starters and add a touch of personality and artistic flair to your outdoor space.
By incorporating these garden path ideas, you can transform your brick walkway into a captivating and enjoyable journey through your garden. Experiment with different elements, colors, and textures to create a walkway that reflects your style and enhances the overall beauty and enjoyment of your outdoor space.
Conclusion
A brick walkway has the power to transform your garden into a beautiful and welcoming space. From the traditional straight walkway to the intricate patterns of herringbone and basket weave, the choices are endless. With careful planning and proper installation, you can create a walkway that not only guides you through your garden but also adds charm, elegance, and character to the overall landscape.
As you embark on your brick walkway project, consider the design that best complements your garden. Whether it’s a straight path for a formal garden or a curved walkway that follows the natural contours of your landscape, the choice is yours. Don’t be afraid to explore different patterns, such as herringbone, running bond, diagonal, or even create unique combinations that reflect your personal style.
Maintaining your brick walkway is just as important as its installation. Regular sweeping, weed removal, and prompt cleaning of spills and stains will help keep your walkway looking pristine. If you opt for a mortar-based walkway, occasional inspection and repointing of joints will ensure its longevity and structural integrity.
Enhancing your brick walkway with creative garden path ideas can elevate its visual appeal and create a truly enchanting experience. Experiment with flower bed borders, stepping stones, lighting, and other elements that add texture, color, and interest to your walkway. Let your imagination roam free and infuse your personal touch into the design.
In conclusion, a well-designed and properly maintained brick walkway can be a standout feature in your garden. It not only provides a practical way to navigate through your outdoor space but also serves as a canvas for your creativity and adds undeniable charm to your home. So, roll up your sleeves, gather your tools, and embark on this rewarding journey of creating a stunning brick walkway that will be enjoyed for years to come.
Frequently Asked Questions about Garden Path Ideas: Brick Walkways
Was this page helpful?
At Storables.com, we guarantee accurate and reliable information. Our content, validated by Expert Board Contributors, is crafted following stringent Editorial Policies. We're committed to providing you with well-researched, expert-backed insights for all your informational needs.


0 thoughts on “Garden Path Ideas: Brick Walkways”