Home>Articles>How To Build A Beautiful Brick Walkway Or Patio
Articles
How To Build A Beautiful Brick Walkway Or Patio
Modified: August 16, 2024
Learn expert tips and tricks in our articles on how to build a stunning brick walkway or patio. Transform your outdoor space with our comprehensive step-by-step guides and design inspiration.
(Many of the links in this article redirect to a specific reviewed product. Your purchase of these products through affiliate links helps to generate commission for Storables.com, at no extra cost. Learn more)
Introduction
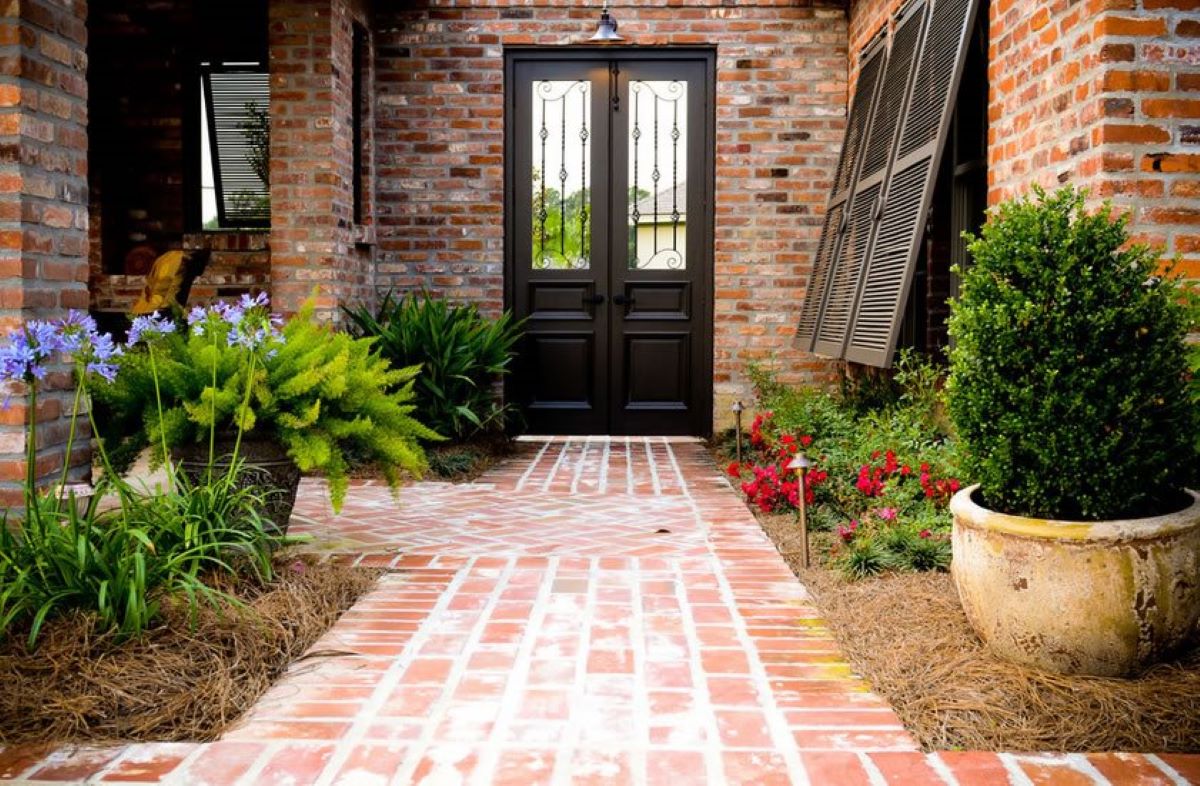
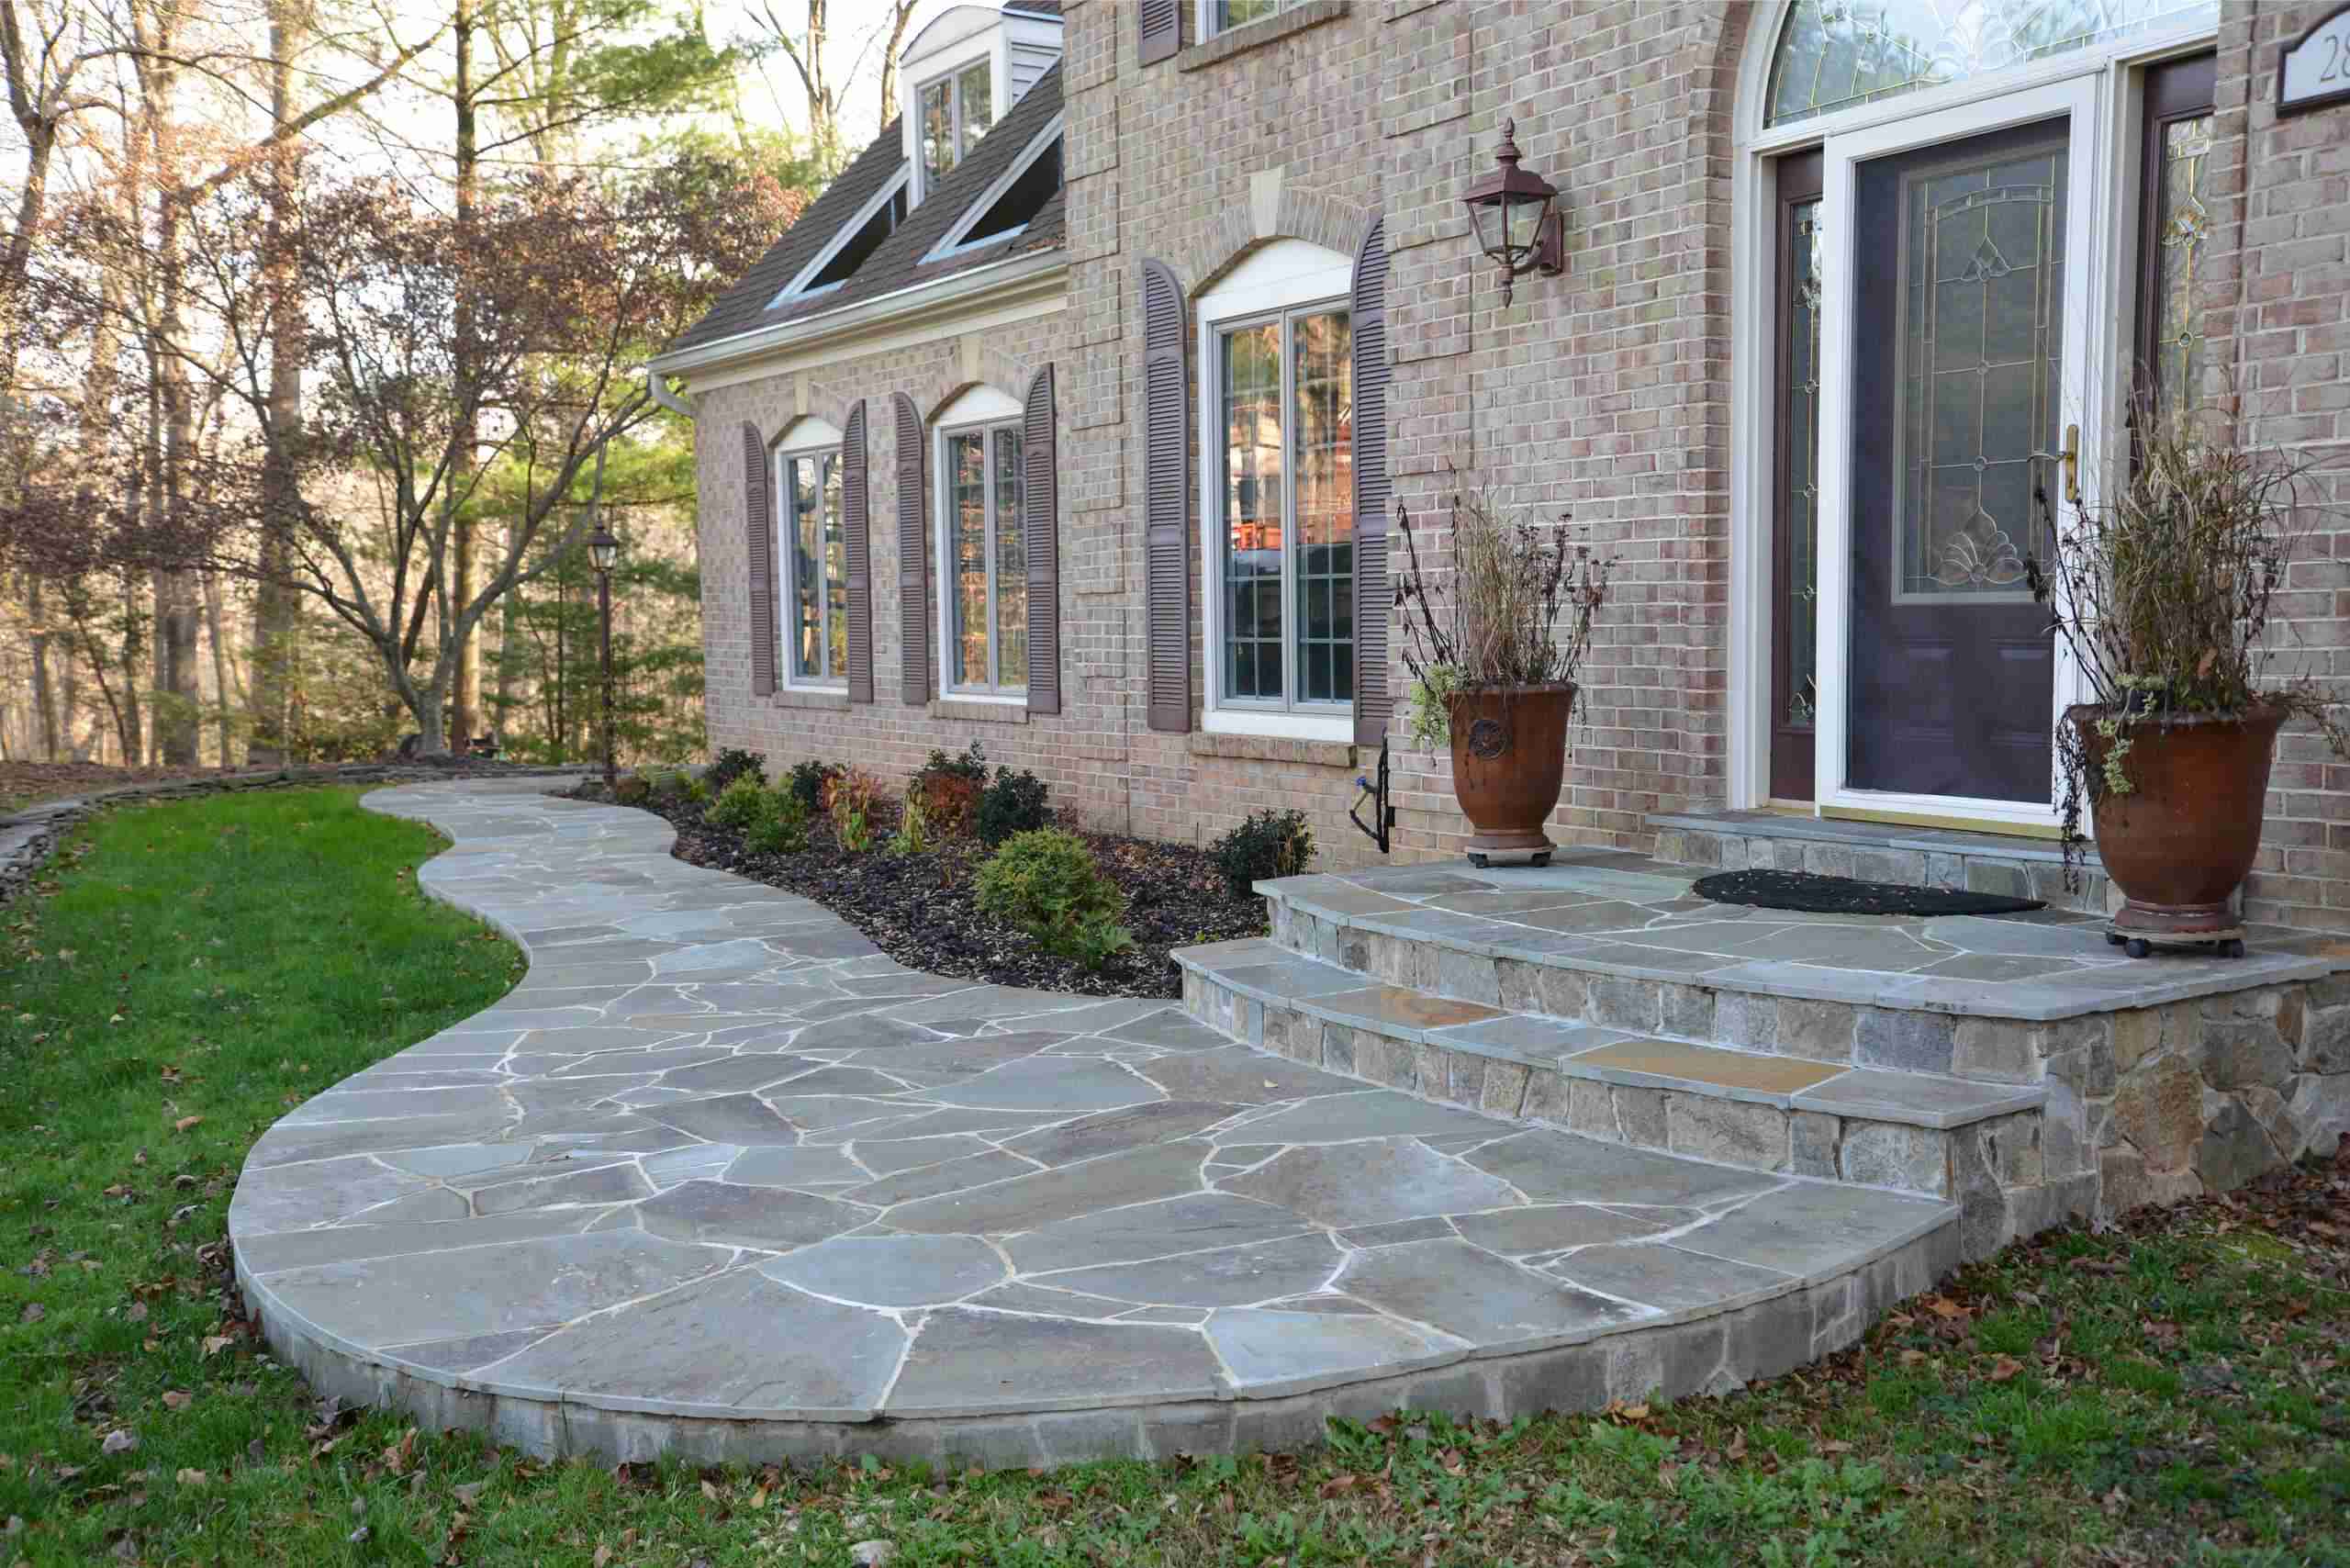
Creating a beautiful brick walkway or patio can greatly enhance the curb appeal and functionality of your outdoor space. Whether you want to give your home’s entrance a welcoming touch or create a cozy outdoor sitting area, building a brick walkway or patio can be a rewarding and enjoyable project.
Brick is a versatile and durable material that can withstand the elements and add a timeless charm to any space. With careful planning and the right tools and materials, you can transform your outdoor area into a stunning and inviting space.
This article will guide you through the process of building a beautiful brick walkway or patio. We will cover everything from planning and design to laying the bricks and adding finishing touches. By following these steps, you can create a functional and visually appealing outdoor space that you can enjoy for years to come.
Before you begin this project, it’s important to note that building a brick walkway or patio requires basic knowledge of construction and working with tools. If you are unfamiliar with these concepts, it’s advisable to seek professional assistance or consult with an experienced DIYer.
Now, let’s dive into the planning and design phase of building your brick walkway or patio.
Key Takeaways:
- Planning and Design
Proper planning and design are essential for building a beautiful brick walkway or patio. Consider the purpose, landscape, brick type, patterns, materials, budget, permits, and create a clear roadmap for a successful project. - Securing and Finishing
After laying the bricks, ensure they are securely compacted, level, and aligned. Add finishing touches like cleaning, sealing, lighting, landscaping, seating, and decorative accents to create a stunning and functional outdoor space.
Read more: How To Repair A Brick Walkway
Planning and Design
Before you start building your brick walkway or patio, it’s essential to have a well-thought-out plan in place. Proper planning and design will help ensure that the end result meets your aesthetic preferences and functional needs. Here are a few key considerations:
1. Determine the Purpose: Decide how you want to use your walkway or patio. Is it primarily for decoration, or do you want it to serve as a functional space for entertaining or relaxing? Understanding the purpose will help you determine the size, shape, and location of your project.
2. Measure and Mark the Area: Use measuring tape to determine the dimensions of your desired walkway or patio. Mark the area using stakes and string to visualize the layout and make any necessary adjustments.
3. Consider the Landscape: Take into account the existing landscape features, such as trees, shrubs, and slopes. Incorporate these elements into your design, and plan for proper drainage to prevent water buildup.
4. Select the Brick Type: Choose the type of brick that suits your style and budget. Common options include clay bricks, concrete pavers, and natural stone. Consider factors such as color, texture, and durability when making your selection.
5. Research Different Patterns: Explore various brick laying patterns to add visual interest to your walkway or patio. Popular options include herringbone, running bond, and basket weave. Consider the size and shape of your bricks when choosing a pattern.
6. Create a Materials List: Make a comprehensive list of all the materials you will need for your project, including bricks, sand, gravel, and edging materials. It’s crucial to measure accurately to avoid any material shortages.
7. Set a Budget: Determine your budget for the project, and factor in the cost of materials, tools, and any additional features you may wish to include, such as lighting or seating.
8. Obtain Permits if Necessary: Check with your local building department to determine if you need any permits or approvals for constructing your brick walkway or patio. Compliance with local regulations will help you avoid any potential issues down the line.
Taking the time to plan and design your brick walkway or patio will ensure that you have a clear roadmap for your project. Once you have completed the planning phase, it’s time to gather the necessary materials and tools for construction.
Gathering Materials and Tools
Now that you have your plan in place, it’s time to gather the materials and tools needed to build your brick walkway or patio. Here’s a list of essential items you’ll need for the construction process:
Materials:
- Bricks: Purchase enough bricks to cover the area of your walkway or patio, accounting for a few extras in case of breakage or mistakes.
- Sand: Use coarse sand, such as concrete sand or paver sand, for the base and jointing between the bricks.
- Gravel: Prepare the foundation of your walkway or patio with a layer of compacted gravel.
- Edging Material: Choose a sturdy edging material, such as metal or plastic, to hold the bricks in place and prevent shifting.
- Landscaping Fabric: Use landscaping fabric to control weed growth and prevent soil erosion.
- Optional: Additional features such as decorative stones, lighting, or seating, depending on your design preferences.
Tools:
- Shovel: A sturdy shovel will be needed to excavate the area and remove any existing grass or debris.
- Rake: Use a rake to level the excavated area and remove any rocks or uneven surfaces.
- Tape Measure: Accurate measurements are crucial for planning and laying out your brick walkway or patio.
- Straight Edge: A straight board or level will help ensure that your bricks are properly aligned.
- Masonry Saw or Chisel: Use a masonry saw or chisel to cut bricks when necessary.
- Plate Compactor: A plate compactor will help compact the gravel base for better stability.
- Jointing Tool: A jointing tool or pointed trowel is helpful for filling in the gaps between the bricks with sand.
- Safety Gear: Don’t forget to wear safety glasses, work gloves, and appropriate footwear to protect yourself during construction.
Before you start gathering materials and tools, double-check your design plans and measurements to ensure accurate purchasing. It’s also a good idea to explore different suppliers to compare prices and quality.
Once you have all the necessary materials and tools, you’ll be ready to move on to the next phase: preparing the area for construction.
Preparing the Area
Before you begin laying the bricks, it’s important to properly prepare the area where your walkway or patio will be constructed. Taking the time to prepare the site will ensure a solid foundation and help prevent issues in the future. Here’s a step-by-step guide on how to prepare the area:
1. Clear the Area: Remove any obstacles such as plants, rocks, or debris from the site. Use a shovel or rake to clear the area and create a clean, level surface.
2. Mark the Layout: Use stakes and string to mark the boundaries of your walkway or patio. Ensure that the lines are straight and true to your design plan.
3. Excavate the Area: Use a shovel or a rented excavator to dig out the area to a depth of about 6 inches. This will allow room for the base materials and the thickness of the bricks.
4. Level the Subgrade: Use a rake or a compactor to level and compact the soil in the excavated area. This will provide a stable base for the foundation materials.
5. Add a Layer of Gravel: Spread a layer of compacted gravel, about 4 inches thick, evenly across the excavated area. Use a plate compactor to compact the gravel for stability.
6. Install Edging Material: Place the edging material along the perimeter of the excavated area. Secure it firmly in place using stakes or nails to keep the bricks from shifting.
7. Lay Landscaping Fabric: Lay down landscaping fabric over the compacted gravel. This will help prevent weed growth and provide additional stability and drainage.
8. Add a Layer of Sand: Spread a layer of sand evenly over the landscaping fabric to a depth of about 1 inch. Use a straight board or level to ensure the sand is level and compacted.
With the area properly prepared, you now have a solid foundation for your walkway or patio. The next step is to start laying the bricks according to your desired pattern.
Building the Foundation
With the area prepared, it’s time to start building the foundation for your brick walkway or patio. The foundation is a crucial step as it provides stability and support for the bricks. Here’s how to build a solid foundation:
1. Wet the Sand: Before laying the bricks, dampen the layer of sand with water. This will help the sand compact better and create a firmer base for the bricks.
2. Start at the Starting Point: Choose a corner or edge of your walkway or patio as the starting point. It’s important to work from a consistent reference point to ensure a straight and even installation.
3. Lay the First Row of Bricks: Place the first brick at the starting point, pressing it gently into the damp sand. Use a rubber mallet or a wooden block to tap the brick into place, ensuring it is level with the surrounding area.
4. Check for Alignment: Use a level and a straight edge to check the alignment of the brick. Adjust the position as necessary to maintain a straight and even row.
5. Add the Next Rows: Continue laying the first row of bricks, checking for alignment and leveling each brick as you go. If needed, use a masonry saw or chisel to cut bricks to fit the desired pattern.
6. Maintain Joint Spacing: Leave a small gap, about 1/4 inch, between each brick for jointing sand. Use spacers or your fingers to ensure consistent spacing between the bricks.
7. Use String as a Guide: To maintain straight rows and accurate alignment, stretch a string between two stakes at the desired height of the bricks. Use it as a guide to lay the subsequent rows.
8. Check for Levelness: Periodically use a level to check the flatness and levelness of the bricks. Adjust the sand or tap the bricks as needed to achieve an even surface.
9. Work in Sections: Divide your project into manageable sections and work on one section at a time. This will help you maintain control and ensure a consistent installation.
10. Fill the Joints with Sand: Once the entire foundation is laid, fill the joints between the bricks with fine sand. Use a broom or brush to sweep the sand into the gaps, ensuring it is fully filled.
By following these steps to build a strong foundation, you are now ready to move on to the next stage of your project: laying the bricks and creating beautiful patterns.
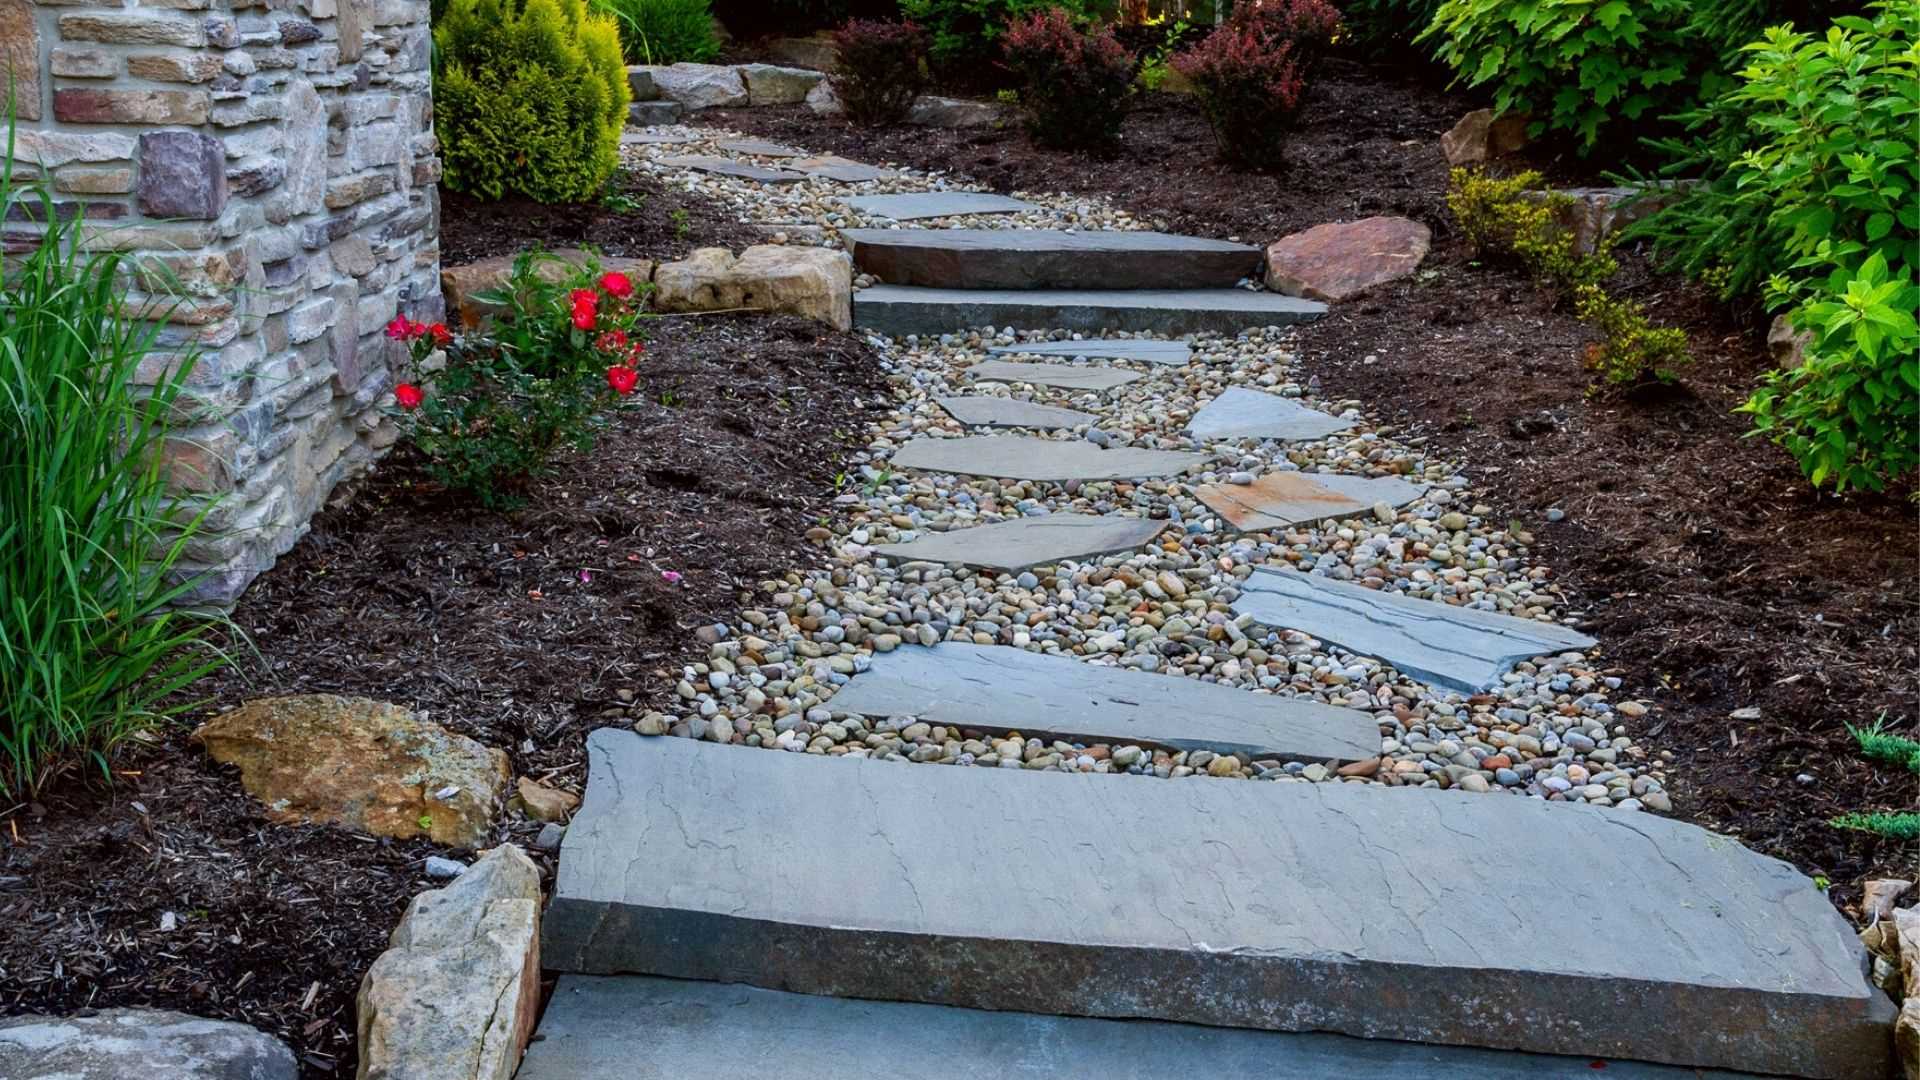
When laying bricks for a walkway or patio, make sure to use a sturdy base of compacted gravel and sand to prevent shifting and settling over time.
Read more: How To Clean Brick Walkway
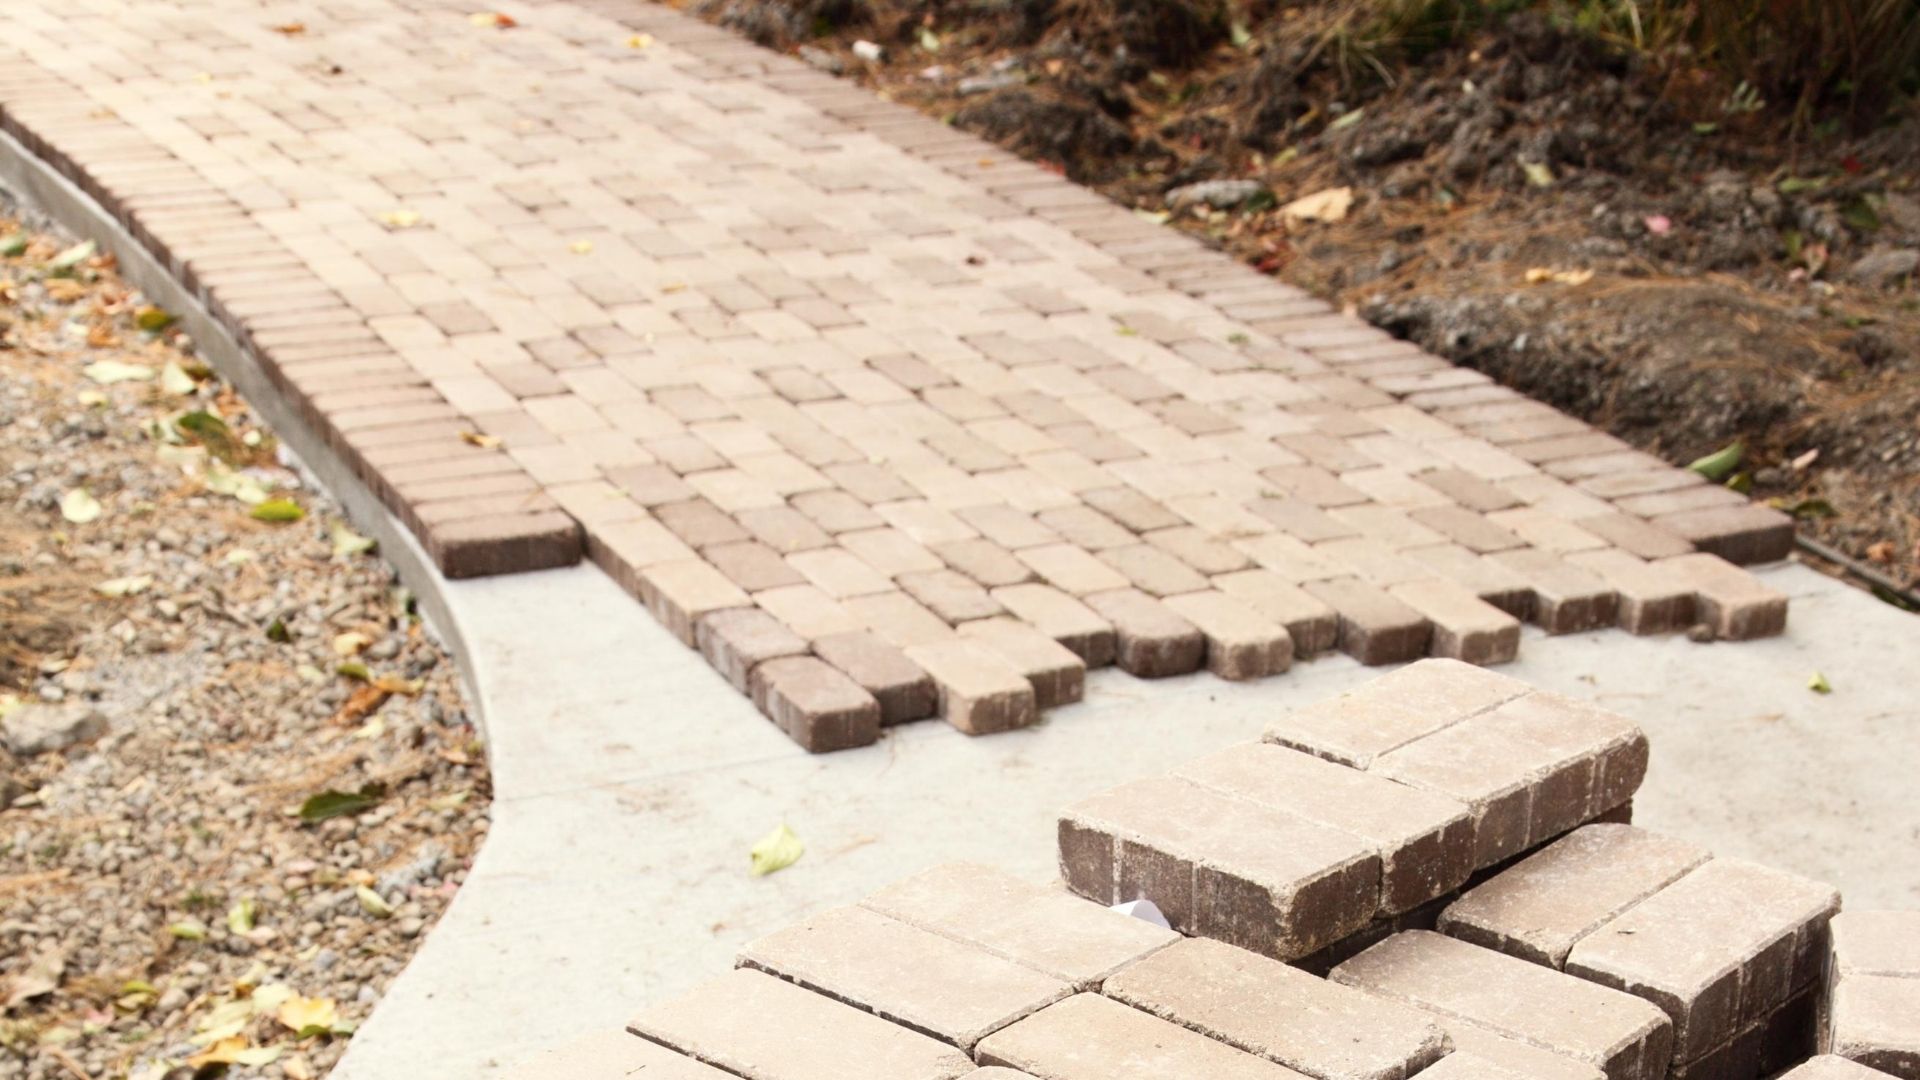
Laying the Bricks
With the foundation in place, it’s time to start laying the bricks for your walkway or patio. This step requires careful attention to detail to ensure a neat and professional-looking installation. Here’s a step-by-step guide on how to lay the bricks:
1. Prepare the Brick: Before laying each brick, dip it in water to prevent it from absorbing too much moisture from the mortar. This will help the mortar adhere better.
2. Mix the Mortar: Follow the manufacturer’s instructions to mix the mortar to the desired consistency. Aim for a thick but workable consistency that holds its shape.
3. Start at the Starting Point: Begin laying the bricks at the starting point you determined during the planning stage. Apply a layer of mortar on the foundation within the marked boundaries.
4. Lay the Bricks: Place the first brick in the mortar with a small twisting motion to ensure good contact. Press it down gently and wiggle it slightly to settle it in place. Repeat this process for the subsequent bricks.
5. Maintain Level and Alignment: Use a level and a straight edge to periodically check that the bricks are level and aligned. Adjust the position of the bricks as needed to maintain a straight and uniform surface.
6. Apply Mortar Joints: After laying a few bricks, use a pointing trowel to apply mortar between the bricks, filling the gaps. Press the mortar firmly to ensure a secure bond.
7. Clean Excess Mortar: Use a damp cloth or brush to gently clean off any excess mortar from the surface of the bricks. It’s important to remove the excess mortar before it hardens.
8. Continue the Pattern: Depending on your design, continue laying the bricks in the desired pattern, whether it’s a herringbone, running bond, or basket weave. Pay attention to the pattern and maintain consistency throughout.
9. Cut Bricks if Needed: Use a masonry saw or chisel to cut bricks to fit into corners or irregular spaces. Measure carefully and make precise cuts to ensure a proper fit and a seamless appearance.
10. Work in Sections: Divide your project into manageable sections and work on one section at a time. This will help you stay organized and maintain control over the installation process.
Remember to take your time and pay attention to detail while laying the bricks. A well-laid pattern will enhance the overall appearance of your walkway or patio. Once all the bricks are in place, it’s time to move on to securing and leveling them.
Creating Patterns
One of the advantages of using bricks for your walkway or patio is the ability to create visually appealing patterns. Whether you prefer a classic herringbone pattern or a more intricate design, patterns can add a unique touch to your outdoor space. Here are some popular brick laying patterns to consider:
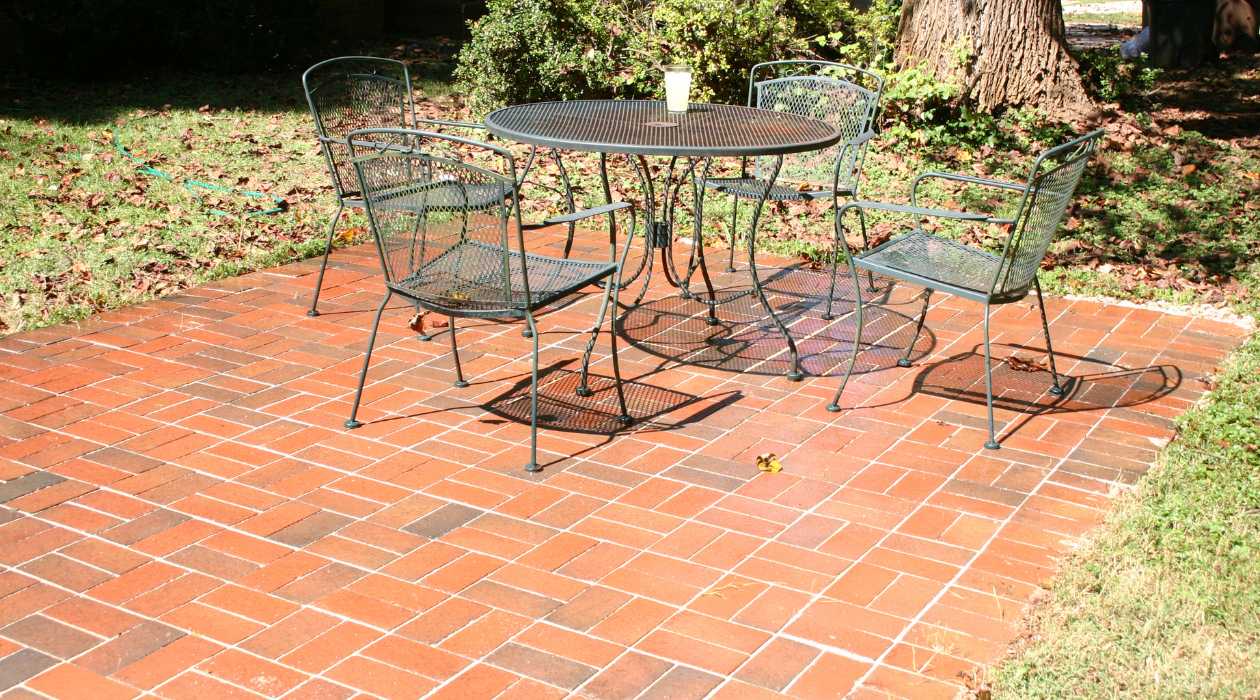
1. Running Bond: The running bond pattern is the most common and straightforward brick pattern. It involves laying the bricks in a staggered formation, with each brick overlapping the one below it by half. This pattern creates a simple and clean look.
2. Herringbone: The herringbone pattern is a classic and timeless choice. It involves laying the bricks in a diagonal, zigzag pattern. This pattern can add depth and visual interest to your walkway or patio.
3. Basket Weave: The basket weave pattern creates a woven effect by alternating pairs of vertical and horizontal bricks. This pattern can give your space a unique and textured look.
4. Flemish Bond: The Flemish bond pattern is a more intricate and visually appealing option. It involves alternating rows of bricks with their long sides and short ends exposed. This pattern is commonly used for decorative areas or focal points.
5. Circular or Curved Patterns: If you want to add a touch of elegance and interest to your walkway or patio, consider creating circular or curved patterns. These patterns can soften the overall design and create a welcoming flow.
When selecting a pattern, consider the size and shape of your bricks, as well as the overall style of your outdoor space. Some patterns may work better with larger bricks, while others may be more suitable for smaller bricks. Experiment with different patterns to find the one that best complements your design aesthetic.
Before laying the bricks in your chosen pattern, it’s a good idea to create a mockup or a small test area to ensure that you are satisfied with the pattern and alignment. Once you are confident in your pattern choice, you can proceed with securing and leveling the bricks.
Securing and Leveling the Bricks
Once you have laid the bricks in your desired pattern, the next step is to secure and level them. Properly securing the bricks will help prevent shifting or movement over time, while ensuring they are level creates a smooth and even surface for walking or sitting. Here’s how to secure and level the bricks:
1. Compact the Bricks: Use a rubber mallet or a hammer and a scrap piece of wood to gently tap each brick into place, ensuring they are tightly packed together. This will help create a solid foundation for the bricks.
2. Check for Levelness: Use a level to check the alignment and levelness of the bricks. Lay the level across multiple bricks in different directions to ensure the entire surface is even. Adjust the bricks as needed to achieve a level surface.
3. Add or Remove Sand: If any bricks are slightly higher or lower than the desired level, you may need to add or remove sand underneath them. Use a trowel or a small shovel to adjust the sand accordingly and create a level surface.
4. Fill in Gaps: Check for any gaps or spaces between the bricks. If you find any, use additional mortar or sand to fill them in. Press the mortar or sand firmly to ensure a secure and tight fit.
5. Install Edging Restraints: To further secure and stabilize the bricks, install the edging restraints along the edges of the walkway or patio. These restraints should be anchored firmly into the ground and provide support for the outer row of bricks.
6. Compact the Bricks Again: After securing and leveling the bricks, use the rubber mallet or a tamper to compact them once more. This step helps ensure that the bricks are tightly set and won’t shift over time.
7. Sweep Jointing Material: Whether you’ve used mortar or sand, sweep the jointing material into the gaps between the bricks. Use a broom or brush to ensure that the material fills the joints entirely.
8. Wet the Jointing Material: If you used sand for the joints, lightly mist or sprinkle water over the entire surface to settle the sand and help it solidify. Avoid oversaturating the sand, as it may cause it to wash away.
By securing and leveling the bricks, you can ensure a stable and uniform surface for your walkway or patio. This step is crucial in creating a long-lasting and visually appealing outdoor space. Once you are satisfied with the secure and level condition of the bricks, it’s time to add the finishing touches.
Adding Finishing Touches
Now that you have successfully secured and leveled the bricks of your walkway or patio, it’s time to add the finishing touches to complete the project. These final details will enhance the overall appearance and functionality of your outdoor space. Here are some finishing touches to consider:
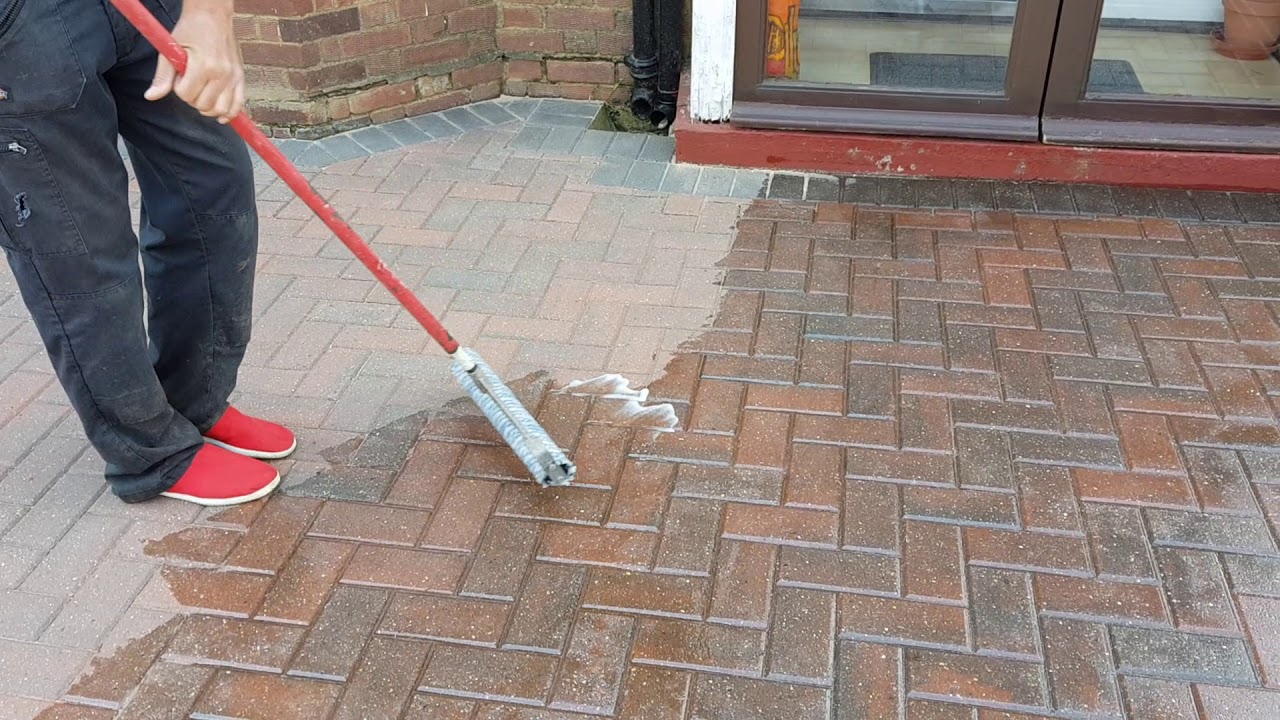
1. Clean the Surface: Before moving on to additional enhancements, thoroughly clean the surface of your brick walkway or patio. Sweep away any debris, dirt, or excess jointing material. Consider using a mild detergent and a stiff-bristle brush to remove any stubborn stains or marks.
2. Seal the Bricks: Applying a sealant to the bricks can help protect them from stains, discoloration, and weathering. Choose a suitable brick sealant and follow the manufacturer’s instructions for application. Regularly reapplying the sealant will help maintain the integrity and appearance of the bricks.
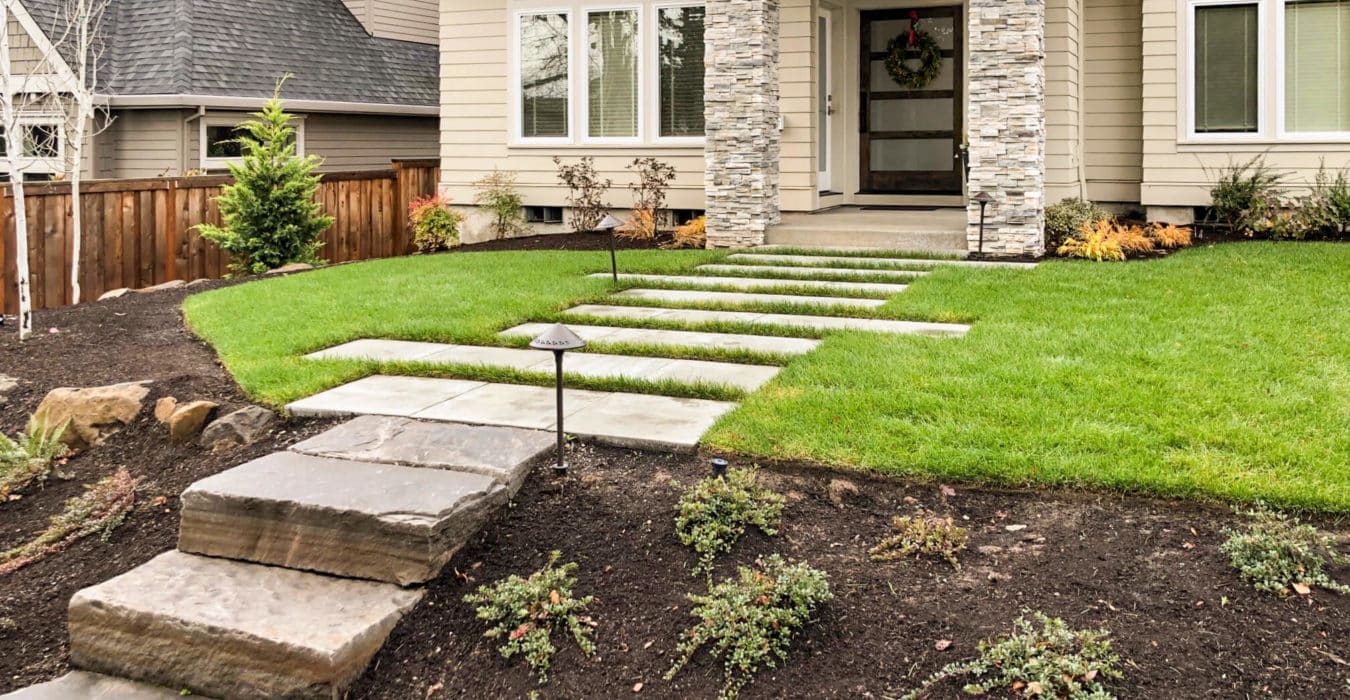
3. Add Lighting: Consider installing outdoor lighting to illuminate your walkway or patio during the evening hours. This not only enhances the safety and security of your outdoor space but also adds ambiance and visual appeal. Options include solar-powered lights, LED strips, or built-in brick lighting fixtures.
4. Incorporate Landscaping: Enhance the beauty of your walkway or patio by incorporating landscaping elements. Add potted plants, hanging baskets, or colorful flowers along the edges to create a vibrant and inviting atmosphere. Consider using low-maintenance plant varieties that can thrive in your climate and require minimal upkeep.
5. Install Seating: If your walkway or patio is designed for relaxation and outdoor enjoyment, consider adding seating options. Place a bench, outdoor chairs, or even built-in seating to provide a comfortable space for you and your guests to sit and unwind.
6. Integrate Pathway Lighting: To further enhance the functionality and beauty of your walkway, consider installing pathway lighting. This can include solar-powered pathway lights or low-voltage landscape lighting that illuminates the way and adds a touch of elegance.
7. Incorporate Decorative Accents: Add decorative accents, such as ornamental statues, a water feature, or stepping stones, to personalize your walkway or patio. These elements can create focal points and add a unique touch to your outdoor space.
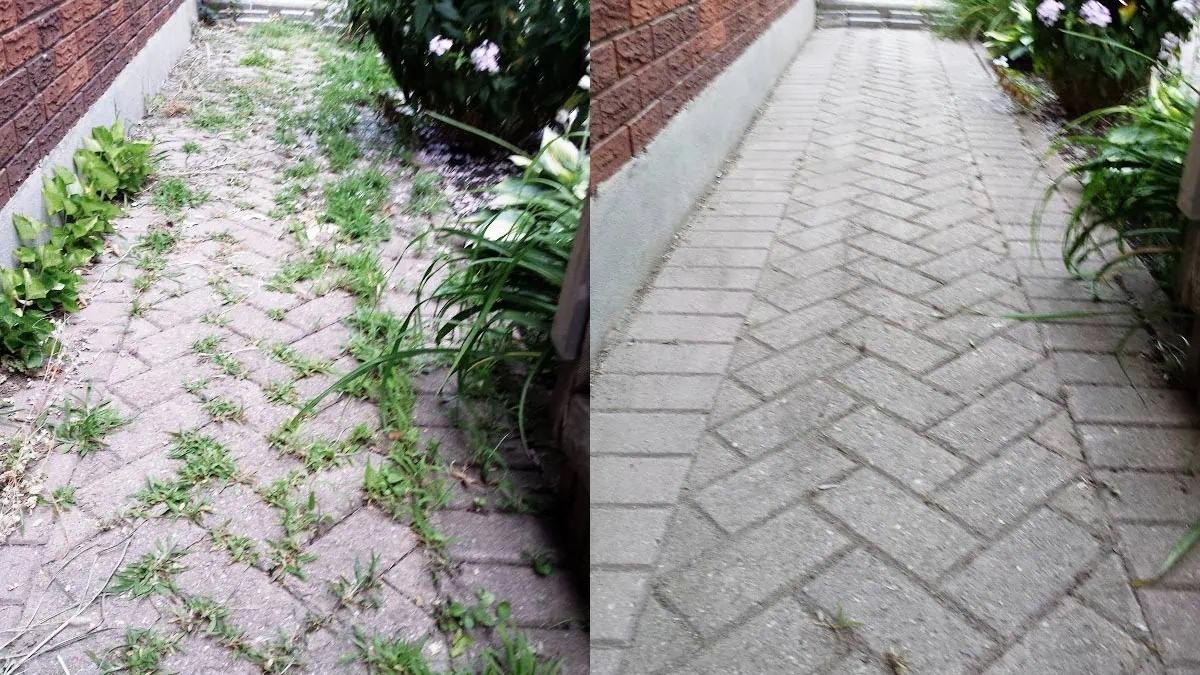
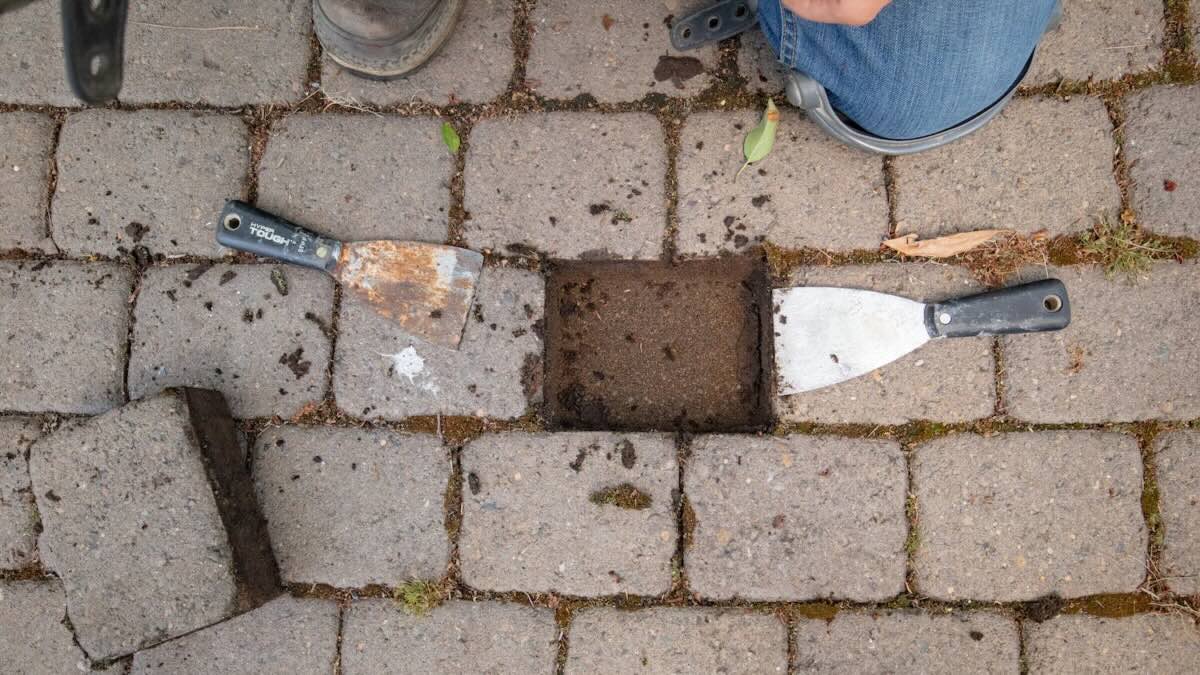
8. Regular Maintenance: Finally, to keep your brick walkway or patio looking its best, establish a regular maintenance routine. This may include sweeping off debris, removing weeds, and periodically reapplying jointing material or sealant as needed.
By adding these finishing touches, you can truly transform your brick walkway or patio into an inviting and functional space. Take pride in the completed project and enjoy the beauty and functionality it brings to your outdoor living area.
Read more: How To Fix Loose Brick Walkway
Conclusion
Building a beautiful brick walkway or patio is a rewarding project that can completely transform your outdoor space. By following the steps outlined in this guide, you have learned how to plan and design your project, gather the necessary materials and tools, prepare the area, build a solid foundation, lay the bricks, create patterns, secure and level the bricks, and add the finishing touches.
Throughout this process, you have gained valuable knowledge and skills in working with bricks, ensuring that your walkway or patio is not only visually appealing but also functional and durable. The careful planning and attention to detail have resulted in a space that amplifies the curb appeal of your home and provides a pleasant area for entertaining guests or simply relaxing outdoors.
Remember, maintaining your brick walkway or patio is essential to ensure its longevity and continued beauty. Regular cleaning, sealing, and periodic maintenance will help protect and preserve the bricks, keeping them in optimal condition for years to come.
Now that you have successfully completed your brick project, take the time to appreciate your hard work and enjoy the fruits of your labor. Invite friends and family to admire your new outdoor space and create lasting memories. With a beautiful and functional brick walkway or patio, you have added value, charm, and elegance to your home.
So, grab a cup of coffee or a glass of wine, and relax in the serenity of your beautifully crafted brick walkway or patio. The tranquil sound of footsteps and the sight of the timeless brickwork will bring you joy and a sense of accomplishment.
Congratulations on completing your brick walkway or patio project, and enjoy the world of possibilities it opens up for you to explore and enjoy in your own backyard.
Frequently Asked Questions about How To Build A Beautiful Brick Walkway Or Patio
Was this page helpful?
At Storables.com, we guarantee accurate and reliable information. Our content, validated by Expert Board Contributors, is crafted following stringent Editorial Policies. We're committed to providing you with well-researched, expert-backed insights for all your informational needs.


0 thoughts on “How To Build A Beautiful Brick Walkway Or Patio”