Home>Garden Essentials>Garden Storage>How To Build A Simple Entry Arbor For A Charming Front Yard
Garden Storage
How To Build A Simple Entry Arbor For A Charming Front Yard
Modified: January 9, 2024
Learn how to build a charming front yard entry arbor with storage in just a few simple steps. Transform your outdoor space with this functional and beautiful addition.
(Many of the links in this article redirect to a specific reviewed product. Your purchase of these products through affiliate links helps to generate commission for Storables.com, at no extra cost. Learn more)
Introduction
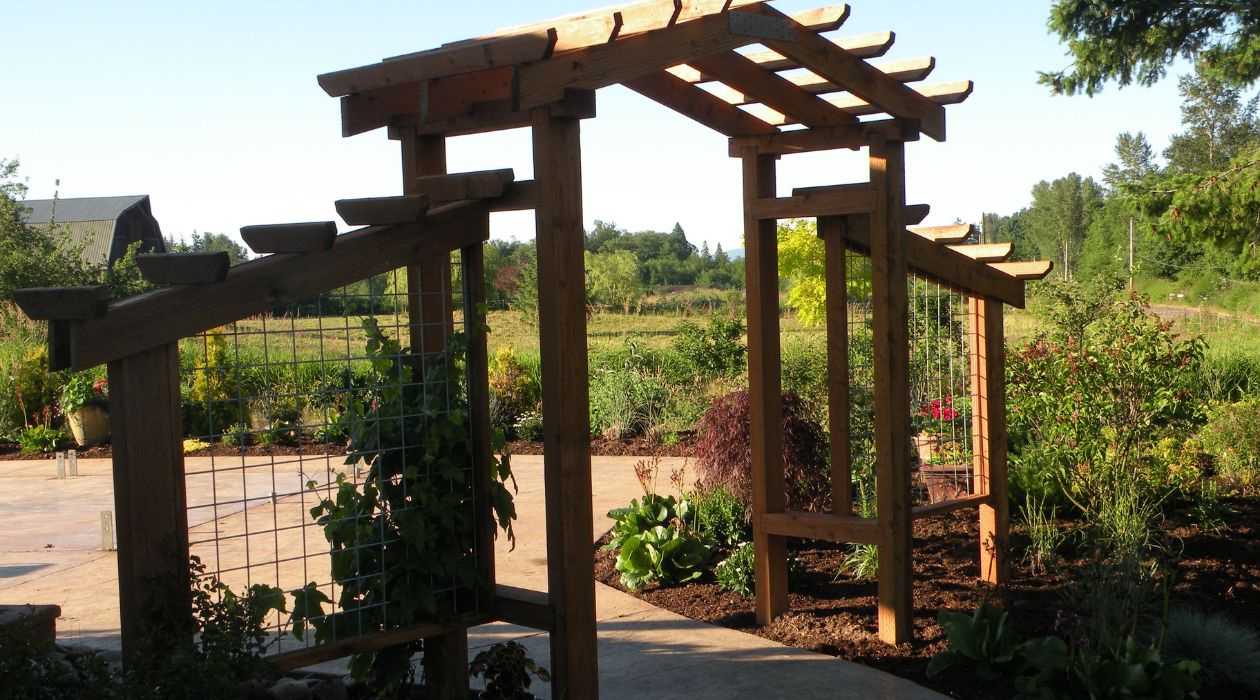
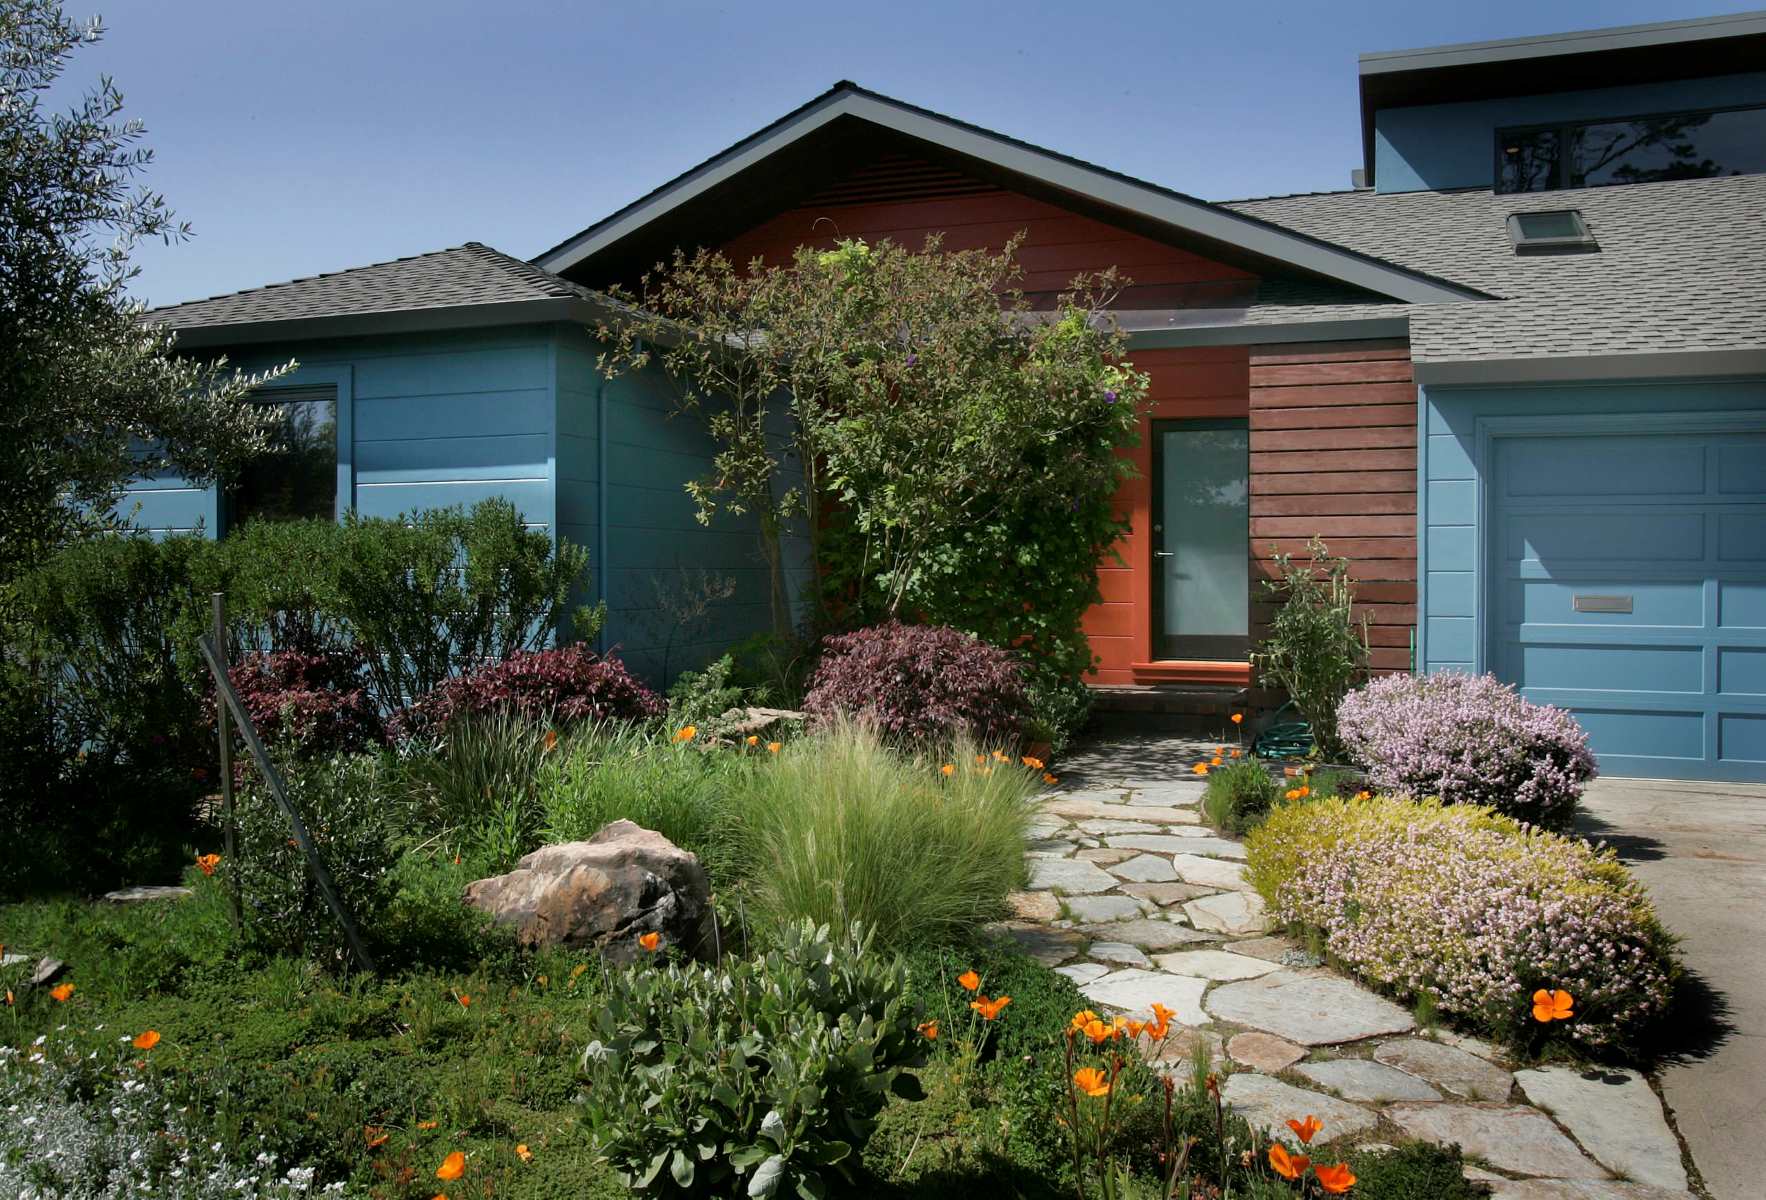
Welcome to the world of charming front yards! A well-designed entryway can transform the entire look and feel of your home, creating an inviting atmosphere for both residents and visitors alike. And one feature that can add a touch of elegance and character to your front yard is an entry arbor.
An entry arbor serves as a beautiful gateway, framing the entrance to your home and providing a sense of privacy and charm. Whether you want to showcase climbing vines or simply enhance the overall aesthetic, building a simple entry arbor is a straightforward project that can be completed with a few basic tools and materials.
In this article, we will guide you through the step-by-step process of constructing a simple entry arbor that will instantly elevate the curb appeal of your front yard. From gathering materials to adding the finishing touches, we’ll cover all the essential details to help you create a stunning entryway.
So, let’s get started on this exciting DIY project and transform your front yard into a picturesque oasis!
Key Takeaways:
- Create a charming front yard oasis by building a simple entry arbor using basic tools and materials. Enhance curb appeal and add character to your home with this DIY project.
- Infuse your personal style and creativity into your entry arbor design. From paint colors to decorative elements, make your arbor a reflection of your unique taste and craftsmanship.
Step 1: Gather Materials and Tools
Before you begin constructing your entry arbor, it’s crucial to gather all the necessary materials and tools. Here’s a list of what you’ll need:
- Pressure-treated wooden posts – These will serve as the main support structure of the arbor. Make sure they are long enough to reach the desired height.
- Lattice panels – These will add a decorative touch to the arbor and provide a support structure for climbing plants.
- 2×4 lumber – You will use this to create the crossbeams that connect the posts.
- Galvanized screws – These screws will ensure the sturdiness of the arbor.
- Post hole digger – This tool will allow you to dig holes for the posts.
- Level – Used to ensure that the posts and crossbeams are level and plumb.
- Saw – You may need this to cut the posts and crossbeams to the desired length.
- Drill – This will be used to attach the crossbeams and lattice panels to the posts.
- Paint or stain – If desired, you can paint or stain the arbor to match your home’s color scheme.
- Brush or roller – Use this to apply the paint or stain.
Once you have gathered all the necessary materials and tools, you’ll be ready to move on to the next step in the construction process. But before you start, it’s a good idea to double-check your measurements and ensure that you have everything you need.
With all your materials and tools in place, it’s time to roll up your sleeves and embark on the exciting journey of building your own entry arbor. Remember to take your time and follow each step carefully for the best results.
Step 2: Measure and Mark the Area
Now that you have gathered all the necessary materials and tools, it’s time to measure and mark the area where you will be constructing your entry arbor. This step is crucial to ensure that your arbor is properly aligned and fits seamlessly into your front yard.
Start by deciding on the placement of your arbor. Consider factors such as the size of your yard, the proximity to other structures, and the desired visual impact. Once you have determined the ideal location, use stakes and string to outline the perimeter of the arbor.
Next, take precise measurements to determine the dimensions of your arbor. Measure the width and height that you desire, keeping in mind that the width should be slightly wider than the entrance you want to frame. This will ensure that the arbor is proportionate and visually appealing.
Using a tape measure and a level, mark the spots where you will be digging the post holes. These holes should be evenly spaced, with the distance between the center of each hole matching the desired width of your arbor. For stability, it’s recommended to dig the holes at least 2 feet deep.
Once you have marked the spots for the post holes, remove the stakes and strings, and double-check the accuracy of your measurements. This will help you avoid any alignment issues or discrepancies when you begin the construction process.
Remember, taking the time to accurately measure and mark the area will ensure that your entry arbor fits perfectly into your front yard and enhances its overall aesthetic. So, grab your measuring tools and get ready for the next step!
Step 3: Dig Post Holes
With the area marked and measurements finalized, it’s time to dig the post holes for your entry arbor. This step is crucial as it provides the foundation and stability for the entire structure.
Start by using a post hole digger to dig the first hole. The diameter of the hole should be a few inches wider than the diameter of your wooden posts to allow for proper placement and secure anchoring. Dig the hole to the desired depth, usually around 2 feet, or as specified in your local building codes for fence posts.
Once you have dug the first hole, repeat the process for each remaining post hole, ensuring that they are evenly spaced according to your measurements. Be sure to remove any rocks, roots, or debris from the holes to provide a stable base for the posts.
It’s important to ensure that the depth of each hole is consistent, as this will determine the overall stability of your entry arbor. You can use a level or a measuring tape to double-check the depth and make any necessary adjustments.
Before moving on to the next step, take a moment to visualize the arbor’s placement and make sure the post holes are aligned correctly. This will help ensure that the arbor stands straight and true once the posts are set.
Once you have finished digging all the post holes, you’re ready to move on to the next step – setting the posts. But first, take a moment to appreciate the progress you’ve made so far and get ready to witness your entry arbor really taking shape!
Step 4: Set the Posts
With the post holes dug, it’s time to set the wooden posts in place for your entry arbor. This step is crucial as it ensures the structural integrity and stability of the entire arbor.
Start by placing the first post into the first post hole. Make sure it is positioned vertically and flush with the ground. Use a level to ensure that the post is perfectly upright. If needed, add or remove soil from the hole to adjust the height.
Once the first post is in position, fill the hole with concrete mix or gravel. This will provide a solid foundation and secure the post in place. Follow the instructions on the specific concrete mix or gravel you are using. Ensure that the post is steady and in the desired position before the concrete or gravel sets.
Repeat this process for each of the remaining posts, taking care to position them accurately and ensuring they are properly aligned with the marked post holes. Use the level to double-check the vertical alignment of each post. Adjust as needed.
As you set each post, remember to take a step back and assess the overall symmetry and balance of the arbor. This will help you detect any inconsistencies early on and make necessary adjustments to achieve a visually appealing result.
Allow the concrete or gravel to fully cure or set, following the instructions provided by the manufacturer. This usually takes a few days, so be patient and resist the temptation to rush to the next step.
Once the concrete or gravel has fully cured, you can proceed to the next step. Congratulations! Your entry arbor is really starting to come together, and you can now visualize the beauty it will bring to your front yard.
When building a simple entry arbor for your front yard, be sure to choose sturdy, weather-resistant materials such as cedar or pressure-treated wood to ensure longevity and durability.
Step 5: Install Crossbeams
With the posts securely set in place, it’s time to install the crossbeams that will provide the framework for your entry arbor. These crossbeams will not only add stability to the structure but also create a visually appealing design.
Start by measuring the distance between the two posts at the desired height for your crossbeams. Cut the 2×4 lumber to the appropriate length, ensuring that it fits snugly between the posts.
Place the first crossbeam between the two posts, adjusting it to the desired height and making sure it is level. Use a level to ensure that the crossbeam is perfectly horizontal. Once the first crossbeam is in position, attach it to the posts using galvanized screws.
Repeat this process for each of the remaining crossbeams, spacing them evenly along the length of the arbor. Take your time to ensure that each crossbeam is level and securely attached to the posts.
As you install the crossbeams, step back and assess the overall design. Check that the spacing between the crossbeams is aesthetically pleasing and aligns with your vision for the arbor.
It’s important to note that the number of crossbeams you choose to install will depend on your personal preference and the overall design of your arbor. Some builders prefer a more open design with wider spacing between crossbeams, while others opt for a tighter arrangement. Choose a spacing that suits your style and complements your front yard.
Once all the crossbeams are installed, take a moment to admire your progress. The framework of your entry arbor is now complete, and it’s time to move on to the next exciting step – adding the lattice panels.
Step 6: Attach Lattice Panels
Now that you have the framework of your entry arbor in place, it’s time to add a decorative touch by attaching lattice panels. These panels not only enhance the visual appeal of your arbor but also provide a support structure for climbing plants, adding a touch of natural beauty to your front yard.
Start by measuring the dimensions of the openings between the crossbeams. Cut the lattice panels to fit within these dimensions, ensuring a precise and snug fit.
With the lattice panels cut to size, position them between the crossbeams, aligning them with the edges of the arbor. Use galvanized screws or nails to attach the panels to the crossbeams, securing them in place.
Take care to evenly attach the lattice panels, ensuring that they are aligned vertically and fit securely within the framework. Use a level to double-check that the panels are straight and level.
As you attach each lattice panel, step back and assess the overall look of your entry arbor. Ensure that the spacing between the panels is visually appealing and provides an aesthetically pleasing balance to your front yard.
Alternatively, if you prefer a more open design, you can opt to skip the lattice panels and leave the framework as is. This will create a minimalist and modern look for your entry arbor.
Once you have attached all the lattice panels, take a moment to admire the transformation. Your arbor is now complete, and it’s time to move on to the final step – adding the finishing touches.
By now, your entry arbor is taking shape and adding charm to your front yard. But let’s not stop there – we’re almost finished! Onto the next step – the finishing touches.
Step 7: Add Finishing Touches
Congratulations! You’re in the final stretch of building your entry arbor. Now, it’s time to add the finishing touches that will truly make your arbor stand out and complement the overall design of your front yard.
One option is to paint or stain your arbor to match your home’s color scheme or personal preference. Choose a high-quality paint or stain that is suitable for outdoor use and apply it evenly to the entire structure. Make sure to follow the manufacturer’s instructions for proper application and drying time.
If you decide to paint your arbor, consider using a bold color to create a focal point in your front yard. Alternatively, a stain can help enhance the natural beauty of the wood while providing protection against the elements.
Once the paint or stain has dried, you can further enhance the aesthetic appeal of your entry arbor by adding some decorative elements. Consider hanging flower baskets or installing solar-powered lighting fixtures. These small additions can make a big difference in adding charm and character to your arbor.
If you have opted for lattice panels, you can also consider training climbing plants to grow along the panels. Choose appropriate vine varieties that will thrive in your climate and provide stunning visual interest as they intertwine with the lattice.
Lastly, don’t forget about landscaping. Consider adding some colorful flowers or lush green plants around the base of your entry arbor to create a seamless transition between architecture and nature.
A well-maintained entry arbor can add value to your home and create a warm and welcoming atmosphere. Remember to periodically inspect and maintain your arbor, checking for any loose screws or nails, and addressing any needed repairs.
With the finishing touches complete, step back and take in the beauty of your newly constructed entry arbor. It’s now ready to greet you and your guests with its charm and elegance every time you enter your front yard.
Enjoy the fruits of your labor and revel in the satisfaction of creating a stunning focal point for your home. Your arbor is a testament to your creativity and craftsmanship, a tangible symbol of your personal style and commitment to transforming your front yard into a captivating haven.
Congratulations once again on successfully completing the construction of your entry arbor!
Conclusion
Building a simple entry arbor for your front yard can be a rewarding and fulfilling DIY project. Not only does it enhance the aesthetic appeal of your home, but it also adds a touch of charm and character to your outdoor space.
Throughout this article, we have guided you through the step-by-step process of constructing an entry arbor, from gathering materials and tools to adding the finishing touches. By following these steps and paying attention to detail, you can create a beautiful structure that complements your home and showcases your personal style.
Remember, the key to a successful entry arbor is proper planning, accurate measurements, and taking the time to ensure that each step is done correctly. By doing so, you’ll create a sturdy and visually appealing arbor that will withstand the test of time.
Additionally, don’t be afraid to infuse your own creativity and personal touch into the design. Consider incorporating embellishments, choosing unique paint colors, or adding decorative elements that reflect your style and make the arbor truly your own.
As you enjoy your newly constructed entry arbor, take pride in the work you’ve put in. Admire how it frames your front yard, welcomes guests, and adds a touch of beauty to your home’s exterior. Don’t forget to maintain it regularly, ensuring it remains in top condition for years to come.
Finally, remember that the journey of creating a charming front yard doesn’t end here. Your entry arbor serves as a foundation for further landscaping and design possibilities. Consider adding additional elements, such as walkways, garden beds, or seating areas, to create a complete and cohesive outdoor space that truly reflects your personality.
So, roll up your sleeves, gather your materials, and embark on the exciting adventure of building a simple entry arbor. Let your creativity blossom and watch as your front yard transforms into an enchanting and inviting retreat.
Frequently Asked Questions about How To Build A Simple Entry Arbor For A Charming Front Yard
Was this page helpful?
At Storables.com, we guarantee accurate and reliable information. Our content, validated by Expert Board Contributors, is crafted following stringent Editorial Policies. We're committed to providing you with well-researched, expert-backed insights for all your informational needs.


0 thoughts on “How To Build A Simple Entry Arbor For A Charming Front Yard”