Home>Gardening & Outdoor>Landscaping Ideas>How To Build A Low Deck Over Grass
Landscaping Ideas
How To Build A Low Deck Over Grass
Modified: August 27, 2024
Learn how to create a low deck over grass with our expert landscaping ideas. Transform your outdoor space with our step-by-step guide.
(Many of the links in this article redirect to a specific reviewed product. Your purchase of these products through affiliate links helps to generate commission for Storables.com, at no extra cost. Learn more)
Introduction
Creating a relaxing outdoor space where you can unwind, entertain, or simply enjoy the beauty of nature is a wonderful addition to any home. If you have a spacious backyard with lush grass, building a low deck over the grass can be a fantastic way to extend your living area and make the most of your outdoor space. Whether you envision a cozy seating area for morning coffee or a platform for hosting gatherings with friends and family, a low deck provides the perfect foundation for your outdoor oasis.
In this comprehensive guide, we will explore the step-by-step process of building a low deck over grass, from the initial planning stages to the finishing touches. You'll discover the essential materials and tools needed, gain insights into effective planning and preparation, and learn the techniques for clearing the area, building the foundation, and installing the decking. Additionally, we'll delve into the crucial details of adding finishing touches that elevate the visual appeal and functionality of your new outdoor space.
By following this guide, you'll be equipped with the knowledge and confidence to embark on this rewarding DIY project. Embrace the opportunity to transform your outdoor environment into a welcoming retreat that reflects your personal style and enhances your lifestyle. Let's embark on this exciting journey of creating a stunning low deck over your grassy backyard, where countless memorable moments await.
Key Takeaways:
- Building a low deck over grass requires careful planning, precise preparation, and the use of essential materials and tools. From clearing the area to installing the decking, each step contributes to creating a captivating outdoor space.
- Adding finishing touches such as railings, lighting, furnishings, and personal decor transforms the low deck into a welcoming retreat. Embracing outdoor living and infusing personal style enhances the deck’s functionality and ambiance.
Read more: How To Build A Deck Over A Concrete Patio
Materials and Tools Needed
Before diving into the construction process, it’s essential to gather the necessary materials and tools to ensure a smooth and efficient build. Here’s a comprehensive list to help you prepare for the project:
Materials:
- Pressure-treated lumber or composite decking boards
- Concrete deck blocks or pavers
- Landscape fabric
- Gravel or crushed stone
- Galvanized screws or nails
- Joist hangers and connectors
- Concrete mix (if using deck blocks)
- Wood sealer or stain
- Optional: Weed barrier fabric
Tools:
- Tape measure
- Level
- String or twine
- Shovel or sod cutter
- Wheelbarrow
- Power drill/driver
- Saw (circular saw or miter saw)
- Hammer
- Adjustable wrench
- Safety goggles and work gloves
These materials and tools are fundamental for constructing a sturdy and visually appealing low deck over your grassy area. Additionally, depending on the specific design and layout of your deck, you may require additional materials such as railing systems, post anchors, and decorative elements to customize the space to your preferences.
By ensuring you have all the necessary materials and tools at the outset, you’ll be well-equipped to proceed through each phase of the construction process with confidence and efficiency. Now that you’re prepared with the essentials, it’s time to move on to the crucial planning and preparation stage.
Planning and Preparation
Effective planning and thorough preparation are the cornerstones of a successful low deck construction project. Before breaking ground, take the time to meticulously plan and prepare the layout and design of your deck, ensuring that it harmonizes with your outdoor space and meets your functional and aesthetic preferences.
Begin by considering the following key aspects:
1. Design and Layout: Determine the size, shape, and placement of your low deck. Consider factors such as the existing landscape, natural light exposure, and potential access points from your home. Visualize how the deck will integrate with your outdoor activities and furniture arrangements.
2. Permits and Regulations: Check with your local building department to understand the necessary permits and regulations for constructing a deck in your area. Compliance with building codes and regulations is essential to ensure the safety and legality of your project.
3. Utility Lines and Drainage: Identify the location of underground utility lines and assess the drainage patterns in your yard. Avoid building over utility lines and ensure that the deck’s design promotes proper water drainage to prevent issues such as pooling or erosion.
4. Material Selection: Choose between pressure-treated lumber and composite decking based on your preferences for durability, maintenance, and visual appeal. Select materials that complement the style of your home and outdoor environment.
Once you’ve outlined these considerations, it’s time to move on to the practical preparation steps:
1. Marking the Layout: Use string, stakes, or spray paint to mark the perimeter and layout of your deck on the grass. This visual guide will help you visualize the space and make adjustments before proceeding to the next steps.
2. Clearing Vegetation: Remove any grass, weeds, or vegetation within the marked area using a shovel or sod cutter. Clearing the ground allows for a clean and level foundation for your deck.
3. Excavation and Leveling: If necessary, excavate the area to achieve a level surface for the foundation. Use a shovel and a level to ensure the ground is uniformly graded and free of any obstructions.
By investing time and attention into the planning and preparation phase, you’ll set the stage for a smooth and efficient construction process. With a clear vision, adherence to regulations, and a well-prepared site, you’re ready to proceed to the next steps of creating your low deck over the grass.
Read more: How To Build A Decking
Clearing the Area
Clearing the designated area where your low deck will be constructed is a crucial step that sets the foundation for the entire project. This process involves the removal of existing vegetation, ensuring a clean and level surface to support the deck’s structure. Here’s a detailed guide on how to effectively clear the area:
1. Marking the Boundaries: Begin by outlining the boundaries of your deck using stakes, string, or spray paint. This visual guide will define the precise area where vegetation needs to be cleared, providing a clear roadmap for the clearing process.
2. Vegetation Removal: Utilize a shovel, sod cutter, or a mechanical turf cutter to remove the grass and vegetation within the marked boundaries. It’s essential to clear the area down to the bare soil, ensuring that no grass, roots, or weeds remain that could compromise the stability of the deck’s foundation.
3. Soil Inspection and Grading: After clearing the vegetation, inspect the soil to identify any irregularities or obstructions that may need to be addressed. Ensure that the ground is uniformly graded and free of debris, rocks, or large roots that could impact the levelness of the deck’s foundation.
4. Weed Barrier Installation (Optional): Consider installing a weed barrier fabric over the cleared soil to inhibit weed growth and promote long-term maintenance of the area beneath the deck. This step can contribute to the overall longevity and cleanliness of your deck’s foundation.
5. Site Clean-Up: Remove any debris, rocks, or excess soil from the cleared area to create a clean and organized workspace for the subsequent construction phases. A tidy and well-prepared site sets the stage for a seamless transition to the foundation-building stage.
By meticulously clearing the area and preparing the ground for the construction of your low deck, you establish a solid base for the subsequent stages of the project. This foundational work sets the tone for the structural integrity and visual appeal of your deck, laying the groundwork for the exciting steps to come.
Building the Foundation
With the area cleared and prepared, the next critical phase in constructing your low deck over grass is building a sturdy and level foundation. The foundation serves as the structural support for the deck, ensuring its stability and longevity. Here’s a detailed overview of the steps involved in creating the foundation for your low deck:
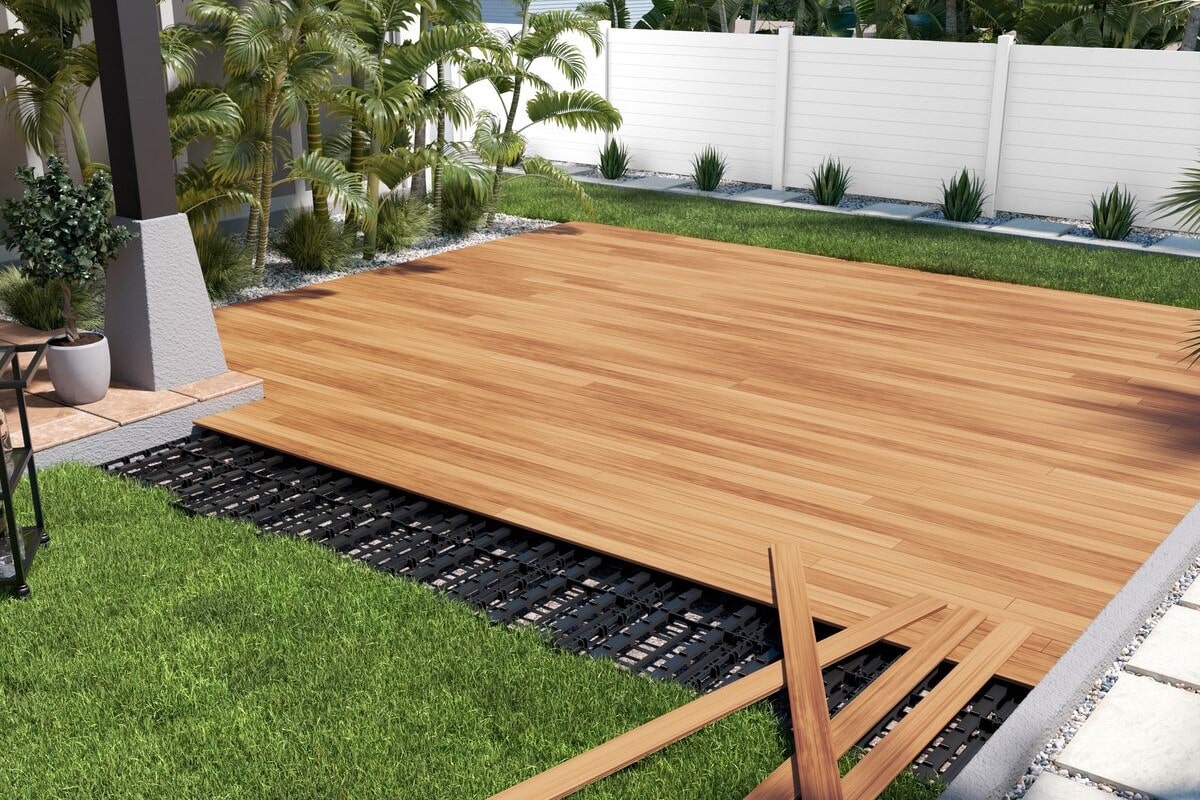
1. Choosing the Support System: Determine whether you will use concrete deck blocks or pavers to support the deck’s structure. Concrete deck blocks are a popular choice for low decks due to their ease of installation and ability to provide stable support on grassy surfaces.
2. Placing the Deck Blocks: Position the concrete deck blocks at designated intervals according to your deck’s layout and design. Ensure that the blocks are level and aligned, providing a solid base for the deck’s framework.
3. Adding Landscape Fabric and Gravel: Lay down landscape fabric within the perimeter of the deck blocks to inhibit weed growth and promote a clean foundation. Fill the interior of the deck area with gravel or crushed stone to enhance drainage and stability.
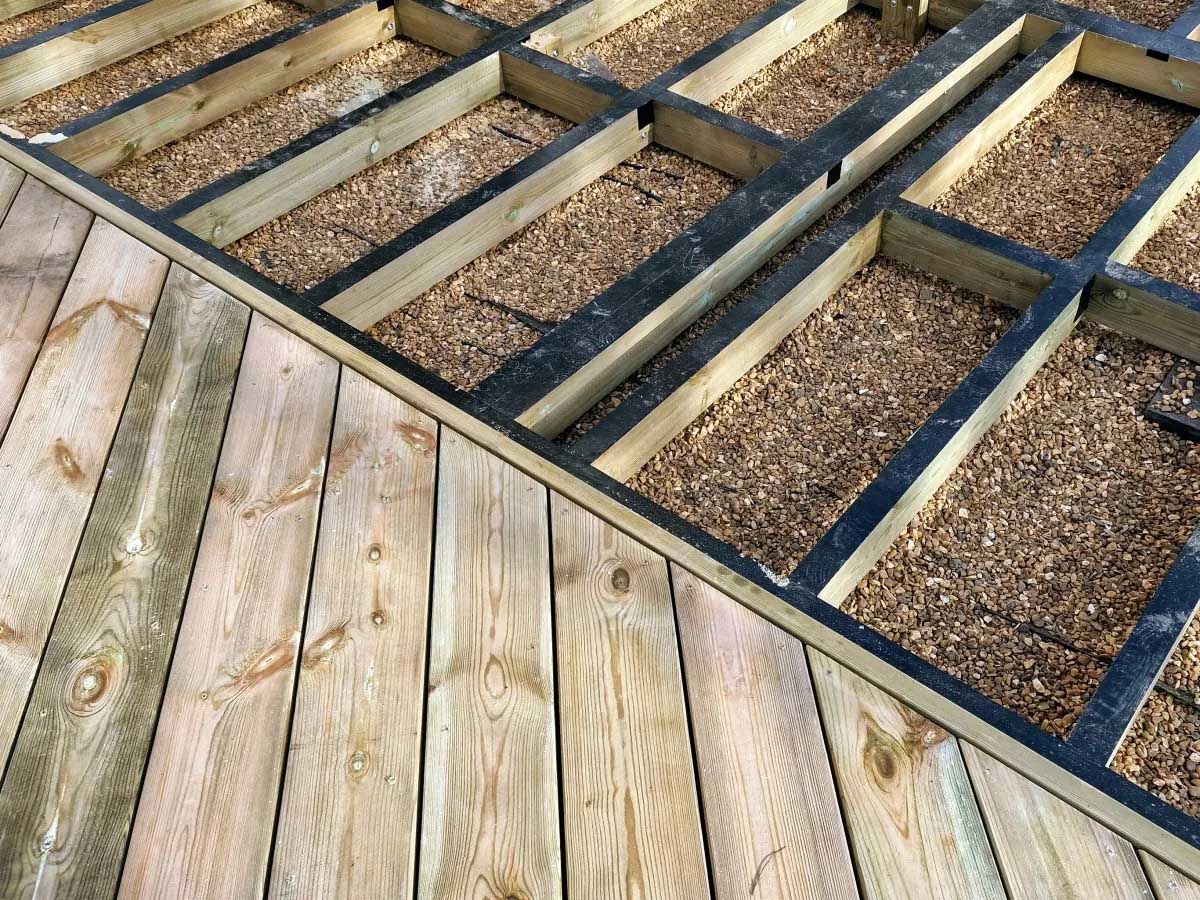
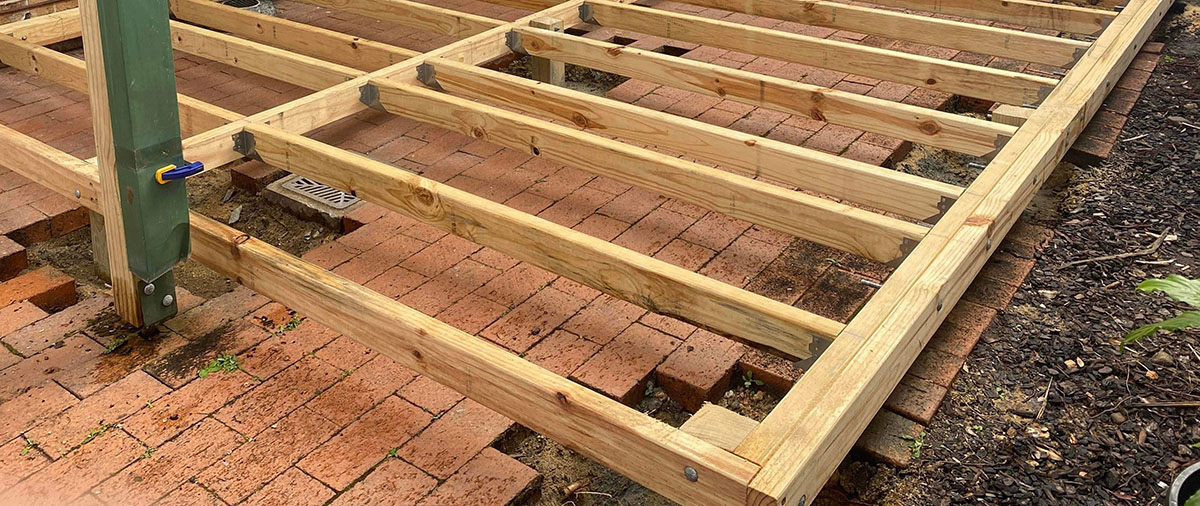
4. Installing Joists and Beams: Place pressure-treated lumber joists onto the deck blocks, ensuring that they are level and securely positioned. Connect the joists with beams to create a robust framework that will support the decking material.
5. Securing the Structure: Utilize joist hangers and connectors to secure the joists to the beams, ensuring a strong and stable connection. Use galvanized screws or nails to fasten the components together, creating a reliable foundation for the deck.
6. Leveling and Alignment: Use a level to ensure that the entire foundation structure is perfectly level and aligned. This step is crucial to guarantee the overall stability and structural integrity of the deck, preventing issues such as uneven weight distribution or instability.
7. Optional: Concrete Footings (If Applicable): In certain cases, concrete footings may be necessary to provide additional support for the deck’s foundation, especially in areas with unstable soil or specific load-bearing requirements. Consult local building codes and regulations to determine if concrete footings are necessary for your project.
By meticulously constructing a solid foundation for your low deck, you establish a reliable base that will support the deck’s structure and withstand the test of time. With the foundation in place, you’re ready to progress to the exciting phase of installing the decking material, bringing your vision of a stunning outdoor space to life.
Before building a low deck over grass, make sure to clear the area of any rocks, roots, or other debris. This will help ensure a level and stable foundation for your deck.
Installing the Decking
As you transition from building the foundation to the next phase of construction, installing the decking material is a pivotal step that significantly shapes the visual appeal and functionality of your low deck. Whether you opt for traditional pressure-treated lumber or contemporary composite decking, the installation process requires precision and attention to detail. Here’s a comprehensive guide to installing the decking for your low deck over grass:
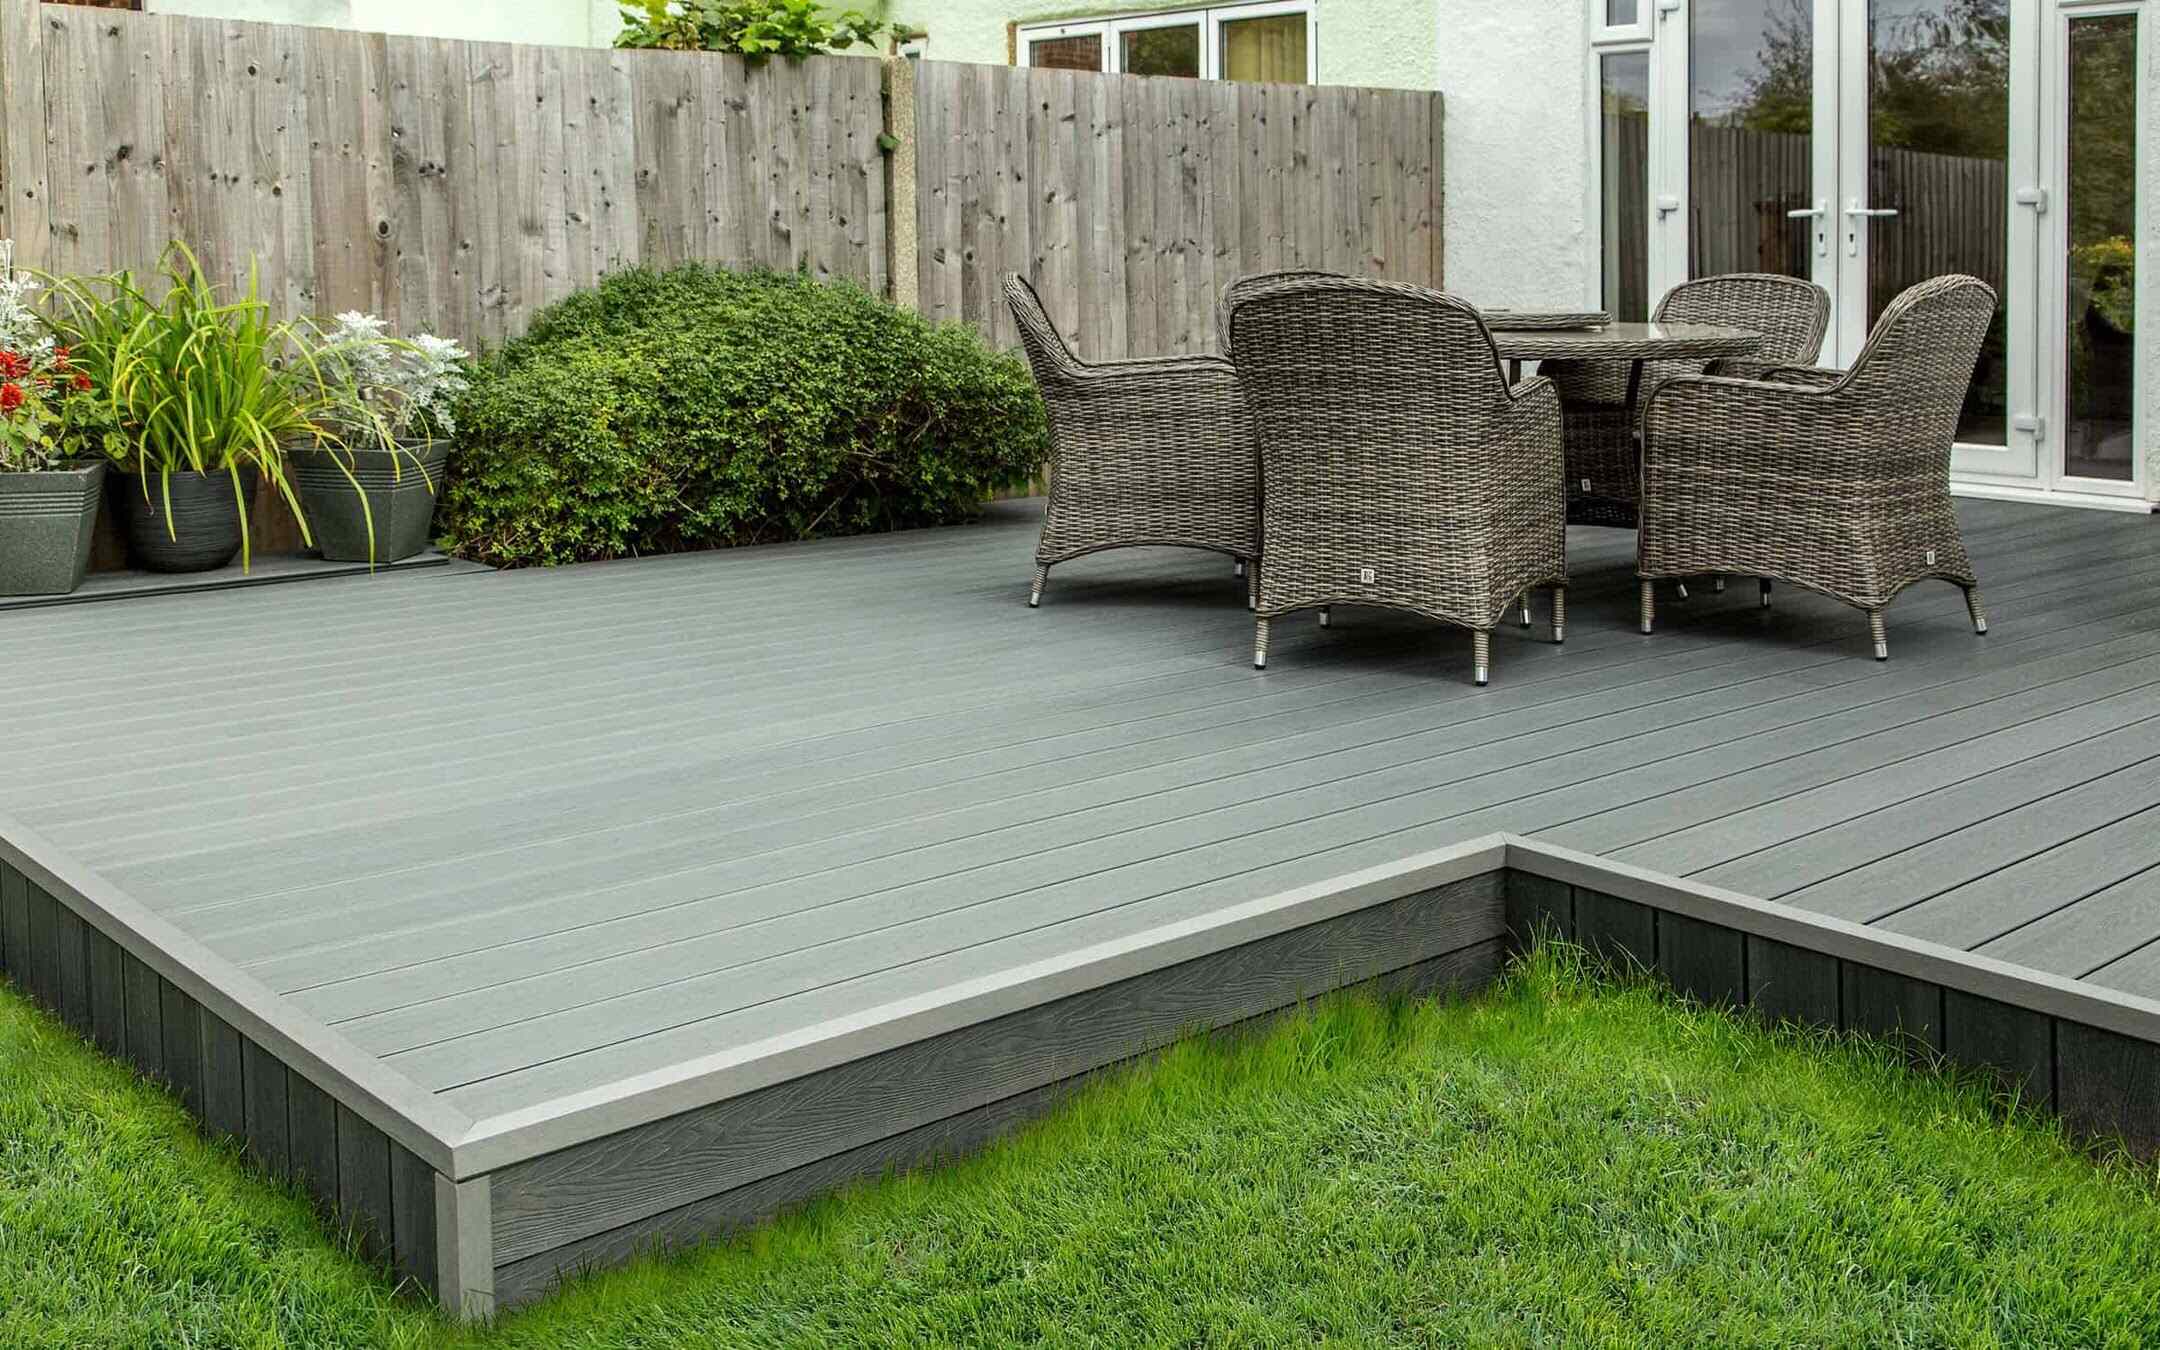
1. Selecting the Decking Material: Choose between pressure-treated lumber and composite decking based on your preferences for aesthetics, maintenance, and longevity. Consider the color, texture, and overall style that best complements your outdoor environment.
2. Decking Layout and Orientation: Determine the orientation and layout of the decking boards, considering factors such as natural light exposure, visual symmetry, and the overall design of your deck. Visualize how the decking pattern will enhance the space and accommodate your outdoor activities.
3. Cutting and Fitting: Measure and cut the decking boards to fit the dimensions of your deck, ensuring precise and seamless alignment. Use a circular saw or miter saw to achieve clean and accurate cuts, allowing the boards to snugly fit within the framework.
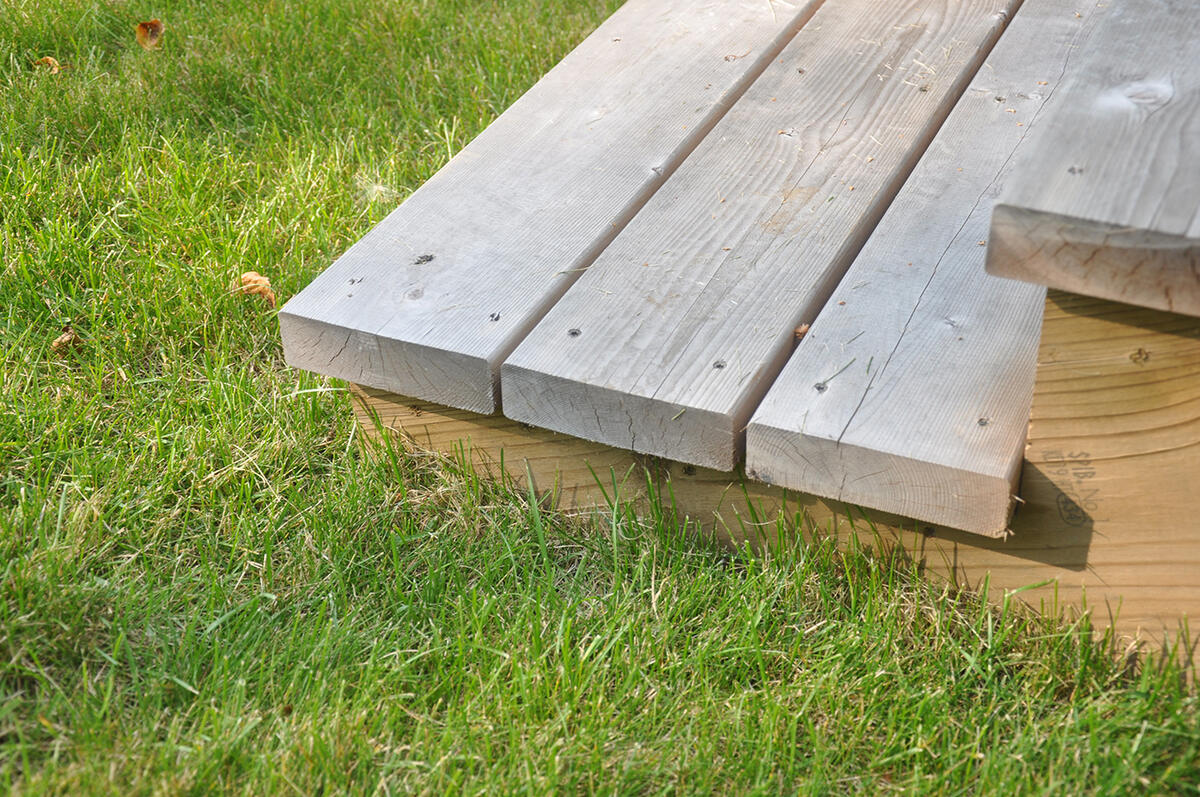
4. Fastening the Decking: Secure the decking boards to the joists using galvanized screws or nails, ensuring consistent spacing between each board for proper ventilation and drainage. Follow the manufacturer’s guidelines for recommended fastening methods and spacing requirements.
5. Optional: Concealed Fastening Systems (If Applicable): Consider utilizing concealed fastening systems for a sleek and polished look, eliminating visible screws or nails on the surface of the decking. These systems offer a streamlined aesthetic and reduce the risk of protruding fasteners.
6. Sealing and Finishing: Apply a high-quality wood sealer or stain to the decking boards to enhance their durability, weather resistance, and visual appeal. Ensure that the sealer penetrates the wood to protect it from moisture and UV exposure, prolonging the lifespan of your deck.
7. Deck Edge and Trim: Complete the decking installation by addressing the deck’s edge and adding trim elements as needed. Trim boards provide a polished and cohesive finish, concealing the exposed ends of the decking and framing for a refined look.
By meticulously installing the decking material with precision and care, you transform the foundational structure into a captivating and functional outdoor living space. The decking serves as the platform for relaxation, entertainment, and cherished moments in the embrace of nature, bringing your vision of a stunning low deck over grass to fruition.
Adding Finishing Touches
As the construction of your low deck nears completion, adding the finishing touches enhances the aesthetic appeal, functionality, and ambiance of your outdoor oasis. These details contribute to the overall character and comfort of the space, elevating it from a simple structure to a welcoming retreat. Here’s a guide to adding the essential finishing touches to your low deck over grass:
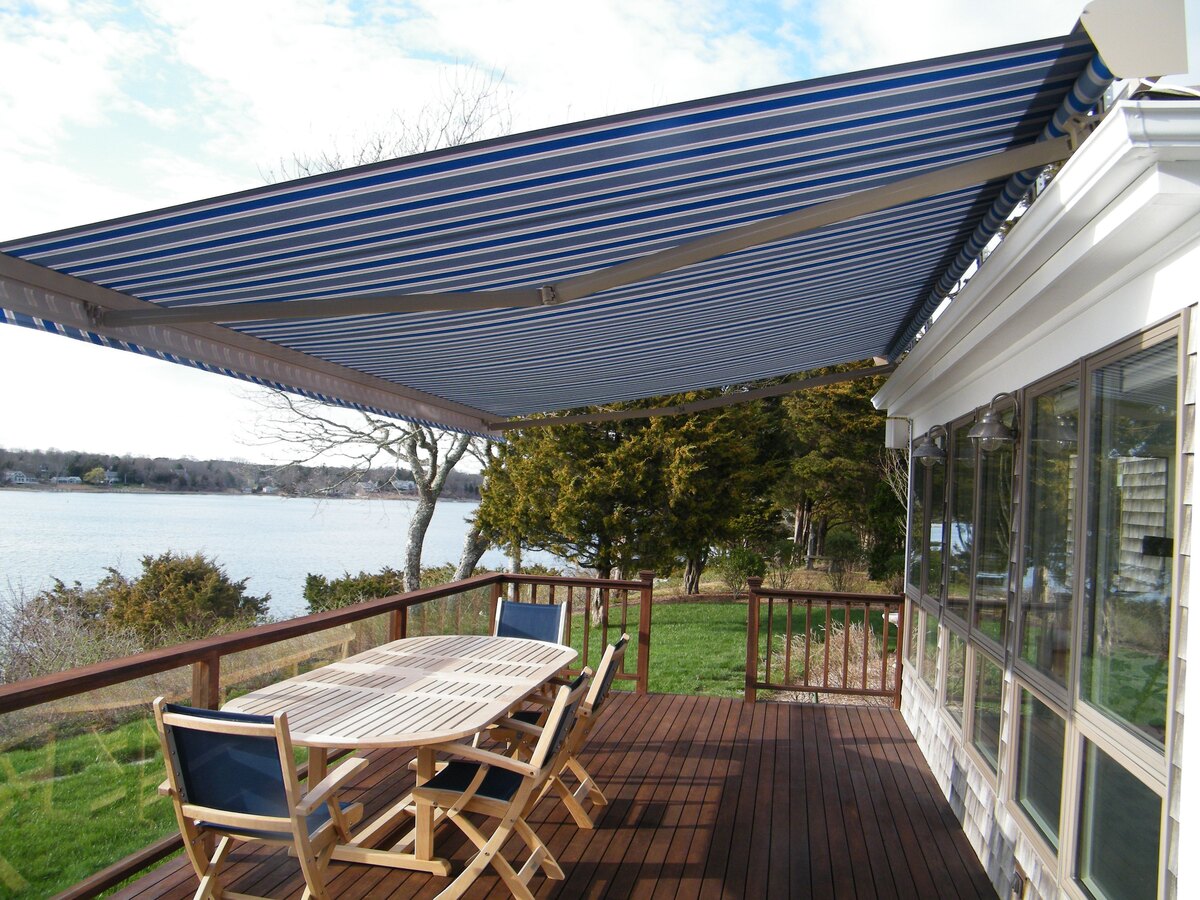
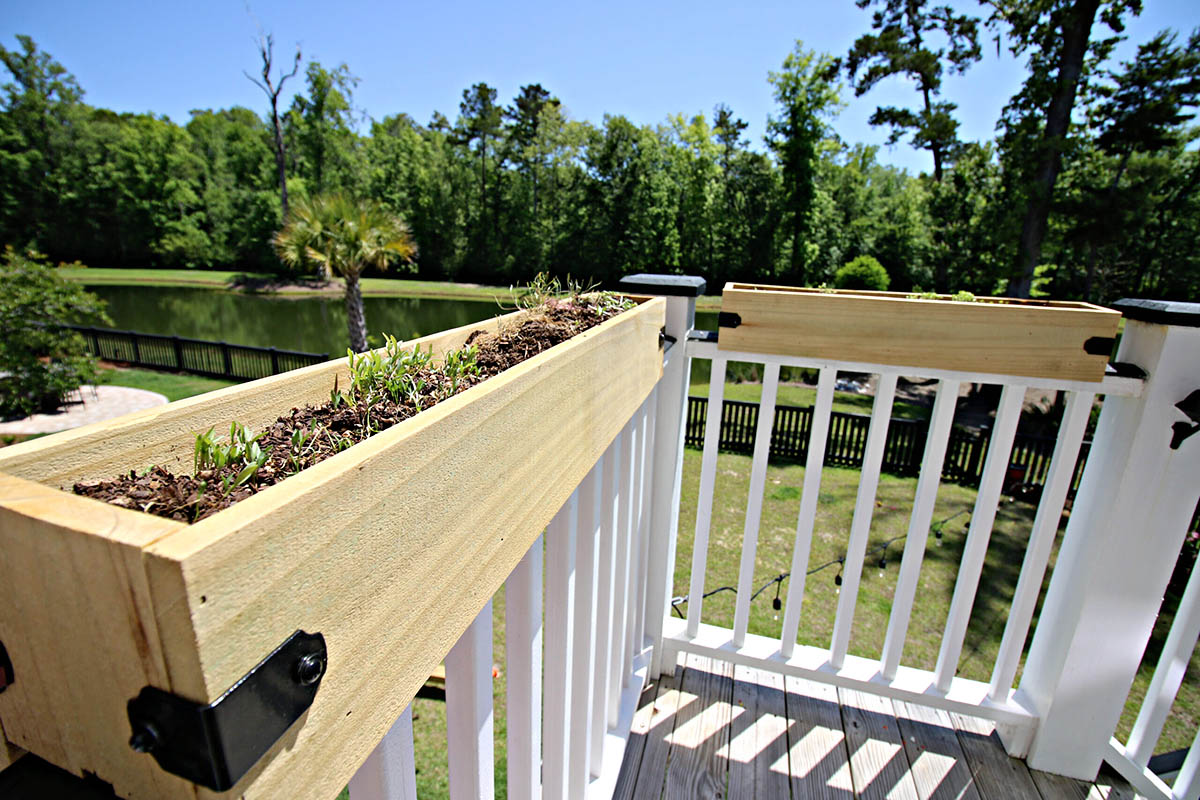
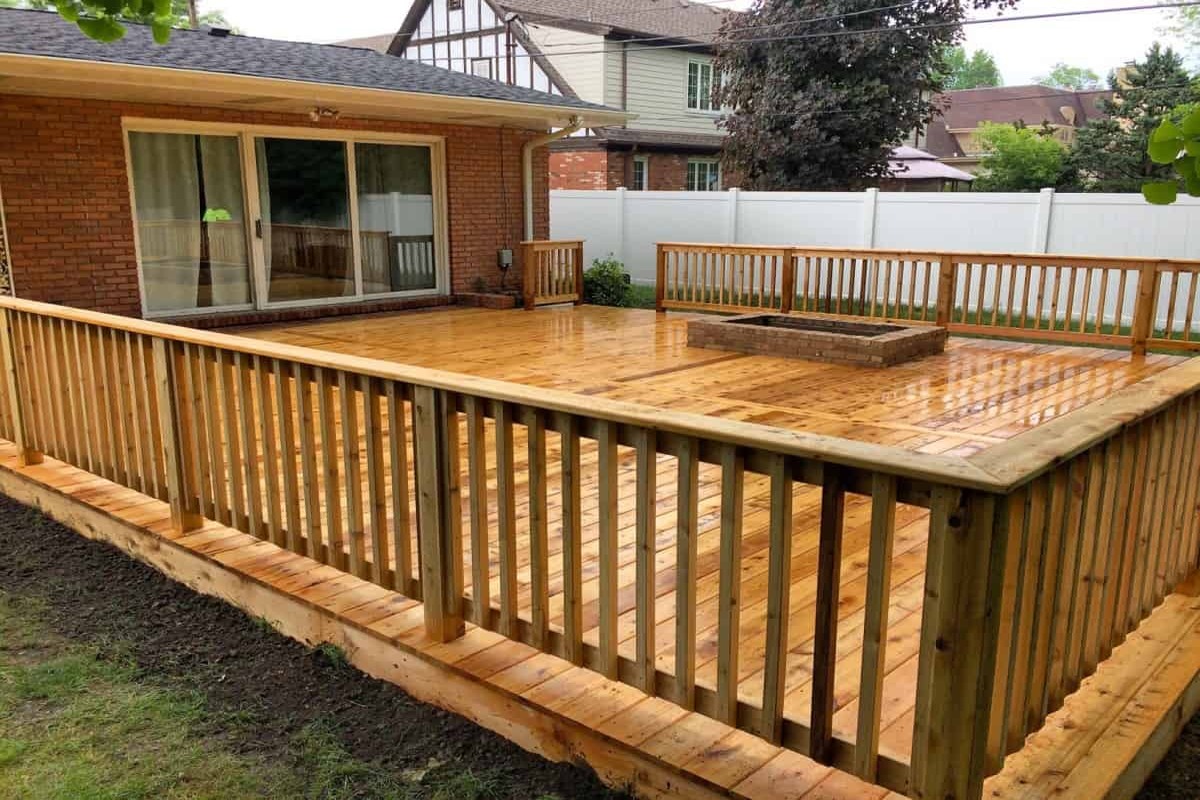
1. Railings and Balustrades: If your deck design includes raised areas or specific safety considerations, install railings and balustrades to provide security and visual distinction. Choose railing systems that harmonize with the style of your deck and complement the surrounding landscape.
2. Lighting Fixtures: Illuminate your deck with strategically placed lighting fixtures to extend its functionality into the evening hours. Consider options such as solar-powered pathway lights, LED deck post cap lights, or string lights to create a warm and inviting atmosphere.
3. Seating and Furnishings: Introduce comfortable and stylish outdoor furniture to create inviting seating areas on your deck. From lounge chairs and dining sets to cozy benches and ottomans, select furnishings that cater to your preferred outdoor activities and encourage relaxation.
4. Outdoor Décor and Greenery: Infuse personality and charm into your deck with decorative elements such as potted plants, vibrant flowers, and artistic accents. Incorporate outdoor rugs, throw pillows, and decorative lanterns to infuse your personal style into the space.
5. Functional Additions: Enhance the practicality of your deck with functional additions such as a built-in storage bench, a serving cart, or a designated grilling area. These elements contribute to the convenience and versatility of your outdoor space.
6. Personalized Touches: Consider incorporating personal touches that reflect your unique style and interests. Display outdoor artwork, hang wind chimes, or create a dedicated space for hobbies such as gardening or birdwatching to infuse the deck with character and meaning.
7. Maintenance Considerations: Implement a maintenance routine to preserve the beauty and longevity of your deck. Regularly clean the decking material, inspect the structural components, and address any maintenance requirements to ensure that your deck remains a captivating and enduring feature of your home.
By attending to these finishing touches, you transform your low deck into a captivating and functional outdoor sanctuary that invites relaxation, social gatherings, and cherished moments with loved ones. Embrace the opportunity to infuse your personal style and preferences into the space, creating a welcoming environment that reflects the beauty of outdoor living.
Read more: How To Lay Decking Over Concrete
Conclusion
Congratulations on completing the transformative journey of building a low deck over your grassy backyard. Through meticulous planning, precise execution, and thoughtful design choices, you’ve created a captivating outdoor space that extends your living area into the embrace of nature. As you reflect on the rewarding process and look forward to enjoying your new deck, consider the profound impact it will have on your lifestyle and well-being.
By embracing the project with enthusiasm and dedication, you’ve not only expanded your home’s footprint but also cultivated a welcoming retreat where you can unwind, entertain, and create cherished memories. Your low deck is a testament to your creativity, craftsmanship, and vision for enhancing your outdoor environment.
As you step onto your newly constructed deck, envision the countless moments of relaxation, laughter, and connection that await. Whether it’s savoring a morning cup of coffee, hosting lively gatherings with friends and family, or simply basking in the tranquility of your outdoor sanctuary, your deck stands as a versatile and inviting space for a myriad of experiences.
Additionally, the skills and knowledge gained throughout this project have equipped you with a deeper understanding of outdoor construction, design principles, and the gratifying process of bringing ideas to life. The pride and fulfillment derived from creating a tangible and functional addition to your home are invaluable rewards that resonate beyond the completion of the project.
As you embark on this new chapter of outdoor living, remember to cherish the moments spent on your deck, surrounded by the beauty of nature and the comfort of a space uniquely tailored to your preferences. Your low deck over grass is not merely a structure; it’s an extension of your lifestyle, an expression of your individuality, and a canvas for countless memorable experiences.
Embrace the joy of outdoor living, relish the serenity of your natural surroundings, and savor the warmth of your inviting deck. Your journey of creating a low deck over grass has not only enriched your home but has also enriched your life in ways that will be cherished for years to come.
Now that you've mastered building a low deck over grass, why not spruce up that space for gatherings and relaxation? Our next guide on outdoor living will show you how to infuse color and charm with simple decorations and add-ons, perfectly prepping your deck for any outdoor occasion. Don't miss out on transforming your new deck into the ideal spot for leisure and enjoyment.
Frequently Asked Questions about How To Build A Low Deck Over Grass
Was this page helpful?
At Storables.com, we guarantee accurate and reliable information. Our content, validated by Expert Board Contributors, is crafted following stringent Editorial Policies. We're committed to providing you with well-researched, expert-backed insights for all your informational needs.


0 thoughts on “How To Build A Low Deck Over Grass”