Home>Furniture>Outdoor Furniture>How To Build A Decking Frame
Outdoor Furniture
How To Build A Decking Frame
Modified: August 27, 2024
Learn how to build a sturdy and durable decking frame for your outdoor furniture. Create the perfect foundation for your outdoor oasis with our step-by-step guide.
(Many of the links in this article redirect to a specific reviewed product. Your purchase of these products through affiliate links helps to generate commission for Storables.com, at no extra cost. Learn more)
Introduction
Welcome to our comprehensive guide on how to build a decking frame. Building a deck is a fantastic way to enhance the outdoor living space of your home and create a cozy area for relaxation or entertainment. A properly constructed decking frame is essential for the durability and stability of your deck, ensuring that it can withstand the elements and provide years of enjoyment.
Whether you are a DIY enthusiast or a homeowner looking to understand the process of deck construction, this step-by-step guide will walk you through the important aspects of planning, gathering materials, and building a reliable decking frame.
Before we delve into the details, it’s crucial to note that building codes and regulations may vary depending on your location. Prior to starting your project, be sure to check with your local authorities and obtain any necessary permits. Safety should always be the top priority when building any outdoor structure.
In this guide, we will cover everything from planning and design to the installation of decking boards, railings, and more. So, let’s get started on creating your dream outdoor space!
Key Takeaways:
- Plan carefully, gather materials, and follow local regulations to build a sturdy deck. From site preparation to applying finishes, create a safe and beautiful outdoor space to enjoy for years to come.
- Ensure safety and stability by properly installing support posts, beams, and joists. Add railings and stairs for accessibility and aesthetics, and protect your deck with finishes and sealants.
Read more: How To Build A Raised Decking Frame
Planning and Design
Before you start building your decking frame, it’s crucial to spend some time on careful planning and design. This stage will set the foundation for a successful project and ensure that your deck meets your specific needs and preferences.
Here are some key considerations:
- Location: Determine the ideal location for your deck based on factors like sun exposure, privacy, and accessibility.
- Size and Shape: Determine the dimensions of your deck based on the available space and how you plan to use it. Consider the layout and shape that will best complement your outdoor area.
- Functionality: Consider how you will use the deck. Will it be primarily for lounging and relaxation, outdoor dining, or a combination of activities? This will help determine the layout and features you incorporate.
- Materials: Research various decking materials like wood, composite, or PVC, and choose one that suits your style and budget. Consider the maintenance requirements and longevity of the material as well.
- Building Codes: Familiarize yourself with local building codes and regulations to ensure compliance throughout the construction process.
Once you have a clear vision for your deck, it’s time to sketch out a design. You can use design software, online tools, or even draw it out by hand. Be sure to include accurate measurements and consider factors like stairs, railings, and any additional features you wish to incorporate.
At this stage, it can be helpful to consult with a professional designer or architect who can provide insights and suggestions based on their expertise. They can also help you create a detailed blueprint or construction plan.
The planning and design phase is crucial for visualizing the end result and determining the materials and tools required for the project. Take the time to review and refine your plans before proceeding to the next steps of building the decking frame.
Gathering Materials and Tools
Now that you have a well-thought-out design and plan in place, it’s time to gather the materials and tools needed to build your decking frame. Having all the necessary supplies on hand will ensure a smooth construction process and prevent delays.
Here’s a list of the materials and tools you’ll likely need:
- Materials:
- Decking boards
- Pressure-treated lumber for framing
- Concrete footings
- Support posts
- Beams
- Joists
- Galvanized nails or screws
- Hardware, such as anchors and brackets
- Gravel or crushed stone for leveling
- Waterproofing membrane or flashing
- Tools:
- Tape measure
- Level
- Hammer
- Power drill
- Circular saw
- Speed square
- Chalk line
- Shovel
- Screwdriver
- Adjustable wrench
When selecting materials, opt for high-quality products that are suited to your local climate. If you’re unsure about which specific materials to choose, consult with the experts at your local home improvement store or seek advice from professionals in the construction industry.
It’s also a good idea to stock up on safety equipment, such as gloves, safety glasses, and a dust mask, to protect yourself during the construction process.
Prior to purchasing materials, take accurate measurements according to your design plans. This will help you determine the quantity of materials required and ensure you don’t waste money on unnecessary products.
Once you have all the materials and tools ready, you can proceed to the next phase of clearing and preparing the site for construction.
Clearing and Preparing the Site
Before construction can begin on your decking frame, it’s important to clear and prepare the site. This ensures a stable and level foundation for your deck, which is essential for its longevity and safety. Follow these steps to prep the site before moving forward:
- Remove existing vegetation: Clear away any grass, plants, or weeds in the area where your deck will be located. Use a shovel or a garden hoe to remove the top layer of vegetation and create a clean surface.
- Level the ground: Use a level and a long straightedge (such as a 2×4) to check for any uneven areas on the ground. If you notice any low or high spots, use a shovel or a rake to level the ground, removing excess soil or adding fill as needed.
- Mark the boundaries: Use stakes and string to mark the boundaries of your deck, ensuring accurate placement and dimensions. This will serve as a guide for the construction process.
- Clear the site: Remove any rocks, debris, or obstructions from the area. This includes large stones, tree roots, or any other objects that may interfere with the installation of the decking frame.
- Consider drainage: Take into account the natural slope of your yard and the direction of water flow. If necessary, make provisions for proper drainage, which may involve adding a layer of gravel or creating a slope away from your house.
It’s important to note that the specific site preparation steps may vary depending on your individual circumstances and the condition of your yard. For example, if you’re building on a slope, additional measures will be required to ensure a level foundation.
Site preparation is a critical step that sets the stage for the rest of the construction process. By taking the time to clear and properly prepare the site, you are laying the groundwork for a sturdy and long-lasting deck.
Building the Foundation
Once the site is cleared and prepared, it’s time to start building the foundation of your decking frame. The foundation is crucial for providing stability and support to your deck, especially if it will be elevated or built on uneven ground. Follow these steps to construct a solid foundation:
- Install concrete footings: Dig holes for the concrete footings at each support post location, following local building codes for depth and diameter. Place a cardboard tube or formwork in each hole and pour concrete into the forms. Allow the concrete to cure before proceeding.
- Position support posts: Place support posts on top of the concrete footings, ensuring they are plumb and level. Use a post level or a regular level to check for vertical alignment. Secure the posts to the footings with metal anchors or brackets.
- Connect beams: Attach beams to the top of the support posts, creating the outer frame of your decking structure. Secure the beams with nails or screws, ensuring they are level and properly aligned.
- Add intermediate posts: Depending on the size and design of your deck, you may need to add additional support posts between the main support posts. Position these intermediate posts evenly along the beams and secure them in place.
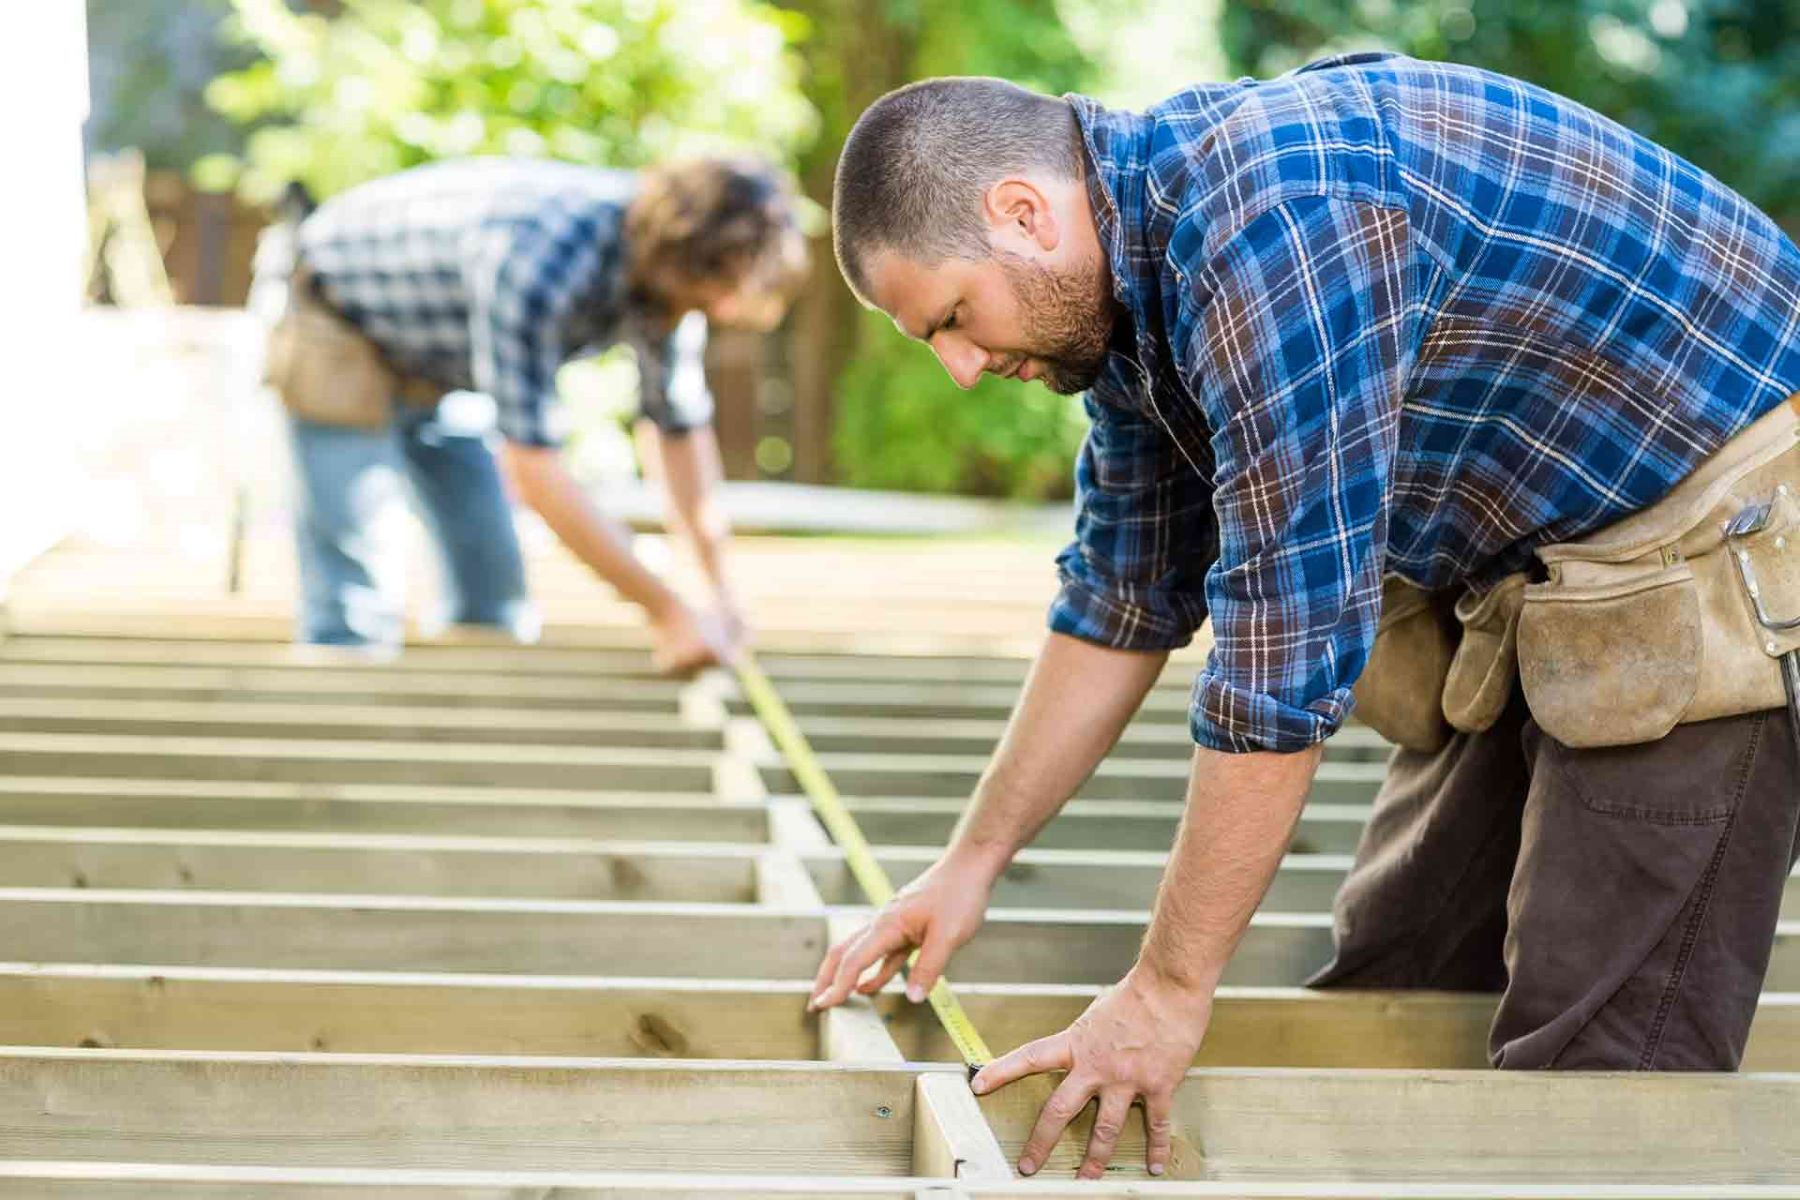
- Place joists: Install the joists perpendicular to the beams, spaced according to your design plans. Use joist hangers or metal brackets to secure the joists to the beams. Double-check that all the joists are level before proceeding.
- Ensure stability: Regularly check for the stability and squareness of the foundation as you build. Make any necessary adjustments to the posts, beams, and joists to ensure a level and secure foundation.
During the construction process, it’s important to refer back to your design plans to ensure accurate placement and alignment. Take the time to measure and double-check all the dimensions to avoid any errors.
The foundation is a critical element of your decking frame, providing the framework upon which the rest of the deck will be built. By following these steps and ensuring the stability of your foundation, you’re well on your way to creating a sturdy and reliable outdoor space.
Read more: How To Frame A Porch Deck
Installing Support Posts
Support posts are a crucial component of your decking frame, providing vertical support and stability to your deck structure. These posts are typically made of pressure-treated lumber or other durable materials. Follow these steps to properly install the support posts:
- Mark the post locations: Use a tape measure and your design plans to mark the locations where the support posts will be installed. Make sure the spacing between the posts aligns with your design and local building codes.
- Dig the post holes: Use a post hole digger or an auger to dig holes at each marked location. The depth and diameter of the holes will depend on the specific requirements of your decking frame design and local building codes.
- Insert the posts: Place the support posts into the holes, ensuring they are properly aligned and at the desired height. Use a level to check for plumbness and adjust as necessary. If needed, temporarily brace the posts to keep them in position.
- Secure the posts: Once the posts are properly positioned, pour concrete into the holes to secure the posts. Make sure the concrete is filled to ground level or slightly above. Use a trowel to smooth the surface of the concrete.
- Allow curing time: Concrete requires time to cure and harden. Follow the guidelines provided by the manufacturer for curing time. It’s important to avoid putting excessive weight or pressure on the posts while the concrete is curing.
- Attach post brackets: Once the concrete is fully cured, attach post brackets to the top of each support post. These brackets will serve as a connection point for the beams of your decking frame.
When installing support posts, it’s important to follow local building codes and regulations to ensure the safety and stability of your deck. Consider using pressure-treated lumber or other treated materials for the posts, as they offer increased resistance to moisture, rot, and pests.
Remember to refer to your design plans and double-check all measurements and alignments as you proceed with the installation. Accurate and properly installed support posts are essential for a strong and durable decking frame.
When building a decking frame, make sure to use pressure-treated lumber to prevent rot and decay. Also, use galvanized or stainless steel screws and nails to prevent rust and corrosion.
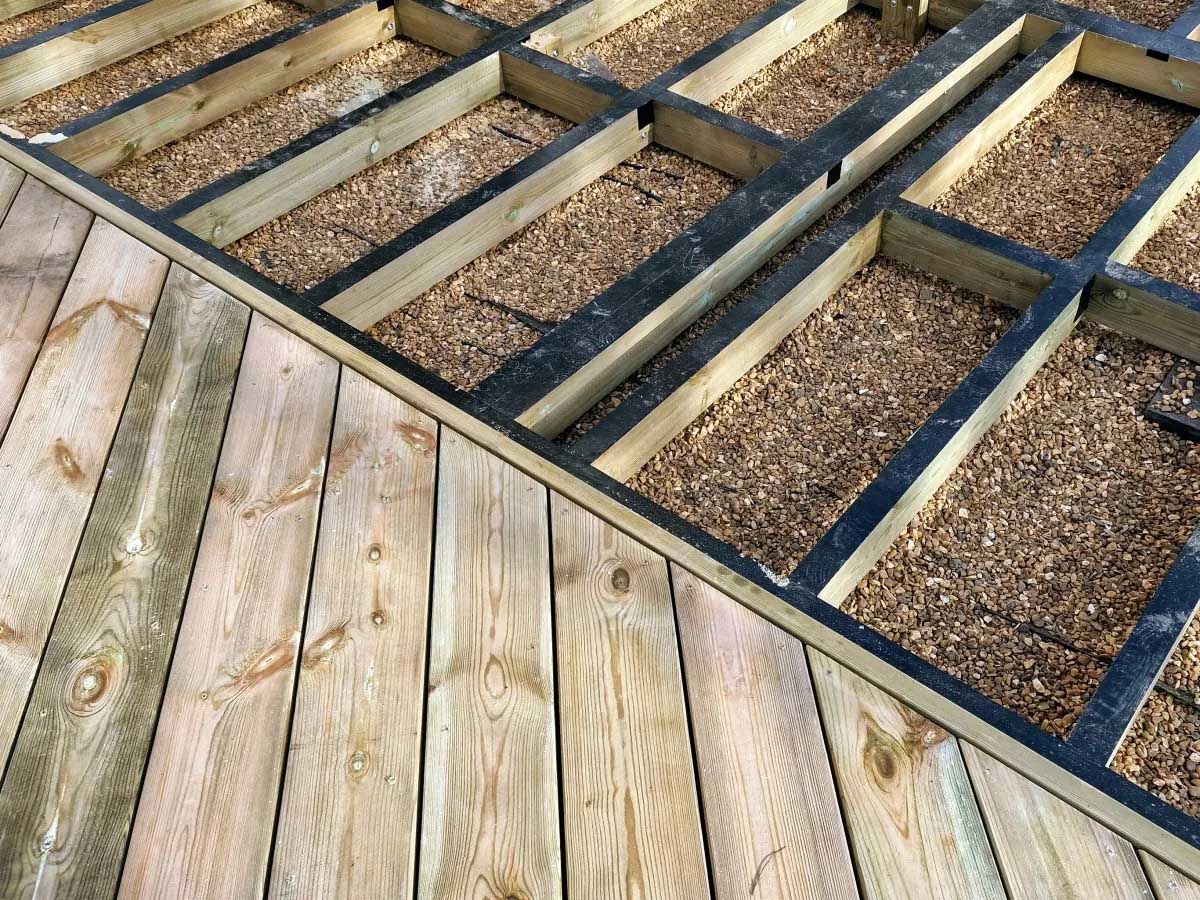
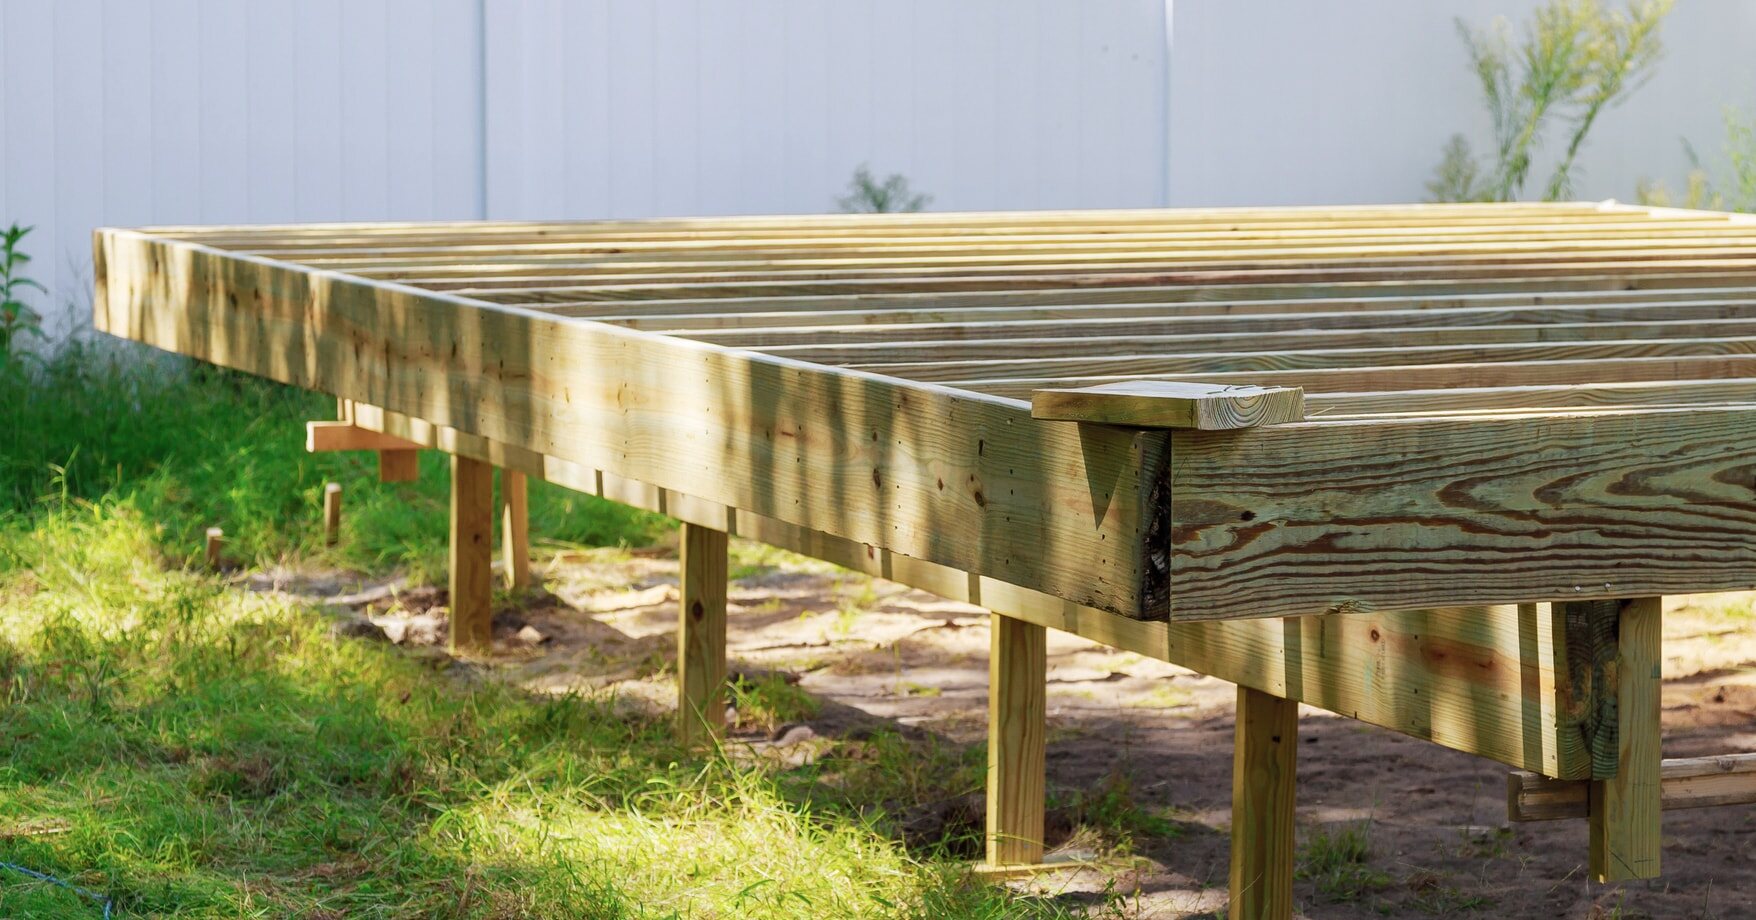
Attaching the Beams and Joists
Once the support posts are securely in place, it’s time to attach the beams and joists, which will provide the horizontal framework for your decking frame. This step is crucial for distributing the weight evenly and ensuring the stability of your deck structure.
Follow these steps to properly attach the beams and joists:
- Measure and cut the beams: Measure the length required for the beams according to your design plans. Use a circular saw or a miter saw to make accurate cuts. Be sure to double-check your measurements before cutting to avoid any mistakes.
- Position the beams: Place the beams on top of the support posts, ensuring they are level and flush with the tops of the posts. Attach the beams to the post brackets using galvanized nails or screws. Check for levelness and make any necessary adjustments.
- Space the joists: Measure and mark the spacing for the joists along the length of the beams. The spacing will depend on the specific requirements of your decking frame design. Use a chalk line or a straightedge to create straight and even lines.
- Attach the joists: Secure the joists to the beams using joist hangers or metal brackets. Ensure that each joist is flush with the top of the beams and properly aligned with the chalk lines. Use galvanized nails or screws to secure the joists in place.
- Double-check for levelness and alignment: Use a level to ensure that the beams and joists are level and aligned correctly. Make any necessary adjustments before moving on to the next steps of the decking frame construction.
During this process, it’s essential to follow your design plans meticulously and double-check all measurements and alignments. Ensuring the beams and joists are properly attached will provide the structural integrity needed for your deck to withstand the weight and forces exerted on it.
Remember to use pressure-treated lumber or other treated materials for the beams and joists to increase their resistance to moisture and decay. Following these steps will allow you to create a solid and stable framework for your decking project.
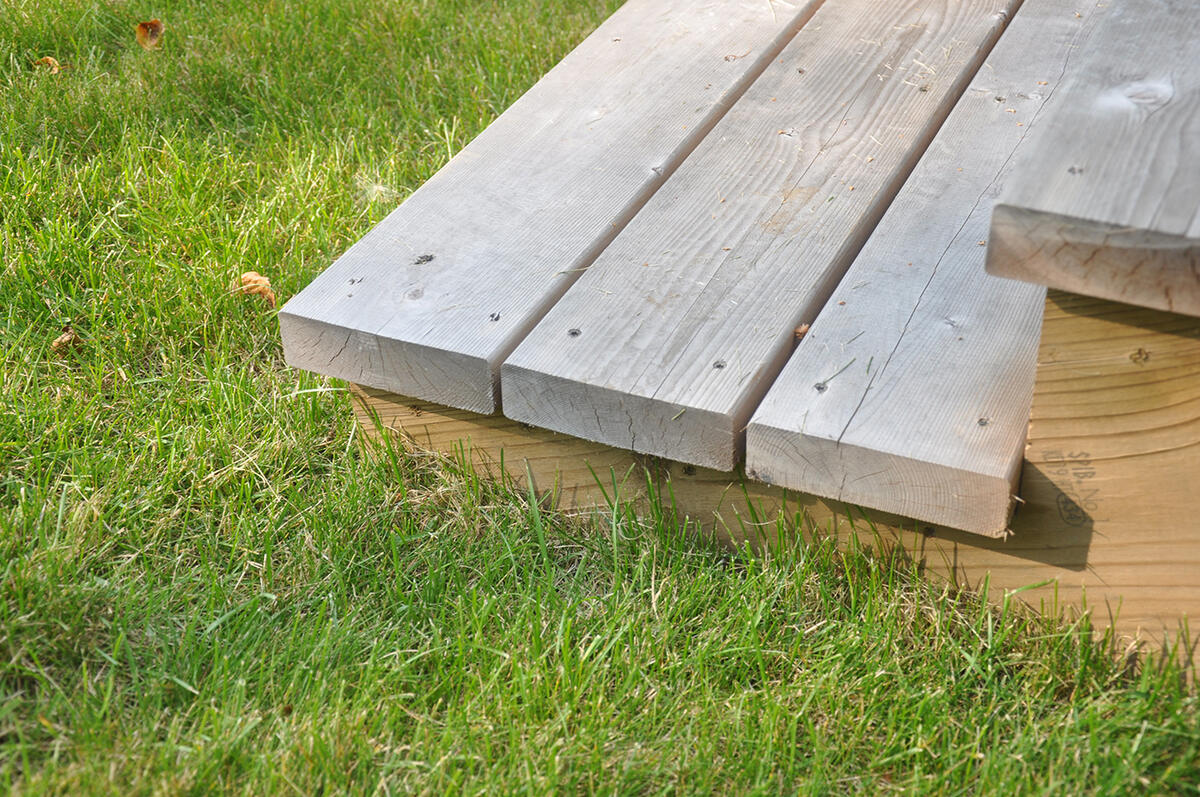
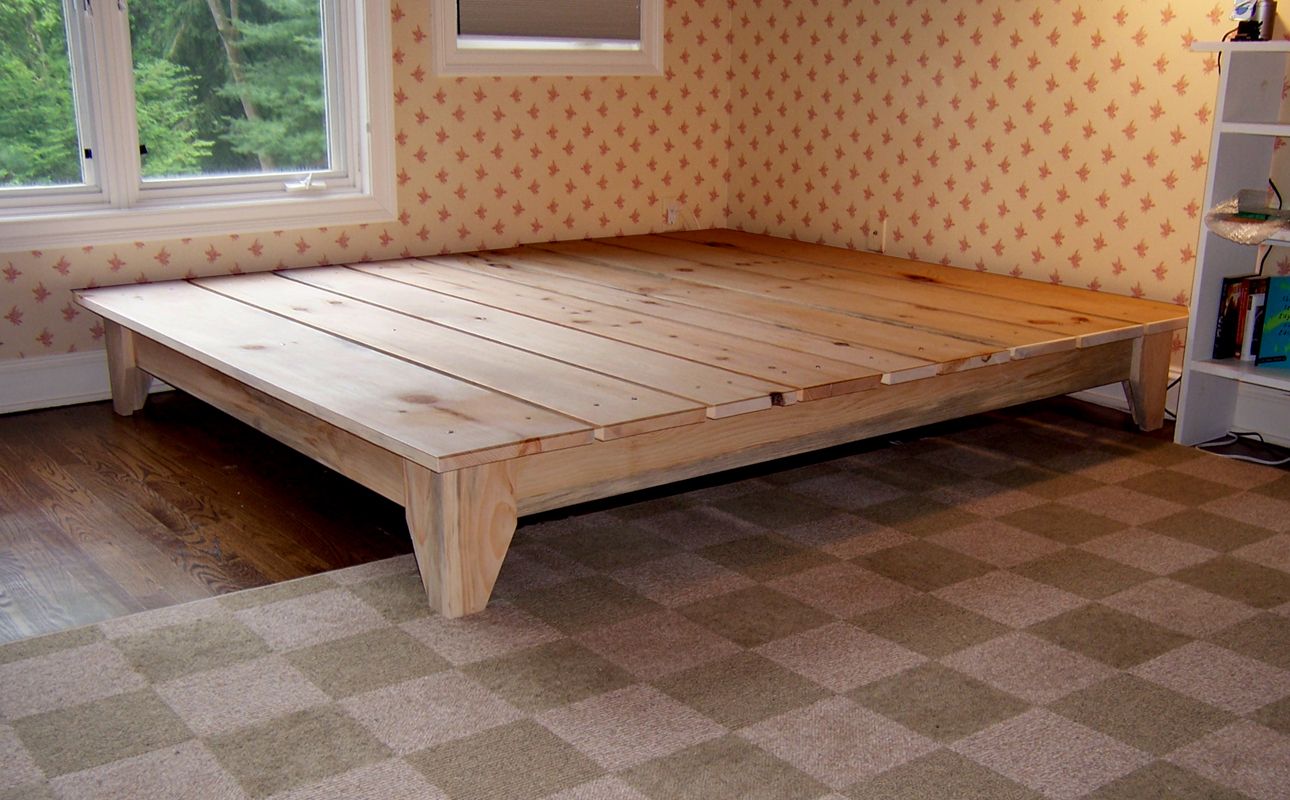
Adding Decking Boards
Adding the decking boards is an exciting step as it brings your decking frame one step closer to becoming a functional and beautiful outdoor space. The decking boards will create the surface on which you will walk, sit, and enjoy your deck. Follow these steps to properly install the decking boards:
- Plan the starting point: Decide where you want to start the installation of the decking boards. It’s common to start from the outer edge of the frame and work toward the center. This allows for a cleaner and more visually appealing finished result.
- Pre-drill the boards: To prevent the decking boards from splitting, pre-drill holes through the boards near the ends and along the edges before securing them to the frame.
- Align the boards: Place the first decking board in position, ensuring it is flush with the outer edge of the frame. Use a carpenter’s square or a straightedge to ensure the board is square. Secure the board to the joists using galvanized decking screws or nails.
- Continue installation: Place the next board beside the first one, leaving a small gap (usually around 1/8 inch) for expansion. Use a spacer, such as a nail, to maintain consistent spacing between each board. Repeat this process for the remaining boards.
- Trim the final boards: Depending on the size of your deck, you may need to trim the final boards to fit. Measure and cut the boards using a circular saw or a miter saw to ensure a clean and precise fit.
- Inspect and make adjustments: Regularly check for any boards that may have warped or shifted during installation. Make any necessary adjustments to ensure a level and uniform surface.
When installing the decking boards, consider using screws instead of nails, as they provide a stronger and longer-lasting connection. Additionally, using screws allows for easier removal in case any future maintenance or repairs are required.
Take your time during this step to ensure that each decking board is properly aligned and securely fastened to the frame. Proper installation of the boards will ensure that your deck is not only visually appealing but also durable and safe to use.
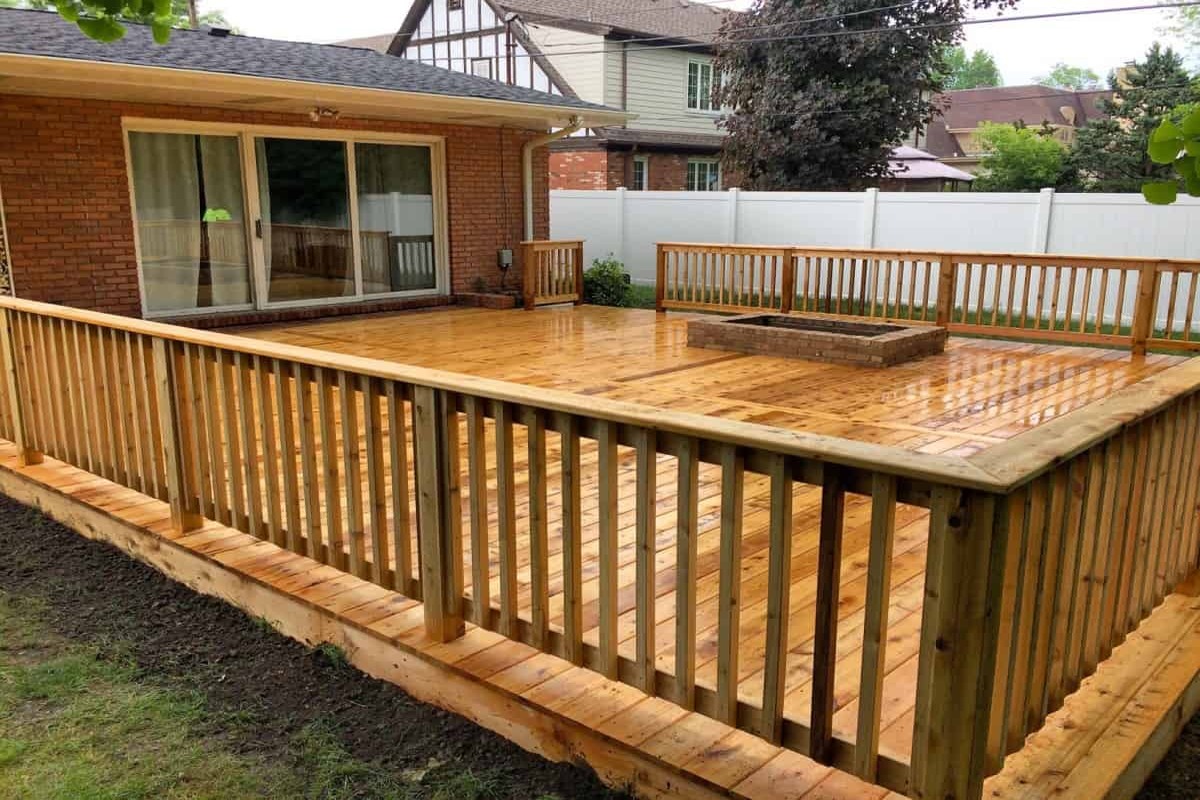
Installing Railings and Stairs
Installing railings and stairs is a critical step in completing your deck construction. Railings provide safety and support, while stairs allow for easy access to and from your deck. Follow these steps to install railings and stairs:
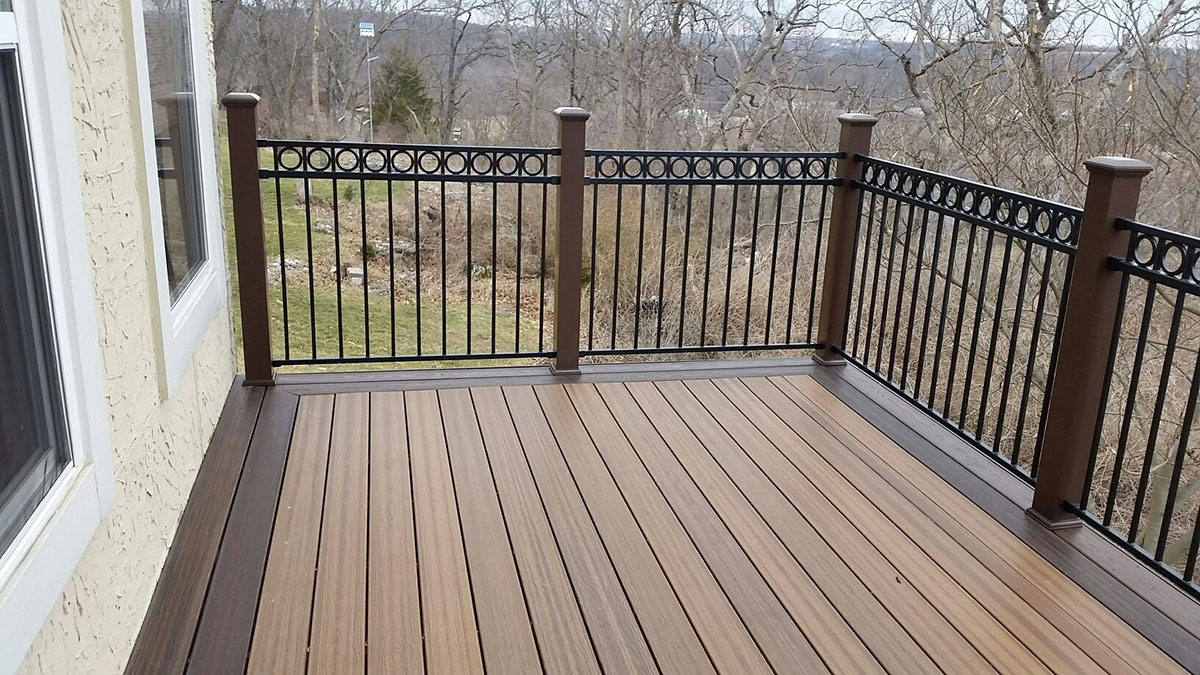
- Determine the railing style: Choose the type and style of railings that complement your deck design and meet local building codes. Common options include wood, metal, or composite railings.
- Measure and cut the railing posts: Measure the appropriate height for your railing posts, ensuring they comply with local regulations. Cut the posts to the desired length and make sure they are level and plumb when installed.
- Secure the railing posts: Attach the railing posts to the deck frame using metal post brackets or by directly screwing them into the framing. Ensure the posts are properly aligned and securely fastened to provide a sturdy foundation.
- Install the railing sections: Depending on your chosen railing style, attach the railing sections to the posts using appropriate hardware. This may involve brackets, screws, or other connectors. Make sure the railing sections are evenly spaced and provide adequate support.
- Add post caps and decorative elements: Consider adding post caps or other decorative elements to enhance the overall appearance of your railings. These elements not only provide a finished look but also help protect the railing posts from moisture and prolong their lifespan.
- Construct the stairs: If your deck requires stairs, carefully plan and measure the stair dimensions. Ensure the stair rise and run meet local building codes for safety. Construct the stairs using pressure-treated lumber or other suitable materials, following the guidelines for proper construction.
- Attach the stair stringers: Install the stair stringers between the deck and the ground. Secure them to the deck frame with appropriate hardware, ensuring they are level and properly aligned.
- Add the stair treads and risers: Attach the stair treads and risers to the stringers, providing a secure and comfortable stepping surface. Ensure that the space between each tread is consistent to prevent tripping hazards.
- Inspect and test: Once the railings and stairs are installed, thoroughly inspect the entire structure for any loose connections or potential safety concerns. Test the railings and stairs to ensure they are stable and meet safety requirements.
During the installation of railings and stairs, it’s important to reference local building codes and regulations to ensure compliance. Safety should always be the top priority when constructing these essential components of your deck.
Proper installation of railings and stairs provides a secure environment for you and your guests to enjoy your deck, while also adding aesthetic appeal to the overall design.
Read more: How To Build A Decking
Applying Finishes and Sealants
Applying finishes and sealants to your decking frame is a crucial step in protecting and enhancing the appearance of your deck. Finishes add color and protection to the wood, while sealants create a barrier against moisture and prolong the lifespan of the deck. Follow these steps to apply finishes and sealants effectively:
- Clean the deck: Before applying any finishes or sealants, thoroughly clean the decking frame to remove dirt, debris, and any residual stains. Use a deck cleaner and a stiff-bristle brush to scrub the surface, then rinse it thoroughly with water. Allow the deck to dry completely.
- Choose the appropriate finish: Select a finish that suits your preferences and the type of wood used for your decking frame. Options include stains, paints, or clear finishes. Consider factors such as durability, UV protection, and color options.
- Apply the finish: Follow the manufacturer’s instructions for the specific finish you have chosen. Use a brush or roller to apply an even coat of the finish to the decking boards, working with the wood grain for optimal coverage. Pay attention to areas prone to wear, such as stairs and railings, and ensure that the finish is applied uniformly.
- Allow drying time: Once the finish has been applied, allow ample time for it to dry and cure. This will ensure that it adheres properly and provides maximum protection. Avoid walking on the deck or placing any furniture on it until the finish has fully dried.
- Consider sealant application: While not always necessary, applying a sealant to your decking frame can further protect it from moisture, rot, and deterioration. Choose a high-quality sealant that is suitable for outdoor use and follow the instructions for proper application.
- Inspect and maintain: Regularly inspect the decking frame for any signs of wear or damage and make any necessary repairs or touch-ups. Depending on the type of finish and sealant used, it may require periodic reapplication to maintain its protective properties.
When applying finishes and sealants, follow safety precautions such as wearing gloves and protective eyewear. Work in a well-ventilated area and dispose of any unused or empty containers according to local regulations.
By applying finishes and sealants, you not only enhance the natural beauty of the wood but also protect your decking frame from the effects of weather and everyday use. This will ensure the longevity and durability of your deck, allowing you to enjoy it for years to come.
Conclusion
Congratulations! You have successfully learned how to build a sturdy and beautiful decking frame. By following the steps outlined in this comprehensive guide, you have taken the necessary measures to ensure the durability, stability, and safety of your deck.
From the initial planning and design stage to the installation of railings and stairs, each step has contributed to the creation of your dream outdoor space. By gathering the right materials and tools, clearing and preparing the site, building a solid foundation, and attaching the beams and joists, you have laid the groundwork for a strong and reliable deck.
Installing decking boards, applying finishes, and sealants have added the final touches to your deck, creating a visually appealing and well-protected surface for you to enjoy. The added railings and stairs provide the necessary safety features, ensuring easy access and an elevated level of security.
Remember to maintain your deck by regularly inspecting for any signs of wear or damage and making any necessary repairs or touch-ups. By being proactive and addressing any issues promptly, you can extend the lifespan of your deck and continue to enjoy its benefits for many years to come.
Building a decking frame is a rewarding project that allows you to create an inviting outdoor space for relaxation, entertaining, and making memories with loved ones. Take pride in your accomplishment and enjoy the fruits of your labor as you spend countless hours enjoying your deck.
Thank you for using our comprehensive guide on how to build a decking frame. We hope you found it helpful, and we wish you all the best in your deck construction journey!
Frequently Asked Questions about How To Build A Decking Frame
Was this page helpful?
At Storables.com, we guarantee accurate and reliable information. Our content, validated by Expert Board Contributors, is crafted following stringent Editorial Policies. We're committed to providing you with well-researched, expert-backed insights for all your informational needs.


0 thoughts on “How To Build A Decking Frame”