Articles
The ABCs Of Deck Building
Modified: February 25, 2024
Learn expert tips and tricks for deck building with our informative articles. Discover the ABCs of deck construction and create your dream outdoor space.
(Many of the links in this article redirect to a specific reviewed product. Your purchase of these products through affiliate links helps to generate commission for Storables.com, at no extra cost. Learn more)
Introduction
Welcome to the world of deck building, where creativity meets functionality and outdoor spaces come to life. Whether you’re looking to expand your living area, create an outdoor entertaining space, or simply add value to your home, building a deck is a great project to undertake. In this comprehensive guide, we will walk you through the ABCs of deck building, from the planning and design phase to the finishing touches. Get ready to transform your backyard into an oasis of relaxation and enjoyment.
Building a deck is an exciting endeavor that requires careful planning, attention to detail, and a bit of elbow grease. But fear not, even if you’re new to the world of DIY projects, with the right information and a little bit of patience, you can successfully build a deck that will become the envy of your neighborhood.
Before we dive into the nitty-gritty details, it’s important to have a clear understanding of the basic components of deck building. A deck is a raised platform typically made of wood or composite materials that is attached to the side of a house. It provides a designated outdoor space for a variety of activities, such as lounging, dining, and entertaining.
Now that you have a general idea of what a deck is, let’s explore the step-by-step process of building one. From planning and designing to choosing materials, constructing the deck frame, and adding the finishing touches, we’ll cover everything you need to know to turn your deck building dreams into reality.
So, grab your notebook, put on your work boots, and let’s get started on this exciting journey of deck building!
Key Takeaways:
- Understanding the basics of deck building, from the different types of decks to the importance of materials and tools, is crucial for making informed decisions and creating a functional and visually appealing outdoor space.
- Each step of the deck building process, from planning and designing to applying finishes and sealants, plays a pivotal role in ensuring the strength, stability, and longevity of your deck. Prioritizing safety and attention to detail are key to a successful project.
Read more: How To Build A Deck With Composite Decking
Understanding the Basics of Deck Building
Before you embark on your deck building project, it’s important to have a solid understanding of the fundamentals. This will ensure that you approach the project with confidence and make informed decisions throughout the process.
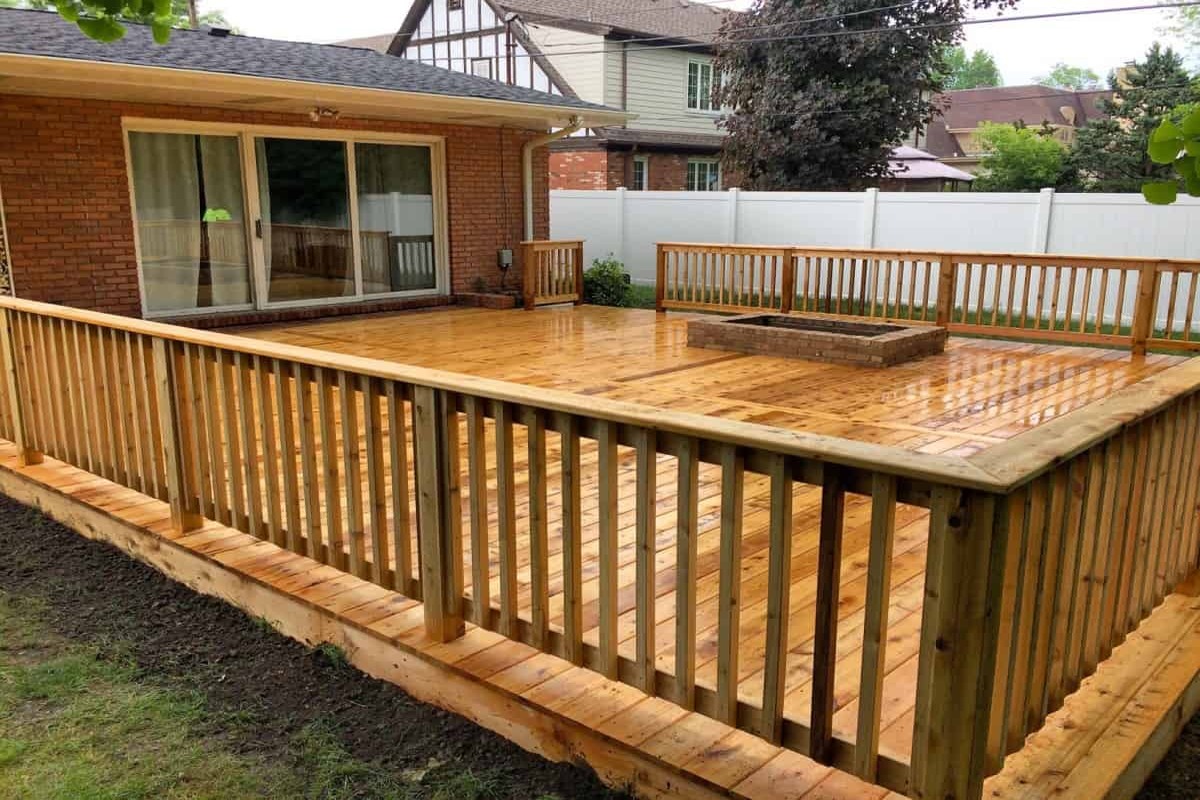
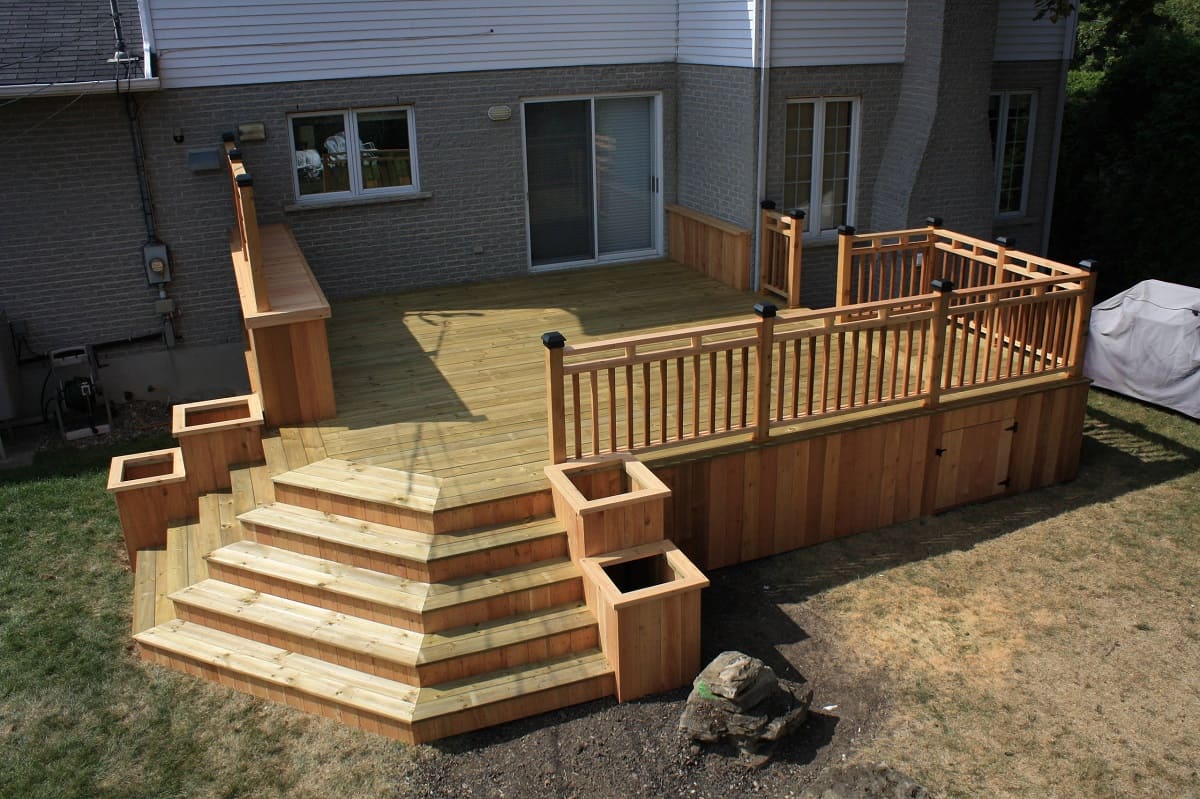
The first step in understanding the basics of deck building is familiarizing yourself with the various types of decks. There are three main types: ground-level decks, raised decks, and multi-level decks. Ground-level decks are built on the ground without any elevation, while raised decks are elevated above the ground with support beams and footings. Multi-level decks, as the name suggests, consist of multiple levels, creating a visually appealing and functional outdoor space.
Once you’ve determined the type of deck that suits your needs, it’s time to consider the size and shape. The size of your deck will depend on factors such as available space, intended use, and local building regulations. The shape can be rectangular, square, or even custom-designed to fit your unique requirements.
Another crucial aspect of deck building is understanding the different materials available. Wood is a popular choice for decks due to its natural beauty and affordability. Common wood options include cedar, redwood, and pressure-treated lumber. Composite materials, made from a combination of wood fibers and recycled plastics, are becoming increasingly popular due to their durability and low maintenance requirements.
Before you start building, it’s important to research and familiarize yourself with local building codes and permits. These regulations vary from region to region, and it’s essential to ensure that you comply with them to avoid any legal issues down the line. Additionally, it’s a good idea to consult with a professional to ensure that your deck meets safety standards and is structurally sound.
A final consideration in understanding the basics of deck building is budgeting. Like any home improvement project, building a deck involves costs, including materials, tools, labor (if you’re hiring professionals), and any necessary permits. Carefully assessing your budget will help you prioritize your needs and make informed decisions when it comes to material choices and design elements.
By understanding the basics of deck building, you’ll be well-equipped to plan, design, and execute your project with confidence. With a clear vision in mind, it’s time to move on to the next step: planning and designing your deck.
Step 1: Planning and Designing Your Deck
Planning and designing your deck is a crucial step that sets the foundation for a successful project. Taking the time to carefully consider your needs and preferences will ensure that your deck not only looks aesthetically pleasing but also functions optimally for your lifestyle.
The first aspect to consider is the purpose of your deck. Are you looking for a space to relax and unwind? Or do you envision a deck that functions as an entertainment area for hosting gatherings and barbecues? Determining the primary use of your deck will help you make decisions on size, layout, and features.
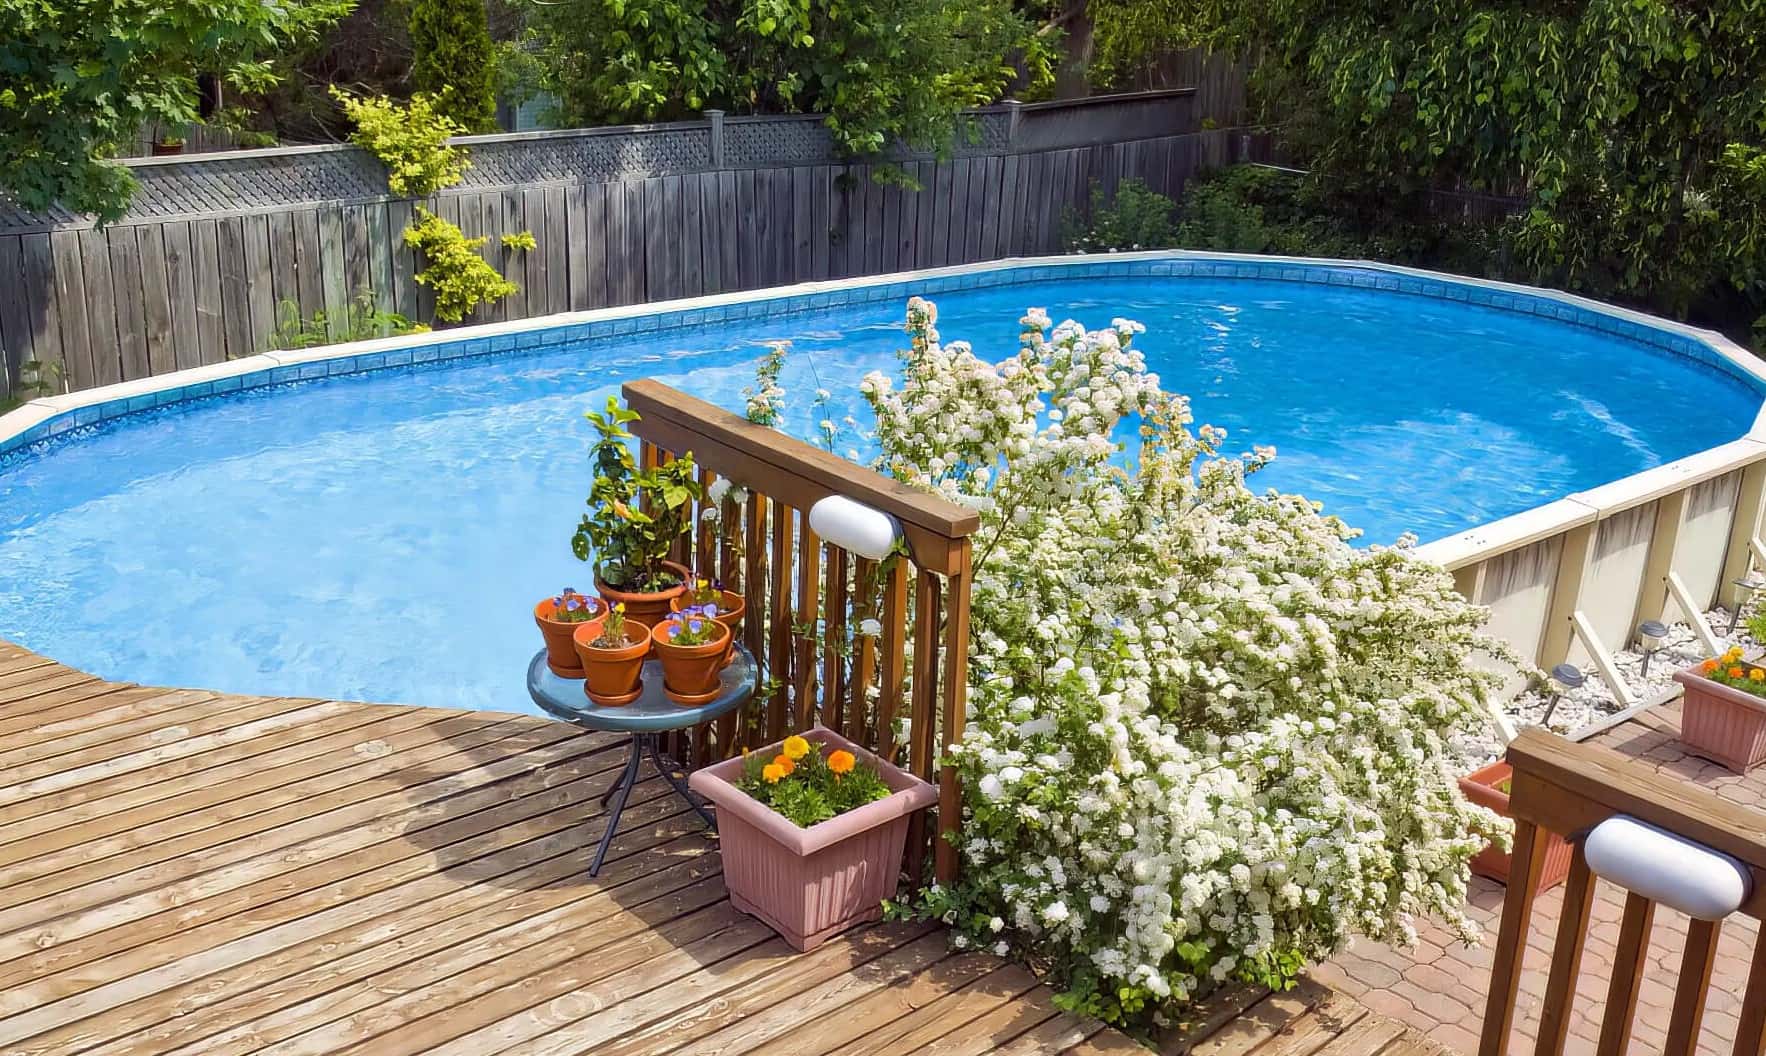
Next, assess the available space in your backyard. Take measurements and consider any existing features, such as trees, pools, or gardens, that you want to incorporate or work around. Consider the orientation of your deck in relation to the sun and other elements to ensure optimal usability and comfort throughout the day.
Once you have a clear idea of your needs and the available space, it’s time to design your deck. You can either sketch out your ideas on paper or utilize online design tools to create a visual representation of your vision. Consider factors such as the shape, elevation, and flow of the deck. Will it have multiple levels or include built-in seating? Will you incorporate features like pergolas, fire pits, or outdoor kitchens?
During the design process, also think about the materials you want to use. The choice of materials can greatly impact the aesthetics and maintenance requirements of your deck. Whether you opt for the warmth and natural beauty of wood or the durability and low maintenance of composite materials, be sure to research the pros and cons of each option.
Don’t forget to consider safety measures in your design. Install proper railing and choose materials that are slip-resistant to ensure a secure and comfortable space. If you have children or pets, take additional precautions to create a child-friendly and pet-safe environment.
Once your design is complete, it’s a good idea to consult with a professional deck builder or structural engineer to ensure that your plans are feasible and comply with local building codes. They can provide valuable insights and make recommendations to ensure the structural integrity and safety of your deck.
In summary, taking the time to plan and design your deck will pay off in the long run. Consider the purpose, available space, and desired features of your deck. Sketch out a design, choose materials wisely, and prioritize safety. With a well-thought-out plan in place, you’re ready to move on to the next step: choosing the right materials and tools.
Step 2: Choosing the Right Materials and Tools
Choosing the right materials and tools for your deck construction is essential for creating a sturdy and long-lasting outdoor space. The materials you select will not only affect the overall aesthetics of your deck but also determine its durability and maintenance requirements.
Let’s start with the deck materials. There are various options to consider, including wood, composite, and PVC. Wood is a classic and widely used choice, offering natural beauty and versatility. Popular wood options for decking include cedar, redwood, and pressure-treated lumber. Composite decking, made of a combination of wood fibers and recycled plastic, offers the look of wood without the maintenance requirements. PVC decking, on the other hand, is made entirely of synthetic materials and is highly resistant to moisture, insects, and rot.
When choosing the materials for your deck, consider factors such as durability, maintenance, cost, and environmental impact. Wood decks require periodic staining or sealing, while composite and PVC decks are generally low maintenance and resistant to rot, splintering, and insect damage. Take into account your personal preferences, budget, and the specific needs of your deck project.
In addition to the decking material, you’ll also need to select the appropriate fasteners, such as screws or hidden fastening systems, to secure the deck boards. Stainless steel or coated screws are recommended for outdoor use as they are resistant to rust and corrosion.
Now let’s move on to the tools you’ll need for deck construction. While the specific tools may vary depending on your project, here are some essential tools you’re likely to require:
- Measuring tape and level
- Circular saw or miter saw
- Drill and drill bits
- Hammer and nails
- Screwdriver
- Decking board straightener
- Post hole digger or auger
- Shovel
- String line
- Safety equipment (gloves, safety glasses, ear protection)
Having the right tools on hand will not only make the deck building process smoother but also ensure accurate measurements, precise cuts, and secure installations.
While it’s essential to have the necessary tools, keep in mind that safety is paramount. Always follow safety guidelines and wear appropriate protective gear when operating power tools or working at heights on scaffolding or ladders.
By choosing the right materials and tools for your deck project, you’ll set the stage for a successful and enjoyable construction process. Take the time to research different materials, understand their pros and cons, and invest in quality tools that will aid in the construction and longevity of your deck.
With the materials and tools in hand, it’s time to move on to the next step: preparing the site for deck construction.
Step 3: Preparing the Site for Deck Construction
Preparing the site for deck construction is a crucial step that lays the groundwork for a sturdy and stable structure. By properly preparing the site, you’ll ensure that your deck is built on a solid foundation and will last for years to come.
The first task in site preparation is to clear the area of any vegetation, rocks, or debris. Remove grass, weeds, and other plants by using a shovel or a sod cutter, ensuring that the area is level and free from any obstacles. This will provide a clean canvas for the construction process.
Next, mark the boundaries of your deck using stakes and string. This will help you visualize the layout and confirm that the dimensions align with your initial design. Take measurements and ensure that the corners are square to guarantee an accurately positioned deck.
If your deck will be built at ground level, skip this step. But if it will be a raised deck, you’ll need to dig footings for the support posts. Consult local building codes to determine the required depth and diameter for the footings. Using a post hole digger or an auger, dig the holes accordingly, ensuring they are below the frost line to prevent movement or shifting of the deck in colder climates.
Once the footings are dug, insert the support posts and check for levelness. Use a post level to ensure that the posts are perfectly plumb. If necessary, add or remove soil to achieve the desired level and stability.
After the footings and support posts are in place, it’s time to install a weed barrier or landscape fabric. This will help prevent weed growth and keep the area beneath the deck clean and tidy. Roll out the fabric, overlapping the seams, and secure it in place using landscape staples.
If you’re building a raised deck, you’ll also need to install ledger boards on the exterior wall of your house. These sturdy boards will provide additional support and a connection point for the deck structure. Ensure that the ledger boards are level and securely attached to the house using appropriate fasteners.
Lastly, consider the drainage of your deck. If your deck is built on or near a slope, you may need to incorporate a drainage system to redirect water away from the deck and prevent pooling or water damage. There are various options available, including under-deck drainage systems or slope the deck surface to allow water to run off.
By thoroughly preparing the site, you’ll create a solid foundation for your deck. Clear the area, mark the boundaries, dig footings if needed, install support posts, and implement a weed barrier. Paying attention to these details will ensure a stable and durable base for the next step: building the deck frame.
When building a deck, make sure to carefully consider the climate and weather conditions in your area. This will help you choose the right materials and design to ensure the longevity and durability of your deck.
Read more: How To Build A Decking
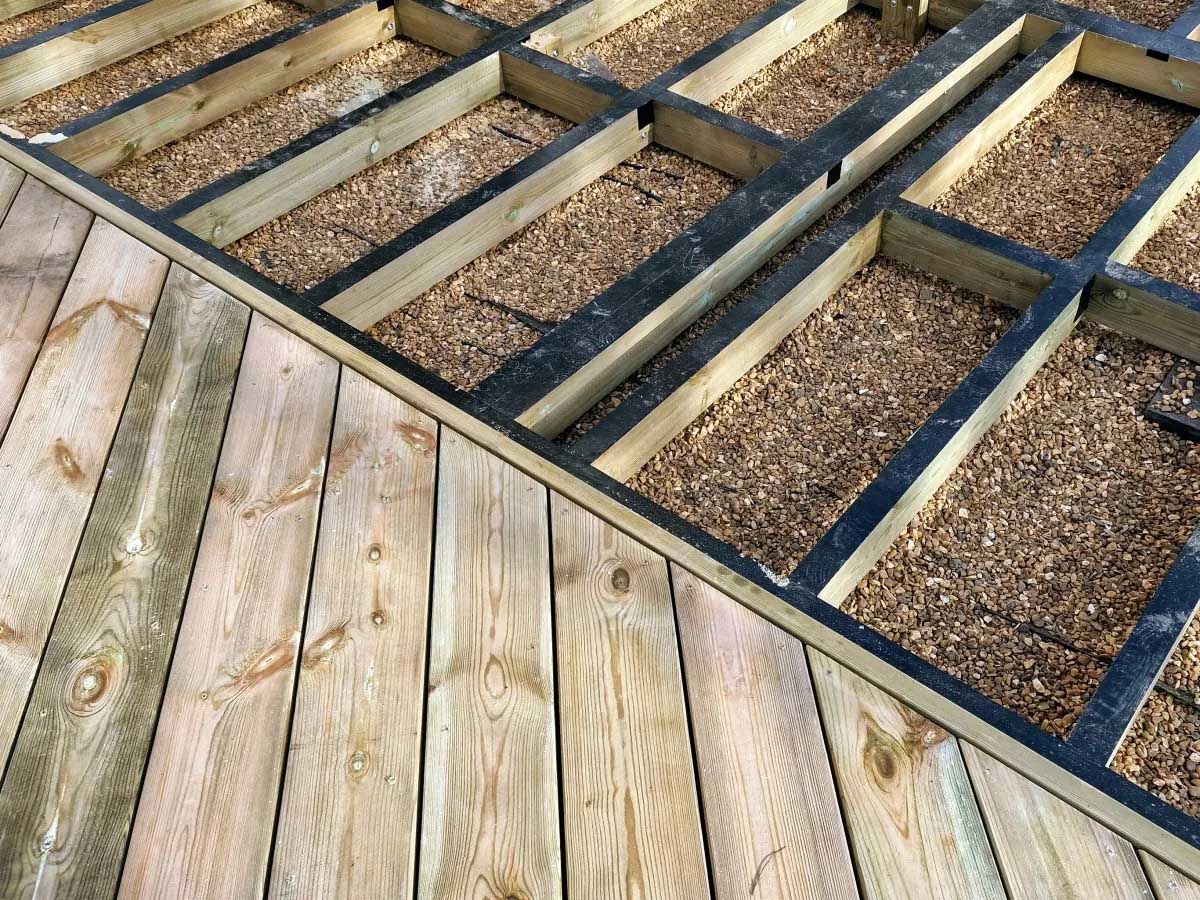
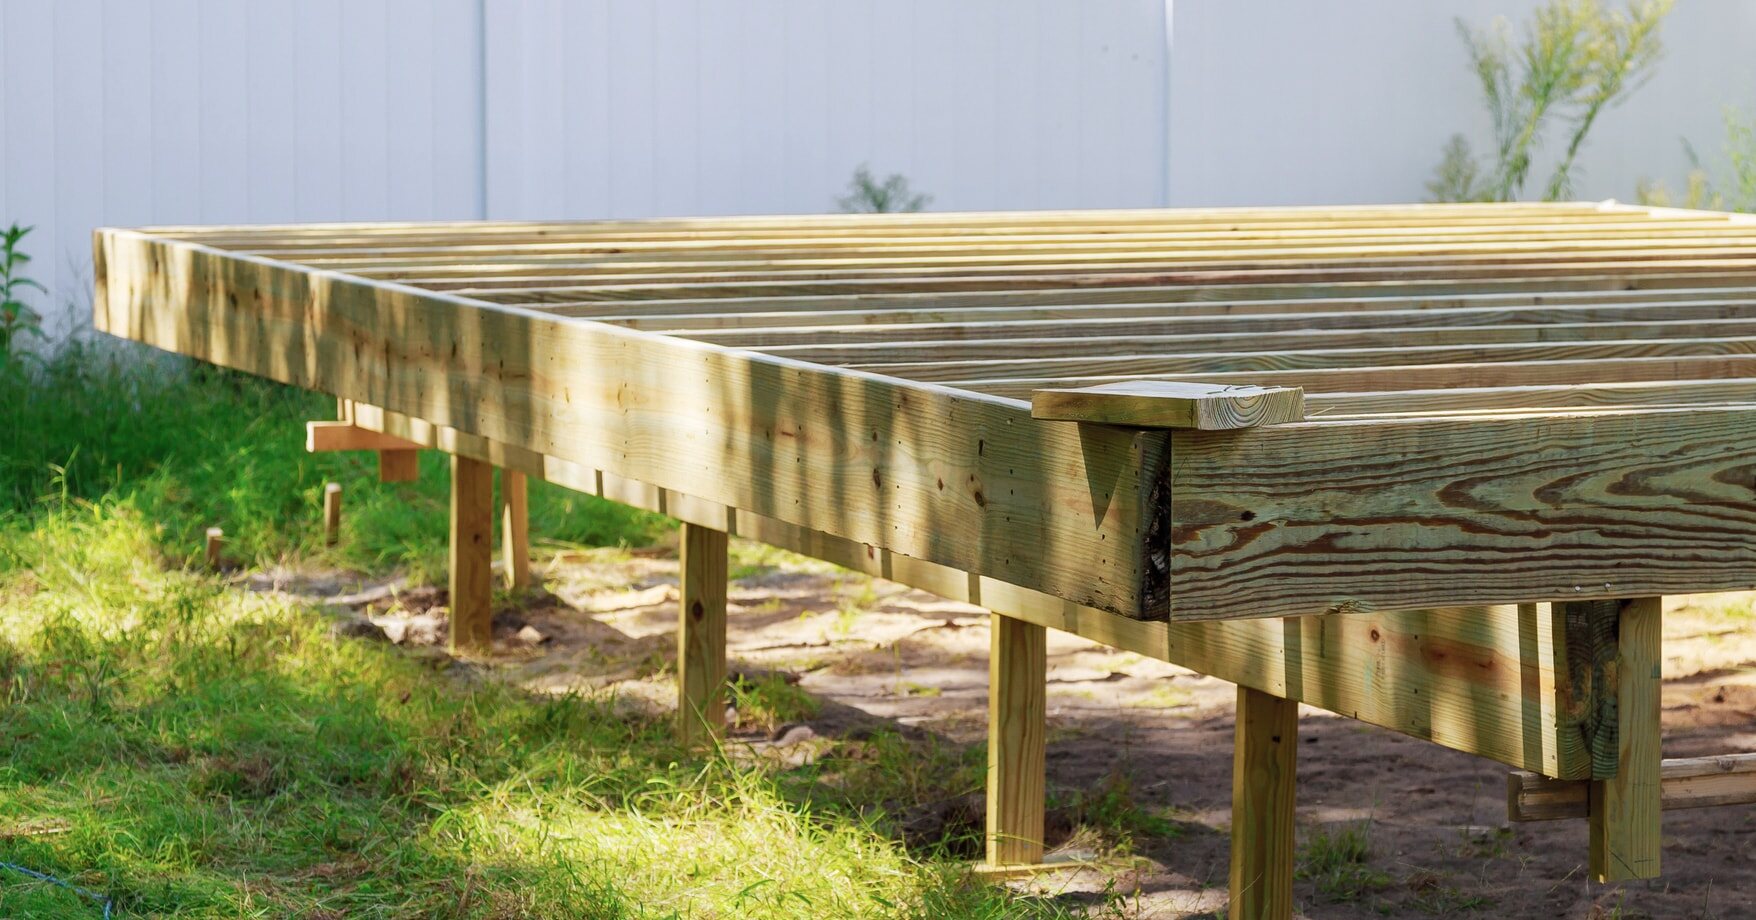
Step 4: Building the Deck Frame
Building the deck frame is a critical step that establishes the structural integrity of your deck. This framework supports the weight of the deck and provides stability, ensuring that your deck is safe and long-lasting.
The first component of the deck frame is the ledger board, which attaches the deck to the exterior wall of your house. Ensure that the ledger board is securely fastened to the house using appropriate lag screws or bolts. It should be level and aligned with the marked boundaries of your deck.
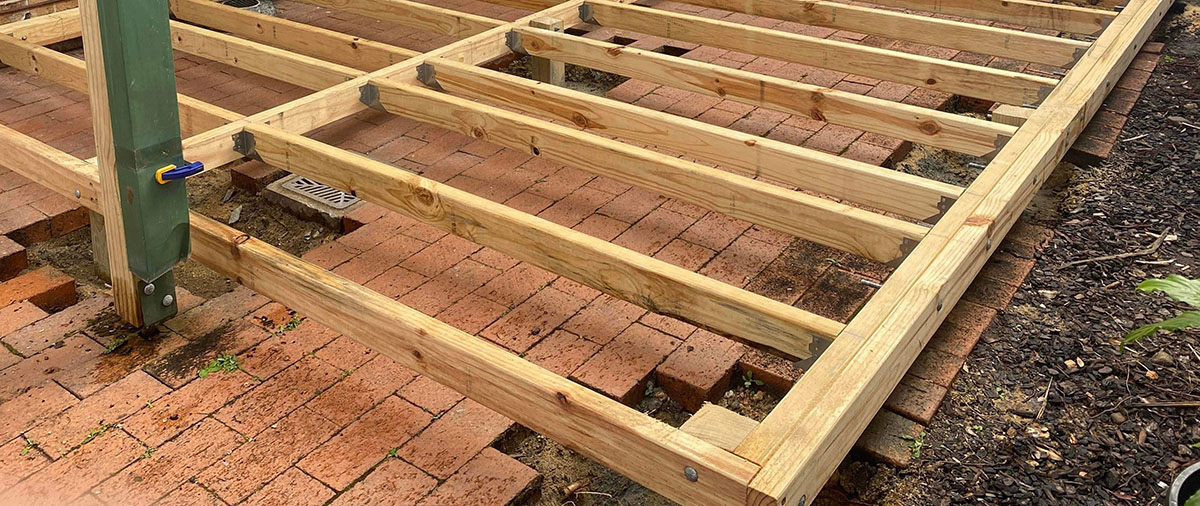
Next, install the rim joists, which will form the outer frame of the deck. Cut the rim joists to the appropriate length and attach them to the ledger board using joist hangers or through-bolts. Ensure that the corners are square and use a level to confirm that the rim joists are level.
After the rim joists are in place, it’s time to add the interior joists. These joists will provide support to the deck boards and help distribute the weight evenly. Determine the spacing between the joists, typically 16 or 24 inches apart, and mark their placement on the rim joists.
Install the joist hangers on the inner side of the rim joists, following the marked spacing. Slide the interior joists into the hangers and secure them with nails or screws. Use a level to ensure that the joists are level and adjust them as needed.
If your deck is elevated, consider adding additional support with beams. These beams run perpendicular to the joists and provide extra stability. Install the beams on top of the support posts and secure them using appropriate connectors.
Finally, install blocking between the joists. Blocking helps prevent the joists from twisting or shifting, adding further stability to the deck frame. Cut the blocking to fit between the joists and secure them in place using nails or screws.
Throughout the construction of the deck frame, take extra care to ensure that all components are level and square. Use a level and a square to make accurate measurements and adjustments as needed. Taking the time to build a sturdy and level frame will prevent future issues and ensure the proper installation of the deck boards.
With the deck frame complete, you’ve reached a significant milestone in your deck building journey. The foundation is set, and it’s time to move on to the next step: installing the decking boards.
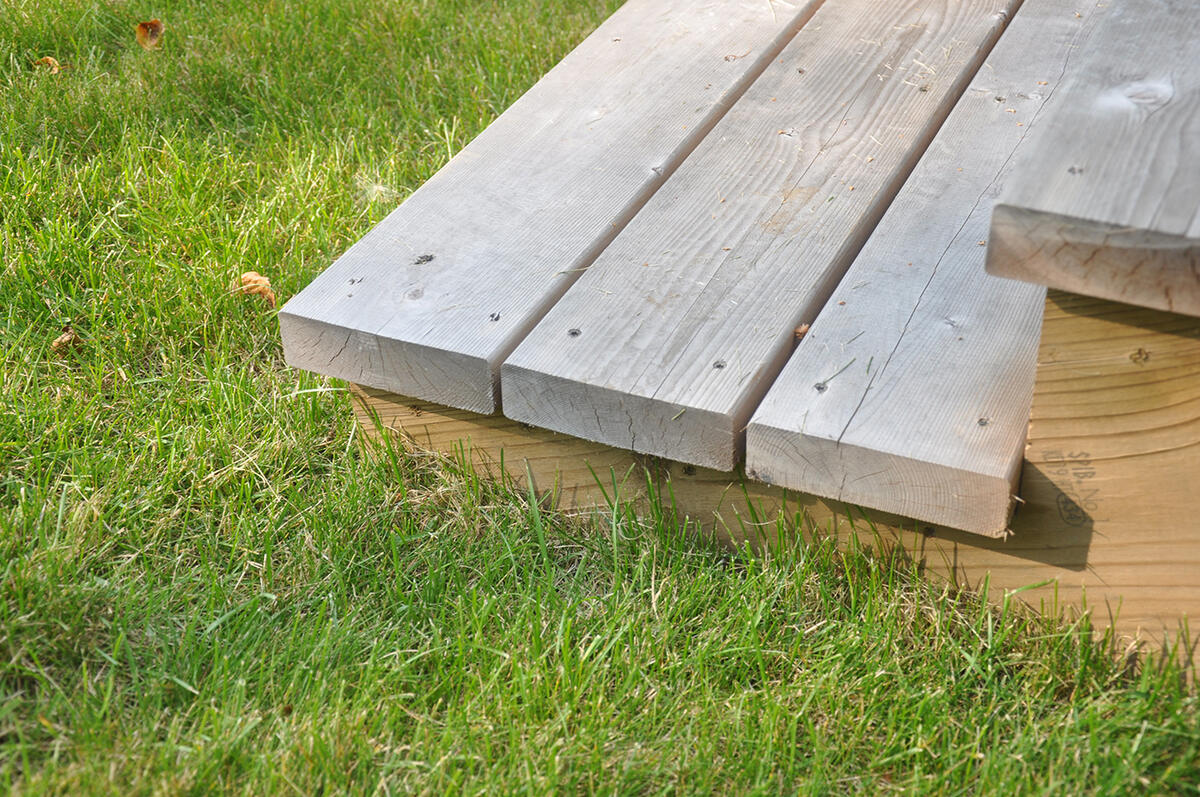
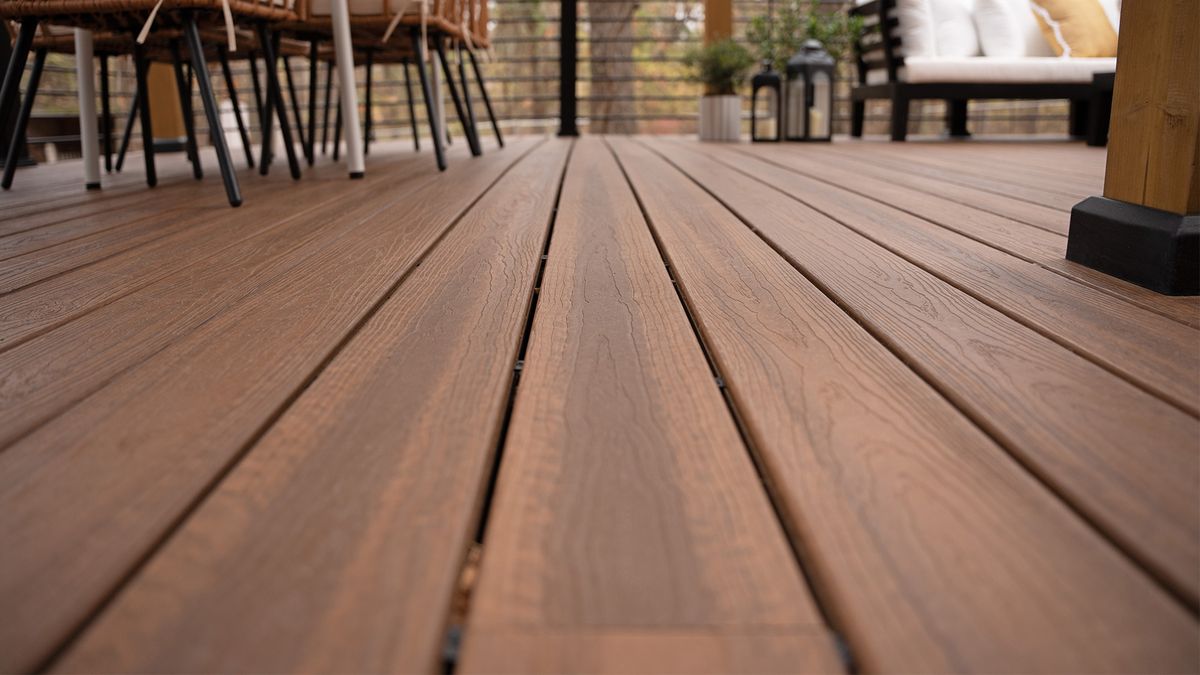
Step 5: Installing the Decking Boards
Now that the deck frame is complete, it’s time to move onto the next exciting step: installing the decking boards. This is where your deck truly starts to take shape and transform into a functional and beautiful outdoor space.
Before you start laying down the decking boards, there are a few considerations to keep in mind. First, decide on the orientation of the boards. You can choose between horizontal or diagonal installations, depending on your design preferences and the desired visual effect.
Begin by placing the first deck board flush with the outer edge of the frame. Use deck screws to secure it in place, making sure it is level. Use a spacer, such as a nail or a small piece of wood, between each board to ensure consistent spacing and proper water drainage.
Continue installing the remaining boards, working your way toward the center of the deck. For each board, check for levelness and alignment with the previous ones. Use a circular saw or a miter saw to cut the boards to the desired length and ensure a clean and precise fit.
As you install the decking boards, it’s important to leave a small gap between each board. This allows for natural expansion and contraction of the wood due to temperature and moisture changes. Typically, a gap of 1/8 to 1/4 inch is recommended.
If you’re using composite or PVC decking, follow the manufacturer’s guidelines for installation. These materials may have specific requirements for spacing, fasteners, and joist support.
As you progress with the installation, periodically check for any boards that may have warped or twisted. If necessary, remove and replace them to maintain a flat and uniform surface. Remember to use quality deck screws or hidden fasteners that are designed for outdoor use and will not corrode or rust.
If you have any obstacles, such as posts or drains, plan the positioning of the boards accordingly. You may need to cut and fit the boards around these obstacles for a seamless and professional finish.
Take your time during this step to ensure that each deck board is securely attached and properly aligned. The meticulous installation of the decking boards will result in a visually pleasing and structurally sound deck.
With the decking boards in place, you’re one step closer to completing your deck. The next step is to move on to Step 6: adding railings and balusters to enhance safety and aesthetics.
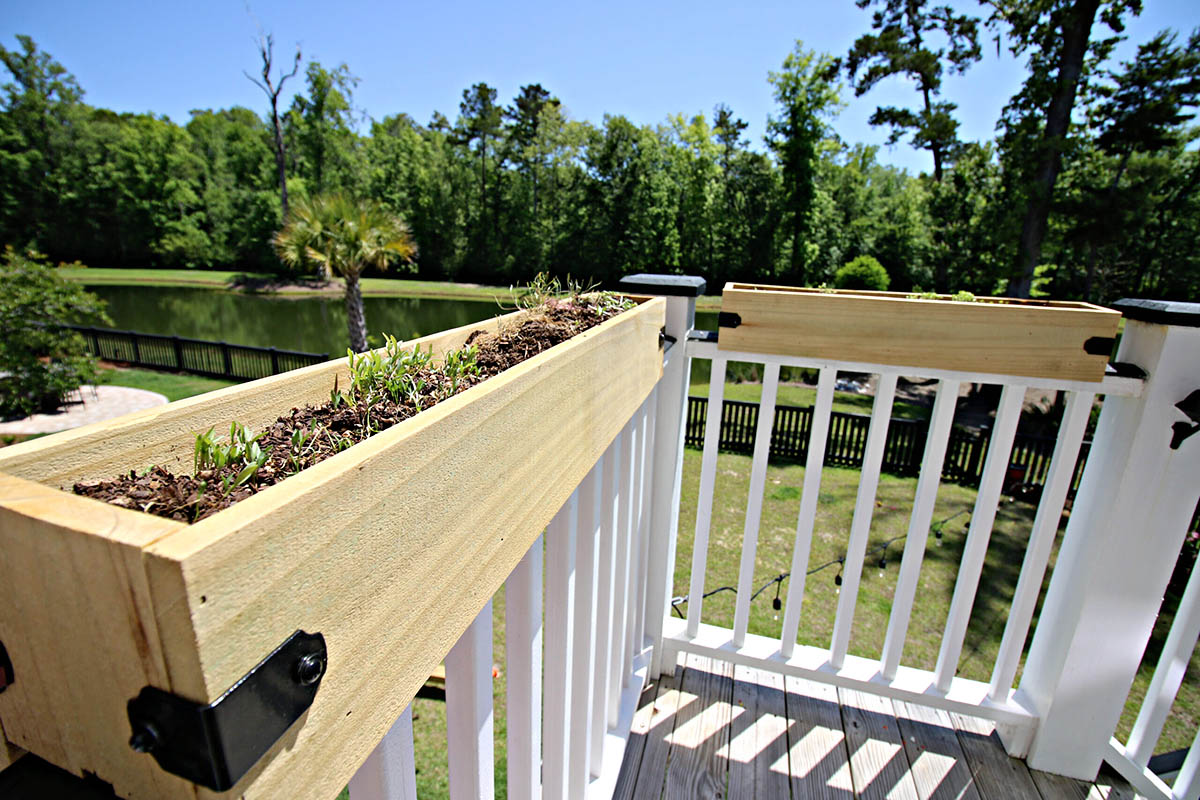
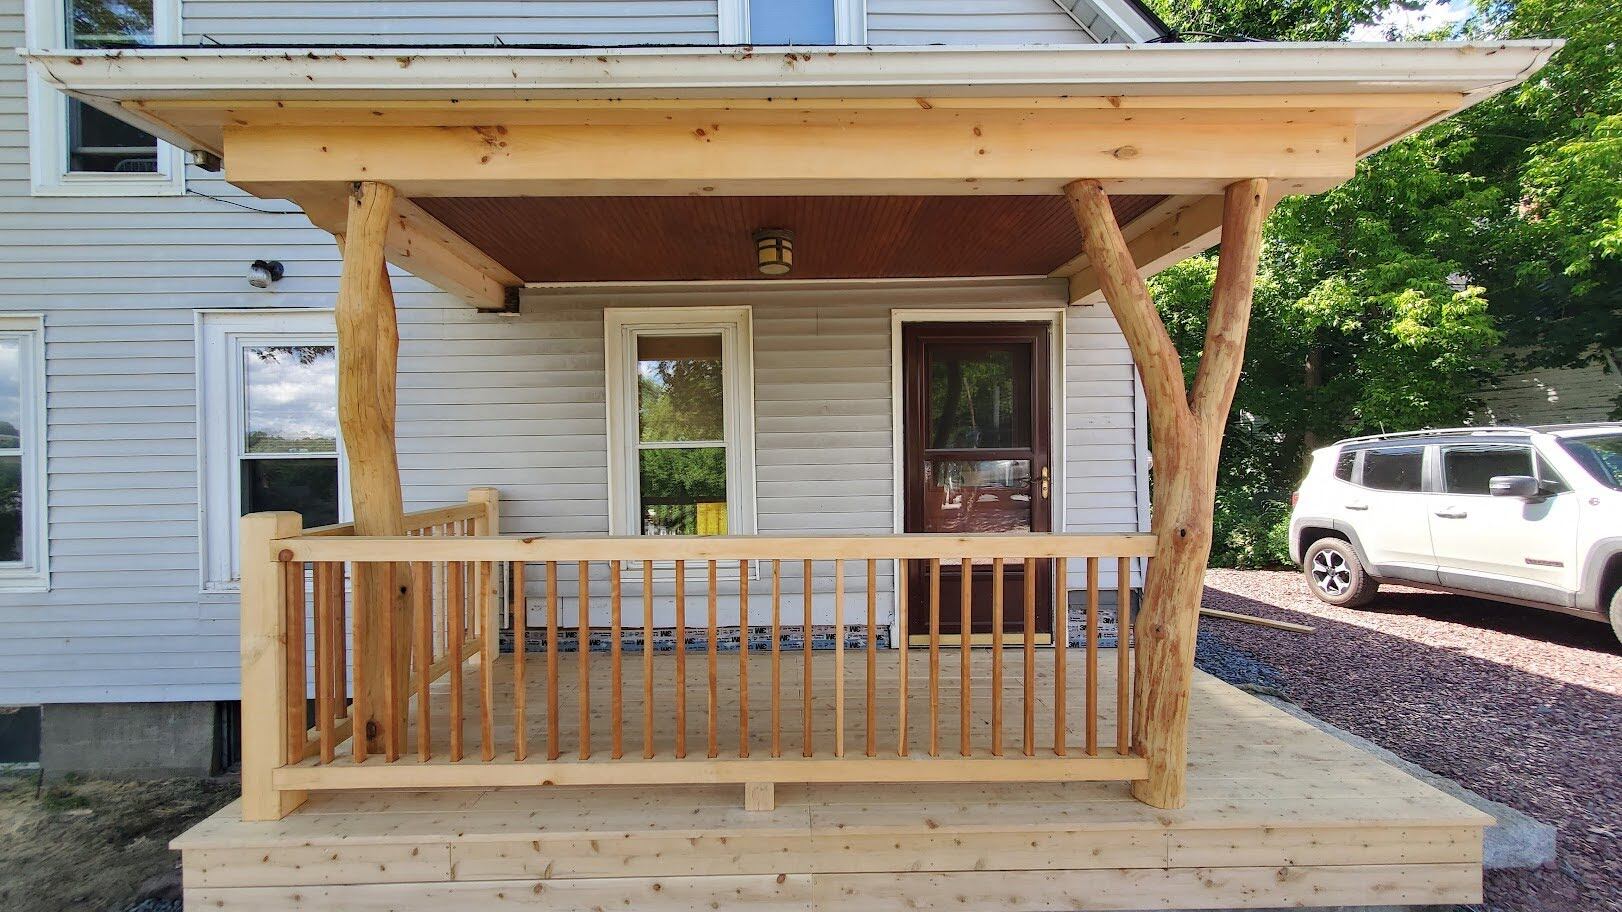
Step 6: Adding Railings and Balusters
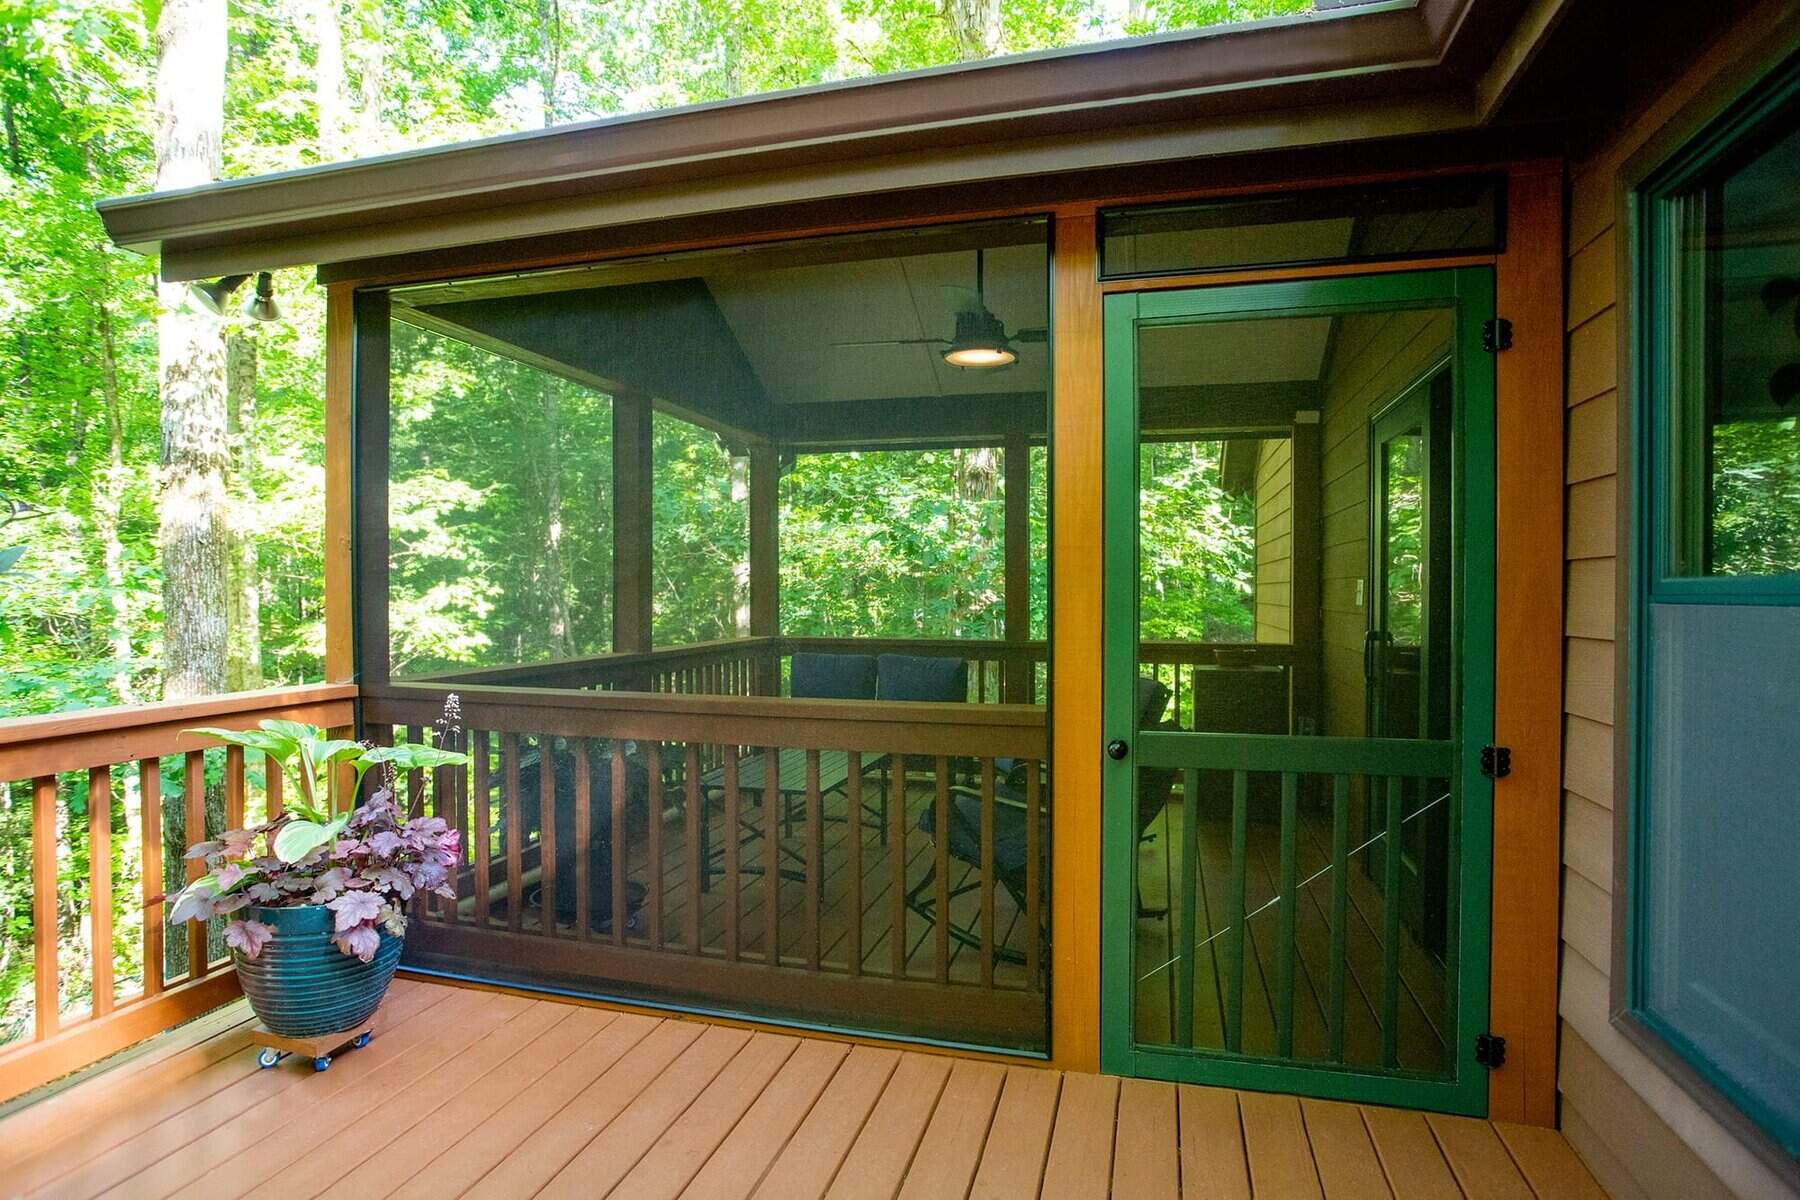
As you near the completion of your deck construction, it’s time to focus on adding the railings and balusters. Railings not only add a touch of style and sophistication to your deck but also provide safety and security, especially if your deck is elevated.
The first consideration when installing railings is to determine the height and style that best suits your deck and local building codes. Check with your local authorities to ensure compliance with safety regulations regarding railing height and spacing between balusters.
When it comes to materials, railings can be made from various options such as wood, metal, or composite materials. Choose a material that complements the overall look and aesthetic of your deck while also considering durability, maintenance, and cost.
To install the railings, start by attaching the railing posts to the deck frame. These posts serve as the main support for the railing system. Use appropriate connectors or brackets to secure the posts to the deck frame, ensuring they are level and plumb. Reinforce the posts with blocking or additional support if needed.
Once the posts are securely in place, it’s time to install the railing balusters. These vertical or horizontal spindles provide safety by preventing people from falling off the deck. The spacing between balusters should comply with local regulations to ensure the safety of your deck.
If you are using wooden balusters, measure the desired spacing between each baluster and mark the positions on the top and bottom rails. Use a drill and appropriate screws or baluster connectors to attach the balusters to the railings. Repeat this process for each section of railing.
If you prefer a more streamlined and modern look, you can opt for cable railings or glass panels. Cable railings consist of stainless steel cables stretched between the railing posts, offering unobstructed views and a sleek aesthetic. Glass panels provide a clear visual barrier without compromising the view.
Remember to install a top rail, which provides a sturdy grip for users and adds to the overall design of the railing system. Attach the top rail using appropriate screws or connectors, ensuring it is level and securely fastened.
Throughout the installation process, periodically check the levelness and plumbness of the railings to ensure a professional and secure finish. Make any necessary adjustments and double-check the spacing between balusters to ensure compliance with local regulations.
Adding railings and balusters completes the visual appeal of your deck while providing safety for you and your guests. Once the railings are in place, it’s time to move on to the final step: applying finishes and sealants to protect and enhance the longevity of your deck.
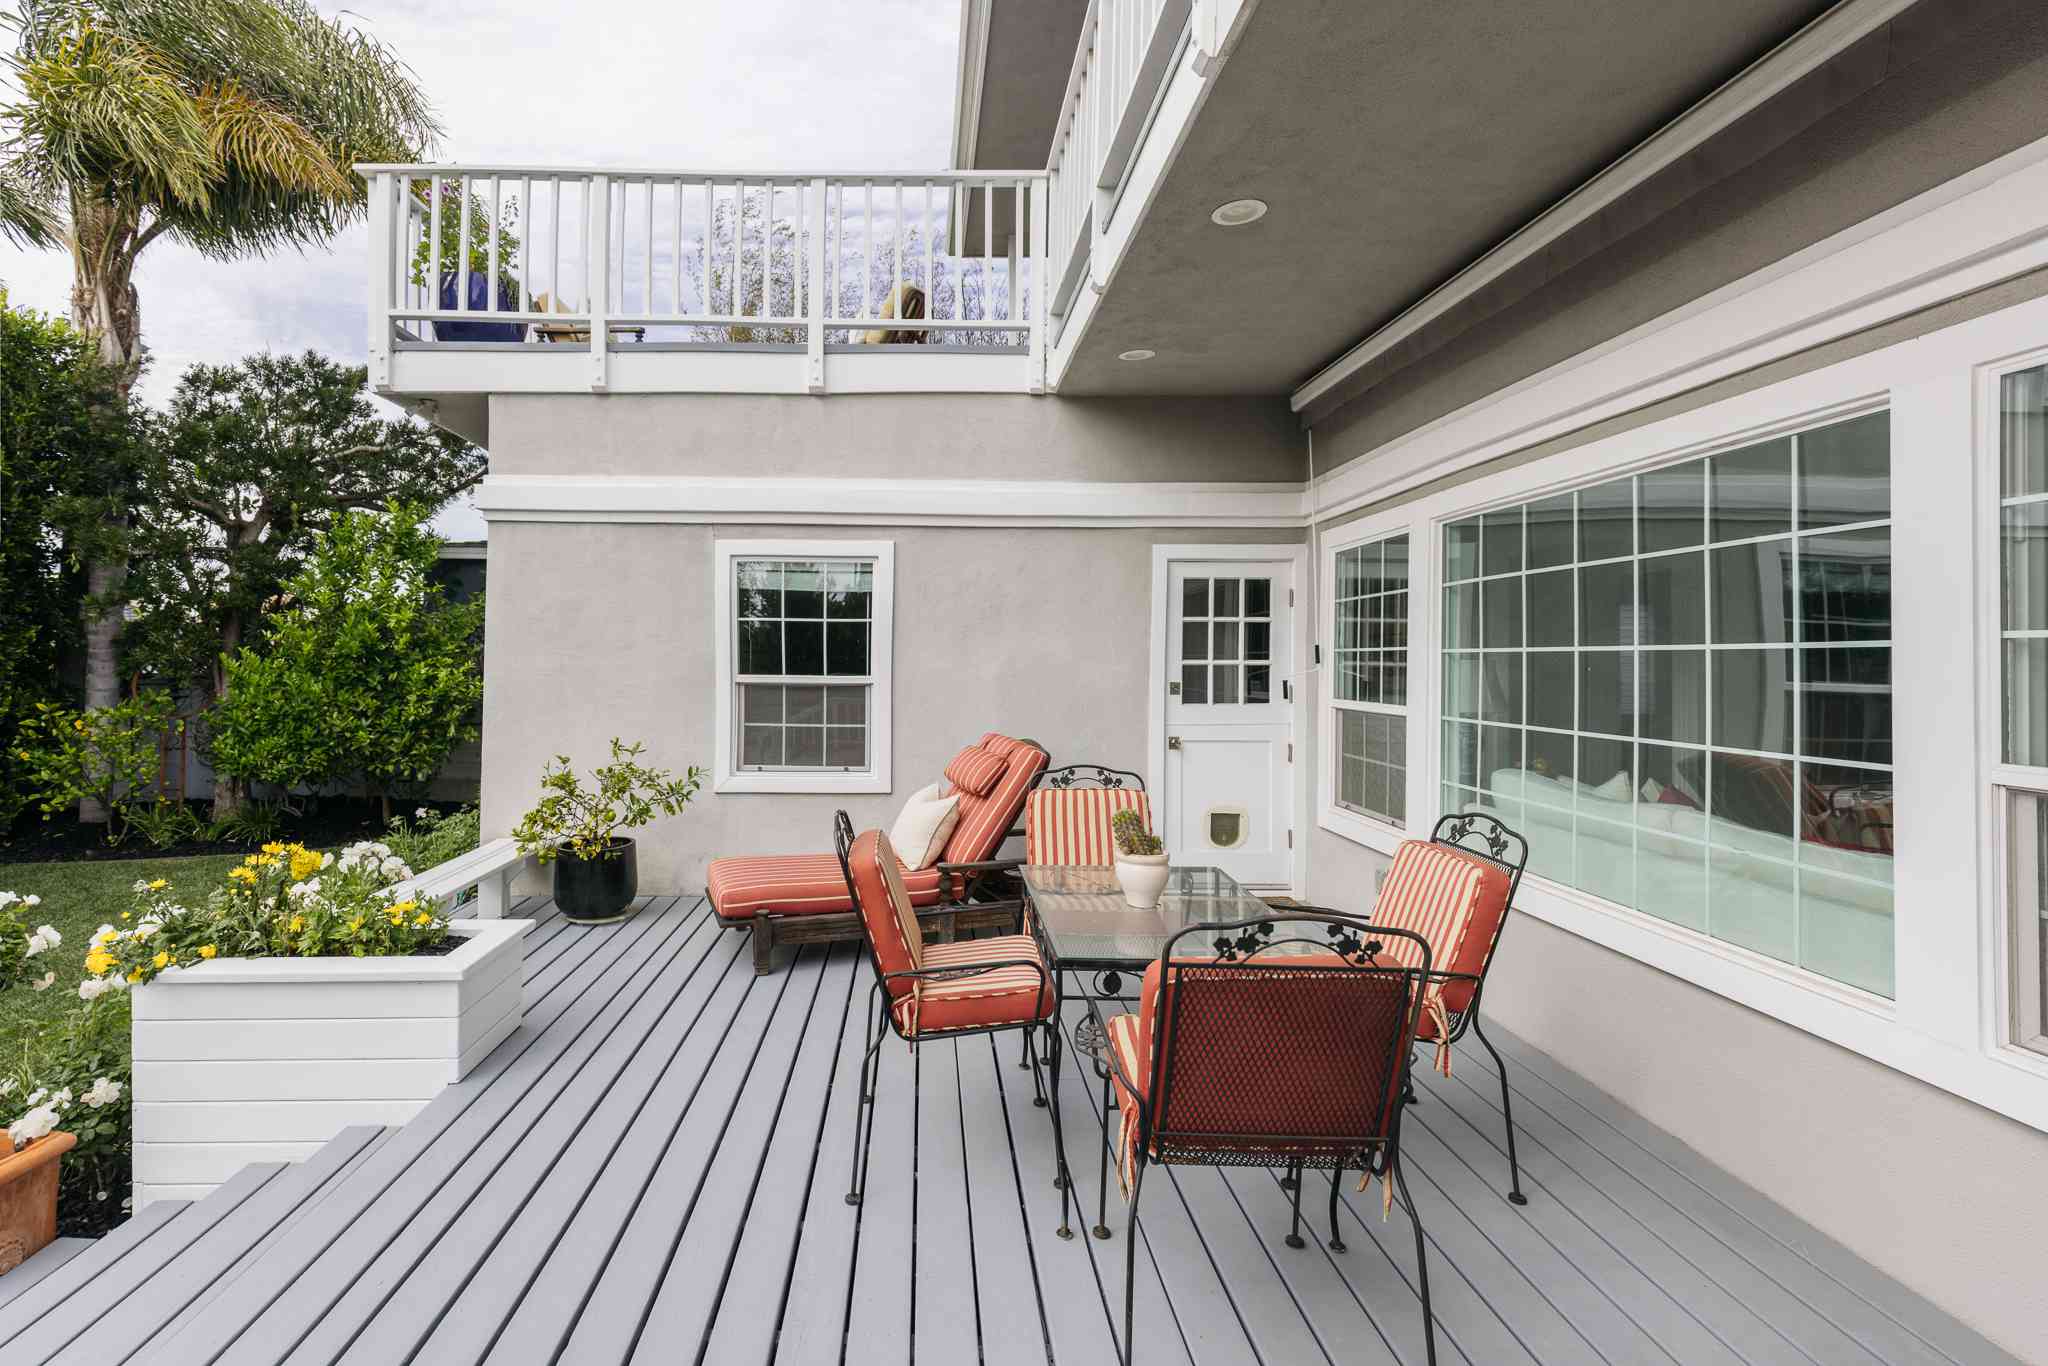
Step 7: Applying Finishes and Sealants
Congratulations! You’re in the final stretch of your deck building project. In this last step, we’ll focus on applying finishes and sealants to protect and enhance the beauty of your deck.
Before proceeding, ensure that the deck surface is clean and free from debris. Sweep away any dust, dirt, or loose materials that may have accumulated during the construction process. If necessary, use a power washer or a deck cleaner to remove stubborn stains or grime.
The first finishing step is to apply a protective stain or paint to the deck boards. Stains are available in different shades and finishes, ranging from transparent to solid colors. Choose a stain that complements the natural beauty of the wood or opt for a paint color that aligns with your overall design aesthetic.
Prior to applying the stain or paint, it’s important to read and follow the manufacturer’s instructions for proper application. Use a brush, roller, or sprayer to evenly coat the deck boards, working in manageable sections. Allow the stain or paint to dry completely before moving on to the next step.
If you have a composite or PVC deck, you can skip the staining or painting step, as these materials are designed to be low maintenance and are already resistant to fading and staining. However, you may still want to clean the surface to remove any dirt or residue and enhance its appearance.
After the stain or paint has dried, it’s time to apply a protective sealant. Sealants help protect the deck from moisture, UV damage, and everyday wear and tear. They provide an extra layer of defense, prolonging the life of your deck.
Choose a high-quality deck sealant that matches the type of deck and finish you have. Apply the sealant with a brush or roller, following the product instructions for proper coverage. Pay special attention to horizontal surfaces, as they are more prone to water damage, and ensure that all exposed edges, joints, and cracks are adequately sealed.
Allow the sealant to fully dry before allowing foot traffic on the deck. Keep in mind that regular maintenance and reapplication of sealant may be necessary to maintain optimal protection for your deck.
Aside from stain, paint, and sealant, you may also consider adding additional finishing touches to enhance your deck’s appeal and functionality. For example, you can incorporate features such as built-in benches, planters, or lighting to personalize and elevate the deck space.
Congratulations on completing all the steps of your deck building project! By diligently following each step, you’ve created a beautiful and functional outdoor space that you and your family can enjoy for years to come. So, grab a chair, relax, and take pride in your accomplishment!
Read more: DIY Guide To Building A Deck
Conclusion
Building a deck is a rewarding and fulfilling project that can transform your outdoor space into a haven for relaxation, entertainment, and enjoyment. Throughout the ABCs of deck building, we have explored the essential steps, from planning and designing to installing the decking boards, adding railings and balusters, and applying finishes and sealants.
Understanding the basics of deck building is crucial, as it sets the foundation for a successful project. By familiarizing yourself with the different types of decks, materials, and tools, you can make informed decisions and create a deck that suits your needs, budget, and style. Building a deck requires careful planning, precise measurements, and attention to detail.
Each step plays a pivotal role in the construction process. From preparing the site and building a solid frame to installing the decking boards and adding railings, every decision and action contributes to the overall strength, stability, and aesthetics of your deck.
Applying finishes and sealants provides the final touch, protecting your deck from the elements and enhancing its beauty. Choosing and applying the right stain, paint, and sealant will ensure that your deck maintains its appeal, durability, and longevity over the years.
Throughout this journey, keep safety at the forefront. Adhere to local building codes, use proper protective gear, and consult professionals when needed. By prioritizing safety, you can enjoy your deck with peace of mind for years to come.
We hope that this comprehensive guide has equipped you with the knowledge and confidence to embark on your own deck building project. Remember to adapt the information to suit your specific needs and consult professionals as necessary. Whether you’re seeking a cozy space to unwind or a sprawling outdoor oasis, building a deck can make your dreams a reality.
Now, it’s time to roll up your sleeves, grab your tools, and start transforming your backyard into a captivating and functional outdoor retreat. Happy deck building!
Frequently Asked Questions about The ABCs Of Deck Building
Was this page helpful?
At Storables.com, we guarantee accurate and reliable information. Our content, validated by Expert Board Contributors, is crafted following stringent Editorial Policies. We're committed to providing you with well-researched, expert-backed insights for all your informational needs.


0 thoughts on “The ABCs Of Deck Building”