Home>Furniture>Outdoor Furniture>How To Build A Deck Patio

Outdoor Furniture
How To Build A Deck Patio
Modified: August 21, 2024
Learn how to build a stunning deck patio and create the perfect outdoor furniture setup. Transform your backyard into a cozy and inviting space for relaxation and entertainment.
(Many of the links in this article redirect to a specific reviewed product. Your purchase of these products through affiliate links helps to generate commission for Storables.com, at no extra cost. Learn more)
Introduction
Building a deck patio is a fantastic way to enhance your outdoor space and create a relaxing retreat right in your own backyard. Whether you want to entertain guests, enjoy family gatherings, or simply relax outdoors on a sunny day, a well-designed deck patio can provide the perfect setting for all your outdoor activities.
Creating a deck patio not only adds value to your home but also extends your living space, allowing you to make the most of your outdoor area. It provides a versatile space where you can set up comfortable seating, dining areas, or even a mini outdoor kitchen. The possibilities are endless when it comes to designing and customizing your deck patio to suit your individual style and needs.
However, before you can start enjoying your dream deck patio, it’s important to plan and design the space carefully, gather the necessary materials, and follow the proper construction steps. In this article, we’ll guide you through the process of building a deck patio, from planning and designing to the final touches.
But first, let’s talk about the importance of careful planning and designing. Planning your deck patio allows you to envision what you want the final result to look like and helps you make informed decisions about its size, shape, and layout. Consider factors such as the available space, the purpose of the deck, and any specific design features you want to incorporate.
Once you have a clear vision in mind, it’s time to prepare the area where your deck patio will be built. This involves clearing the site, removing any vegetation or obstacles, and ensuring the ground is level and stable. Taking the time to prepare the area properly will lay the foundation for a successful deck patio construction process.
Next, you’ll need to gather all the necessary materials and tools required for building the deck patio. This includes everything from the lumber for the frame and decking boards to the hardware, fasteners, and tools like saws, drills, and measuring equipment. Making a comprehensive materials list and ensuring you have everything on hand will save you time and prevent delays during the construction process.
In the following sections, we’ll guide you through each step of the deck patio building process, providing tips and guidance along the way. By following these steps and taking your time to ensure each stage is done correctly, you’ll be well on your way to creating a beautiful and functional deck patio that you can enjoy for years to come.
Key Takeaways:
- Building a deck patio requires careful planning, sturdy construction, and thoughtful finishing touches. From creating a solid foundation to adding furniture and lighting, each step contributes to a beautiful and functional outdoor space.
- Safety, durability, and personal style are key considerations when building a deck patio. By following the construction process and adding unique finishing touches, you can create an inviting and enjoyable outdoor retreat.
Read more: How To Build A Deck Over A Concrete Patio
Planning and Designing Your Deck Patio
Before you start building your deck patio, it’s crucial to take the time to plan and design the space properly. This step is essential as it will help you determine the size, shape, and layout of your deck patio, ensuring it meets your needs and fits seamlessly into your outdoor area.
Start by considering the purpose of your deck patio. Are you looking to create a space for entertaining guests, a cozy relaxation area, or a combination of both? Think about how many people you intend to accommodate and the activities you plan to enjoy on your deck patio. This will help you determine the size and layout of the space.
Take into account the available space in your backyard. Assess the dimensions and shape of the area where you plan to build your deck patio. Consider any existing landscaping features, such as trees or slopes, that may impact the layout and design of your deck.
Once you have a clear idea of the purpose and size of your deck patio, it’s time to decide on its shape and layout. You can choose from a variety of shapes, such as rectangular, square, or even curved, depending on your preferences and available space. Consider how the shape of the deck patio will flow with the rest of your outdoor area and create a harmonious and inviting space.
Think about the placement and access to your deck patio. Consider factors such as privacy, views, and sun exposure. You may want to position your deck patio to take advantage of beautiful views or create a more private and secluded area. Additionally, think about the direction of the sun throughout the day and how it will affect the use of your deck patio. Consider adding shade structures, such as pergolas or umbrellas, to provide relief from direct sunlight.
Consider any additional features or design elements you want to incorporate into your deck patio. This could include built-in seating, planters, or even an outdoor kitchen. These features can enhance the functionality and aesthetics of your deck patio, creating a unique and personalized outdoor space.
Once you have a clear vision of your deck patio design, consider drawing up a detailed plan or creating a digital mock-up using design software. This will help you visualize the final result and make any necessary adjustments before starting construction.
Remember to also check your local building codes and regulations. Depending on the height and size of your deck patio, you may need to obtain permits or adhere to specific construction guidelines. It’s important to ensure that your deck patio meets all safety requirements and building standards.
By carefully planning and designing your deck patio, you’ll lay the foundation for a successful construction process. Taking the time to consider the purpose, size, shape, and layout of your deck patio will result in a functional and aesthetically pleasing outdoor space that you can enjoy for years to come.
Preparing the Area
Before you can begin building your deck patio, it’s essential to properly prepare the area where it will be constructed. This ensures a solid foundation and a smooth construction process.
The first step in preparing the area is to clear the site of any vegetation, debris, or obstructions. Remove any plants, bushes, or trees that may be in the way. It’s important to have a clear and level space to work with, so take the time to clear the area thoroughly.
Once the area is cleared, it’s time to evaluate the ground’s condition. Check for any unevenness, slopes, or soft spots. It’s crucial to have a level and stable surface for your deck patio. If the ground is not level, you may need to make adjustments by adding or removing soil. Use a shovel, rake, or a compactor to level the ground as necessary.
If your deck patio will be built on grass or soil, it’s recommended to add a layer of landscape fabric or weed barrier to prevent weed growth. This will help keep your deck patio area clean and low-maintenance in the long run.
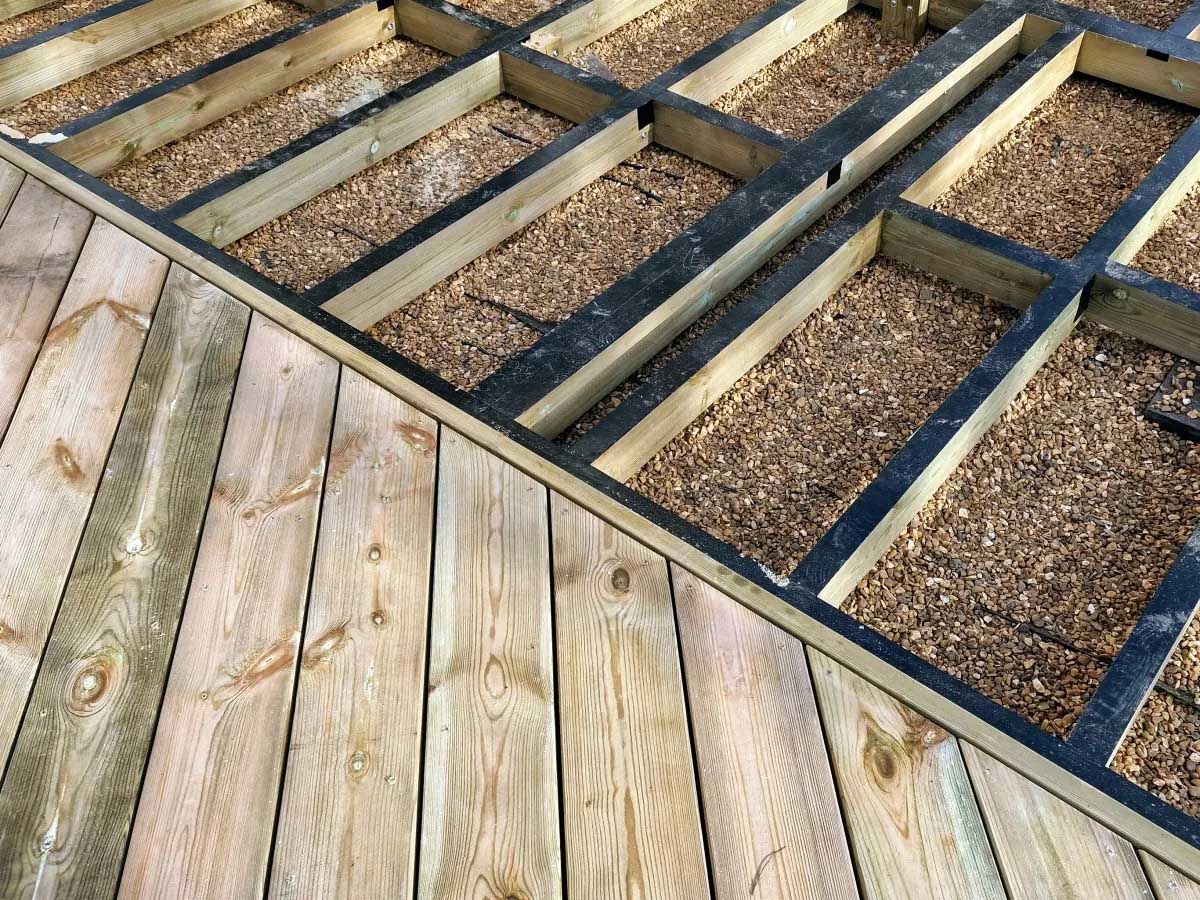
For added stability and to prevent the growth of weeds or grass under your deck patio, consider installing a layer of gravel or crushed stone. This material allows for proper drainage and helps create a solid base for your deck patio.
Before proceeding with the construction, it’s also crucial to check for any underground utilities or cables that may be present in the area. Contact your local utility companies to have the area marked to avoid any accidents or damage during the construction process.
Keep in mind that the preparation and clearing process may take some time and effort, but it’s a critical step in ensuring the long-term durability and stability of your deck patio. Take the time to prepare the area properly, as it will provide a solid foundation for the rest of the construction process.
By properly preparing the area for your deck patio, you’ll have a level and stable surface ready for the next steps in the construction process. Taking the time to clear the area, level the ground, and address any potential issues will save you time and frustration down the line, resulting in a successful and long-lasting deck patio.
Gathering Materials and Tools
Before you can start building your deck patio, it’s essential to gather all the necessary materials and tools. Having everything you need on-hand will make the construction process smoother and more efficient.
The materials required for building a deck patio will vary depending on the design, size, and specific features you plan to incorporate. Here are some common materials you may need:
- Pressure-treated lumber for the frame: This includes posts, beams, and joists that will form the structure of your deck patio. Pressure-treated lumber is durable and resistant to moisture, making it ideal for outdoor use.
- Decking boards: These are the surface of your deck patio, and they come in a variety of materials, including wood, composite, or PVC. Choose a material that suits your style, budget, and maintenance preferences.
- Hardware and fasteners: This includes nails, screws, and brackets for securing the frame and decking boards.
- Concrete footings or deck blocks: These provide support and stability for the deck patio’s foundation.
- Concrete mix: If you’re using concrete footings, you’ll need a bag or two of concrete mix for pouring the footings.
- Gravel or crushed stone: This is used as a base for the deck patio to promote proper drainage and stability.
- Landscape fabric or weed barrier: This is optional but recommended to help prevent weed growth under the deck patio.
In addition to the materials, you’ll need a variety of tools to build your deck patio. Here are some common tools you may need:
- Tape measure and level: These are essential for measuring and ensuring your deck patio is level and properly aligned.
- Miter saw or circular saw: These tools are used for cutting the lumber to the required lengths.
- Drill: You’ll need a power drill for drilling pilot holes and driving screws.
- Hammer: This is useful for hammering nails or adjusting small adjustments.
- Shovel and rake: These tools are used for clearing the ground, leveling the area, and moving materials.
- Safety gear: Don’t forget to have safety glasses, gloves, and ear protection to ensure your safety during the construction process.
It’s crucial to gather all the necessary materials and tools before starting the construction process. This way, you’ll have everything on hand and won’t have to pause the work to make additional trips to the store.
Make a comprehensive list of all the materials and tools you’ll need for your specific deck patio project. Double-check your list against the instructions or plans you have to ensure you haven’t missed anything. If you’re not familiar with construction or DIY projects, consider consulting with a professional or experienced builder to help guide you in gathering the right materials and tools.
By gathering all the necessary materials and tools in advance, you’ll be prepared to start building your deck patio without any unnecessary delays or interruptions. This will help ensure a smooth and efficient construction process, bringing you closer to enjoying your dream outdoor space.
Building the Foundation
Building a solid foundation is a crucial step in constructing your deck patio. The foundation provides stability and support for the entire structure, ensuring its longevity and safety.
There are two common options for the foundation of a deck patio: concrete footings or deck blocks. The choice will depend on your local building codes and personal preference. Both methods require careful planning and execution.
If you choose to use concrete footings, you’ll need to dig holes at the designated support locations. The depth and width of the holes will depend on local building codes and the size of your deck patio. Typically, the holes should be at least 12 inches in diameter and extend below the frost line to prevent shifting during freeze-thaw cycles.
Once the holes are dug, you’ll need to pour a few inches of gravel or crushed stone into the bottom for proper drainage. Then, place a cardboard tube or a pre-formed footing form into each hole to serve as a mold for the concrete. Use a level to ensure the tubes are plumb and aligned correctly.
Mix the concrete according to the manufacturer’s instructions and pour it into the footing forms, filling them to the top. Use a screed board or a trowel to smooth and level the surface. Allow the concrete to cure for the recommended time before proceeding with the construction process.
If you prefer to use deck blocks, you’ll need to prepare the area by clearing it of any vegetation or debris. Place the deck blocks at each designated support location, making sure they are level and properly aligned.
On top of each deck block, place pressure-treated beams or support posts to create the frame structure for your deck patio. Use a level to ensure the beams are level and adjust as needed. Secure the beams to the deck blocks using appropriate fasteners, such as screws or brackets.
Regardless of the foundation method you choose, it’s crucial to ensure proper spacing between the support posts or beams. Consult your local building codes and the manufacturer’s guidelines to determine the appropriate spacing for your specific deck patio design.
Building a solid and level foundation is essential to the overall stability and longevity of your deck patio. Take the time to plan and execute the foundation construction correctly, following all necessary guidelines and regulations.
Remember to prioritize safety during the construction process. Use proper safety equipment, such as gloves and safety glasses, when working with tools and materials. If you’re unsure about any aspect of building the foundation, consider consulting with a professional builder or contractor to ensure the proper execution and adherence to local building codes.
By building a strong and stable foundation, you’ll create a solid base for the remainder of the deck patio construction. This will provide you with the confidence and peace of mind that your deck patio is built to last, allowing you to enjoy countless years of outdoor relaxation and entertainment.
Read more: How To Build A Decking
Installing Support Posts
Support posts play a vital role in providing stability and structural integrity to your deck patio. These posts serve as the vertical support for the beams and joists that form the frame of your deck.
The first step in installing support posts is determining their precise locations. The spacing of the posts will depend on the size and design of your deck patio, as well as local building codes. Generally, support posts are placed at regular intervals, typically every 6 to 8 feet.
Once you have determined the post locations, mark them on the foundation or beams. Use a measuring tape and pencil to ensure accuracy. Double-check the measurements before proceeding to avoid any mistakes.
To install the support posts, you have a few options: bolting them directly to the deck patio’s foundation, securing them to the beams, or using post anchors. The method you choose may depend on your specific deck patio design, local building codes, and personal preference.
If you’re bolting the support posts directly to the foundation, you’ll need to pre-drill holes in the footing or deck block. Ensure that the holes align with the marked post locations. Place the post in position and use a level to ensure it is plumb and straight. Then, secure the post to the foundation using appropriate bolts and fasteners.
If you prefer to secure the support posts to the beams, you’ll need to cut notches in the beams to create a slot for the posts. The depth and width of the notches should match the dimensions of the support posts. Use a saw or a chisel to carefully create the notches, ensuring a snug fit for the posts.
Place the support posts into the notches of the beams, making sure they are level and securely positioned. Double-check the alignment and adjust if necessary. Once the posts are in the correct position, secure them to the beams using appropriate fasteners, such as screws or brackets.
If you choose to use post anchors, follow the manufacturer’s instructions for installation. Typically, this involves attaching the anchor to the foundation, inserting the post into the anchor, and securing it in place using screws or nails. Ensure that the anchor is level and properly aligned before attaching the post.
Throughout the installation process, it’s crucial to check the level of each support post to ensure they are plumb and straight. Adjustments may be necessary to achieve the desired levelness. An uneven or misaligned support post can compromise the integrity of the deck patio structure.
Remember, safety is paramount when working with support posts. Use proper safety equipment, such as gloves and safety glasses, and follow all necessary precautions. If you’re uncertain about any aspect of installing the support posts, consider consulting with a professional builder or contractor for guidance.
By properly installing the support posts, you’ll ensure the stability and strength of your deck patio’s structure. The support posts are the backbone of your deck, so take the time and care to install them correctly. With solid support posts in place, you’ll be one step closer to enjoying your beautiful and functional deck patio.
Attaching the Ledger Board
The ledger board is a crucial component of your deck patio as it provides support and stability by connecting the deck to the exterior of your house. Attaching the ledger board properly is essential to ensure the safety and longevity of your deck patio.
Before you begin attaching the ledger board, it’s important to ensure that the area where the ledger board will be installed is clean and free of any obstructions. Remove any siding, trim, or other obstacles that may interfere with the attachment process.
Start by positioning the ledger board against the exterior wall of your house, ensuring it is level and aligned with the layout of your deck patio. Use a level to confirm that the board is straight both vertically and horizontally. Make any necessary adjustments to achieve proper alignment.
Mark the locations for the bolt holes on the ledger board. The spacing and number of bolt holes will depend on the length and width of your deck patio, as well as local building codes. Typically, it is recommended to place a bolt hole every 16-24 inches along the ledger board.
Once the bolt hole locations are marked, use a drill with a suitable drill bit to create the holes in the ledger board. Ensure that the holes are slightly larger than the diameter of the bolts you will be using. This allows for some movement as the wood may expand or contract over time.
Now, it’s time to attach the ledger board to the exterior wall. Temporarily secure the ledger board in place with clamps or braces to prevent it from moving during the installation process.
Insert the appropriate bolts through the pre-drilled holes in the ledger board and into the wall studs of your house. Tighten the bolts securely using a wrench or socket set. Be sure not to overtighten, as this can damage the ledger board or the wall structure.
It’s essential to ensure that the ledger board is attached to solid framing members, such as wall studs or blocking, for optimal strength and support. If the existing wall structure does not provide adequate support, it may be necessary to add additional framing or blocking to ensure a secure attachment.
During the attachment process, it’s important to use pressure-treated or corrosion-resistant bolts and hardware to prevent rusting or deterioration over time. This ensures the long-term stability and safety of your deck patio.
Once the ledger board is securely attached, double-check its alignment and levelness. Use a level to confirm that the board is still straight both vertically and horizontally. Make any necessary adjustments before proceeding to the next steps of building your deck patio.
Remember to prioritize safety during the installation process. Use proper safety equipment, such as gloves and safety glasses, and follow all necessary precautions. If you’re uncertain about any aspect of attaching the ledger board, consider consulting with a professional builder or contractor to ensure the proper installation and adherence to local building codes.
By attaching the ledger board correctly, you’ll ensure a strong and stable connection between your deck patio and the exterior wall of your house. The ledger board forms a crucial link in the structural integrity of your deck, allowing you to enjoy a safe and durable outdoor space for years to come.
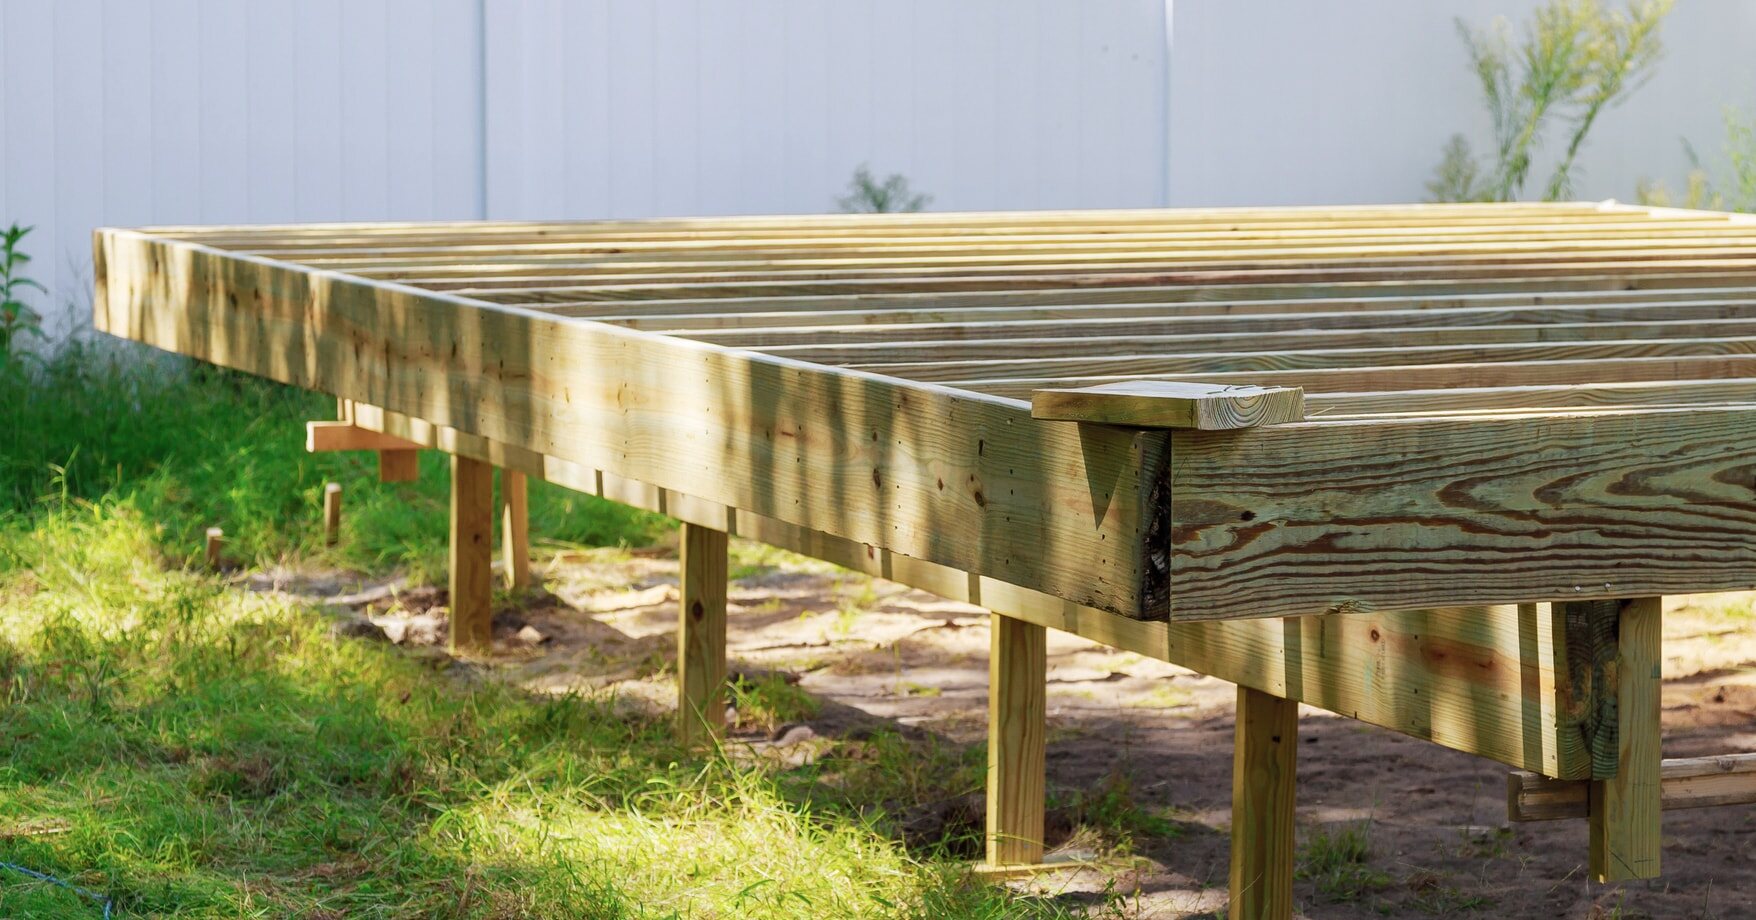
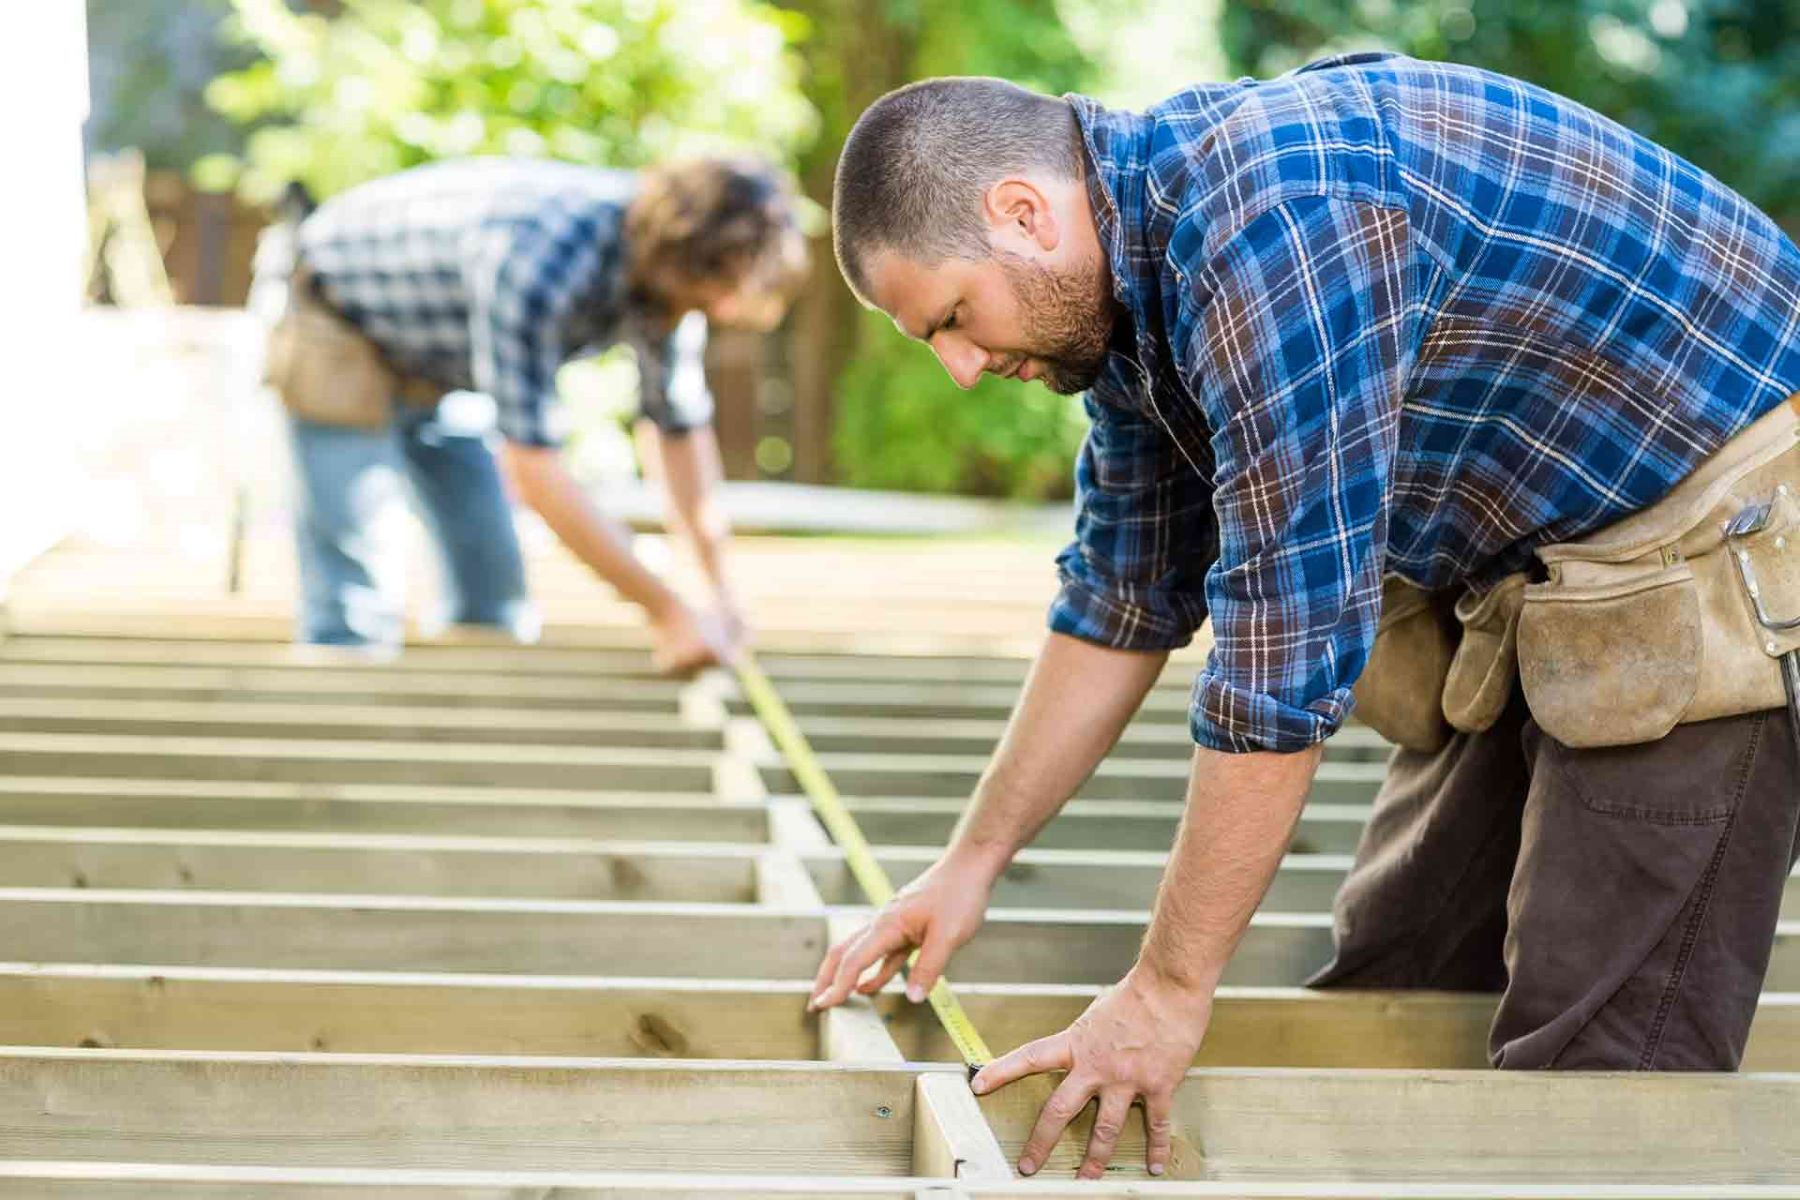
Constructing the Frame
The frame of your deck patio serves as the skeleton that provides structural support for the entire deck. Constructing a sturdy and well-built frame is crucial for the longevity and safety of your deck patio. Follow these steps to effectively construct the frame:
Step 1: Lay out the perimeter: Measure and mark the perimeter of your deck patio on the ground, using stakes and string to create a visual guide. Ensure that the layout is square and aligned with the desired dimensions of your deck.
Step 2: Install the outer beams: Starting at one corner of the perimeter, position the first beam parallel to the house, flush with the ledger board. Use a level to ensure that it is level and adjust as needed. Secure the beam with appropriate fasteners, such as screws or brackets. Repeat this process for the remaining outer beams, securing them at the corners and evenly spaced along the perimeter.
Step 3: Insert the intermediate beams: Once the outer beams are in place, measure and mark the locations for the intermediate beams. These beams will run perpendicular to the outer beams and provide additional support for the deck patio. Secure the intermediate beams using appropriate fasteners, ensuring they are level and evenly spaced.
Step 4: Add the joists: Joists are horizontal support members that connect the beams and provide the surface for attaching the decking boards. Starting at one end, position the first joist on top of the beams and secure it with joist hangers or appropriate hardware. Use a level to ensure that the joist is level and adjust as needed. Repeat this process for the remaining joists, spacing them according to your deck patio design and local building codes.
Step 5: Cut and install blocking: Blocking is small pieces of lumber placed between the joists to provide additional support and prevent them from twisting or warping. Measure, cut, and install blocking between the joists at regular intervals, using appropriate fasteners.
Step 6: Check for levelness and squareness: Once the frame is constructed, use a level and a tape measure to check for levelness and squareness. Ensure that all beams, joists, and blocking are level and properly aligned. Make any necessary adjustments to ensure a square and level frame.
Step 7: Install additional supports and bracing: Depending on the size and design of your deck, you may need to install additional supports, such as post anchors or bracing, to reinforce the frame and provide extra stability. Consult your local building codes and guidelines for specific requirements and recommendations.
Throughout the frame construction process, prioritize safety by using appropriate safety equipment and following all necessary precautions. Ensure that all connections and fasteners are secure and that the frame is built to withstand the intended load and use.
If you are unsure about any aspect of constructing the frame, consider consulting with a professional builder or contractor for guidance and expertise. They can provide valuable insights and ensure that your deck patio frame is built to code and meets all safety requirements.
By constructing a sturdy and well-built frame, you’ll establish a strong foundation for your deck patio. This will ensure the structural integrity and longevity of your deck, allowing you to enjoy a safe and durable outdoor space for years to come.
Adding Joists and Beams
Once the frame of your deck patio is constructed, the next step is to add the joists and beams. These components provide structural support and create the framework for attaching the decking boards. Here’s how to efficiently add joists and beams to your deck patio:
Step 1: Placement of the Beams: Position the beams parallel to each other, perpendicular to the outer beams of the frame. Place them on top of the support posts or beams, depending on your deck patio design. Ensure they are properly aligned and level. Use a level to confirm the levelness, and make any necessary adjustments.
Step 2: Secure the Beams: Secure the beams in place using appropriate fasteners, such as screws or brackets. Ensure that the beams are securely attached to the support posts or beams. Double-check the levelness of the beams and adjust if needed.
Step 3: Measure and Cut the Joists: Measure the distance between the outer rim joists or ledger board and the beams. Cut the joists to the exact length required for your deck patio. Use a saw or a miter saw to make precise cuts. It’s recommended to cut all the joists to the same length for consistency.
Step 4: Install the Joists: Position the joists perpendicular to and on top of the beams. Space the joists according to your deck patio design and local building codes. Secure them to the beams using appropriate joist hangers or hardware. Ensure that each joist is level and adjusted as required. Repeat this process until all the joists are installed.
Step 5: Check for Levelness and Alignment: Use a level to check the levelness of the joists across the entire deck patio. Make any necessary adjustments to ensure that all the joists are level. Check for alignment as well, ensuring that the joists are straight and evenly spaced.
Step 6: Add Blocking or Bridging: For additional support and stability, consider installing blocking or bridging between the joists. This will prevent them from twisting or warping over time. Measure, cut, and install the blocking or bridging according to your deck design and spacing requirements.
Step 7: Double Check Stability: Before moving on to the next steps, double-check the overall stability and integrity of the joists and beams. Ensure that all connections are secure and that the joists are properly supported by the beams and frame structure.
Throughout the process of adding joists and beams, prioritize safety by using appropriate safety equipment and taking necessary precautions. Confirm that all connections and fasteners are secure, and ensure that the joists and beams are strong enough to support the intended load and use of your deck patio.
If you are unsure about any aspect of adding joists and beams, consulting with a professional builder or contractor can provide invaluable guidance and expertise. They can ensure that your deck patio meets all safety requirements and is constructed to code.
By properly adding joists and beams, you’ll create a sturdy and reliable framework for your deck patio. This will support the weight of the decking boards and provide a solid foundation for years of enjoyment in your outdoor space.
Read more: How To Build A Deck With Composite Decking
Choosing Decking Materials
Choosing the right decking materials is crucial for the aesthetics, durability, and maintenance of your deck patio. With a wide range of options available, it’s important to consider factors such as the desired look, budget, maintenance requirements, and environmental sustainability. Here are some popular decking materials to consider:
1. Wood:
Wood is a classic and natural choice for decking. Options such as pressure-treated lumber, cedar, and redwood are popular due to their durability and affordability. Wood decking provides a warm and traditional look, and it can be stained or painted to match your desired aesthetic. However, wood requires regular maintenance, including sealing and staining, to protect it from moisture, UV rays, and rot.
2. Composite Decking:
Composite decking is a blend of wood fibers and recycled plastic. It offers the look of natural wood without the high maintenance. Composite decking is resistant to rot, fading, and insects, and doesn’t require frequent sealing or staining. It is available in a variety of colors and finishes, allowing you to customize the look of your deck patio. However, composite decking tends to be more expensive upfront.
3. PVC Decking:
PVC decking is made of 100% synthetic materials, offering exceptional durability and low maintenance. It is resistant to moisture, rot, stains, and scratches. PVC decking is also available in a variety of colors and styles and offers excellent fade resistance. While it can be more expensive than wood or composite decking, it provides longevity and requires minimal maintenance.
Read more: How Much For A Deck And Patio
4. Tropical Hardwood:
Tropical hardwood, such as ipe or mahogany, offers a luxurious and exotic look for your deck patio. These woods are exceptionally durable and resistant to rot, insects, and extreme weather conditions. Tropical hardwoods require regular maintenance, including sealing and staining, to preserve their appearance. They tend to be more expensive than other decking materials, but they offer unmatched durability and elegance.
5. Aluminum Decking:
Aluminum decking is known for its durability, strength, and low maintenance. It is lightweight, fire-resistant, and resistant to fading, staining, and mold. Aluminum decking can be powder-coated in various colors and is often used for contemporary or modern deck designs. However, it tends to be the most expensive option among decking materials.
When choosing decking materials, consider your budget, lifestyle, and the look you want to achieve. Take into account factors such as durability, maintenance requirements, and environmental impact. It’s also helpful to consult with professionals or visit showrooms to see and feel the different decking options in person.
Regardless of the decking materials you choose, remember to follow the manufacturer’s guidelines for installation and maintenance. Regular cleaning and periodic inspections will help maximize the lifespan of your deck patio and ensure its continued beauty and functionality.
By selecting the right decking materials, you’ll create a deck patio that perfectly suits your style, budget, and maintenance preferences. Whether you prefer the natural look of wood or the low-maintenance benefits of composite or PVC, choosing the right materials is essential for an enjoyable and long-lasting outdoor space.
Installing Decking Boards
Installing the decking boards is the final step in building your deck patio, and it’s an exciting moment as you see your vision come to life. Proper installation of the decking boards is crucial for both the aesthetics and the structural integrity of your deck. Here are the steps to effectively install the decking boards:
Step 1: Prepare the Decking Boards: Before installation, allow the decking boards to acclimate to the surrounding environment. Place them near the installation site for a few days to adjust to the moisture and temperature conditions. This helps minimize expansion or contraction after installation.
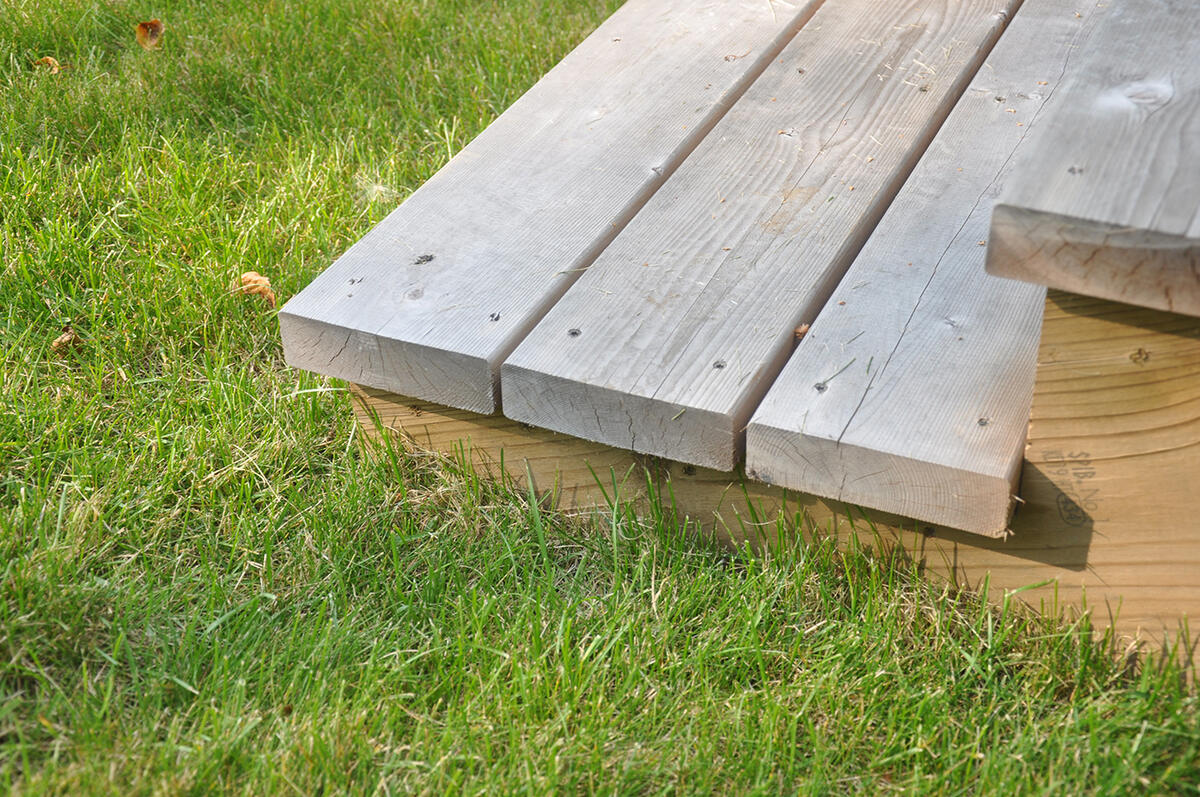
Step 2: Start at One End: Begin installation at one end of the deck patio, working your way across. Start with the first row of boards parallel to the outer edge or the house, depending on your design. Leave a small gap (around 1/4 inch) between each board to allow for natural expansion and contraction due to weather changes.
Step 3: Secure the Boards: Attach each decking board to the joists using appropriate fasteners. Common options include deck screws or hidden deck fasteners for a clean and seamless appearance. Follow the manufacturer’s instructions for fastener spacing and installation techniques.
Step 4: Check for Level and Alignment: As you install each board, use a level to ensure it is level both horizontally and vertically. Adjust as needed to maintain a consistent and even surface. Check for alignment with a straight-edged board to ensure straight lines across the deck patio.
Step 5: Stagger the Boards: Stagger the end joints of adjacent boards for added strength and visual appeal. This helps distribute weight evenly and prevents a single point of weakness. Aim for a random pattern rather than a repetitive layout.
Step 6: Trim and Shape: Depending on your deck patio design, you may need to trim or shape some boards to fit around obstacles, edges, or curved areas. Measure and mark the areas to be cut, and use a saw or a router to make precise cuts. Take care to maintain consistent spacing and aesthetic continuity.
Step 7: Finishing Touches: Once all the decking boards are installed, add any finishing touches you desire. This could include adding fascia boards around the edges for a polished look or installing trim boards to cover exposed ends. Sand any rough edges or splintered areas and clean the deck patio thoroughly.
Throughout the installation process, prioritize safety by using appropriate safety equipment and taking necessary precautions. Take care to evenly distribute weight on the deck as you work. If you have any concerns during the installation, consult a professional builder or contractor for guidance and expertise.
Properly installing the decking boards will result in a beautiful and functional deck patio. It’s important to follow the manufacturer’s guidelines and local building codes to ensure a sturdy and long-lasting deck that you can enjoy for years to come.
Remember to regularly inspect your deck patio and perform routine maintenance, such as cleaning and sealing, to protect the decking boards and maintain their appearance. With proper care, your deck patio will continue to be a welcoming and enjoyable outdoor space for relaxation and entertainment.
Building Stairs and Railings
Building stairs and railings for your deck patio is a crucial step in ensuring safety and providing easy access to and from your outdoor space. Stairs and railings not only add functionality but also enhance the overall aesthetics of your deck. Here’s how to effectively build stairs and railings:
Step 1: Determine the Stair Design: Decide on the style and design of your stairs, taking into account factors such as the height of the deck, local building codes, and personal preferences. Common options include straight stairs, L-shaped stairs, or switchback stairs.
Step 2: Measure and Calculate: Measure the height from the bottom of the deck patio to the ground to determine the number of steps needed. Divide the total height by the desired riser height (typically between 6 and 8 inches) to calculate the number of risers. Determine the tread depth (typically around 10 inches) and multiply it by the number of risers to find the total run or length of the stairs.
Step 3: Build the Stair Stringers: The stair stringers are the diagonal pieces that support the weight of the stairs. Calculate and mark the position of the stringers on the deck patio frame or ledger board. Use a framing square to outline the stringer cuts and a circular saw to make the necessary cuts. Ensure that the stringers are properly aligned and secured to the frame or ledger board.
Step 4: Install the Stair Treads and Risers: Attach the stair treads, which are the horizontal steps, to the stringers using suitable fasteners. Ensure that each tread is securely attached and evenly spaced. Attach the risers, which are the vertical pieces between the treads, to the back of each tread. This creates a solid and safe stair structure.
Step 5: Measure and Position Railings: Measure the desired height for the railings, keeping in mind local building codes and safety regulations. Mark the positions for the railing posts along the edge of the deck patio and at the top and bottom of the stairs. Ensure that the post spacing meets local requirements and provides adequate support.
Step 6: Secure the Railing Posts: Attach the railing posts to the deck patio frame or ledger board using appropriate fasteners. Ensure that the posts are plumb and securely anchored. Consider using post anchors or brackets for additional stability.
Step 7: Install the Railing Balusters and Handrail: Attach the balusters, which are the vertical spindles or pickets, to the railing posts at the desired spacing. Secure them using screws or appropriate fasteners. Install the handrail on top of the balusters, ensuring that it is sturdy and level. Consider adding a bottom rail for added safety, especially for taller decks.
Step 8: Finishing Touches: Sand any rough edges and apply appropriate finishes or sealants to the stairs and railings for protection and longevity. Consider adding decorative caps or post tops for a finished look.
Throughout the construction of stairs and railings, prioritize safety by adhering to local building codes and ensuring all connections are secure. If you have any concerns or are unsure about any aspect of building the stairs and railings, consult a professional builder or contractor for guidance and expertise.
By effectively building stairs and railings, you’ll ensure easy access and enhance the safety of your deck patio. The stairs and railings serve as important features, providing a secure and visually appealing transition between your outdoor space and the surrounding area.
Read more: How To Build Patio
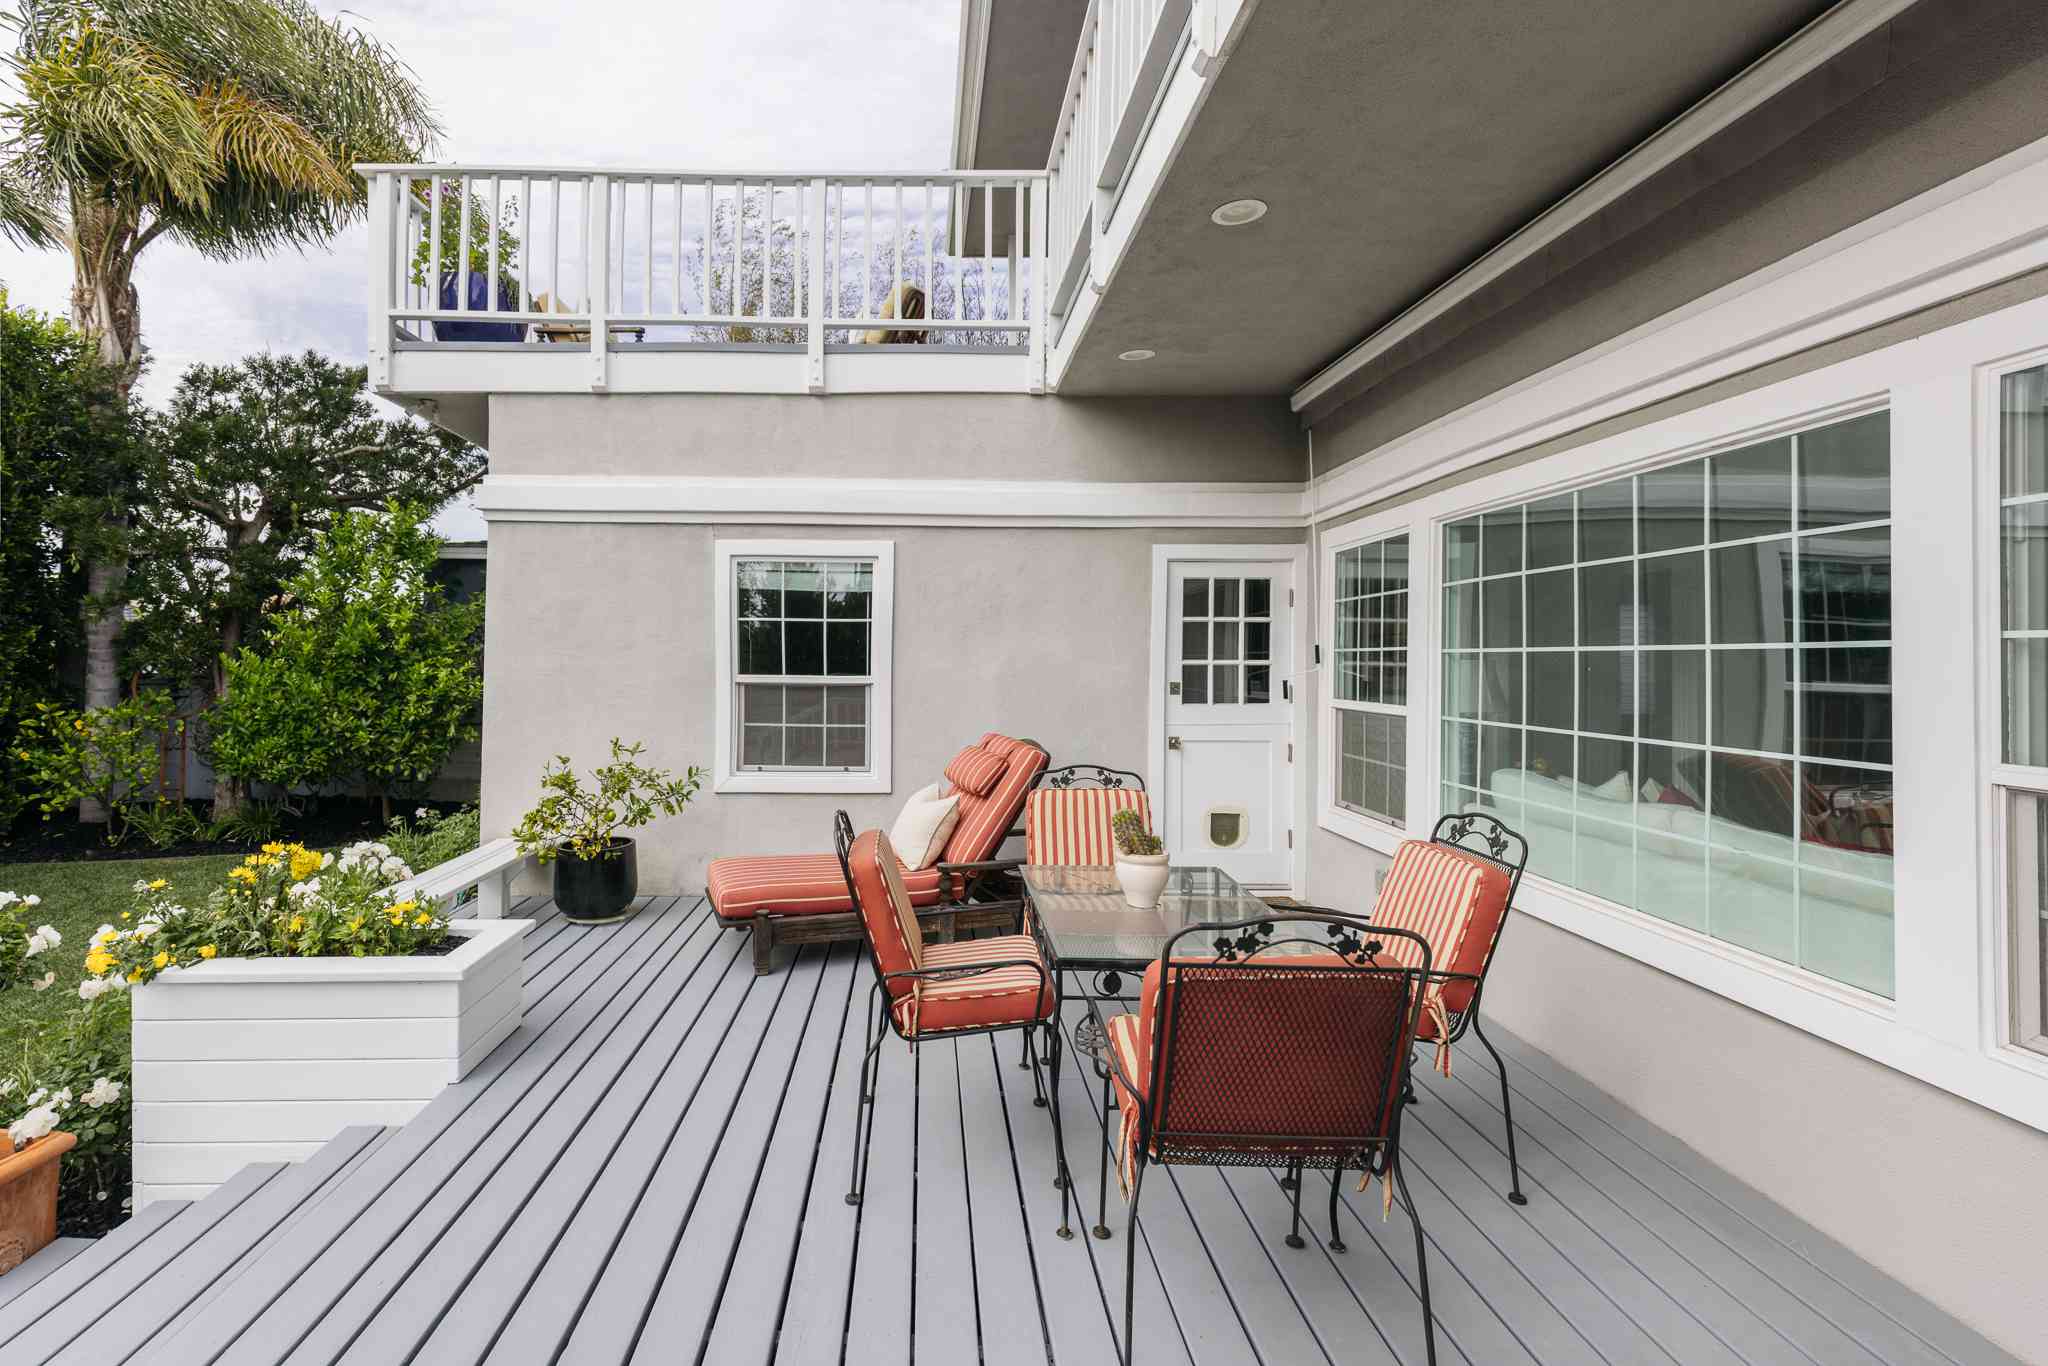
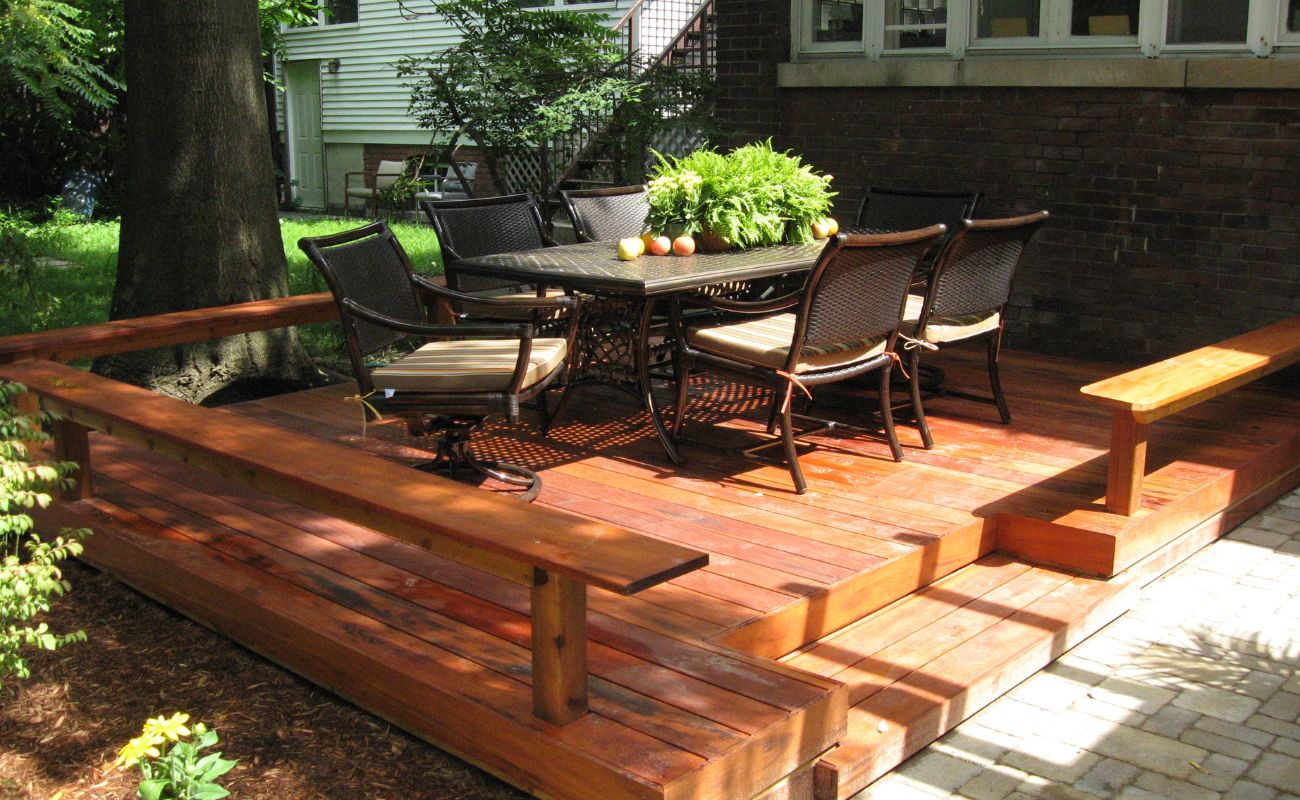
Adding Finishing Touches
Adding finishing touches to your deck patio is an exciting step that allows you to personalize and enhance the overall look and functionality of your outdoor space. These finishing touches can elevate the ambiance, add comfort, and create a welcoming atmosphere. Here are some ideas for adding those final details:
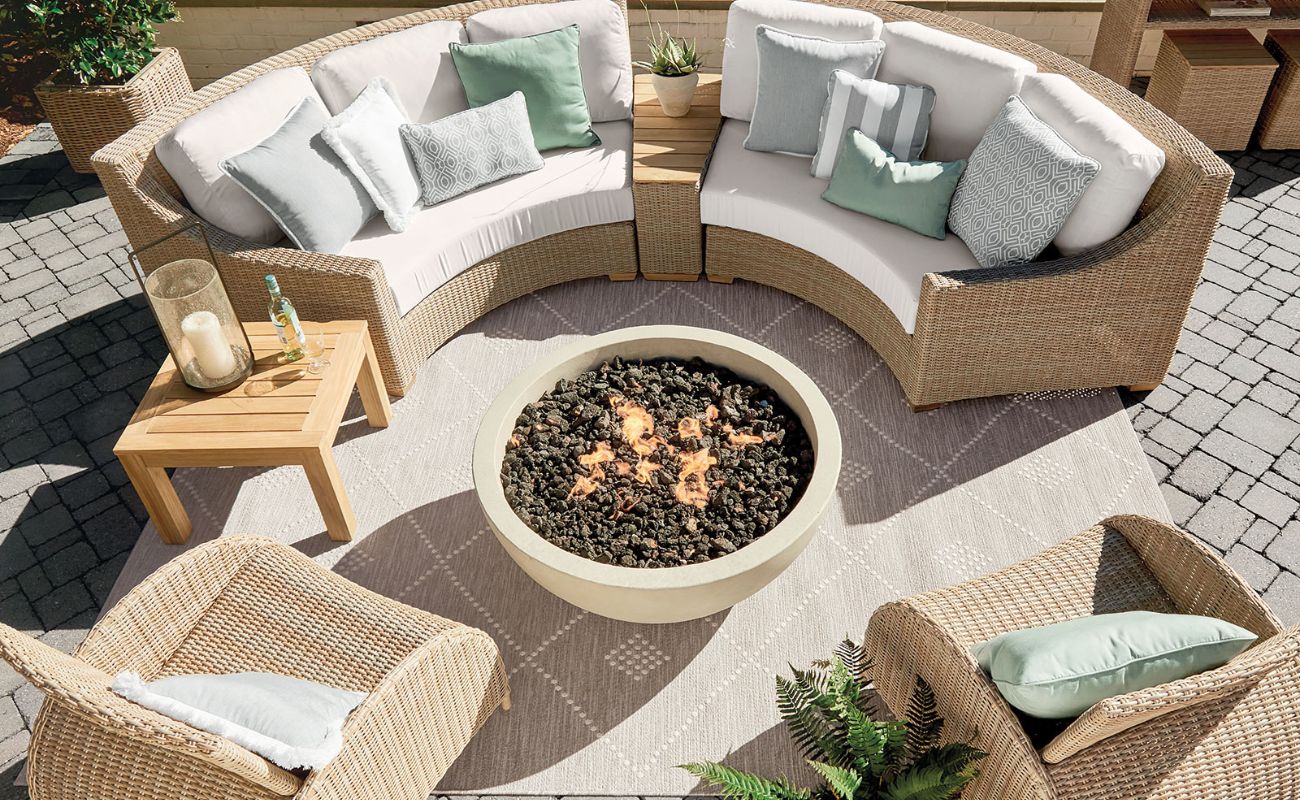
1. Outdoor Furniture:
Investing in comfortable and durable outdoor furniture is a great way to create a cozy seating area on your deck patio. Choose furniture that suits your style and complements the design of your deck. Consider options such as lounge chairs, dining sets, benches, or hammocks, depending on the available space and your preferences.
2. Shade Solutions:
Depending on the location and sun exposure of your deck patio, adding shade solutions can make your outdoor space more comfortable. Consider options like pergolas, umbrellas, or retractable awnings to provide shade and protection from the sun. This will allow you to enjoy your deck patio during hot summer months.
3. Lighting:
Proper lighting can create a magical atmosphere on your deck patio, allowing you to extend your outdoor enjoyment into the evening. Consider installing lighting fixtures such as string lights, LED deck lights, or solar-powered pathway lights. These will enhance the ambiance and ensure safety during nighttime use.
Read more: The ABCs Of Deck Building
4. Outdoor Rugs:
Adding an outdoor rug can tie together your seating or dining area, add color and texture, and provide a cozy feel. Opt for rugs specifically designed for outdoor use, as they are made to withstand the elements and are easy to clean. Choose a style that complements your deck patio’s design and fits the size of your seating area.
5. Planters and Greenery:
Adding plants and greenery can bring life and freshness to your deck patio. Place potted plants or flower boxes strategically to add color, texture, and a touch of nature. Consider low-maintenance plants that thrive in outdoor conditions and suit your design aesthetic.
6. Decorative Accents:
Add personal touches and decorative accents to reflect your style and create a welcoming atmosphere. Consider options such as outdoor cushions, throw pillows, outdoor artwork, or decorative lanterns. These small touches can make a big impact on the overall look and feel of your deck patio.
Remember to consider the functionality, durability, and weather resistance of the finishing touches you choose for your deck patio. Opt for materials that can withstand exposure to sunlight, rain, and changing seasons.
Each finishing touch you add will contribute to the overall enjoyment and functionality of your deck patio. Whether it’s creating a comfortable seating area, adding shade solutions, or beautifying the space with plants and decor, these elements will help transform your outdoor space into a true extension of your home.
Lastly, have fun with the process of adding the finishing touches. Let your creativity shine and create a deck patio that is uniquely yours. Sit back, relax, and enjoy the fruits of your labor in your beautiful and well-appointed outdoor retreat!
When building a deck patio, make sure to use pressure-treated wood to prevent rot and decay. It’s also important to properly space the deck boards to allow for water drainage and airflow.
Conclusion
Building a deck patio is an exciting endeavor that allows you to create a functional and inviting outdoor space for relaxation, entertainment, and enjoyment. By following the steps outlined in this guide, you can bring your vision to life and construct a deck patio that enhances the beauty and functionality of your home.
From planning and designing to the final touches, every stage of the construction process is crucial. Take the time to carefully plan the layout, consider the materials, and ensure proper preparation of the area. Building a solid foundation, installing support posts, constructing the frame, and adding the appropriate decking materials are all essential for the stability and longevity of your deck patio.
Don’t forget about the importance of safety. Always use the proper safety equipment, follow local building codes, and consult with professionals if needed. Prioritize regular maintenance and inspections to keep your deck patio in optimal condition for years to come.
Once your deck patio is complete, it’s time to add the finishing touches that make the space truly yours. From outdoor furniture and shade solutions to lighting, rugs, and decorative accents, these details will add comfort, style, and personality to your deck patio.
As you enjoy your deck patio, remember to create lasting memories with family and friends. Host gatherings, enjoy meals outdoors, and take moments to relax and unwind in your beautiful outdoor oasis.
Building a deck patio is a rewarding project that can significantly enhance the value and livability of your home. It provides a space where you can connect with nature, embrace the outdoors, and create cherished moments with loved ones.
So, roll up your sleeves, gather your tools, and embark on this exciting journey of building your dream deck patio. With careful planning, attention to detail, and a bit of creativity, you’ll create a remarkable addition to your home that will bring you joy and relaxation for years to come.
Frequently Asked Questions about How To Build A Deck Patio
Was this page helpful?
At Storables.com, we guarantee accurate and reliable information. Our content, validated by Expert Board Contributors, is crafted following stringent Editorial Policies. We're committed to providing you with well-researched, expert-backed insights for all your informational needs.


0 thoughts on “How To Build A Deck Patio”