Home>Gardening & Outdoor>Outdoor Entertaining>How To Build A Picnic Table Bench
Outdoor Entertaining
How To Build A Picnic Table Bench
Modified: April 23, 2024
Learn how to build a versatile picnic table bench for your outdoor entertaining needs. Follow our step-by-step guide for a perfect addition to your outdoor space.
(Many of the links in this article redirect to a specific reviewed product. Your purchase of these products through affiliate links helps to generate commission for Storables.com, at no extra cost. Learn more)
Introduction
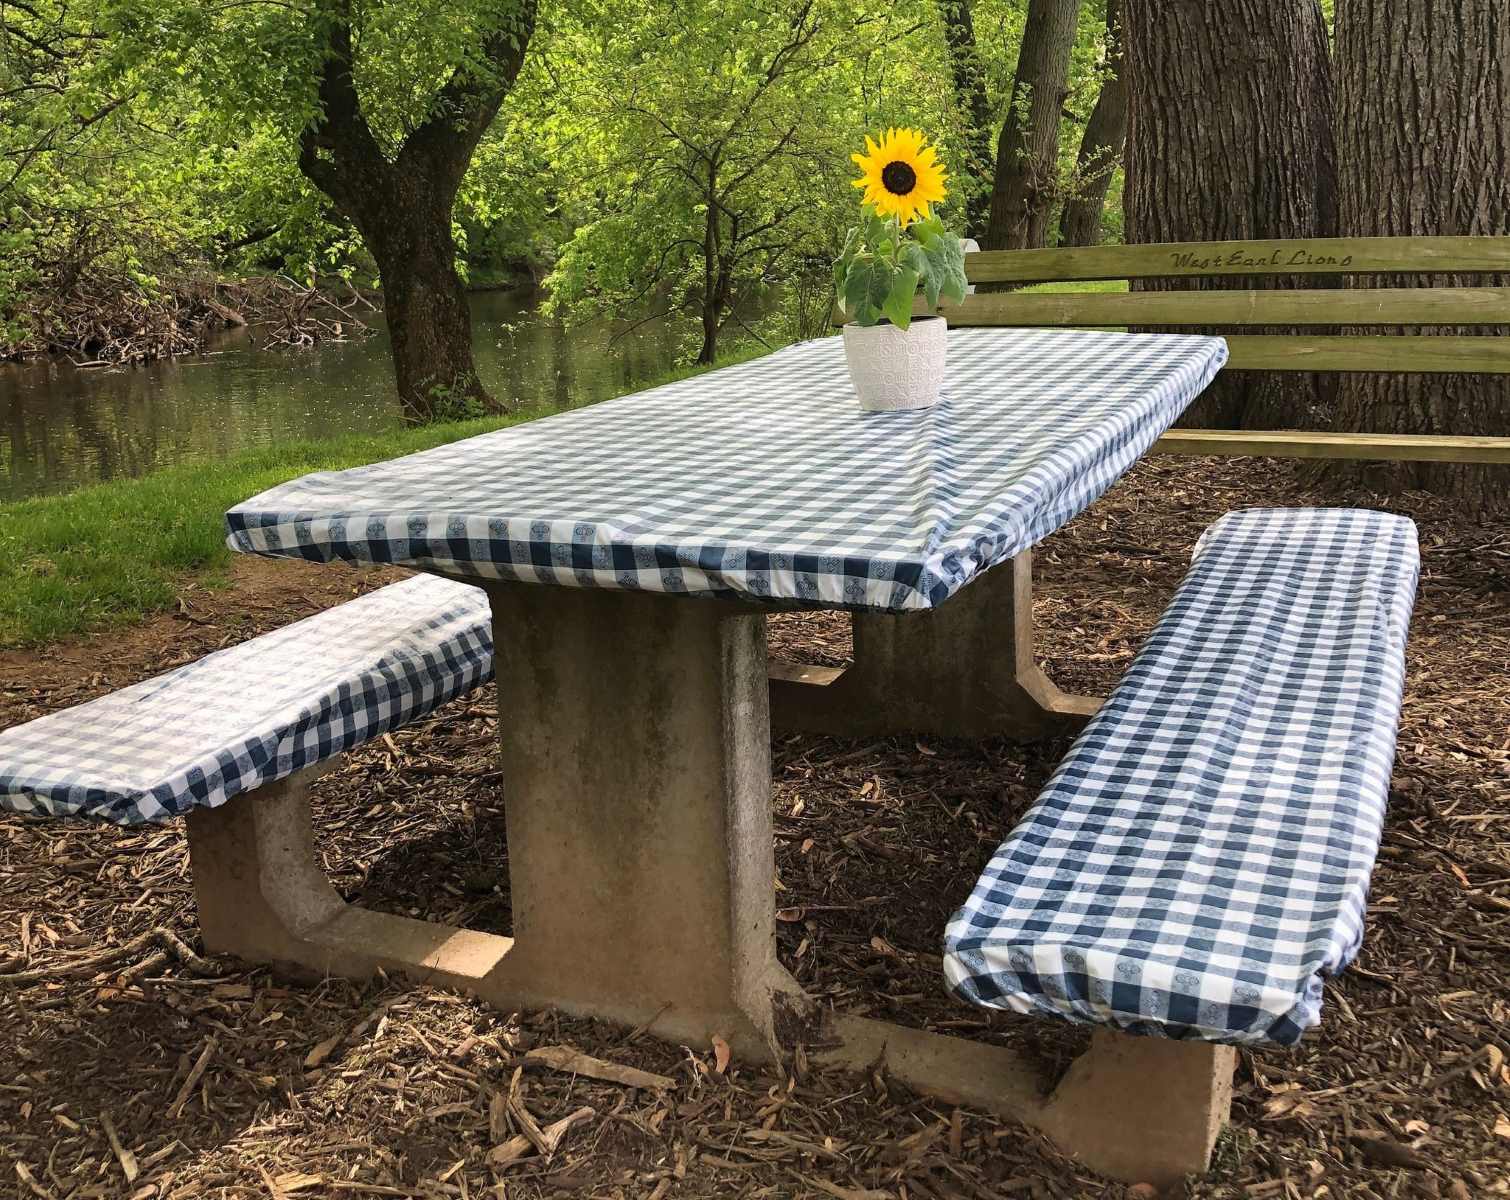
Are you ready to elevate your outdoor entertaining game? Imagine hosting delightful picnics in your backyard or enjoying leisurely meals in the great outdoors. With a custom-built picnic table bench, you can transform any outdoor space into a charming and functional area for dining, socializing, and making lasting memories.
Building your own picnic table bench is not only a rewarding DIY project but also a cost-effective way to add a touch of rustic charm to your outdoor setting. Whether you're a seasoned woodworking enthusiast or a novice looking for a fun and practical endeavor, this step-by-step guide will walk you through the process, from gathering the necessary materials to putting the finishing touches on your masterpiece.
In this comprehensive tutorial, you will discover the essential materials and tools required for the project, along with detailed instructions for cutting the wood, assembling the tabletop, building the bench, attaching the legs, and achieving a smooth, polished finish. By the end of this journey, you'll have a sturdy and stylish picnic table bench that perfectly complements your outdoor space and beckons you to savor the simple pleasures of al fresco dining and relaxation.
So, roll up your sleeves, unleash your creativity, and get ready to embark on a woodworking adventure that will not only enhance your outdoor entertaining experience but also showcase your craftsmanship for years to come. Let's dive in and bring your vision of the perfect picnic table bench to life!
Key Takeaways:
- Elevate your outdoor entertaining game with a custom-built picnic table bench, perfect for hosting delightful picnics and leisurely meals in your backyard. It’s a rewarding DIY project that adds rustic charm to your outdoor space.
- Gather the essential materials and tools, follow the step-by-step guide, and unleash your creativity to build a sturdy and stylish picnic table bench that complements your outdoor space. Embrace the joy of woodworking and create lasting memories in the great outdoors.
Read more: How To Build A Dining Table Bench
Materials Needed
Before delving into the construction process, it’s crucial to gather all the necessary materials to ensure a smooth and efficient building experience. Here’s a comprehensive list of the items you’ll need to complete your picnic table bench:
- Pressure-treated lumber: Select high-quality, weather-resistant lumber for durability and longevity. Opt for 2×6 and 2×4 boards to form the tabletop, bench, and legs.
- Wood screws: Choose corrosion-resistant screws that are suitable for outdoor use. The size and quantity will depend on the dimensions of your project.
- Wood glue: Invest in a reliable outdoor-grade wood glue to reinforce the joints and enhance the structural integrity of your picnic table bench.
- Sandpaper: Acquire a variety of sandpaper grits to smoothen the wood surfaces and achieve a polished finish. Consider using both coarse and fine-grit sandpaper for optimal results.
- Wood stain or paint: Enhance the aesthetic appeal of your picnic table bench by selecting a high-quality wood stain or outdoor paint in your preferred color. Ensure that the product is designed to withstand the elements.
- Waterproof sealant: Protect your picnic table bench from moisture, UV rays, and general wear and tear by applying a durable waterproof sealant. This crucial step will prolong the life of your creation.
- Measuring tape and carpenter’s square: Accurate measurements and precise angles are essential for a professional-looking finish. A reliable measuring tape and carpenter’s square will be indispensable tools throughout the construction process.
- Safety equipment: Prioritize safety by wearing protective gear, such as safety goggles, ear protection, and work gloves, to shield yourself from potential hazards during woodworking.
By ensuring that you have all the required materials on hand, you can streamline the building process and minimize interruptions, allowing you to focus on bringing your picnic table bench to fruition with confidence and ease.
Tools Required
Equipping yourself with the right tools is paramount to the success of your picnic table bench construction project. Here’s a comprehensive list of essential tools that will empower you to bring your woodworking vision to life:
- Power saw: Whether you prefer a circular saw, miter saw, or table saw, a reliable power saw is indispensable for cutting the lumber to the desired dimensions with accuracy and efficiency.
- Drill and driver set: Invest in a quality drill and driver set to create pilot holes and drive screws with precision. Cordless models offer convenience and maneuverability in outdoor settings.
- Clamps: Secure wood pieces firmly in place during assembly with a selection of clamps, such as bar clamps or quick-grip clamps, to ensure stability and alignment.
- Sandpaper or electric sander: Smooth the surfaces of the wood components by hand using sandpaper or expedite the process with an electric sander for a consistent and polished finish.
- Paintbrushes or staining pads: Apply wood stain, paint, or sealant evenly and smoothly using high-quality paintbrushes or staining pads to enhance the aesthetic appeal and protect the wood.
- Square and level: Accurately measure and mark angles with a carpenter’s square, while a level ensures that your picnic table bench is stable and balanced on uneven surfaces.
- Tape measure: Obtain precise measurements for cutting and assembly tasks using a durable and reliable tape measure, a fundamental tool for woodworking projects.
- Safety gear: Prioritize safety by wearing protective gear, including safety goggles, ear protection, and work gloves, to safeguard yourself from potential hazards during woodworking.
By assembling a comprehensive array of tools, you can approach the construction process with confidence and efficiency, ensuring that every cut, joint, and finish reflects your craftsmanship and attention to detail. With the right tools at your disposal, you’re poised to embark on a fulfilling woodworking journey and create a picnic table bench that embodies your creativity and practicality.
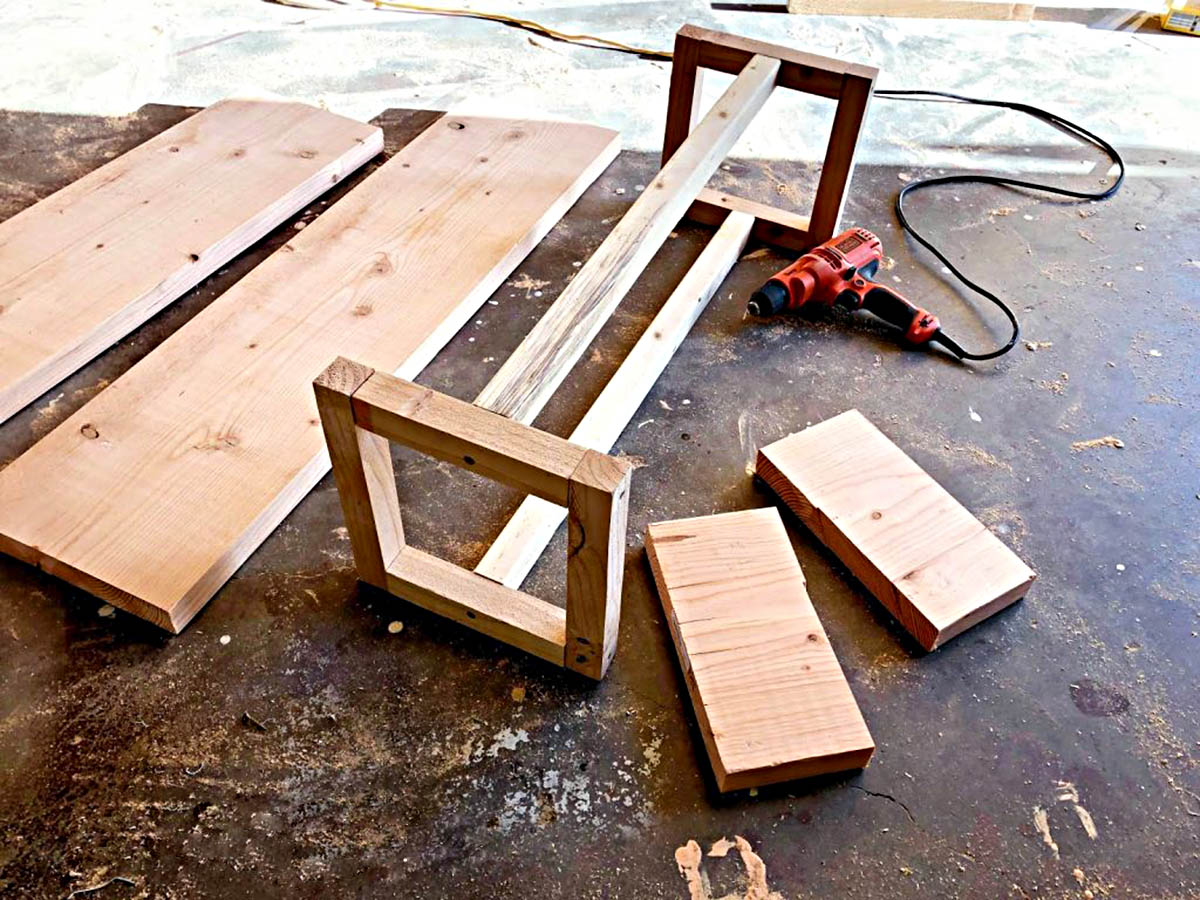
Step 1: Cutting the Wood
Before diving into the assembly process, precision cutting of the lumber is essential to ensure that each component fits seamlessly and contributes to the structural integrity of your picnic table bench. Follow these steps to execute accurate and clean cuts:
- Measure and mark: Use a tape measure and carpenter’s square to measure and mark the dimensions for the tabletop, bench, and legs. Accurate measurements are crucial for a professional-looking and sturdy final product.
- Set up your saw: Whether you’re using a circular saw, miter saw, or table saw, ensure that the blade is sharp and properly aligned. Adhere to safety guidelines and wear protective gear, including safety goggles and ear protection, before operating the saw.
- Cut the lumber: With precision and care, proceed to cut the pressure-treated lumber to the designated dimensions, following your measurements and markings. Maintain a steady hand and a controlled pace to achieve clean and accurate cuts.
- Double-check the cuts: After each cut, verify the accuracy and quality of the pieces. Ensure that the tabletop, bench, and legs are cut to the correct lengths and angles, as per your design specifications.
By meticulously executing the cutting phase, you lay the groundwork for a successful and gratifying construction journey. Accurate cuts are the building blocks of a sturdy and visually appealing picnic table bench, setting the stage for the subsequent assembly and finishing stages.
Step 2: Assembling the Tabletop
As the foundation of your picnic table bench, the tabletop plays a pivotal role in providing a stable and inviting surface for dining, games, and relaxation. Follow these steps to assemble the tabletop with precision and attention to detail:
- Arrange the boards: Lay out the cut 2×6 boards for the tabletop on a flat and stable surface, ensuring that the edges are aligned evenly. This initial arrangement will provide a clear visual of the tabletop’s dimensions and allow you to assess the fit and alignment of the boards.
- Create the tabletop frame: Using wood glue and corrosion-resistant wood screws, join the 2×4 boards to form a sturdy frame around the perimeter of the tabletop. Ensure that the frame is square and the corners are flush before securing the joints.
- Attach the tabletop boards: With the frame in place, affix the 2×6 boards to the frame using wood screws, maintaining even spacing between the boards. This step requires precision and attention to detail to achieve a seamless and visually appealing tabletop surface.
- Reinforce the joints: Apply wood glue to the joints between the tabletop boards and the frame to enhance the structural integrity of the assembly. Wipe off any excess glue to ensure a clean and professional finish.
- Check for stability: Once the tabletop is assembled, carefully flip it over to inspect the underside. Confirm that the boards are securely fastened, the frame is robust, and the overall structure is stable and level.
By meticulously assembling the tabletop, you lay the groundwork for a central feature that epitomizes the craftsmanship and functionality of your picnic table bench. The tabletop serves as a welcoming centerpiece for outdoor gatherings, beckoning guests to savor the joys of al fresco dining and leisurely moments in the open air.
When building a picnic table bench, make sure to use weather-resistant materials like cedar or pressure-treated lumber to ensure durability and longevity.
Read more: How To Build A Picnic Style Dining Table
Step 3: Building the Bench
As an integral component of your picnic table bench, the bench provides comfortable seating and contributes to the overall aesthetic appeal of the structure. Follow these steps to construct the bench with precision and attention to detail:
- Prepare the bench components: Lay out the cut 2×6 and 2×4 boards for the bench on a flat and spacious surface, ensuring that they are organized according to their designated positions in the assembly process.
- Assemble the bench frame: Using wood glue and corrosion-resistant wood screws, construct a sturdy frame for the bench by joining the 2×4 boards to form the perimeter and support structure. Confirm that the frame is square and the joints are secure before proceeding.
- Attach the bench boards: Affix the 2×6 boards to the frame using wood screws, creating a comfortable and visually appealing seating surface. Pay attention to the spacing and alignment of the boards to ensure a uniform and inviting bench.
- Reinforce the joints: Apply wood glue to the joints between the bench boards and the frame to bolster the stability and durability of the bench. Wipe off any excess glue to maintain a clean and polished appearance.
- Verify the structural integrity: Once the bench is assembled, inspect the frame, support structure, and seating surface to confirm that they are robust, stable, and capable of accommodating guests with comfort and reliability.
By meticulously constructing the bench, you contribute to the functionality and visual appeal of your picnic table bench, creating a welcoming and comfortable seating area for outdoor gatherings and leisurely moments. The bench embodies the fusion of craftsmanship and practicality, inviting individuals to relax and enjoy the beauty of outdoor living.
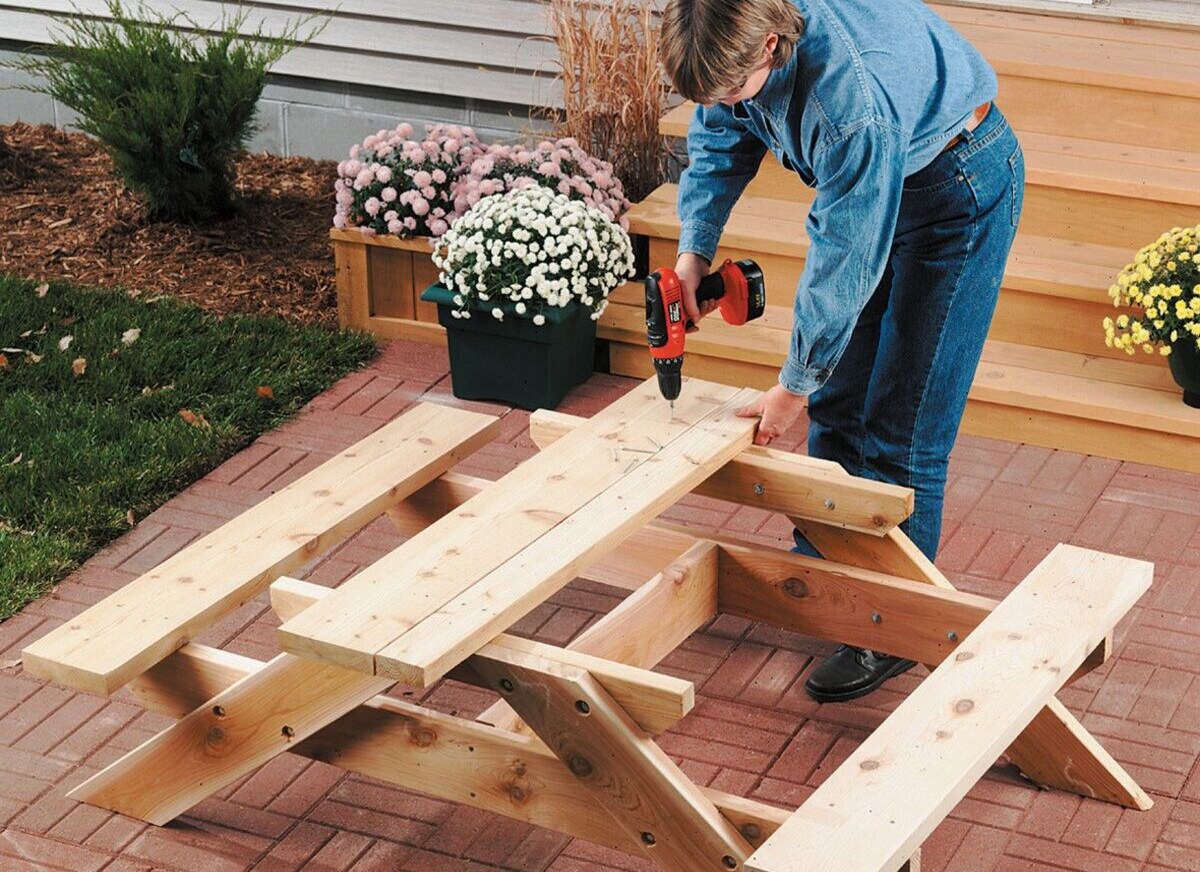
Step 4: Attaching the Legs
The legs of your picnic table bench provide essential support and stability, anchoring the structure and ensuring a secure foundation for outdoor enjoyment. Follow these steps to attach the legs with precision and attention to detail:
- Position the tabletop and bench: Place the assembled tabletop and bench in the desired location, ensuring that they are aligned and parallel to each other. This initial positioning will facilitate the accurate attachment of the legs.
- Mark the leg placement: Use a pencil or masking tape to mark the positions where the legs will be attached to the tabletop and bench. Ensure that the markings are consistent and aligned to maintain symmetry and balance.
- Attach the legs to the tabletop: Secure the legs to the underside of the tabletop using wood screws, ensuring that they are positioned firmly and evenly to provide robust support. Confirm that the legs are flush with the tabletop for a professional and stable connection.
- Secure the legs to the bench: Similarly, affix the legs to the corners of the bench using wood screws, ensuring that they are aligned and firmly attached to provide dependable support. Verify that the legs are level and stable to uphold the integrity of the entire structure.
- Reinforce the connections: Inspect the attachment points of the legs to the tabletop and bench, reinforcing the joints with additional wood screws if necessary to enhance the overall stability and sturdiness of the picnic table bench.
By methodically attaching the legs, you fortify the foundation of your picnic table bench, ensuring that it stands poised to accommodate outdoor gatherings and leisurely moments with unwavering support and reliability. The legs represent the backbone of the structure, underscoring the union of functionality and durability in your woodworking endeavor.
Step 5: Sanding and Finishing
As you near the culmination of your picnic table bench construction, the sanding and finishing phase is pivotal in enhancing the visual appeal, smoothness, and weather resistance of the wood. Follow these steps to achieve a polished and enduring finish for your masterpiece:
- Prepare the surfaces: Begin by thoroughly sanding all exposed wood surfaces, including the tabletop, bench, and legs, using coarse-grit sandpaper. This initial sanding will remove rough spots, splinters, and imperfections, preparing the wood for a refined finish.
- Progress to finer grits: Transition to finer-grit sandpaper to smoothen the wood further, ensuring a uniform and velvety texture across the entire picnic table bench. Pay special attention to the edges and corners to achieve a seamless and inviting feel.
- Round the edges: Use sandpaper or a router to round off the edges of the tabletop and bench, creating a soft and comfortable profile while minimizing the risk of splinters or sharp protrusions.
- Apply the finish: Select a high-quality wood stain, outdoor paint, or waterproof sealant to protect and enhance the natural beauty of the wood. Apply the finish evenly to all surfaces, following the manufacturer’s instructions for optimal coverage and longevity.
- Allow for drying and curing: Once the finish is applied, allow adequate time for drying and curing as per the product’s guidelines. This crucial step ensures that the wood is fortified against the elements and ready for long-lasting outdoor use.
- Inspect and touch up: After the finish has fully cured, inspect the picnic table bench for any areas that may require additional touch-ups or refinements. Address any imperfections to achieve a flawless and professional result.
By meticulously sanding and finishing your picnic table bench, you elevate its aesthetic appeal and fortify its resilience against the elements, culminating in a captivating and enduring outdoor centerpiece. The sanding and finishing phase represents the pinnacle of your woodworking journey, infusing your creation with a timeless allure and the promise of countless cherished gatherings and moments in the open air.
Conclusion
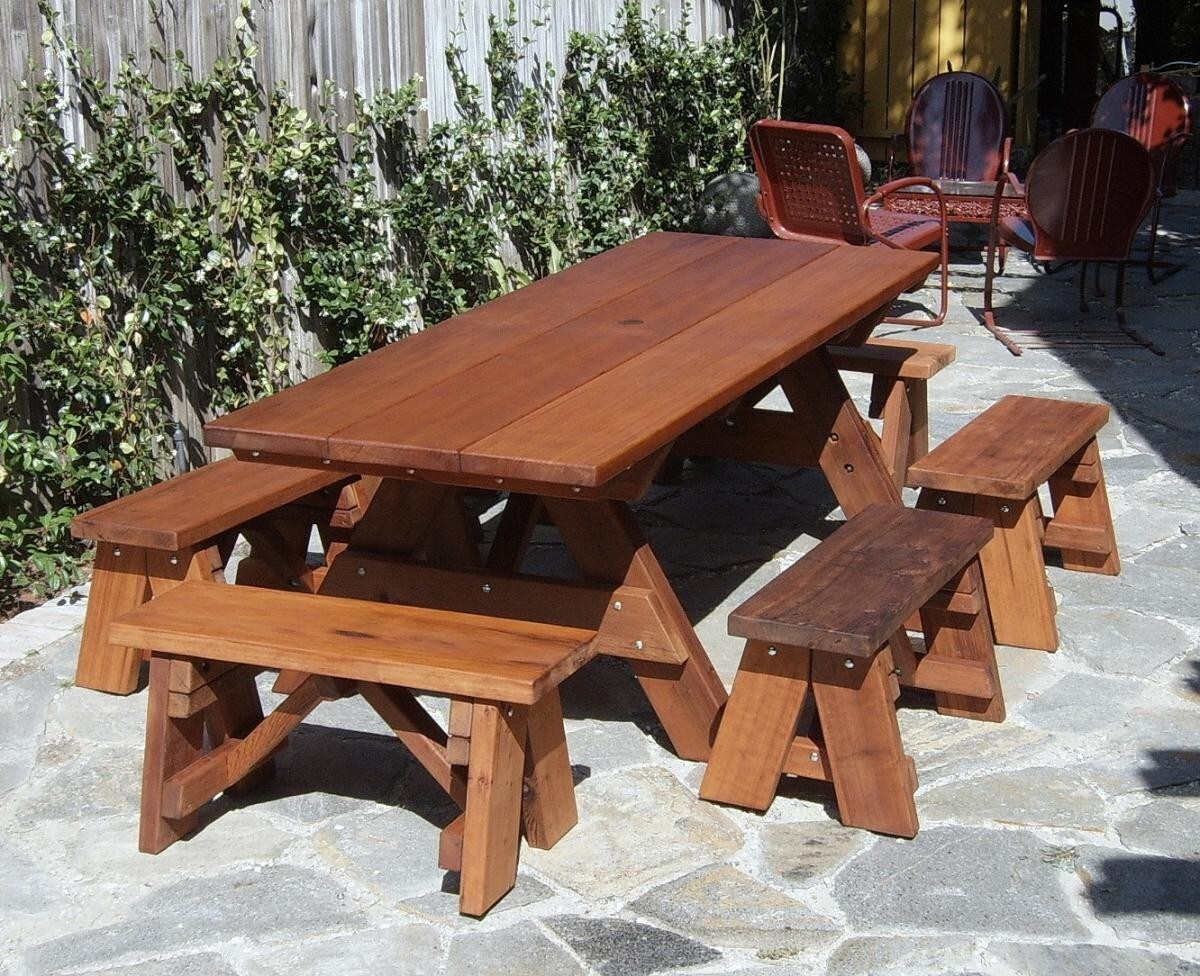
Congratulations on completing your journey to construct a bespoke picnic table bench that embodies craftsmanship, functionality, and the warmth of outdoor hospitality. By following this comprehensive guide, you’ve not only honed your woodworking skills but also enriched your outdoor space with a captivating and practical addition that beckons friends and family to gather and indulge in the simple pleasures of al fresco living.
As you admire your finished picnic table bench, take pride in the meticulous attention to detail that has culminated in a sturdy and inviting centerpiece for outdoor entertaining. The fusion of precision cutting, thoughtful assembly, and meticulous finishing has yielded a creation that reflects your dedication to quality and your passion for woodworking.
Embrace the satisfaction of knowing that your picnic table bench is poised to host countless memorable occasions, from leisurely picnics and family meals to lively gatherings and relaxed moments of solitude in the embrace of nature. Your creation stands as a testament to the joy of craftsmanship and the enduring allure of outdoor living.
Now, as you envision the laughter, conversations, and shared meals that await around your picnic table bench, take a moment to appreciate the transformative power of your creativity and the tangible impact it has on the ambiance and functionality of your outdoor space.
May your picnic table bench serve as a symbol of conviviality, comfort, and the timeless allure of outdoor entertaining, inviting you and your guests to savor the beauty of nature and the camaraderie it inspires. With each gathering and every cherished moment spent around your handcrafted creation, you’ll reaffirm the value of craftsmanship and the joy of creating meaningful connections in the open air.
So, bask in the pride of your woodworking accomplishment, and embrace the countless delightful experiences that await around your new picnic table bench. Your dedication and creativity have truly transformed an ordinary outdoor space into a captivating haven for shared moments and cherished memories.
Frequently Asked Questions about How To Build A Picnic Table Bench
Was this page helpful?
At Storables.com, we guarantee accurate and reliable information. Our content, validated by Expert Board Contributors, is crafted following stringent Editorial Policies. We're committed to providing you with well-researched, expert-backed insights for all your informational needs.


0 thoughts on “How To Build A Picnic Table Bench”