Home>Storage & Organization>Living Room Organization>How To Build A Coat Rack Bench
Living Room Organization
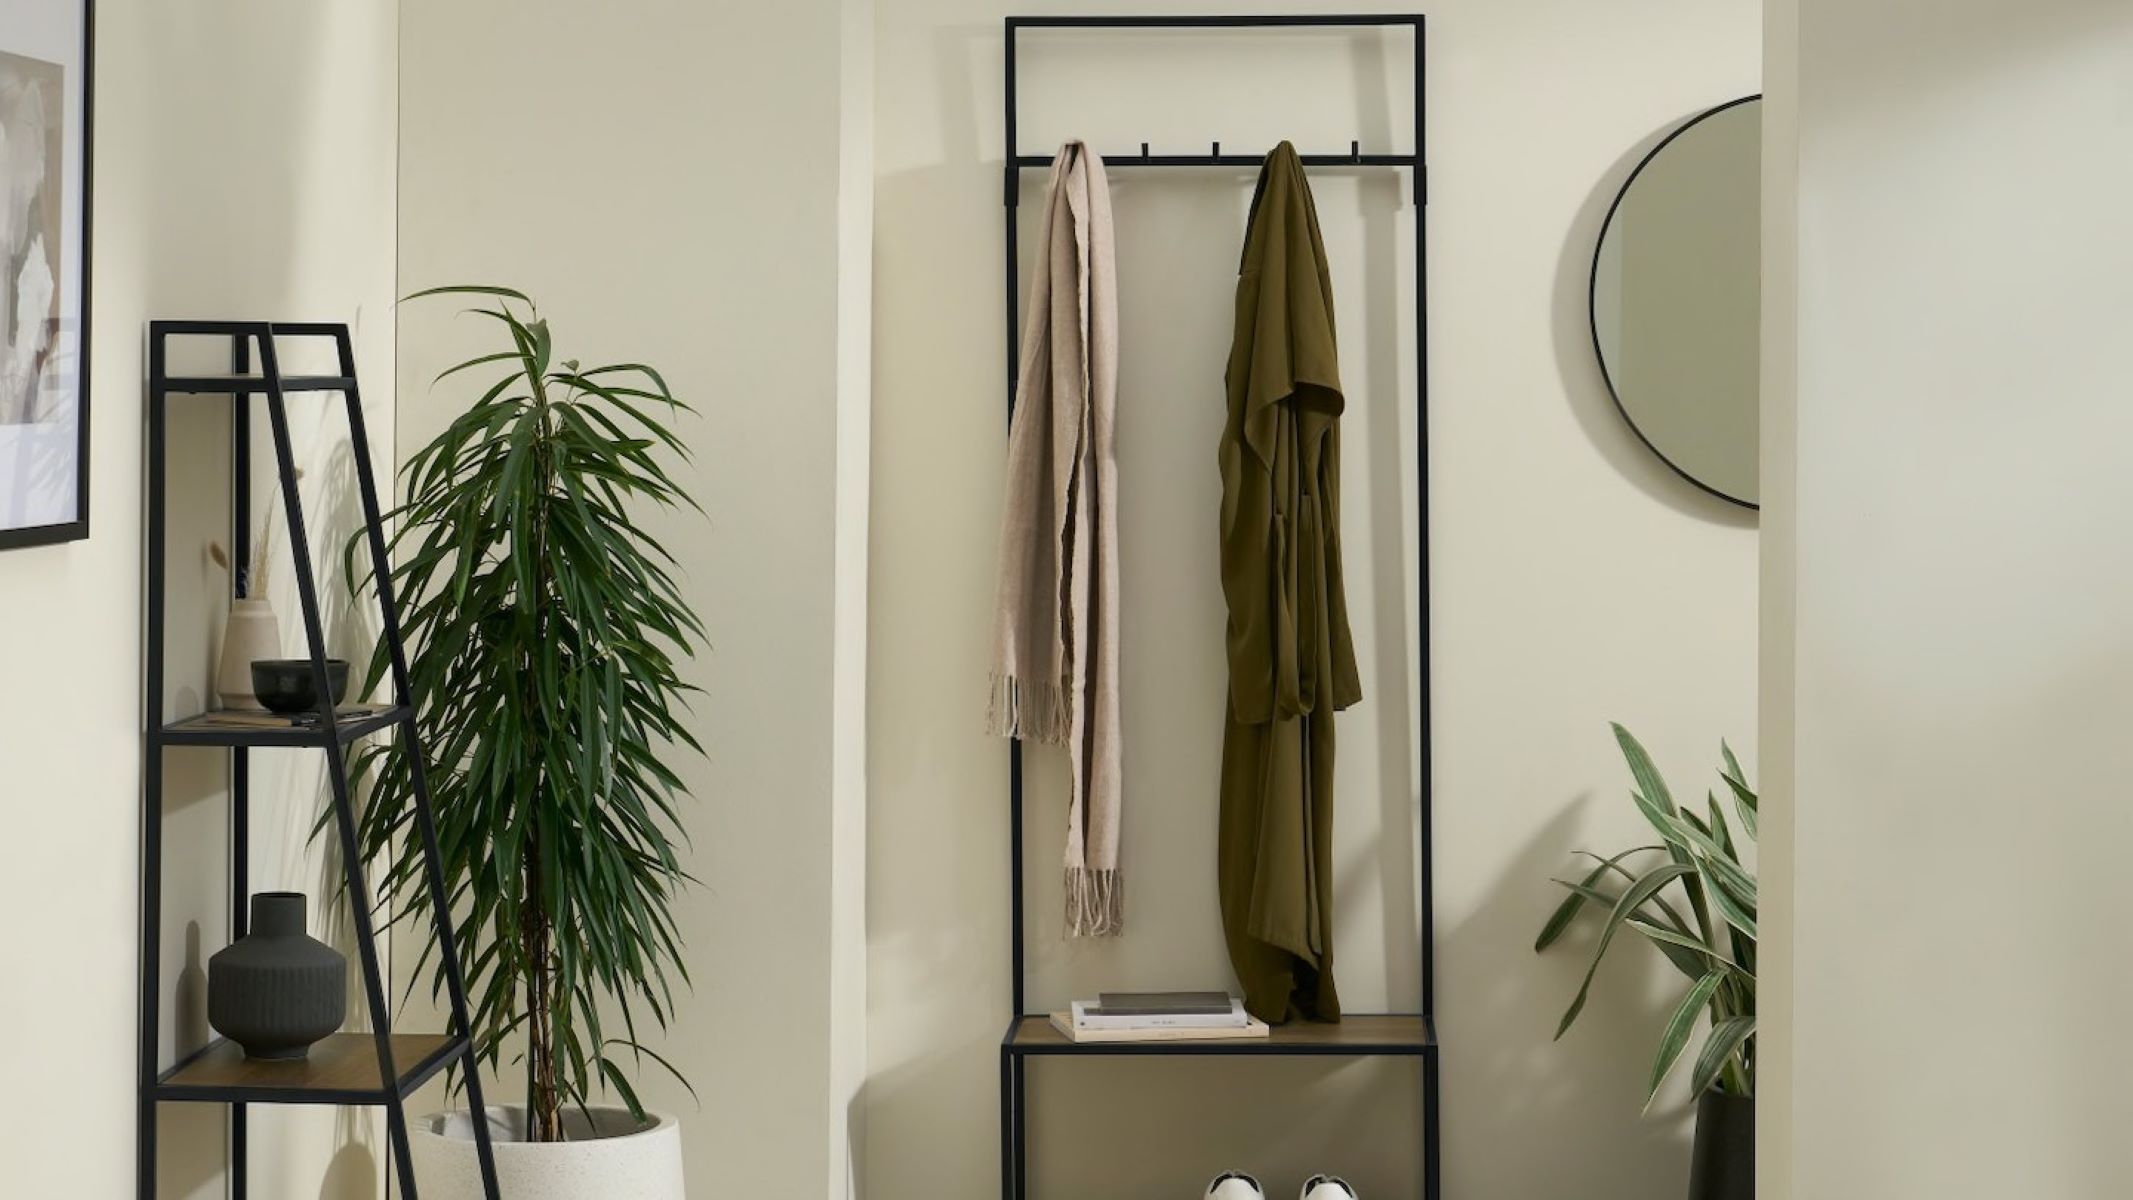
How To Build A Coat Rack Bench
Modified: August 24, 2024
Discover how to maximize your living room organization with our step-by-step guide on building a coat rack bench. Create a stylish and functional space with ease!
(Many of the links in this article redirect to a specific reviewed product. Your purchase of these products through affiliate links helps to generate commission for Storables.com, at no extra cost. Learn more)
Introduction
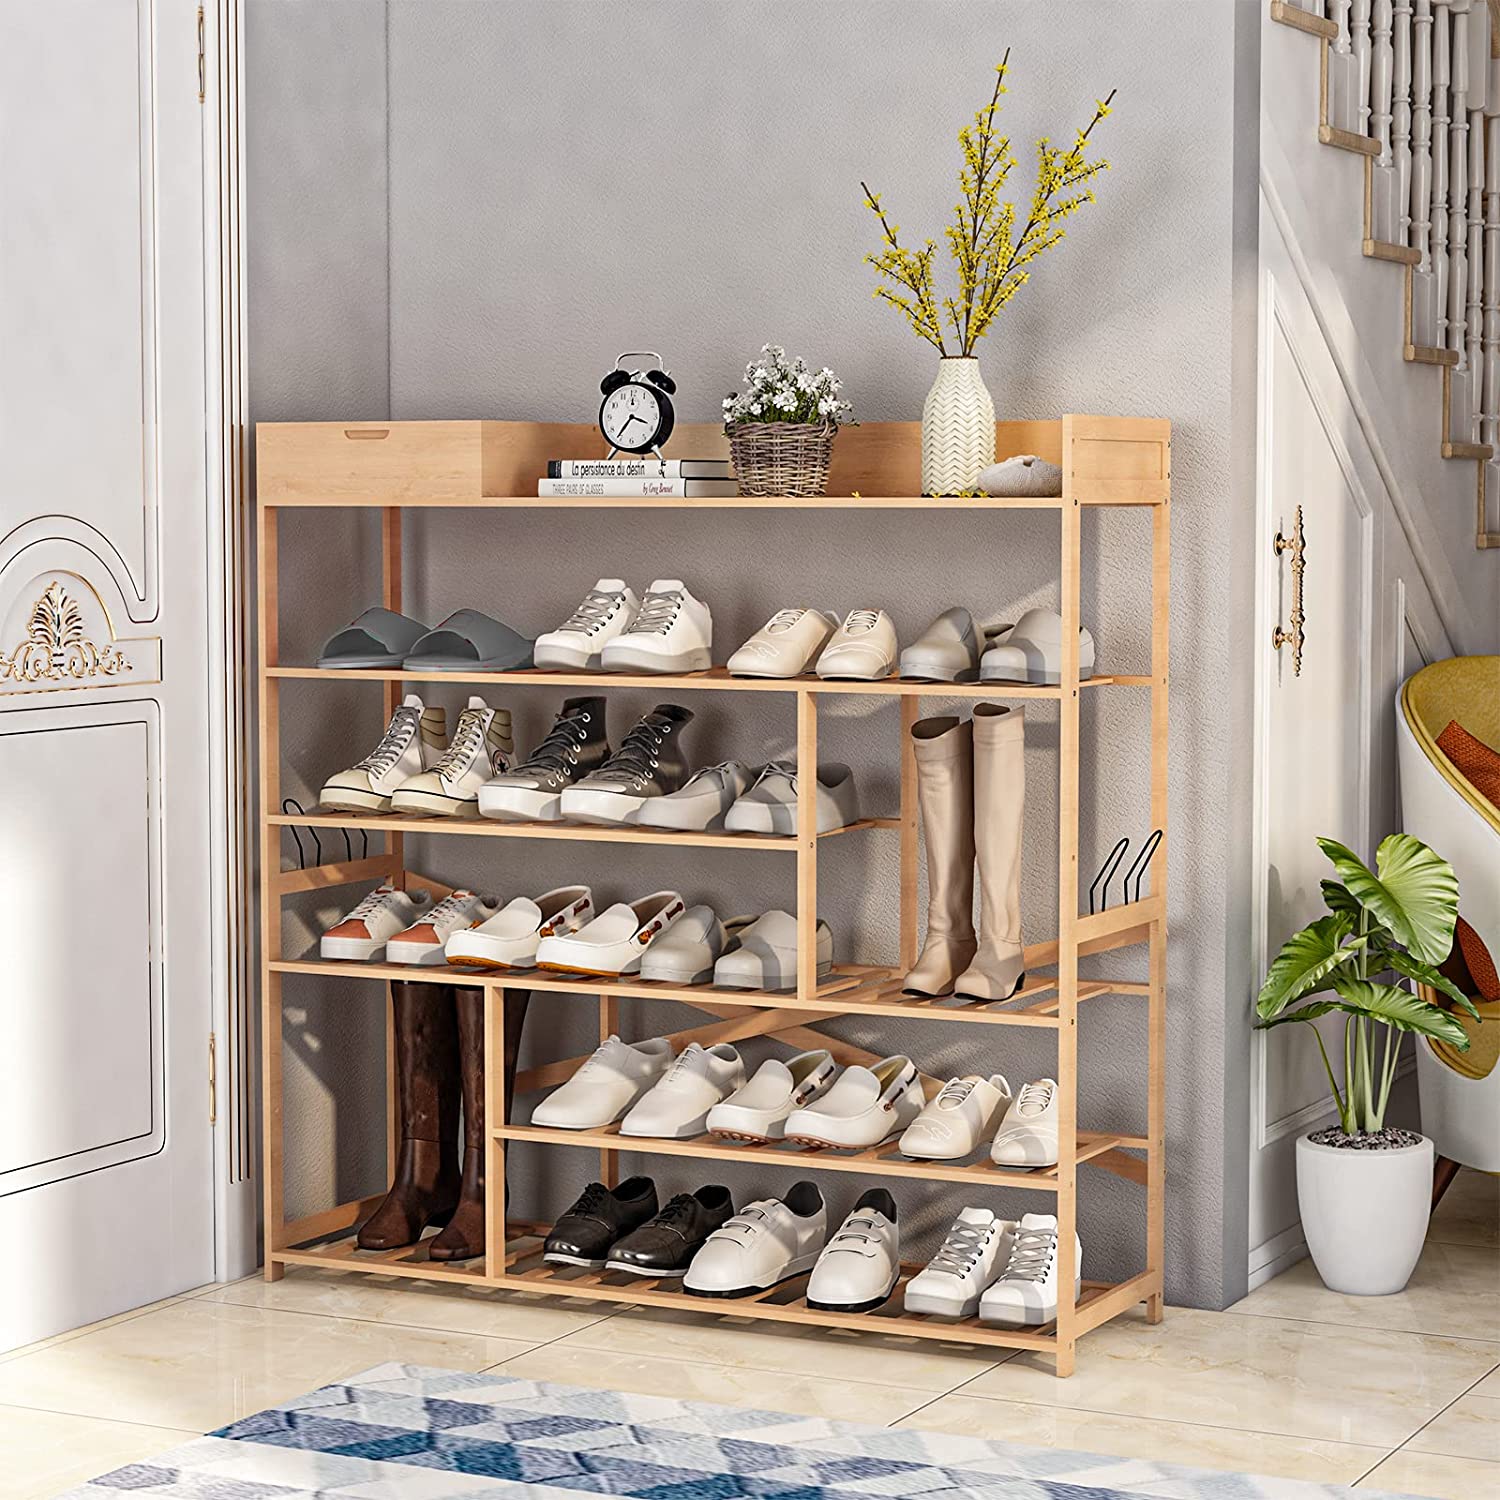
Welcome to the ultimate guide on how to build a coat rack bench! If you've been yearning for a stylish and functional piece of furniture to enhance your entryway or mudroom, you're in the right place. A coat rack bench not only provides a convenient spot to hang coats, hats, and bags but also offers a comfortable seating area for putting on or taking off shoes.
In this comprehensive tutorial, we will walk you through the step-by-step process of creating your very own coat rack bench. Whether you're a seasoned DIY enthusiast or a novice looking to embark on your first woodworking project, this guide is designed to be accessible and easy to follow.
By the end of this tutorial, you'll have the satisfaction of crafting a custom piece of furniture that perfectly suits your space and meets your organizational needs. Plus, you'll gain valuable woodworking skills and have a beautiful and practical addition to your home.
So, roll up your sleeves, gather your tools and materials, and let's dive into the exciting world of creating a stunning coat rack bench that will be the envy of all your guests!
Key Takeaways:
- Building a coat rack bench is a fun and rewarding DIY project that adds both style and functionality to your home. With the right materials and tools, you can create a custom piece of furniture that meets your organizational needs.
- By following the step-by-step process of cutting, assembling, and finishing, you can expertly build a coat rack bench that brings a sense of accomplishment and practicality to your living space. It’s a creative and valuable addition to your home!
Read more: How To Build A Coat Rack With A Shelf
Step 1: Gather Materials and Tools
Before diving into the construction of your coat rack bench, it's essential to gather all the necessary materials and tools. Having everything at hand will streamline the building process and ensure a smooth and efficient workflow. Here's a comprehensive list of what you'll need:
Materials:
- Lumber: Select high-quality lumber for the frame and bench seat. Opt for sturdy wood such as oak, pine, or maple, ensuring it is of the appropriate dimensions for your desired bench size.
- Coat Rack Hooks: Choose durable and stylish coat rack hooks to accommodate the number of coats and accessories you intend to hang.
- Wood Screws: Invest in a variety of wood screws in different lengths to secure the frame and bench components firmly.
- Wood Glue: A reliable wood glue will reinforce the joints and add structural integrity to your coat rack bench.
- Sandpaper: Acquire sandpaper of varying grits to smoothen the wood surfaces and achieve a flawless finish.
- Wood Stain or Paint: Depending on your preference, select a high-quality wood stain or paint to enhance the aesthetic appeal of your coat rack bench.
Tools:
- Circular Saw or Miter Saw: A reliable saw will be essential for cutting the lumber to the required dimensions accurately.
- Drill and Bits: A power drill with a set of drill bits is necessary for creating pilot holes and driving screws into the wood.
- Screwdriver: Both manual and electric screwdrivers will be handy for assembling the components securely.
- Measuring Tape and Square: Accurate measurements are crucial in woodworking, so ensure you have a measuring tape and square for precision.
- Clamps: Clamps will assist in holding the wood pieces together during assembly, ensuring a tight and secure fit.
- Paintbrushes or Stain Applicators: If you opt for a stained or painted finish, quality brushes or applicators will be essential for a professional-looking result.
By gathering these materials and tools, you'll be well-prepared to embark on the exciting journey of building your very own coat rack bench. With everything in place, you can proceed to the next step with confidence and enthusiasm.
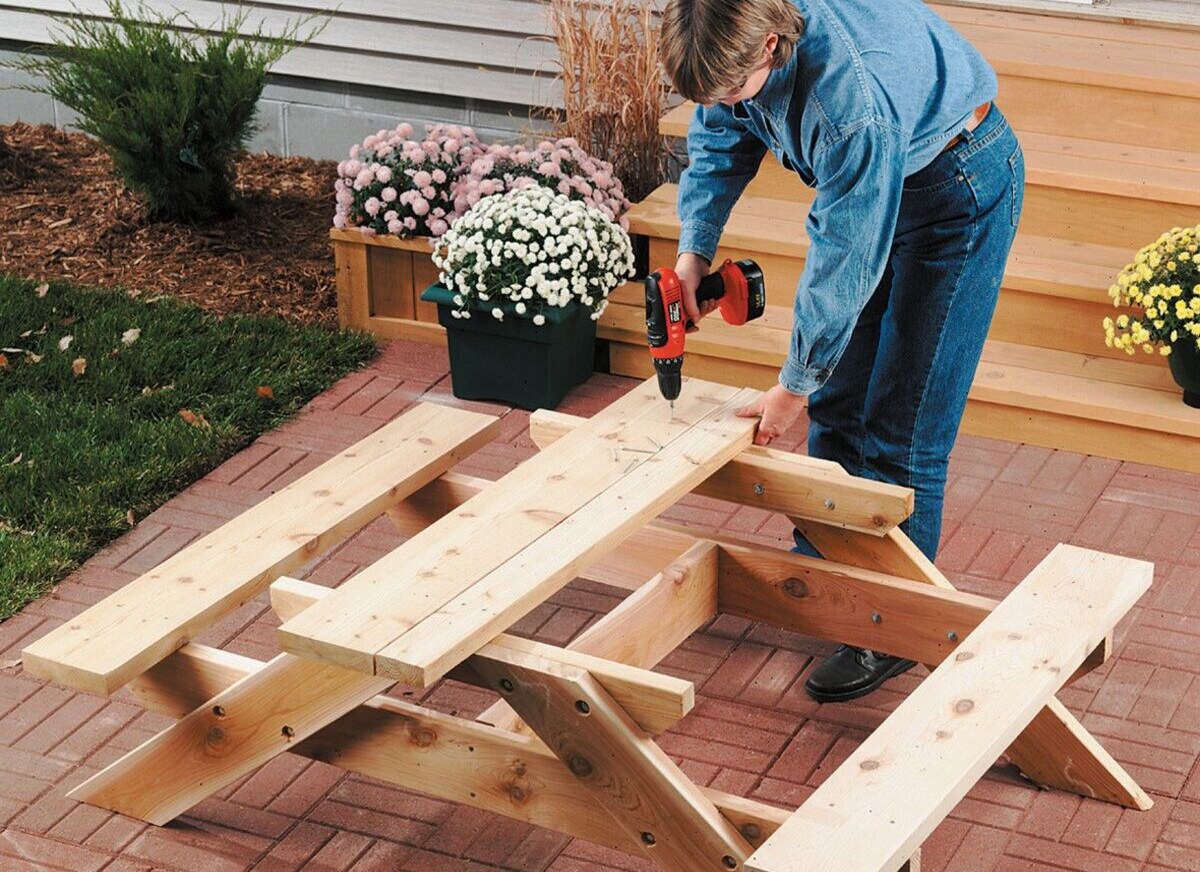
Step 2: Cut and Assemble the Frame
With all the materials and tools at your disposal, it's time to dive into the construction process. The frame serves as the foundation of your coat rack bench, providing structural support and stability. Follow these steps to cut and assemble the frame with precision and care.
Read more: How To Build A Wall-Mounted Coat Rack
Cutting the Lumber
Begin by measuring and marking the lumber according to the dimensions of your desired coat rack bench. Use a measuring tape and square to ensure accuracy in your measurements. A circular saw or miter saw will be your best friend in cutting the lumber to the required lengths. Remember the old adage: "Measure twice, cut once." This simple rule can save you from costly mistakes and ensure a perfect fit for your frame components.
Assembling the Frame
Once the lumber is cut to size, it's time to assemble the frame. Lay out the pieces according to your design plan, ensuring that the joints align perfectly. Pre-drill pilot holes to prevent the wood from splitting when you drive in the screws. Apply wood glue to the joints before securing them with screws for added strength and stability. Utilize clamps to hold the pieces in place as the glue sets, ensuring a tight and secure fit.
Reinforcing the Joints
To reinforce the joints and enhance the durability of the frame, consider adding corner braces or brackets at key connection points. These metal reinforcements provide additional support, especially in areas that will bear the weight of the bench and the items placed on it. Secure the braces with screws, ensuring they are flush with the wood surface for a seamless finish.
Checking for Squareness
Before proceeding further, it's crucial to check the squareness of the frame. Use a carpenter's square to verify that the corners form perfect right angles. This step is essential for ensuring that your coat rack bench will be level and stable. Making any necessary adjustments at this stage will save you from potential issues during the later stages of construction.
By meticulously cutting and assembling the frame, you'll lay the groundwork for a sturdy and reliable coat rack bench. With the frame in place, you're ready to move on to the next exciting phase of adding the coat rack hooks, bringing you one step closer to completing your custom creation.
Read more: How To Decorate A Coat Rack
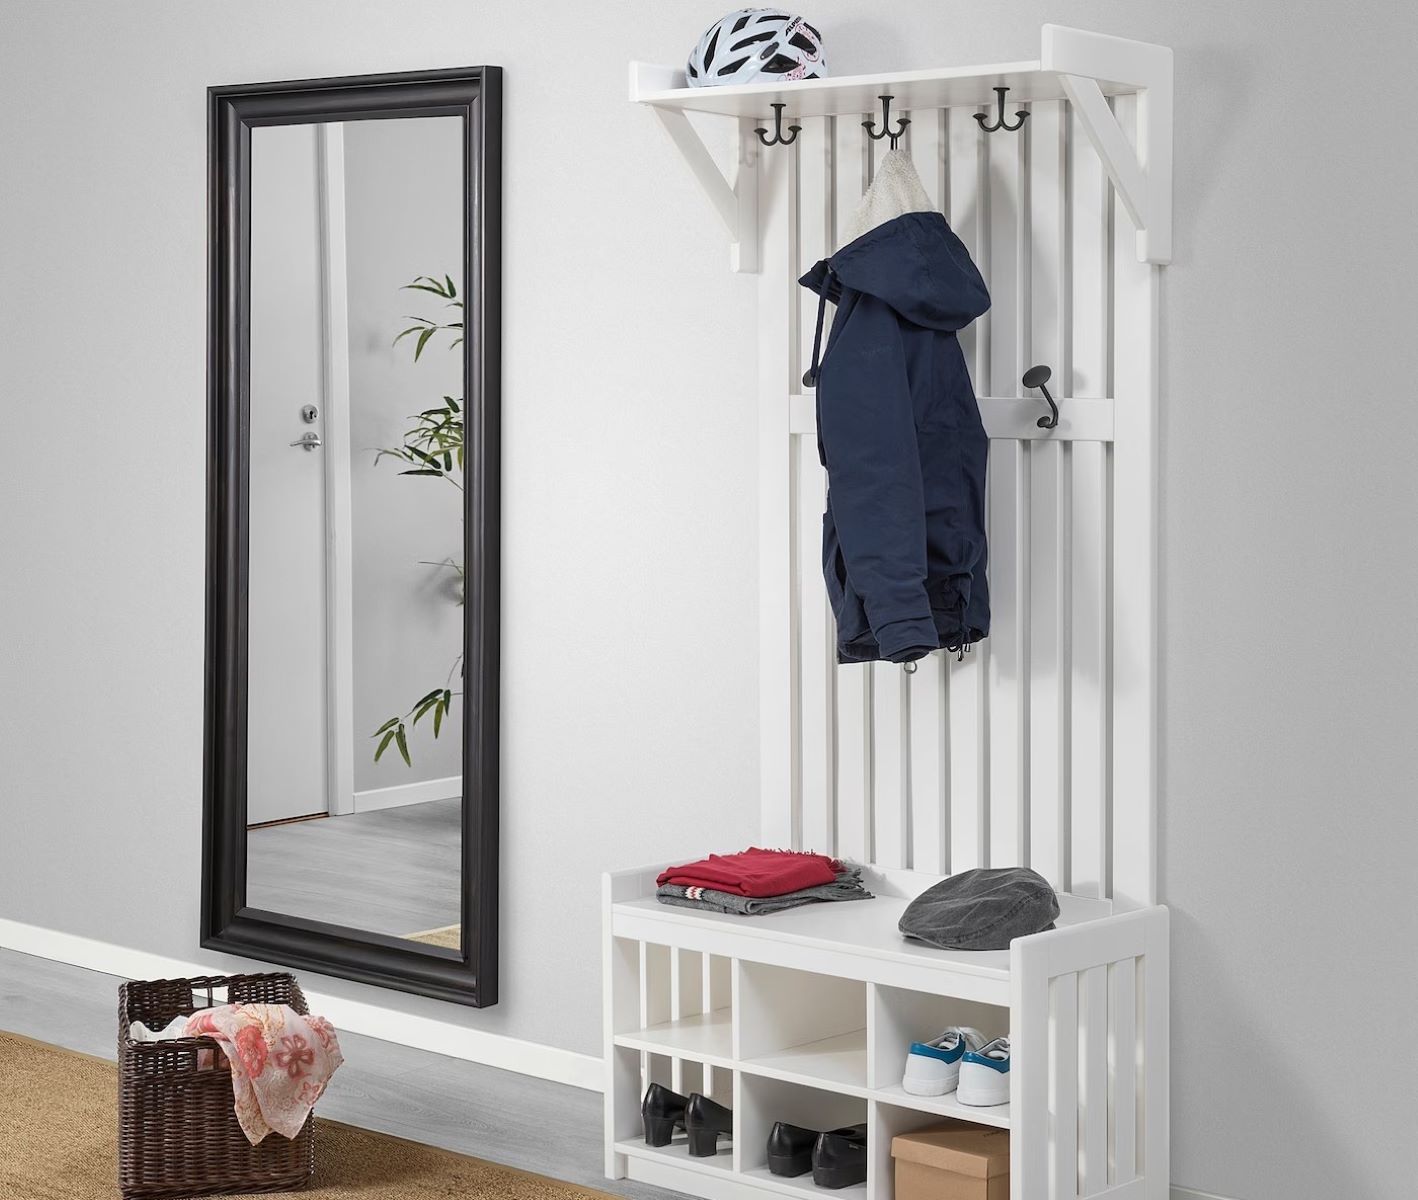
Step 3: Attach the Coat Rack Hooks
With the frame of your coat rack bench securely assembled, it's time to add the essential element that gives this piece of furniture its name: the coat rack hooks. This step brings both functionality and aesthetic appeal to your creation, providing a designated space for hanging coats, hats, scarves, and bags. Here's how to expertly attach the coat rack hooks to your bench, ensuring a professional and polished result.
Planning the Placement
Before attaching the coat rack hooks, take a moment to plan their placement. Consider the dimensions of your bench and the number of hooks you intend to install. Ensure that the spacing between the hooks is uniform and allows for easy access and ample hanging space. You may want to use a measuring tape and pencil to mark the precise locations for each hook, maintaining symmetry and balance in the overall design.
Preparing the Hooks
If your coat rack hooks come with accompanying screws, ensure that they are of the appropriate length for securing the hooks to the wood without protruding through the other side. If necessary, select shorter screws to avoid any unwanted punctures. Additionally, consider pre-drilling pilot holes at the marked locations to facilitate the insertion of the screws and prevent the wood from splitting.
Attaching the Hooks
With the preparation complete, it's time to attach the coat rack hooks to your bench. Position each hook at its designated location, aligning it carefully with the markings you've made. Using a screwdriver or power drill, secure the hooks in place by driving the screws through the pre-drilled pilot holes. Ensure that the hooks are firmly attached and can bear the weight of heavy coats without wobbling or coming loose.
Adding Decorative Elements
Depending on your design preferences, consider incorporating decorative elements to enhance the visual appeal of your coat rack bench. This could involve adding embellishments such as decorative caps or finials to the ends of the hooks, providing a touch of elegance and charm to the piece. These small details can elevate the overall aesthetic and make your coat rack bench a standout feature in your entryway or mudroom.
By following these steps, you'll expertly attach the coat rack hooks to your bench, transforming it into a functional and stylish furniture piece. With the hooks securely in place, your coat rack bench is now ready for the final phase of adding the bench seat, bringing you closer to the completion of your custom creation.
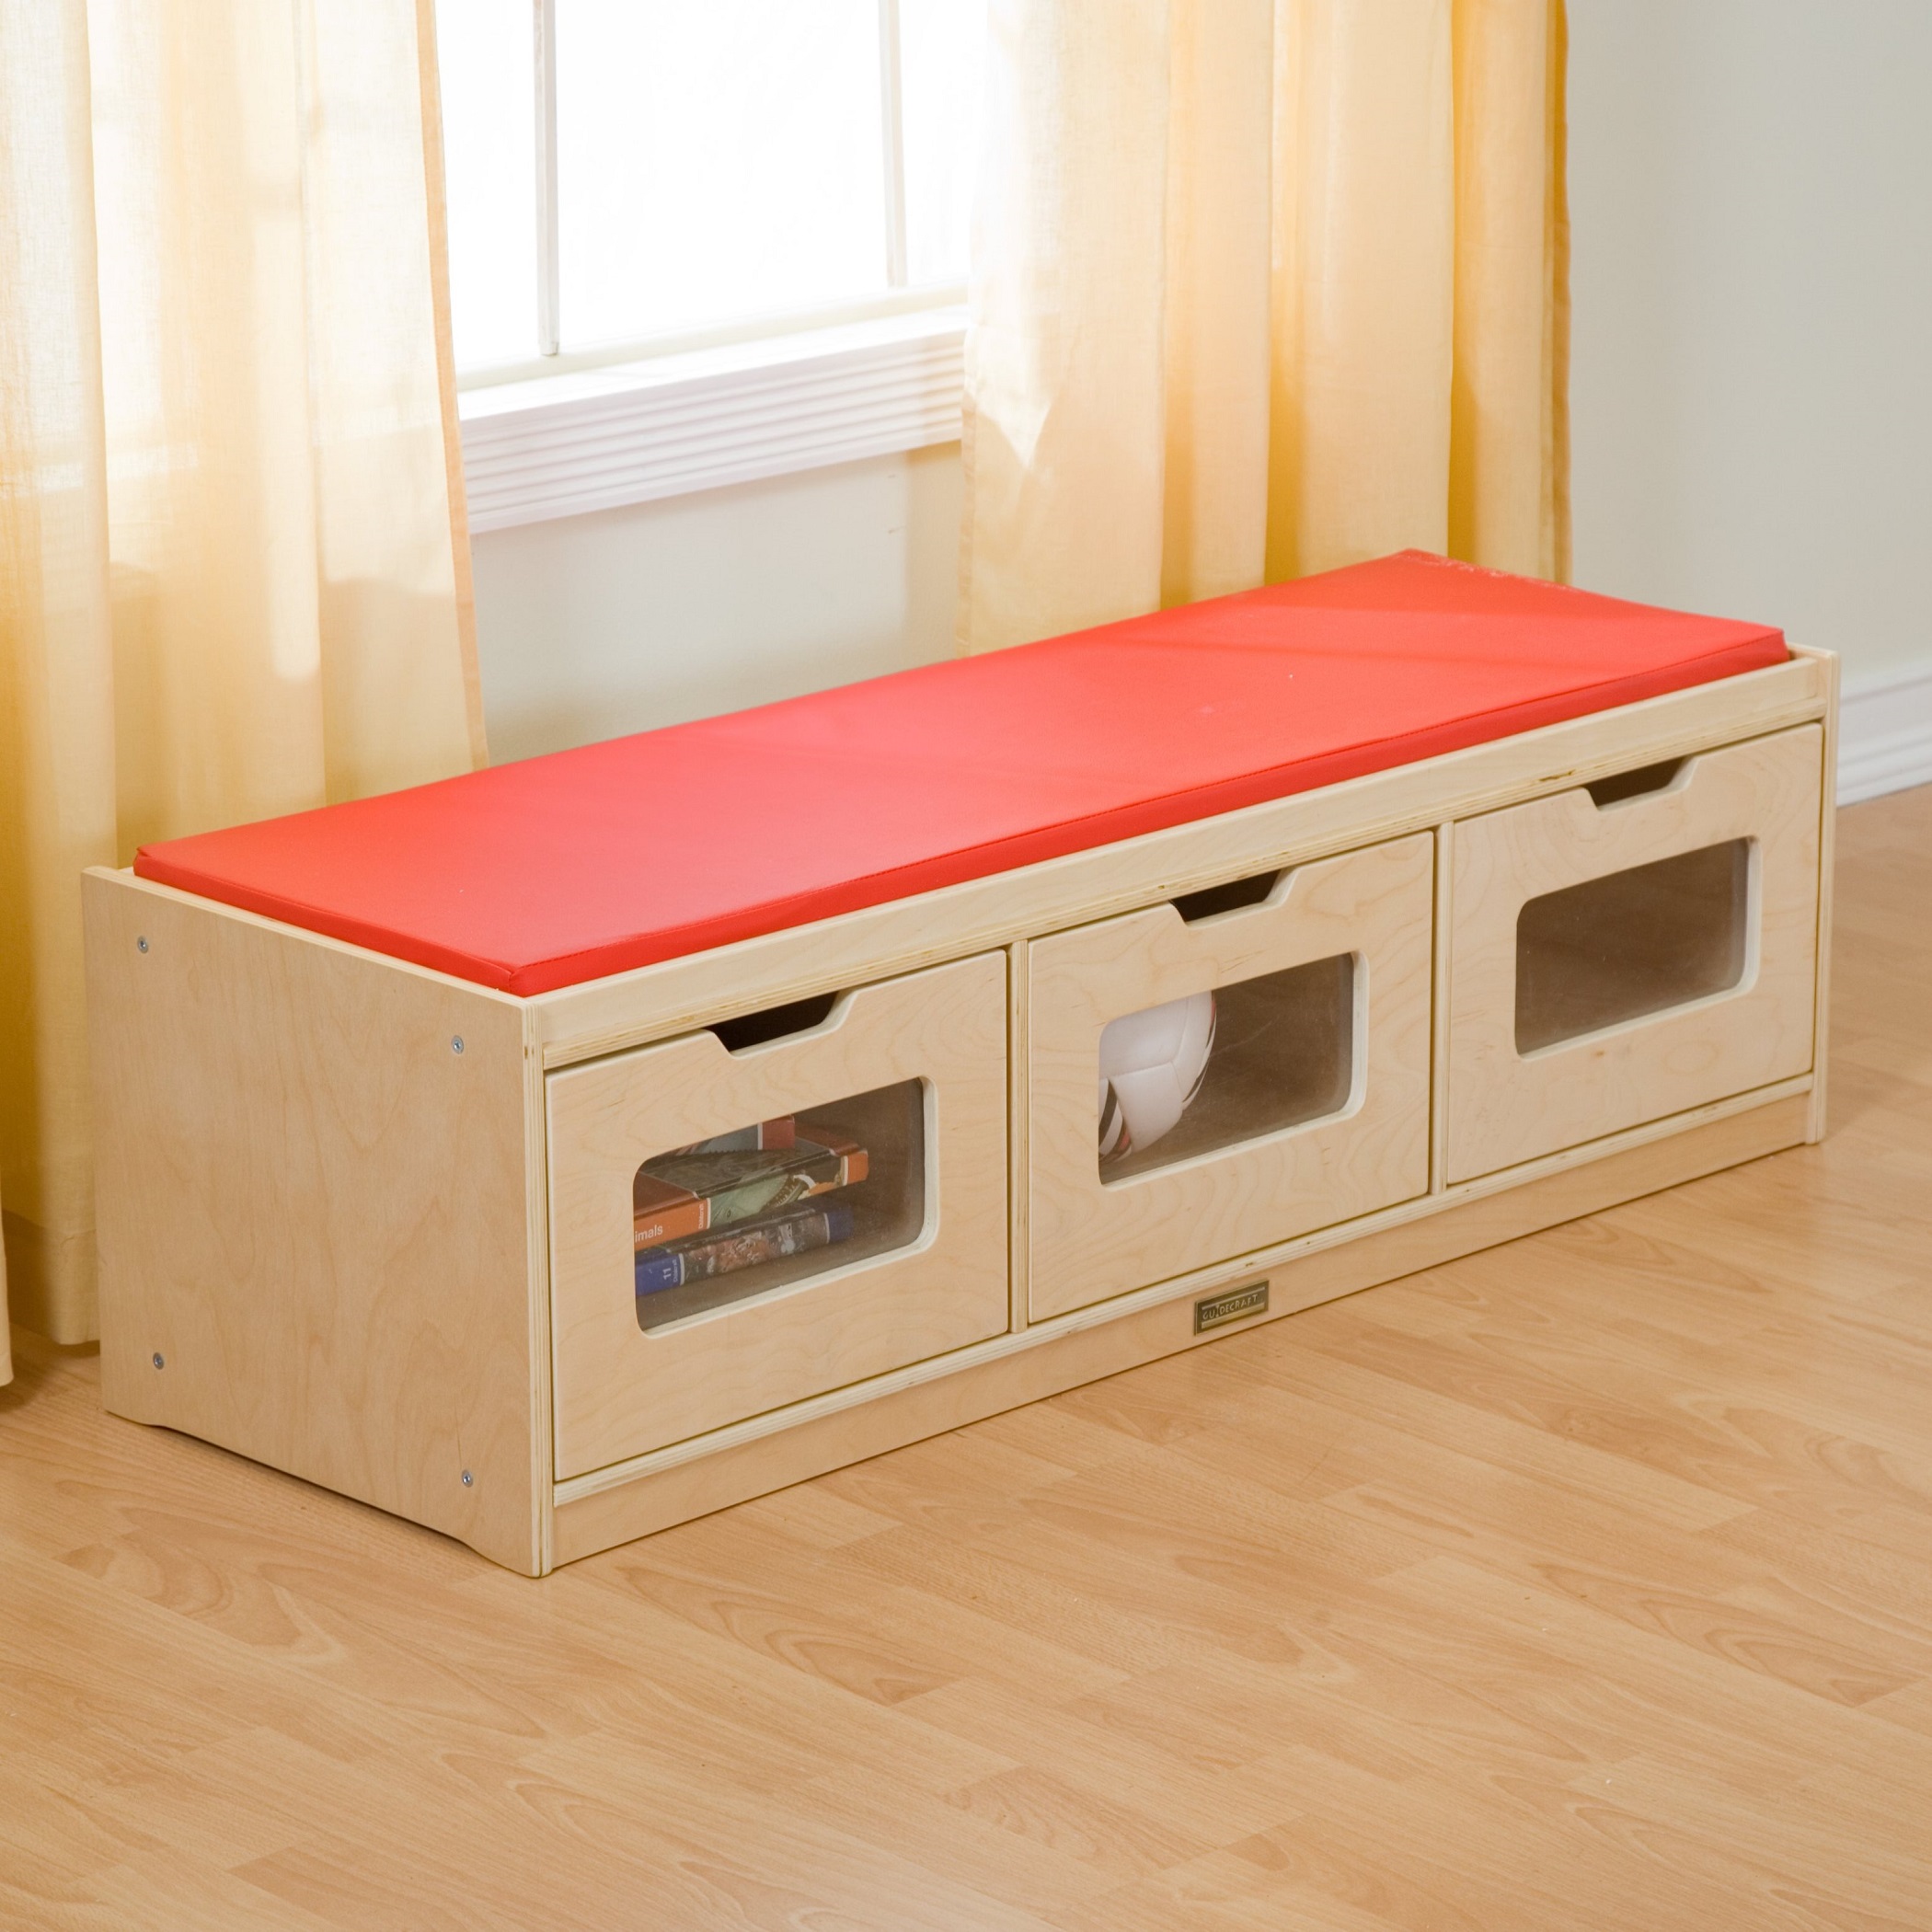
Step 4: Add the Bench Seat
Adding the bench seat is a pivotal step in bringing your coat rack bench to completion. Not only does it provide a comfortable and practical seating area, but it also serves as the finishing touch that unifies the entire piece. Here's a detailed guide on how to expertly add the bench seat to your coat rack bench, ensuring a seamless and professional result.
Selecting the Bench Seat Material
Begin by selecting the material for the bench seat. Opt for a sturdy and visually appealing wood that complements the overall design of your coat rack bench. Consider the dimensions of the bench frame and choose a wood panel that fits snugly within the frame, providing ample seating space while aligning with the edges of the frame for a cohesive look.
Cutting and Preparing the Bench Seat
Using a circular saw or miter saw, carefully cut the selected wood panel to the precise dimensions required for the bench seat. Ensure that the edges are smooth and even, allowing for a comfortable seating surface. If desired, you can round off the corners of the bench seat for a softer and more polished appearance.
Read more: How To Make A Standing Coat Rack
Attaching the Bench Seat to the Frame
With the bench seat prepared, position it securely within the frame of the coat rack bench. Ensure that it sits flush and level, aligning perfectly with the edges of the frame. Once the positioning is confirmed, use wood screws to secure the bench seat to the frame, driving the screws through the underside of the frame into the bench seat. This method of attachment provides a clean and seamless look from the top while ensuring a strong and stable connection.
Reinforcing the Bench Seat
To enhance the durability and stability of the bench seat, consider adding additional support underneath. This can be achieved by attaching wooden braces or cleats along the underside of the bench seat, providing reinforcement and preventing any potential warping or sagging over time. Secure the braces with wood screws, ensuring they are evenly spaced and firmly attached to the bench seat and frame.
Sanding and Finishing
Once the bench seat is securely attached, take the time to sand the edges and surfaces, ensuring a smooth and splinter-free finish. Pay attention to any sharp corners or rough spots, smoothing them out for a comfortable seating experience. Finally, apply a wood stain or paint of your choice to the bench seat, enhancing its visual appeal and protecting it from wear and tear.
By following these detailed steps, you'll expertly add the bench seat to your coat rack bench, bringing the entire piece to fruition. With the bench seat in place, your custom creation is now ready to grace your entryway or mudroom, providing both functionality and aesthetic charm.
Step 5: Sand and Finish
After the assembly of the coat rack bench, the crucial step of sanding and finishing brings the project to its final stage, ensuring a flawless and professional appearance. This step not only enhances the visual appeal of the bench but also adds a layer of protection, ensuring its longevity and durability.
Read more: How To Build Patio Benches
Sanding the Surfaces
Begin by carefully sanding all exposed surfaces of the coat rack bench, including the frame and the bench seat. Start with coarse-grit sandpaper to smooth out any rough edges, uneven surfaces, or imperfections in the wood. Gradually progress to finer-grit sandpaper to achieve a silky-smooth finish. Pay special attention to the corners, edges, and joints, ensuring that they are seamlessly blended and free of any sharp or rough areas.
Smoothing the Edges
In addition to sanding the surfaces, focus on smoothing the edges of the bench seat and the frame. Rounded edges not only enhance the visual appeal of the bench but also contribute to a more comfortable seating experience. Use sandpaper to gently round off the edges, creating a soft and inviting contour that adds a touch of refinement to the overall design.
Removing Dust and Residue
Once the sanding process is complete, thoroughly remove any dust and residue from the surfaces of the coat rack bench. A clean, dust-free surface is essential for achieving a flawless finish. Use a soft, dry cloth or a tack cloth to wipe down the entire bench, ensuring that no particles or debris remain on the wood surfaces.
Applying the Finish
With the surfaces impeccably sanded and cleaned, it's time to apply the chosen finish to the coat rack bench. Whether you opt for a rich wood stain to accentuate the natural beauty of the wood or a vibrant paint color to complement your decor, the application process requires precision and care. Use high-quality brushes or applicators to apply the finish evenly, ensuring complete coverage and a smooth, lustrous appearance.
Read more: How To Build Woodworking Bench
Adding Protective Coating
To safeguard the coat rack bench from daily wear and tear, consider adding a protective coating as the final step. A clear polyurethane sealant or varnish can provide a durable and resilient layer of protection, shielding the wood from scratches, moisture, and UV damage. Apply the protective coating according to the manufacturer's instructions, allowing ample drying time between coats for a robust and long-lasting finish.
By meticulously sanding and finishing the coat rack bench, you'll elevate it from a collection of wood components to a stunning and functional piece of furniture. The attention to detail in this final step ensures that your custom creation will stand the test of time, adding both practicality and beauty to your home.
Conclusion
Congratulations on successfully completing the construction of your very own coat rack bench! Through each step of this woodworking journey, you've not only crafted a practical and stylish piece of furniture but also honed your skills as a DIY enthusiast. As you stand back and admire your creation, you can take pride in the fact that you've brought both form and function to your entryway or mudroom.
Your coat rack bench is more than just a furniture piece; it's a testament to your creativity and craftsmanship. With its sturdy frame, carefully positioned coat rack hooks, and a comfortable bench seat, it stands as a symbol of your dedication to creating a welcoming and organized space within your home.
Beyond the tangible aspects of your coat rack bench, the journey of building it has likely provided you with a sense of fulfillment and accomplishment. The process of selecting materials, measuring and cutting lumber, and assembling the components has not only expanded your woodworking skills but also offered a creative outlet for self-expression.
As you envision your coat rack bench taking its place in your home, picture the convenience it will bring to your daily routine. No more scrambling to find a spot for coats and bags, no more searching for a place to sit while putting on or taking off shoes. Your custom creation will effortlessly fulfill these needs while adding a touch of elegance to your living space.
Moreover, the knowledge and experience gained from this project will undoubtedly serve you well in future woodworking endeavors. Whether you embark on more furniture-building projects or tackle other DIY tasks around the house, the skills and confidence you've acquired will continue to be valuable assets.
As you bask in the satisfaction of completing your coat rack bench, consider the joy it will bring to your household and the admiration it will garner from visitors. Your creation is not just a piece of furniture; it's a reflection of your dedication to enhancing your living environment through creativity and practicality.
So, as you take a moment to appreciate your finished coat rack bench, revel in the sense of accomplishment and the anticipation of the functionality and beauty it will bring to your home. Your custom creation is a testament to your ingenuity and a valuable addition to your living space. Well done!
Frequently Asked Questions about How To Build A Coat Rack Bench
Was this page helpful?
At Storables.com, we guarantee accurate and reliable information. Our content, validated by Expert Board Contributors, is crafted following stringent Editorial Policies. We're committed to providing you with well-researched, expert-backed insights for all your informational needs.
0 thoughts on “How To Build A Coat Rack Bench”