Home>Gardening & Outdoor>Outdoor Structures>How To Build A Wood Ramp For A Shed
Outdoor Structures
How To Build A Wood Ramp For A Shed
Modified: August 24, 2024
Learn how to construct a durable wood ramp for your shed with our step-by-step guide. Create a safe and functional outdoor structure for easy access.
(Many of the links in this article redirect to a specific reviewed product. Your purchase of these products through affiliate links helps to generate commission for Storables.com, at no extra cost. Learn more)
Introduction
Building a wood ramp for a shed is a practical and rewarding project that can greatly enhance the accessibility and functionality of your outdoor storage space. Whether you use your shed for storing tools, equipment, or as a workshop, a well-constructed ramp can make it easier to move heavy items in and out. In this guide, we will walk you through the step-by-step process of building a sturdy and reliable wood ramp for your shed. From planning and preparation to the final touches, you will gain valuable insights and expert tips to help you successfully complete this project.
Not only does a well-built ramp provide convenience, but it also adds to the overall aesthetic appeal of your property. By utilizing the natural beauty and durability of wood, you can create a ramp that seamlessly blends with the surroundings while serving its practical purpose. Additionally, the satisfaction of designing and constructing a functional structure with your own hands is truly fulfilling.
Throughout this guide, we will cover essential aspects such as planning and preparation, gathering materials and tools, choosing the right location for the ramp, building the ramp frame, installing the ramp surface, and adding handrails for added safety and convenience. Each step is crucial in ensuring that the ramp meets your specific needs and complies with safety standards.
Whether you are an experienced DIY enthusiast or a novice looking to expand your skills, this comprehensive guide will equip you with the knowledge and confidence to take on the challenge of building a wood ramp for your shed. So, roll up your sleeves, gather your tools, and let's embark on this rewarding journey of creating a functional and visually appealing wood ramp for your outdoor shed.
Key Takeaways:
- Building a wood ramp for your shed is a rewarding DIY project that enhances accessibility and functionality. Thorough planning, sturdy construction, and optional handrails ensure a safe and visually appealing addition to your outdoor space.
- Carefully selecting materials, choosing the right location, and adding non-slip features contribute to a durable and user-friendly wood ramp. Consider handrails for added safety, making the ramp accessible to individuals of all abilities.
Read more: How To Build A Wood Shed
Planning and Preparation
Before diving into the construction of a wood ramp for your shed, thorough planning and preparation are essential for a successful outcome. Start by assessing the specific needs and requirements for the ramp, considering factors such as the intended use, the weight of items to be transported, and the slope required for easy access.
Begin by measuring the height from the ground to the shed entrance. This measurement will determine the length and slope of the ramp. The slope is a critical aspect to ensure that the ramp is easily navigable while accommodating the necessary rise in elevation. As a general guideline, a 1:12 slope ratio is recommended for wheelchair accessibility, but this can be adjusted based on your specific needs.
Next, check local building codes and regulations to ensure compliance with any requirements related to ramps, such as width, slope, and handrail specifications. Understanding these regulations will help you design a ramp that meets safety standards and legal requirements.
Once the design and measurements are finalized, create a detailed plan that outlines the materials needed, the construction process, and a timeline for completion. This plan will serve as a roadmap for the project, helping you stay organized and efficient throughout the construction phase.
Consider the environmental factors that may impact the longevity of the ramp, such as exposure to sunlight, moisture, and fluctuating temperatures. Choosing durable, weather-resistant materials will ensure that the ramp withstands the elements and remains in top condition for years to come.
Lastly, assess your skill level and availability of tools. If you are new to woodworking or construction projects, consider seeking guidance from experienced individuals or professionals. Gather the necessary tools, ensuring that they are in good working condition and suitable for the tasks involved in ramp construction.
By thoroughly planning and preparing for the construction of the wood ramp, you set the stage for a smooth and efficient building process. With a clear understanding of the requirements, regulations, and materials, you can proceed with confidence, knowing that your efforts will result in a well-designed and functional addition to your shed.
Gathering Materials and Tools
Once the planning phase is complete, it’s time to gather the materials and tools necessary for constructing the wood ramp for your shed. The specific materials and tools required will depend on the design, size, and slope of the ramp, as well as your local building codes and environmental factors. Here’s a general overview of the essential items you’ll need:
Materials:
- Pressure-treated lumber: This is the primary material for building the frame and support structure of the ramp. Pressure-treated wood is resistant to decay and rot, making it ideal for outdoor applications.
- Plywood or composite decking: These materials are commonly used for the ramp surface, providing a durable and slip-resistant finish. Composite decking offers the advantage of low maintenance and enhanced longevity.
- Concrete or gravel: Depending on the soil composition and drainage in the ramp area, you may need to use concrete footings or a gravel base to provide stable support for the ramp.
- Galvanized screws and hardware: Select corrosion-resistant fasteners to ensure the structural integrity of the ramp, especially in outdoor environments where exposure to moisture is a concern.
- Ramp surfacing material: If additional traction is desired, consider incorporating non-slip surfacing material to enhance safety, especially in wet or icy conditions.
- Handrail materials (if applicable): If you opt to include handrails for added safety and accessibility, gather the necessary components such as wood or metal railing, balusters, and mounting hardware.
Tools:
- Measuring tape and level: Essential for taking accurate measurements and ensuring the ramp is properly aligned and sloped.
- Saw: Depending on the chosen materials, you may need a circular saw, miter saw, or reciprocating saw for cutting lumber and decking to the required dimensions.
- Drill and driver: A power drill and screwdriver bit are indispensable for fastening the components together securely.
- Shovel and rake: If concrete footings or a gravel base are necessary, these tools will aid in excavation and leveling the ramp site.
- Safety gear: Prioritize safety by using protective equipment such as gloves, safety glasses, and hearing protection, especially when using power tools and handling construction materials.
Before purchasing materials, review your project plan and ensure that you have accounted for all the necessary items. Consider the quantity and dimensions of the materials based on the ramp design and measurements. By gathering the right materials and tools in advance, you’ll be well-prepared to commence the construction process with confidence and efficiency.
Read more: How To Build A Ramp For A Deck
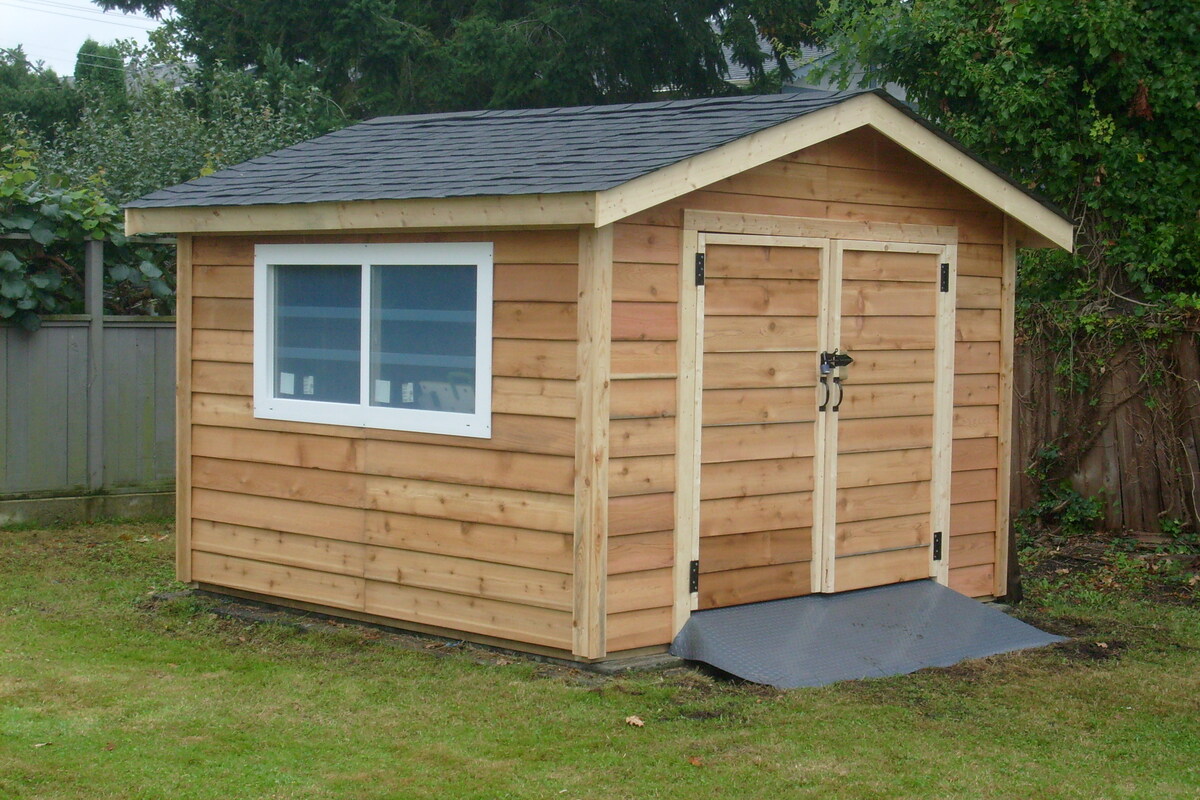
Choosing the Right Location
When selecting the location for your wood ramp, careful consideration of the terrain, accessibility, and proximity to the shed entrance is crucial. The ideal location will provide a smooth transition from ground level to the shed, ensuring ease of use and safety for anyone using the ramp.
Start by evaluating the terrain and identifying a spot that offers a relatively flat and stable surface for the ramp. If the ground is uneven or sloped, you may need to make adjustments through excavation, adding fill material, or constructing retaining walls to create a level area for the ramp. It’s essential to ensure that the ramp site is free from obstructions such as rocks, tree roots, or drainage features that could impede the construction process or compromise the integrity of the ramp.
Consider the path leading to the shed entrance and choose a location that minimizes the length of the ramp while maintaining a manageable slope. This will make the ramp more user-friendly and efficient for transporting items in and out of the shed. Additionally, assess the surrounding landscape and vegetation to determine if any trees, shrubs, or structures need to be relocated or trimmed to accommodate the ramp.
Accessibility is another key factor to keep in mind when choosing the location. Ensure that the ramp provides easy access for individuals with mobility challenges, such as those using wheelchairs or mobility aids. The design and placement of the ramp should prioritize inclusivity and convenience for all users, regardless of their physical abilities.
Furthermore, consider the visual impact of the ramp on the overall aesthetics of the property. While the primary focus is on functionality, integrating the ramp seamlessly into the landscape and architectural elements can enhance the overall appeal of the outdoor space. Choosing a location that complements the existing design and layout of the property will result in a harmonious and visually pleasing addition.
By carefully evaluating the terrain, accessibility, and visual considerations, you can confidently select the right location for your wood ramp. Taking the time to assess these factors will contribute to the successful integration of the ramp into your outdoor space, ensuring both practicality and visual appeal.
Building the Ramp Frame
Constructing a sturdy and well-designed frame is the foundation of a durable wood ramp for your shed. The frame provides the structural support and stability necessary to withstand regular use and varying weather conditions. Here’s a step-by-step guide to building the ramp frame:
1. Marking the Layout:
Begin by marking the layout of the ramp on the ground, ensuring that it aligns with the measurements and slope determined during the planning phase. Use stakes and string to outline the perimeter of the ramp, providing a visual guide for the construction process.
2. Excavation and Footings:
If concrete footings are required to support the ramp, excavate the designated areas to the specified depth and dimensions. Install formwork and pour concrete to create stable footings that will bear the weight of the ramp. Alternatively, if a gravel base is sufficient for your ramp design, ensure that the area is properly leveled and compacted to provide a solid foundation.
Read more: How To Build A Simple Wood Shed
3. Assembling the Frame:
Using pressure-treated lumber, begin assembling the frame of the ramp according to the planned dimensions. The frame should include joists, headers, and support beams that form the underlying structure of the ramp. Secure the components together using galvanized screws or appropriate hardware, ensuring that the frame is rigid and level.
4. Adding Cross Bracing:
Incorporate cross bracing within the frame to enhance stability and prevent lateral movement. Diagonal braces can be installed between the joists to reinforce the structure and minimize any potential for swaying or shifting under load.
5. Attaching Ledger Board:
If the ramp will be attached to the shed, install a ledger board along the entrance of the shed to provide a secure connection point. The ledger board should be firmly anchored to the shed structure, providing solid support for the ramp and ensuring a seamless transition from the ramp to the shed entrance.
6. Checking Alignment and Level:
Throughout the construction process, regularly check the alignment and level of the frame to ensure that it conforms to the intended slope and dimensions. Proper alignment is essential for the functionality and safety of the ramp, so adjustments should be made as needed.
By following these steps, you will create a robust and reliable frame that forms the backbone of the wood ramp. Attention to detail and precision during the construction of the frame will contribute to the overall stability and longevity of the ramp, setting the stage for the installation of the ramp surface and any additional features.
Read more: How To Build A Wood Foundation For A Shed
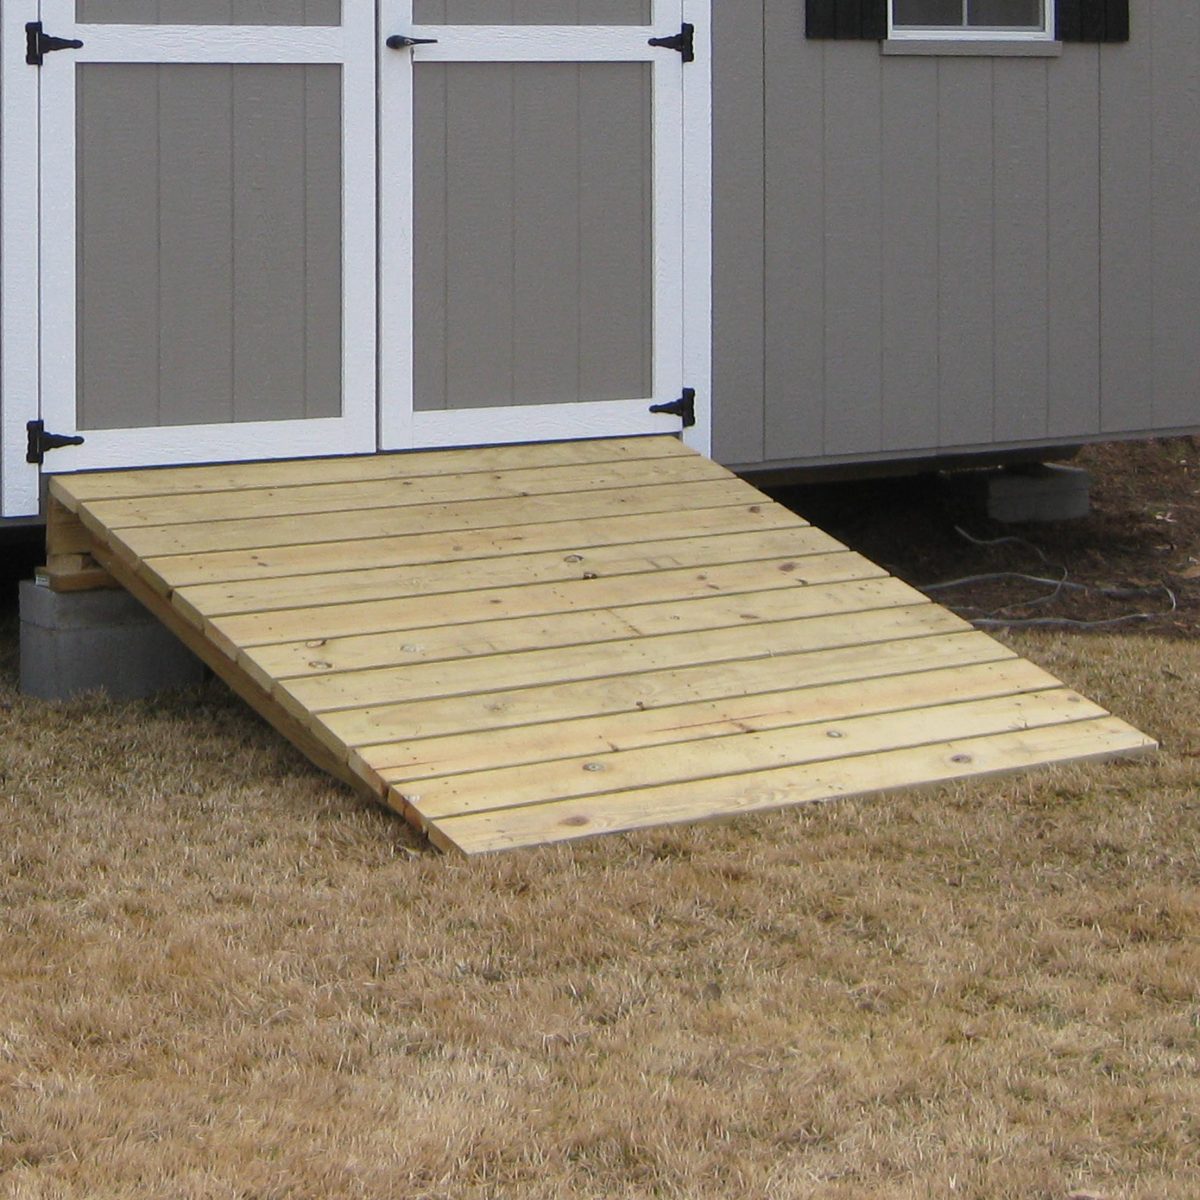
Installing the Ramp Surface
Once the frame of the wood ramp for your shed is securely in place, the next crucial step is to install the ramp surface. The surface material not only contributes to the functionality and durability of the ramp but also plays a significant role in its visual appeal. Here’s a comprehensive guide to installing the ramp surface:
1. Selecting the Surface Material:
Depending on your preferences and budget, choose a suitable material for the ramp surface. Pressure-treated plywood is a common and cost-effective option, providing a sturdy base for the ramp. Alternatively, composite decking offers enhanced durability, low maintenance, and a slip-resistant surface, making it an ideal choice for long-term use.
2. Cutting and Fitting the Material:
Measure and cut the chosen surface material to fit the dimensions of the ramp frame accurately. Ensure that the edges are smooth and aligned with the frame, providing a seamless transition from the ground to the shed entrance. If using multiple sheets or boards, securely fasten them together to create a continuous and uniform surface.
3. Securing the Surface:
Using galvanized screws or appropriate fasteners, secure the ramp surface to the frame, ensuring that it is firmly attached and free from any protruding nails or screws that could pose a safety hazard. Pay attention to the spacing and placement of the fasteners to maintain the integrity of the surface material.
Read more: How To Build A Wood Base For A Shed
4. Adding Non-Slip Features:
To enhance safety, consider incorporating non-slip features onto the ramp surface, especially if the area is prone to moisture or slick conditions. Non-slip strips, coatings, or paint can be applied to provide added traction and reduce the risk of slips and falls, particularly during inclement weather.
5. Finishing Touches:
Once the surface material is securely installed, inspect the ramp for any sharp edges, splinters, or imperfections that may compromise safety and usability. Sand down rough areas and apply a protective sealant or finish to the surface, safeguarding it from moisture and wear while maintaining a polished appearance.
6. Conducting Quality Checks:
Before putting the ramp into regular use, conduct thorough quality checks to ensure that the surface is level, stable, and free from any defects. Test the ramp under load to verify its structural integrity and functionality, addressing any issues or adjustments as necessary.
By following these steps, you will successfully install a durable and visually appealing surface for your wood ramp. Attention to detail and precision during the installation process will result in a functional and safe ramp that enhances the accessibility and usability of your shed.
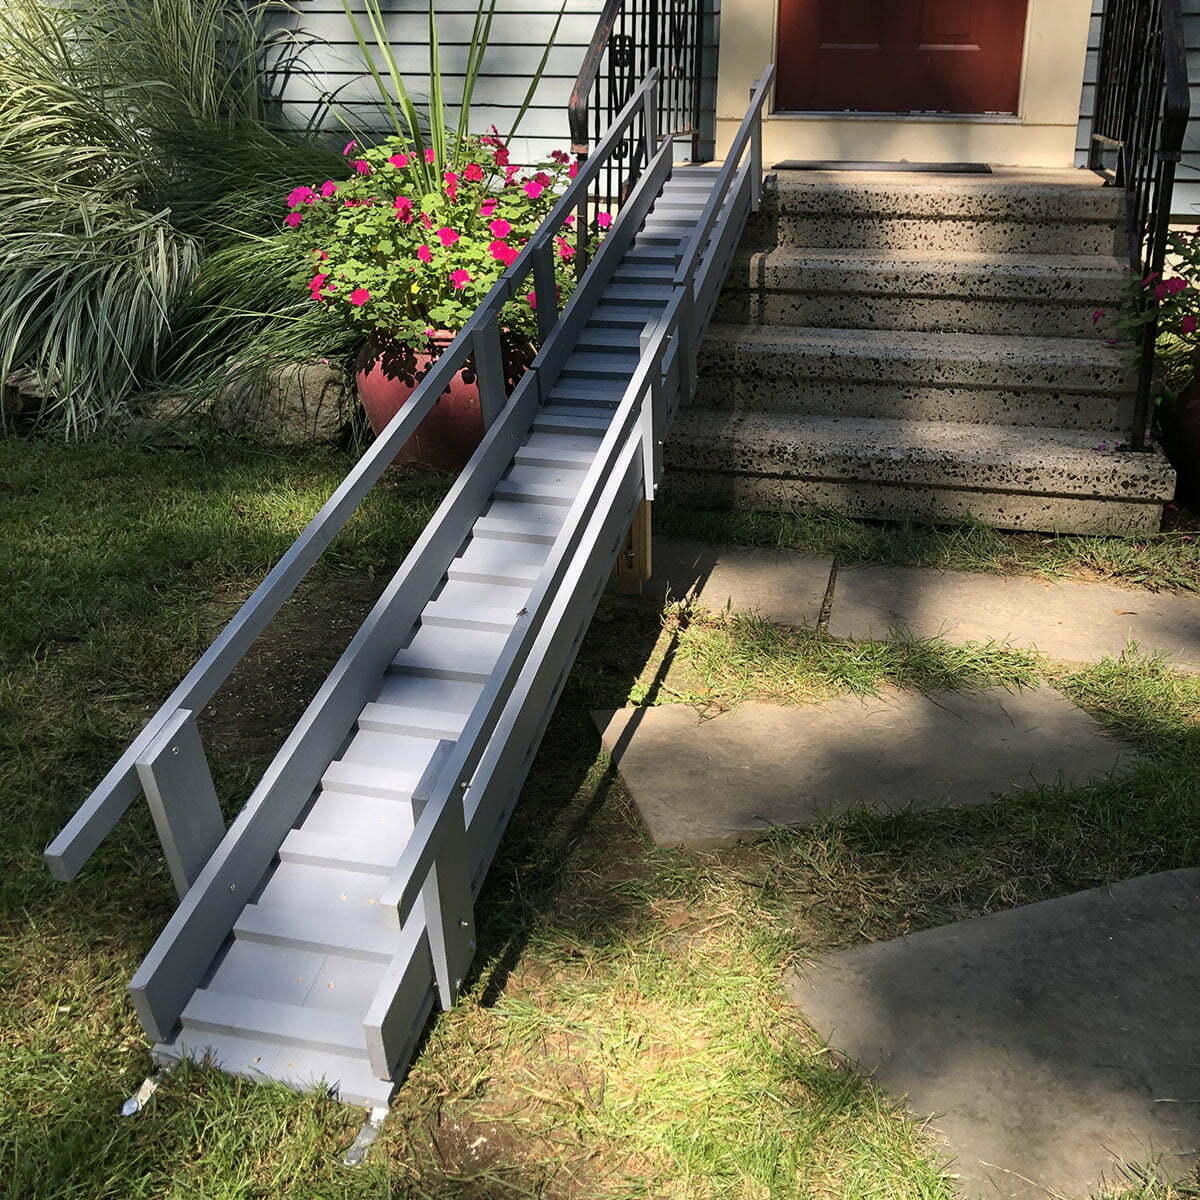
Adding Handrails (Optional)
While not always a mandatory feature, adding handrails to your wood ramp can significantly enhance safety and accessibility, especially for individuals with mobility challenges or those transporting heavy items. Handrails provide support and stability, reducing the risk of slips and falls while instilling confidence in users as they navigate the ramp. Here’s a detailed guide to adding handrails to your wood ramp:
Read more: How To Build A Porch Ramp
1. Assessing the Need:
Evaluate the intended use of the ramp and consider the potential users. If the ramp will be frequently used by individuals with limited mobility or for transporting bulky items, incorporating handrails is highly advisable. Additionally, local building codes and accessibility guidelines may specify the requirement for handrails based on the ramp’s height and purpose.
2. Choosing Handrail Materials:
Select suitable materials for the handrails, taking into account durability, aesthetics, and compatibility with the ramp design. Common options include pressure-treated wood, metal railing systems, or composite materials. Ensure that the chosen materials are weather-resistant and capable of withstanding regular use and exposure to the elements.
3. Designing the Handrail System:
Determine the layout and configuration of the handrails, considering factors such as height, spacing, and attachment points along the ramp. The handrail system should provide a secure grip and continuous support along the entire length of the ramp, conforming to safety standards and ergonomic considerations.
4. Installing the Handrails:
Begin by attaching the necessary mounting hardware to the ramp frame or surface, ensuring that it is securely anchored and capable of withstanding the intended load. Install the handrail posts at designated intervals, ensuring that they are plumb and aligned with the ramp’s slope. Secure the handrail sections to the posts, verifying that they are firmly attached and free from any sharp edges or protruding elements.
Read more: How To Make A Wood Ramp Non-Slip
5. Adding Finishing Details:
Once the handrails are installed, inspect the entire system for any rough edges, splinters, or sharp corners that could pose a safety risk. Sand down any imperfections and apply a protective finish to the handrails, safeguarding them from moisture and wear while enhancing their visual appeal.
6. Conducting Safety Checks:
Test the handrails under load to ensure that they provide stable and reliable support. Verify that the handrails meet the required height and clearance standards, promoting safe and comfortable use for all individuals accessing the ramp.
By incorporating well-designed handrails, you enhance the safety and inclusivity of your wood ramp, making it more accessible and user-friendly for everyone. Whether for personal use or to comply with accessibility regulations, the addition of handrails contributes to the overall functionality and peace of mind when utilizing the ramp.
Conclusion
Congratulations on completing the construction of your wood ramp for the shed! By following the comprehensive guide provided, you have successfully transformed accessibility and functionality within your outdoor space. The process of planning, gathering materials, and executing each step with precision has resulted in a well-designed and reliable ramp that enhances the usability of your shed.
As you stand back and admire the finished ramp, take pride in the craftsmanship and attention to detail that went into its construction. The sturdy frame, carefully installed surface, and optional handrails all contribute to a seamless and safe transition from ground level to the shed entrance. Not only does the ramp serve a practical purpose, but it also adds to the overall aesthetic appeal of your property, blending harmoniously with the surrounding landscape.
With the completion of the wood ramp, you have created a valuable addition to your outdoor space that offers convenience and inclusivity. Whether used for storing tools, equipment, or as a workspace, the ramp facilitates easy access for individuals of all abilities, ensuring a seamless experience when moving items in and out of the shed.
As you move forward, remember to conduct regular maintenance and inspections to uphold the ramp’s integrity and functionality. Keep an eye on the surface for wear and tear, address any loose fasteners promptly, and ensure that the handrails, if installed, remain secure and stable. By staying proactive, you can prolong the lifespan of the ramp and continue to enjoy its benefits for years to come.
Lastly, consider sharing your experience and knowledge with others who may be embarking on similar projects. Your insights and lessons learned can inspire and guide fellow DIY enthusiasts, empowering them to take on their own wood ramp construction with confidence and success.
Thank you for investing your time, effort, and creativity into building a wood ramp for your shed. May it serve you well and contribute to the functionality and beauty of your outdoor space for many years ahead.
Frequently Asked Questions about How To Build A Wood Ramp For A Shed
Was this page helpful?
At Storables.com, we guarantee accurate and reliable information. Our content, validated by Expert Board Contributors, is crafted following stringent Editorial Policies. We're committed to providing you with well-researched, expert-backed insights for all your informational needs.


0 thoughts on “How To Build A Wood Ramp For A Shed”