Home>Furniture>Bedroom Furniture>How To Fix A Broken Wooden Bed Frame
Bedroom Furniture
How To Fix A Broken Wooden Bed Frame
Modified: October 19, 2024
Learn how to fix a broken wooden bed frame with our step-by-step guide. Restore your bedroom furniture and enjoy a sturdy and comfortable sleep.
(Many of the links in this article redirect to a specific reviewed product. Your purchase of these products through affiliate links helps to generate commission for Storables.com, at no extra cost. Learn more)
Introduction
Welcome to our comprehensive guide on how to fix a broken wooden bed frame. Your bed is an essential piece of furniture that provides comfort and relaxation after a long day. However, over time, wear and tear can take a toll on the wooden frame, leading to loose joints, cracks, or even broken pieces.
While the idea of repairing a broken bed frame may seem daunting, it is actually a relatively straightforward task that can save you money and extend the lifespan of your beloved bed. In this article, we will walk you through the step-by-step process of assessing the damage, gathering the necessary tools and materials, and executing the repairs like a pro.
Before we dive into the details, it’s important to note that the extent and complexity of the repair will vary depending on the severity of the damage. Minor issues can usually be fixed with some simple adjustments, while more significant problems may require a bit of carpentry expertise.
Whether you’re dealing with loose joints, cracks, or even broken pieces, this guide will provide you with the knowledge and confidence to tackle the repair head-on. So, grab your tools and let’s get started on bringing your bed frame back to its former glory!
Key Takeaways:
- Repairing a broken wooden bed frame is a manageable DIY project that can save money and extend the lifespan of your furniture. By following the comprehensive steps outlined in this guide, you can confidently restore the stability and functionality of your bed frame.
- In addition to fixing loose joints and reinforcing weak areas, you have the option to enhance the appearance of your repaired bed frame by sanding and applying paint or stain. This optional step allows you to customize the look of your bed frame and create a cohesive and aesthetic impact in your bedroom.
Read more: How To Paint A Wooden Bed Frame
Step 1: Assess the Damage
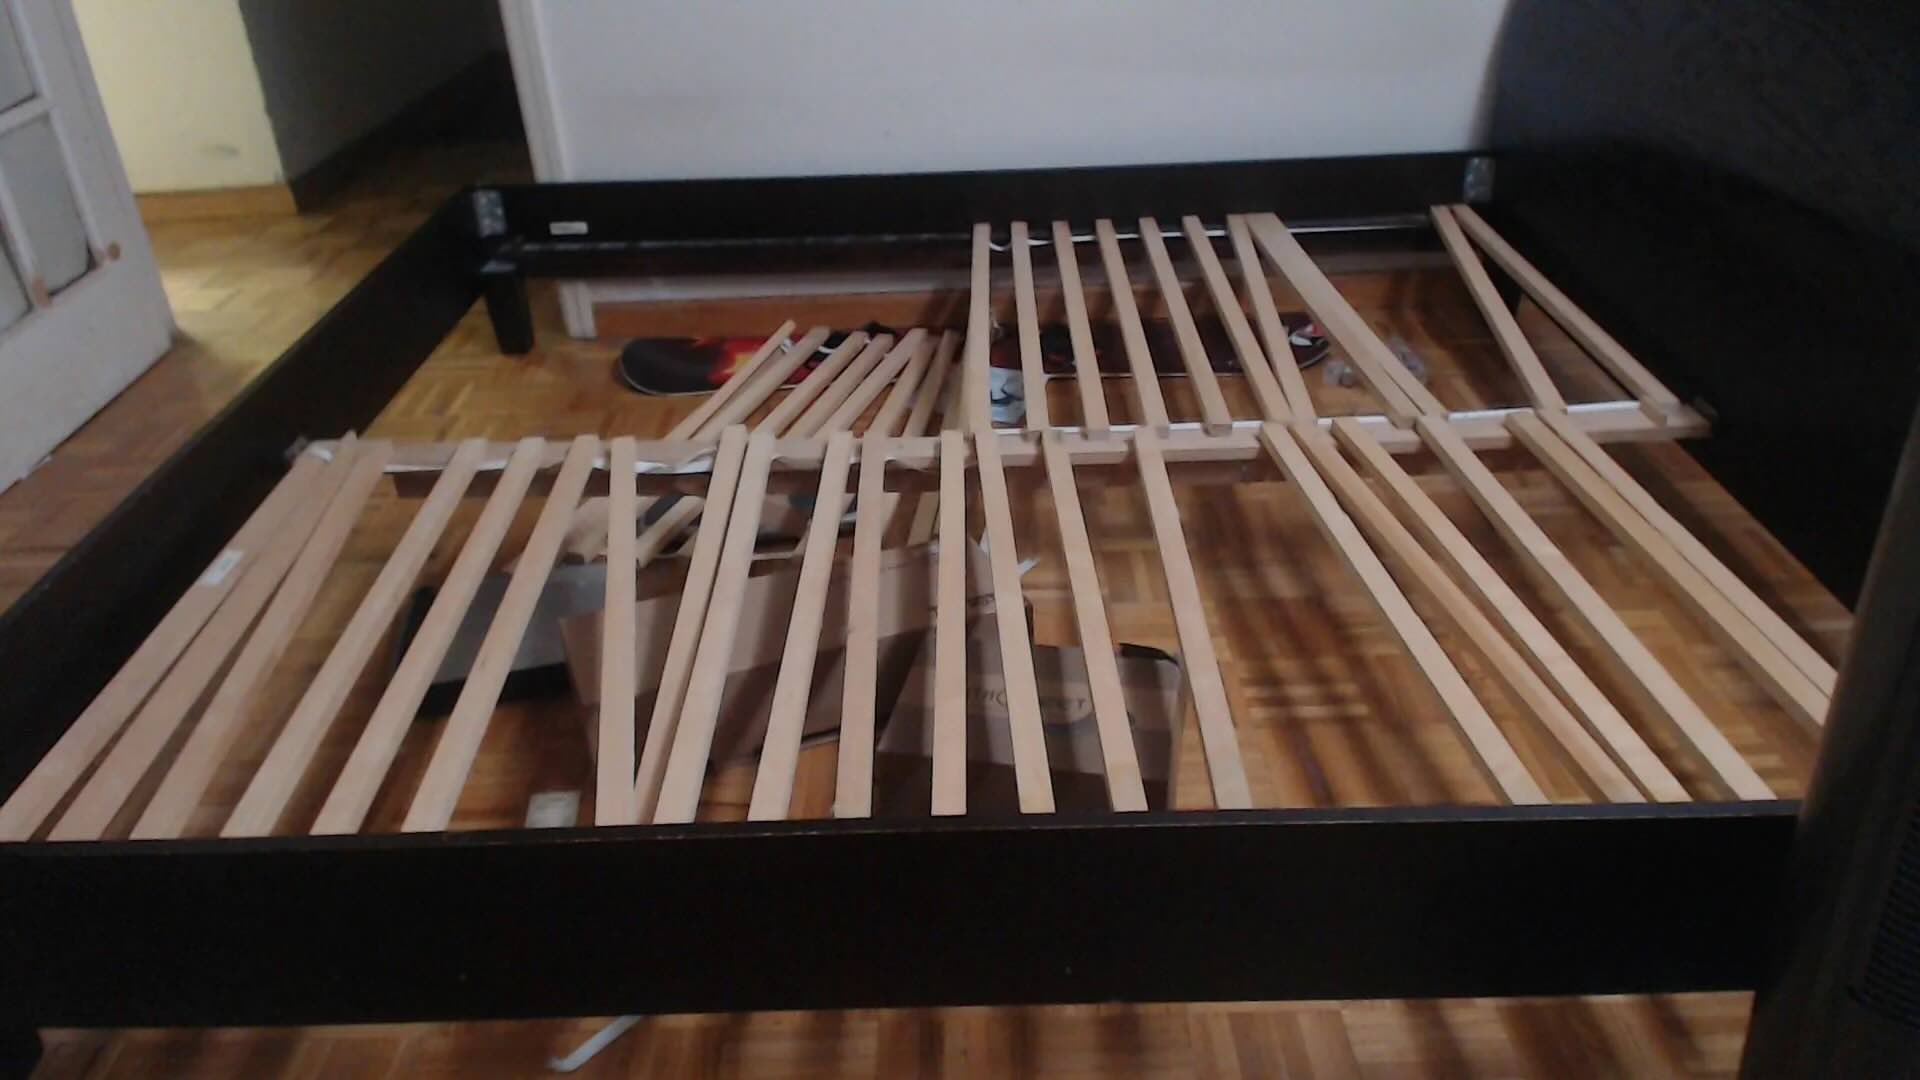
The first step in fixing a broken wooden bed frame is to assess the extent of the damage. Carefully examine the entire frame, paying close attention to the joints, slats, and any noticeable cracks or splits in the wood. Take note of any loose or detached parts, as well as any areas that may require additional reinforcement.
It’s important to have a clear understanding of the specific issues affecting your bed frame before proceeding with the repairs. This will help you determine the appropriate solutions and ensure that the repaired frame will be sturdy and functional.
Some common problems you may encounter include:
- Loose joints: Over time, the connections between the wooden pieces in your bed frame can become loose, leading to wobbling and instability.
- Cracks or splits: Exposure to temperature changes and humidity can cause the wood to crack or split. These issues may compromise the strength and aesthetics of your bed frame.
- Broken slats or support beams: The slats or support beams that hold the mattress may break due to excessive weight or pressure. This can result in sagging or uneven support.
- Detached or broken parts: Occasionally, pieces of the bed frame may become dislodged or break completely. This can significantly affect the overall stability and functionality of the bed.
By carefully assessing the damage, you’ll be able to determine the appropriate repair techniques and gather the necessary tools and materials. Remember, different repairs may require different approaches, so it’s crucial to have a clear understanding of the specific issues at hand.
Once you have assessed the damage, you’re ready to move on to the next step: gathering the necessary tools and materials. This will ensure a smooth and efficient repair process, allowing you to restore your bed frame to its former strength and beauty.
Step 2: Gather Necessary Tools and Materials
Before you embark on the journey of fixing your broken wooden bed frame, it is important to gather all the necessary tools and materials for a successful repair. Having the right equipment at hand will ensure that you can proceed smoothly and efficiently with the repairs.
Here is a list of commonly used tools and materials:
- Screwdriver set: A set of screwdrivers with various sizes and types (flathead, Phillips) will be essential for removing screws and tightening loose joints.
- Hammer: A hammer will come in handy for tapping in loose nails or gentle adjustments.
- Wood glue: Wood glue is crucial for reinforcing joints and repairing cracks or splits in the wood. Opt for a high-quality wood glue that dries clear and offers a strong bond.
- Clamps: Clamps are useful for holding the frame together while the glue dries. They help ensure a secure and tight bond between the wooden pieces.
- Sanding block or sandpaper: To smooth out rough edges, remove splinters, or prepare the surface for painting or staining, you will need sandpaper or a sanding block.
- Wood filler: For filling in cracks or splits in the wood, a wood filler that matches the color of your bed frame will be necessary.
- Paint or stain: If you plan to touch up the repaired areas or give your bed frame a fresh look, you will need paint or wood stain.
- Brushes: Brushes will be required for applying wood glue, paint, or stain.
- Ruler or measuring tape: Accurate measurements may be needed when cutting replacement pieces or positioning the repaired components.
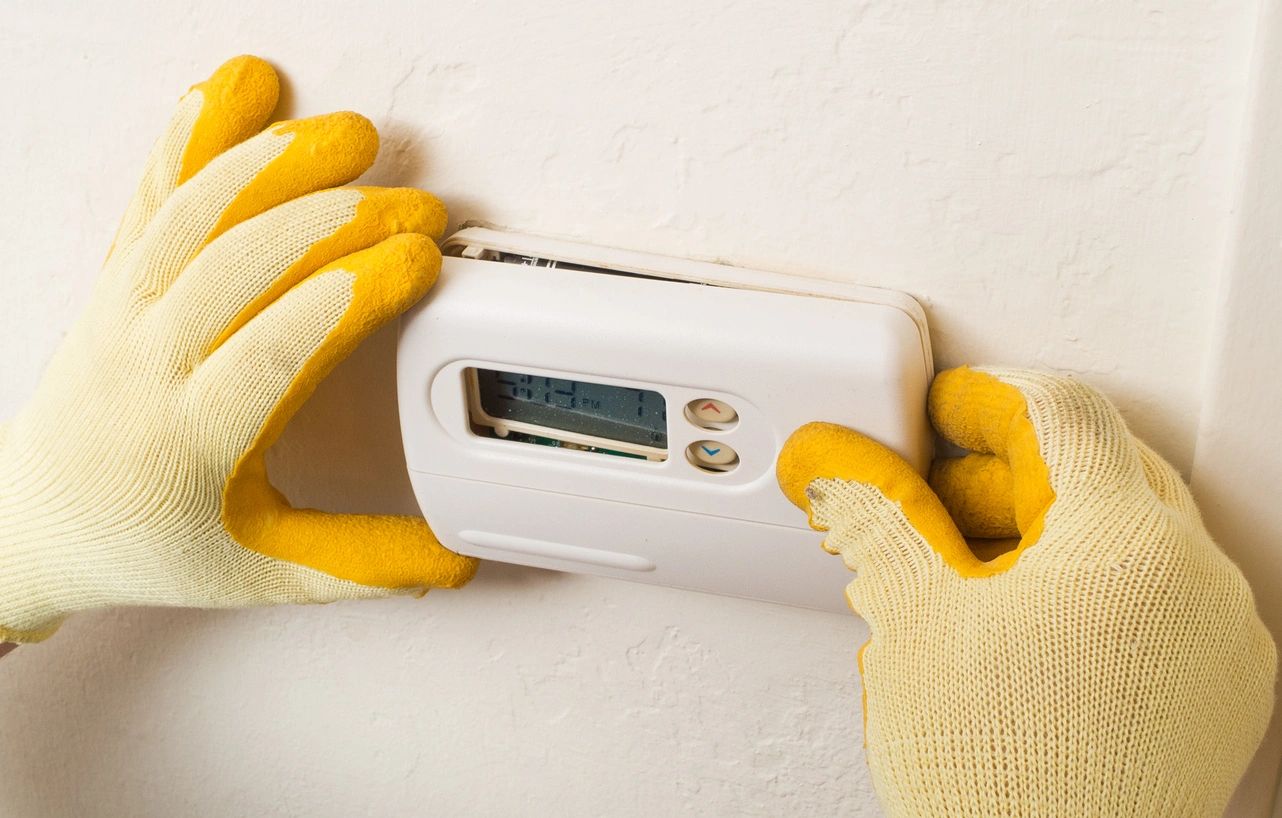
- Safety equipment: Safety should always be a priority, so don’t forget to wear protective gloves and safety glasses during the repair process.
This list is a general guide, and the specific tools and materials required may vary depending on the nature of your bed frame and the repairs needed. Take some time to assess the damage and consult any specific instructions or recommendations from the manufacturer, if available.
Once you have gathered all the necessary tools and materials, you’re ready to move on to the next step: removing the mattress and bedding to access the frame for repairs.
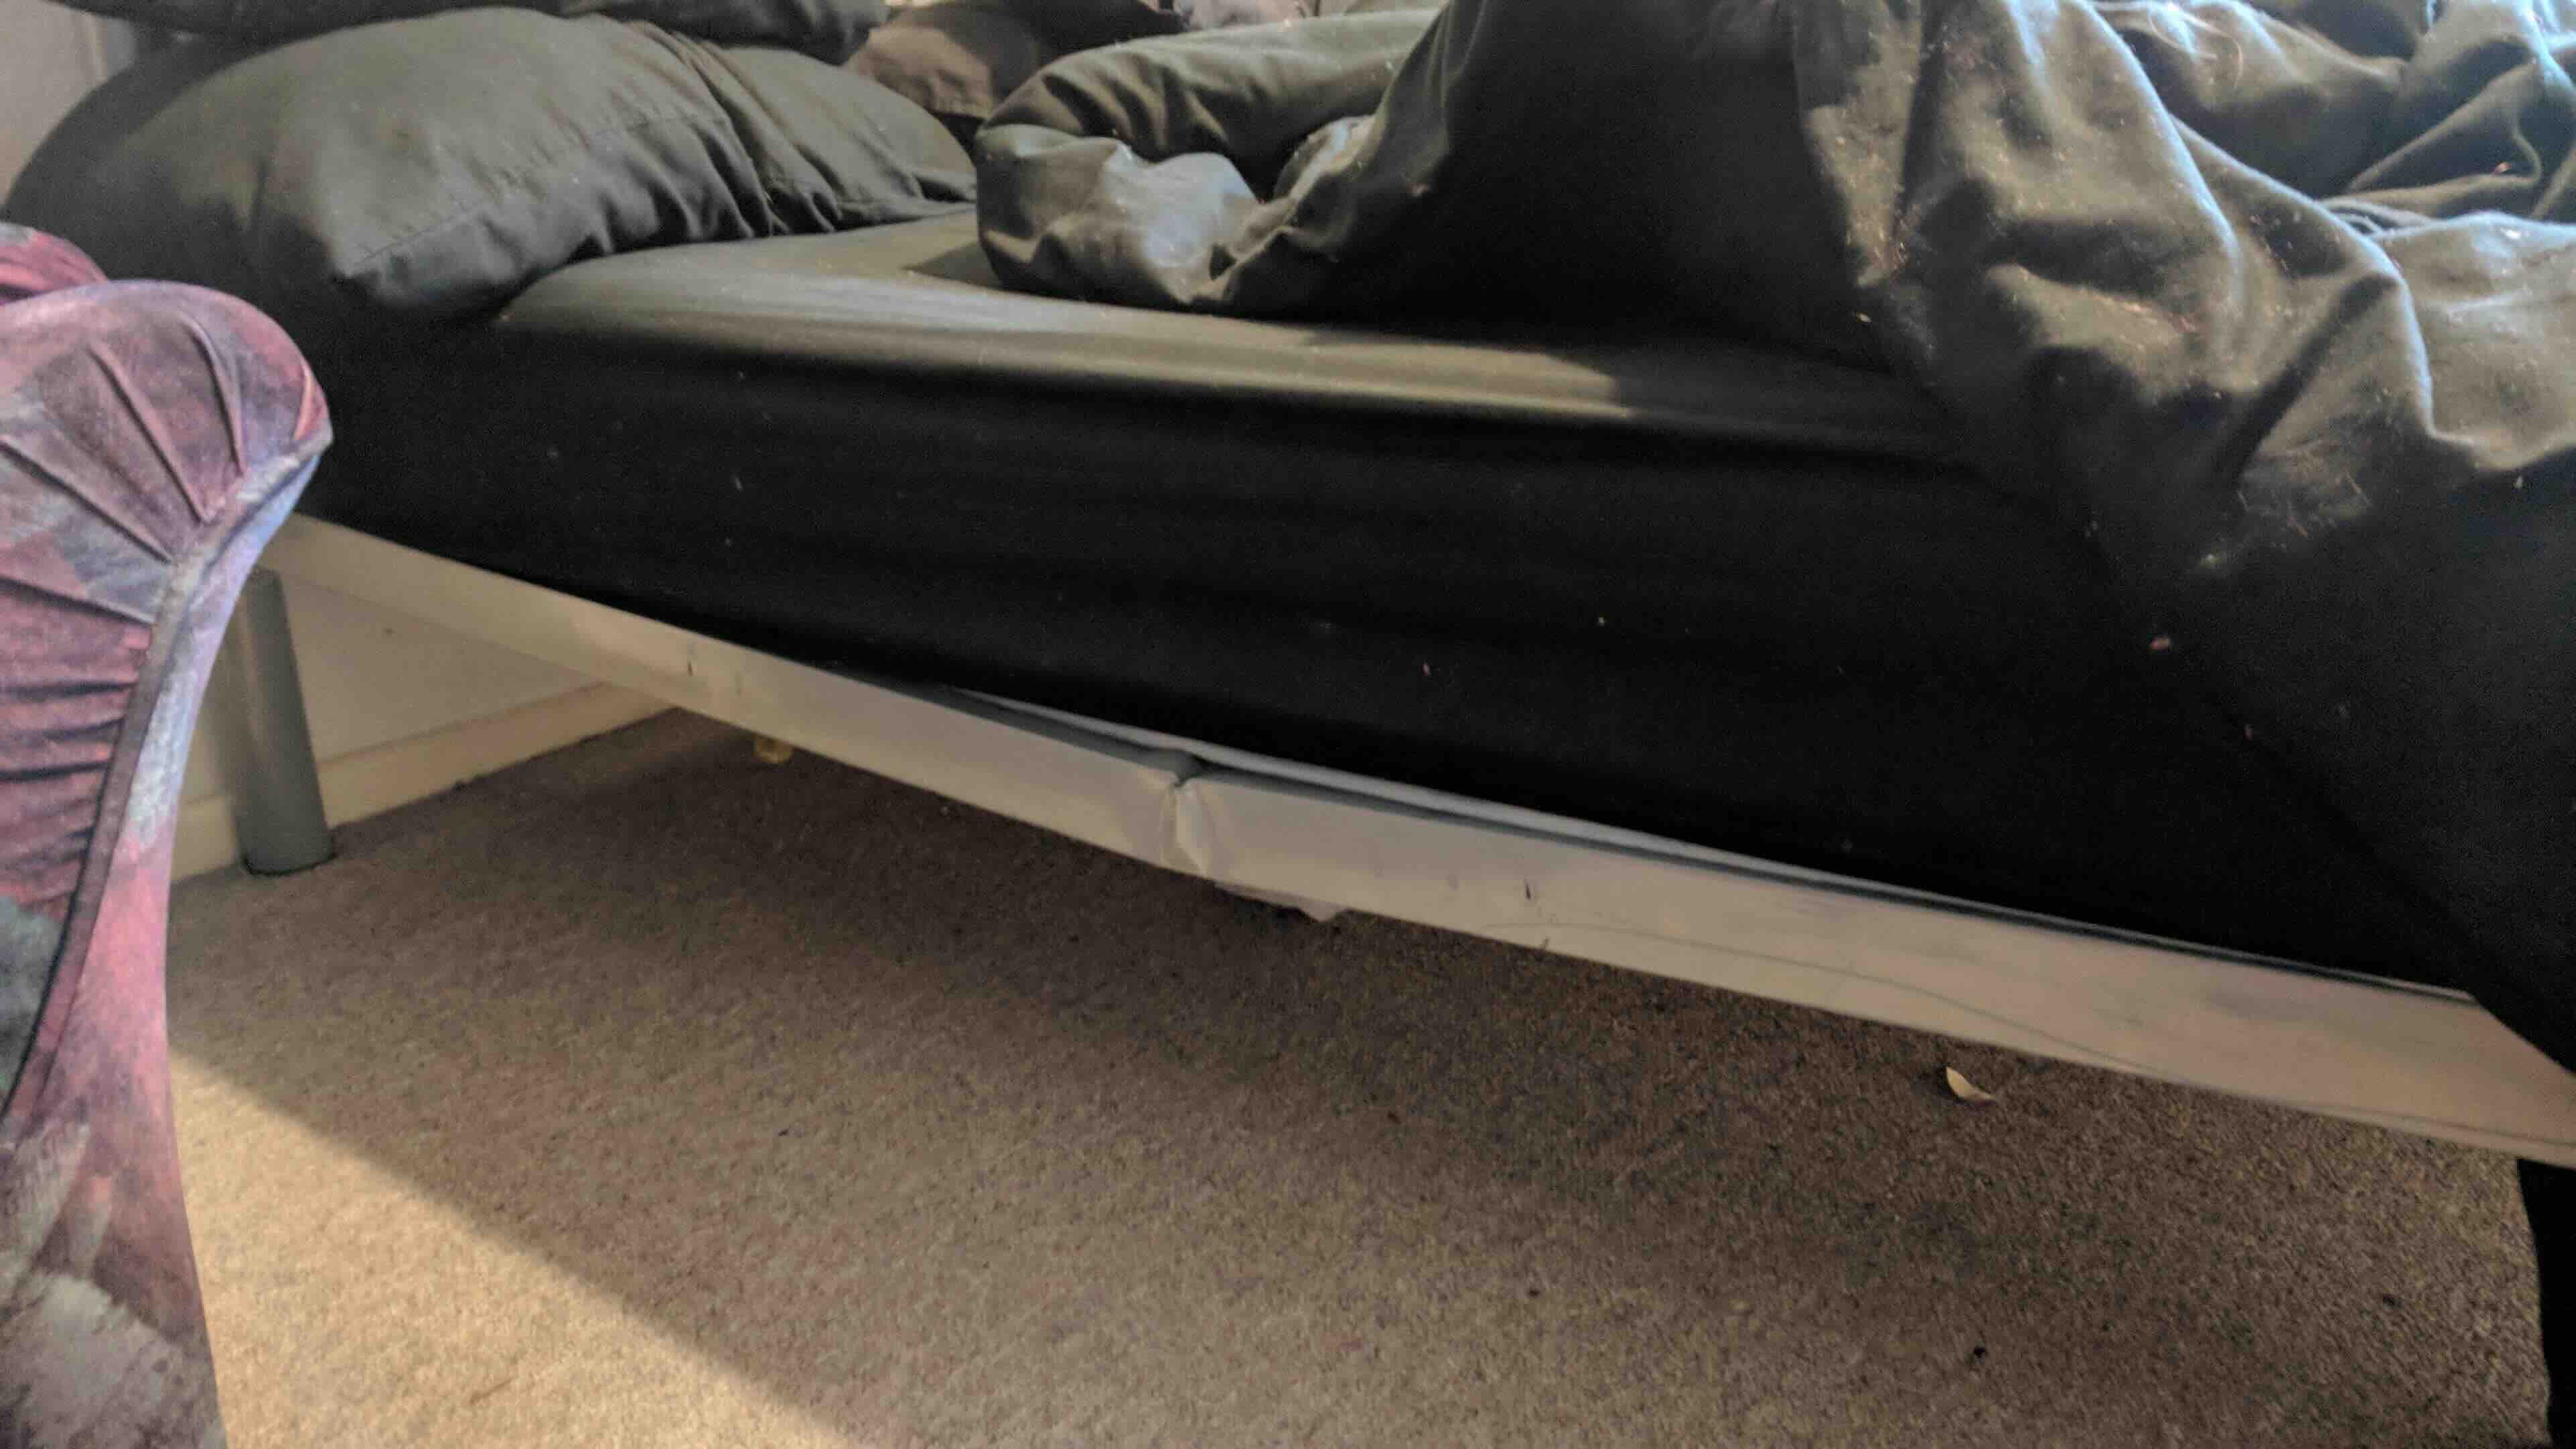
Step 3: Remove the Mattress and Bedding
In order to properly access and repair your broken wooden bed frame, it is important to remove the mattress and any bedding that may be on top of it. This will allow you to work on the frame without any obstructions and ensure that the repairs are done effectively.
Follow these steps to safely remove the mattress and bedding:
- Clear the surrounding area: Before removing the mattress, clear any objects or furniture that might hinder the process. This will create a safe and unobstructed workspace.
- Protect the mattress: Place a clean sheet or blanket on the floor nearby to protect the mattress from dust or any potential damage during the removal process.
- Ask for assistance if needed: Depending on the size and weight of the mattress, it may be helpful to have someone assist you in lifting and moving it. Avoid straining your back or causing any injuries by carrying it alone.
- Remove the bedding: Take off any sheets, blankets, or comforters that are on top of the mattress. Fold them neatly and set them aside for later use.
- Remove the mattress: Carefully lift the mattress off the bed frame, ensuring that both you and your helper maintain a secure grip to prevent dropping or damaging it. If necessary, you can slide the mattress towards the foot of the bed to make it easier to lift.
- Store the mattress safely: Once the mattress is off the frame, place it in a clean and dry area, away from any potential hazards or moisture. This will protect it during the repair process.
By removing the mattress and bedding, you create a clear workspace to assess and repair the broken wooden bed frame. This step ensures that you have enough space and maneuverability to work efficiently and effectively.
Now that the mattress and bedding are safely removed, you are ready to move on to the next step: reinforcing loose or broken joints in the bed frame.
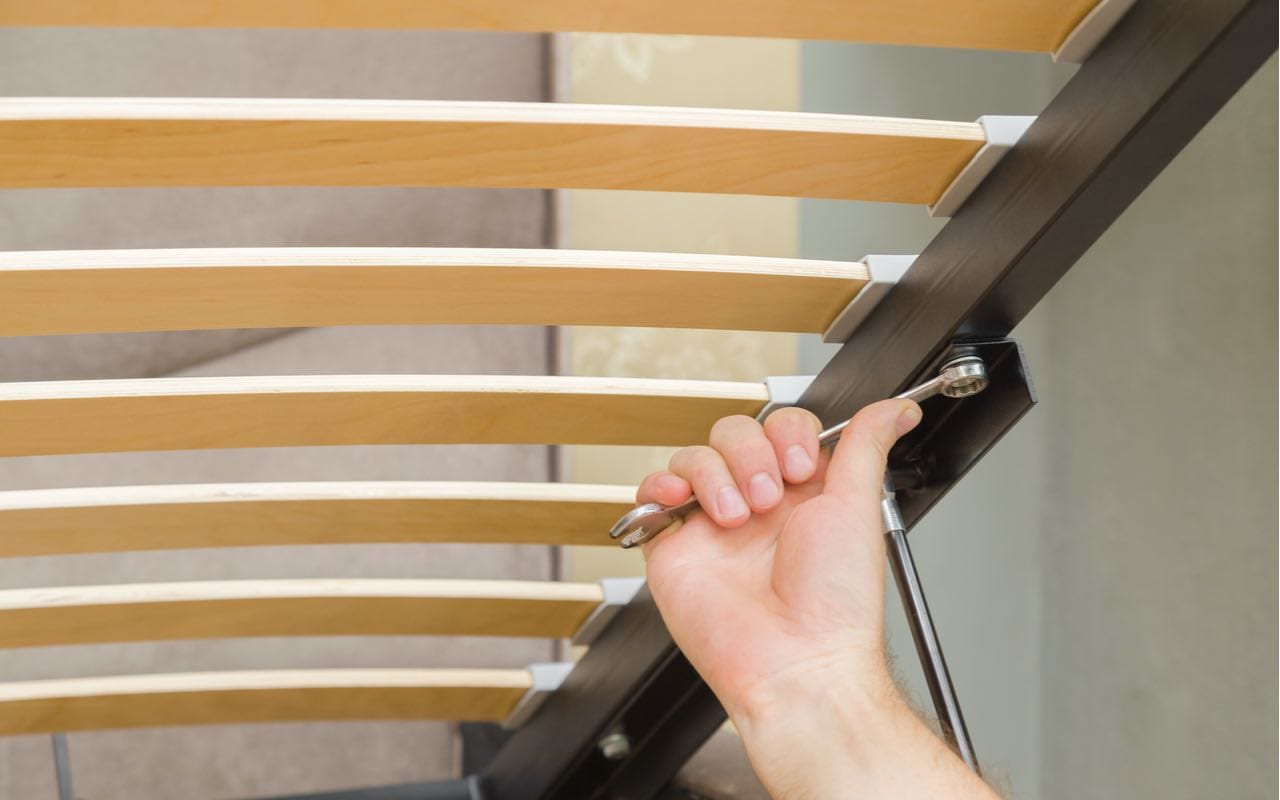
Step 4: Reinforce Loose or Broken Joints
One of the most common issues with a broken wooden bed frame is loose or broken joints. Over time, the connections between the wooden pieces can become weak or detached, resulting in a wobbly or unstable frame. In this step, we will guide you through the process of reinforcing these joints to ensure a sturdy and secure bed frame.
Follow these steps to reinforce the loose or broken joints:
- Identify the loose joints: Carefully inspect the bed frame and locate the joints that are loose or showing signs of weakness. Pay close attention to areas where the frame connects, such as the corners or where the headboard and footboard meet.
- Tighten the screws or bolts: In many cases, loose joints can be easily fixed by tightening the screws or bolts that hold the pieces together. Use an appropriate screwdriver or wrench to securely tighten the fasteners. If screws are missing or stripped, replace them with new ones.
- Reinforce with wood glue: For joints that are still loose after tightening the fasteners, you can reinforce them with wood glue. Apply a generous amount of wood glue to the joint, making sure to spread it evenly. Then, gently press the pieces together and wipe off any excess glue.
- Use clamps for added strength: To ensure a strong bond, place clamps over the joint while the wood glue dries. The clamps will apply pressure and hold the pieces firmly together. Follow the drying time recommended by the wood glue manufacturer.
- Repair broken joints: If you encounter any broken joints, you may need to repair them using additional wooden dowels or metal brackets. Carefully align the broken pieces, insert dowels or attach the brackets, and secure them with wood glue or screws.
By reinforcing loose or broken joints, you will restore the stability and strength of your bed frame. This step is crucial in ensuring that the repaired frame can endure regular use and provide a solid foundation for your mattress and sleep.
Continue to the next step: filling cracks or splits in the wood.
Read more: How To Disassemble A Wooden Bed Frame
Step 5: Fill Cracks or Splits in the Wood
In this step, we will address another common issue in a broken wooden bed frame: cracks or splits in the wood. These can occur due to various factors such as temperature changes, humidity, or general wear and tear. It is important to fill these cracks or splits to prevent further damage and maintain the structural integrity of the bed frame.
Follow these steps to fill cracks or splits in the wood:
- Clean the area: Start by cleaning the cracked or split area of the wood to remove any debris or loose particles. Use a soft brush or cloth to gently wipe away any dirt or dust.
- Select a suitable filler: Choose a wood filler that matches the color of your bed frame for a seamless repair. Wood fillers come in various shades and textures, so be sure to pick one that closely matches the wood’s color and grain.
- Apply the wood filler: Use a putty knife or a spatula to apply the wood filler into the crack or split. Fill the damaged area, ensuring that the filler is slightly overfilled to compensate for any shrinkage during the drying process.
- Smooth the filler: Once the filler is applied, use the putty knife or spatula to smooth and level the surface. This will create a seamless finish and make it easier to sand and paint/stain later on.
- Allow the filler to dry: Follow the instructions provided by the wood filler manufacturer regarding the drying time. It is important to let the filler fully cure to ensure a strong and durable repair.
- Sand the filled area: After the filler has dried, use sandpaper or a sanding block to gently sand the filled area. Start with a coarse-grit sandpaper and gradually move to a finer-grit paper for a smooth and even finish.
- Remove any dust: Wipe away any sanding dust using a clean cloth or brush. This will prepare the surface for painting or staining, if desired.
Filling cracks or splits in the wood not only improves the appearance of your bed frame but also prevents further damage. The filled areas will be stronger and less susceptible to future cracks or splits, ensuring the longevity of your repaired bed frame.
Continue to the next step: sanding and smoothing the frame.
Step 6: Sand and Smooth the Frame
After addressing any loose joints, cracks, or splits in your bed frame, it’s time to focus on refining the overall appearance and texture of the wood. In this step, we will guide you through the process of sanding and smoothing the frame – an essential step in achieving a polished and professional-looking repair.
Follow these steps to sand and smooth the bed frame:
- Prepare your workspace: Find a well-ventilated area and spread a drop cloth or newspaper to catch any sanding debris. This will make cleanup easier and prevent any damage to the surrounding surfaces.
- Select appropriate sandpaper grit: Start with a medium-grit sandpaper (around 120 grit) to remove any rough spots, imperfections, or remaining filler. Then, move to a finer-grit sandpaper (such as 220 grit) for further smoothing and refining.
- Sand in the direction of the wood grain: Wrap the sandpaper around a sanding block or use your hand to apply even pressure as you sand. Always sand in the direction of the wood grain to avoid leaving visible scratches or marks.
- Be mindful of rounded edges: If your bed frame has rounded edges or intricate details, use a smaller piece of sandpaper or sanding sponge to ensure you can reach all the nooks and crannies.
- Check frequently: As you sand, frequently check the smoothness of the wood with your fingers. This will help you identify any rough areas that need further attention.
- Wipe away dust: Once you have finished sanding, use a clean cloth or brush to remove any sanding dust from the frame. You can also use a vacuum cleaner with a brush attachment to ensure a thorough cleanup.
Sanding and smoothing the frame not only enhances the appearance of your bed frame but also ensures a pleasant tactile experience. The smooth surface will be more comfortable and less likely to snag bedding or clothing.
Next, we will move on to Step 7: applying wood glue for added strength.
Inspect the broken area to identify the type of repair needed. Use wood glue and clamps for small cracks, and metal brackets for larger breaks. Sand and repaint the repaired area for a seamless finish.
Step 7: Apply Wood Glue for Added Strength
Now that you have reinforced any loose joints, filled cracks or splits, and smoothed the bed frame, it’s time to take the repair process to the next level. In this step, we will guide you through applying wood glue to provide additional strength and stability to your now repaired wooden bed frame.
Follow these steps to apply wood glue for added strength:
- Prepare the wood glue: Select a high-quality wood glue that is appropriate for your bed frame material. Look for a glue that is specifically designed for woodworking and provides a strong bond. Follow the instructions on the glue bottle for proper usage.
- Apply the glue: Using a brush or a small spatula, apply a thin and even layer of wood glue to the surfaces that require reinforcement. Pay special attention to the previously repaired joints or any areas that showed signs of weakness or movement.
- Press the pieces together: Once the glue is applied, carefully press the corresponding pieces together firmly. Ensure that the joints fit snugly and there are no gaps between the surfaces.
- Wipe off excess glue: Use a damp cloth or sponge to immediately wipe away any excess glue before it dries. This will ensure a neat and clean finish.
- Allow the glue to cure: Refer to the manufacturer’s instructions for the recommended drying and curing time of the wood glue. Typically, it is advisable to leave the frame undisturbed for at least 24 hours to allow the glue to fully set.
By applying wood glue, you are reinforcing the repairs made to your bed frame and ensuring long-lasting strength and stability. The glue provides an additional layer of support, making the frame more resilient to daily use and preventing future issues.
Now that the wood glue has been applied, it’s time to move on to Step 8: using clamps to hold the frame together while the glue dries.
Step 8: Use Clamps to Hold the Frame Together While the Glue Dries
As you apply wood glue to reinforce the repaired areas of your wooden bed frame, it’s important to ensure that the pieces are held together tightly during the drying process. This is where clamps come into play. Clamps provide the necessary pressure to keep the joints secure and allow the glue to set and create a strong bond. In this step, we will guide you through using clamps effectively to hold the frame together while the glue dries.
Follow these steps to use clamps for optimal results:
- Select the appropriate clamps: Choose clamps that are suitable for the size and shape of your bed frame. Consider using bar clamps, strap clamps, or C-clamps, depending on the specific needs of your repair.
- Prepare the clamps: Before applying the clamps, ensure they are clean and in good working condition. Check for any signs of damage or wear that may affect their functionality.
- Apply pressure evenly: Position the clamps strategically to apply pressure evenly across the repaired joints. The goal is to create a tight and secure bond between the pieces.
- Adjust the clamps: Gradually tighten the clamps to exert enough pressure without causing damage to the wood. Be cautious not to overtighten, as excessive pressure may lead to misalignment or cracking.
- Clean up excess glue: As you apply the clamps, check for any excess glue that may ooze out of the joints. Immediately wipe away the excess glue with a damp cloth or sponge to maintain a clean and smooth finish.
- Allow the glue to dry: Refer to the manufacturer’s instructions for the recommended drying time of the wood glue. It is generally advisable to leave the clamps in place for at least 24 hours to ensure that the glue fully cures.
- Remove the clamps: After the appropriate drying time, carefully remove the clamps from the bed frame. Take care not to disturb or apply excessive force to the repaired joints.
Using clamps to hold the bed frame together while the wood glue dries is crucial in ensuring a strong and durable bond. The clamping process helps maintain the integrity of the repairs, allowing you to enjoy a stable and functional bed.
Now that the glue is drying and the clamps are in place, you’re ready to move on to Step 9: reattaching any detached or broken pieces.
Read more: How To Assemble A Wooden Bed Frame
Step 9: Reattach any Detached or Broken Pieces
If your wooden bed frame had any detached or broken pieces, now is the time to reattach them to complete the repair process. Whether it’s a slat, support beam, or decorative element, reattaching these components is essential to ensure the structural integrity and functionality of your bed frame. In this step, we will guide you through the process of reattaching any detached or broken pieces.
Follow these steps to reattach the pieces:
- Prepare the surfaces: Ensure that the surfaces to be joined are clean and free of any old glue residue or debris. Use a cloth or brush to remove any dirt or dust.
- Apply wood glue: Apply a thin layer of wood glue to both surfaces that will come into contact. Be cautious not to apply too much glue, as excess glue may cause messy seepage or compromise the bond.
- Align the pieces: Carefully align the detached or broken piece with the corresponding area on the bed frame. Ensure a snug and precise fit, taking note of any notches or grooves that provide structural support.
- Secure the pieces: Use clamps, if necessary, to hold the pieces together while the glue dries. Adjust the clamps to apply gentle pressure, ensuring a tight and secure bond. Wipe away any excess glue that may seep out.
- Check for stability: After the glue has dried, carefully test the stability of the reattached piece. Gently apply pressure or give it a slight wiggle to ensure it stays firmly in place.
Reattaching any detached or broken pieces completes the final touch of the repair. By ensuring that all elements are securely fastened, you can enjoy the confidence of a sturdy and reliable bed frame.
Now that you have successfully reattached any detached or broken pieces, it’s time to allow the bed frame to dry and cure before moving on to the final steps of sanding, painting, or staining the repaired areas.
Step 10: Allow the Frame to Dry and Cure
Now that you have completed the necessary repairs and reattachment of any detached or broken pieces, it is crucial to allow the bed frame to dry and cure. Drying and curing times will vary depending on the type of glue or filler used, so it’s important to follow the manufacturer’s instructions for the specific products you have chosen. This step ensures that the repairs properly set and that the bed frame achieves maximum strength and stability.
Follow these steps to allow the frame to dry and cure:
- Read the instructions: Carefully read and understand the recommended drying and curing time provided by the manufacturer of the glue, filler, or any other products you have used during the repair.
- Provide proper ventilation: Ensure that the area where the bed frame is drying has good airflow to facilitate the evaporation of moisture. Proper ventilation will enhance the drying process and prevent any potential mold or mildew formation.
- Avoid disturbance: During the drying and curing period, it is essential to avoid moving or using the bed frame. Any excessive movement or pressure could compromise the bond or result in loosening of the joints.
- Extend the drying time if needed: In certain cases, it may be wise to extend the recommended drying time to ensure proper setting and curing. This is especially true for larger or more extensive repairs that require a longer duration to achieve optimal strength.
- Test for solidity: After the recommended drying and curing time has elapsed, gently test the repaired areas for solidity and stability. Apply slight pressure or give the frame a gentle shake to ensure that the repairs have successfully set and are solid.
Allowing the bed frame to dry and cure properly safeguards the integrity of your repairs and ensures long-lasting results. Resisting the temptation to rush this step will reward you with a strong and durable bed frame that can provide you with restful nights for years to come.
Now that you have completed the drying and curing process, you can move on to the optional steps of sanding and painting or staining the repaired areas to enhance the visual appeal of your bed frame.
Step 11: Sand and Paint/Stain the Repaired Areas (Optional)
After allowing the repaired areas of your bed frame to dry and cure, you have the option to further enhance its appearance by sanding and applying paint or stain. This step is entirely optional and depends on your personal preference and the desired aesthetic for your bed frame.
Follow these steps to sand and paint/stain the repaired areas:
- Sanding: Use a fine-grit sandpaper or sanding block to gently sand the repaired areas. This will help smooth any rough edges, blend the repaired sections with the rest of the frame, and provide a consistent finish.
- Cleaning: After sanding, wipe away any dust or debris using a clean cloth or brush. Ensure that the surface is clean and free from any particles that may affect the appearance or adhesion of the paint or stain.
- Choosing paint or stain: Determine whether you prefer to enhance the natural beauty of the wood with a stain or give it a new color with paint. Take into consideration the overall style and decor of your bedroom when selecting the color or stain shade.
- Applying paint or stain: Follow the instructions provided by the manufacturer for proper application. Use a brush or roller to apply an even coat of paint or stain to the repaired areas. Ensure that the application is consistent and covers the entire surface evenly.
- Allow drying and curing: Give the paint or stain ample time to dry and cure based on the instructions provided by the manufacturer. This will ensure that the finish sets properly and achieves its intended appearance.
- Additional coats (optional): If desired, apply additional coats of paint or stain to achieve the desired depth of color or to ensure full coverage. Allow each coat to dry before applying the next. Follow the manufacturer’s instructions regarding the number of coats recommended.
- Final inspection: Once the paint or stain has dried and cured, inspect the repaired areas for any touch-ups or unevenness. Smooth out any imperfections using fine-grit sandpaper and apply additional paint or stain as necessary.
Sanding and applying paint or stain to the repaired areas can help blend the repaired sections seamlessly with the rest of the bed frame, giving it a polished and finished look. This optional step allows you to customize the appearance of your bed frame to suit your personal style and complement your bedroom decor.
Once you have completed the optional step of sanding and painting or staining, your bed frame is almost ready to be reassembled. Continue to Step 12: Reassemble the Bed Frame to complete the repair process.
Step 12: Reassemble the Bed Frame
Now that you have successfully repaired, reinforced, and enhanced the appearance of your bed frame, it is time to reassemble it. This final step brings everything together and allows you to fully enjoy your restored and rejuvenated bed.
Follow these steps to reassemble the bed frame:
- Gather all the bed frame components: Ensure that you have all the necessary parts, including the side rails, headboard, footboard, support beams, and slats.
- Prepare the area: Clear the surrounding space and place a soft material or protective covering on the floor to prevent any accidental scratches or damage to the bed frame.
- Attach the side rails: Starting with the side rails, align them with the corresponding slots or attachment points on the headboard and footboard. Secure them in place using screws or other fasteners according to the manufacturer’s instructions.
- Install the support beams: Position the support beams across the bed frame, ensuring they are properly aligned and securely attached. Depending on the design of your bed frame, this may involve inserting support bolts or attaching them to the side rails using screws.
- Insert the slats: Place the slats evenly along the support beams, ensuring they are properly aligned and spaced. Some bed frames may have pre-drilled holes or brackets to hold the slats in place, while others may require you to attach them with screws or other fasteners.
- Double-check the stability: Once all the components are attached, give the bed frame a gentle shake or apply light pressure to make sure everything is secure and stable.
- Reattach the headboard and footboard (if detachable): If the headboard and footboard were detached during the repair process, reattach them using the appropriate screws or fasteners provided by the manufacturer.
- Inspect the completed assembly: Take a moment to visually inspect the reassembled bed frame. Check for any loose connections, gaps, or areas that may need further tightening or adjustment.
By carefully reassembling the bed frame, you are ensuring a sturdy and functional piece of furniture that is ready to provide you with restful nights of sleep.
Congratulations! You have successfully completed the process of fixing your broken wooden bed frame. By following these steps, you have not only restored the functionality and strength of your bed but also gained the satisfaction of taking on a DIY repair project. Now, you can enjoy the comfort and stability of your restored bed frame for years to come.
Remember to regularly inspect and maintain your bed frame to prevent future issues. With proper care, your restored bed frame will continue to provide you with the comfort and support you deserve.
Read more: How To Stop Squeaky Wooden Bed Frame
Conclusion
Repairing a broken wooden bed frame may initially seem like a daunting task, but with the right knowledge and approach, it can be a rewarding and cost-effective way to extend the lifespan of your furniture. By following the comprehensive steps outlined in this guide, you can confidently fix loose joints, fill cracks or splits, reinforce weak areas, and restore the overall stability and functionality of your bed frame.
Throughout the repair process, it is essential to prioritize safety, attention to detail, and the use of high-quality tools and materials. Taking the time to assess the damage, gather the necessary tools and materials, and follow each step diligently will ensure a successful repair and a bed frame that will serve you well for years to come.
Additionally, you have the option to enhance the appearance of your repaired bed frame by sanding and applying paint or stain. This optional step allows you to customize the look of your bed frame and create a cohesive and aesthetic impact in your bedroom.
Remember, regular maintenance and care are crucial in preserving the integrity of your bed frame. Inspect your bed frame periodically, tighten any loose screws, and address minor issues promptly to prevent them from escalating into major problems.
By tackling the repair of your broken wooden bed frame, you have not only saved money on purchasing a new one but also demonstrated your DIY skills and commitment to sustainability. So, get ready to enjoy a restful night’s sleep on your revitalized and stable bed frame!
Thank you for following this comprehensive guide. We hope it has empowered you with the knowledge and confidence to restore your bed frame and breathe new life into your sleeping space. Good luck with your repair endeavors!
Ready to level up your DIY skills further? If mastering the art of repairing your wooden bed frame has ignited a passion for woodworking, you'll definitely want to check out our guide on the best techniques and projects for the coming year. Whether you're a seasoned woodworker or just starting, these insights will help you refine your craft and tackle new challenges confidently. Don't miss out on advancing your woodworking prowess with this essential read!
Frequently Asked Questions about How To Fix A Broken Wooden Bed Frame
Was this page helpful?
At Storables.com, we guarantee accurate and reliable information. Our content, validated by Expert Board Contributors, is crafted following stringent Editorial Policies. We're committed to providing you with well-researched, expert-backed insights for all your informational needs.


0 thoughts on “How To Fix A Broken Wooden Bed Frame”