Home>Home Appliances>Laundry Appliances>How To Take Apart A Washing Machine
Laundry Appliances
How To Take Apart A Washing Machine
Published: February 22, 2024
Learn how to safely disassemble a washing machine with our step-by-step guide. Get expert tips for taking apart laundry appliances at home.
(Many of the links in this article redirect to a specific reviewed product. Your purchase of these products through affiliate links helps to generate commission for Storables.com, at no extra cost. Learn more)
Introduction
Taking apart a washing machine may seem like a daunting task, but it can be a necessary and rewarding endeavor. Whether you're troubleshooting a malfunctioning appliance or performing routine maintenance, understanding how to disassemble a washing machine can save you time and money. By gaining insight into the inner workings of your washer, you can identify issues, replace worn-out parts, and ensure optimal performance.
In this comprehensive guide, we will walk you through the step-by-step process of disassembling a washing machine. From the essential tools needed to the safety precautions to consider, we'll cover everything you need to know to confidently dismantle your appliance. By following these instructions, you'll be equipped to access and inspect the internal components, such as the drum and motor, and carry out any necessary repairs or maintenance.
So, if you're ready to delve into the inner workings of your washing machine and gain a deeper understanding of its mechanisms, let's get started on the journey of disassembling and reassembling this essential household appliance.
Key Takeaways:
- Disassembling a washing machine requires essential tools and safety precautions. By following step-by-step instructions, you can access and inspect internal components for repairs and maintenance, ensuring optimal performance and safety.
- Cleaning and maintaining a washing machine is crucial for its longevity and efficiency. Thoroughly inspecting and addressing issues with internal components, such as seals, bearings, and suspension systems, can prevent potential problems and ensure consistently clean laundry.
Read more: How To Take Apart A Whirlpool Washer
Tools Needed
Before embarking on the task of disassembling a washing machine, it's crucial to gather the necessary tools to ensure a smooth and efficient process. Here's a comprehensive list of tools you'll need:
-
Screwdriver Set: A set of screwdrivers with various head types, including Phillips and flathead, will be indispensable for removing screws securing the outer cabinet and accessing internal components.
-
Adjustable Wrench: This versatile tool will come in handy for loosening and tightening nuts and bolts, particularly when disconnecting hoses and fasteners.
-
Pliers: Both regular and needle-nose pliers will be essential for gripping and maneuvering small components, such as wire connectors and clamps.
-
Socket and Ratchet Set: Utilized for removing and reinstalling bolts and nuts, a socket and ratchet set will facilitate the disassembly and reassembly of the washing machine.
-
Putty Knife: A putty knife or a similar flat, sturdy tool will aid in prying open the clips or fasteners securing the washing machine's outer cabinet.
-
Flashlight: Given the confined spaces within the appliance, a reliable flashlight will assist in illuminating dim areas and enhancing visibility during the disassembly process.
-
Safety Gloves and Goggles: To protect your hands from sharp edges and your eyes from potential debris, it's essential to wear safety gloves and goggles throughout the disassembly and reassembly procedures.
-
Container for Small Parts: As you dismantle the washing machine, it's crucial to keep track of small screws, nuts, and bolts. Using a container to store these components will prevent misplacement and ensure they are readily available for reassembly.
By ensuring you have these essential tools at your disposal, you'll be well-prepared to tackle the disassembly of your washing machine with confidence and precision. These tools will not only facilitate the process but also contribute to a safe and efficient disassembly experience, allowing you to effectively access and inspect the internal components of the appliance.
With the tools in hand, you're now ready to proceed to the next steps of the disassembly process, ensuring that you have everything you need to navigate the inner workings of your washing machine.
Safety Precautions
When undertaking the disassembly of a washing machine, prioritizing safety is paramount to prevent accidents and ensure a smooth and secure process. Before delving into the intricate task of dismantling the appliance, it's crucial to adhere to the following safety precautions:
1. Disconnect the Power
Before initiating any disassembly procedures, it is imperative to unplug the washing machine from the power source. This precautionary measure eliminates the risk of electrical shocks and ensures a safe working environment. Additionally, if the washing machine is hardwired, it's essential to turn off the circuit breaker to cut off the power supply completely.
2. Wear Protective Gear
To safeguard yourself from potential hazards during the disassembly process, it's advisable to wear safety gloves and goggles. These protective accessories serve as a barrier against sharp edges, moving components, and debris, reducing the risk of injuries and ensuring a secure disassembly experience.
Read more: How To Take Apart Maytag Washer
3. Secure the Appliance
Before commencing the disassembly, ensure that the washing machine is placed on a stable and level surface. This stability minimizes the risk of the appliance tipping over during the disassembly process, thereby preventing accidents and injuries. Additionally, if necessary, use support blocks or wedges to stabilize the appliance.
4. Exercise Caution with Sharp Components
Throughout the disassembly process, be mindful of sharp edges and components within the washing machine. Exercise caution when handling metal panels, brackets, and edges to avoid accidental cuts or injuries. Utilizing gloves and being attentive to potential hazards will mitigate the risk of cuts and abrasions.
5. Work in a Well-Ventilated Area
As you embark on the disassembly of the washing machine, ensure that the workspace is well-ventilated. Adequate ventilation minimizes the accumulation of fumes and ensures a breathable environment, particularly when dealing with cleaning agents or lubricants during the maintenance process.
By adhering to these safety precautions, you can approach the disassembly of your washing machine with confidence and peace of mind. Prioritizing safety not only safeguards against potential hazards but also contributes to a smooth and secure disassembly experience, allowing you to navigate the internal components of the appliance with precision and care.
Disconnecting the Power
Before initiating any disassembly procedures, it is imperative to unplug the washing machine from the power source. This precautionary measure eliminates the risk of electrical shocks and ensures a safe working environment. Additionally, if the washing machine is hardwired, it's essential to turn off the circuit breaker to cut off the power supply completely.
To disconnect the power, start by locating the power cord of the washing machine. Typically, the power cord is situated at the rear of the appliance, near the top. Carefully pull the washing machine away from the wall to access the power cord and ensure that there is ample space to work safely around the appliance.
Once the power cord is accessible, firmly grasp the plug and gently pull it from the electrical outlet. It's crucial to exert even pressure and avoid yanking the cord to prevent damage to the plug or outlet. After unplugging the washing machine, it's advisable to inspect the power cord for any signs of wear, fraying, or damage. If any issues are detected, refrain from using the appliance until the cord is repaired or replaced to mitigate potential electrical hazards.
In the case of a hardwired washing machine, the power supply must be disconnected at the circuit breaker. Locate the appropriate circuit breaker in the electrical panel and switch it to the "off" position to cut off the power supply to the appliance. It's essential to verify that the power has been successfully disconnected by testing the washing machine to ensure it does not power on.
By following these steps to disconnect the power supply, you create a safe working environment for the disassembly process. Prioritizing this crucial safety measure not only safeguards against electrical hazards but also sets the foundation for a secure and efficient disassembly experience. With the power safely disconnected, you can proceed with confidence to the next steps of dismantling the washing machine, knowing that you have taken the necessary precautions to ensure a safe working environment.
Read more: How To Take Apart Stackable Washer/Dryer
Removing the Outer Cabinet
With the power safely disconnected and the essential tools at hand, the next step in disassembling a washing machine involves removing the outer cabinet. The outer cabinet encases the internal components of the appliance and is typically secured in place by a series of screws and fasteners. By carefully dismantling the outer cabinet, you gain access to the inner workings of the washing machine, allowing for thorough inspection and maintenance.
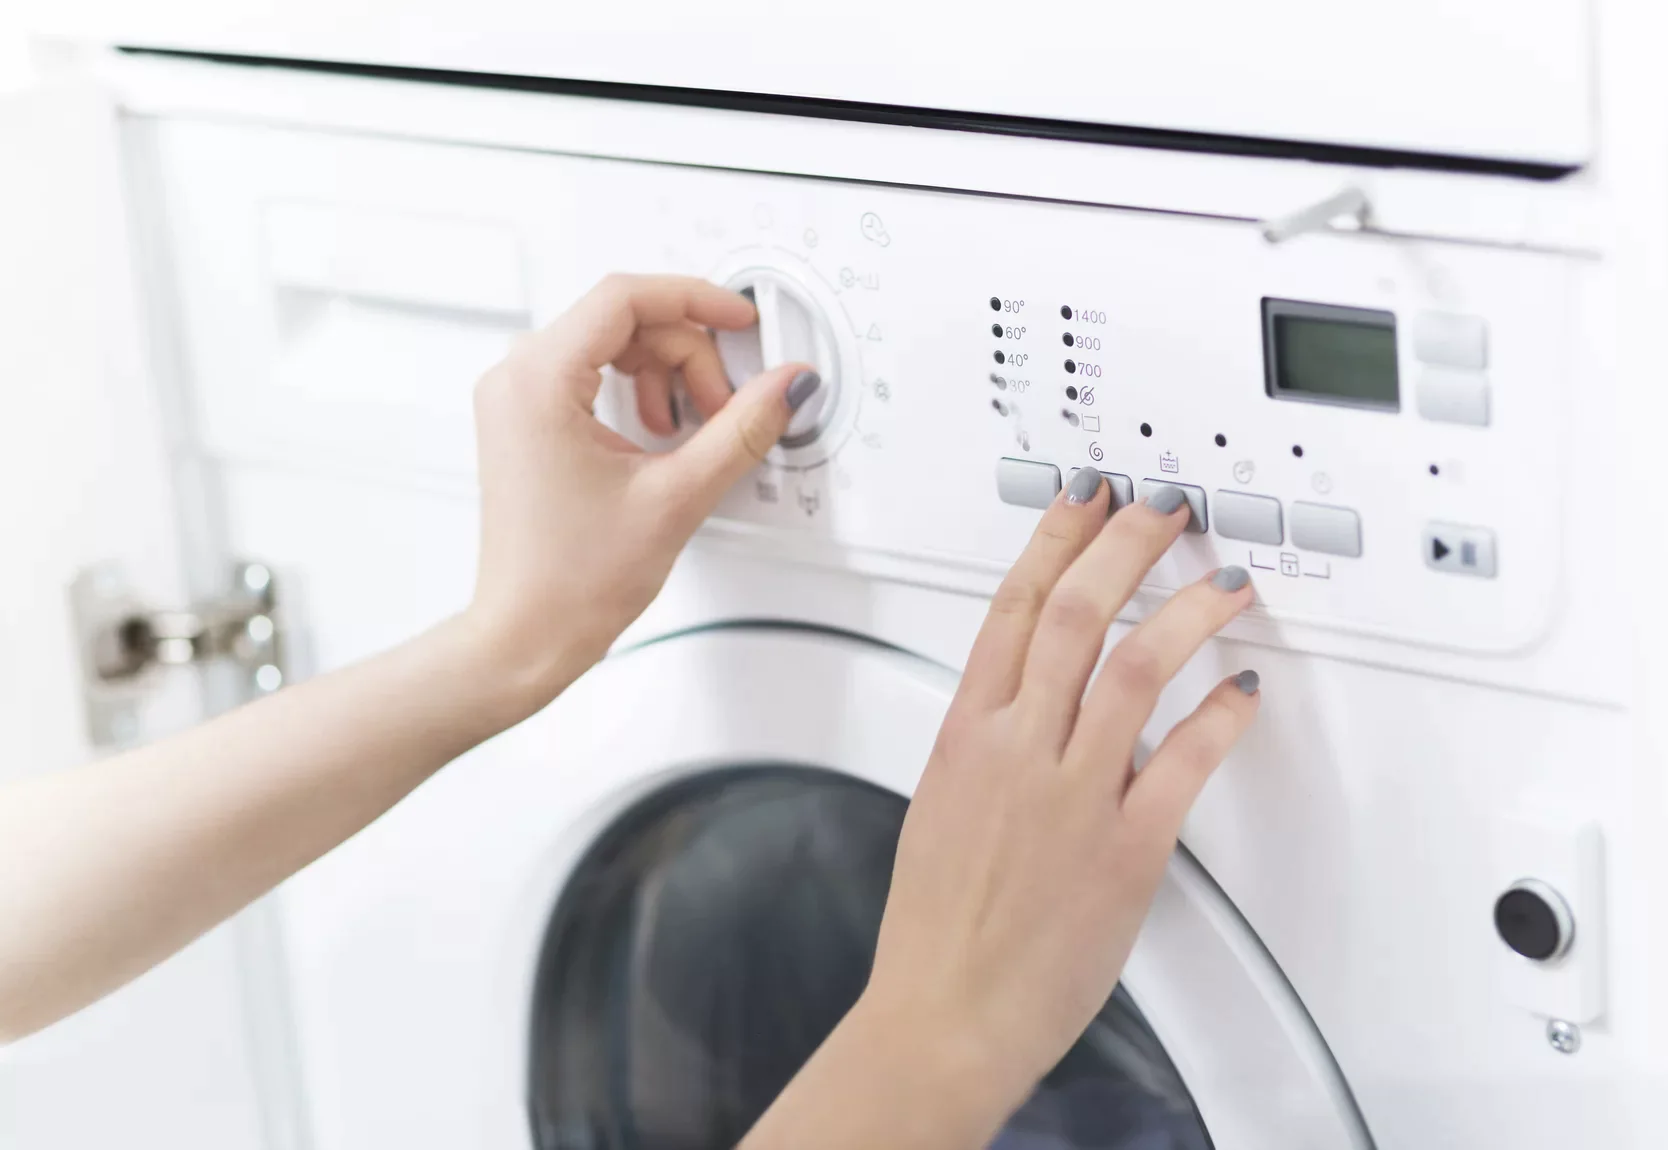
To begin, locate and remove the screws securing the control panel at the top of the washing machine. Depending on the model, these screws may be visible on the front or rear of the panel. Once the screws are removed, gently tilt the control panel forward to access the retaining clips that secure it in place. Depress these clips to release the control panel, taking care not to damage any attached wires or harnesses.
Following the removal of the control panel, the next step involves disconnecting the lid switch harness, which is typically situated beneath the control panel. Carefully detach the harness to free the control panel from the washing machine. With the control panel removed, set it aside in a safe location to prevent any damage during the subsequent disassembly process.
After detaching the control panel, locate and remove the screws or fasteners securing the back panel of the washing machine. These screws are often positioned at the top and may require a screwdriver or socket and ratchet set for removal. Once the screws are extracted, carefully lift and remove the back panel, taking note of any attached grounding wires or hoses that may need to be disconnected.
With the control panel and back panel removed, the outer cabinet is now accessible for disassembly. Depending on the specific model of the washing machine, the cabinet may be secured by clips, screws, or fasteners. Utilize a putty knife or a similar flat tool to gently pry open the clips or fasteners, gradually releasing the outer cabinet from the appliance's frame.
As the outer cabinet is freed from its securing mechanisms, enlist the assistance of another person to support and carefully lift the cabinet away from the washing machine. Take caution to avoid damaging any attached wires or hoses during this process, ensuring a smooth and controlled removal of the outer cabinet.
By meticulously following these steps, you can successfully remove the outer cabinet of the washing machine, unveiling the internal components for thorough inspection and maintenance. With the outer cabinet removed, you are now prepared to delve deeper into the inner workings of the appliance, gaining valuable insight into its mechanisms and facilitating any necessary repairs or maintenance tasks.
Accessing the Inner Components
With the outer cabinet successfully removed, you have gained access to the inner components of the washing machine, setting the stage for a comprehensive inspection and potential maintenance tasks. This pivotal step allows you to delve deeper into the appliance's mechanisms, providing a clear view of the internal parts and facilitating the identification of any issues or areas requiring attention.
As you peer into the exposed interior of the washing machine, take a moment to survey the layout and arrangement of the components. The inner workings may include the motor, pump, drive belt, suspension springs, and the drum assembly, among other essential parts. By familiarizing yourself with the positioning of these components, you can effectively navigate the internal space and pinpoint areas that may require inspection or maintenance.
One of the primary components to focus on is the motor, which serves as the powerhouse driving the washing machine's operations. Inspect the motor for any signs of wear, such as frayed wiring or loose connections, and ensure that it is securely mounted within the appliance. Additionally, examine the drive belt, if applicable, to assess its condition and tension, as a worn or damaged belt can impede the proper functioning of the washing machine.
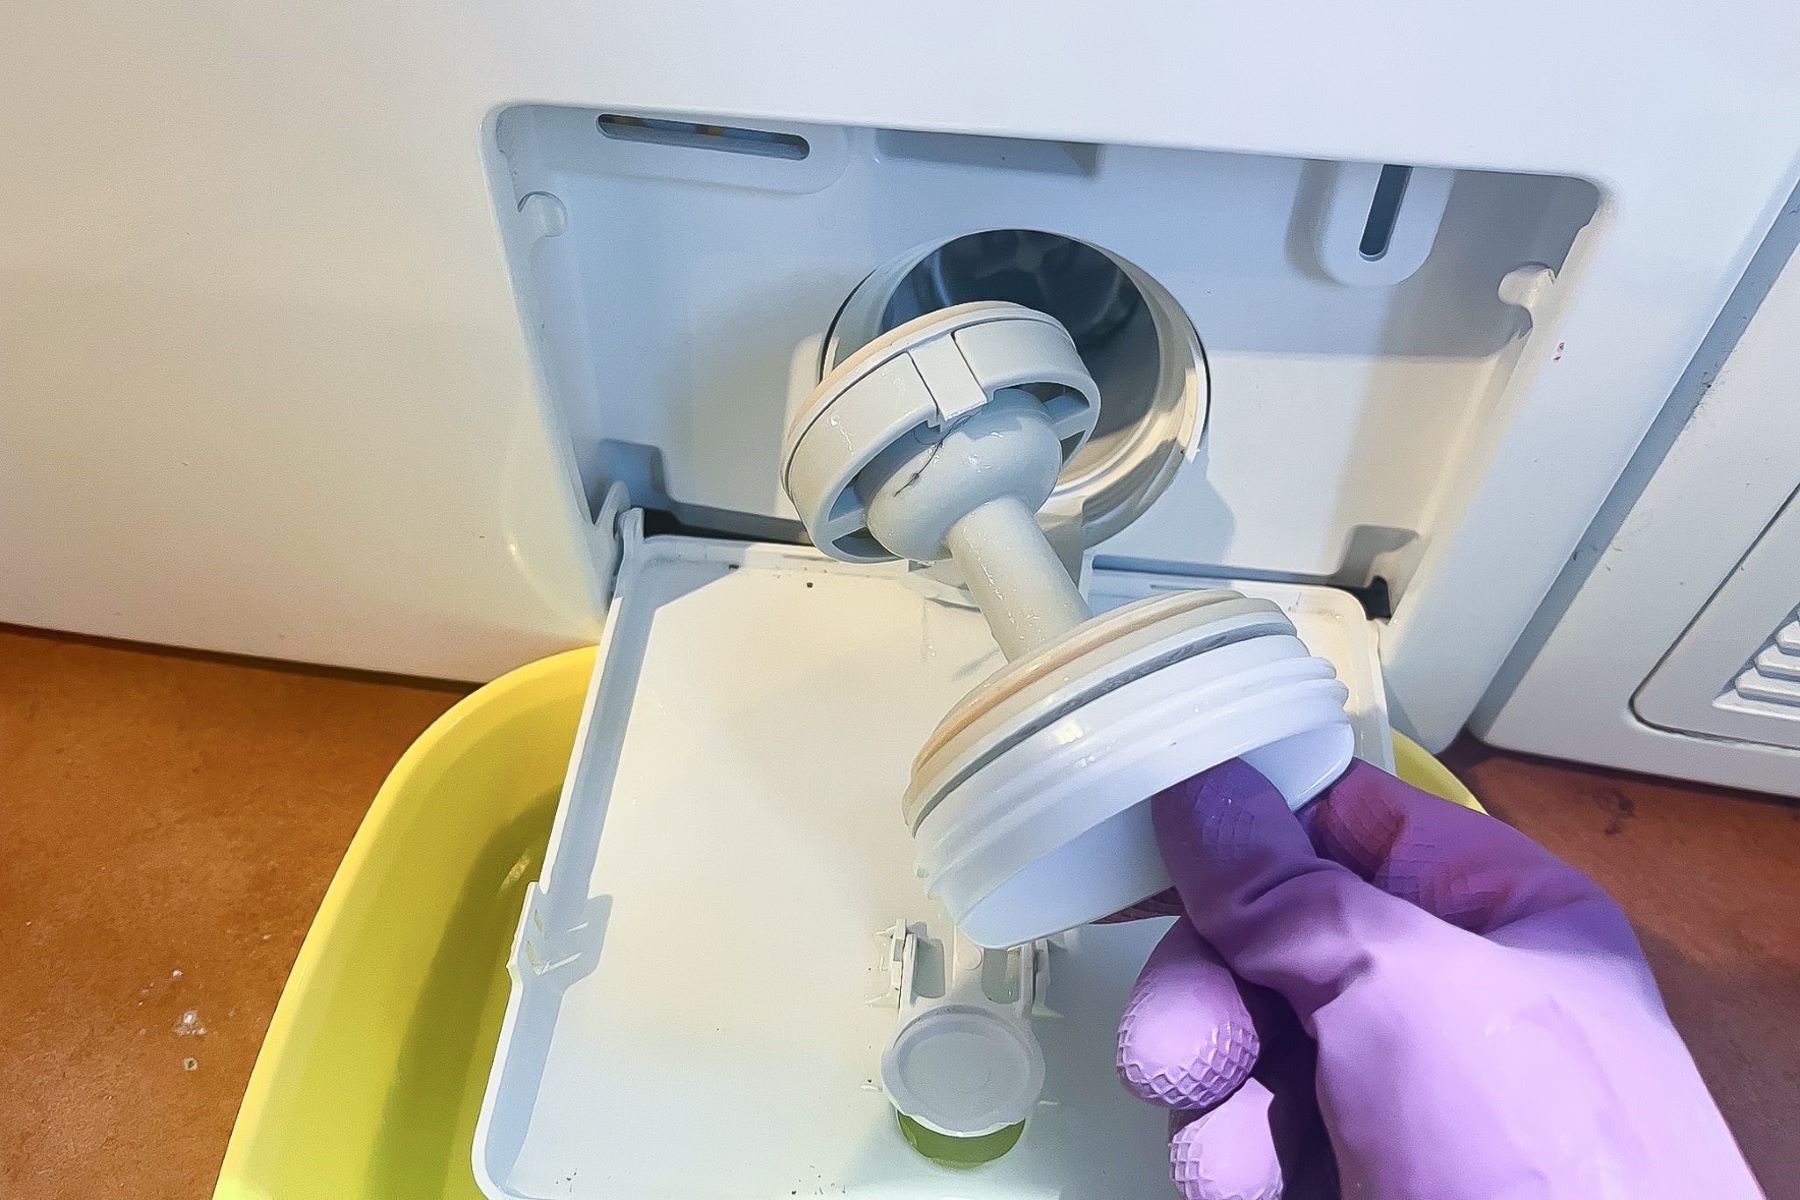
The pump, responsible for draining water from the appliance, is another critical component to scrutinize. Check for any obstructions or debris that may hinder the pump's performance, and inspect the pump's connections to ensure they are secure and free from leaks. By conducting a thorough examination of the pump, you can preemptively address any potential drainage issues and maintain the optimal functionality of the washing machine.
Furthermore, take note of the suspension springs that support the drum assembly within the washing machine. Verify that the springs are intact and properly positioned, as they play a crucial role in stabilizing the drum during the wash and spin cycles. Any signs of wear or damage to the suspension springs should be promptly addressed to prevent imbalance and potential damage to the appliance.
As you access the inner components, it's essential to approach the inspection with attentiveness and a keen eye for detail. By meticulously surveying the internal parts, you can identify any areas requiring maintenance or repairs, ensuring the continued efficiency and longevity of your washing machine. This thorough assessment sets the stage for targeted maintenance tasks and provides valuable insights into the appliance's inner workings, empowering you to address any potential issues with confidence and precision.
Removing the Drum
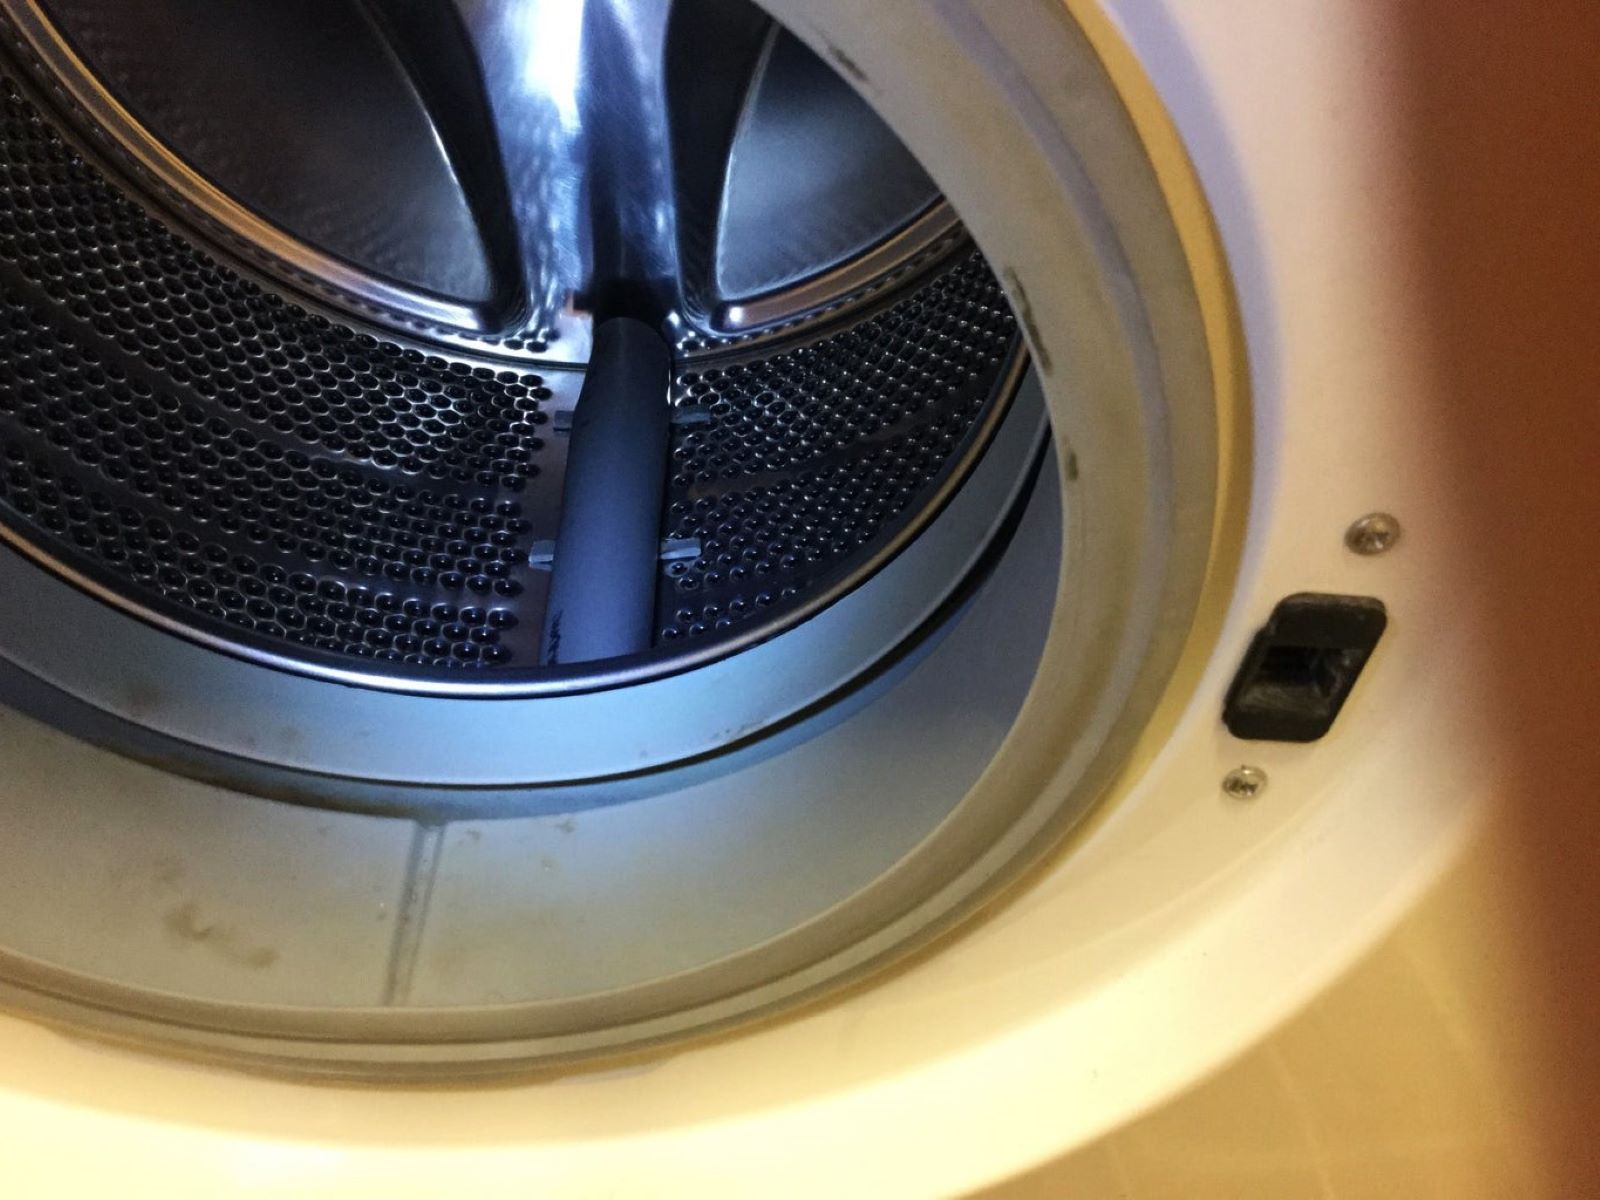
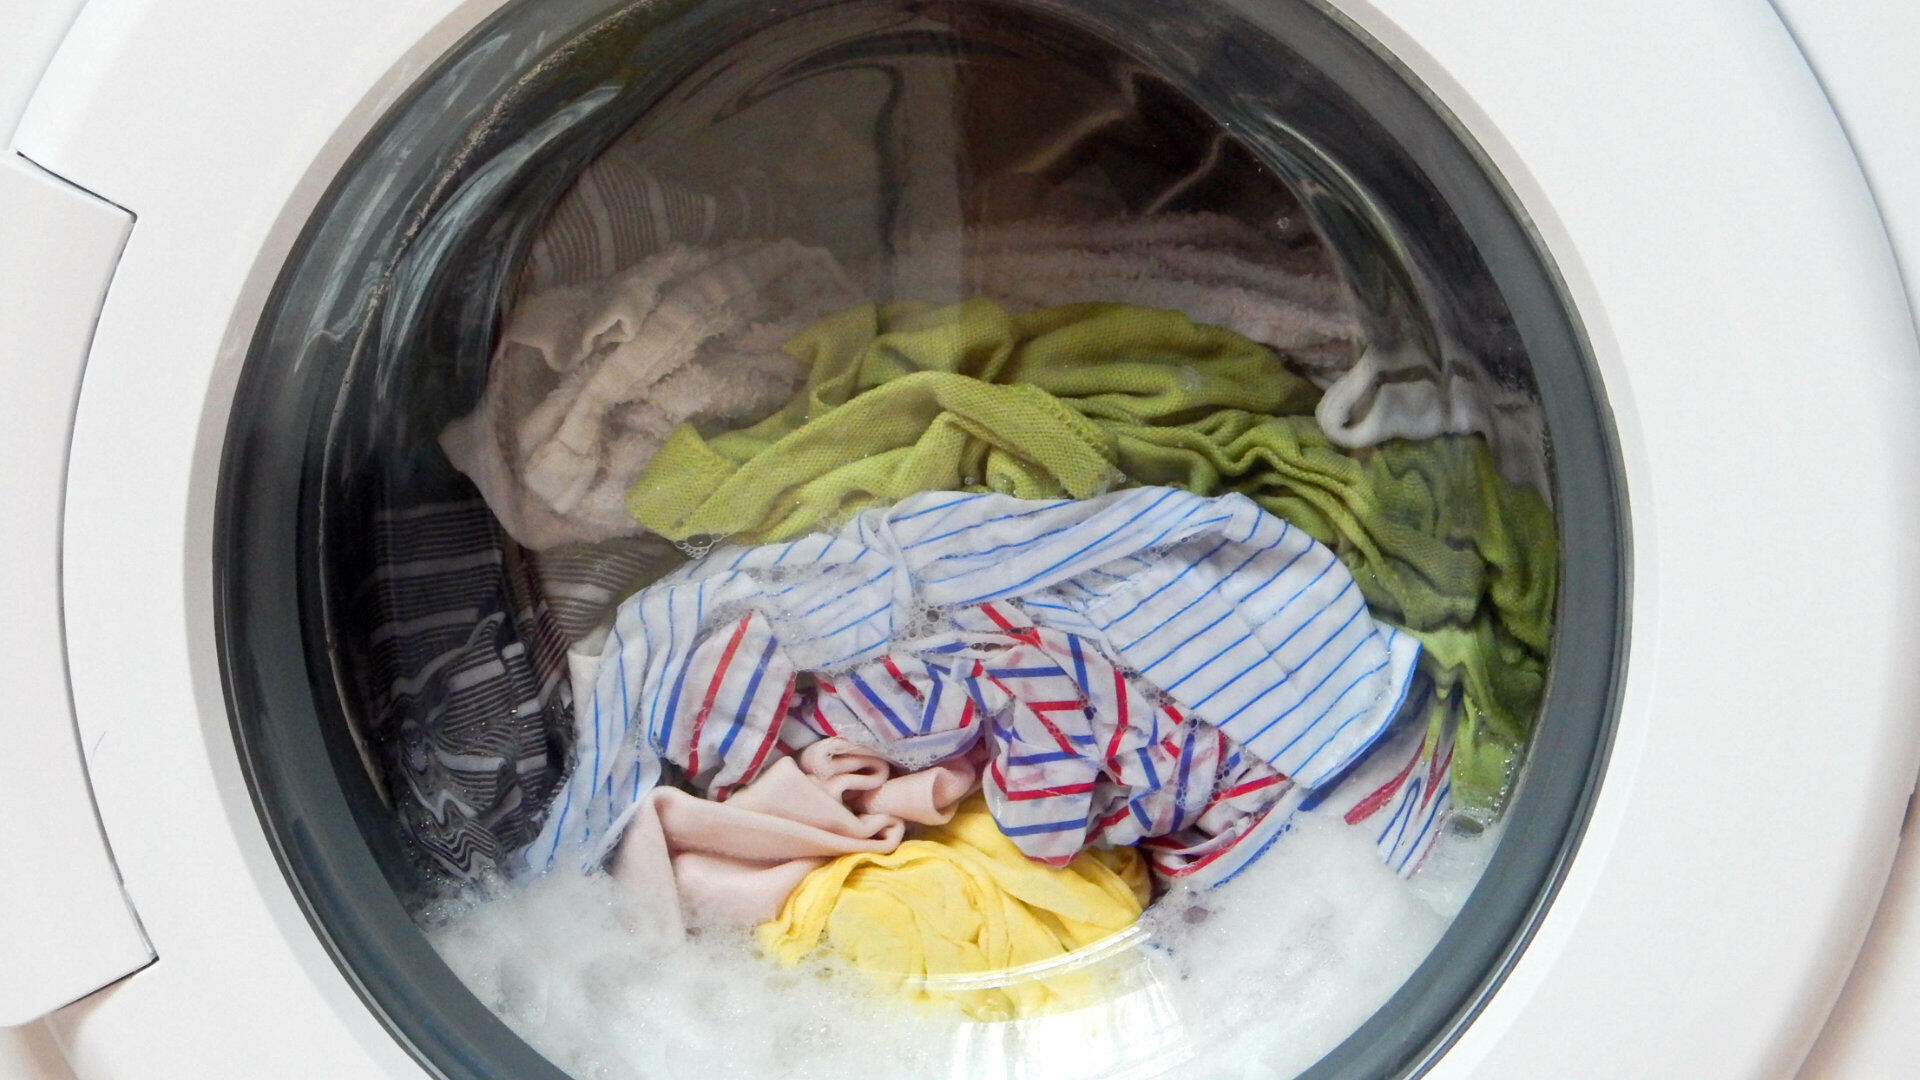
Removing the drum of a washing machine is a crucial step in gaining access to the innermost components of the appliance. The drum, also known as the tub, is the central component responsible for holding the laundry during the wash and spin cycles. When undertaking the disassembly process, removing the drum provides an opportunity to inspect and maintain components such as the bearings, seals, and drive shaft, ensuring the optimal performance of the washing machine.
To commence the removal of the drum, it is essential to first disconnect any hoses or wiring connected to the drum assembly. These connections may include the water inlet hoses, drain hose, and any wiring harnesses linked to sensors or the motor. Carefully detach these connections, taking note of their positions and ensuring that they are labeled for reassembly.
Once the external connections are detached, the next step involves accessing the rear of the washing machine to remove the access panel. This panel provides entry to the rear of the drum assembly, allowing for the disconnection of the drive belt and other components securing the drum in place. Utilizing a screwdriver or socket and ratchet set, remove the screws or fasteners securing the access panel, and set it aside in a safe location.
With the access panel removed, the drive belt, which connects the motor to the drum, must be disconnected. Depending on the specific model of the washing machine, there may be a tensioner or pulley system that requires adjustment to release the tension on the drive belt. Carefully maneuver the drive belt off the pulleys and motor, ensuring that it is free from any obstructions.
Following the disconnection of the drive belt, the next step involves accessing the front of the washing machine to remove the door seal or gasket. This rubber seal encircles the drum opening and is secured in place by a retaining band or spring. Gently pry open the retaining band or release the spring to detach the door seal, taking care to avoid damaging the seal during removal.
Once the door seal is detached, the front panel of the washing machine can be removed to access the drum assembly. Depending on the model, the front panel may be secured by screws or clips located at the top and bottom of the appliance. Carefully remove these fasteners and lift the front panel away, setting it aside for reassembly.
With the front panel removed, the drum assembly is now visible and accessible. The drum is typically mounted on the appliance's frame by a series of shock absorbers, springs, or suspension rods. These components must be carefully disconnected or removed to release the drum from its position within the washing machine.
As the drum assembly is freed from its securing mechanisms, it is essential to enlist the assistance of another person to support and carefully lift the drum away from the appliance. The drum is a substantial component and may require additional support during removal to prevent damage or injury.
By meticulously following these steps, you can successfully remove the drum of the washing machine, providing access to the internal components for thorough inspection and maintenance. This critical process empowers you to address any issues related to the drum, such as worn bearings or damaged seals, ensuring the continued efficiency and functionality of the appliance. With the drum removed, you are now prepared to delve deeper into the inner workings of the washing machine, gaining valuable insight into its mechanisms and facilitating any necessary repairs or maintenance tasks.
Cleaning and Maintenance
Cleaning and maintaining a washing machine is essential for ensuring its optimal performance and longevity. Once the internal components have been accessed and inspected, it is crucial to prioritize thorough cleaning and targeted maintenance tasks to uphold the efficiency of the appliance. Here are the key steps involved in cleaning and maintaining a washing machine:
1. Drum and Tub Cleaning
Begin by cleaning the drum and tub of the washing machine to remove any accumulated residue, detergent buildup, or lint. Use a mild detergent or specialized washing machine cleaner to wipe down the interior surfaces, ensuring that all areas, including the drum, agitator, and tub, are thoroughly cleaned. Pay particular attention to the rubber door seal, ensuring that it is free from mold, mildew, and debris. Additionally, inspect and clean the lint filter, if applicable, to prevent clogging and optimize drainage.
2. Inspection of Seals and Bearings
Inspect the seals and bearings within the washing machine for signs of wear, damage, or leaks. Worn seals and bearings can lead to water leakage and reduced efficiency. If any issues are detected, consider replacing these components to prevent potential water damage and maintain the integrity of the appliance.
3. Drive Belt and Motor Maintenance
Evaluate the condition of the drive belt and motor to ensure proper tension and alignment. A loose or worn drive belt can impede the spinning and agitation functions of the washing machine. Additionally, lubricate the motor bearings, if applicable, to minimize friction and ensure smooth operation.
4. Pump and Drainage System Check
Inspect the pump and drainage system for any obstructions, debris, or blockages that may hinder water drainage. Clear any clogs and ensure that the pump and hoses are free from damage or leaks. This proactive maintenance task prevents potential drainage issues and promotes efficient water removal during the wash and spin cycles.
Read more: How Long Does A Whirlpool Washer Take
5. Suspension System Assessment
Evaluate the suspension system, including springs, shock absorbers, or suspension rods, to verify their integrity and functionality. Worn or damaged suspension components can lead to excessive vibration and imbalance during operation. Address any issues by replacing worn suspension parts to maintain stability and minimize noise during the washing machine's cycles.
By diligently performing these cleaning and maintenance tasks, you can uphold the efficiency and functionality of your washing machine, ensuring that it continues to deliver optimal performance. Regular cleaning and targeted maintenance not only extend the lifespan of the appliance but also contribute to energy efficiency and the preservation of your laundry appliances. With a well-maintained washing machine, you can enjoy consistently clean and fresh laundry while minimizing the need for extensive repairs or replacements.
Reassembling the Washing Machine
Reassembling a washing machine is a crucial phase that follows the inspection, cleaning, and maintenance of its internal components. This process involves carefully restoring the appliance to its original configuration, ensuring that all parts are securely reattached and the outer cabinet is properly reassembled. By methodically reassembling the washing machine, you can restore its functionality and structural integrity, preparing it for seamless operation.
To commence the reassembly, begin by carefully positioning the drum back into the washing machine's frame. Enlist the assistance of another person to support and guide the drum into place, ensuring that it aligns with the suspension components and mounting brackets. Take care to avoid damaging any wiring or hoses during this process, ensuring a smooth and controlled reinstallation of the drum.
Once the drum is securely positioned, proceed to reattach the suspension components, such as springs, shock absorbers, or suspension rods, to stabilize the drum within the appliance. Verify that these components are securely fastened and aligned, as they play a crucial role in minimizing vibration and maintaining balance during the wash and spin cycles.
Following the reinstallation of the drum and suspension components, the next step involves reattaching the front panel of the washing machine. Carefully align the panel with the appliance's frame and secure it in place using the appropriate screws or clips. Take care to ensure that the front panel is firmly attached, providing structural support and a seamless exterior appearance.
After securing the front panel, proceed to reattach the door seal or gasket, ensuring that it is properly positioned and secured with the retaining band or spring. Verify that the seal forms a tight and secure seal around the drum opening, preventing water leakage and maintaining the integrity of the washing machine.
With the front panel and door seal in place, the drive belt must be reconnected to the motor and drum pulleys. Adjust the tensioner or pulley system, if applicable, to ensure proper tension and alignment of the drive belt. Verify that the drive belt is free from any obstructions and rotates smoothly during operation.
Finally, reattach the access panel at the rear of the washing machine, securing it with the appropriate screws or fasteners. Ensure that all external connections, including hoses and wiring harnesses, are carefully reconnected to the drum assembly, verifying that they are securely attached and free from any tangles or obstructions.
By meticulously following these steps, you can successfully reassemble the washing machine, restoring its functionality and structural integrity. This comprehensive reassembly process ensures that all internal components are securely reattached, and the outer cabinet is properly restored, preparing the appliance for continued efficient operation.
Frequently Asked Questions about How To Take Apart A Washing Machine
Was this page helpful?
At Storables.com, we guarantee accurate and reliable information. Our content, validated by Expert Board Contributors, is crafted following stringent Editorial Policies. We're committed to providing you with well-researched, expert-backed insights for all your informational needs.


0 thoughts on “How To Take Apart A Washing Machine”