Home>Home Maintenance>How To Clean Air Conditioner Vents In A House
Home Maintenance
How To Clean Air Conditioner Vents In A House
Modified: March 7, 2024
Learn how to clean your air conditioner vents in your house with these simple home maintenance tips. Keep your home cool and comfortable all summer long.
(Many of the links in this article redirect to a specific reviewed product. Your purchase of these products through affiliate links helps to generate commission for Storables.com, at no extra cost. Learn more)
Introduction
Welcome to our comprehensive guide on how to clean air conditioner vents in a house. Your air conditioner plays a crucial role in maintaining a comfortable and healthy indoor environment. As with any home appliance, regular maintenance is necessary to ensure optimal performance and prolong the lifespan of your air conditioner.
Air conditioner vents, also known as registers or grilles, are an integral part of your HVAC system. Over time, these vents can accumulate dust, pollen, and other airborne pollutants. If left unaddressed, this buildup can negatively impact the quality of the air you breathe and reduce the efficiency of your air conditioner.
Cleaning your air conditioner vents regularly is a simple yet important task that can significantly improve indoor air quality and help your HVAC system perform at its best. In this guide, we will walk you through the step-by-step process of cleaning your air conditioner vents, ensuring that you can enjoy cleaner air and maximize the efficiency of your system.
Before we dive into the cleaning process, it’s crucial to understand why clean air conditioner vents are important. Air conditioner vents serve as the entry and exit points for air flowing through your HVAC system. When these vents are clogged with debris, the air circulation within your home becomes restricted.
Restricted airflow can lead to a range of issues, including reduced cooling or heating efficiency, increased energy consumption, and even potential damage to your air conditioning unit. Additionally, dirty vents can contribute to poor indoor air quality, triggering allergies, respiratory problems, and an overall unpleasant environment.
By regularly cleaning your air conditioner vents, you can prevent these problems and ensure that your HVAC system is functioning optimally. Cleaning the vents not only removes dust and debris but also allows for better air circulation, enabling your air conditioner to cool or heat your home more effectively.
Now that you understand the importance of clean air conditioner vents, let’s move on to the tools and materials you’ll need for the cleaning process.
Key Takeaways:
- Regularly cleaning air conditioner vents improves air quality, reduces energy consumption, and extends the lifespan of your HVAC system, creating a healthier and more efficient home environment.
- By following a simple step-by-step process to clean air conditioner vents, you can enjoy cleaner air, improved HVAC performance, and a more comfortable living space.
Read more: How To Fix An Air Conditioner In A House
Understanding the Importance of Clean Air Conditioner Vents
Clean air conditioner vents are not just about aesthetics, but they also play a crucial role in maintaining a healthy and comfortable indoor environment. When your vents are clogged with dust, dirt, and debris, it can have a negative impact on both the quality of the air you breathe and the performance of your HVAC system.
One of the primary benefits of clean air conditioner vents is improved indoor air quality. When air circulates through your HVAC system, it passes through the vents before being distributed throughout your home. If the vents are dirty, they can distribute dust, pollen, pet dander, and other allergens, leading to allergic reactions and respiratory issues among household members.
Furthermore, dirty vents can create an ideal environment for mold and mildew growth. As moisture collects in the vents, it creates a breeding ground for these harmful microorganisms. When the air conditioner is turned on, these mold spores can be dispersed into the air, potentially causing respiratory problems for those living in the house.
Besides the impact on air quality, unclean vents can also affect the efficiency of your HVAC system. When vents are clogged with debris, airflow is restricted. This means that your air conditioner has to work harder to push air through the obstructed vents. As a result, your system may consume more energy to cool or heat your home, leading to increased utility bills.
In addition to higher energy costs, restricted airflow can also put unnecessary strain on your air conditioner’s components. The increased workload can lead to system overheating, reduced lifespan, and even costly repairs or replacements. By keeping your vents clean, you can ensure that your HVAC system operates smoothly, efficiently, and lasts for years to come.
Apart from the direct benefits to your health and HVAC system, clean air conditioner vents can also contribute to a more comfortable and pleasant indoor environment. When vents are free from dust and debris, air can circulate more easily, creating consistent temperatures throughout your home. This helps to eliminate hot and cold spots and ensures a evenly heated or cooled environment in every room.
Overall, maintaining clean air conditioner vents is essential for a healthy, efficient, and comfortable home. In the next section, we will discuss the tools and materials you’ll need to clean your vents effectively.
Tools and Materials Needed for Cleaning
Before you begin cleaning your air conditioner vents, it’s important to gather the necessary tools and materials. Having the right equipment on hand will make the cleaning process easier and more efficient. Here are the tools and materials you’ll need:
- Screwdriver: To remove the vent covers, you’ll need a screwdriver. Choose the appropriate type and size based on the screws holding your vent covers in place.
- Vacuum Cleaner: A vacuum cleaner with a hose attachment will be essential for removing dust and debris from the vents. Make sure the vacuum cleaner is in good working condition and has sufficient suction power.
- Soft Brush or Broom: A soft brush or broom can be used to loosen any stubborn dirt or dust that may have accumulated on the vent covers or inside the vents.
- Mild Detergent: A mild detergent or dish soap will be useful for cleaning the vent covers. Avoid using harsh chemicals or abrasive cleaners that could damage the vents.
- Water: You’ll need water for rinsing the vent covers and any cleaning cloths or brushes you use in the process.
- Clean Cloths: Soft, lint-free cloths will be useful for wiping down the vent covers and drying them after cleaning.
- Plastic Bags or Drop Cloth: To catch any falling debris during the cleaning process, you may want to lay down a plastic bag or drop cloth to protect your floors or furniture.
It’s important to note that the tools and materials required may vary slightly depending on the type of air conditioner vents you have and the level of dirt or debris accumulation. It’s always a good idea to assess your specific needs and adjust the tool and material list accordingly.
Now that you have all the necessary tools and materials, you’re ready to start cleaning your air conditioner vents. In the following steps, we will guide you through the process from start to finish, ensuring that your vents are thoroughly cleaned and free from any obstructions.
Step 1: Preparing for the Cleaning Process
Before you begin cleaning your air conditioner vents, it’s important to take some preparatory steps to ensure a smooth and effective cleaning process. Here’s what you need to do:
- Turn off the Air Conditioner: Start by turning off your air conditioner. This will prevent any air circulation during the cleaning process and ensure your safety.
- Gather Your Tools and Materials: Collect all the tools and materials you’ll need for the cleaning process, as outlined in the previous section. Having everything ready will save you time and make the process more efficient.
- Protect Your Floors and Furniture: Lay down a plastic bag or drop cloth on the floor beneath the vents to catch any falling debris during the cleaning process. This will protect your floors or furniture from getting dirty or damaged.
- Put on Protective Gear: While cleaning the vents, it’s a good idea to protect yourself by wearing gloves, a dust mask, and safety goggles. This will prevent any potential irritation or allergies caused by the dust or cleaning agents.
- Inspect the Vents: Take a close look at the vent covers and surrounding areas for any signs of damage or mold growth. If you notice any significant issues or suspect mold, it’s best to consult a professional before proceeding with the cleaning.
By taking these preparatory steps, you’ll ensure a safe and efficient cleaning process. Now that you’re ready to move on, let’s proceed to the next step: removing the vent covers.
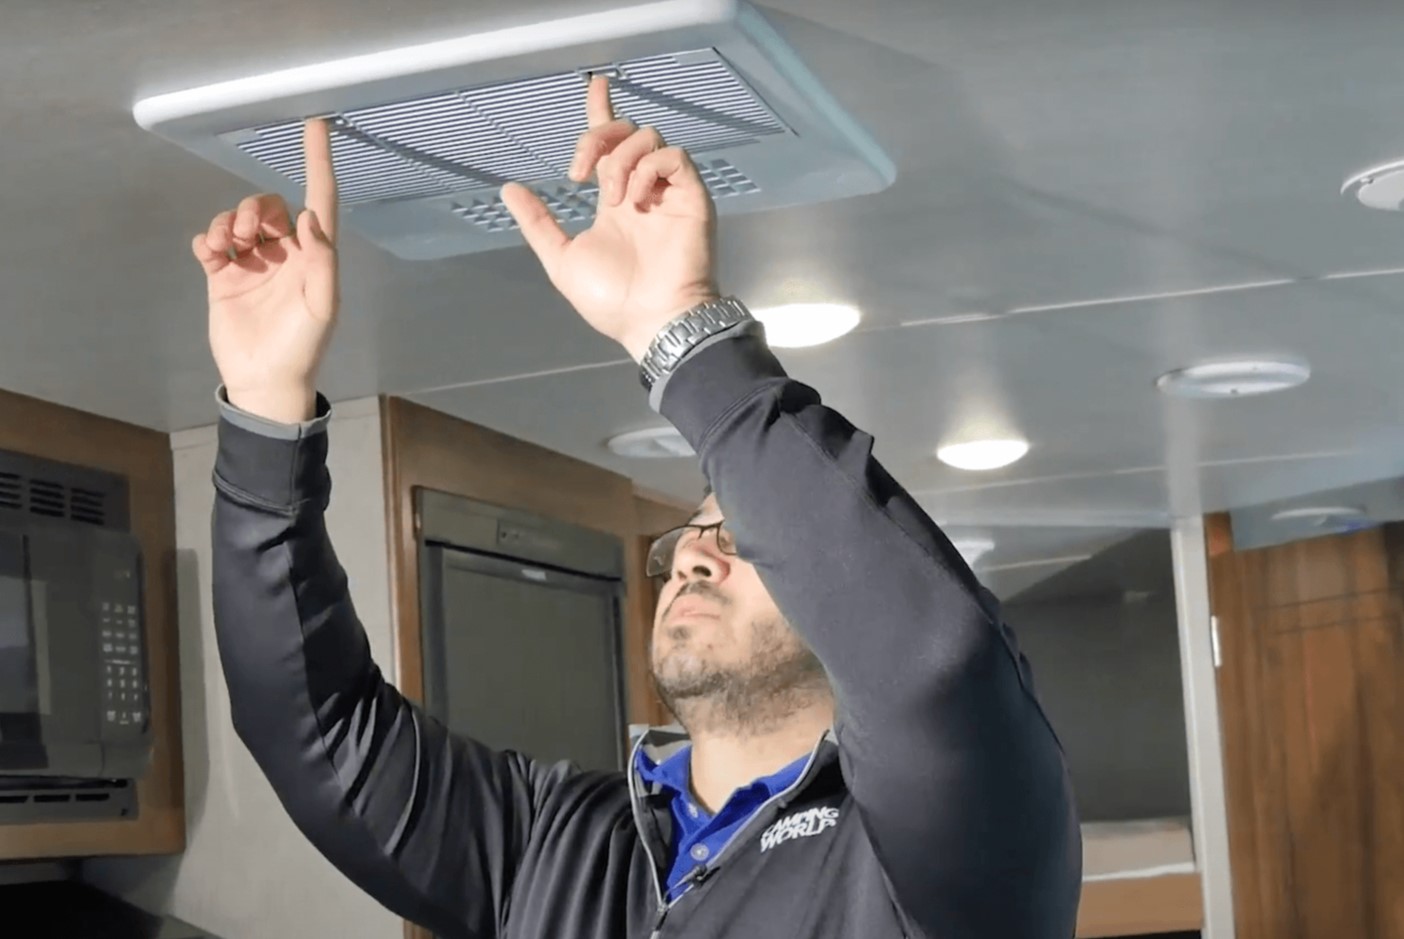
Step 2: Removing the Vent Covers
Now that you have prepared for the cleaning process, it’s time to remove the vent covers. Here’s how to do it:
- Locate the Screws: Look for the screws that are holding the vent covers in place. These are usually located on the outer edges of the covers. The number of screws will depend on the design of your vent covers.
- Use a Screwdriver: Take your screwdriver and carefully unscrew each screw that is securing the vent covers. Keep track of the screws to ensure they are not misplaced.
- Set Aside the Screws: Once you have removed all the screws, place them aside in a safe location. You can use a small container or a piece of tape to keep them together and prevent them from rolling away or getting lost.
- Gently Remove the Vent Cover: With the screws removed, you can now start to gently lift the vent cover away from the wall or floor. Be cautious not to force or damage the cover during this process.
- Inspect the Vent Cover: Take a moment to inspect the vent cover for any visible dust, dirt, or debris. This will give you an idea of the cleaning required for each cover.
By following these steps, you will be able to remove the vent covers safely and effectively. Make sure to handle the covers with care to avoid any unnecessary damage. In the next step, we will discuss how to vacuum the vents to remove any built-up dust and debris.
Read more: How To Clean A Lennox Air Conditioner
Step 3: Vacuuming the Vents
With the vent covers removed, it’s time to start cleaning the vents themselves. Vacuuming is an effective method for removing dust and debris that may have accumulated inside. Here’s how to properly vacuum the vents:
- Attach the Hose Attachment: Take your vacuum cleaner and attach the hose attachment that allows for more precise cleaning. Ensure that it is securely connected to the vacuum.
- Insert the Hose into the Vent: Insert the hose attachment into the vent opening as far as it will comfortably go. Be sure to hold onto the hose to maintain control throughout the cleaning process.
- Move the Hose Back and Forth: Move the hose back and forth within the vent to vacuum up the dust and debris. Start from the top of the vent and work your way down to ensure thorough cleaning.
- Be Thorough but Gentle: Take your time and be thorough in cleaning each vent. However, be gentle and avoid using excessive force that could damage the vents or dislodge any internal components.
- Pay Attention to Corners and Edges: Dust and debris can often accumulate in corners and along the edges of the vent openings. Focus on these areas to ensure a comprehensive cleaning.
- Repeat for All Vents: Repeat the process for each vent in your house, ensuring every vent is thoroughly cleaned.
It’s important to note that different vacuum cleaners vary in terms of power and suction. Adjust the strength of the vacuum cleaner according to what is appropriate for your vents. If you find that the vacuum is not picking up all of the debris, you may need to use a brush attachment or a soft brush to dislodge any stubborn dirt.
Vacuuming is a highly effective method for removing loose dust and debris from your vents. However, for a more thorough cleaning, it’s important to clean the vent covers as well. In the next step, we will discuss how to clean the vent covers to ensure they are free from dirt and grime.
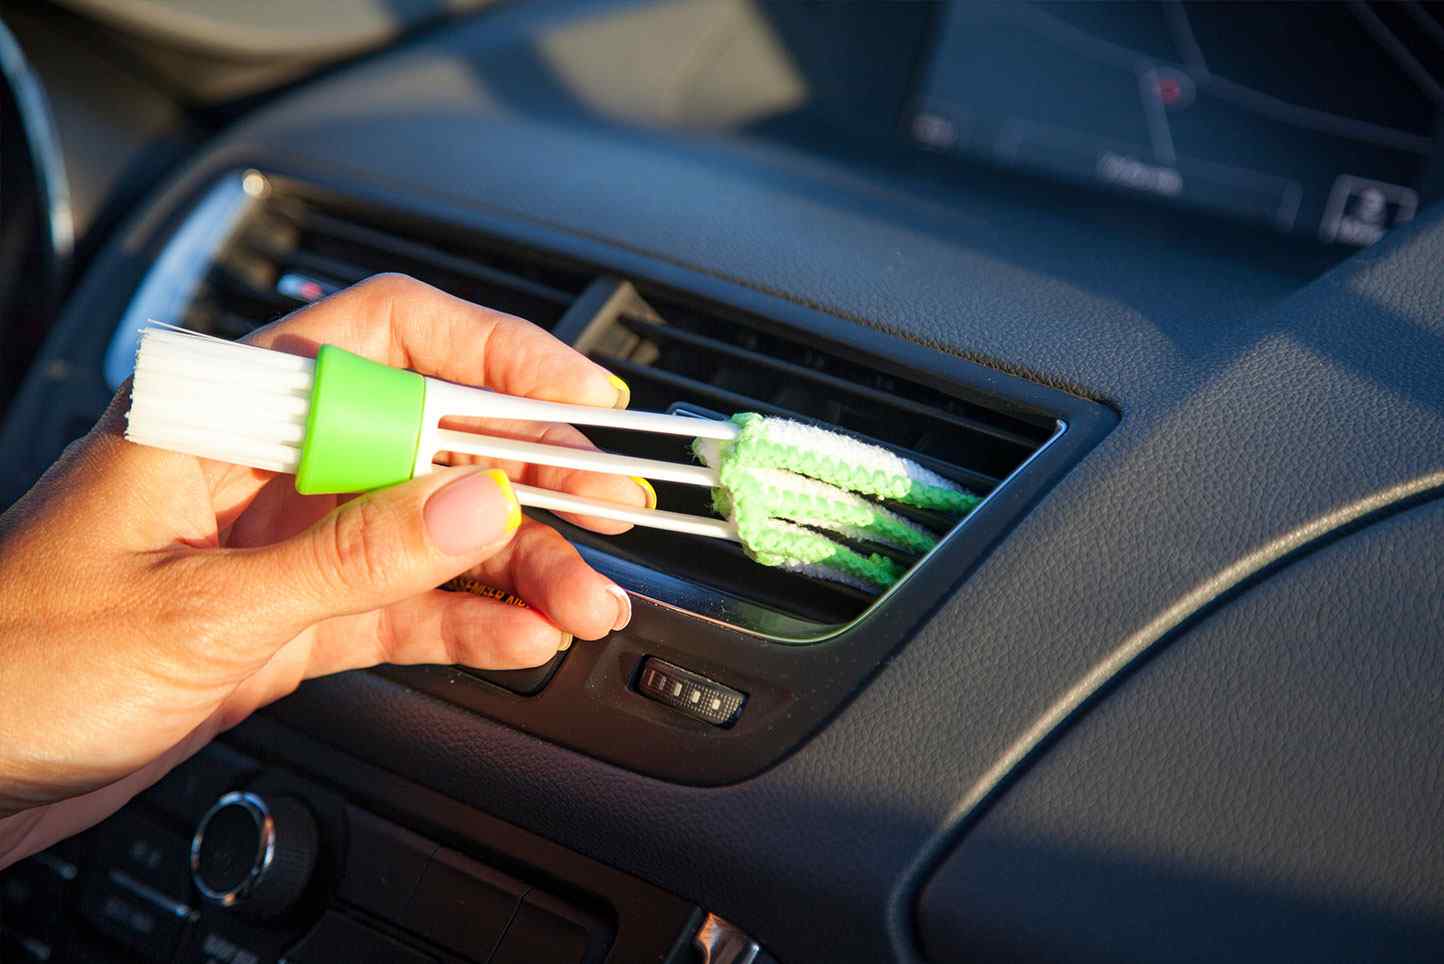
Use a vacuum with a brush attachment to clean the vents. Remove the vent covers, vacuum inside the ducts, and wipe the covers with a damp cloth. Repeat every few months to maintain clean air flow.
Step 4: Cleaning the Vent Covers
Now that you have vacuumed the vents, it’s time to focus on cleaning the vent covers themselves. Over time, these covers can accumulate dust and grime, reducing their appearance and potentially hindering airflow. Here’s how to clean the vent covers effectively:
- Prepare a Cleaning Solution: Mix a mild detergent or dish soap with warm water in a bucket or basin. The ratio of detergent to water will depend on the cleaning instructions provided by the manufacturer of the detergent.
- Dip a Clean Cloth or Sponge: Take a clean cloth or sponge and dip it into the cleaning solution. Make sure it is fully saturated but not dripping.
- Gently Scrub the Vent Covers: Starting with one vent cover at a time, gently scrub the surface of the vent cover with the damp cloth or sponge. Pay attention to any areas with stubborn dirt or grime.
- Repeat if Necessary: For particularly dirty vent covers, you may need to repeat the scrubbing process or use a soft brush to remove the stubborn dirt.
- Rinse the Vent Covers: Once you have cleaned the vent covers, rinse them thoroughly with clean water to remove any soap residue.
- Dry the Vent Covers: Use a clean, dry cloth to wipe down the vent covers and remove any excess water. Allow them to air dry completely before reattaching them to the vents.
It’s essential to avoid using harsh chemicals or abrasive cleaners on the vent covers, as they can damage the finish or material. Stick to mild detergent solutions to ensure a safe and effective cleaning process.
While cleaning the vent covers, take the opportunity to inspect them for any damage. If you notice any cracks, breaks, or other issues, consider replacing them to ensure optimal performance and appearance.
With the vent covers cleaned and dried, you’re now ready to move on to the next step: cleaning the ducts to remove any additional dust or debris.
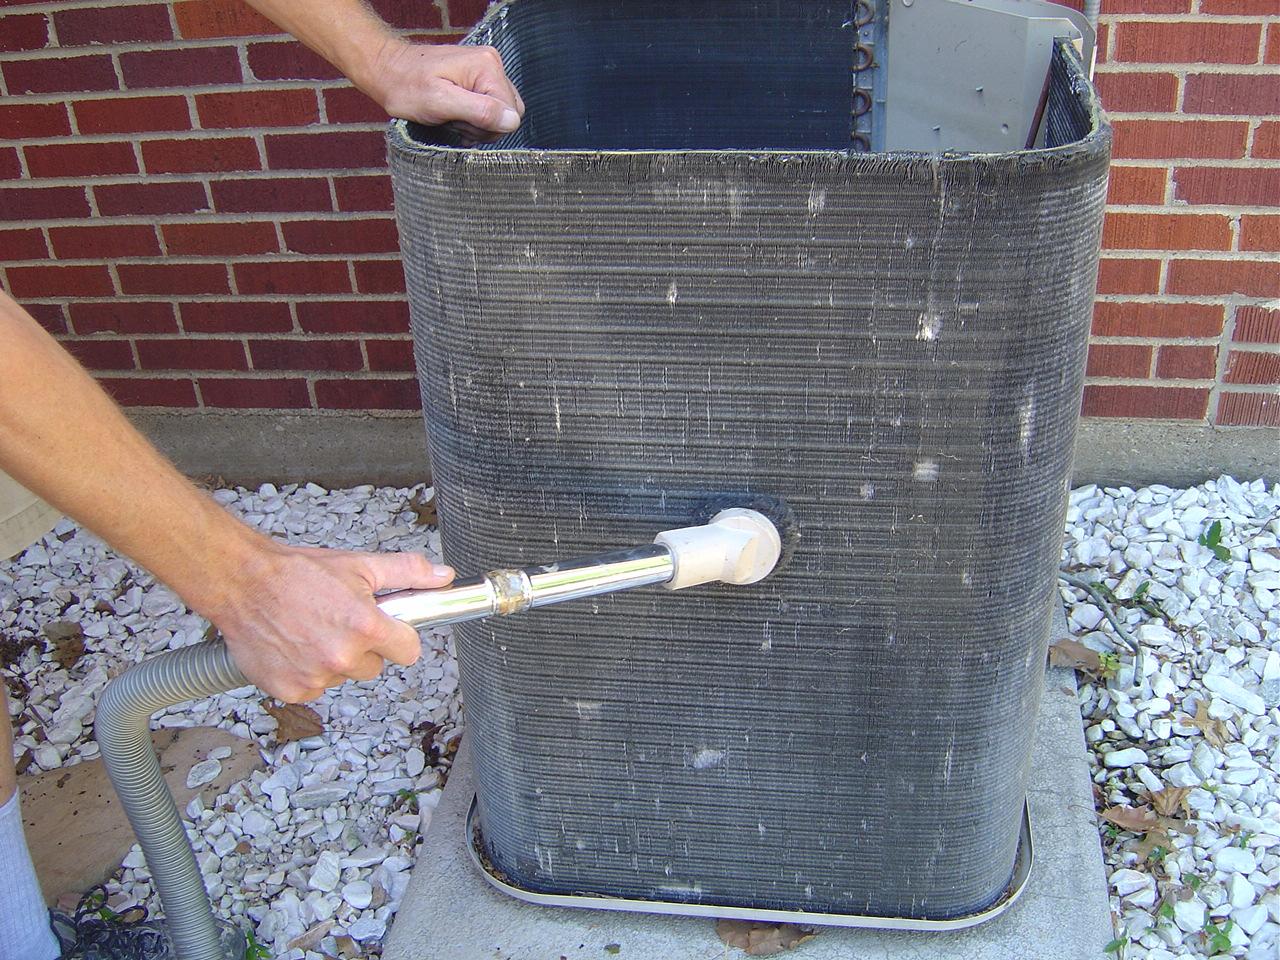
Step 5: Cleaning the Ducts
Cleaning the ducts is an important step in ensuring that your air conditioner vents are thoroughly cleaned. While vacuuming can remove loose dust and debris from the vents, there may still be build-up within the ductwork that needs to be addressed. Here’s how to clean the ducts effectively:
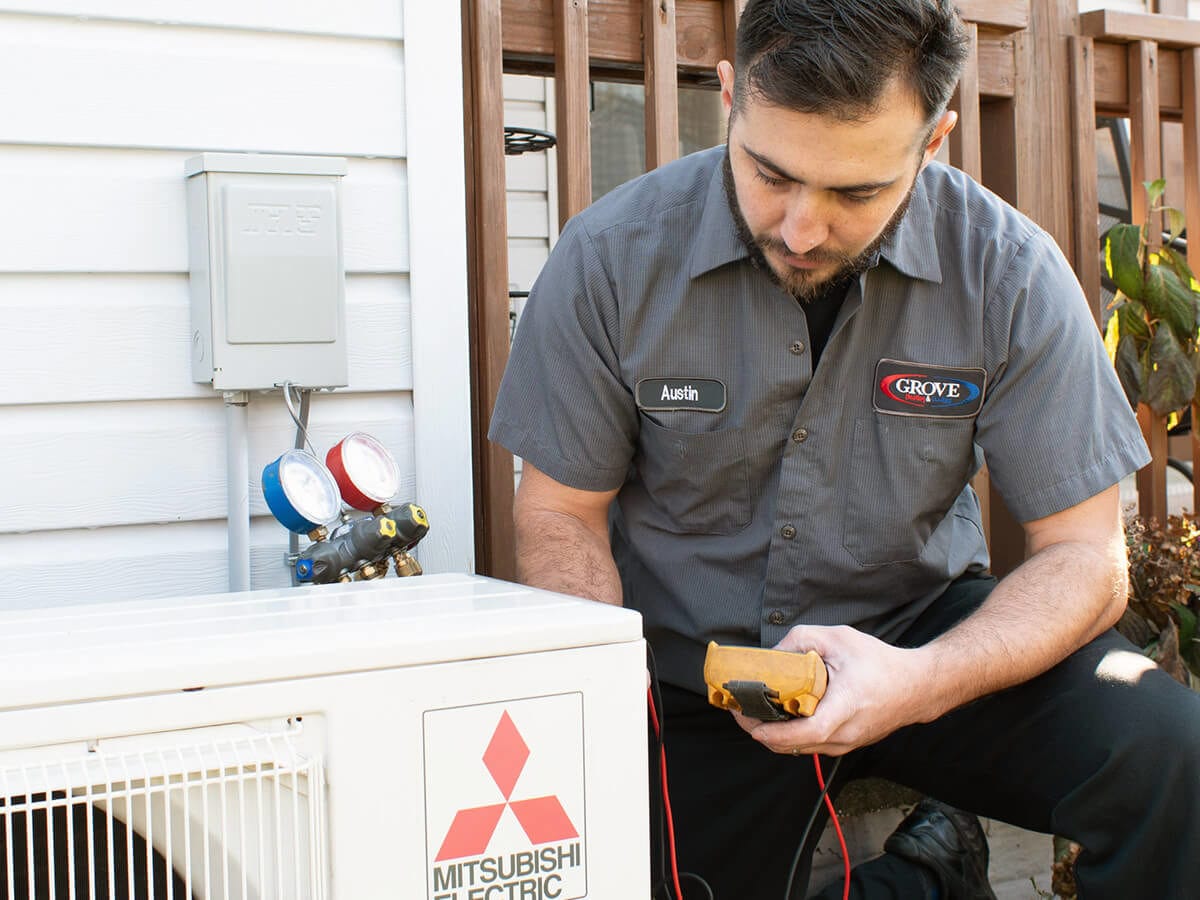
- Inspect the Ductwork: Use a flashlight to inspect the inside of the ducts. Look for any visible dust, debris, or signs of mold growth. Take note of any areas that require extra attention during the cleaning process.
- Consider Professional Cleaning: If you notice significant buildup or suspect mold growth, it’s advisable to seek professional assistance to clean the ducts properly. Professional cleaning companies have specialized equipment and expertise that ensure thorough and safe cleaning.
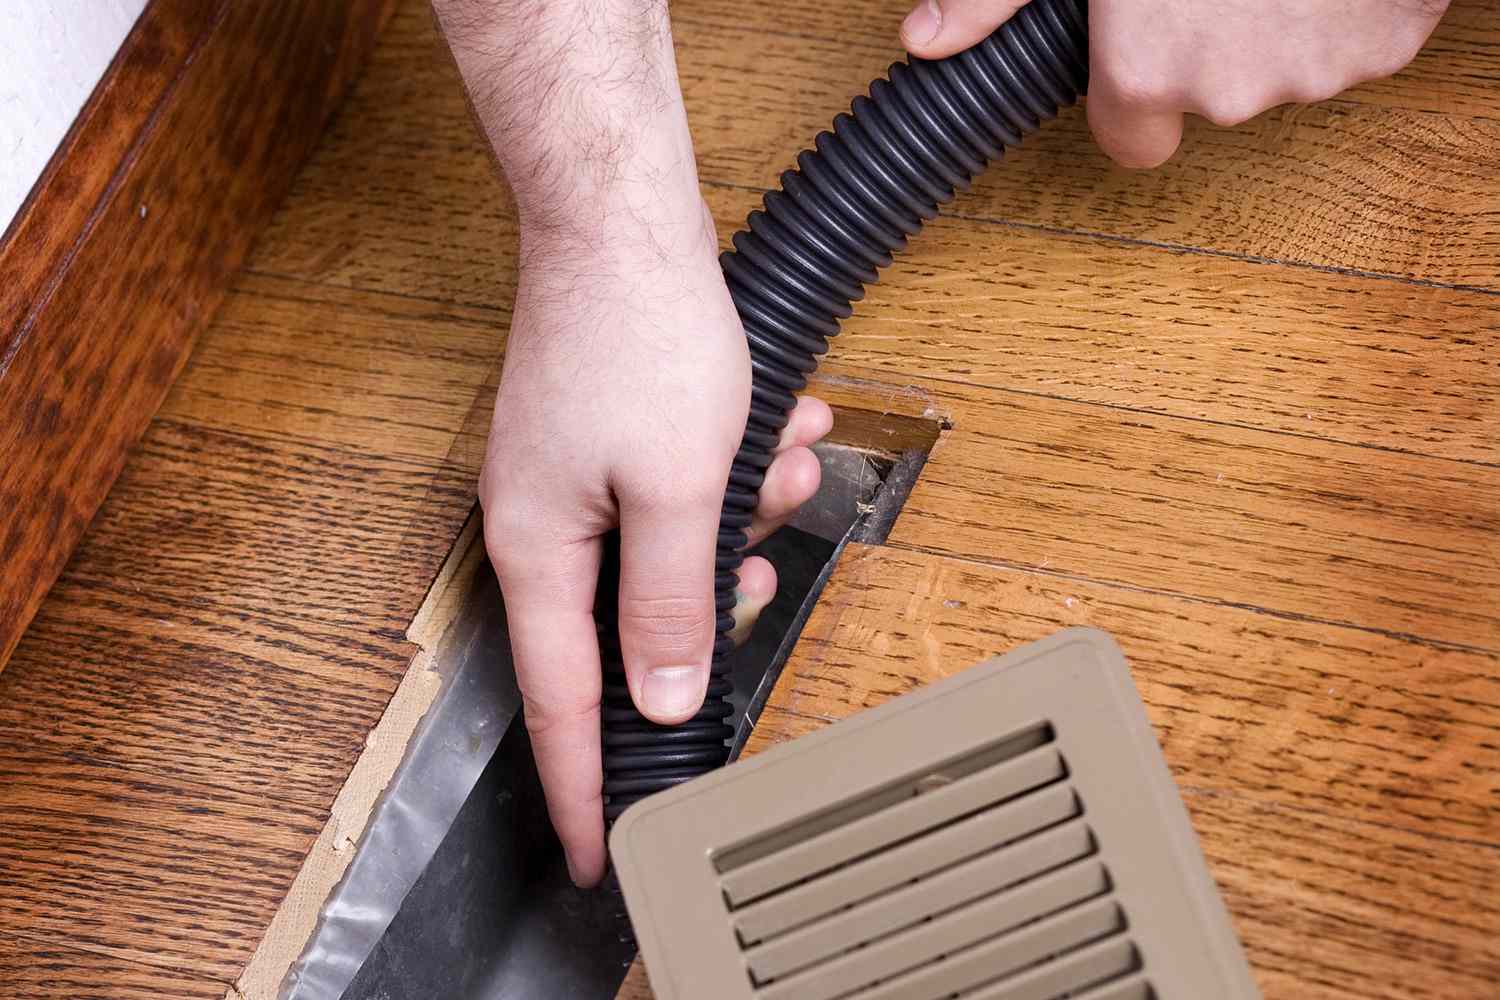
- Dust and Debris Removal: If you prefer to clean the ducts yourself, carefully use a long-handled brush or a duct cleaning tool to loosen any dust or debris. Be cautious not to damage the ductwork while doing so.
- Vacuum the Ducts: Attach a vacuum cleaner with a long hose to the ductwork or use a duct cleaning brush attachment. Carefully vacuum the dust and debris from the ducts, starting from the furthest vents and working your way back to the main air handler.
- Use Compressed Air: If available, you can use compressed air to blow out any remaining dust or debris from the ducts. However, exercise caution to prevent creating a mess or blowing contaminants into your living space.
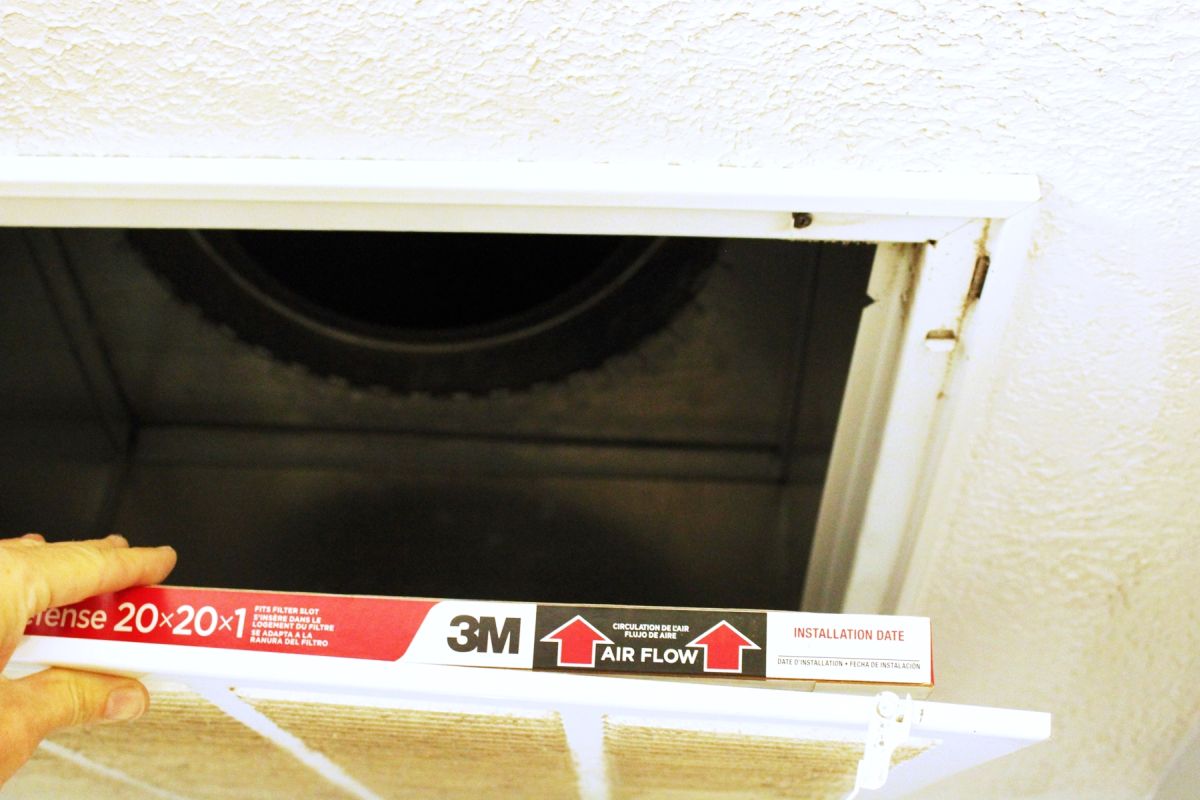
- Replace Air Filters: As part of the process, it’s important to check and replace the air filters in your HVAC system. Clean filters contribute to better airflow and improved indoor air quality.
It’s worth noting that cleaning the ducts can be a challenging task, especially for larger or complex duct systems. If you are unsure about the process or the condition of your ductwork, it’s always recommended to consult a professional HVAC technician who can assess and perform the cleaning for you.
With the ducts cleaned, you have completed a comprehensive cleaning of your air conditioner vents. The next step is to reattach the vent covers and give the exterior of the vents a final clean.
Step 6: Reattaching the Vent Covers
After cleaning the ducts, it’s time to reattach the vent covers to complete the cleaning process. Here’s how to properly reattach the vent covers:
- Position the Vent Covers: Hold the vent cover up to the opening in the wall or floor, ensuring that it aligns correctly.
- Insert the Screws: Take the screws that you set aside earlier and insert them into the screw holes on the vent cover. Use a screwdriver to tighten them securely but avoid over-tightening, as it can damage the vent cover or the surface it’s attached to.
- Double-Check the Alignment: Ensure that the vent cover is properly aligned and sits flush with the surrounding surface. This will ensure a clean and seamless appearance.
- Repeat for All Vent Covers: Repeat the process for each vent cover in your home, ensuring that they are all securely reattached.
By following these steps, you ensure that the vent covers are firmly in place and will not come loose during normal use. Take your time to double-check the alignment and screws, as a properly reattached vent cover contributes to the overall aesthetics of your home.
With the vent covers successfully reattached, we are almost done with the cleaning process. The final step is to clean the exterior of the vents to enhance their appearance and maintain a clean and fresh environment.
Read more: How To Clean A Frigidaire Air Conditioner
Step 7: Cleaning the Exterior of the Vents
The final step in the air conditioner vent cleaning process is to clean the exterior of the vents. This step ensures that the vents not only function optimally but also look clean and well-maintained. Here’s how to clean the exterior of the vents:
- Dust and Wipe the Vents: Take a soft cloth or duster and dust off the exterior surfaces of the vent covers. This will remove any loose dust or debris that may have settled on them.
- Clean with Mild Detergent: If the vents have visible stains or grime, dampen a cloth with a mild detergent and gently scrub the exterior surfaces. Be careful not to saturate the vents with too much water or cleaning solution.
- Rinse and Dry: After scrubbing, use a clean cloth dampened with water to rinse off the detergent residue from the vents. Make sure to wipe away any excess water and allow the vents to air dry completely before turning the air conditioner back on.
- Inspect for Damages: While cleaning, take the opportunity to inspect the vents for any damages or signs of wear and tear. Replace any damaged vents to maintain the functionality and appearance of your ventilation system.
Cleaning the exterior of the vents not only improves their appearance but also ensures that they are free from any dirt or grime that could potentially be blown into the indoor air when the air conditioner is in use. Regularly cleaning the vent exteriors will help maintain a clean and fresh environment in your home.
With the exterior of the vents cleaned and looking fresh, you have successfully completed the air conditioner vent cleaning process. It’s recommended to clean your vents at least once a year or as needed, depending on the level of dirt and debris accumulation.
Congratulations on taking the time and effort to clean your air conditioner vents. By doing so, you have improved the indoor air quality, enhanced the performance of your HVAC system, and contributed to a healthier and more comfortable living environment.
If you found this guide helpful, be sure to share it with others who may benefit from it. Happy cleaning!
Conclusion
Cleaning your air conditioner vents is an essential maintenance task that should not be overlooked. By keeping your vents clean, you can enjoy better indoor air quality, improved HVAC system performance, and a more comfortable living environment.
In this comprehensive guide, we have walked you through the step-by-step process of cleaning your air conditioner vents. From understanding the importance of clean vents to gathering the necessary tools and materials, we’ve covered it all.
By following the steps outlined in this guide, you can effectively clean your air conditioner vents. Preparing for the cleaning process, removing the vent covers, vacuuming the vents, cleaning the vent covers, addressing the ducts, reattaching the vent covers, and cleaning the exterior of the vents are the key steps to ensure thorough cleaning.
Remember, regular maintenance is key. It’s recommended to clean your air conditioner vents at least once a year or as needed, depending on your specific circumstances and the level of dirt and debris accumulation.
Maintaining clean air conditioner vents not only ensures better air quality but also extends the lifespan of your HVAC system, improves energy efficiency, and reduces the likelihood of expensive repairs or replacements.
We hope this guide has been informative and helpful in guiding you through the air conditioner vent cleaning process. By following these steps, you can enjoy cleaner air, a more efficient HVAC system, and a healthier living environment for you and your loved ones.
So, take the time to clean your air conditioner vents and reap the benefits of a well-maintained HVAC system. Your health, comfort, and wallet will thank you!
Frequently Asked Questions about How To Clean Air Conditioner Vents In A House
Was this page helpful?
At Storables.com, we guarantee accurate and reliable information. Our content, validated by Expert Board Contributors, is crafted following stringent Editorial Policies. We're committed to providing you with well-researched, expert-backed insights for all your informational needs.