Home>Home Maintenance>How To Clean Mold From A Window Air Conditioner

Home Maintenance
How To Clean Mold From A Window Air Conditioner
Modified: March 7, 2024
Learn how to clean mold from your window air conditioner with these simple home maintenance tips. Remove harmful mold and improve air quality in your home.
(Many of the links in this article redirect to a specific reviewed product. Your purchase of these products through affiliate links helps to generate commission for Storables.com, at no extra cost. Learn more)
Introduction
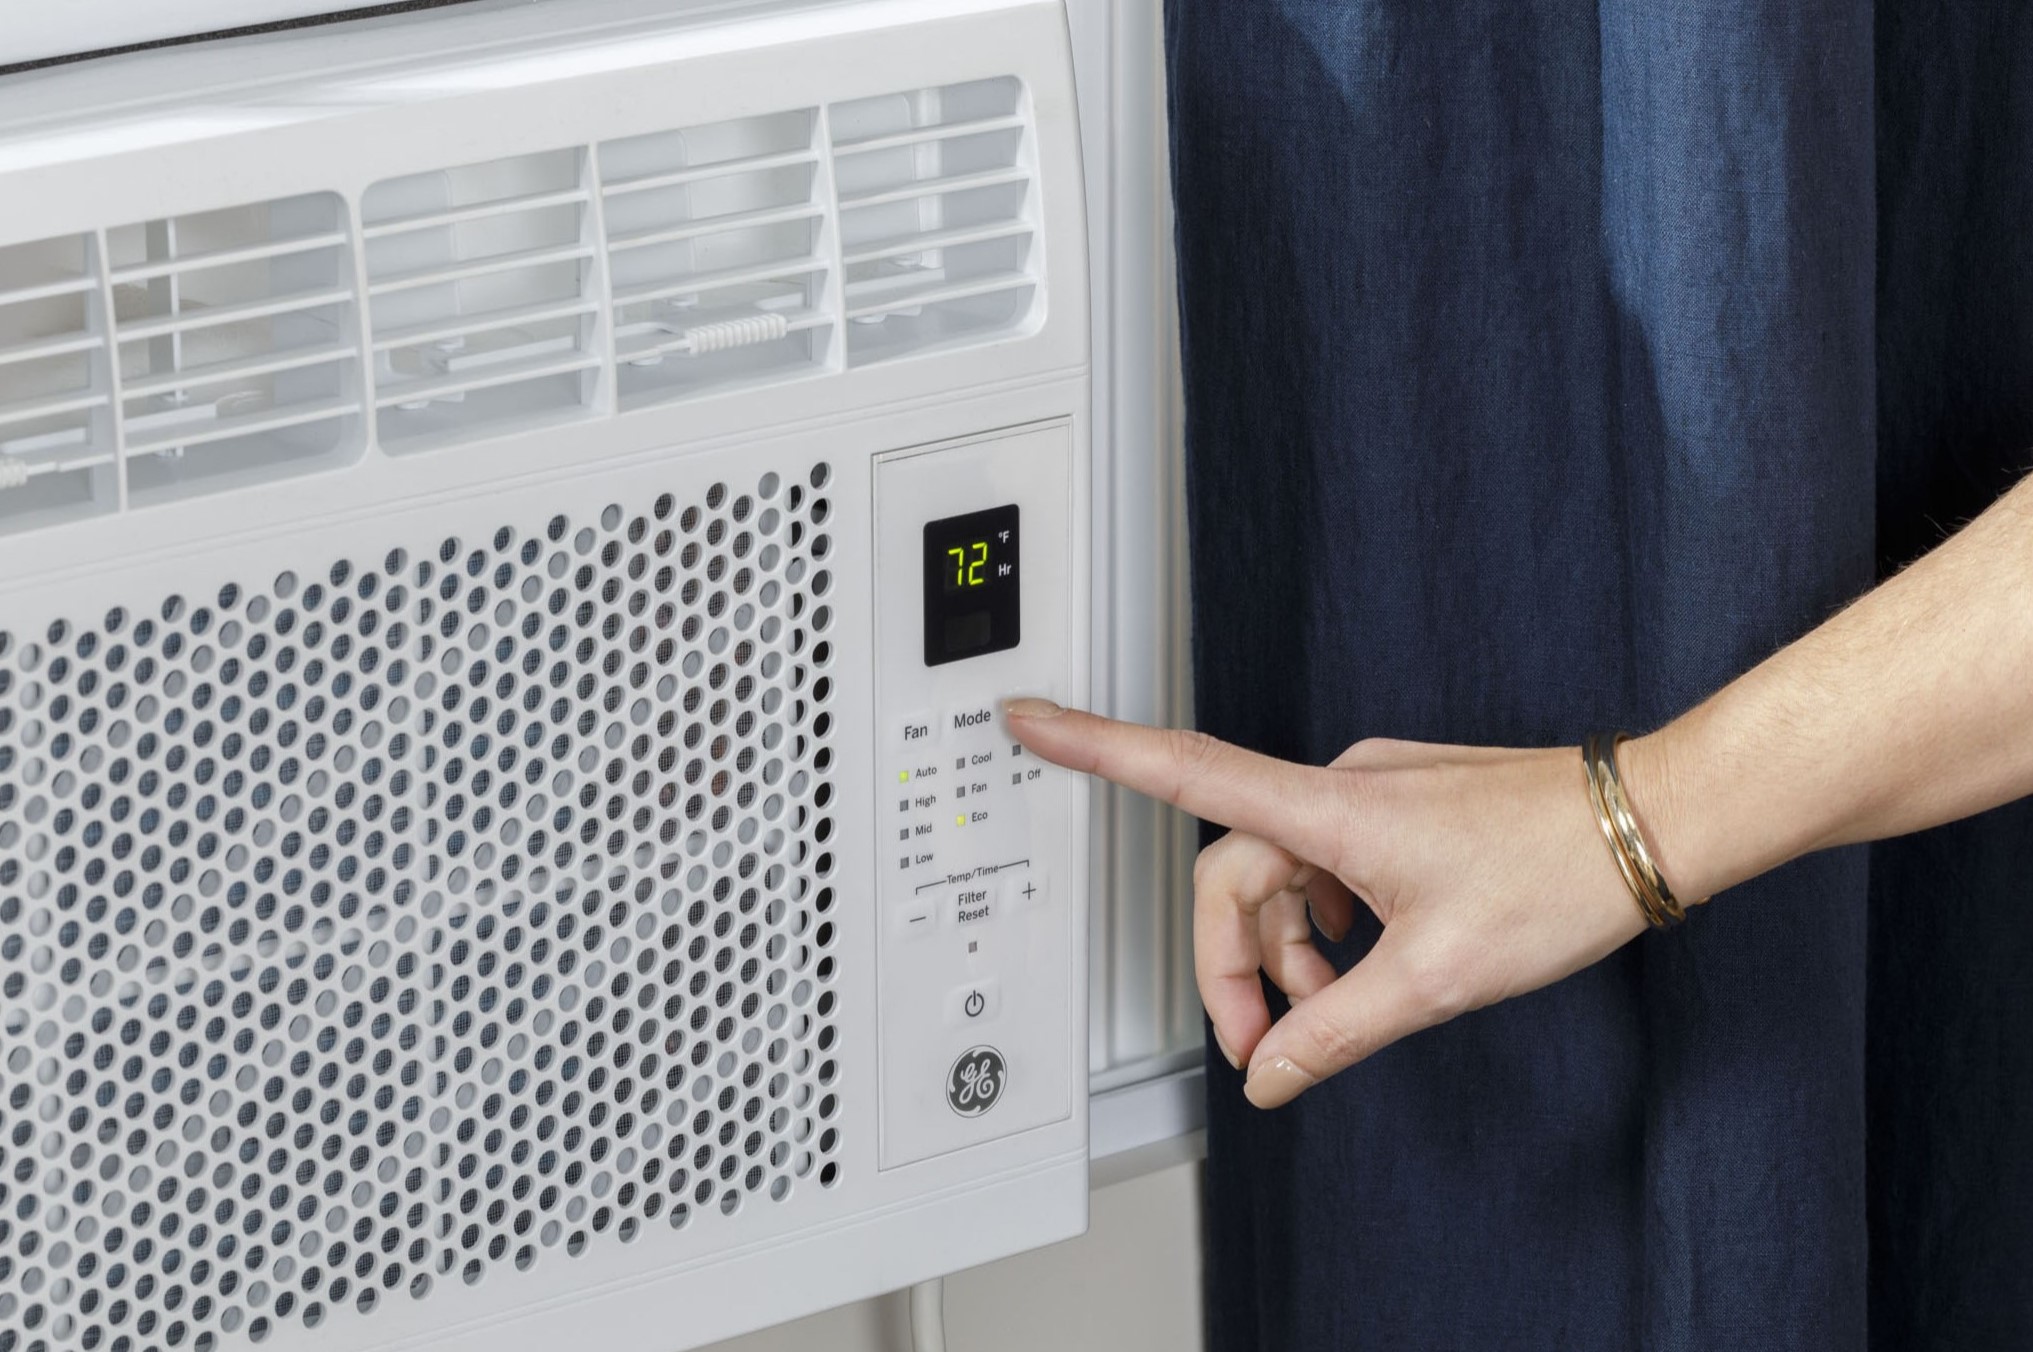
Welcome to our guide on how to clean mold from a window air conditioner. Window air conditioners are a popular choice for cooling individual rooms or small spaces, but if not properly maintained, they can become a breeding ground for mold and mildew. Mold growth in an air conditioner not only affects the unit’s performance but can also pose serious health risks for you and your family. Therefore, it is crucial to regularly clean and remove any mold or mildew buildup.
In this article, we will provide you with a step-by-step guide on how to effectively clean mold from your window air conditioner. We will also discuss safety precautions, necessary tools and materials, and tips for preventing future mold growth.
Before we delve into the cleaning process, let’s first understand what causes mold growth in window air conditioners and why it is essential to address this issue promptly.
Mold and mildew thrive in damp and humid environments. Window air conditioners provide a perfect breeding ground for mold because they constantly draw in moisture from the air through their cooling process. This moisture, combined with dust and debris that accumulates in the unit, creates an ideal environment for mold spores to grow and multiply.
The presence of mold in your air conditioner can lead to various health problems. Mold spores can trigger allergic reactions, respiratory issues, and even cause infections in individuals with compromised immune systems. Moreover, mold growth can negatively impact the efficiency and performance of your air conditioner, leading to higher energy bills and decreased cooling capacity.
Now that we understand the importance of keeping our window air conditioners free from mold, let’s discuss the necessary safety precautions before we begin the cleaning process.
Key Takeaways:
- Keep your window air conditioner mold-free by regularly cleaning the air filter, exterior, and interior components. Preventive measures like maintaining ventilation and addressing leaks are crucial for a healthy living environment.
- Prioritize safety by wearing protective gear and using non-toxic cleaning agents when cleaning mold from your window air conditioner. Regular maintenance and proper upkeep are key to a clean and efficient unit.
Understanding mold in window air conditioners
Before we dive into the cleaning process, let’s take a closer look at how mold can develop in window air conditioners and what signs to look out for. Understanding the nature of mold growth in these units will help us effectively eliminate it and prevent future infestations.
Mold spores are microscopic organisms that are present everywhere in the environment. They become a problem when they find a suitable environment to grow and multiply rapidly. In the case of window air conditioners, the combination of moisture, warmth, and organic matter creates an ideal habitat for mold to flourish.
The moisture that accumulates in an air conditioner is primarily a result of the unit’s cooling process. As warm air is drawn into the air conditioner, it passes over the evaporator coil, where it is cooled and dehumidified. The moisture extracted from the air then collects in the unit’s drip pan or condensate tray.
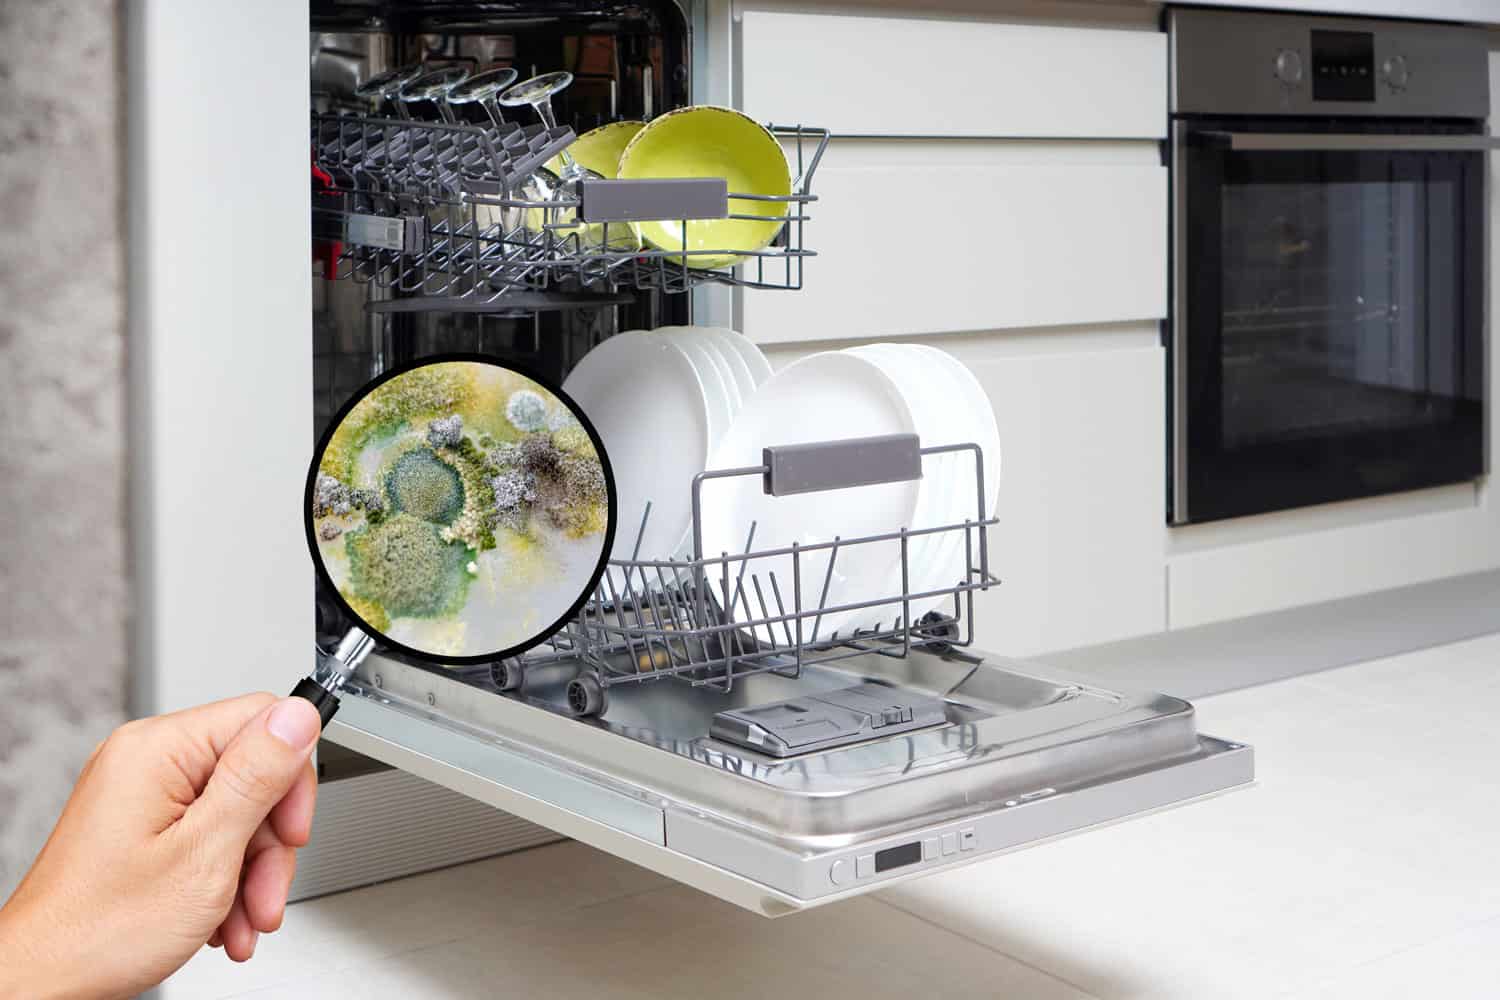
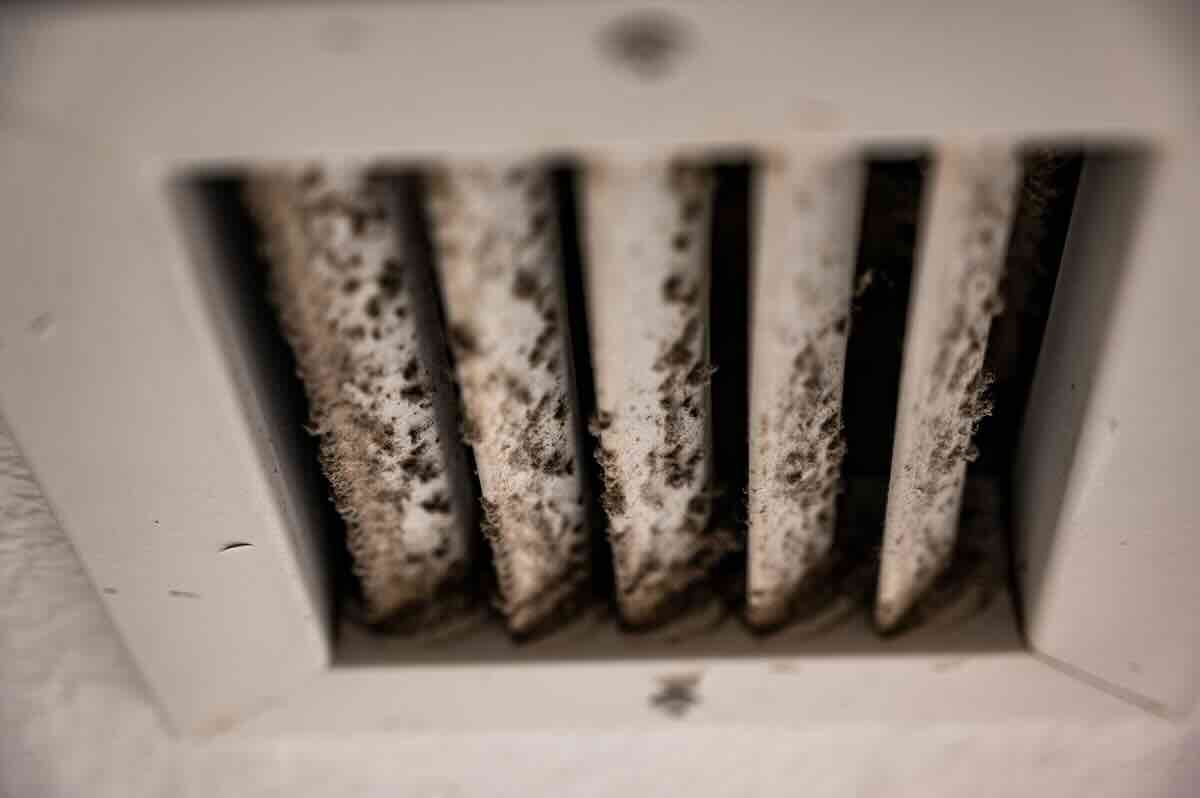
If the air conditioner is not regularly cleaned and maintained, this moisture can pool and become stagnant. Dust, dirt, and other organic matter in the air conditioner provide nutrients for mold spores to feed on. Soon, you may start noticing the telltale signs of mold growth, such as a musty odor, visible black or greenish patches, or even allergenic symptoms like coughing and sneezing.
It’s essential to address mold growth in window air conditioners promptly. Not only does mold compromise the air quality in your home, but it can also spread to other areas if left unchecked. Therefore, regular maintenance and cleaning of your air conditioner is crucial to prevent mold infestations.
In the next sections, we will walk you through the step-by-step process of cleaning mold from your window air conditioner. We will also discuss the safety precautions you should take before beginning the cleaning process. Remember, your health and well-being are top priorities, so always prioritize safety when dealing with mold and cleaning agents.
Safety Precautions Before Cleaning
Before diving into the task of cleaning mold from your window air conditioner, it is crucial to take proper safety precautions to protect yourself and ensure effective cleaning. Mold spores can cause allergic reactions and respiratory issues, so it’s important to minimize your exposure and handle cleaning agents responsibly. Here are some safety precautions to keep in mind:
- Wear Protective Gear: Mold spores can be harmful when inhaled or when they come into contact with your skin or eyes. Before starting the cleaning process, be sure to wear protective gear such as gloves, goggles, and a face mask to minimize direct contact and inhalation of mold spores.
- Ventilate the Area: Mold remediation inevitably releases mold spores into the air. To minimize the spread of spores to other parts of your home and reduce your exposure, open windows and doors to create good ventilation. Consider using fans to help circulate fresh air during the cleaning process.
- Isolate the Area: If possible, remove the window air conditioner from its window or isolate the area by closing doors and covering nearby furniture. This will help contain the mold spores and prevent them from spreading to other areas of your home.
- Turn off the Power: Safety is paramount when working with electrical appliances. Before cleaning your window air conditioner, make sure to turn off the power supply. This will protect you from potential electric shock and allow you to work safely without any power interruptions.
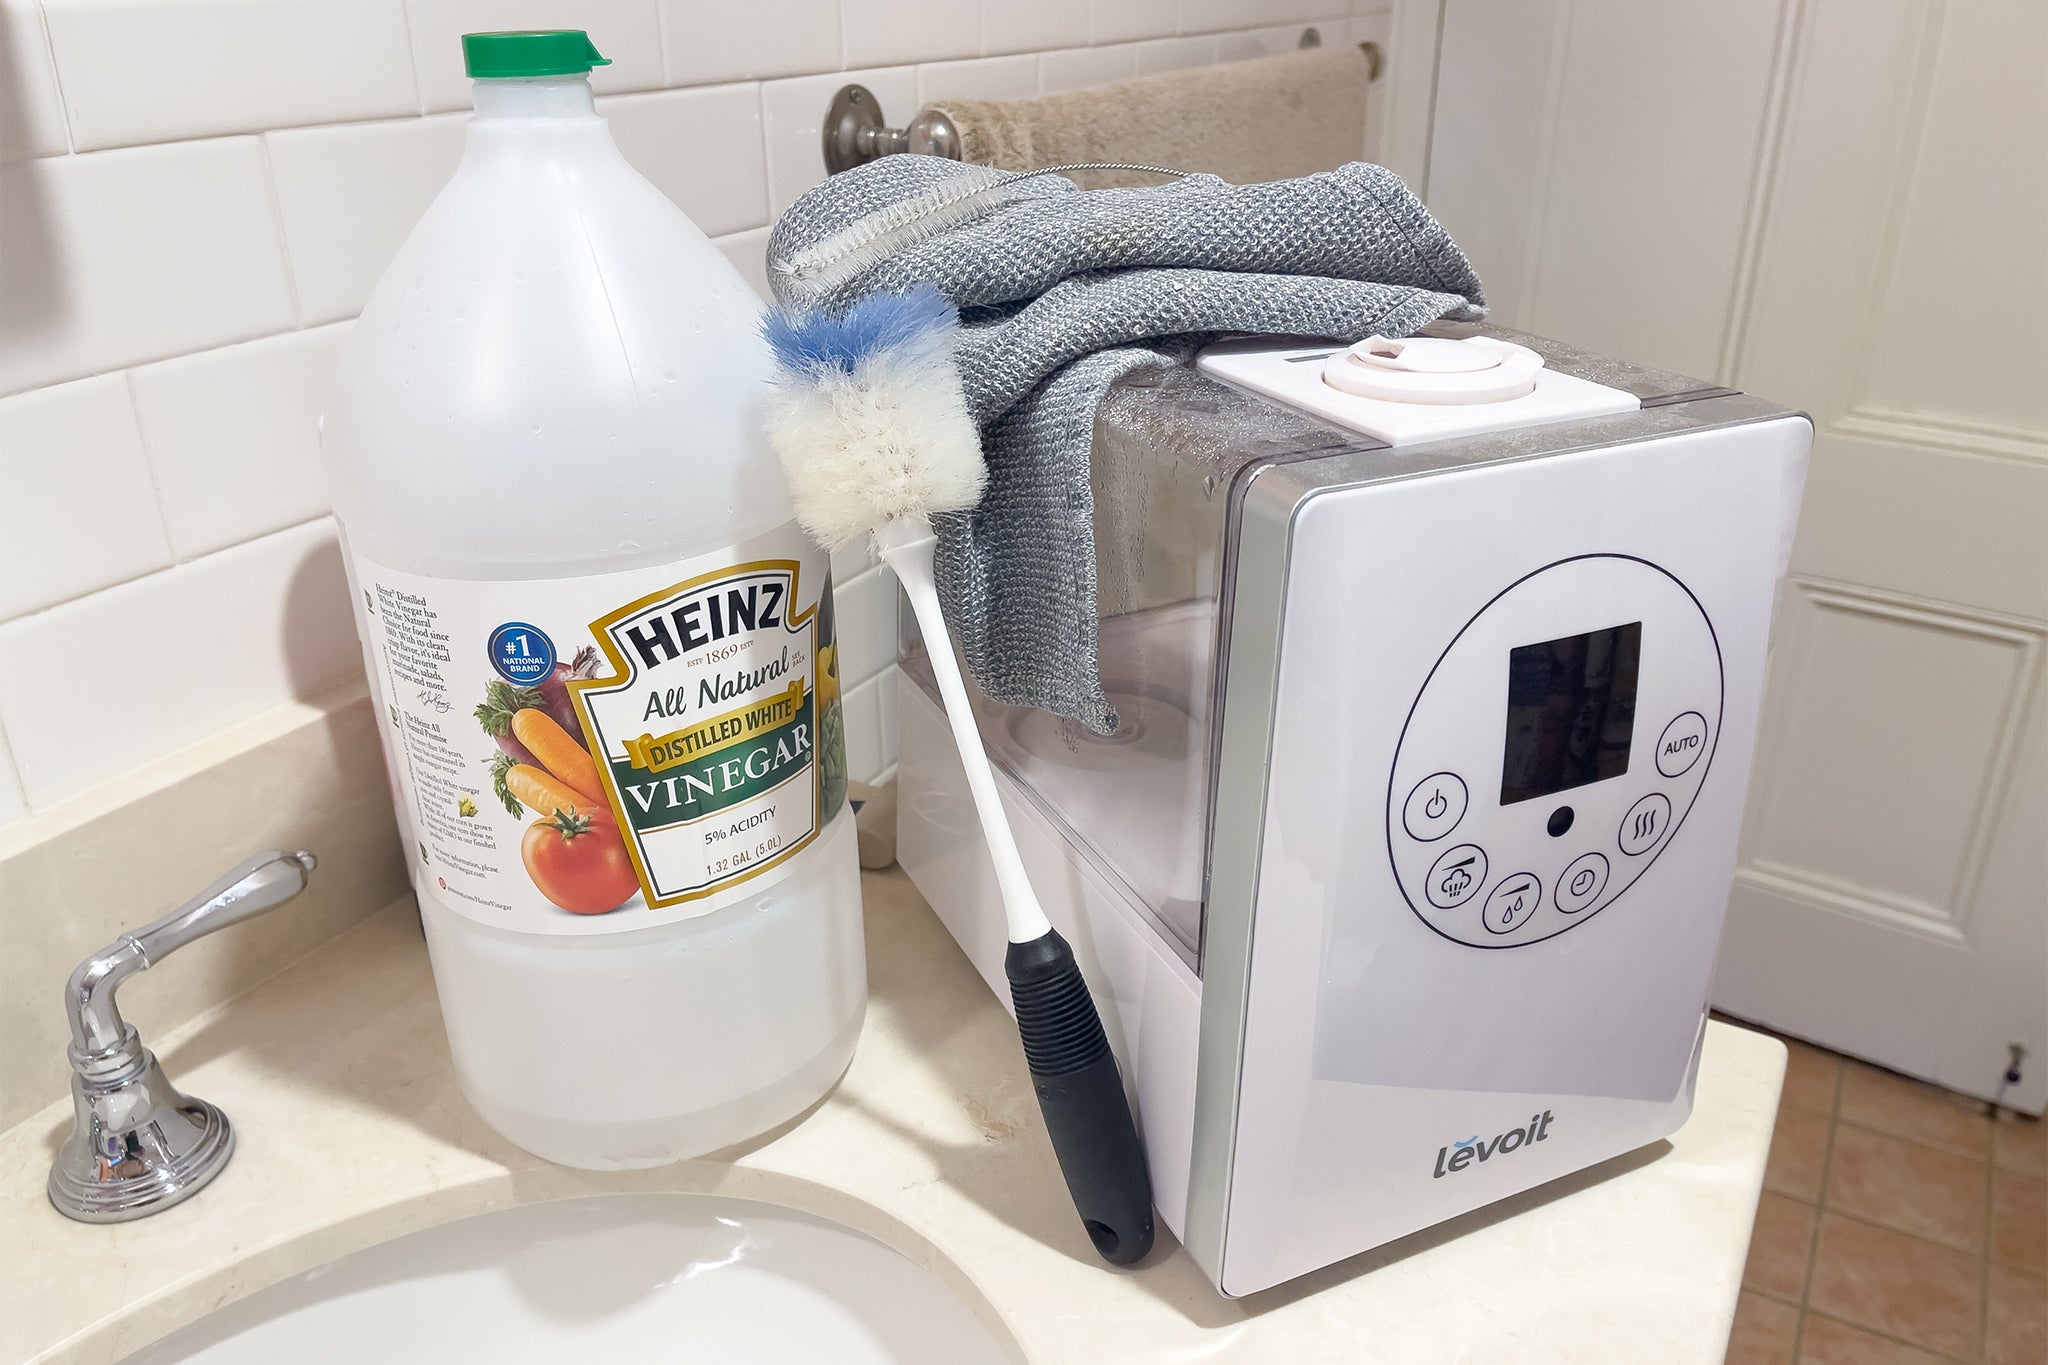
- Use Suitable Cleaning Agents: When selecting cleaning agents to remove mold, opt for non-toxic and environmentally friendly options. Avoid using bleach as it can be harsh and emit strong fumes. Instead, consider using hydrogen peroxide, vinegar, or specialized mold and mildew cleaners that are safe for indoor use.
- Read and Follow Instructions: Always read the labels and follow the instructions on cleaning products. This will ensure that you use the appropriate amount and follow the recommended application methods for maximum effectiveness.
- Dispose of Contaminated Materials: After cleaning, dispose of any contaminated materials, such as paper towels or rags, in sealed plastic bags. This will prevent the spread of mold spores to other areas of your home. Properly seal and dispose of the bags in outdoor trash containers.
By following these safety precautions, you can minimize your exposure to mold spores and ensure a safe and effective cleaning process for your window air conditioner. Now that we’ve covered the necessary safety measures, let’s move on to the tools and materials you’ll need for the cleaning process.
Tools and Materials Needed
Before you begin the process of cleaning mold from your window air conditioner, it’s important to gather the necessary tools and materials. Having everything ready will make the cleaning process smooth and efficient. Here is a list of essential tools and materials you will need:
- Protective Gear: Wear gloves, goggles, and a face mask to protect yourself from exposure to mold spores and cleaning agents.
- Cleaning Agents: Choose safe and effective cleaning agents such as hydrogen peroxide, vinegar, or specialized mold and mildew cleaners. Avoid using bleach as it can emit strong fumes and damage certain materials.
- Soft Brush or Toothbrush: Use a soft brush or toothbrush to scrub away stubborn mold stains from the air conditioner’s surfaces.
- Microfiber Cloths or Paper Towels: These will be used to wipe down surfaces and absorb moisture during the cleaning process.
- Drip Pan or Condensate Tray: If your window air conditioner has a removable drip pan or condensate tray, you will need to remove it for cleaning.
- Bucket or Basin: Use a bucket or basin to collect and dispose of any stagnant water or cleaning solution.
- Water Source: You will need access to a water source for rinsing surfaces and diluting cleaning agents if necessary.
- Screwdriver: If your air conditioner has screws holding the cover or components in place, you may need a screwdriver to remove them and access the interior of the unit.
- Ventilation: Ensure you have good ventilation in the area where you are cleaning the air conditioner. Open windows and doors or use fans to help circulate fresh air.
- Trash Bags: Have sealed plastic bags ready to dispose of any contaminated materials like paper towels or rags.
Gathering these tools and materials in advance will save you time and ensure you have everything you need within reach during the cleaning process. Now that you are well-prepared, let’s move on to the step-by-step guide on how to clean mold from your window air conditioner.
Steps to Clean Mold from a Window Air Conditioner
Now that you have gathered all the necessary tools and materials, it’s time to start cleaning the mold from your window air conditioner. Follow these step-by-step instructions to effectively remove mold and ensure a clean and healthy unit:
- Turn off the Power: Before starting the cleaning process, turn off the power supply to the window air conditioner. This will prevent any accidental activation of the unit while you’re working on it.
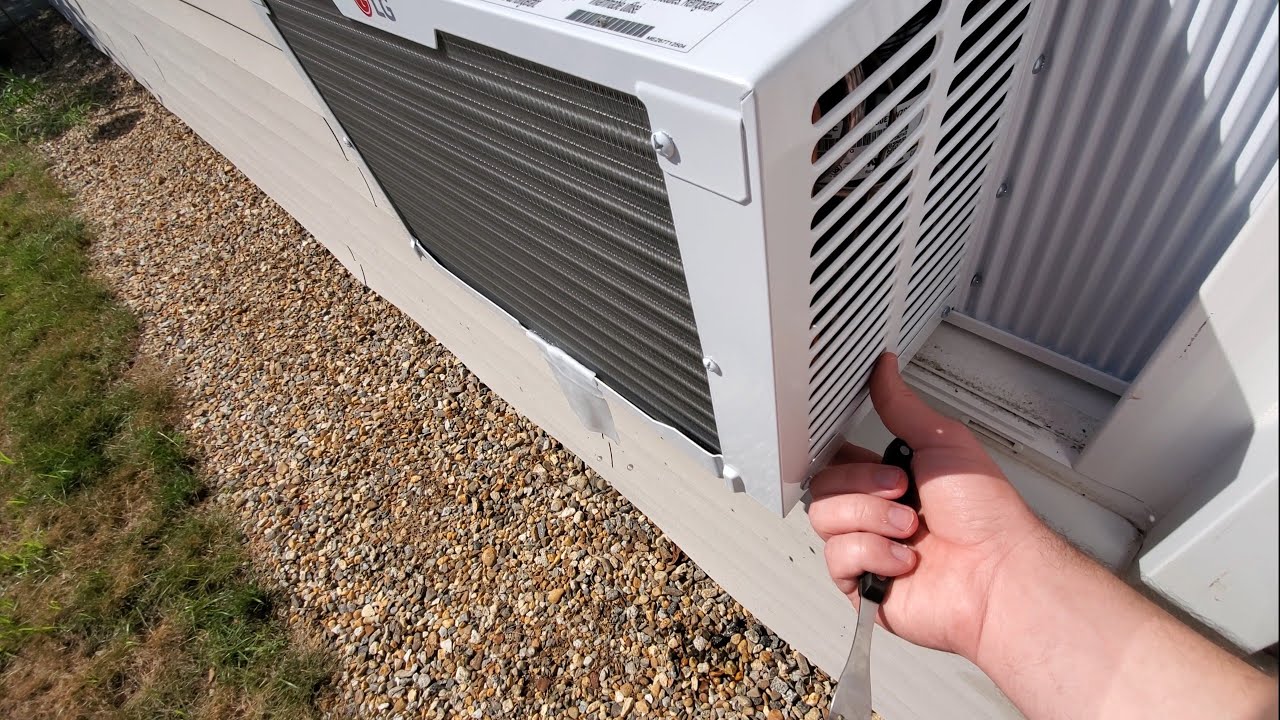
- Remove the Unit: If possible, remove the window air conditioner from its window slot. This will provide easier access to all parts of the unit for cleaning.
- Disassemble the Cover: If your window air conditioner has a removable cover, unscrew or unclip it to access the interior components. Set the cover aside for cleaning separately.
- Remove the Air Filter: Locate the air filter in the unit. It is often located behind the front cover or grille. Carefully remove the air filter and set it aside for cleaning.
- Clean the Air Filter: Rinse the air filter under running water or soak it in a sink filled with warm water and mild dish soap. Use a soft brush or toothbrush to gently scrub away any dirt, dust, or mold buildup. Rinse thoroughly and allow it to dry completely before reinserting it into the unit.
- Clean the Exterior: Using a mixture of water and mild soap, wipe down the exterior surfaces of the unit with a microfiber cloth or paper towel. Pay special attention to areas prone to mold growth, such as corners and crevices. For stubborn mold stains, use a soft brush or toothbrush dipped in the cleaning solution to scrub the affected areas.
- Clean the Drip Pan or Condensate Tray: If your window air conditioner has a removable drip pan or condensate tray, remove it and empty any standing water. Clean the tray with a mixture of water and vinegar or hydrogen peroxide to remove any mold or mildew buildup. Rinse thoroughly and allow it to dry before reinstalling it.
- Clean the Interior Components: Carefully inspect the interior components of the unit for any visible mold or mildew. Wipe them down with a cloth dampened with the cleaning solution. If necessary, use a soft brush or toothbrush to scrub away stubborn mold stains. Be cautious not to damage any delicate parts.
- Rinse and Dry: After cleaning all the components, rinse them with clean water to remove any residual cleaning solution. Dry them thoroughly with a microfiber cloth or allow them to air dry completely before reassembling the unit.
- Reassemble and Reinstall: Once all the parts are clean and dry, reassemble the window air conditioner. If you had removed the unit from the window, carefully reinstall it back into place.
Following these steps will ensure that you effectively remove mold from your window air conditioner and restore its cleanliness. However, it’s important to take preventive measures to minimize the chances of mold growth in the future. Let’s explore some tips for preventing future mold infestations in your window air conditioner.
To clean mold from a window air conditioner, mix equal parts water and white vinegar in a spray bottle. Spray the affected areas and let it sit for 10-15 minutes, then scrub with a brush. Rinse and dry thoroughly before using the unit again.
Read more: How To Clean A Window Air Conditioner
Removing and Cleaning the Air Filter
The air filter is an essential component of your window air conditioner as it helps to trap dust, debris, and mold spores from entering your living space. Over time, the air filter can become clogged with dirt and mold, reducing the unit’s efficiency and potentially spreading mold spores into the air. Therefore, it’s crucial to regularly remove and clean the air filter. Here’s how to do it:
- Turn off the Power: Before you begin, make sure to turn off the power supply to the window air conditioner to prevent any accidental activation.
- Locate the Air Filter: The air filter is usually located behind the front cover or grille of the air conditioner. Refer to your unit’s manual if you’re unsure about its exact location.
- Remove the Air Filter: Carefully remove the air filter by sliding it out from its slot or unscrewing any latches or clips that hold it in place.
- Inspect the Filter: Take a close look at the air filter and inspect it for any visible signs of dirt, dust, or mold. If the filter appears to be heavily contaminated, it may be time for a replacement instead of cleaning.
- Clean the Air Filter: If the air filter is reusable and in good condition, you can clean it. Start by gently tapping the filter on a hard surface or using a soft brush to remove loose dust and debris. Be careful not to damage the filter during this process.
- Wash the Air Filter: Rinse the air filter under running water to remove remaining dirt and dust. Alternatively, you can soak the filter in a sink or basin filled with warm water and mild dish soap. Use a soft brush or toothbrush to gently scrub away any stubborn mold or dirt stains.
- Rinse and Dry Thoroughly: After washing, rinse the filter thoroughly to remove all traces of soap. Gently squeeze out excess water and shake off any excess moisture. Place the filter in a well-ventilated area and allow it to air dry completely. Make sure it is completely dry before reinstalling it in the air conditioner.
- Reinstall the Air Filter: Once the air filter is dry, slide it back into its designated slot or reattach it using the latches, clips, or screws. Ensure that it is properly secured and in the correct orientation.
By regularly removing and cleaning the air filter, you can maintain optimal airflow, improve the air quality in your home, and prevent the spread of mold spores. Remember to consult your unit’s manual for specific instructions on how to clean and replace the air filter, as different models may have slight variations.
Now that we’ve covered the process of removing and cleaning the air filter, let’s move on to the next step: cleaning the exterior of the window air conditioner.
Cleaning the Exterior of the Unit
The exterior of your window air conditioner can accumulate dust, dirt, and even mold over time. Cleaning the exterior not only improves the appearance of the unit but also helps maintain its efficiency and prevents the spread of mold spores. Here’s a step-by-step guide on how to clean the exterior of your window air conditioner:
- Turn off the Power: Before starting the cleaning process, ensure that the power supply to the window air conditioner is turned off to prevent any accidents or electrical hazards.
- Prepare the Cleaning Solution: Fill a bucket or basin with warm water and add a mild detergent or a mixture of water and vinegar. Avoid using abrasive or harsh cleaners that can damage the unit or emit strong fumes.
- Dampen a Cloth or Sponge: Dip a cloth or sponge into the cleaning solution, making sure it is damp but not overly soaked. Excess water can seep into the unit and cause damage.
- Wipe Down the Exterior Surfaces: Gently wipe down the exterior surfaces of the window air conditioner using the damp cloth or sponge. Pay attention to areas that are prone to mold growth, such as corners, seams, and grille openings. Take your time and ensure thorough coverage.
- Remove Stubborn Stains or Mold: For stubborn stains or visible mold growth on the exterior, use a soft brush or toothbrush dipped in the cleaning solution. Gently scrub the affected areas to remove the stains or mold. Avoid using excessive force that may damage the unit’s surfaces.
- Rinse with Clean Water: Once you have finished cleaning, rinse the exterior surfaces of the window air conditioner with clean water. This will help remove any remaining detergent residue and ensure a thorough clean.
- Dry the Unit: Use a dry cloth or allow the unit to air dry completely before turning it back on or reinstalling it. Moisture buildup can lead to mold growth, so it’s important to ensure the unit is completely dry.
- Clean the Grille or Vent Openings: If your window air conditioner has a removable grille or has vent openings, clean them separately according to the manufacturer’s instructions. This will ensure optimal airflow and prevent any restrictions caused by dirt or debris buildup.
- Check for any Loose or Damaged Parts: While cleaning the exterior, take a moment to inspect the unit for any loose or damaged parts. If you notice any issues, tighten or repair them as necessary. It’s important to address these issues promptly to ensure the proper functioning of the window air conditioner.
By following these steps, you can effectively clean the exterior of your window air conditioner and maintain its cleanliness. Regularly cleaning the exterior will not only enhance the unit’s appearance but also contribute to its longevity and performance.
Now that we have covered the process of cleaning the exterior, let’s move on to the next step: cleaning the interior components of the window air conditioner.
Cleaning the Interior Components
Keeping the interior components of your window air conditioner clean is crucial for maintaining its efficiency and preventing the growth of mold and mildew. Regular cleaning helps ensure proper airflow and cooling performance. Follow these steps to effectively clean the interior components of your window air conditioner:
- Turn off the Power: Before starting the cleaning process, ensure that the power supply to the window air conditioner is turned off to prevent any accidents or electrical hazards.
- Remove the Cover: If your window air conditioner has a removable cover, unscrew or unclip it to access the interior components. Refer to the manufacturer’s instructions if needed.
- Inspect for Mold or Debris: Carefully inspect the interior components for any visible signs of mold, mildew, or debris accumulation. Pay particular attention to the evaporator coil, condensate drain, and fan blades. If mold is present, proceed to clean it using the following steps.
- Clean the Evaporator Coil: Moisten a soft brush or toothbrush with a cleaning solution of water and mild detergent. Gently scrub the evaporator coil to remove any mold or dirt buildup. Take care not to bend or damage the delicate fins of the coil. Rinse the coil with clean water to remove any residue.
- Clean the Condensate Drain: The condensate drain can become clogged with mold, debris, or algae growth. Use a small brush or pipe cleaner to gently clean the drain and remove any blockage. Rinse the drain with water to ensure it is clear.
- Clean the Fan Blades: Wipe down the fan blades with a damp cloth to remove any dust or debris. If necessary, use a soft brush or toothbrush to reach tight spaces or stubborn areas.
- Remove and Clean the Drip Pan or Condensate Tray: If your window air conditioner has a removable drip pan or condensate tray, take it out and clean it. Empty any standing water and wash the tray with warm soapy water or a mixture of water and vinegar. Rinse thoroughly and allow it to dry completely before reinstalling.
- Check and Clean the Blower Wheel: The blower wheel can accumulate dust and debris, affecting the unit’s performance. Carefully inspect the blower wheel and clean it using a brush or compressed air to remove any buildup. Ensure the blower wheel spins freely.
- Reassemble the Unit: Once all the interior components are clean and dry, reassemble the window air conditioner in the reverse order of disassembly. Make sure all parts are securely attached and aligned properly.
By regularly cleaning the interior components of your window air conditioner, you can prevent mold growth, optimize cooling performance, and extend the lifespan of the unit. Remember to consult your unit’s manual for specific cleaning instructions, as different models may have slight variations in component arrangement and cleaning requirements.
Now that we have covered the process of cleaning the interior components, let’s discuss some preventive measures to minimize the chances of mold growth in your window air conditioner.
Preventing Future Mold Growth
Now that you have successfully cleaned the mold from your window air conditioner, it’s important to take preventive measures to minimize the chances of future mold growth. Here are some tips to keep your unit mold-free:
- Maintain Regular Cleaning: Make it a habit to regularly clean and maintain your window air conditioner. Follow the manufacturer’s guidelines for maintenance and cleaning intervals.
- Monitor Humidity Levels: Keep an eye on the humidity levels in your home. High humidity provides a favorable environment for mold growth. Consider using a dehumidifier if necessary, especially in areas prone to excess moisture.
- Ensure Proper Ventilation: Good airflow and ventilation are essential for preventing mold growth. Keep doors and windows open whenever possible to allow fresh air circulation. Consider using fans or proper ventilation systems to promote air movement.
- Inspect and Clean Drip Pan or Condensate Tray Regularly: Check the drip pan or condensate tray for standing water and mold buildup. Empty the pan and clean it regularly to prevent stagnant water and mold growth.
- Replace or Clean the Air Filter: Regularly inspect and clean or replace the air filter according to the manufacturer’s recommendations. A clean air filter helps trap dust and prevents mold spores from entering your living space.
- Keep the Area Around the Air Conditioner Clean: Dust and debris can accumulate around the unit and provide a breeding ground for mold. Regularly clean the surrounding area and remove any potential sources of mold growth.
- Check for Window Leaks: Ensure that the window or opening where the air conditioner is installed is properly sealed. Check for any leaks or gaps that can allow moisture to enter and provide a conducive environment for mold growth.
- Consider Using Mold Inhibitors: There are specialized mold inhibitors available that can be applied to surfaces prone to mold growth. Consult with a professional or refer to the manufacturer’s instructions for proper use.
- Address Water Intrusion or Plumbing Issues: In cases where mold growth is persistent, it may be an indication of water intrusion or plumbing issues. Address any leaks, moisture problems, or plumbing malfunctions promptly to prevent further mold growth.
By implementing these preventive measures, you can significantly reduce the chances of mold growth in your window air conditioner and maintain a clean and healthy living environment. Regular maintenance and proper upkeep are key to keeping your unit functioning efficiently and mold-free.
Congratulations on successfully cleaning your window air conditioner and taking steps to prevent future mold growth. By following these guidelines, you can enjoy cool and clean air while ensuring the longevity of your unit.
If you have any further questions or concerns regarding your window air conditioner or mold prevention, it’s always best to consult with a professional in the field. Stay proactive and enjoy a comfortable and mold-free living space!
Read more: How To Clean Black Mold In Air Conditioner
Conclusion
Cleaning mold from a window air conditioner is crucial for maintaining its efficiency, preventing health issues, and ensuring a comfortable living environment. By following the step-by-step guide provided in this article, you can effectively remove mold and restore your unit to optimal functioning.
Throughout the cleaning process, we emphasized the importance of safety precautions. Wearing protective gear, ventilating the area, and using suitable cleaning agents are essential to protect yourself and prevent the spread of mold spores.
We discussed the necessary tools and materials for the cleaning process, including gloves, cleaning agents, brushes, and microfiber cloths. Having these items ready beforehand will make the cleaning process smoother and more efficient.
We then explored the step-by-step process, from removing and cleaning the air filter to cleaning the exterior and interior components of the unit. Each step was explained in detail to ensure a thorough cleaning and prevent future mold growth.
Additionally, we provided preventive measures to minimize the chances of mold growth in the future. These included maintaining regular cleaning, monitoring humidity levels, ensuring proper ventilation, and addressing any water intrusion or plumbing issues promptly.
Remember that maintaining a clean and mold-free window air conditioner not only improves its performance but also contributes to a healthier environment for you and your family. By following these guidelines and taking proactive measures, you can ensure your window air conditioner operates efficiently and provides cool, clean air.
If you have any further questions or concerns regarding your window air conditioner or mold prevention, it’s always best to consult with a professional in the field. They can provide personalized advice and guidance based on your specific situation.
Thank you for reading our comprehensive guide on how to clean mold from a window air conditioner. We hope this article has been informative and helpful in your home maintenance journey. Stay proactive, stay safe, and enjoy a comfortable and mold-free living space!
Frequently Asked Questions about How To Clean Mold From A Window Air Conditioner
Was this page helpful?
At Storables.com, we guarantee accurate and reliable information. Our content, validated by Expert Board Contributors, is crafted following stringent Editorial Policies. We're committed to providing you with well-researched, expert-backed insights for all your informational needs.