Home>Home Maintenance>How To Clean Your Dryer Vent Outside
Home Maintenance
How To Clean Your Dryer Vent Outside
Modified: August 24, 2024
Learn the essential steps of cleaning your dryer vent outside and ensure efficient home maintenance. Protect your home from potential fire hazards with this expert guide.
(Many of the links in this article redirect to a specific reviewed product. Your purchase of these products through affiliate links helps to generate commission for Storables.com, at no extra cost. Learn more)
Introduction
Welcome to our guide on how to clean your dryer vent outside. While it’s essential to regularly clean the lint trap inside your dryer, many homeowners overlook the importance of maintaining the vent that leads outside. Neglecting this crucial task can lead to a range of issues, including reduced dryer efficiency, increased energy consumption, and even fire hazards.
Over time, lint, debris, and even bird nests can accumulate in your dryer vent, obstructing the airflow and causing your dryer to work harder. This not only extends drying times but also puts unnecessary strain on the dryer’s components, reducing its lifespan. Additionally, the accumulation of lint in the vent poses a significant fire risk, as lint is highly combustible.
Regularly cleaning your dryer vent outside ensures optimal performance, energy efficiency, and most importantly, safety. In this guide, we will walk you through the step-by-step process of cleaning your dryer vent outside, providing you with the tools, materials, and safety precautions necessary to complete the task effectively.
Now, let’s gather the necessary items and get started on ensuring your dryer vent is clean and functional!
Key Takeaways:
- Regularly cleaning your dryer vent outside is crucial for efficient drying, fire hazard prevention, extended dryer lifespan, improved air quality, and cost savings.
- Remember to follow safety precautions, inspect and clean the vent cover and duct, and stay vigilant for optimal dryer vent maintenance.
Read more: How To Cover A Dryer Vent Outside
Why Cleaning Your Dryer Vent is Important
Keeping your dryer vent clean is essential for several reasons. Let’s explore why this maintenance task should be at the top of your home maintenance checklist.
1. Efficient Drying: A clogged dryer vent restricts the airflow, making it harder for the moist air to escape. As a result, your clothes take longer to dry, leading to increased energy consumption. By regularly cleaning your dryer vent, you can improve drying efficiency and reduce energy costs.
2. Fire Hazard Prevention: The accumulation of lint in your dryer vent can be a significant fire hazard. Lint is highly flammable, and when combined with heat and air circulation, it can ignite. According to the U.S. Fire Administration, dryer vent fires cause an estimated 2,900 residential fires each year. Regular cleaning helps eliminate this risk and provides peace of mind.
3. Extended Dryer Lifespan: When a dryer’s vent is clogged, the strain on the machine increases. The motor, heating elements, and other components have to work harder, leading to accelerated wear and tear. By keeping the vent clean, you can reduce the stress on your dryer and extend its lifespan.
4. Improved Air Quality: A blocked dryer vent can cause moist air to be trapped inside your home, leading to mold and mildew growth. This not only affects the air quality but also poses health risks, especially for those with respiratory conditions. Proper vent maintenance helps ensure that the moist air is efficiently expelled outside, preventing moisture-related problems.
5. Cost Savings: By maintaining a clean dryer vent, you can save money in multiple ways. First, your dryer will operate more efficiently, reducing the energy consumed for each load. Second, you decrease the risk of a fire, which could lead to costly damages and insurance claims. Lastly, by extending the lifespan of your dryer, you avoid the need for costly repairs or replacements.
Now that you understand why cleaning your dryer vent is so important, let’s move on to the tools and materials you’ll need for the task.
Tools and Materials Needed
Before you begin cleaning your dryer vent outside, it’s crucial to gather the necessary tools and materials. Here’s what you’ll need:
- A ladder: Depending on the height of your vent, you may need a ladder to safely access and clean it. Ensure that the ladder is stable and secure before climbing it.
- Gloves: Protect your hands by wearing a pair of sturdy gloves. This will shield your skin from any sharp debris or potential allergens.
- Screwdriver: A flat-head or Phillips screwdriver may be necessary to remove the vent cover or fasteners holding it in place.
- Shop vacuum or brush: You will need a shop vacuum with a long attachment or a specialized dryer vent brush to clean the inside of the vent duct.
- Bucket or bag: To collect any debris or lint that you remove from the vent, have a bucket or a garbage bag handy.
- Duct tape: If you need to reseal any sections of the vent duct, duct tape can come in handy. Ensure that you’re using heat-resistant duct tape suitable for dryer vents.
- Safety goggles: Protect your eyes from dust and debris by wearing safety goggles. This is especially important when using the vacuum or brush to clean the vent duct.
- Cleaning cloth or brush: For cleaning the vent cover and any visible dirt or residue on the outside of the vent.
Make sure you have all the necessary tools and materials readily available before you start the cleaning process. It’s important to maintain safety and efficiency throughout the task.
Now that you’re equipped with the right tools, let’s move on to the step-by-step process of cleaning your dryer vent outside.
Step 1: Safety Precautions
Prior to cleaning your dryer vent outside, it’s important to take proper safety precautions to ensure your well-being throughout the process. Here are some essential steps to follow:
- Turn off the dryer: Before you start any cleaning, make sure to turn off your dryer and unplug it from the power source. This will prevent any accidents or injuries while you work on the vent.
- Allow the dryer to cool down: Give your dryer sufficient time to cool down before you begin the cleaning process. The heating elements can remain hot for some time, so it’s crucial to avoid any potential burns.
- Wear protective gear: Put on a pair of gloves to protect your hands from sharp debris or allergens that may be present in the vent. Additionally, wear safety goggles to safeguard your eyes from dust and debris.
- Use a stable ladder: If your dryer vent is located at a height that’s not easily reachable, use a sturdy ladder to access it safely. Ensure that the ladder is secure and on a stable surface to prevent falls or accidents.
- Work in a well-ventilated area: When cleaning the vent outside, make sure you’re working in a well-ventilated space. This will help dissipate any accumulated dust or debris, making the process more comfortable and safer for you.
- Be cautious of wildlife nests or pests: Inspect the vent opening for any signs of bird nests, rodents, or pests. If you notice any such activity, contact a professional exterminator or animal control service to handle the situation safely.
- Proceed with care: While cleaning the vent, be aware of your surroundings and take your time. Avoid rushing or using excessive force, as this can cause damage to the vent or the surrounding area.
- Keep children and pets away: During the cleaning process, it’s crucial to keep children and pets at a safe distance. This will prevent any accidental injuries or interference that may disrupt your focus.
By following these safety precautions, you can minimize risks and ensure a smooth, accident-free cleaning experience.
Now that you’ve taken the necessary safety measures, let’s move on to locating and accessing the dryer vent outside in the next step.
Step 2: Locate and Access the Dryer Vent Outside
Locating and accessing the dryer vent outside is an essential step in the cleaning process. Here’s what you need to do:
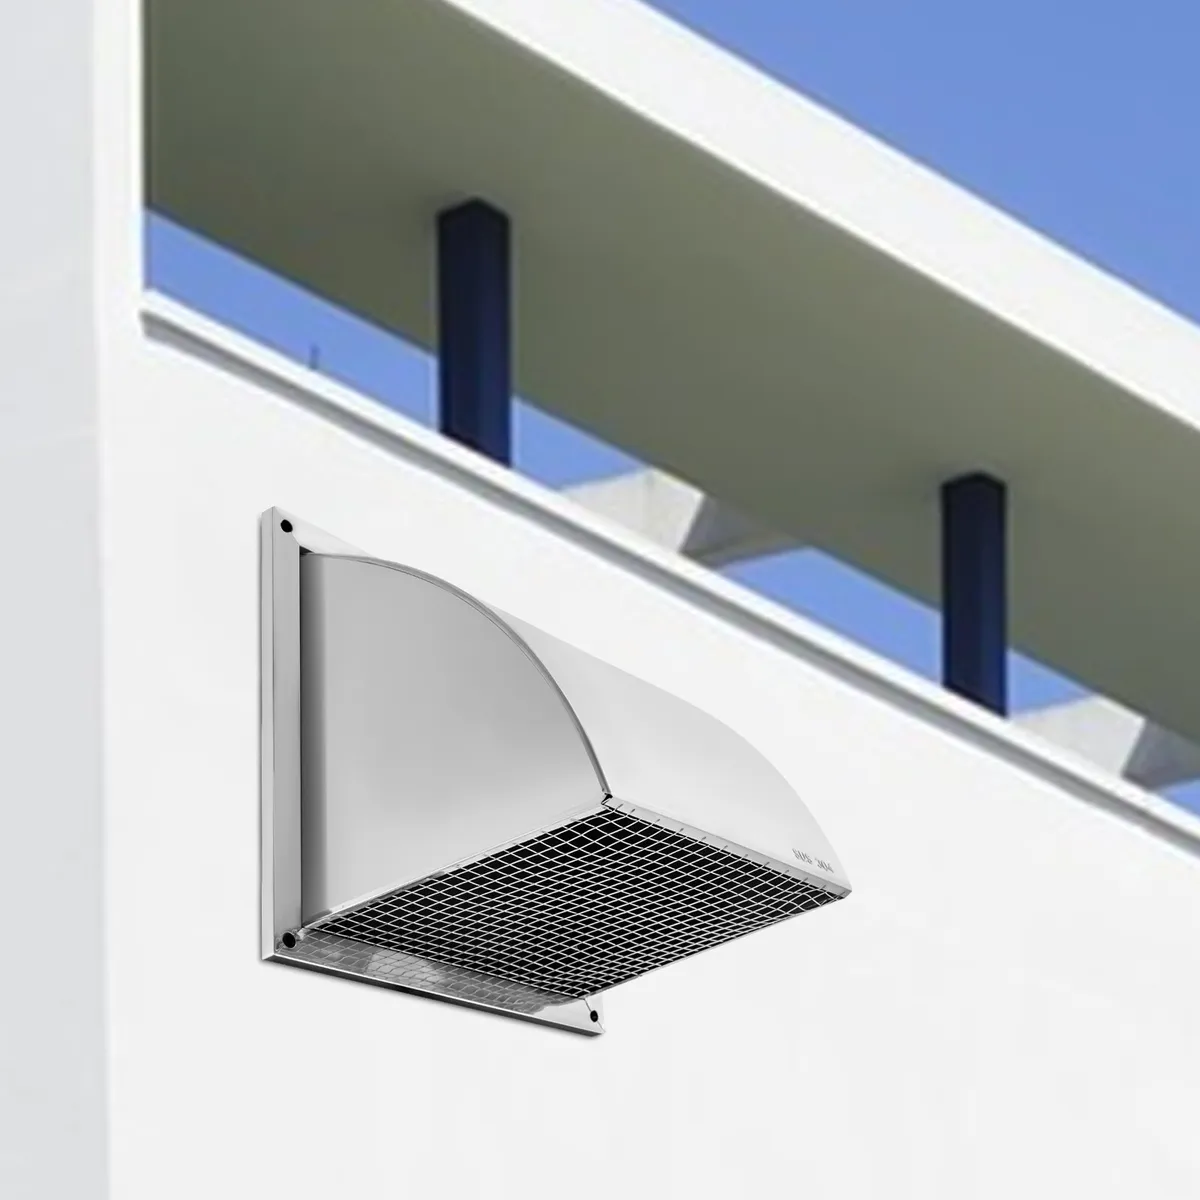
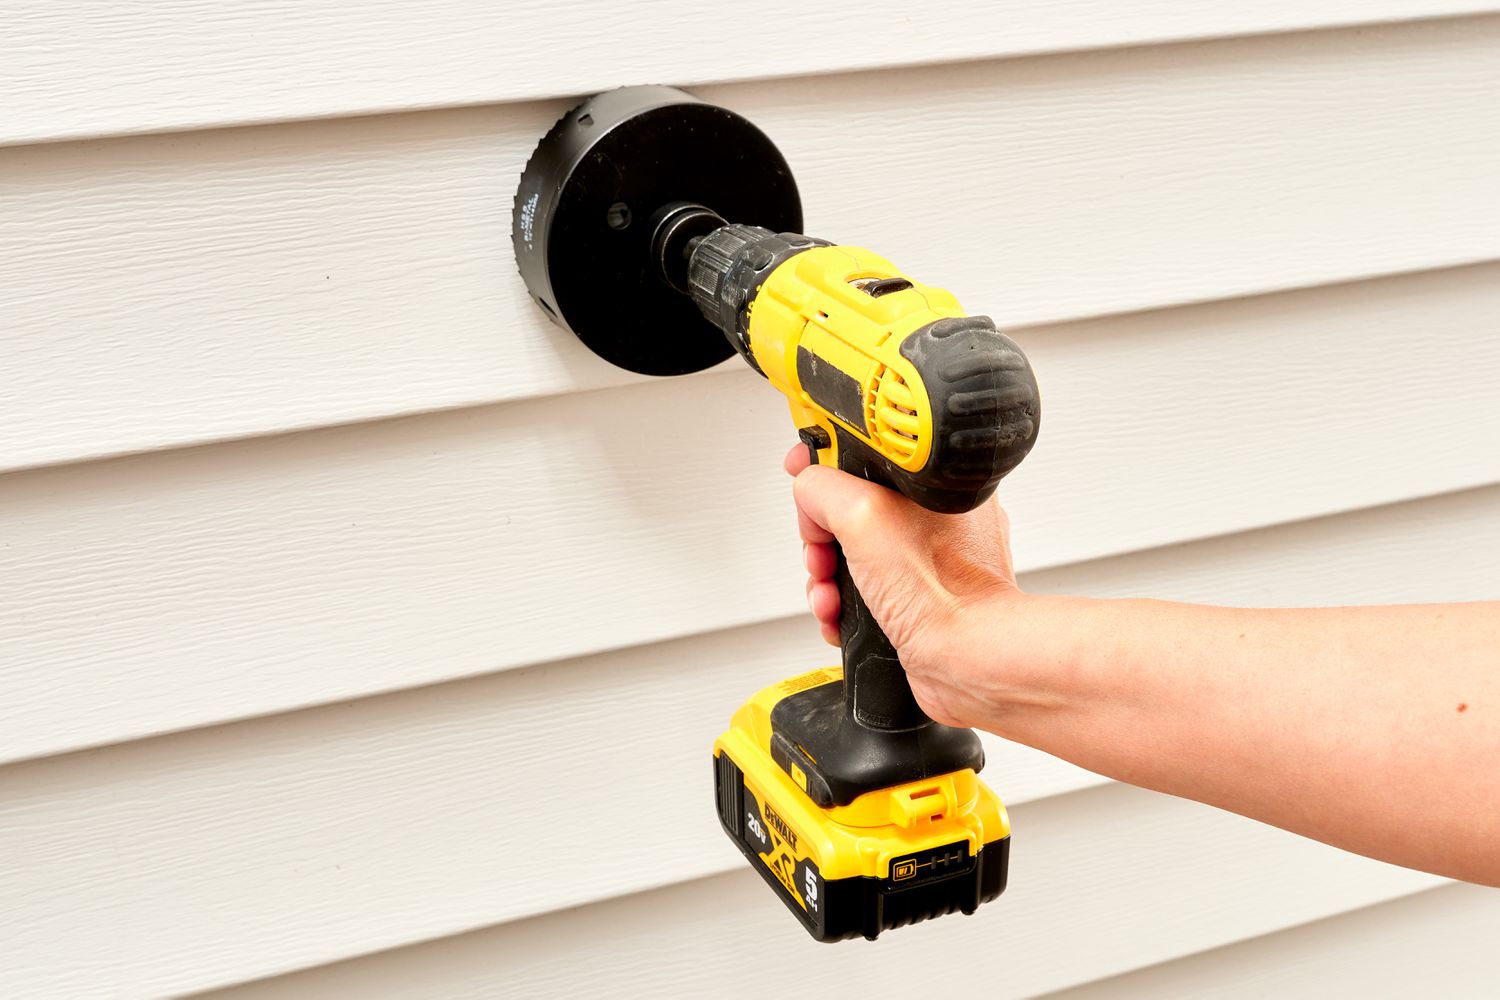
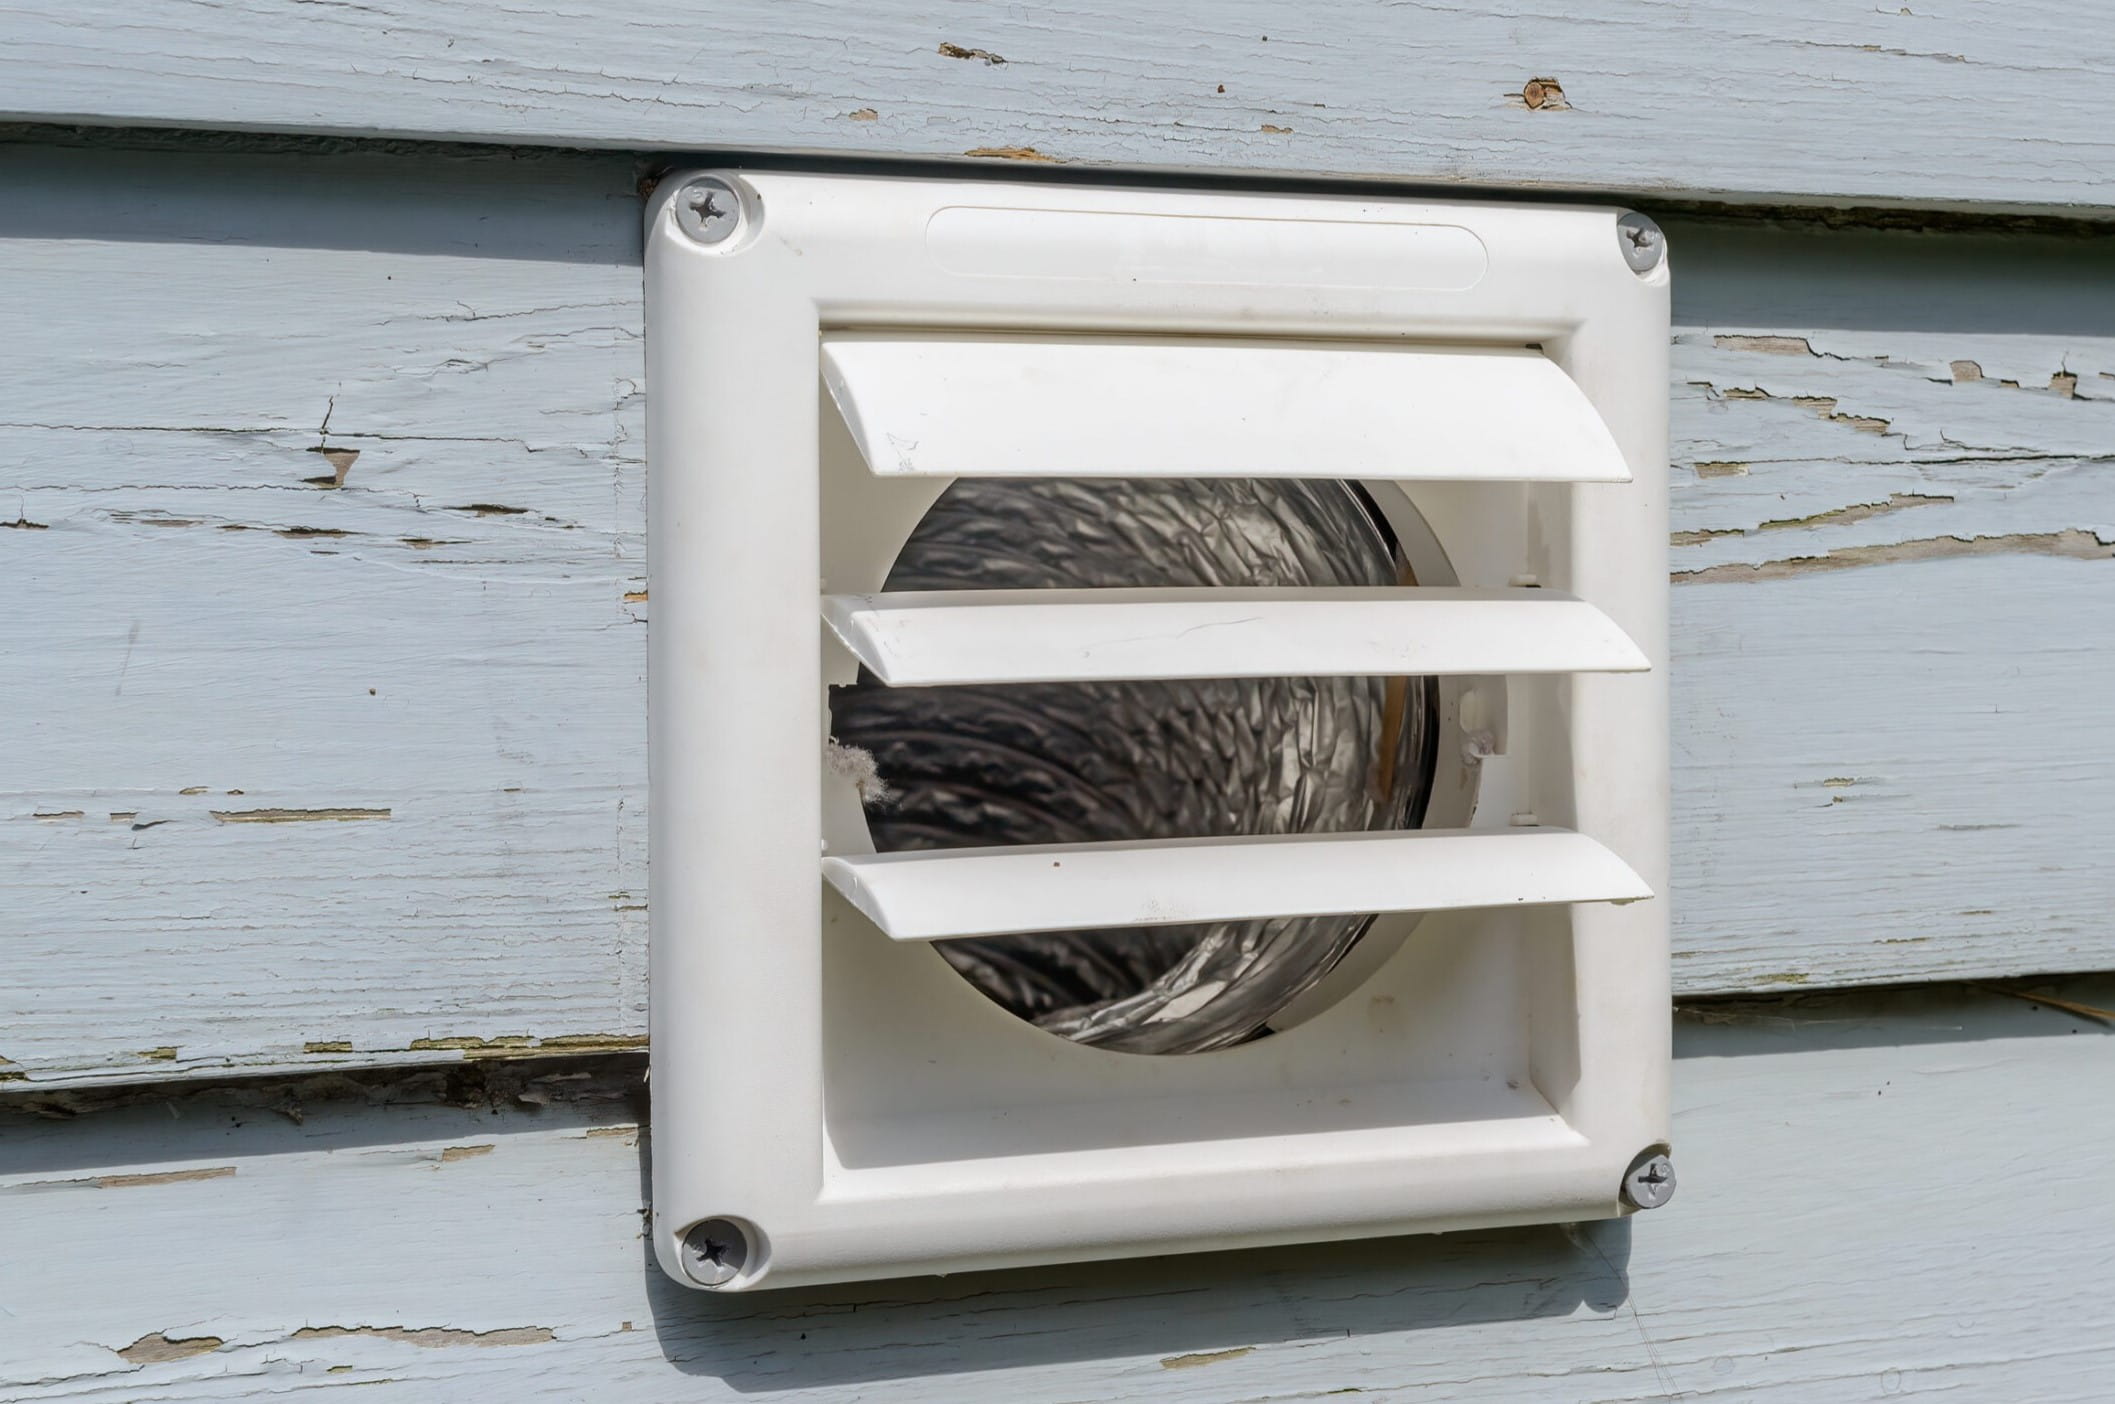
- Find the vent’s exterior opening: Start by identifying where the dryer vent exits your home. Typically, this is found on an exterior wall or the roof. Look for a small louvered or slotted vent cover.
- Clear the area around the vent: Remove any objects or obstacles that may be blocking access to the vent outside. This includes outdoor furniture, plants, or any other items that could impede your cleaning efforts.
- Inspect the vent cover: Once you’ve located the vent, visually inspect the vent cover for any signs of damage or deterioration. If the cover appears to be in poor condition, consider replacing it to ensure proper ventilation and protection against pests and weather elements.
- Remove the vent cover: Using a screwdriver, carefully remove the screws or fasteners that secure the vent cover in place. Keep track of the screws, as you’ll need them later when reinstalling the cover.
- Clean the vent cover: Once the cover is removed, use a cleaning cloth or brush to remove any dirt or debris accumulated on the vent cover’s surface. If necessary, you can also wipe it down with a damp cloth and mild detergent to remove stubborn residue.
- Inspect the vent opening: Take a moment to inspect the vent opening for any visible debris or obstructions. Use a flashlight to get a clear view inside the vent and check for any blockages or signs of pests or nests. If you spot any nests or signs of animal activity, contact a professional to handle the situation.
- Clean the surrounding area: While you have the vent cover removed, take the opportunity to clean the area around the vent opening. Sweep away any dirt, leaves, or debris that may have accumulated over time.
By locating and accessing the dryer vent outside, you’ve completed an important preparatory step. The next step involves removing debris from the vent opening, so let’s delve into that in the following section.
Read more: How To Find A Dryer Vent Outside
Step 3: Remove Debris from the Vent Opening
Now that you’ve located and accessed the dryer vent outside, it’s time to remove any debris that may be obstructing the airflow. Follow these steps to effectively clean the vent opening:
- Put on gloves and safety goggles: Before you begin cleaning, ensure that you’re wearing protective gloves and safety goggles to keep yourself safe from any sharp debris or dust.
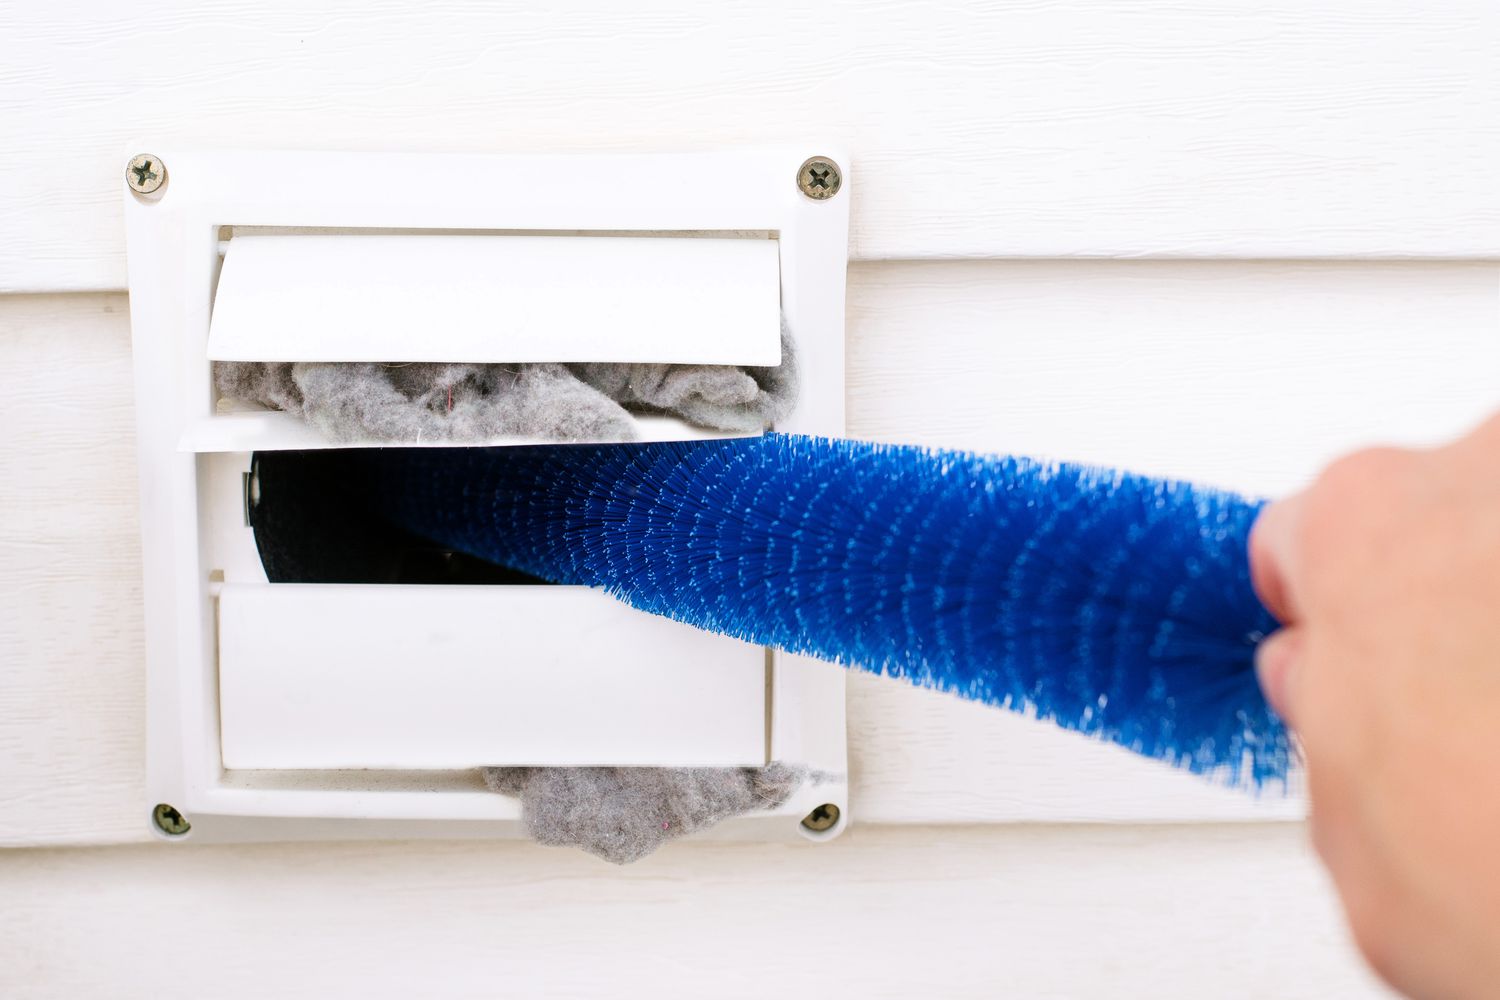
- Clear visible debris: Use your gloved hands or a small brush to clear away any visible debris that may be clogging the vent opening. This includes lint, leaves, twigs, or any other obstructions that may have accumulated over time.
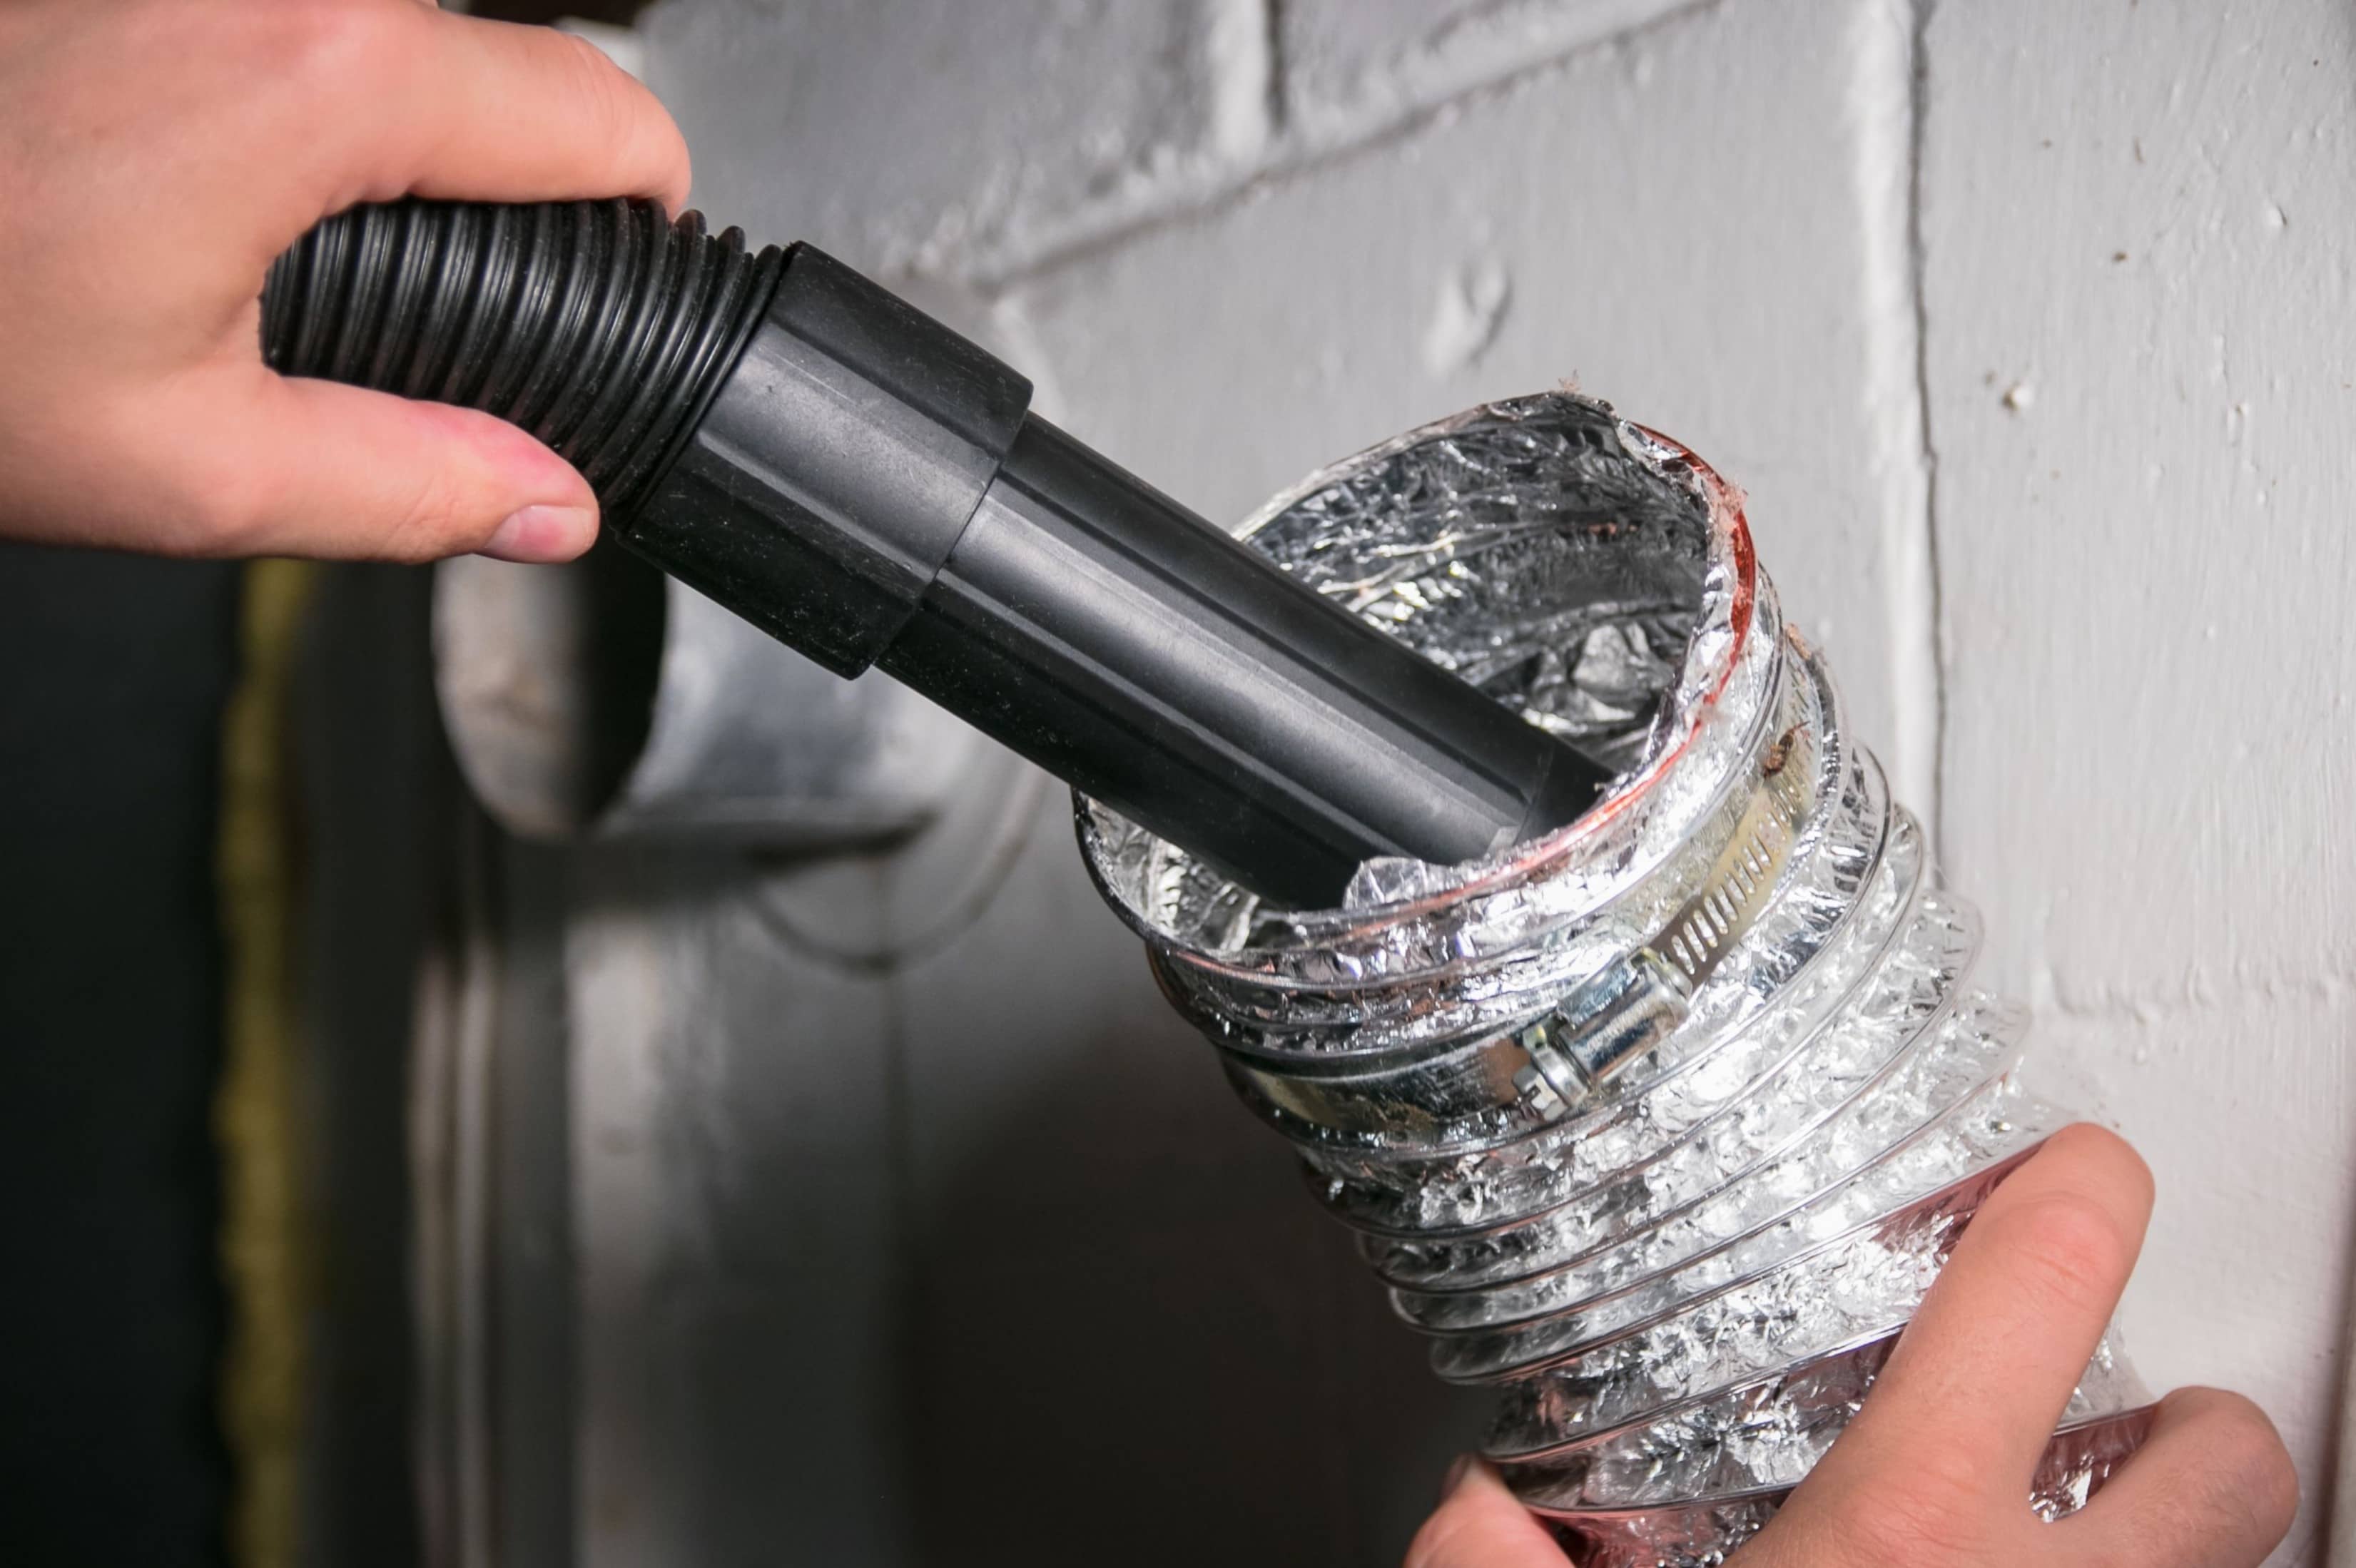
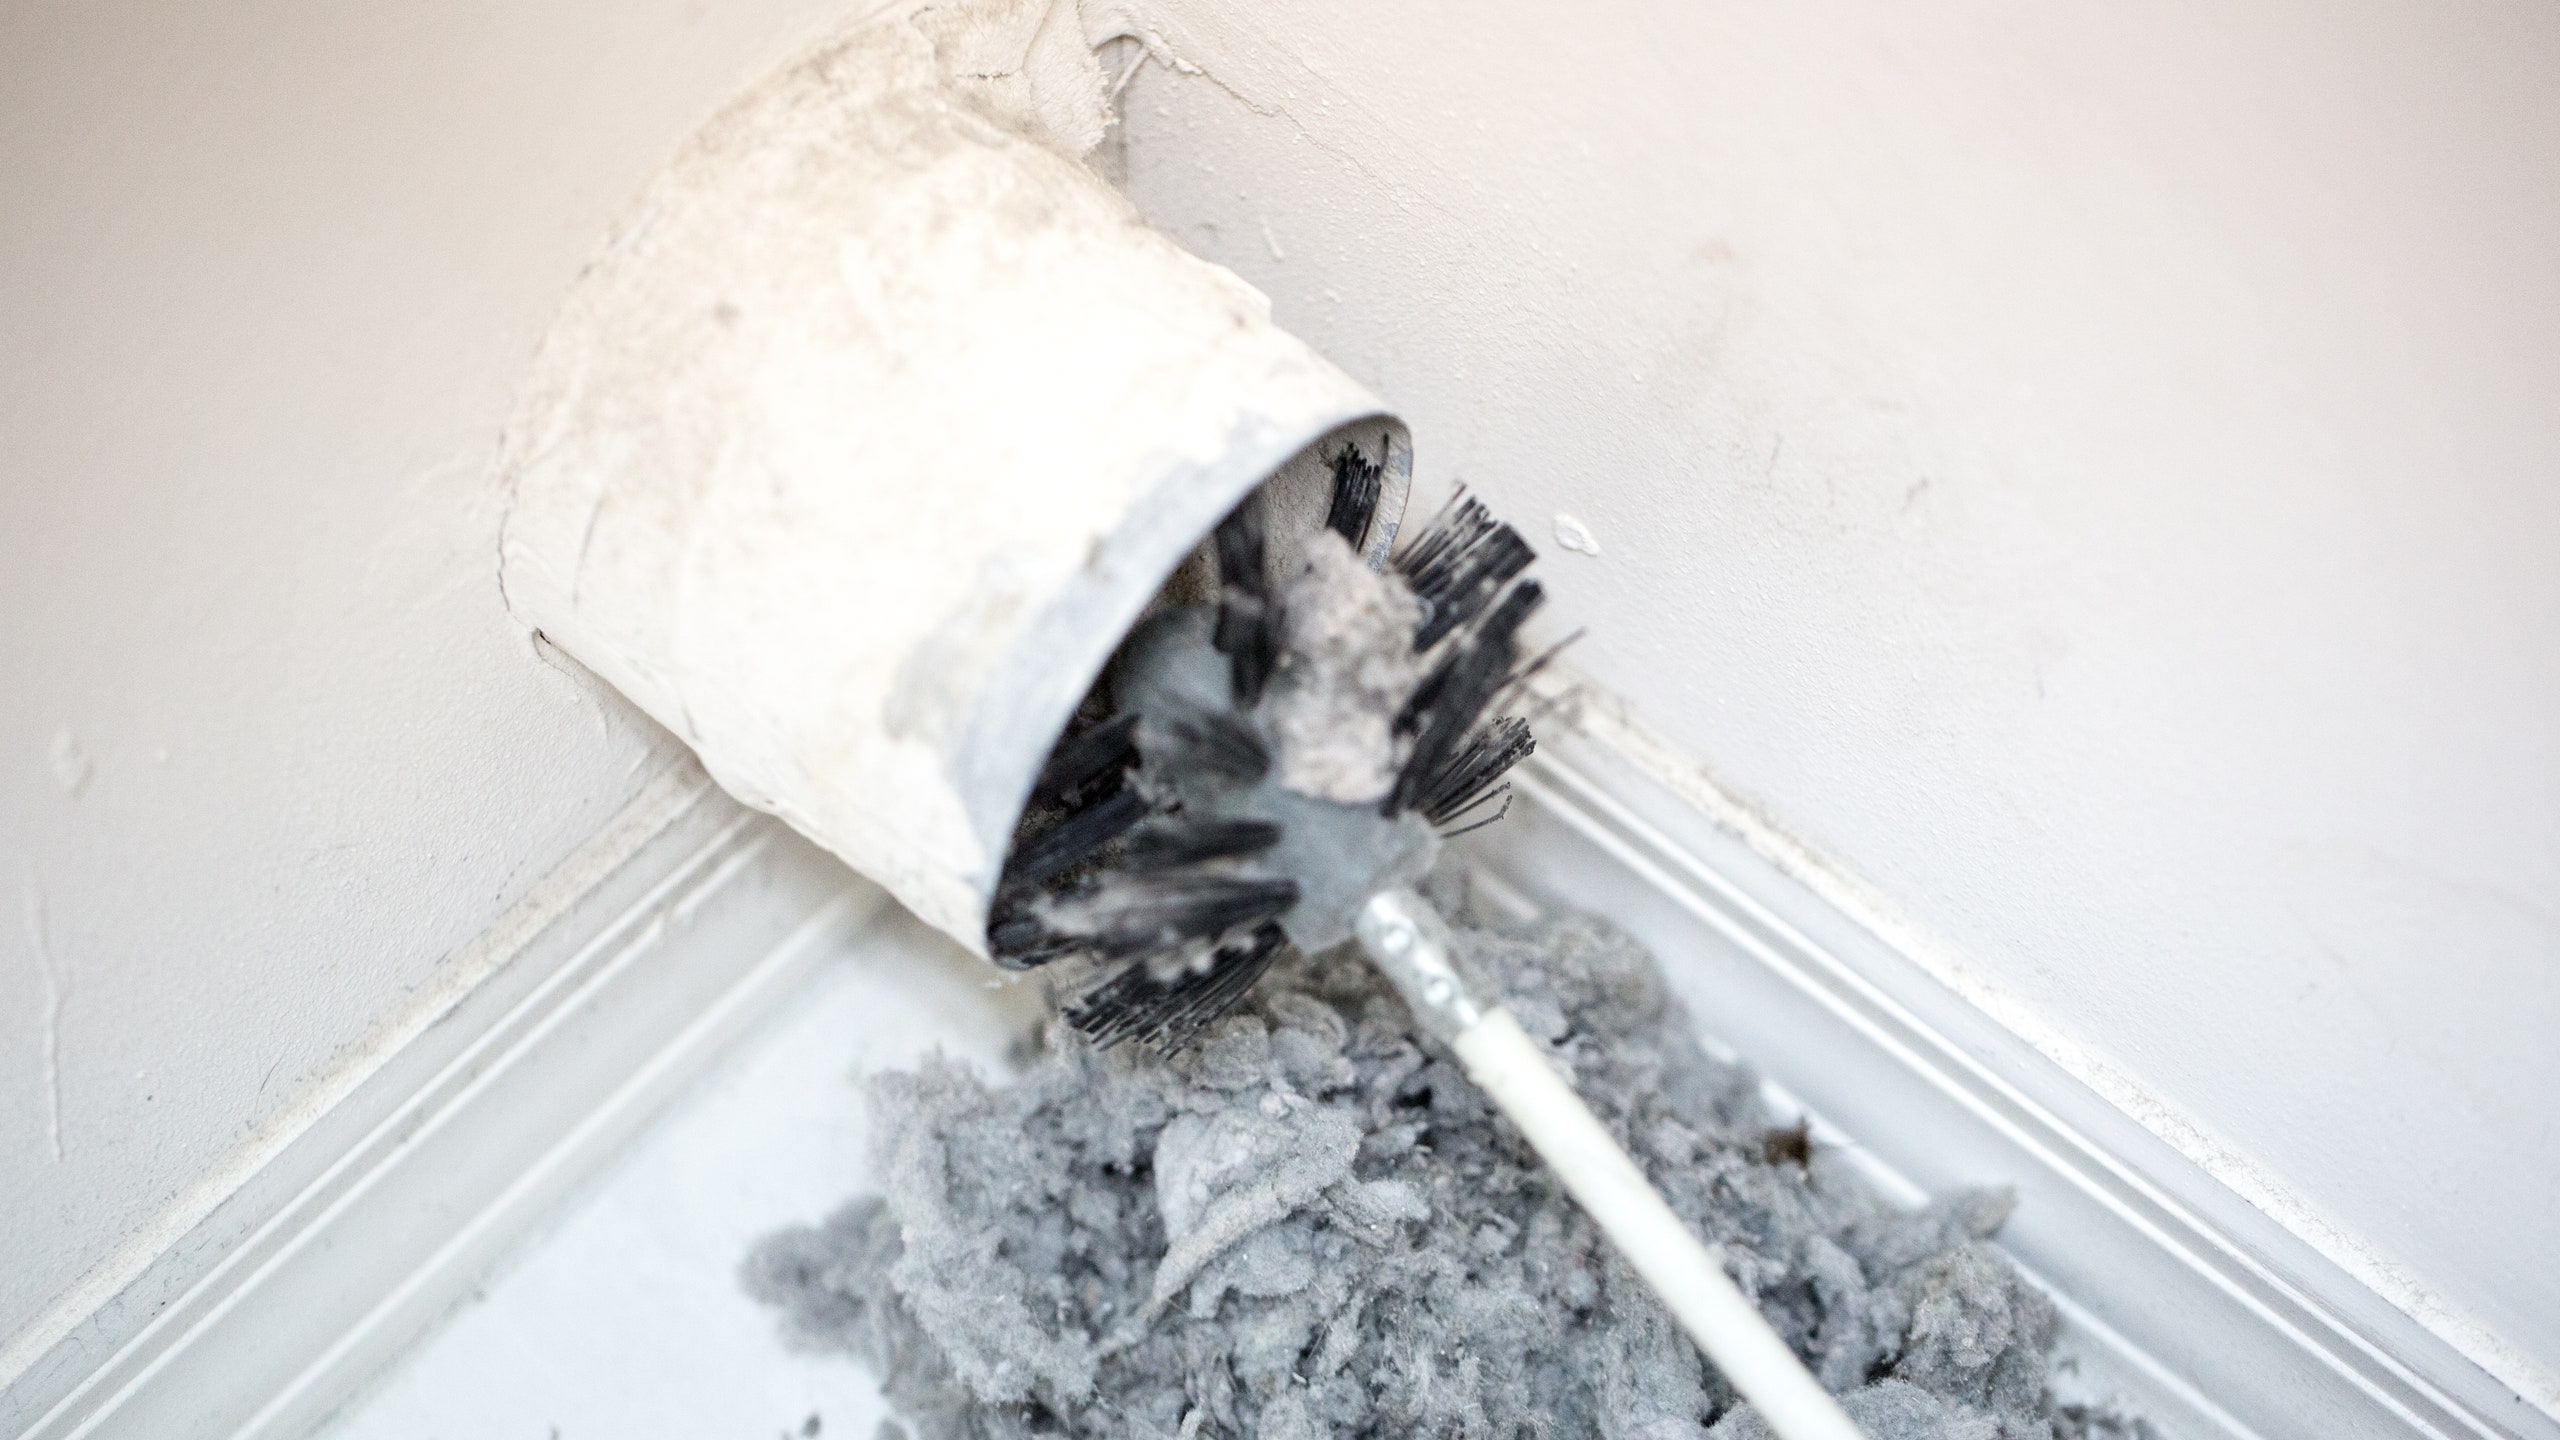
- Use a vacuum or brush: Depending on the accessibility and severity of the debris, you can use a shop vacuum with a long attachment or a specialized dryer vent brush. Insert the vacuum nozzle or brush into the vent opening and gently remove any remaining debris.
- Be thorough: Take your time to ensure that you’ve thoroughly cleaned the vent opening. Move the vacuum or brush around to reach all areas and dislodge any stubborn debris that may be stuck inside.
- Collect the debris: As you clean, collect any debris that you remove from the vent opening. Place it in a bucket or garbage bag for disposal. Properly dispose of the debris to prevent it from accumulating in other areas.
- Inspect for blockages: After removing the visible debris, inspect the vent opening once again to ensure there are no blockages. Shine a flashlight into the vent to check for any remaining obstructions or signs of pests or nests.
- Keep the area clean: As you clean the vent opening, be mindful of keeping the surrounding area free of debris. Sweep or vacuum away any loose dirt or debris that may have fallen during the cleaning process.
By removing debris from the vent opening, you’ve taken a crucial step toward improving the airflow and efficiency of your dryer. Now, let’s move on to the next step: cleaning the vent cover itself.
Make sure to regularly remove any debris or lint buildup from the outside dryer vent. Use a vent brush or vacuum to clean the vent and prevent blockages.
Step 4: Clean the Vent Cover
After removing debris from the vent opening, it’s important to clean the vent cover itself. Here’s how you can effectively clean the vent cover:
- Inspect the vent cover: Take a close look at the vent cover to determine its condition. Look for any signs of damage, such as cracks or missing pieces. If the vent cover is damaged, it’s important to replace it with a new one to ensure proper functioning.
- Remove loose dirt and debris: Use a cleaning cloth or soft brush to remove any loose dirt or debris from the surface of the vent cover. Gently wipe or brush away any particles that may have accumulated on the louvers or slits.
- Prepare a cleaning solution: If the vent cover has stubborn residue or stains, you can create a mild cleaning solution. Mix warm water with a small amount of mild detergent or dish soap in a bucket.
- Clean the vent cover: Dip a clean cloth or brush into the cleaning solution and gently scrub the vent cover. Pay attention to all areas, including the louvers or slits, to remove any dirt or grime. Rinse the cloth or brush in clean water as needed.
- Rinse and dry: Once you’ve cleaned the vent cover, rinse it thoroughly with clean water to remove any soap residue. Wipe the cover dry with a clean towel or allow it to air dry completely before reassembling it.
- Inspect for proper functioning: Before reinstalling the vent cover, ensure that all louvers or slits are intact and can be opened and closed freely. This will ensure proper ventilation and prevent any future clogging.
By cleaning the vent cover, you’re not only improving its appearance but also ensuring that it functions optimally. Now, let’s move on to the next step: inspecting and cleaning the vent duct.
Step 5: Inspect and Clean the Vent Duct
Inspecting and cleaning the vent duct is a crucial step in maintaining a clean and efficient dryer vent system. Follow these steps to effectively inspect and clean the vent duct:
- Disconnect the dryer: Before accessing the vent duct, make sure to turn off your dryer and unplug it from the power source. This will help prevent accidents or injuries during the cleaning process.
- Access the vent duct: Depending on the design of your dryer and vent system, you may need to move the dryer away from the wall to access the vent duct. Carefully disconnect the vent duct from the back of the dryer, ensuring not to damage any connections.
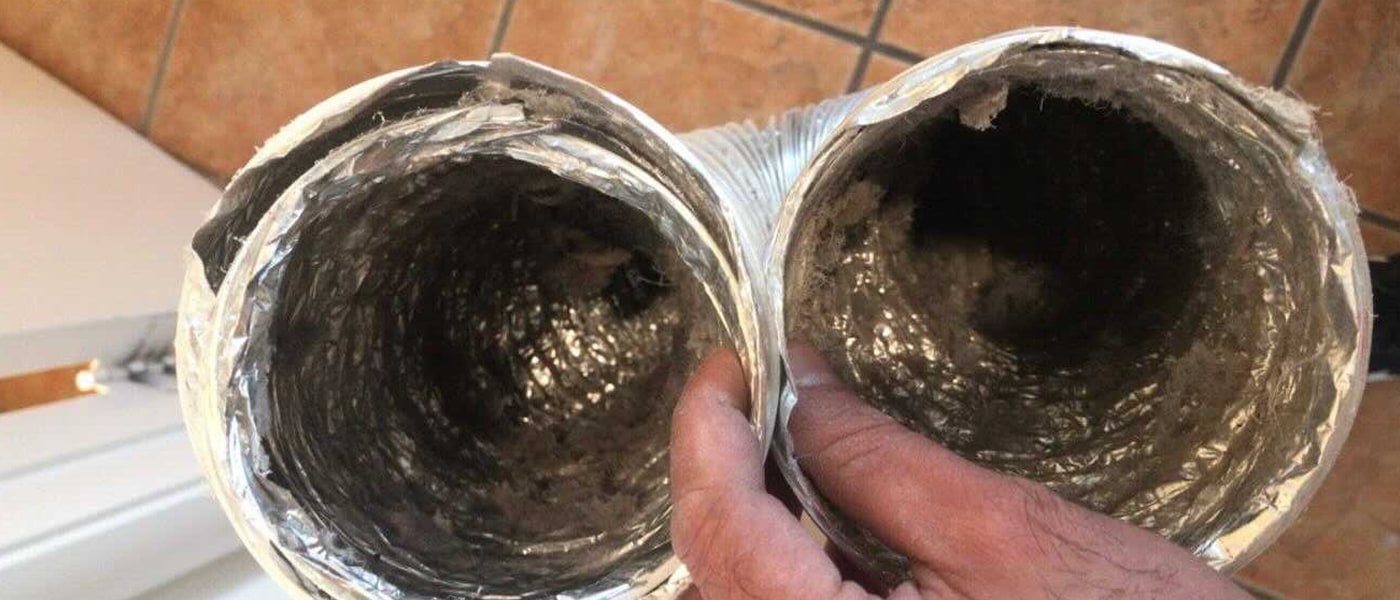
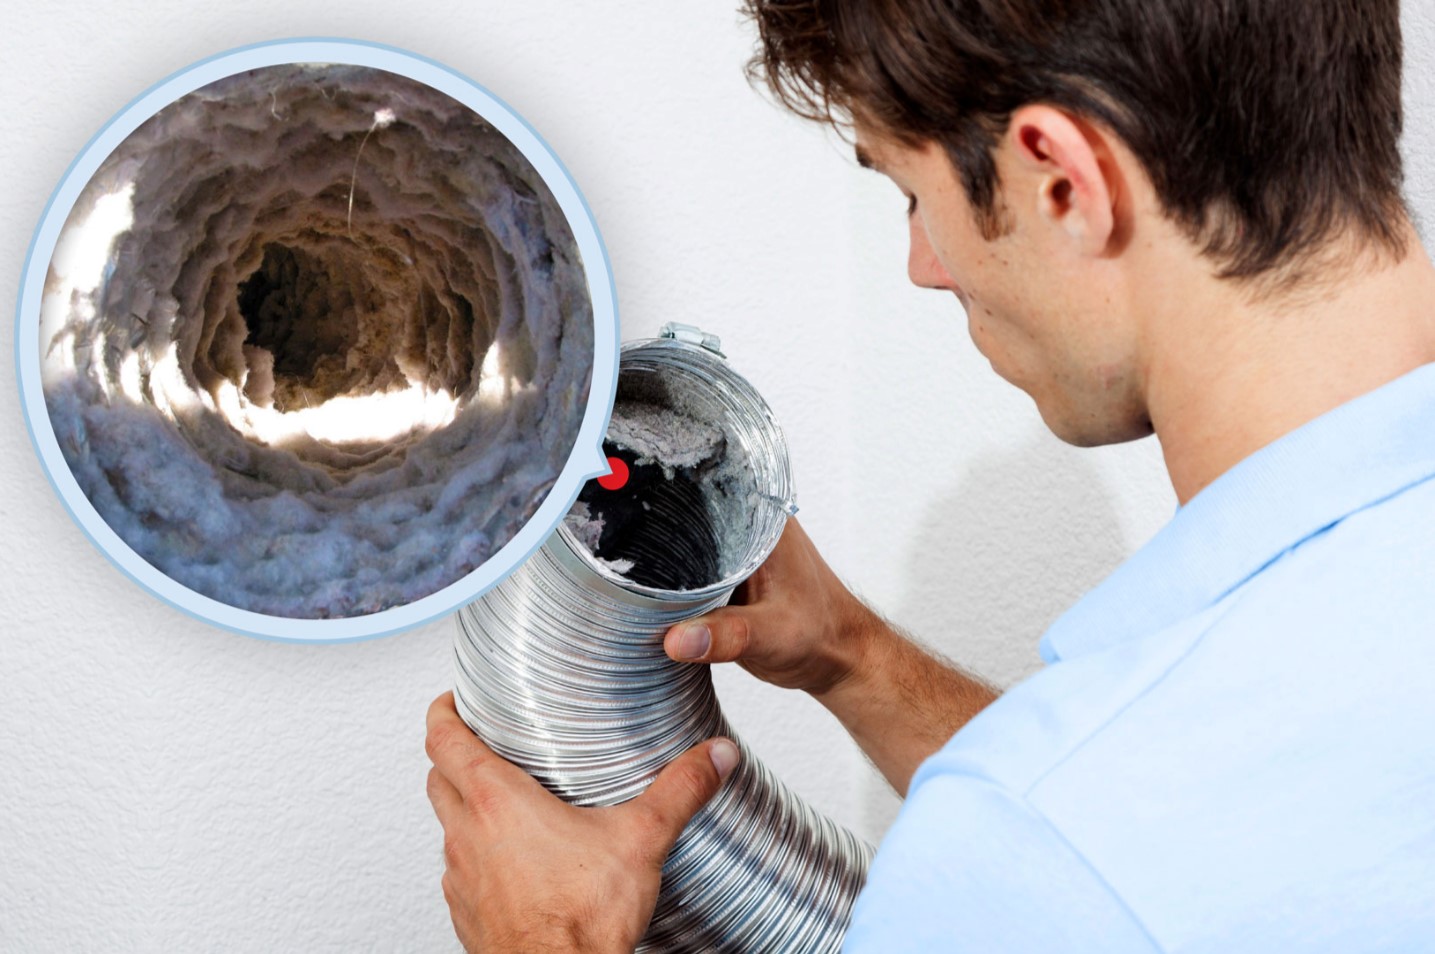
- Inspect the vent duct: With the vent duct removed, visually inspect it for any signs of damage, such as holes, tears, or disconnections. Additionally, check for any built-up lint or debris inside the duct that may be obstructing airflow.
- Remove lint and debris: Use a shop vacuum with a long attachment or a specialized dryer vent brush to clean the inside of the vent duct. Start from one end and work your way through, removing any visible lint or debris. Pay close attention to any bends or curves in the duct, as these areas are more prone to blockages.
- Be thorough: Take your time to ensure that you’ve thoroughly cleaned the vent duct. Move the vacuum or brush along the entire length of the duct, going back and forth as needed to dislodge any stubborn lint or debris.
- Clean the exhaust outlet: While cleaning the vent duct, don’t forget to clean the exhaust outlet where the duct connects to the wall or roof. Use the vacuum or brush to remove any lint or debris from this area.
- Check for airflow: After cleaning the vent duct, reattach it to the dryer and ensure it is securely connected. Turn on the dryer and check for proper airflow. A strong, steady airflow indicates a clear and clean vent duct.
- Reposition the dryer: Once you’ve finished cleaning and confirming proper airflow, carefully reposition the dryer back against the wall, ensuring there is no kinking or crushing of the vent duct.
By inspecting and cleaning the vent duct, you’re ensuring optimal airflow and reducing the risk of lint buildup. Now, let’s proceed to the next step: reinstalling the vent cover.
Step 6: Reinstall the Vent Cover
After cleaning the vent duct, it’s time to reinstall the vent cover. Follow these steps to properly reinstall the vent cover:
- Align the vent cover: Position the vent cover in front of the vent opening, aligning it with the screw holes or fasteners on the exterior wall or roof. Ensure that the vent cover is straight and properly oriented.
- Secure the vent cover: Insert the screws or fasteners back into their respective holes and start tightening them. Use a screwdriver to securely fasten the vent cover, but be careful not to overtighten as it may cause damage to the cover or the vent opening.
- Test the vent cover: After securing the vent cover, give it a gentle push to ensure it opens and closes smoothly. This will ensure proper ventilation and prevent any potential obstructions.
- Inspect the connection: Check the area where the vent cover meets the vent opening to ensure a tight and secure connection. This will prevent any air leaks or pests from entering the vent system.
- Verify proper vent cover operation: Open and close the vent cover a few times to verify that it operates correctly. Make sure that all louvers or slits open and close freely without any obstruction or hesitation.
- Clean up: Dispose of any debris or cleaning materials you used during the vent cleaning process. Clean up the area around the vent opening, ensuring it’s clear of any dirt or residue.
- Reconnect the dryer: Plug your dryer back into the power source and ensure it’s properly connected. Double-check that the vent duct is securely attached to the dryer’s exhaust outlet.
By reinstalling the vent cover, you’re completing the cleaning process and ensuring that your dryer vent is functioning properly. Now, let’s move on to the final step: tips and maintenance reminders to keep your dryer vent clean and efficient.
Read more: How To Remove An Outside Dryer Vent Cover
Step 7: Final Tips and Maintenance Reminders
Congratulations! You’ve successfully cleaned your dryer vent outside. To keep your dryer vent in top shape and ensure optimal performance, here are some final tips and maintenance reminders:
- Regular cleaning: Make it a habit to clean your dryer vent at least once a year, or more frequently if you notice any signs of reduced airflow or lint buildup.
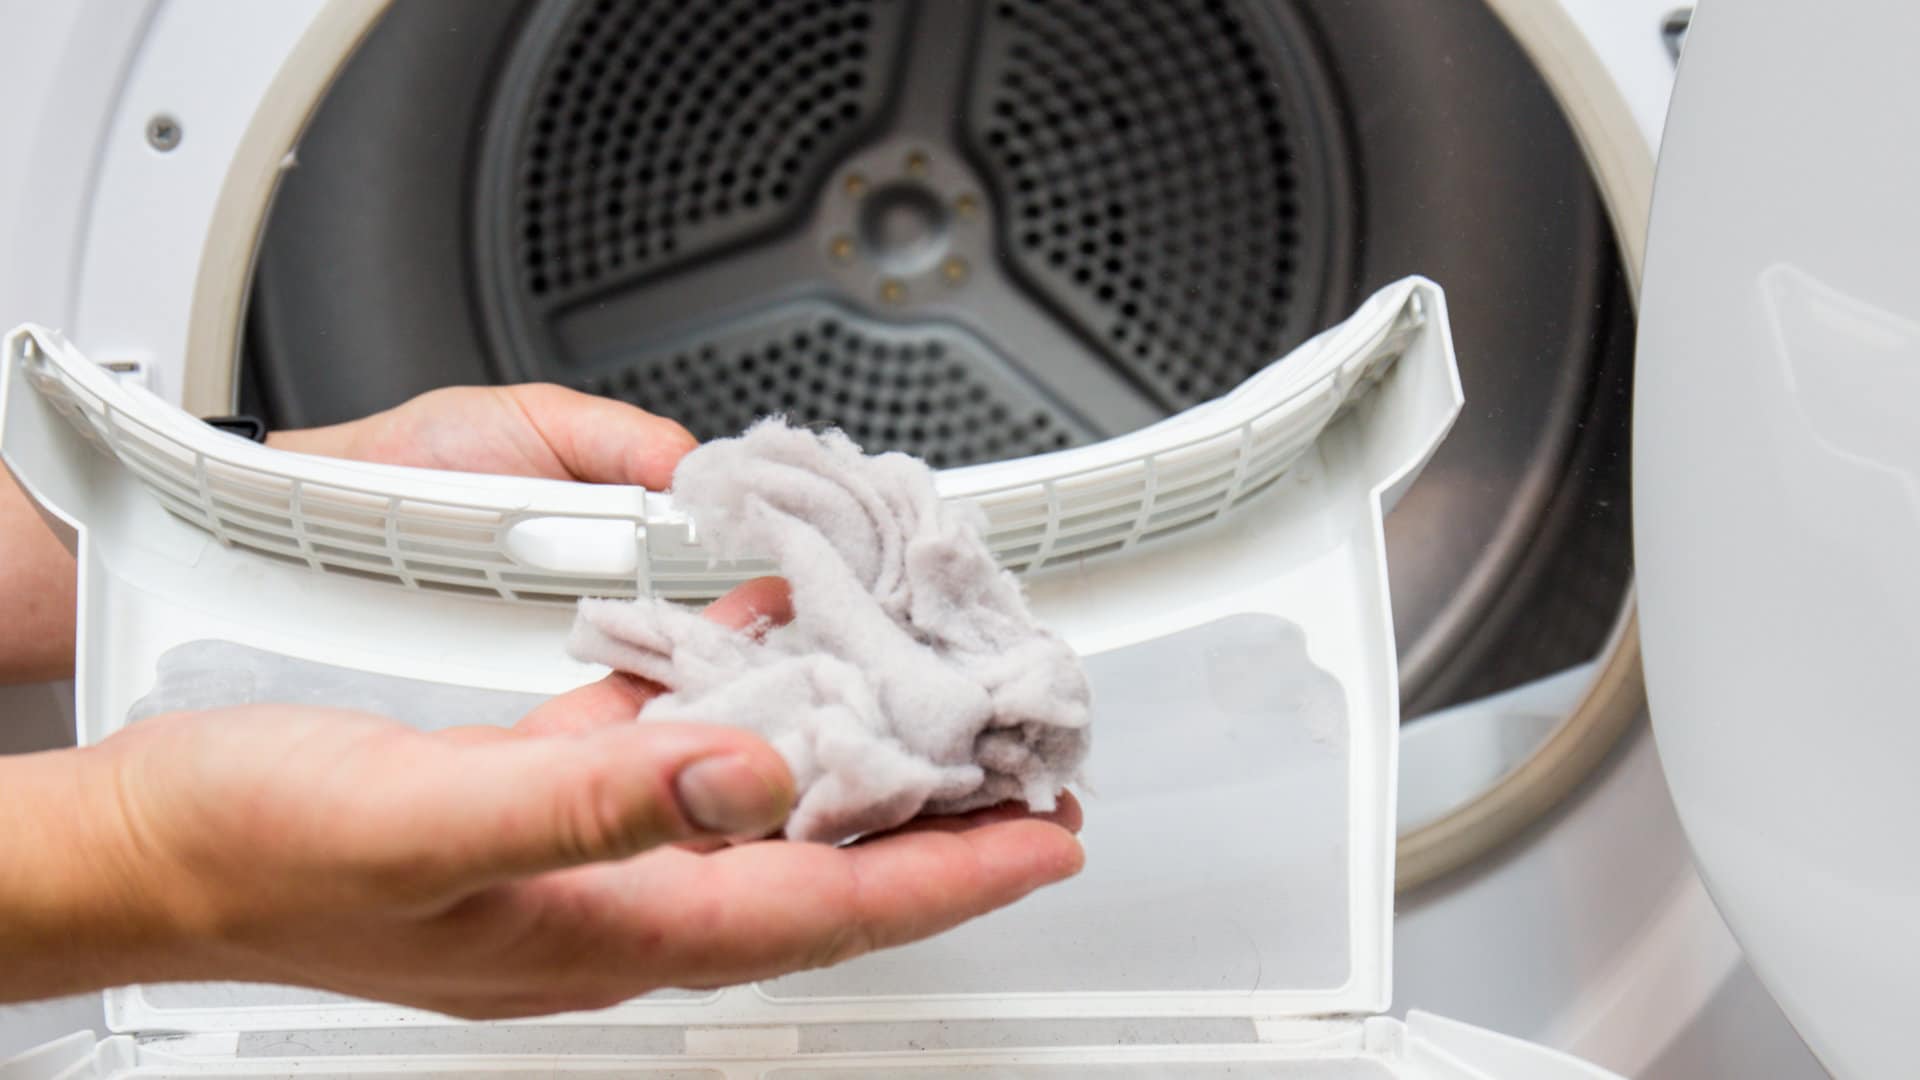
- Clean the lint trap: Remember to clean the lint trap inside your dryer after every use to prevent lint from accumulating in the vent duct.
- Inspect for damage: Regularly inspect the vent cover and vent duct for any signs of damage, such as cracks, tears, or disconnections. If you notice any issues, repair or replace them promptly.
- Monitor drying times: Pay attention to how long it takes for your clothes to dry. If you notice prolonging drying times, it could be a sign of a partially blocked vent, indicating the need for cleaning.
- Keep the area clear: Ensure that the area around the dryer vent outside remains clear of obstructions, such as vegetation or debris, to maintain proper airflow.
- Consider professional cleaning: If you’re uncomfortable or unable to clean your dryer vent yourself, consider hiring a professional service to perform the cleaning for you. They have the expertise and specialized tools to ensure a thorough cleaning.
- Stay vigilant: Stay alert to any strange odors, unusual noises, or performance issues with your dryer. These could be signs of a clogged vent or other underlying problems that require attention.
- Follow manufacturer’s recommendations: Refer to your dryer’s manual for any specific maintenance guidelines or recommendations from the manufacturer. Following these instructions will help prolong the lifespan of your dryer and maintain its efficiency.
By following these tips and maintenance reminders, you can ensure that your dryer vent remains clean, efficient, and safe. Regular maintenance will not only save you energy and money but also provide peace of mind knowing that you’ve taken the necessary steps to prevent potential hazards.
Now that you’re equipped with the knowledge to keep your dryer vent in top condition, take a moment to appreciate the benefits of a clean and well-maintained dryer vent system. Enjoy hassle-free laundry days and the peace of mind that comes with knowing you’ve taken care of an important home maintenance task.
Thank you for reading our guide on how to clean your dryer vent outside. Happy cleaning!
Conclusion
Congratulations on completing the process of cleaning your dryer vent outside! By following the step-by-step instructions and taking the necessary safety precautions, you’ve taken an important step towards maintaining the efficiency, safety, and longevity of your dryer.
Regularly cleaning your dryer vent outside is essential for several reasons. It improves drying efficiency, reduces energy consumption, and minimizes the risk of a potential fire hazard. Additionally, it helps extend the lifespan of your dryer and ensures better air quality in your home.
Throughout this guide, we explored the importance of cleaning your dryer vent, the tools and materials you’ll need, and the step-by-step process to follow. From safety precautions to locating and accessing the vent, removing debris, cleaning the vent cover and duct, to reinstalling the vent cover – each step plays a crucial role in maintaining a clean and efficient dryer vent system.
Remember to make this maintenance task a regular part of your home maintenance routine. Cleaning your dryer vent once a year, or more frequently if needed, will help prevent lint buildup, reduce drying times, and ultimately save energy and money.
By staying vigilant and following the maintenance reminders, such as cleaning the lint trap inside your dryer after each use and monitoring drying times, you can ensure that your dryer and vent system remain in optimal condition.
Lastly, if you ever feel uncomfortable or unsure about cleaning your dryer vent yourself, consider seeking the assistance of a professional service to ensure a thorough and proper cleaning.
Thank you for taking the time to learn how to clean your dryer vent outside. By implementing these practices, you’re safeguarding your home and improving the performance of your dryer for years to come. Enjoy the benefits of a well-maintained dryer vent system and the peace of mind it brings!
Frequently Asked Questions about How To Clean Your Dryer Vent Outside
Was this page helpful?
At Storables.com, we guarantee accurate and reliable information. Our content, validated by Expert Board Contributors, is crafted following stringent Editorial Policies. We're committed to providing you with well-researched, expert-backed insights for all your informational needs.