Home>Interior Design>11 DIY Small Deck Ideas On A Budget To Steal From This Project
Interior Design
11 DIY Small Deck Ideas On A Budget To Steal From This Project
Modified: August 28, 2024
Discover budget-friendly DIY small deck ideas to transform your space. Get inspired by this interior design project and create your own stylish outdoor oasis.
(Many of the links in this article redirect to a specific reviewed product. Your purchase of these products through affiliate links helps to generate commission for Storables.com, at no extra cost. Learn more)
Introduction
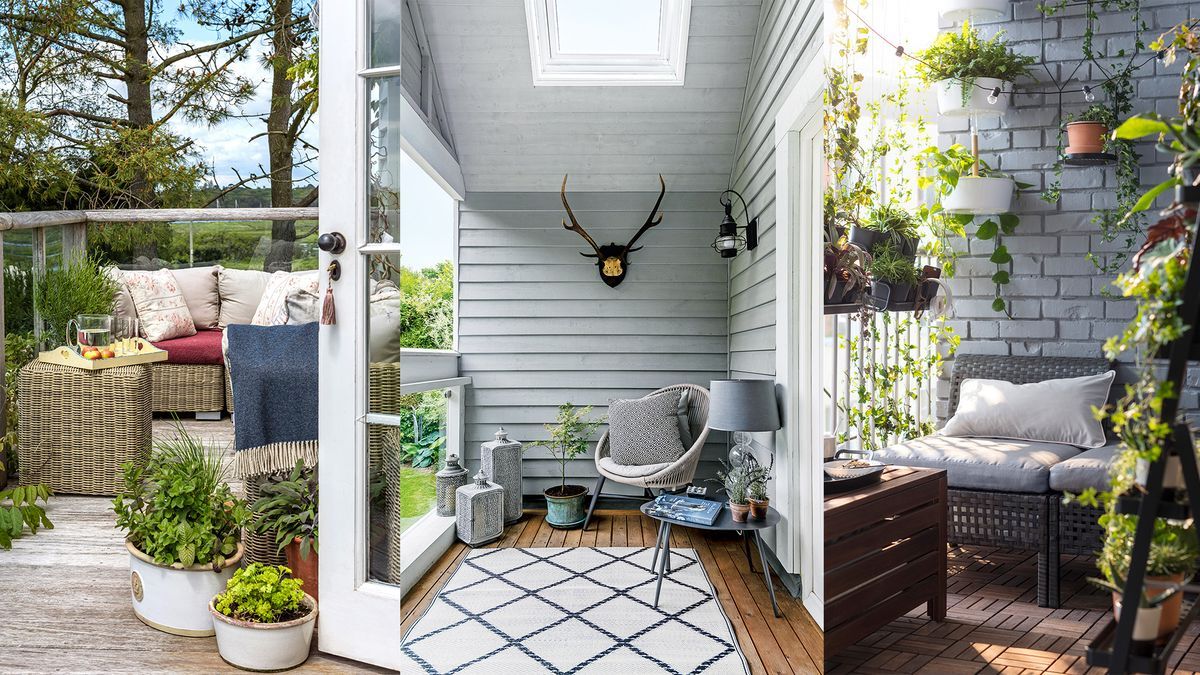
When it comes to creating a cozy outdoor space for your home, a small deck can make a big impact. Whether you have limited space, a tight budget, or simply want to add a touch of charm to your backyard, DIY small deck ideas are a fantastic solution. Not only do they provide a relaxing space to enjoy the outdoors, but they also add value and curb appeal to your property.
In this article, we will explore 11 budget-friendly DIY small deck ideas that you can easily steal and customize for your own project. These ideas range from using pallets and repurposed wood to creative designs with built-in benches and privacy screens. With some basic tools, materials, and a little bit of creativity, you can transform your outdoor space into a beautiful oasis where you can unwind and entertain.
So, grab your toolbox and let’s dive into these exciting DIY small deck ideas!
Key Takeaways:
- Transform your outdoor space with 11 budget-friendly DIY small deck ideas, from pallet and gravel decks to repurposed wood and privacy screens. Create a cozy oasis for relaxation and entertainment right in your backyard.
- Embrace creativity and sustainability with DIY small deck projects, such as cinder block and planter box decks. Maximize your outdoor space with versatile, stylish, and cost-effective design options.
Pallet Deck
Creating a deck using pallets is not only budget-friendly but also a sustainable way to repurpose materials. Here’s what you’ll need and how to build your own pallet deck:
Materials Needed:
- Pallets (number of pallets will depend on the size of your deck)
- Gravel or sand for leveling
- Decking screws
- Circular saw or reciprocating saw
- Drill
- Measuring tape
- Hammer
- Work gloves
Step-by-step Instructions:
- Prepare the ground: Clear the area where you plan to build the deck. Make sure the ground is level by using gravel or sand to fill any uneven spots.
- Layout the pallets: Place the pallets in the desired position, making sure they are aligned and fit together snugly. You can cut the pallets to size if needed using a circular saw or reciprocating saw.
- Secure the pallets: Use decking screws to attach the pallets together, ensuring they are tightly connected. Place screws at the corners and in the middle of each pallet board for added stability.
- Create the base: Measure and mark the desired height for your deck. Dig holes at each corner and insert support posts. Use a level to ensure they are plumb, and then secure them with gravel or concrete.
- Attach the pallets to the base: Place the assembled pallets on top of the support posts. Use screws to secure the pallets to the posts, ensuring they are firmly attached.
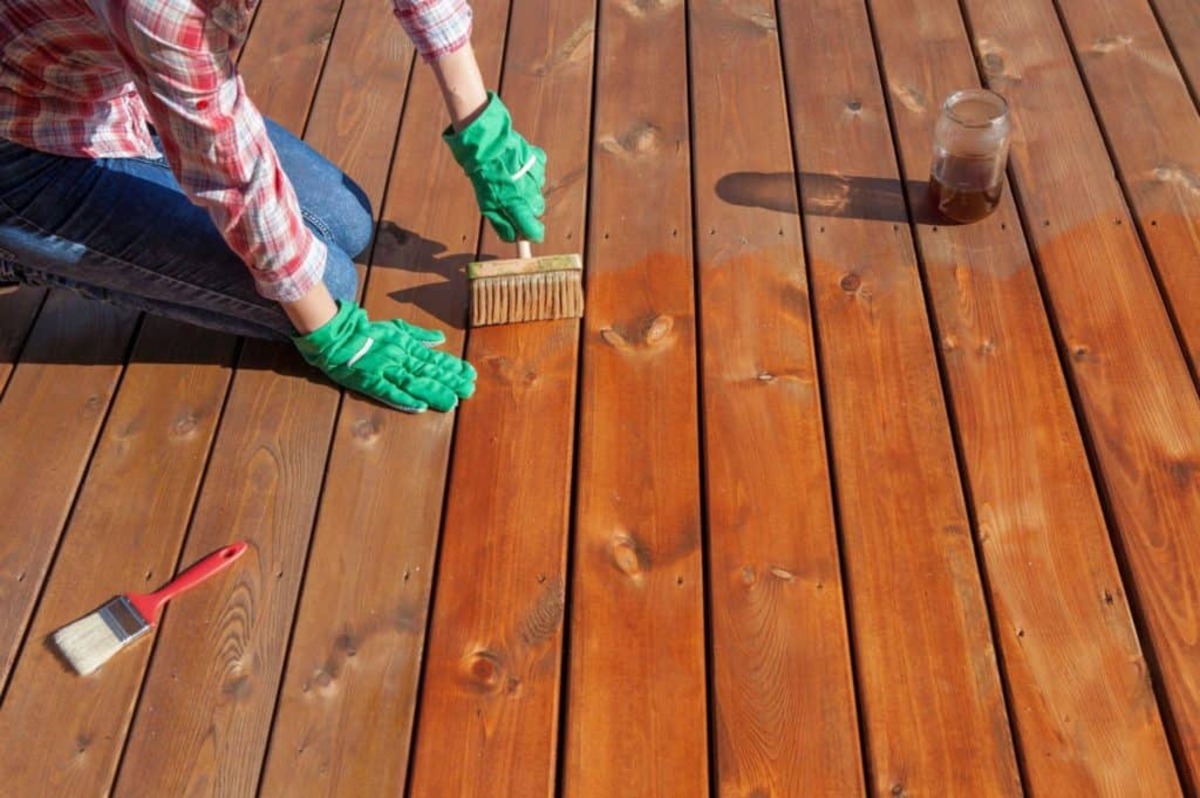
- Finishing touches: If desired, you can stain or paint the pallet deck to enhance its appearance and protect the wood from weathering. Remember to let it dry thoroughly before using the deck.
- Add furniture and decor: With your pallet deck complete, it’s time to add some outdoor furniture, potted plants, and decorative elements to make it your own cozy oasis.
This DIY pallet deck is a fantastic option for small spaces and can be easily customized to fit your specific needs. Whether you use it for sunbathing, gardening, or simply relaxing with a cup of coffee, this eco-friendly deck will surely become your favorite spot to unwind outdoors.
Floating Deck
A floating deck is another great DIY small deck idea that offers flexibility and a modern look. This type of deck is not attached to the house or any existing structure, making it perfect for small spaces or uneven terrain. Here’s what you’ll need and how to build your own floating deck:
Materials Needed:
- Pressure-treated lumber or composite boards
- Concrete deck blocks
- Gravel or sand for leveling
- Galvanized deck screws
- Drill
- Measuring tape
- Level
- Circular saw
- Work gloves
Step-by-step Instructions:
- Plan and measure: Decide on the size and location of your floating deck. Mark the corners with stakes and string to outline the area. Measure the diagonals to ensure the layout is square.
- Prepare the ground: Clear the area and remove any grass or vegetation. Use gravel or sand to level the ground if needed.
- Install the deck blocks: Place concrete deck blocks evenly spaced within the outlined area. Make sure they are level and adjust as necessary. Add gravel under each block for stability.
- Build the frame: Cut pressure-treated lumber or composite boards to create the frame of the deck. Attach the boards together using galvanized deck screws. Use a level to ensure the frame is even and square.
- Attach the decking boards: Lay the decking boards perpendicular to the frame and attach them using deck screws. Leave a small gap between the boards for drainage.
- Finishing touches: If desired, you can apply a stain or paint to protect and enhance the appearance of your floating deck. Allow it to dry before using the deck.
- Add furniture and decor: Complete your floating deck by adding outdoor furniture, potted plants, and other decorative elements to create a cozy outdoor space.
A floating deck is a versatile option that can be easily modified and expanded as your needs change. It provides an elevated platform for relaxation and entertainment, giving your backyard a stylish and functional upgrade.
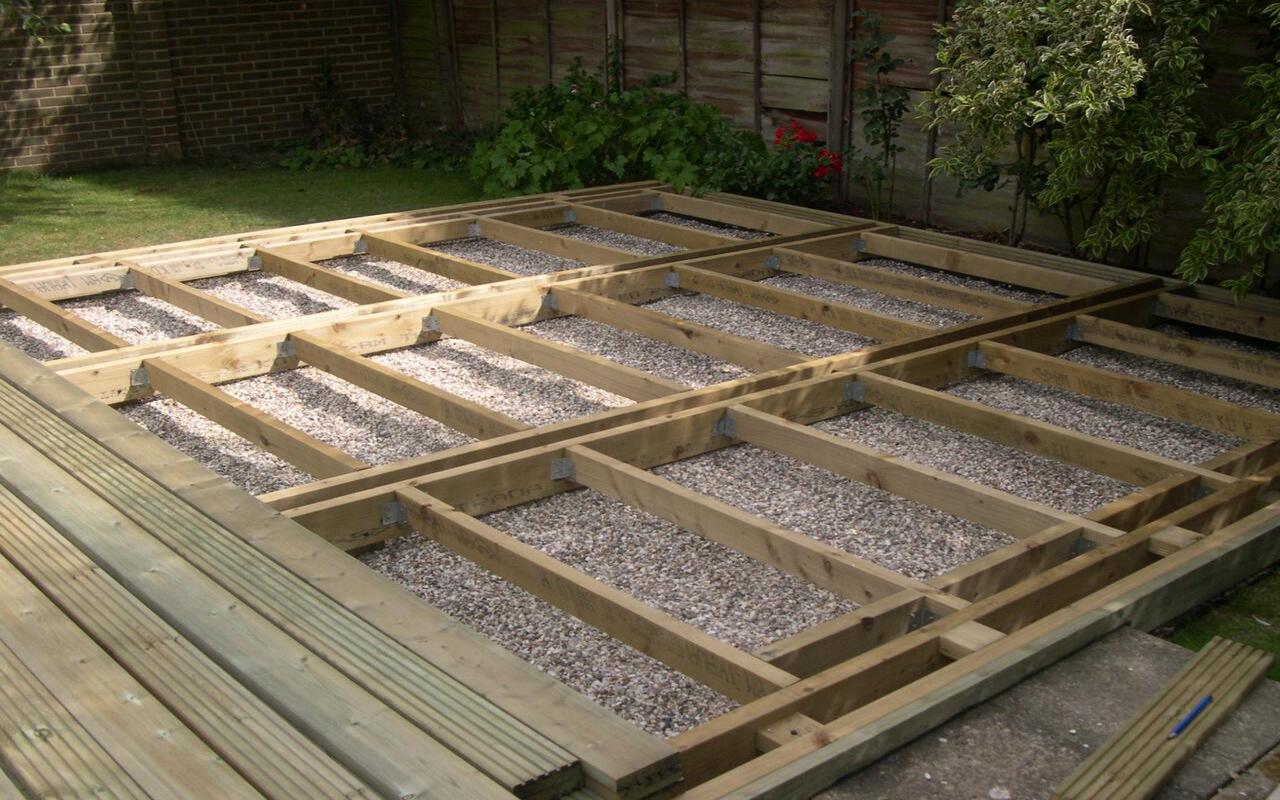
Gravel Deck
If you’re looking for a low-maintenance and affordable small deck idea, a gravel deck is an excellent choice. This minimalist design adds a touch of elegance to your outdoor space. Here’s what you’ll need and how to build your own gravel deck:
Materials Needed:
- Pressure-treated lumber or composite boards
- Plywood (optional)
- Gravel (choose a type and color that suits your aesthetic)
- Weed barrier fabric
- Level
- Measuring tape
- Hammer
- Deck screws
- Drill
- Work gloves
Step-by-step Instructions:
- Plan and measure: Determine the size and shape of your gravel deck. Mark the outline using stakes and string. Measure and adjust until you’re satisfied with the dimensions.
- Prepare the ground: Clear the area and remove any grass or vegetation. Level the ground using a rake and remove any large rocks or debris.
- Build the frame: If desired, you can create a frame using pressure-treated lumber or composite boards. This will define the boundaries of your gravel deck. Attach the boards using deck screws.
- Install the weed barrier: Lay down a weed barrier fabric within the frame. This will help to prevent weed growth and maintain the stability of the gravel.
- Spread the gravel: Pour the gravel onto the weed barrier, ensuring an even distribution. Use a rake to spread and level the gravel across the entire deck area.
- Compact the gravel: Use a tamper or manual compactor to firmly compact the gravel. This will provide stability and prevent shifting over time.
- Trim the weed barrier: Trim any excess weed barrier fabric that extends beyond the deck area using scissors or a utility knife.
- Clean up: Clean up any excess gravel or debris from the surrounding area and dispose of it properly.
- Optional: Enhance the design with edging or pavers. You can install edging or pavers around the perimeter of the gravel deck for a polished look.
A gravel deck offers a minimalistic and modern aesthetic while being cost-effective and easy to maintain. It provides a versatile space for outdoor activities, such as seating areas, dining, or even a fire pit. Enjoy a hassle-free outdoor oasis with your very own DIY gravel deck!
Planter Box Deck
A planter box deck combines the functions of a deck and a gardening space, making it a perfect choice for those with a green thumb. This DIY small deck idea allows you to incorporate plants and flowers into your outdoor space, adding beauty and freshness. Here’s what you’ll need and how to build your own planter box deck:
Materials Needed:
- Pressure-treated lumber or cedar boards
- Deck screws
- Drill
- Saw
- Measuring tape
- Plywood or plastic liner
- Landscaping fabric
- Potting soil
- Plants and flowers
- Work gloves
Step-by-step Instructions:
- Plan and measure: Decide on the size and layout of your planter box deck. Consider the available space and how many planter boxes you want to incorporate. Mark the dimensions using stakes and string.
- Build the frame: Cut pressure-treated lumber or cedar boards to create the frames for the planter boxes. Attach the boards together using deck screws to form the desired shapes and sizes.
- Add the bottom: Place plywood or a plastic liner at the bottom of each planter box to prevent water from leaking out. Ensure there are drainage holes for proper water flow.
- Install the landscaping fabric: Line the inside of each planter box with landscaping fabric to prevent soil from escaping while still allowing water to drain. Use a stapler or nails to secure the fabric in place.
- Fill with soil: Fill the planter boxes with potting soil, leaving some space at the top for your plants. Ensure that the soil is evenly spread and adequately packed.
- Plant your garden: Choose a variety of plants and flowers that thrive well in your climate and sunlight conditions. Arrange them in the planter boxes according to your desired arrangement, leaving enough space for growth.
- Water and care for your plants: Give your plants a good watering and continue to care for them according to their specific needs. Regularly water, fertilize, and prune as necessary to keep your planter box deck flourishing.
- Consider additional features: You can add seating, a trellis, or even a small table to enhance your planter box deck and create a cozy outdoor space for relaxation.
A planter box deck brings together the joys of gardening and outdoor living, allowing you to enjoy fresh herbs, colorful flowers, and lush greenery right on your deck. It’s a beautiful way to incorporate nature into your outdoor space and create a peaceful oasis to relax and unwind.
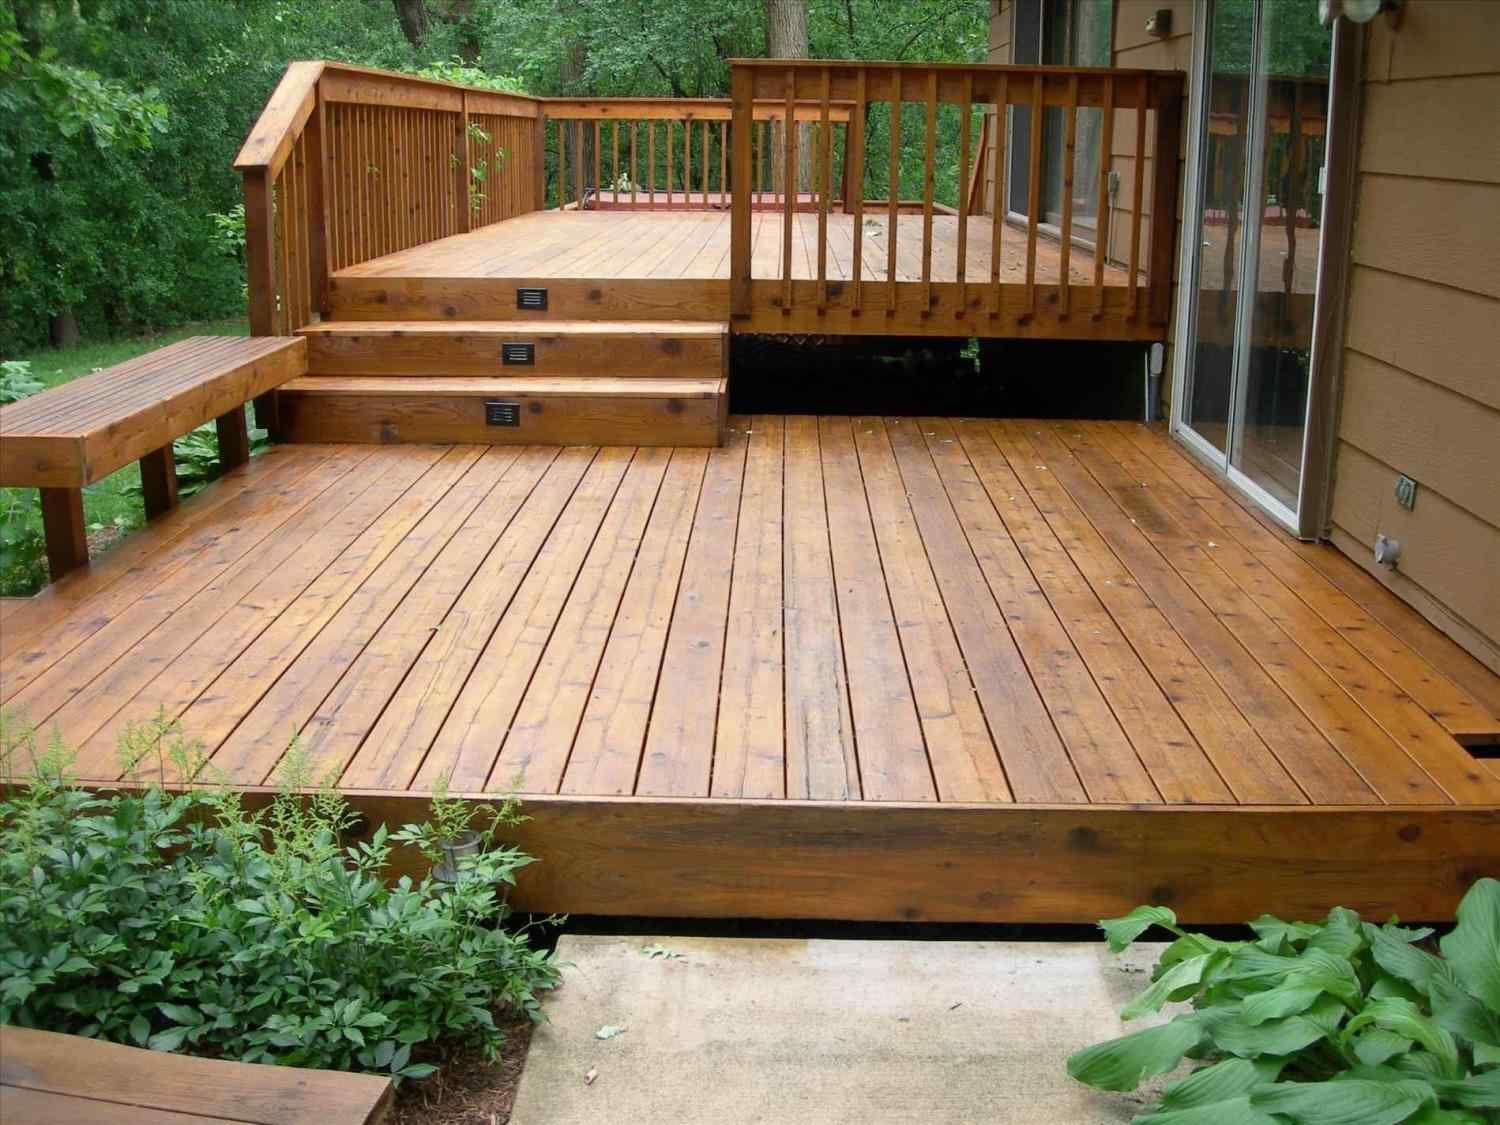
Platform Deck
A platform deck is a versatile and straightforward DIY small deck idea that can be customized to fit any backyard space. Whether you have a compact urban patio or a spacious yard, a platform deck adds an elevated platform for outdoor activities and relaxation. Here’s what you’ll need and how to build your own platform deck:
Materials Needed:
- Pressure-treated lumber or composite boards
- Concrete deck blocks
- Gravel or sand for leveling
- Galvanized deck screws
- Drill
- Measuring tape
- Level
- Circular saw
- Work gloves
Step-by-step Instructions:
- Plan and measure: Determine the size and shape of your platform deck. Mark the outline on the ground using stakes and string. Ensure the area is level and free from any obstructions.
- Prepare the ground: Clear the area and remove any vegetation. Level the ground using a rake and remove any large rocks or debris. Add a layer of gravel or sand to create a stable base.
- Install the deck blocks: Place concrete deck blocks evenly spaced within the outlined area. Make sure they are level and adjust as necessary. Add gravel under each block for stability.
- Build the frame: Cut pressure-treated lumber or composite boards to create the frame of the platform deck. Attach the boards together using galvanized deck screws. Use a level to ensure the frame is even and square.
- Attach the decking boards: Lay the decking boards perpendicular to the frame and attach them using deck screws. Leave a small gap between the boards for drainage.
- Secure the frame to the deck blocks: Attach the frame to the deck blocks using galvanized deck screws or brackets. Ensure that it is securely anchored to the blocks for stability.
- Finishing touches: Trim any excess decking boards and sand any rough edges. You can stain or paint the platform deck to protect and enhance its appearance, following the manufacturer’s instructions.
- Add railings and stairs: If desired, you can install railings around the edges of the platform deck for safety. You can also add stairs or a ramp for easy access.
- Personalize your space: Complete your platform deck by adding outdoor furniture, potted plants, and other decorative elements to create a cozy and inviting outdoor retreat.
A platform deck provides a versatile and elevated outdoor space for various activities, from dining and entertaining to simply soaking up the sun. It’s an excellent addition to any backyard, offering a functional and stylish platform to enjoy the outdoors.
Cinder Block Deck
A cinder block deck is a unique and creative DIY small deck idea that adds an industrial and modern touch to your outdoor space. Cinder blocks are affordable, durable, and versatile, making them an excellent choice for constructing a deck. Here’s what you’ll need and how to build your own cinder block deck:
Materials Needed:
- Cinder blocks
- Pressure-treated 2×6 lumber or composite boards
- Gravel or sand for leveling
- Galvanized deck screws
- Drill
- Measuring tape
- Level
- Circular saw
- Work gloves
Step-by-step Instructions:
- Plan and measure: Determine the size and layout of your cinder block deck. Mark the outline using stakes and string. Measure and adjust until you’re satisfied with the dimensions.
- Prepare the ground: Clear the area and remove any grass or vegetation. Level the ground using a rake and remove any large rocks or debris. If needed, add a layer of gravel or sand for stability.
- Lay the cinder blocks: Place the cinder blocks in the desired position, following the outline of your deck. Ensure they are level and aligned by using a level and a mallet to adjust as needed.
- Build the frame: Cut pressure-treated 2×6 lumber or composite boards to create the frame of the deck. Attach the boards together using galvanized deck screws. Use a level to ensure the frame is even and square.
- Attach the frame to the cinder blocks: Secure the frame to the cinder blocks using galvanized deck screws. Ensure that it is securely anchored and tightly attached for stability.
- Install the decking boards: Lay the decking boards perpendicular to the frame and attach them using deck screws. Leave a small gap between the boards for drainage.
- Finishing touches: Trim any excess decking boards and sand any rough edges. You can stain or paint the cinder block deck to protect and enhance its appearance, following the manufacturer’s instructions.
- Add furniture and decor: Complete your cinder block deck by adding outdoor furniture, potted plants, and other decorations that complement the industrial aesthetic and create a cozy outdoor space.
A cinder block deck offers an unconventional and visually appealing design that is sure to be a conversation starter. It provides a sturdy and durable outdoor platform for relaxation, entertaining, and enjoying the beauty of your surroundings.
Consider using composite decking materials, which are durable, low-maintenance, and cost-effective in the long run. They may have a higher upfront cost, but they can save you money on maintenance and replacement in the future.
Freestanding Deck
A freestanding deck is a versatile and portable DIY small deck idea that can be placed anywhere in your outdoor space. Whether you have a small yard, a patio, or even a balcony, a freestanding deck provides a dedicated area for relaxation and entertainment. Here’s what you’ll need and how to build your own freestanding deck:
Materials Needed:
- Pressure-treated lumber or composite boards
- Concrete deck blocks
- Metal brackets
- Gravel or sand for leveling
- Galvanized deck screws
- Drill
- Measuring tape
- Level
- Circular saw
- Work gloves
Step-by-step Instructions:
- Plan and measure: Determine the size and layout of your freestanding deck. Mark the outline using stakes and string. Measure and adjust until you’re satisfied with the dimensions.
- Prepare the ground: Clear the area and remove any grass or vegetation. Level the ground using a rake and remove any large rocks or debris. If needed, add a layer of gravel or sand for stability.
- Install the deck blocks: Place concrete deck blocks spaced evenly within the outlined area. Make sure they are level and adjust as necessary. Add gravel under each block for stability.
- Build the frame: Cut pressure-treated lumber or composite boards to create the frame of the deck. Attach the boards together using galvanized deck screws. Use a level to ensure the frame is even and square.
- Attach the frame to the deck blocks: Secure the frame to the deck blocks using metal brackets and galvanized deck screws. Ensure that it is tightly attached and level for stability.
- Install the decking boards: Lay the decking boards perpendicular to the frame and attach them using deck screws. Leave a small gap between the boards for drainage.
- Finishing touches: Trim any excess decking boards and sand any rough edges. You can stain or paint the freestanding deck to protect and enhance its appearance, following the manufacturer’s instructions.
- Add furniture and decor: Complete your freestanding deck by adding outdoor furniture, potted plants, and other decorative elements to create a cozy and inviting outdoor space.
A freestanding deck offers the flexibility to place it wherever you desire in your outdoor space. It provides a dedicated area for relaxation, dining, or entertaining, and can be easily moved or modified as needed. Enjoy the convenience and versatility of a freestanding deck in your small outdoor oasis!
Patio Deck
A patio deck is a wonderful DIY small deck idea that transforms your existing patio into an inviting outdoor space. Whether you have a concrete patio, a brick patio, or even a paver patio, you can easily build a deck right on top of it. Here’s what you’ll need and how to build your own patio deck:
Materials Needed:
- Pressure-treated lumber or composite boards
- Concrete deck blocks or adjustable deck supports
- Metal brackets
- Gravel or sand for leveling
- Galvanized deck screws
- Drill
- Measuring tape
- Level
- Circular saw
- Work gloves
Step-by-step Instructions:
- Plan and measure: Determine the size and layout of your patio deck. Measure the dimensions of your existing patio and decide how much space you want to dedicate to the deck. Mark the outline using stakes and string.
- Prepare the ground: Clear the patio area and remove any debris. Level the ground using a rake and remove any uneven spots. If needed, add a layer of gravel or sand for stability.
- Install the deck blocks or supports: Place concrete deck blocks or adjustable deck supports on the patio surface. Make sure they are level and adjust as necessary. If using deck supports, adjust them to the desired height.
- Build the frame: Cut pressure-treated lumber or composite boards to create the frame of the deck. Attach the boards together using metal brackets and galvanized deck screws. Use a level to ensure the frame is even and square.
- Attach the frame to the deck blocks or supports: Secure the frame to the deck blocks or supports using metal brackets and galvanized deck screws. Ensure that it is securely anchored and level for stability.
- Install the decking boards: Lay the decking boards perpendicular to the frame and attach them using deck screws. Leave a small gap between the boards for drainage.
- Finishing touches: Trim any excess decking boards and sand any rough edges. You can stain or paint the patio deck to protect and enhance its appearance, following the manufacturer’s instructions.
- Add furniture and decor: Complete your patio deck by adding outdoor furniture, potted plants, and other decorative elements to create a cozy and inviting outdoor space that seamlessly blends with your existing patio.
A patio deck is a fantastic way to maximize your outdoor space and transform your patio into an extension of your living area. With a DIY patio deck, you can enjoy outdoor activities, entertaining, and relaxation in style and comfort.
Read more: How To Build An Angled Deck Step-by-Step
Mini Deck with Built-in Benches
A mini deck with built-in benches is a space-saving and functional DIY small deck idea that provides seating while maximizing the use of limited space. This design is perfect for a cozy corner or a small balcony where you can relax and enjoy the outdoors. Here’s what you’ll need and how to build your own mini deck with built-in benches:
Materials Needed:
- Pressure-treated lumber or composite boards
- Deck screws
- Drill
- Measuring tape
- Level
- Circular saw
- Work gloves
- Sandpaper
Step-by-step Instructions:
- Plan and measure: Determine the size and layout of your mini deck with built-in benches. Measure the available space and decide on the dimensions of the deck and the benches.
- Prepare the ground: Clear the area and ensure it is level and free from any debris.
- Build the deck frame: Cut pressure-treated lumber or composite boards to create the frame of the deck. Attach the boards together using deck screws. Use a level to ensure the frame is even and square.
- Attach the decking boards: Lay the decking boards perpendicular to the frame and attach them using deck screws. Leave a small gap between the boards for drainage.
- Build the bench frames: Cut pressure-treated lumber or composite boards to create the frames of the benches. Attach the boards together using deck screws.
- Attach the bench frames to the deck: Position the bench frames along the edges of the deck and attach them securely using deck screws.
- Add the seating surfaces: Cut and attach additional pieces of pressure-treated lumber or composite boards as the seating surfaces for the benches.
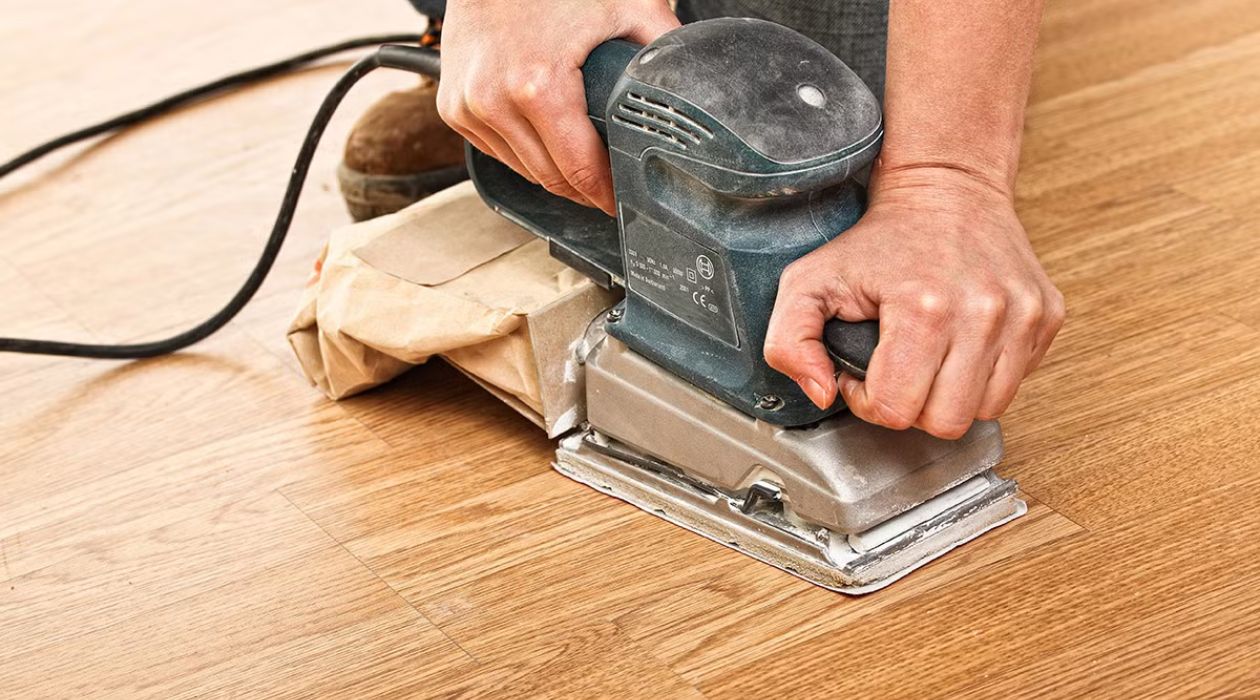
- Sand and finish: Use sandpaper to smooth any rough edges or surfaces. Apply a stain or paint to protect the wood and enhance its appearance, following the manufacturer’s instructions.
- Add cushions and accessories: Complete your mini deck with built-in benches by adding seat cushions, outdoor pillows, and other accessories to create a comfortable and inviting area to relax.
A mini deck with built-in benches provides a cozy and practical outdoor seating area, perfect for enjoying a morning cup of coffee or relaxing with a good book. With its compact design and integrated seating, this deck is a space-saving solution that adds comfort and style to your small outdoor space.
Repurposed Wood Deck
A repurposed wood deck is a sustainable and environmentally friendly DIY small deck idea that gives new life to old or salvaged wood. By repurposing wood from pallets, fences, or other sources, you can create a unique and rustic deck with character. Here’s what you’ll need and how to build your own repurposed wood deck:
Materials Needed:
- Repurposed wood (such as pallets, reclaimed lumber, or salvaged fencing)
- Deck screws
- Circular saw
- Measuring tape
- Level
- Drill
- Work gloves
- Sandpaper
Step-by-step Instructions:
- Plan and measure: Determine the size and layout of your repurposed wood deck. Measure the available space and the dimensions of the repurposed wood pieces.
- Prepare the ground: Clear the area and ensure it is level and free from any debris.
- Prepare the repurposed wood: If needed, remove nails or other fasteners from the repurposed wood using a hammer or pry bar. Cut or trim the wood pieces to the desired lengths if necessary.
- Build the deck frame: Lay out the repurposed wood pieces to create the deck frame. Use deck screws to attach them together at the corners and at regular intervals along the boards.
- Attach the decking boards: Lay the repurposed wood boards perpendicular to the frame and attach them using deck screws. Leave a small gap between the boards for drainage.
- Sand and finish: Use sandpaper to smooth any rough edges or surfaces of the repurposed wood. Apply a sealant or finish to protect the wood and enhance its appearance.
- Add final touches: Once the deck is complete, add any additional features or accessories you desire, such as railings, stairs, or seating options.
A repurposed wood deck not only adds charm and uniqueness to your outdoor space but also contributes to reducing waste and promoting sustainability. By giving old wood a new purpose, you can create a one-of-a-kind deck that reflects your creativity and love for the environment.
Small Deck with Privacy Screen
A small deck with a privacy screen is a perfect DIY project for creating a secluded and intimate outdoor space. This deck provides both functionality and privacy, making it an ideal spot for relaxing, entertaining, or enjoying some quiet time. Here’s what you’ll need and how to build your own small deck with a privacy screen:
Materials Needed:
- Pressure-treated lumber or composite boards
- Deck screws
- Drill
- Measuring tape
- Level
- Circular saw
- Work gloves
- Privacy screen panels (such as lattice, bamboo, or outdoor fabric)
- Additional support posts
Step-by-step Instructions:
- Plan and measure: Determine the size and layout of your small deck with a privacy screen. Measure the available space and decide on the dimensions of the deck and the privacy screen.
- Prepare the ground: Clear the area and ensure it is level and free from any debris.
- Build the deck frame: Cut pressure-treated lumber or composite boards to create the frame of the deck. Attach the boards together using deck screws. Use a level to ensure the frame is even and square.
- Attach the decking boards: Lay the decking boards perpendicular to the frame and attach them using deck screws. Leave a small gap between the boards for drainage.
- Build the privacy screen frame: Cut pressure-treated lumber or composite boards to create the frame of the privacy screen. Attach the boards together using deck screws. Determine the height and width of the privacy screen based on your desired level of privacy.
- Attach the privacy screen panels: Install privacy screen panels (such as lattice, bamboo, or outdoor fabric) to the frame using appropriate fasteners. Ensure the panels are securely attached and provide the desired level of privacy.
- Secure the privacy screen frame: Install additional support posts if needed to ensure the stability and strength of the privacy screen. Attach them to the deck frame using deck screws.
- Finishing touches: Trim any excess decking boards and sand any rough edges. Apply a stain or paint to protect the deck and privacy screen, following the manufacturer’s instructions.
- Add furniture and decor: Complete your small deck with a privacy screen by adding outdoor furniture, potted plants, and other decorative elements to create a cozy and private outdoor oasis.
A small deck with a privacy screen offers a secluded retreat where you can relax and unwind without worrying about prying eyes. Enjoy the serenity and seclusion of your outdoor space with this DIY project that combines functionality and style.
Conclusion
Creating a small deck on a budget is an excellent way to enhance your outdoor space and enjoy the beauty of nature right in your own backyard. Whether you have a small yard, a balcony, or a cozy corner, these DIY deck ideas provide creative and cost-effective solutions to transform your outdoor space into a haven for relaxation and entertainment.
From the versatility of pallet decks to the portability of floating decks, there are options to suit every style and requirement. The gravel deck offers a low-maintenance and affordable choice, while the planter box deck adds a touch of greenery and beauty. The platform deck provides a versatile and straightforward design, and the cinder block deck brings an industrial and modern aesthetic.
For those with limited space, the freestanding deck and patio deck allow you to maximize the potential of your backyard or patio. The mini deck with built-in benches provides seating while saving space, and the repurposed wood deck is a sustainable and unique option. Lastly, the small deck with a privacy screen offers both functionality and seclusion.
When embarking on a DIY small deck project, remember to plan carefully, measure accurately, and select materials that fit your budget and style. Follow the step-by-step instructions provided for each deck idea, and don’t be afraid to add your personal touch with embellishments and decorations to make it truly yours.
With a little creativity, effort, and some basic tools, you can create a beautiful and inviting space where you can relax, entertain, and make lasting memories. Get inspired by these DIY small deck ideas and start transforming your outdoor space into a cozy retreat that reflects your personal style and enhances your enjoyment of the great outdoors.
Ready to spruce up your outdoor living area even further? After diving into DIY small deck ideas, why not add some flair with stylish decorations? Our next feature offers creative and chic deck decorating ideas that ensure your space isn't just functional but also a highlight of your home. From simple additions to more elaborate designs, find inspiration to make your deck the perfect spot for relaxation or entertainment.
Frequently Asked Questions about 11 DIY Small Deck Ideas On A Budget To Steal From This Project
Was this page helpful?
At Storables.com, we guarantee accurate and reliable information. Our content, validated by Expert Board Contributors, is crafted following stringent Editorial Policies. We're committed to providing you with well-researched, expert-backed insights for all your informational needs.


0 thoughts on “11 DIY Small Deck Ideas On A Budget To Steal From This Project”