Home>Interior Design>How To Paint Wood Furniture: An Expert Guide
Interior Design
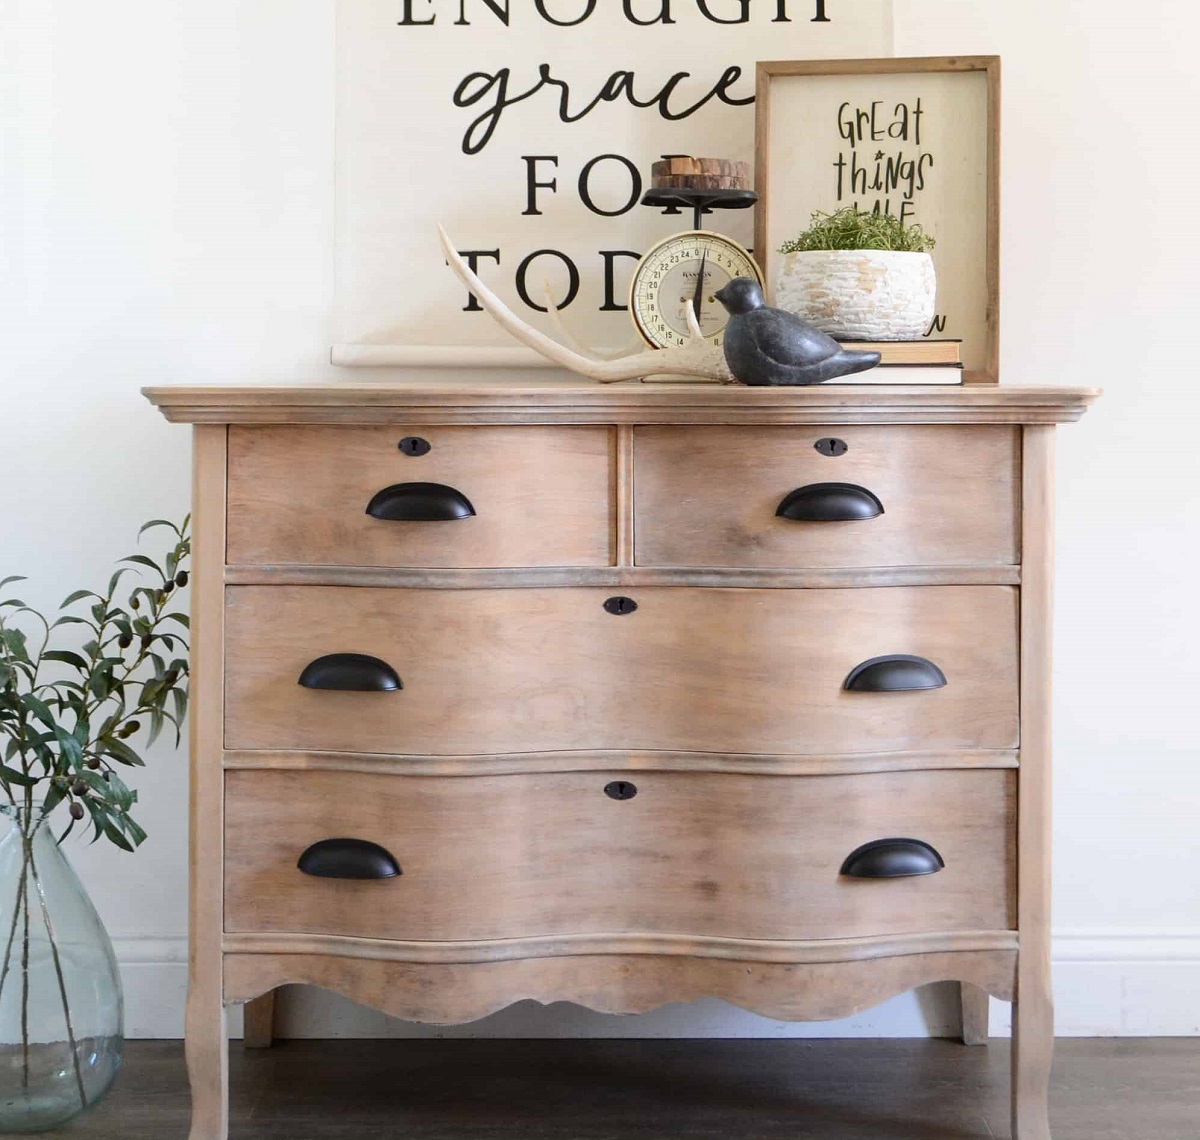
How To Paint Wood Furniture: An Expert Guide
Modified: January 9, 2024
Learn how to paint wood furniture with our expert guide, perfect for interior design enthusiasts. Unleash your creativity and transform any piece in your home.
(Many of the links in this article redirect to a specific reviewed product. Your purchase of these products through affiliate links helps to generate commission for Storables.com, at no extra cost. Learn more)
Introduction
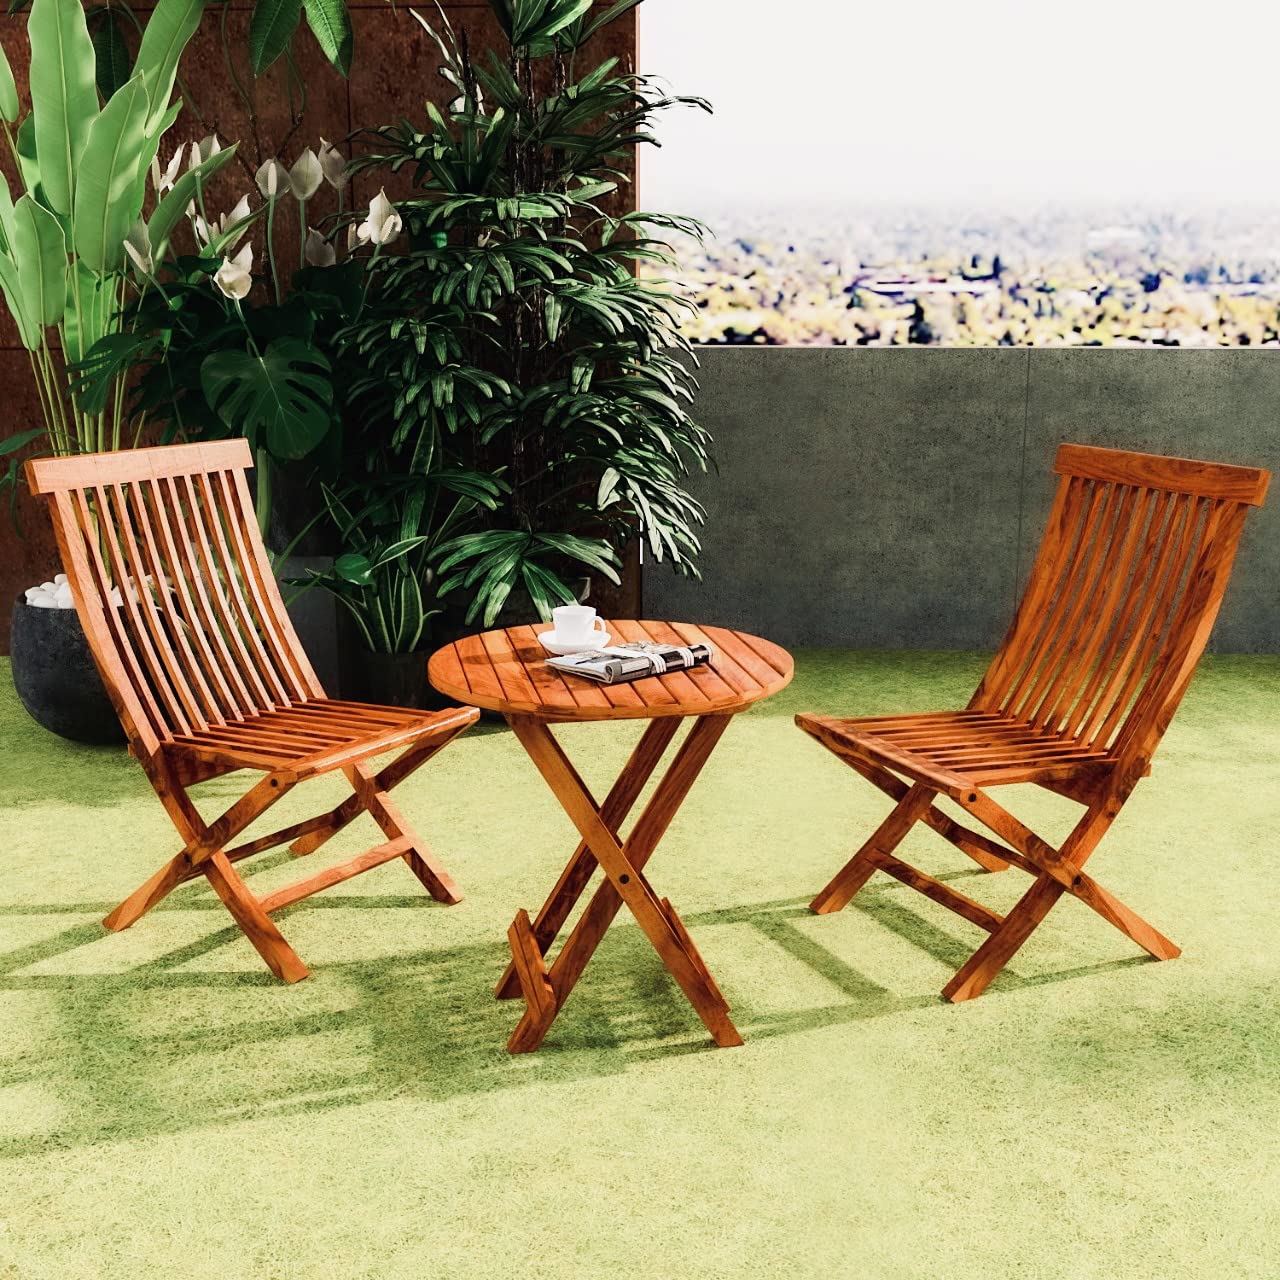
When it comes to revamping the look of your home, one easy and cost-effective way to make a big impact is by painting your wood furniture. Whether you have an old dresser that needs a makeover or a worn-out coffee table that needs a fresh new look, painting can breathe new life into these pieces and transform the overall aesthetic of your living space.
While painting wood furniture might seem like a daunting task, it is actually quite achievable with the right guidance and know-how. In this expert guide, we will take you through the step-by-step process of painting wood furniture, from preparing the furniture to adding finishing touches. By following these tips and techniques, you will be able to achieve professional-looking results and enjoy your newly painted furniture for years to come.
Before we dive into the specifics of painting wood furniture, it’s important to note that preparation is key to a successful paint job. Taking the time to properly prepare the furniture, choose the right paint, and follow the correct techniques will ensure a durable and beautiful finish.
So, grab your paintbrushes and let’s get started on transforming your wood furniture!
Key Takeaways:
- Transform your living space by painting wood furniture with the right techniques and care. Achieve professional-looking results and enjoy a personalized, long-lasting aesthetic in your home.
- Prepare, prime, and paint your wood furniture with attention to detail and creativity. Embrace the process and unleash your style to create a stunning focal point for your home.
Read more: How To Paint Wood Furniture White
Preparing the Furniture
Before you can begin painting your wood furniture, it’s essential to properly prepare the surface. This preparation process will help to ensure that the paint adheres well and creates a smooth and long-lasting finish.
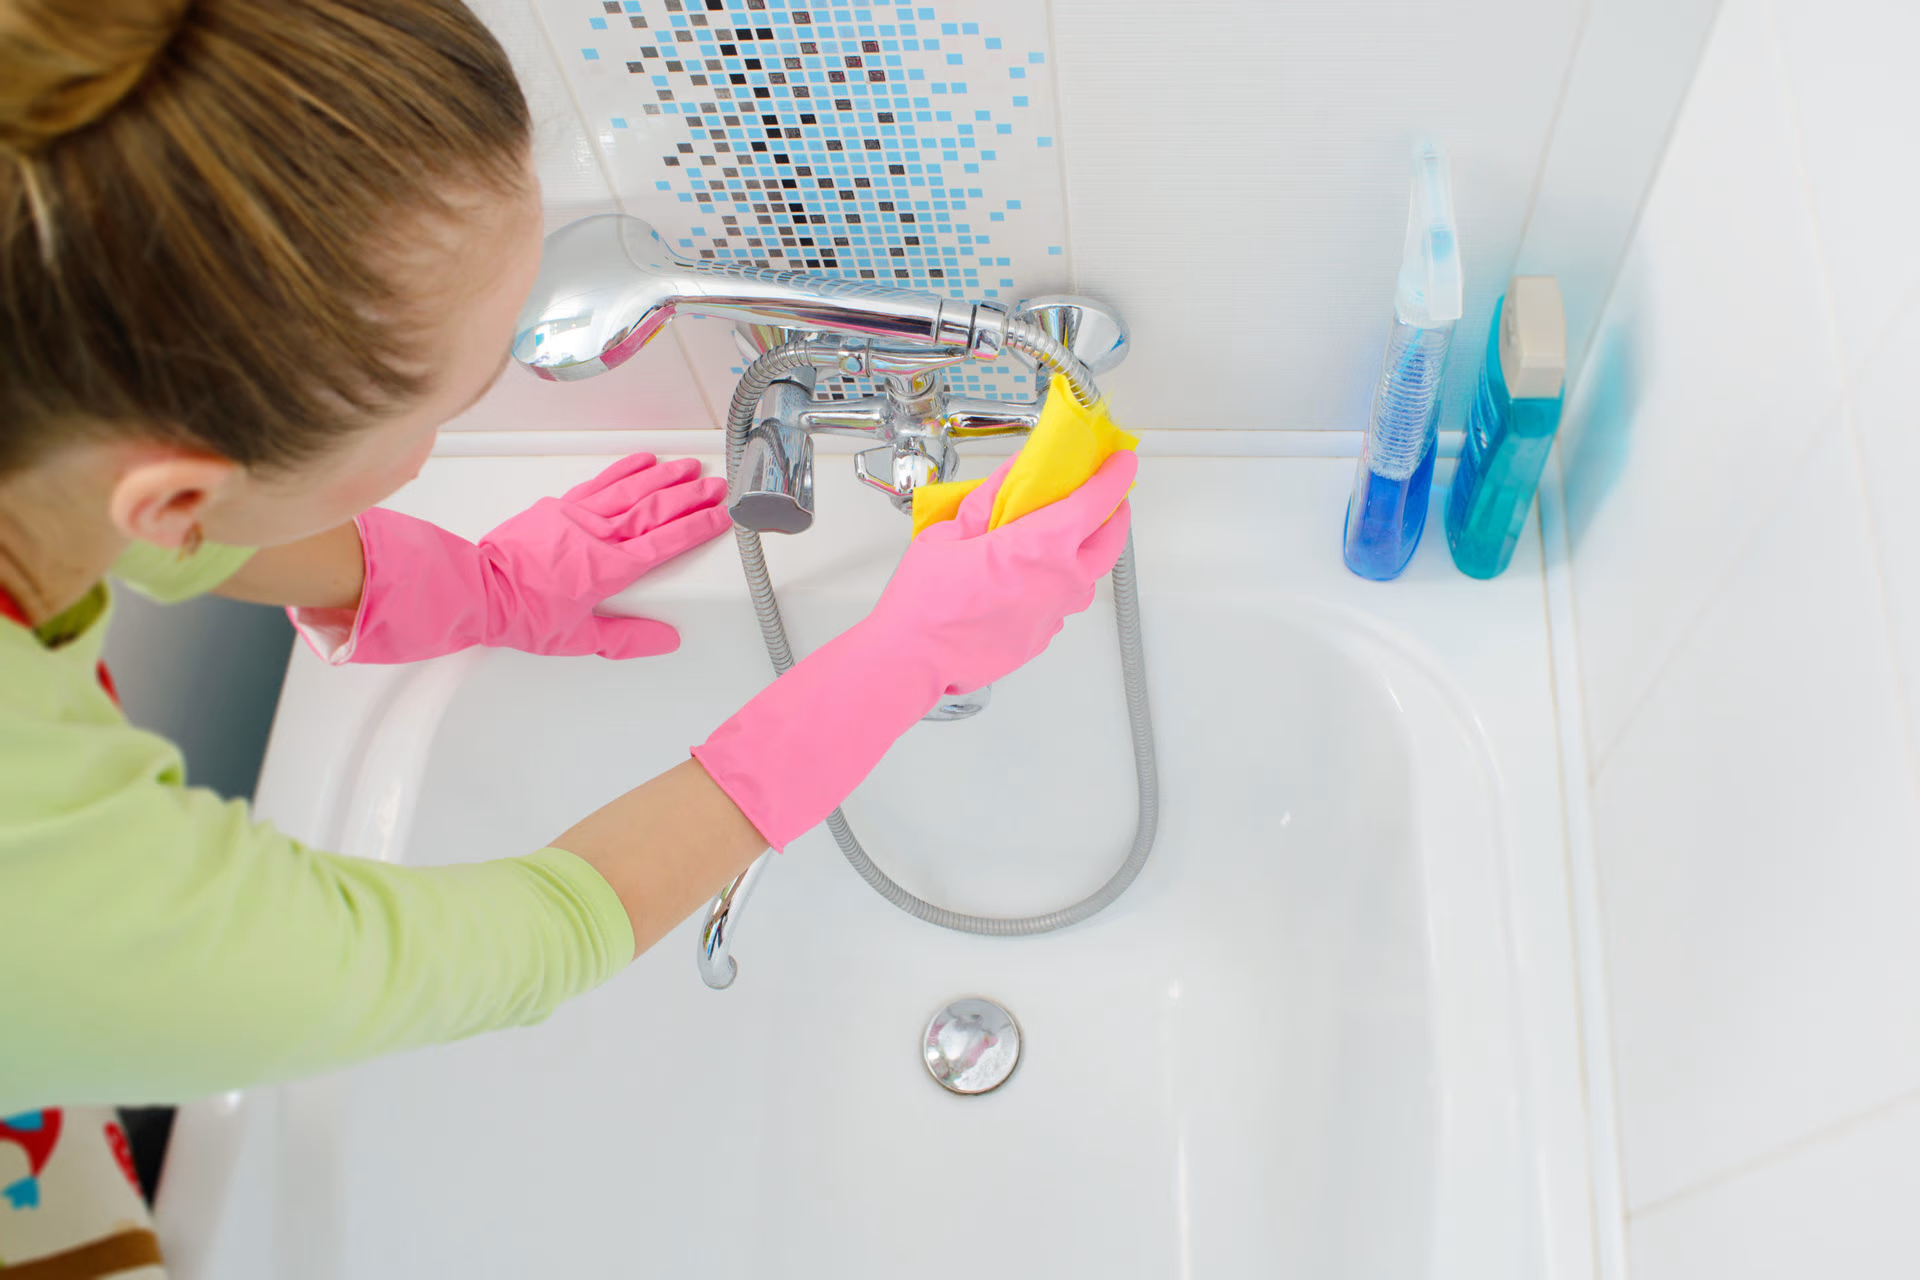
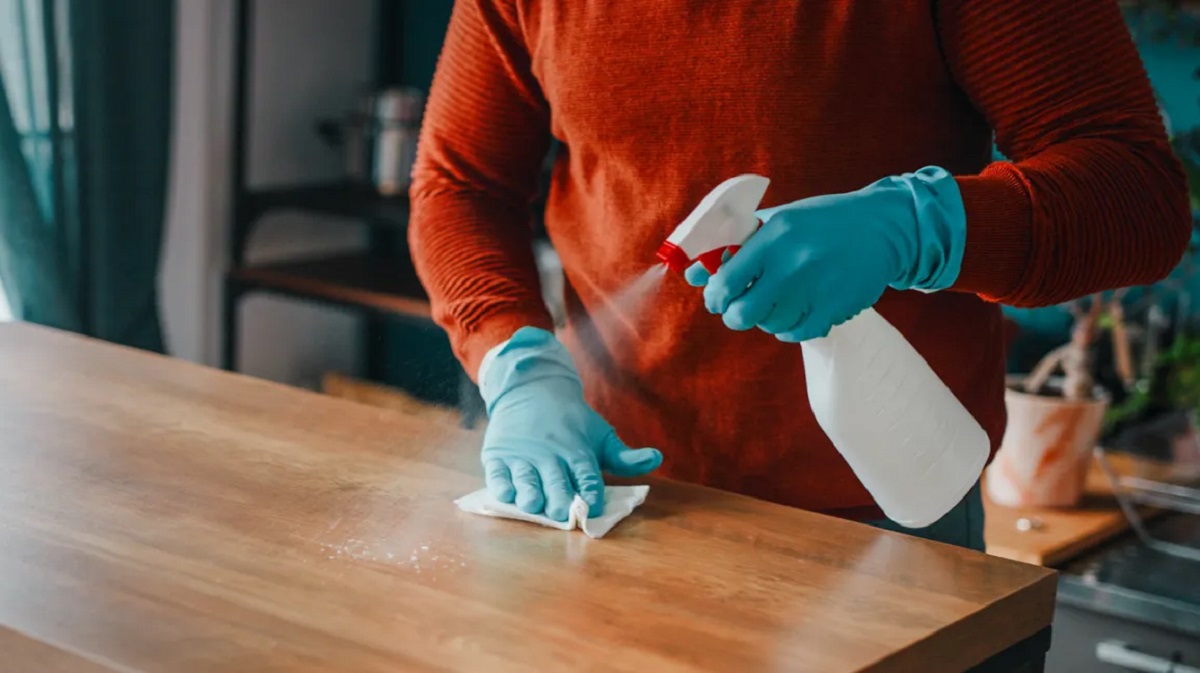
The first step in preparing the furniture is to thoroughly clean it. Use a mild soap or detergent mixed with water to remove any dirt, grime, or oils from the surface. You can also use a gentle scrub brush or sponge to scrub away any stubborn stains. After cleaning, be sure to rinse the furniture with clean water and allow it to dry completely.
If there are any rough patches or imperfections on the wood, you may need to do some light sanding. Use a fine-grit sandpaper to gently sand the surface, following the grain of the wood. This will help to smooth out any rough areas and create a more even surface for the paint to adhere to. After sanding, be sure to wipe away any dust with a clean cloth or tack cloth.
Next, inspect the furniture for any existing paint or finish. If there is old paint or finish that is chipping or peeling, it’s important to remove it before proceeding with the painting process. You can use a paint stripper or a heat gun to loosen and remove the old paint. Be sure to follow the manufacturer’s instructions and take proper safety precautions when using these products.
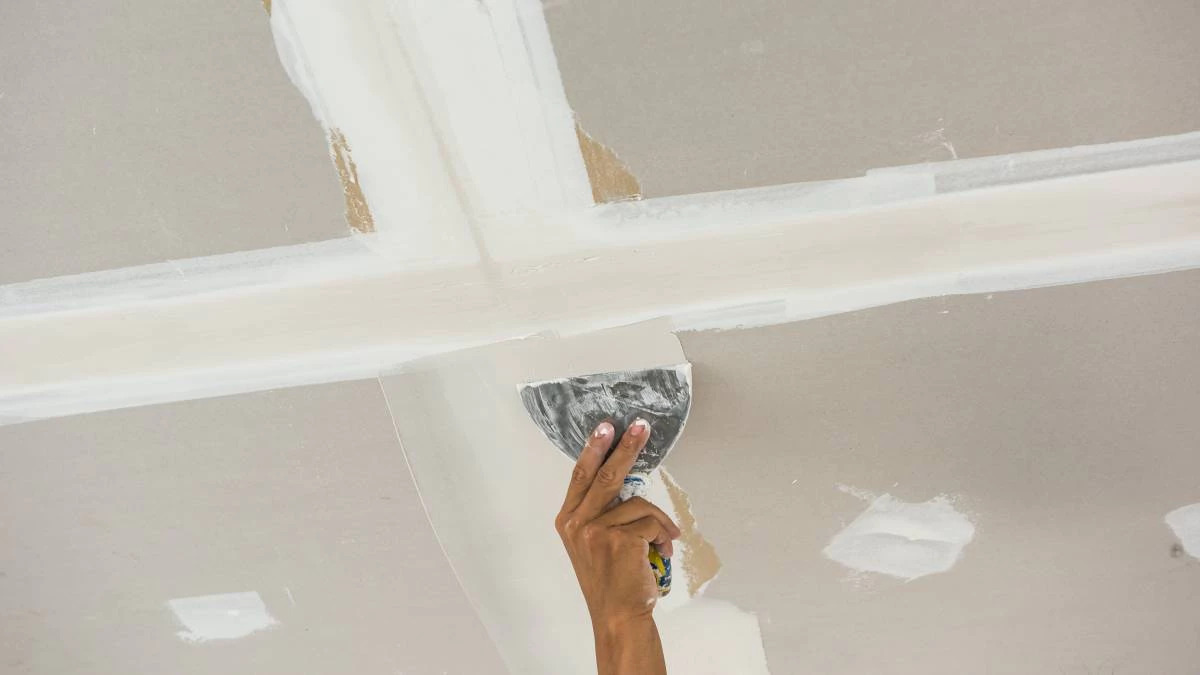
Once the old paint or finish has been removed, you may notice imperfections, such as dents or scratches, in the wood. You can fill these with wood filler or putty and sand them down to create a smooth and even surface. This step is optional but can help to achieve a more polished final result.
Finally, if there are any hardware or accessories attached to the furniture, such as knobs or handles, you may want to remove them before painting. This will allow you to paint the furniture more easily and ensure a clean and professional finish. If removing the hardware is not an option, you can use painter’s tape to protect them from getting painted. Just make sure to cover them securely and avoid any paint seepage.
By thoroughly preparing the furniture before painting, you are setting a solid foundation for a successful paint job. Taking the time to clean, sand, and remove old paint or finish will ensure that the new paint adheres properly and provides a beautiful and durable finish.
Choosing the Right Paint
When it comes to painting wood furniture, choosing the right paint is crucial for achieving the desired results. The type of paint you select will depend on the look you want to achieve, the type of wood you are working with, and the level of durability you require.
One of the most popular types of paint for wood furniture is latex paint. Latex paint is easy to work with, dries quickly, and provides a durable finish. It is available in a wide range of colors and finishes, allowing you to customize the look of your furniture to suit your personal style.
If you’re looking for a more traditional and classic finish, consider using oil-based paint. Oil-based paints provide a smoother and more lustrous appearance, but they do take longer to dry and have a stronger odor. Additionally, they may require the use of a primer for proper adhesion.
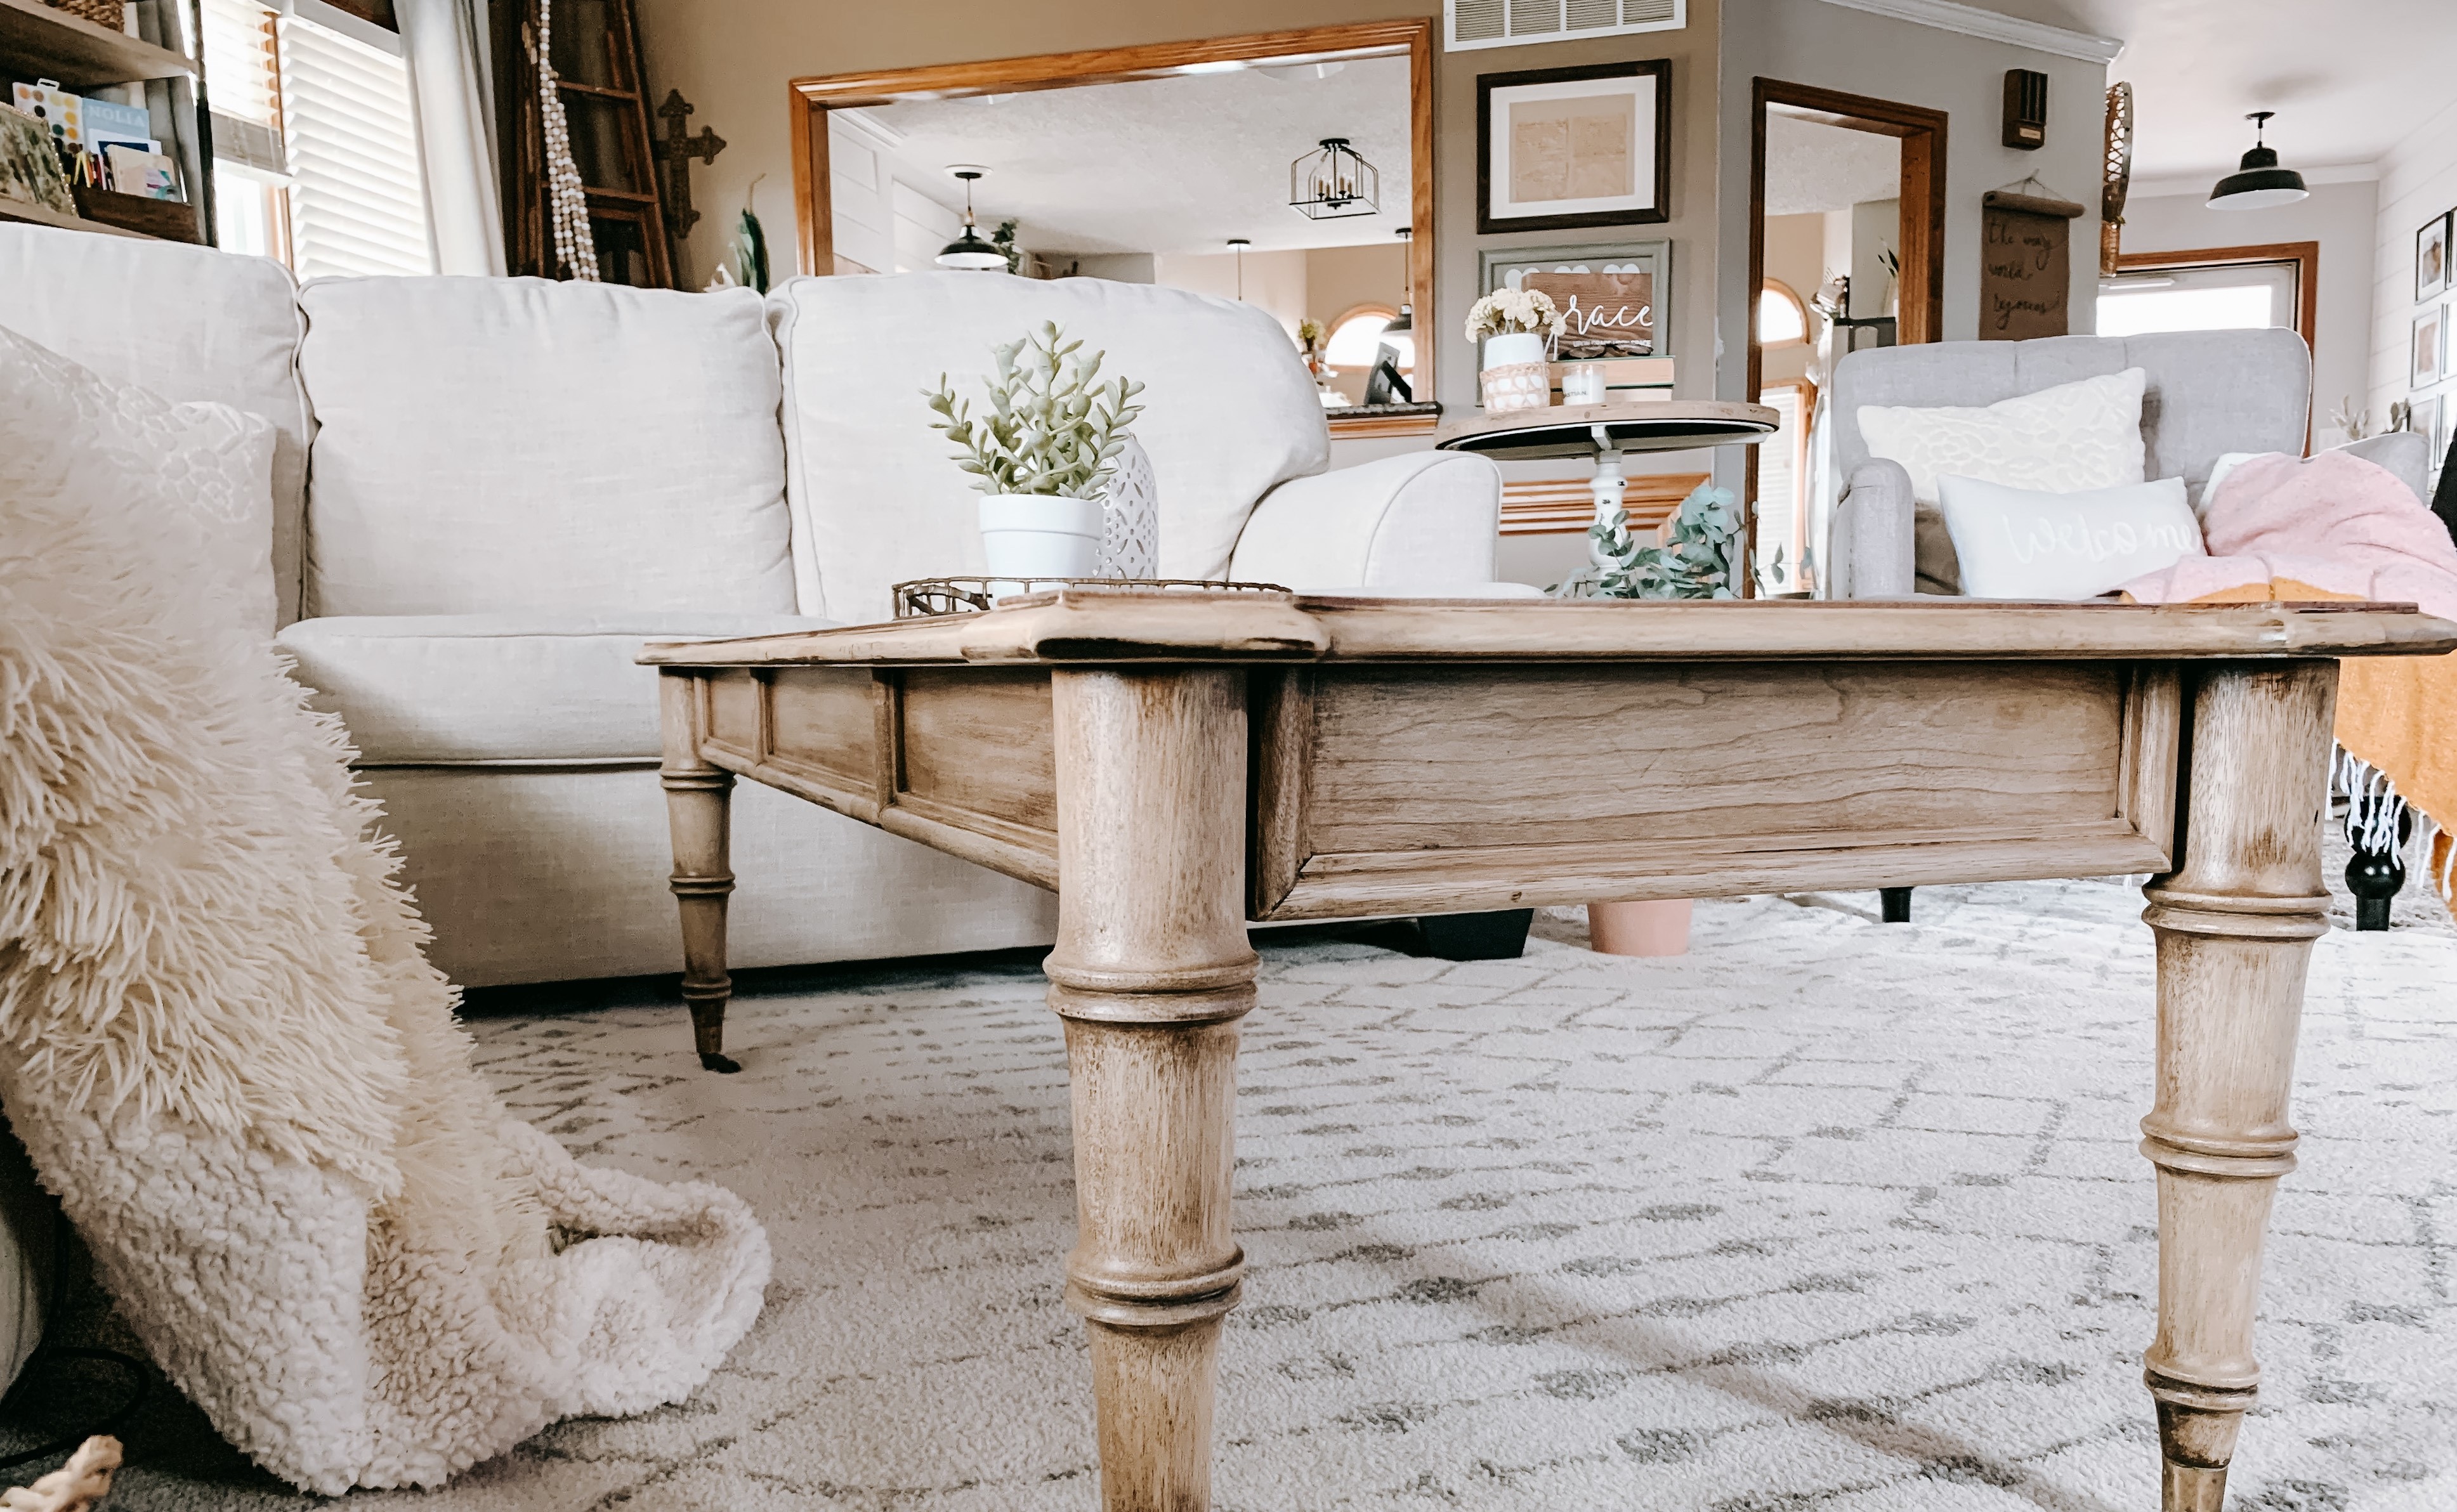
Another option to consider is chalk paint. Chalk paint has gained popularity in recent years for its ability to create a distressed or vintage look. It is known for its matte finish and can be easily distressed or waxed to achieve a unique and aged appearance.
Before purchasing paint, it’s important to consider the type of wood you are working with. If you are painting a piece of furniture made from a porous wood, such as pine or oak, you may need to use a primer to prevent the paint from being absorbed unevenly. This will help to achieve a smooth and uniform finish.
In addition to considering the type of paint, you should also think about the sheen or finish. The sheen refers to the level of shine in the paint, ranging from a high-gloss finish to a flat or matte finish. High-gloss paints are more reflective and can create a dramatic and modern look, while flat or matte paints have a more subdued and understated appearance.
When selecting paint for your wood furniture, it’s always a good idea to test a small area first to ensure that you are happy with the color, coverage, and finish. This can help you avoid any surprises once you start painting the entire piece.
By choosing the right paint for your wood furniture, you can achieve the desired aesthetic and ensure that the paint provides a durable and long-lasting finish. Consider the type of paint, the type of wood, and the desired finish to make an informed decision and bring your furniture to life with a fresh coat of paint.
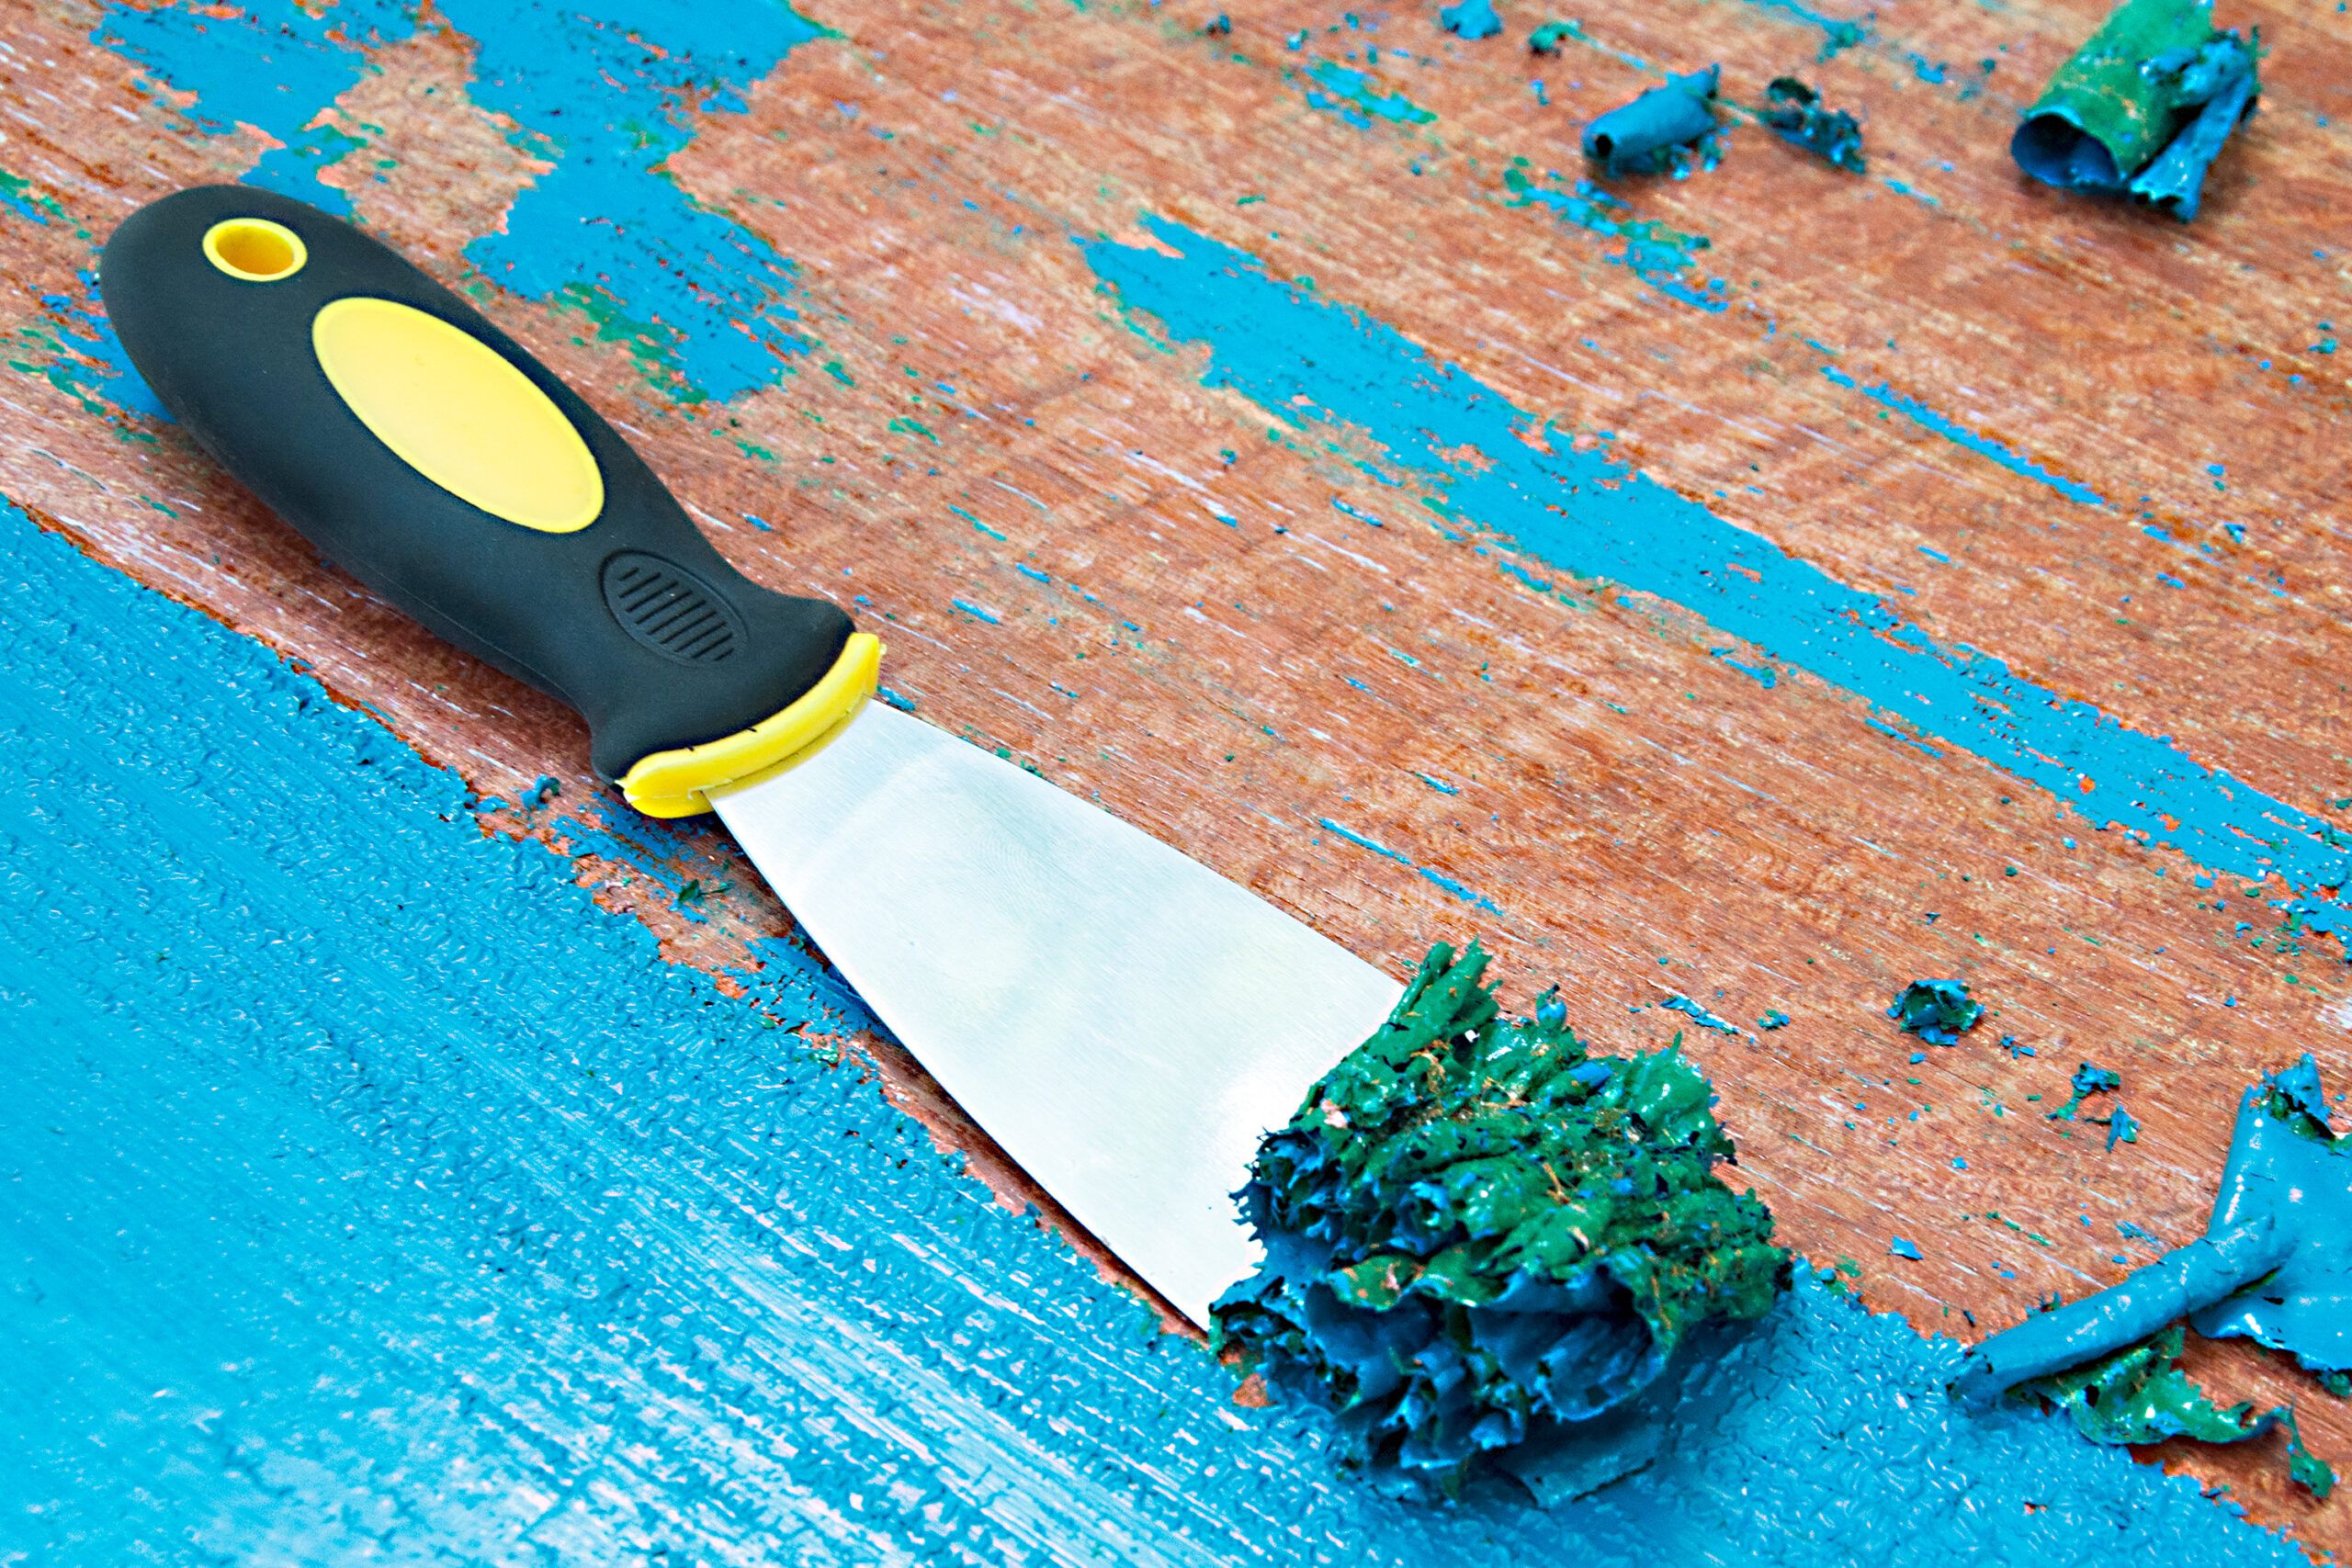
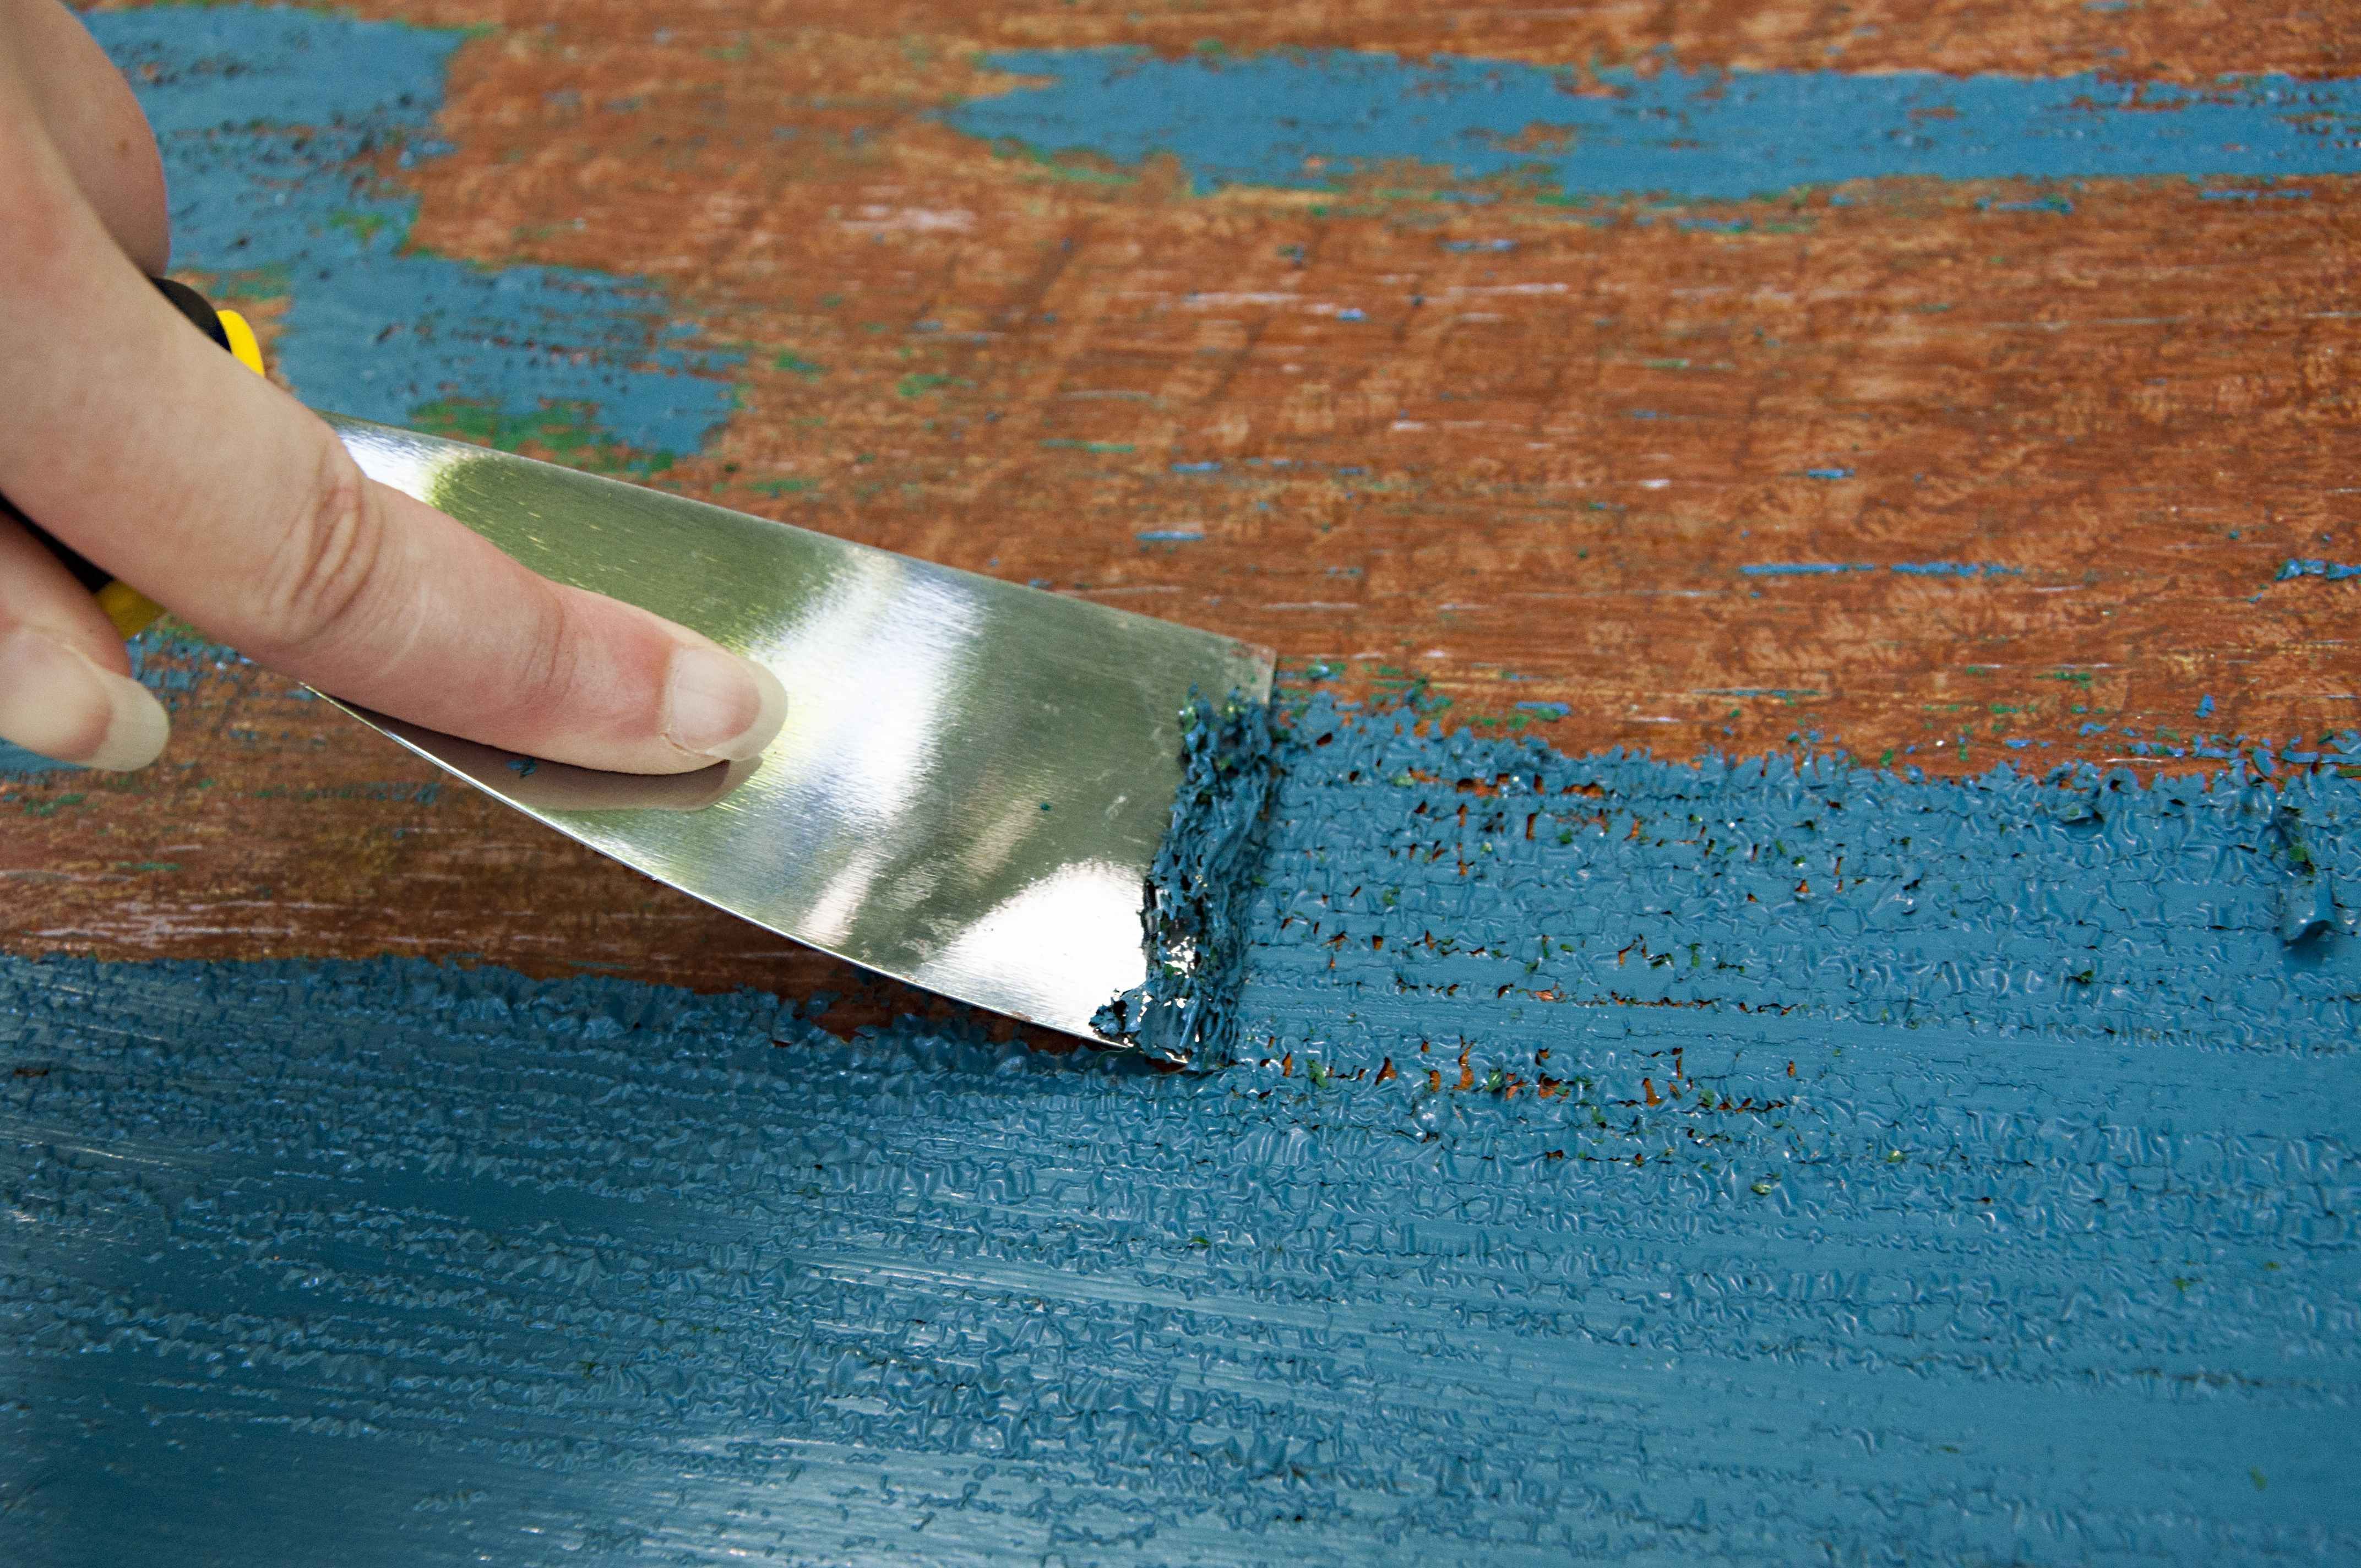
Removing Old Paint or Finish
Before you can apply a fresh coat of paint to your wood furniture, it’s important to remove any old paint or finish that may be present. This step is crucial because it helps to ensure that the new paint adheres properly and creates a smooth and flawless finish.
There are several methods you can use to remove old paint or finish from wood furniture. The method you choose will depend on the type of paint or finish you are dealing with and your personal preference.
One common method is to use a chemical paint stripper. Paint strippers contain a solvent that penetrates the layers of paint or finish, loosening it and making it easier to remove. Follow the instructions provided by the manufacturer when using a paint stripper, as safety precautions may vary.
Another option is to use a heat gun to soften the old paint or finish. By heating the surface, the paint becomes pliable and can be scraped away with a paint scraper or putty knife. It’s important to be cautious when using a heat gun, as excessive heat can damage the wood or even cause a fire hazard.
If the old paint or finish is flaking or peeling, you can also consider sanding it off. Start by using a coarse-grit sandpaper to remove the majority of the paint or finish, then switch to a finer-grit sandpaper to achieve a smooth surface. Be sure to sand in the direction of the wood grain to avoid creating scratches or gouges.
Whichever method you choose, it’s important to work in a well-ventilated area and take appropriate safety precautions. Wear safety goggles, gloves, and a mask to protect yourself from any chemicals or debris generated during the paint removal process.
After removing the old paint or finish, be sure to thoroughly clean the wood surface to remove any residue or dust. You can use a mild detergent mixed with water and a clean cloth or sponge to wipe down the furniture. Allow the wood to dry completely before moving on to the next step of the painting process.
By removing old paint or finish from your wood furniture, you are creating a clean and smooth canvas for your new paint job. Take your time and follow the appropriate safety measures to ensure a successful paint removal process, ultimately leading to a beautifully painted piece of furniture.
Sanding the Surface
Sanding the surface of your wood furniture is an essential step in the painting process. Sanding helps to create a smooth and even surface, removes imperfections, and allows the paint to adhere better to the wood.
Before you begin sanding, make sure that the furniture is clean and free of any dust or debris. If there are any hardware or accessories attached to the furniture, such as knobs or handles, consider removing them to make sanding easier.
Start by using a medium-grit sandpaper, around 120 to 150 grit, to sand the entire surface of the furniture. It’s best to sand in the direction of the wood grain to avoid creating scratches. Apply even pressure and use long, smooth strokes to create a uniform finish.
If there are any rough areas, dents, or scratches on the surface, spend some extra time sanding those areas to smooth them out. It’s important to remove as much of the old finish or imperfections as possible for the best results.
Once you have sanded the entire surface with the medium-grit sandpaper, switch to a finer-grit sandpaper, such as 220 grit. This will help to further smooth the surface and prepare it for the paint application. Sand lightly, using a gentle touch, to avoid removing too much wood or creating deep scratches.
After sanding, it’s important to remove any dust or debris that may be left on the furniture. Use a clean cloth or a tack cloth to wipe down the entire surface, making sure to remove any particles that could interfere with the paint application.
Sanding the surface of your wood furniture may seem time-consuming, but it will greatly contribute to the overall finish and longevity of the paint job. By creating a smooth and clean surface, the paint will adhere better and provide a more professional-looking result.
Remember to always sand in a well-ventilated area or wear a mask to protect yourself from breathing in the dust particles. Taking the time to properly sand the surface will set the stage for a successful painting process.
Read more: How To Paint Outdoor Wood Furniture
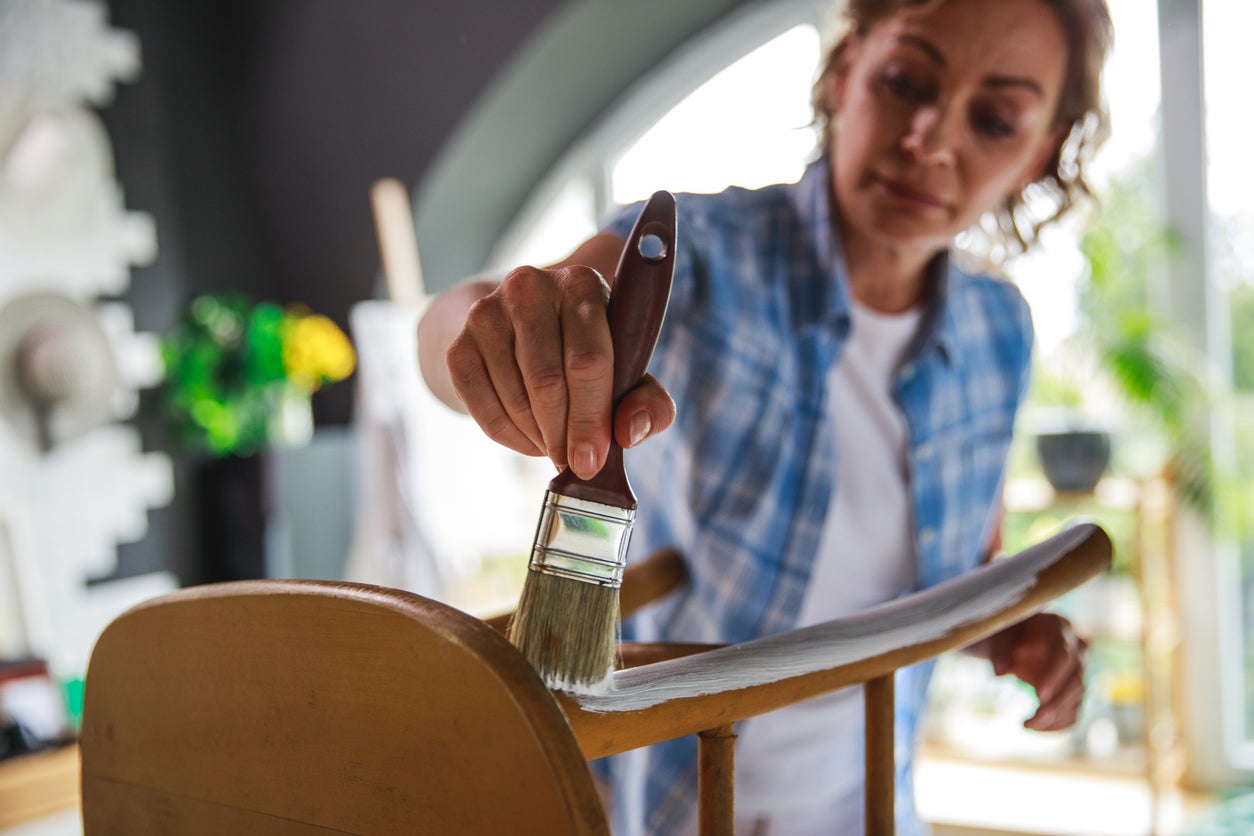
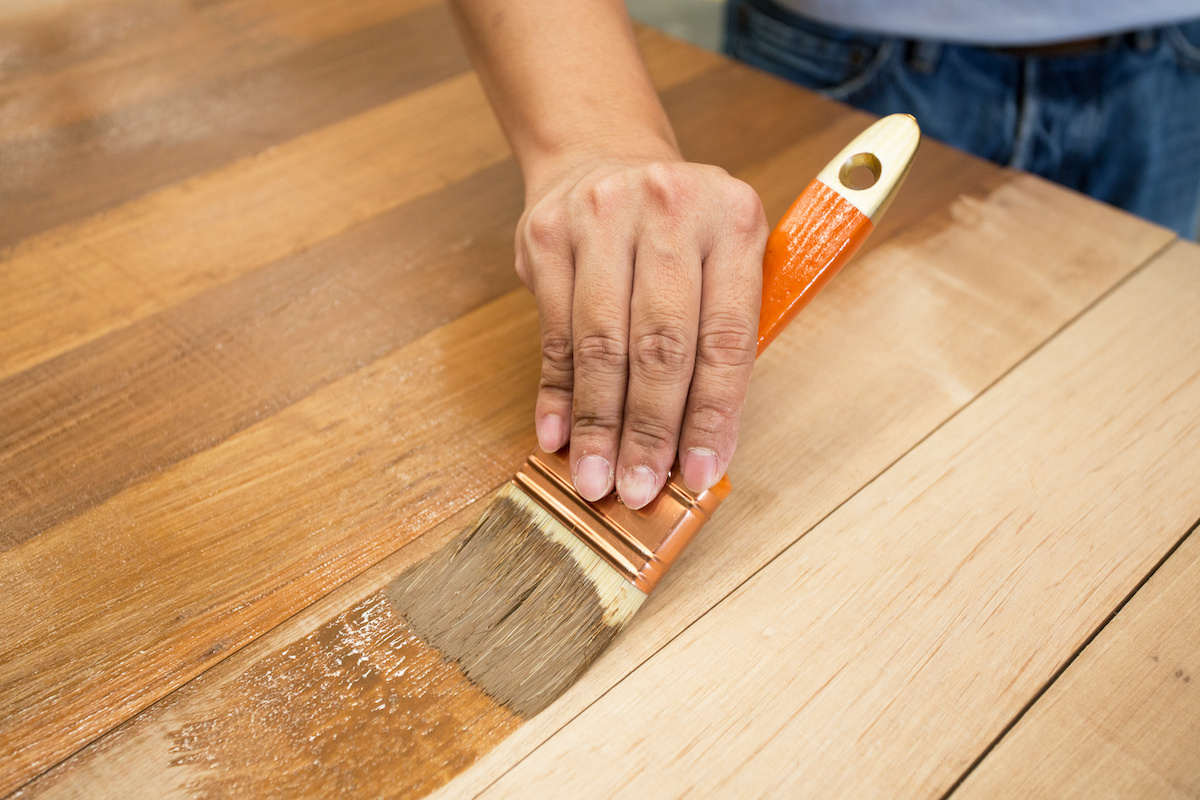
Applying a Primer
Before you start painting your wood furniture, it’s recommended to apply a primer. Primer serves as a preparatory layer that helps the paint adhere better to the surface, improves coverage, and enhances the durability of the paint job.
Choose a primer that is specifically designed for use on wood surfaces. Look for a primer that is compatible with the type of paint you plan to use, whether it is latex, oil-based, or another type.
Before applying the primer, make sure the surface of the furniture is clean and free from any dust or debris. You can use a damp cloth or sponge to wipe down the wood and allow it to dry completely before proceeding.
Using a brush or a roller, apply an even coat of primer to the entire surface of the furniture. Work in smooth and controlled strokes, following the direction of the wood grain. Pay attention to any crevices, corners, or intricate details to ensure the primer covers all areas evenly.
Allow the primer to dry completely according to the manufacturer’s instructions. This may take several hours or overnight, depending on the type of primer you are using. Make sure the primer is fully dry before proceeding to the next steps.
Once the primer has dried, lightly sand the surface with a fine-grit sandpaper, around 220 grit. This step will help to smooth out any imperfections or brush marks and create a smoother surface for the paint to adhere to. Wipe away any dust with a clean cloth or tack cloth.
Applying a primer layer to your wood furniture may seem like an extra step, but it is well worth the effort. The primer provides a solid foundation for the paint, helps to prevent the wood from absorbing the paint unevenly, and increases the longevity of your paint job.
By taking the time to properly prime your furniture, you are ensuring a smoother and more durable finish. The primer will help the paint adhere better and provide a professional-looking result that lasts for years to come.
Before painting wood furniture, make sure to thoroughly clean and sand the surface to ensure the paint adheres properly. Use a high-quality primer to create a smooth base for the paint to adhere to.
Painting Techniques
When it comes to painting wood furniture, using the right painting techniques can make a significant difference in the final result. By employing proper techniques, you can achieve a smooth and flawless finish that enhances the beauty of your furniture piece.
Here are some essential painting techniques to keep in mind:
- Use thin coats: Instead of applying a thick coat of paint all at once, it’s best to use thin and even coats. This allows for better control and helps to prevent drips and uneven application. Apply a thin coat, let it dry completely, then apply additional coats as needed for full coverage.
- Brush strokes: When using a brush to paint, it’s important to pay attention to the direction of your brush strokes. Try to follow the natural grain of the wood for a seamless and professional finish. Avoid applying too much pressure, as this can create brush marks or streaks.
- Roller techniques: If you prefer using a roller for larger surfaces, choose a high-quality roller to achieve a smoother finish. Roll in one direction, applying even pressure, and slightly overlap each stroke to prevent visible lines or roller marks.
- Brush types: Different brushes offer different results. For a smooth finish, consider using a synthetic bristle brush specifically designed for the type of paint you are using. A high-quality brush will help to minimize brush strokes and ensure even coverage.
- Dry brush technique: For a distressed or vintage look, you can use a dry brush technique. Dip your brush lightly into the paint, then remove most of the paint by wiping it off on a paper towel or cloth. Apply the paint with light, quick strokes, allowing some of the wood to show through for a weathered effect.
- Blend colors: If you want to create a unique look, consider blending or layering different paint colors. Start with a base color, then use a dry brush or sponge to apply a second color in a gentle patting or stippling motion. This technique adds depth and dimension to your furniture piece.
Remember to work in a well-ventilated area and allow each coat of paint to dry fully before applying additional coats. Patience and attention to detail in your painting techniques will lead to a beautifully finished piece of furniture.
Experiment with different techniques and find the ones that work best for your desired outcome. Practicing these techniques will help you develop your skills and achieve stunning results as you transform your wood furniture with paint.
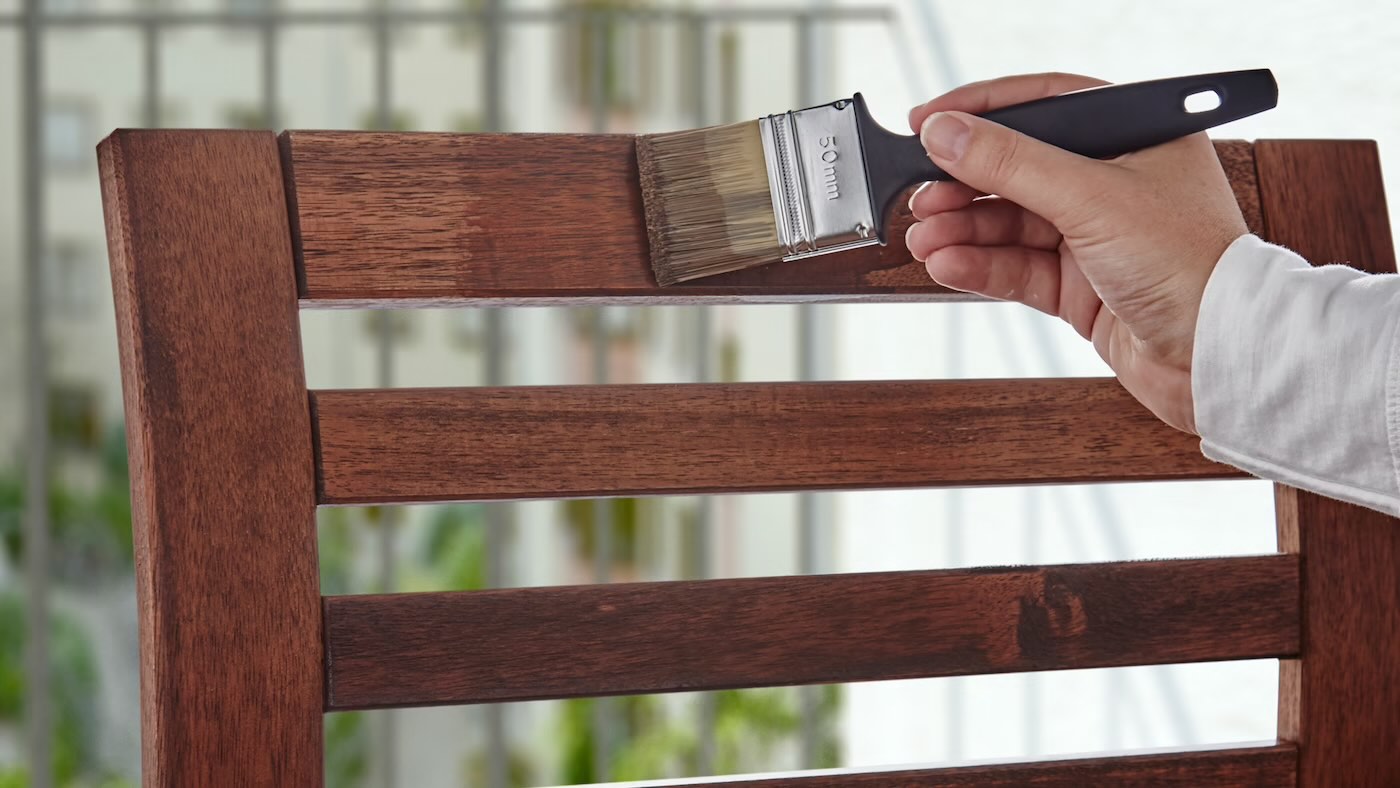
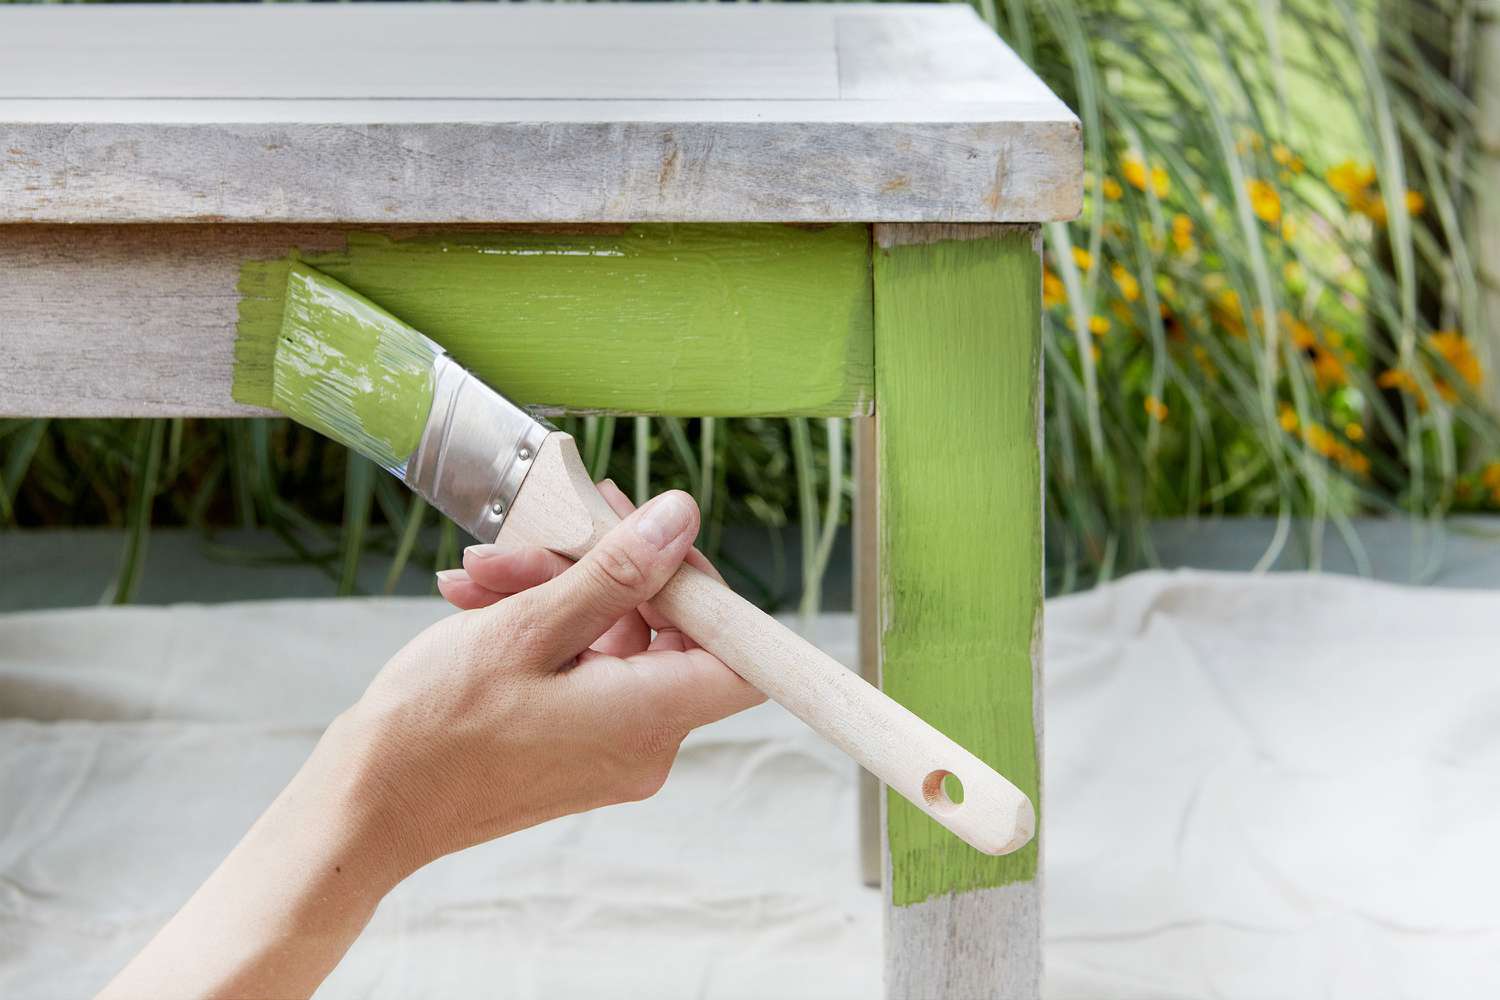
Applying the Paint
Now that you have prepared the furniture, chosen the right paint, and learned about painting techniques, it’s time to apply the paint to your wood furniture. Proper application of the paint will ensure a smooth and professional-looking finish.
Here are the steps to follow when applying the paint:
- Stir the paint: Before you begin, make sure to stir your paint thoroughly. This will help to blend any pigments that may have settled at the bottom of the can.
- Start with the corners and edges: Use a brush to start painting the corners and edges of the furniture. This will allow you to reach areas that may be difficult to access with a roller.
- Apply thin, even coats: When using a brush or a roller, apply thin and even coats of paint to the larger surfaces. Work in small sections and aim for smooth and consistent coverage. Avoid loading too much paint on the brush or roller to prevent drips or excess pooling.
- Follow the grain: Whether using a brush or a roller, try to paint in the direction of the wood grain. This will help to create a seamless and natural finish.
- Watch for drips: As you’re painting, keep an eye out for any drips or excess paint that may accumulate. Immediately smooth them out with your brush or roller to prevent them from drying and leaving an uneven texture.
- Allow drying time: Let each coat of paint dry completely before applying the next one. This will ensure that the paint cures properly and prevents smudging or unwanted texture when adding additional layers.
It’s important to note that some paints may require multiple coats for full coverage. Allow the recommended drying time between coats and assess the coverage before deciding if more coats are needed.
If you notice any imperfections or uneven areas during the painting process, don’t worry. You can lightly sand those areas once the paint has fully dried, and then apply another thin coat to achieve the desired result.
Remember to clean your brushes or rollers promptly after finishing each painting session. This will help to maintain the quality of your tools and ensure smoother application in future painting projects.
By following these steps and applying the paint with care, you’ll be able to achieve a professional-looking finish on your wood furniture. Take your time and enjoy the process as you transform your piece into a stunning focal point for your home.
Adding Finishing Touches
Once you have applied the paint to your wood furniture and allowed it to fully dry, it’s time to add the finishing touches. These final steps will help enhance the overall appearance and durability of your painted furniture.
Here are some tips for adding those finishing touches:
- Protective topcoat: Consider applying a protective topcoat to your painted furniture to seal and protect the paint. This can help prevent scratches, stains, and fading over time. Choose a topcoat that is compatible with the type of paint you used, such as a water-based polyurethane or a clear wax.
- Consider distressing or antiquing: If you want to achieve a distressed or antique look, you can consider sanding or distressing specific areas of the furniture. Use sandpaper or a sanding block to gently remove some of the paint on edges, corners, and areas that would naturally wear over time. This technique adds character and a vintage feel to your piece.
- Hardware and accessories: Reattach any hardware or accessories that you removed before painting. This can include knobs, handles, hinges, or any decorative elements. Make sure they are properly cleaned and securely fastened to complete the look of your painted furniture.
- Additional decorative elements: Add personal flair to your painted furniture by incorporating additional decorative elements. You can stencil designs on the surface, add decals or transfers, or even explore techniques like decoupage to create unique and personalized accents.
- Touch-ups: Step back and carefully inspect your painted furniture for any areas that may need touch-ups or additional detailing. Use a small brush to fix any imperfections or uneven edges, ensuring a polished and seamless finish.
Finishing touches can elevate the appearance of your painted furniture and help protect it from daily wear and tear. Take your time during this phase and pay attention to the details to achieve a professional and visually appealing final result.
Once you are satisfied with the finishing touches, allow your furniture to fully cure and dry according to the recommended timeline provided by the paint manufacturer. This will help ensure that the paint and any protective topcoat have fully hardened and are ready for use.
By adding these final touches, you can truly transform your wood furniture into a statement piece that reflects your personal style and creativity.
Read more: How To Spray Paint Wood Furniture
Caring for Painted Wood Furniture
Once you have painted your wood furniture, it’s important to follow proper care and maintenance practices to preserve the beauty and longevity of the paint job. Taking care of your painted wood furniture will help it stay vibrant and protected for years to come.
Here are some essential tips for caring for your painted wood furniture:
- Prevent scratches and dents: Take precautions to avoid scratching or denting the painted surface. Use coasters, placemats, or tablecloths to protect the furniture from hot dishes, liquids, or sharp objects. Avoid dragging heavy items across the surface as well.
- Regular cleaning: Clean your painted furniture regularly to remove dust and dirt that can accumulate. Use a soft cloth or a feather duster to gently wipe the surface. Avoid using abrasive cleaners or harsh chemicals as they can damage the paint. If you need to remove stains or spills, use a mild soap and water solution.
- Avoid excessive moisture: Moisture can be detrimental to painted wood furniture. Avoid placing your furniture in areas prone to high humidity or direct contact with water. Clean up spills immediately to prevent water damage, warping, or bubbling of the paint.
- Avoid direct sunlight: Prolonged exposure to direct sunlight can cause the paint to fade or discolor over time. Protect your painted furniture by positioning it away from windows or using curtains or blinds to block out harsh sunlight.
- Use furniture pads: Place furniture pads or felt protectors under the legs of your painted furniture to prevent scratches and damage to the underlying floor surface. Check and replace these pads regularly to ensure they are still intact and providing adequate protection.
- Inspect and touch up: Regularly inspect your painted furniture for any signs of wear or damage. If you notice any chips, scratches, or peeling, address them as soon as possible with touch-up paint. This will help maintain the appearance and protect the wood from further damage.
By following these care guidelines, you can extend the lifespan of your painted wood furniture and keep it looking its best. Remember to handle your furniture with care and avoid using harsh chemicals or abrasive materials on the painted surface.
Lastly, enjoy and appreciate your beautifully painted wood furniture. With proper care, it can serve as a stunning focal point in your home for years to come.
Conclusion
Painting wood furniture is a rewarding and creative endeavor that allows you to transform the look and feel of your living space. By following the expert guide provided here, you can confidently tackle your painting project and achieve professional-looking results.
From the initial preparations to choosing the right paint, removing old paint or finish, sanding the surface, applying a primer, mastering painting techniques, and adding finishing touches, each step plays a crucial role in the overall outcome. Taking the time to properly prepare and care for your painted wood furniture will ensure its longevity and maintain its beauty for years to come.
Remember, the key to a successful paint job is a meticulous approach and attention to detail. Take your time, follow the steps outlined in this guide, and don’t be afraid to unleash your creativity. Experiment with different techniques, colors, and finishes to make your furniture pieces truly unique.
Lastly, enjoy the process and have fun with your painting project. The satisfaction of transforming a worn-out or outdated furniture piece into a stunning and personalized focal point in your home is unparalleled. Embrace the opportunity to showcase your style and create a welcoming and aesthetically pleasing space for yourself and others to enjoy.
So, gather your supplies, get inspired, and embark on your journey of painting wood furniture. With the right knowledge and techniques, you can revitalize your space and create a truly remarkable interior design that reflects your personal taste and style.
Frequently Asked Questions about How To Paint Wood Furniture: An Expert Guide
Was this page helpful?
At Storables.com, we guarantee accurate and reliable information. Our content, validated by Expert Board Contributors, is crafted following stringent Editorial Policies. We're committed to providing you with well-researched, expert-backed insights for all your informational needs.

0 thoughts on “How To Paint Wood Furniture: An Expert Guide”