Home>Renovation & DIY>Home Renovation Guides>How To Adjust Storm Door Closing
Home Renovation Guides
How To Adjust Storm Door Closing
Modified: February 18, 2024
Learn how to adjust your storm door closing with our comprehensive home renovation guide. Improve your home's security and energy efficiency today!
(Many of the links in this article redirect to a specific reviewed product. Your purchase of these products through affiliate links helps to generate commission for Storables.com, at no extra cost. Learn more)
Introduction
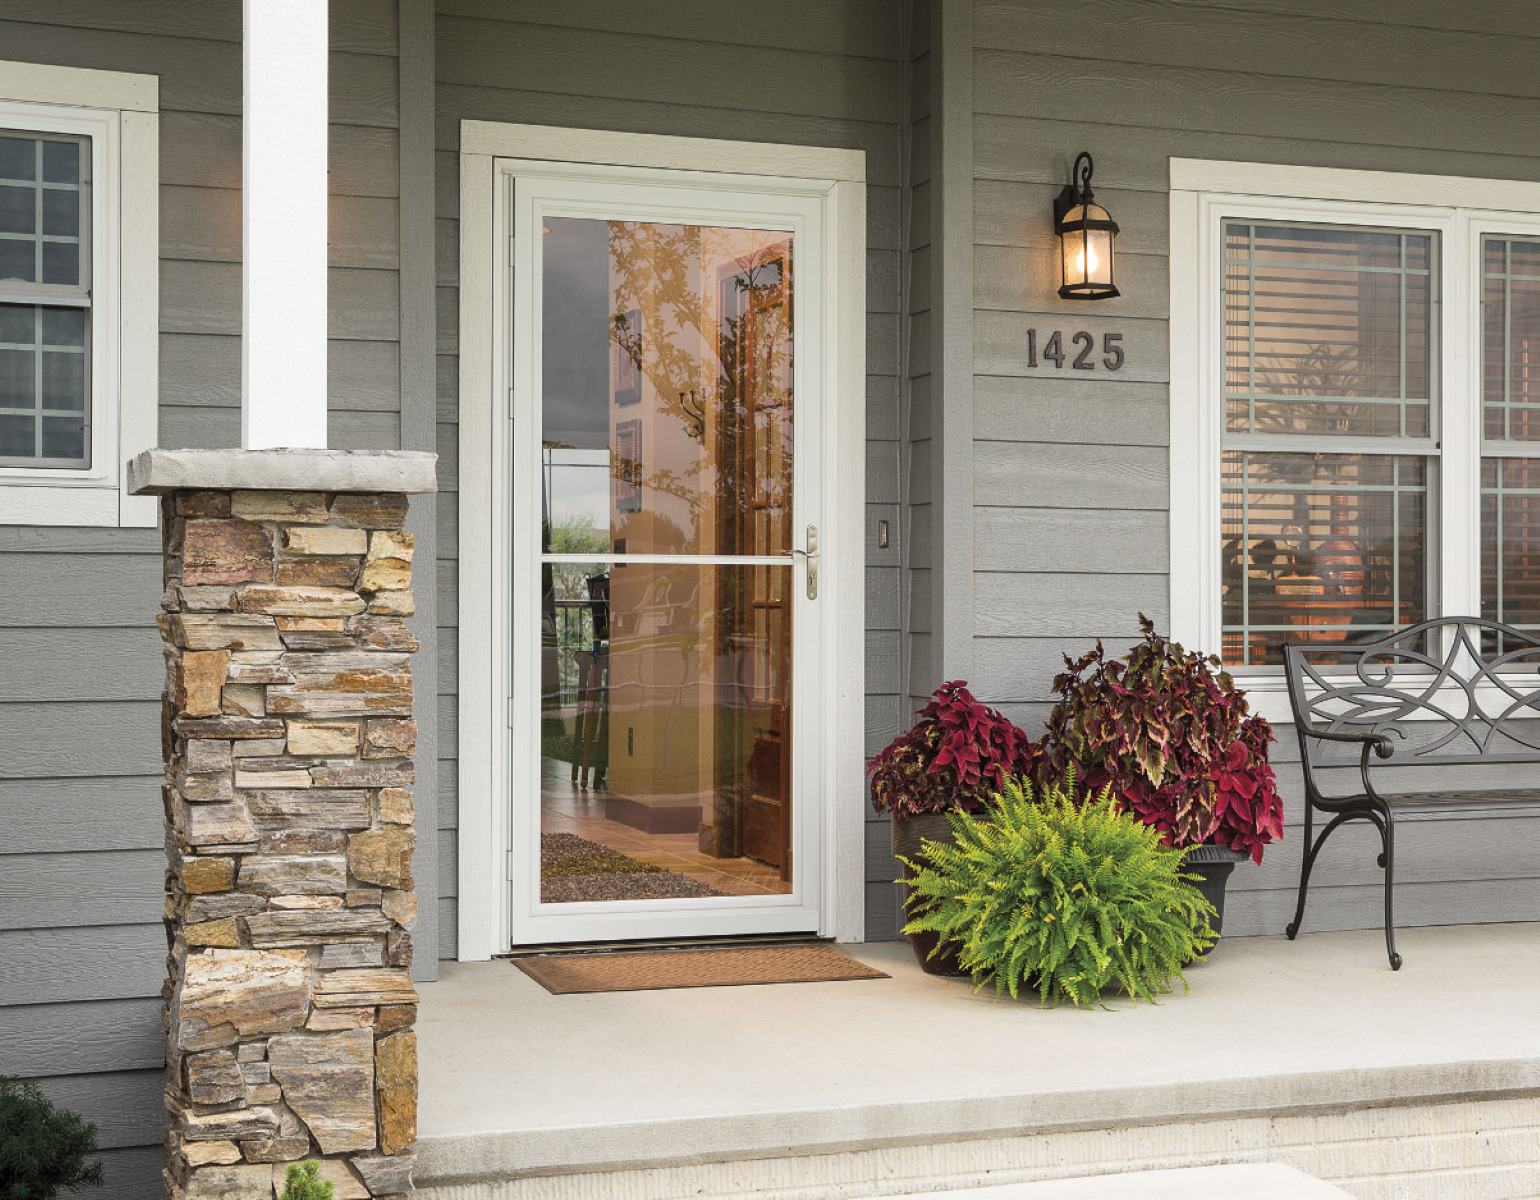
Welcome to our comprehensive guide on adjusting storm door closing. Storm doors are a valuable addition to any home, providing an extra layer of protection against the elements, added security, and improved energy efficiency. However, a poorly functioning storm door can be frustrating and diminish its benefits. One common issue homeowners encounter is a storm door that doesn't close properly. Fortunately, with a few simple adjustments, you can easily remedy this problem and restore your storm door to optimal functionality.
In this guide, we will walk you through the step-by-step process of adjusting the closing mechanism on your storm door. Whether your door slams shut with a jarring force or fails to close completely, we've got you covered. By following our instructions and using basic tools, you can regain control over the closing speed and ensure a proper seal to protect your home from drafts and pests.
So, grab your tools and let's get started on making your storm door operate smoothly and efficiently once again. With a little bit of time and effort, you can enjoy the full benefits of your storm door, knowing that it is functioning exactly as it should.
Key Takeaways:
- Adjusting storm door closing is easy with basic tools like screwdrivers and lubricant. Follow step-by-step instructions to regulate closing speed and ensure a snug seal for improved home comfort and security.
- Regular maintenance and adjustments to storm doors contribute to a more inviting living space, enhanced energy efficiency, and potential long-term cost savings. Stay proactive and enjoy the benefits of a well-maintained storm door.
Read more: How To Close A Storm Door
Tools and Materials
Before you begin adjusting your storm door, it’s important to gather the necessary tools and materials. Fortunately, you won’t need an extensive array of items for this task. Here’s what you’ll need:
- Flathead screwdriver
- Phillips head screwdriver
- Tape measure
- Adjustable wrench
- Hex key (if applicable)
- Lubricating oil or silicone-based lubricant
These basic tools are essential for making the required adjustments to your storm door. Additionally, having a tape measure on hand will be helpful for ensuring precise adjustments, especially when setting the door sweep. If your storm door features a hydraulic closer, a flathead screwdriver and adjustable wrench will be particularly useful for fine-tuning the closing speed and force. In some cases, a hex key may be necessary for specific types of closers, so it’s a good idea to have one available just in case.
Furthermore, to ensure smooth operation of the door’s moving parts, it’s recommended to have lubricating oil or a silicone-based lubricant available. This will help prevent friction and prolong the life of the door’s components, ultimately contributing to its overall functionality.
With these tools and materials at your disposal, you’ll be well-prepared to address any issues affecting the closing mechanism of your storm door. Now that you’ve gathered everything you need, let’s move on to the step-by-step process of adjusting your storm door for optimal performance.
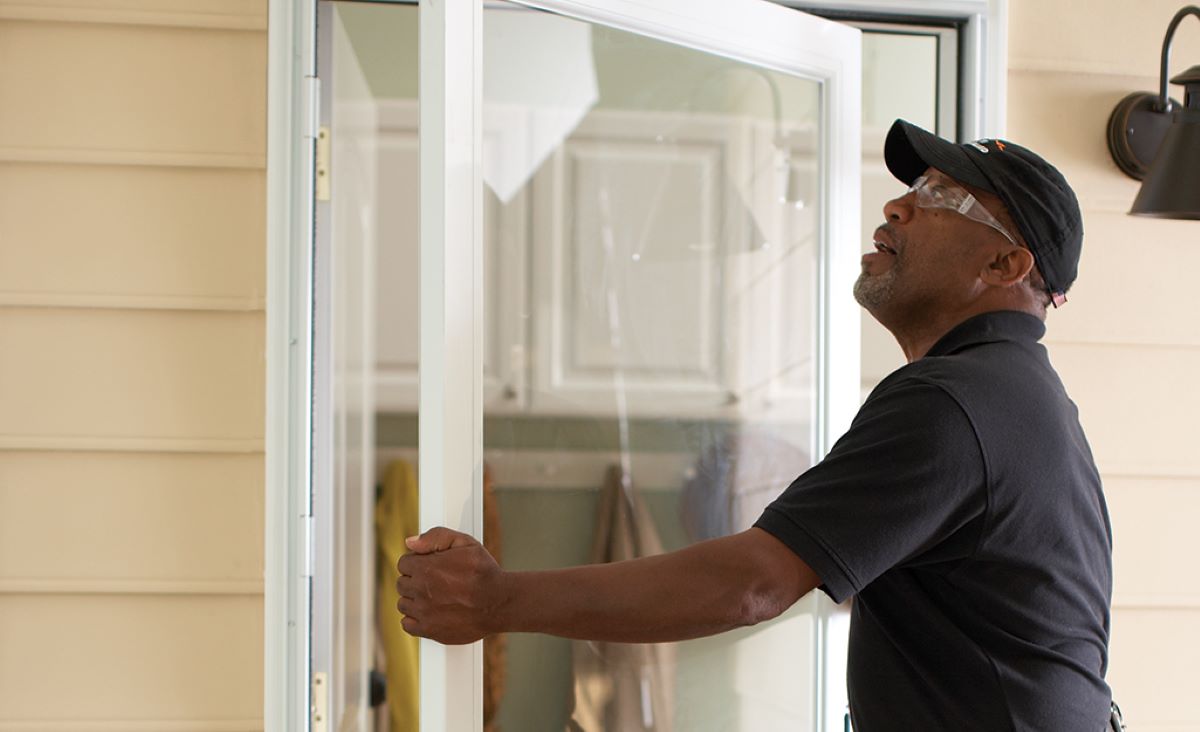
Step 1: Inspect the Door
Before making any adjustments to your storm door, it’s crucial to conduct a thorough inspection to identify the specific issues affecting its closing mechanism. Start by carefully observing the door in action. Open and close it several times, taking note of any irregularities in its movement and behavior. Pay attention to the following key areas:
- Closing Speed: Observe the speed at which the door closes. Does it slam shut rapidly, or does it close too slowly, failing to latch properly?
- Force: Assess the force with which the door closes. Is it exerting excessive force, making it difficult to open, or does it lack the necessary force to close securely?
- Alignment: Check the alignment of the door with the frame. Is it hanging crookedly or rubbing against the frame during operation?
- Seal: Inspect the door sweep and bottom seal for any signs of wear or damage. Ensure that they are making full contact with the threshold to provide an effective seal against drafts and pests.
- Lubrication: Listen for any squeaks or squeals as the door moves. Are there any signs of friction or resistance in the hinges or closer mechanism?
By carefully assessing these aspects, you’ll gain a clearer understanding of the specific adjustments required to restore your storm door’s functionality. Whether it’s a matter of regulating the closing speed, fine-tuning the force, realigning the door, or addressing worn components, a comprehensive inspection will serve as the foundation for the subsequent adjustments.
Once you’ve identified the areas in need of attention, you can proceed to the next steps in our guide, where we’ll walk you through the process of making precise adjustments to your storm door. With a keen eye and a clear understanding of the door’s behavior, you’ll be well-equipped to tackle the necessary adjustments with confidence.
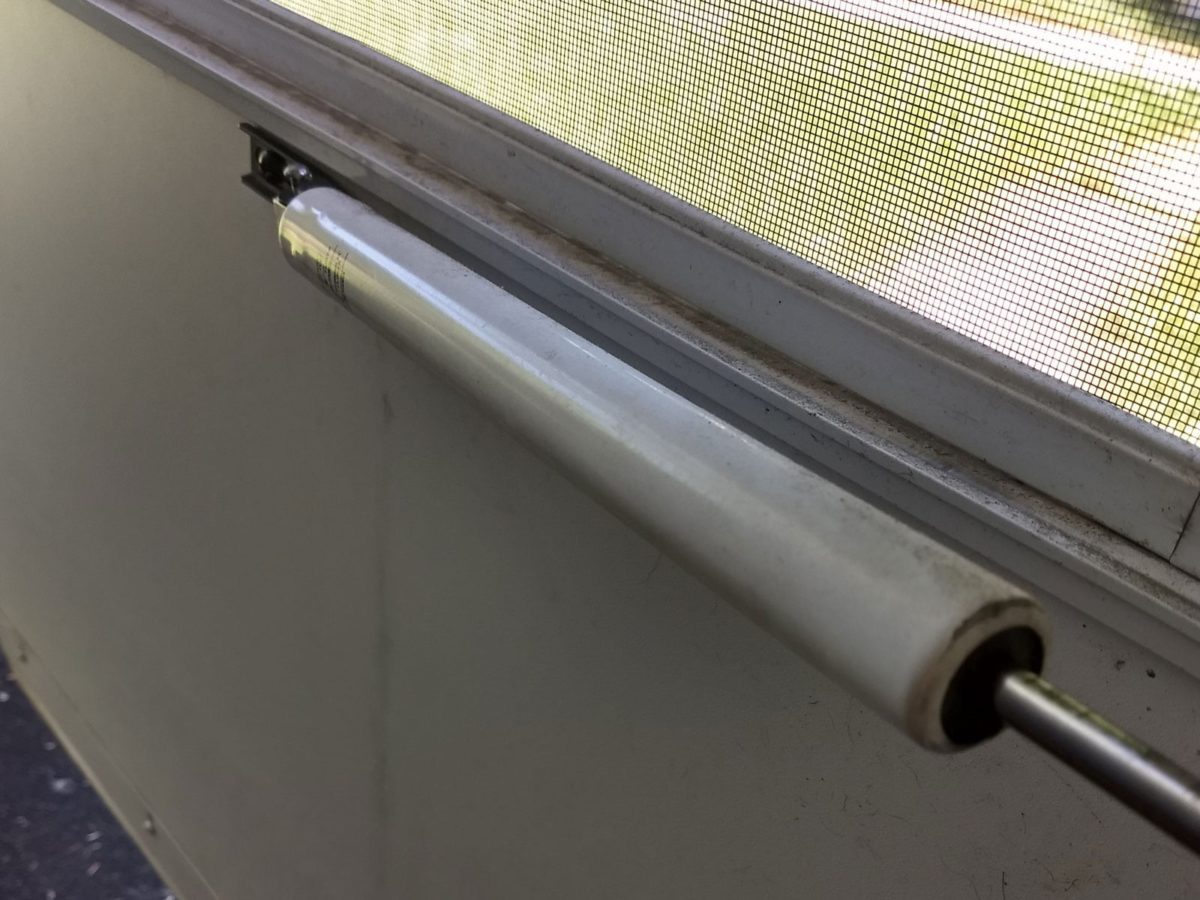
Step 2: Adjust the Closer Speed
One of the most common issues with storm doors is the speed at which they close. A door that slams shut with excessive force not only creates a loud and disruptive noise but can also pose a safety hazard, especially in households with children or pets. On the other hand, a door that closes too slowly may fail to latch securely, compromising the security and energy efficiency of your home. Fortunately, most storm doors are equipped with a hydraulic closer that allows for easy adjustment of the closing speed.
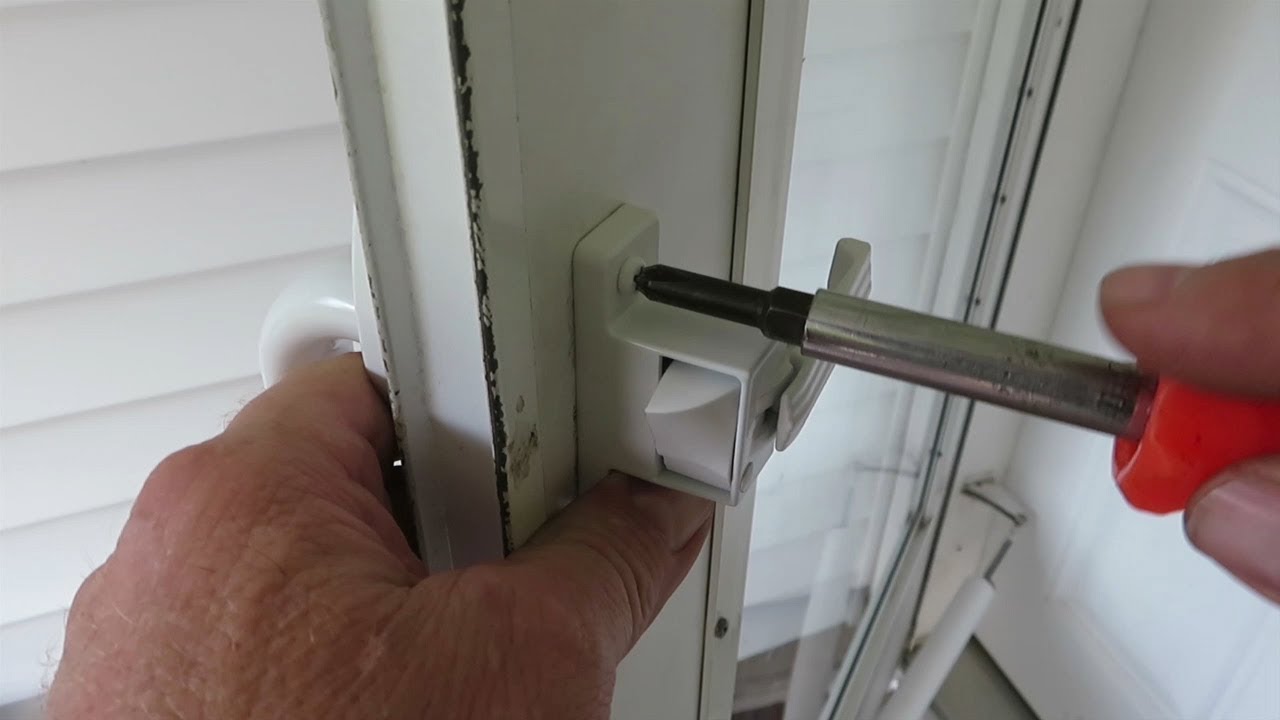
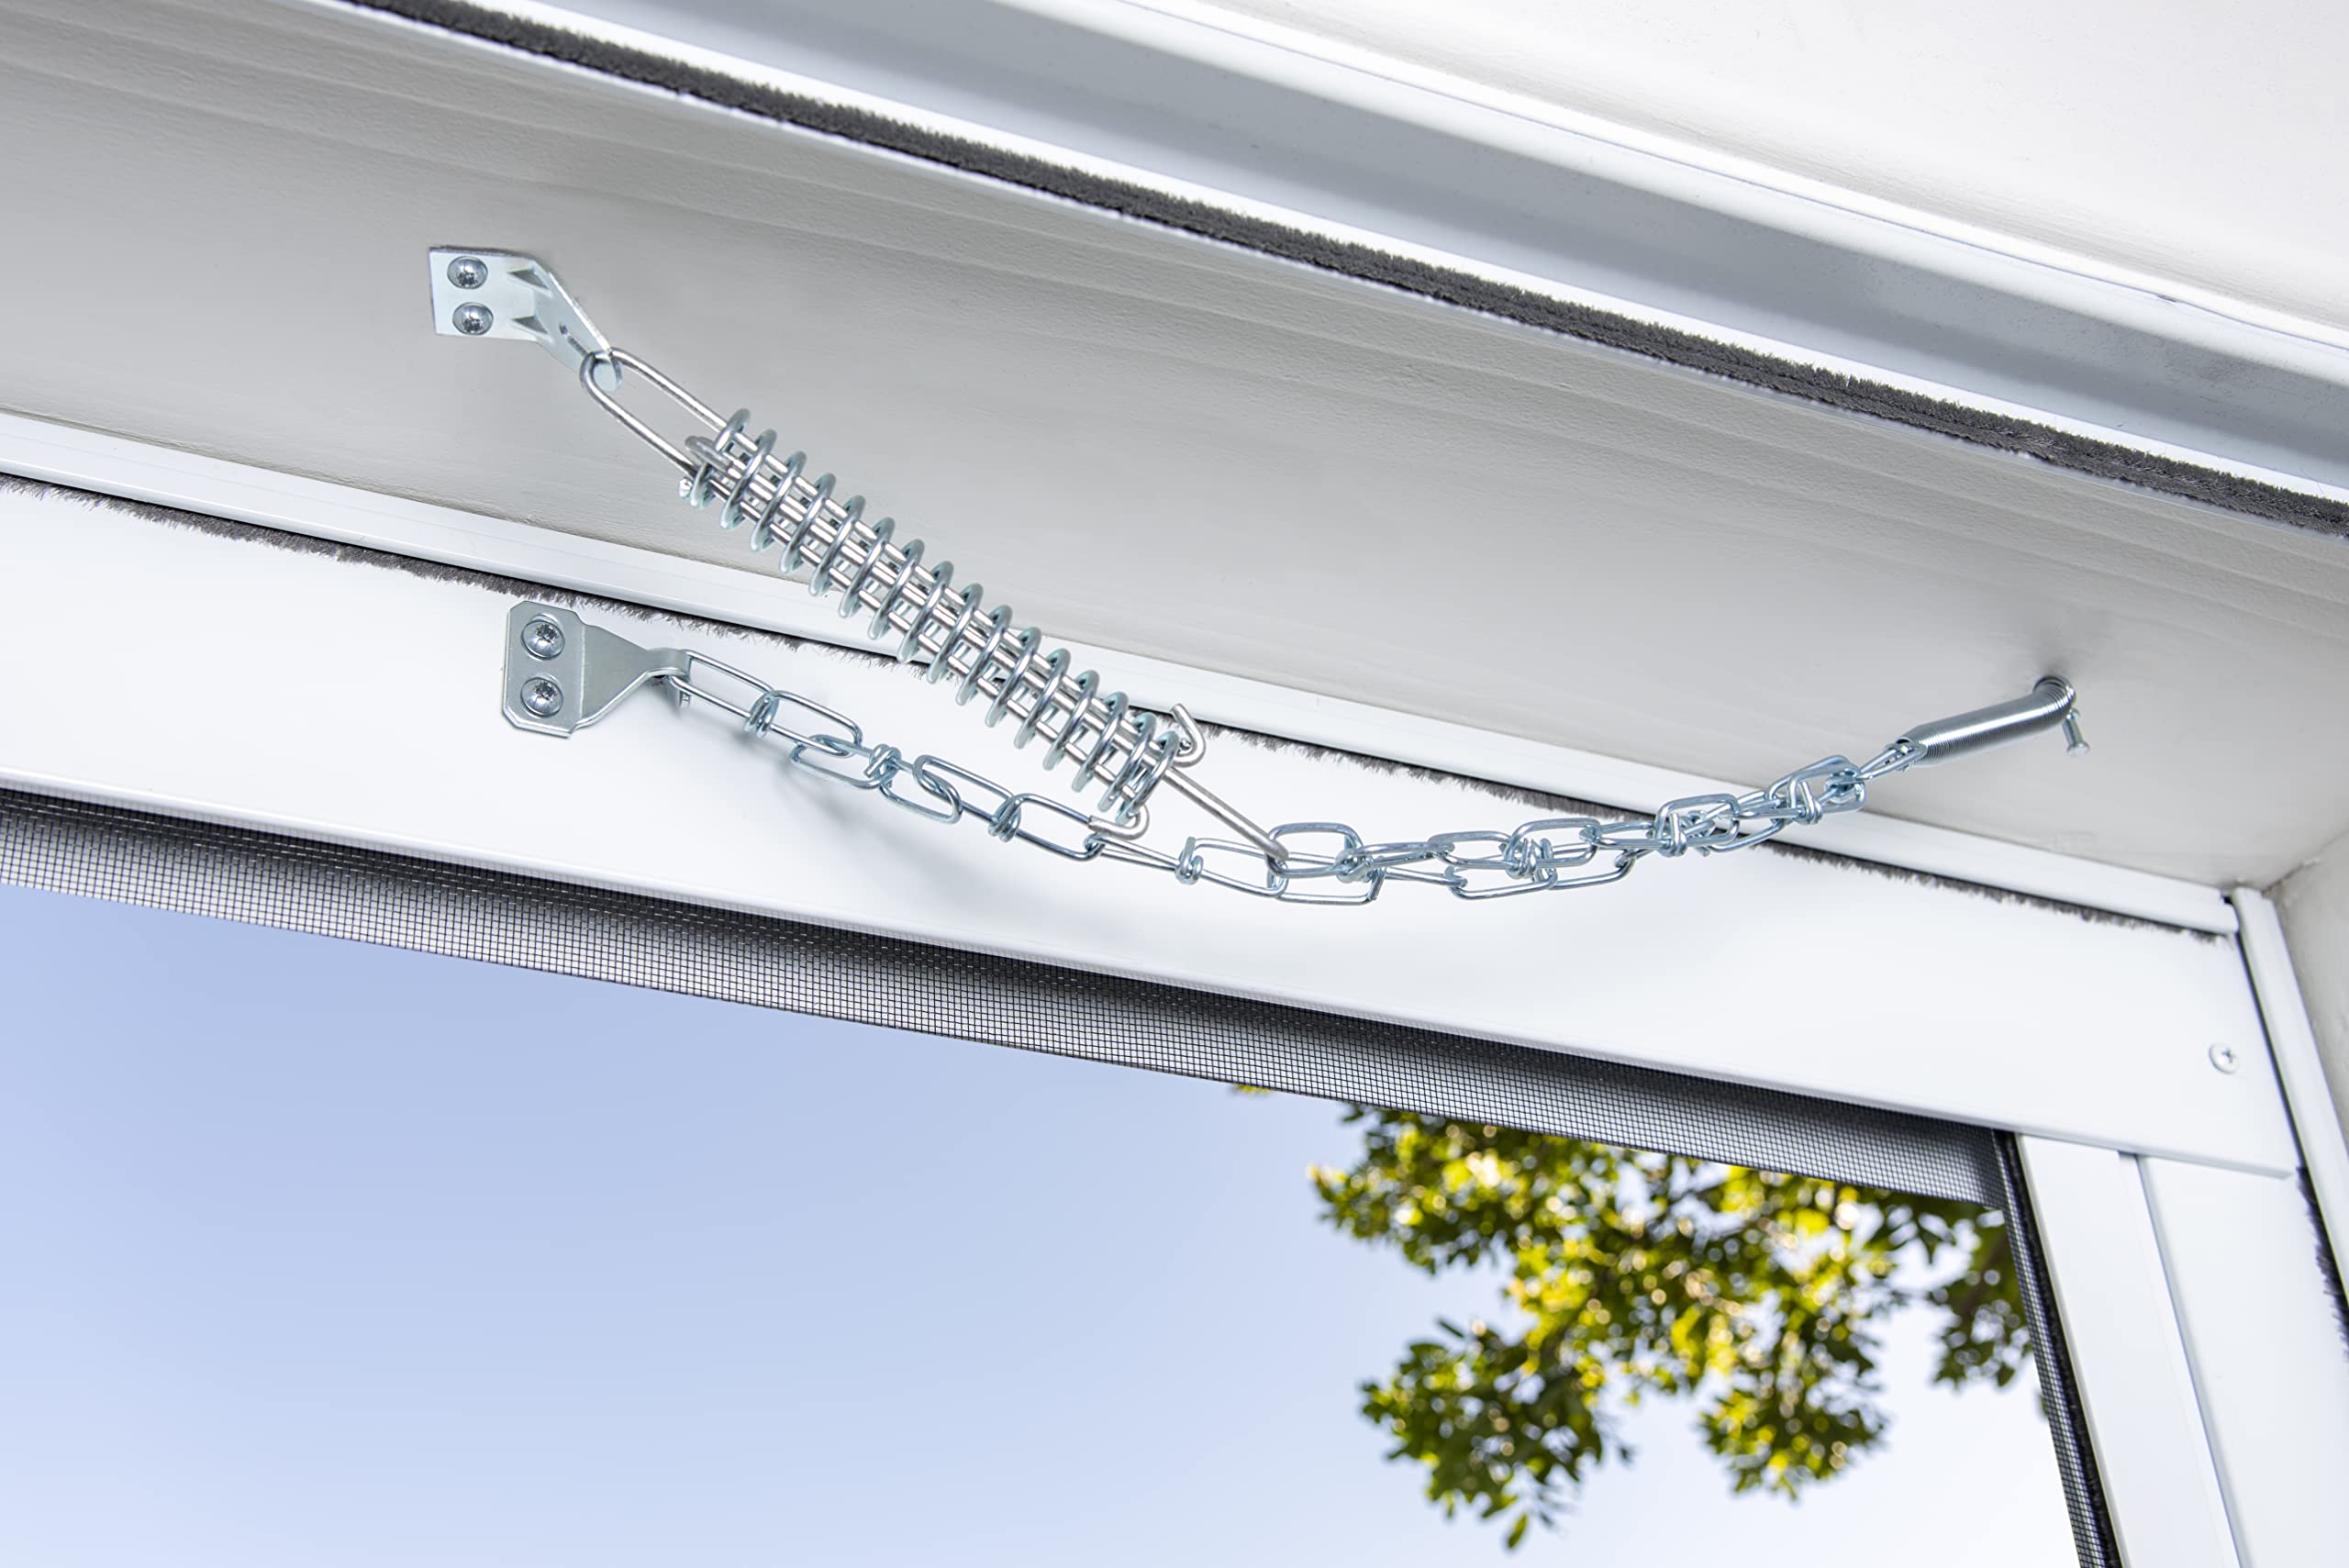
To begin the adjustment process, locate the hydraulic closer on your storm door. This is typically a cylinder-shaped component mounted at the top or bottom of the door. Depending on the model, the closer may feature an adjustment screw or valve that regulates the flow of hydraulic fluid, controlling the door’s closing speed.
Using a flathead screwdriver, gently turn the adjustment screw or valve in the appropriate direction to achieve your desired closing speed. If you want the door to close more slowly, turn the screw or valve counterclockwise. Conversely, for a faster closing speed, turn it clockwise. It’s important to make gradual adjustments, testing the door’s movement after each alteration to ensure that it meets your requirements.
As you make these adjustments, pay close attention to the door’s behavior. Aim for a controlled and gentle closing motion that allows the door to latch securely without slamming shut. Additionally, ensure that the door’s movement is smooth and consistent throughout the closing process. If the closer exhibits signs of wear or damage, such as leaking hydraulic fluid, it may need to be replaced to restore optimal functionality.
By fine-tuning the closer speed to your preference, you can mitigate the jarring impact of a rapidly closing door and ensure that your storm door operates safely and efficiently. With this adjustment complete, you’re one step closer to enjoying the full benefits of your storm door once again.
To adjust a storm door closing, use a screwdriver to tighten or loosen the screws on the door’s hydraulic closer. Turn clockwise to slow the closing speed and counterclockwise to speed it up.
Step 3: Adjust the Door Sweep
The door sweep, located at the bottom of the storm door, plays a crucial role in sealing the space between the door and the threshold. A properly adjusted door sweep not only prevents drafts from entering your home but also helps keep out pests and debris. Over time, the door sweep may become misaligned or worn, compromising its effectiveness. Fortunately, making adjustments to the door sweep is a straightforward process that can significantly enhance the performance of your storm door.
Begin by inspecting the door sweep for any signs of wear, damage, or misalignment. Ensure that it makes full contact with the threshold when the door is closed, creating a tight seal. If the door sweep is worn or damaged, it may need to be replaced to restore its effectiveness. However, if it’s simply misaligned, you can proceed with making the necessary adjustments without replacing the entire sweep.
Using a Phillips head screwdriver, loosen the screws securing the door sweep in place. With the screws slightly loosened, you’ll be able to adjust the position of the sweep to ensure proper contact with the threshold. Slide the sweep up or down as needed, then tighten the screws to secure it in its new position. Be sure to test the door’s movement to confirm that the sweep effectively seals the bottom of the door when closed.
Additionally, check for any gaps or irregularities along the length of the door sweep. If you notice areas where the seal is incomplete, consider using a utility knife to trim the sweep to the appropriate length, allowing it to make full contact with the threshold. This minor adjustment can make a significant difference in the door’s ability to seal out drafts and maintain a comfortable indoor environment.
By ensuring that the door sweep is properly aligned and in good condition, you’ll bolster the energy efficiency and overall functionality of your storm door. With this adjustment complete, you’re well on your way to enjoying a snug and secure seal that enhances the comfort and protection of your home.
Read more: How To Paint A Storm Door
Step 4: Test the Door
With the adjustments to the closing speed and door sweep complete, it’s time to thoroughly test the functionality of your storm door. Testing the door will allow you to assess the impact of the adjustments and ensure that the door operates smoothly and efficiently.
Begin by opening the storm door and allowing it to close naturally. Observe its movement closely, paying attention to the speed, force, and alignment. Listen for any unusual sounds or signs of friction as the door closes. Ideally, the door should move with controlled speed, exerting appropriate force, and aligning properly with the frame throughout the closing process.
Next, test the door’s ability to latch securely. Close the door and confirm that it latches firmly without excessive force. If the door fails to latch or requires excessive force to do so, further adjustments may be necessary to achieve the desired outcome.
As the door closes, check the seal created by the door sweep. Ensure that it makes full contact with the threshold, effectively sealing the bottom of the door to prevent drafts and maintain a comfortable indoor environment. If there are any gaps or areas where the seal is incomplete, consider revisiting the adjustment of the door sweep to achieve a secure and consistent seal.
If your storm door features a locking mechanism, test its functionality to verify that the door can be securely locked when closed. A properly adjusted storm door should lock easily and securely, providing an additional layer of security for your home.
Throughout the testing process, make note of any remaining issues or irregularities in the door’s operation. These observations will guide you in determining whether additional adjustments or maintenance are needed to address any lingering concerns.
By thoroughly testing the door after making the necessary adjustments, you can ensure that it operates as intended, providing enhanced security, energy efficiency, and overall functionality. With the door performing optimally, you can enjoy the peace of mind that comes with a well-maintained and properly adjusted storm door.
Conclusion
Congratulations on successfully adjusting the closing mechanism of your storm door! By following the steps outlined in this guide, you’ve taken proactive measures to address common issues that can affect the functionality of your storm door. From regulating the closing speed to fine-tuning the door sweep, your efforts have contributed to the improved performance and overall effectiveness of your storm door.
It’s important to recognize the impact of these adjustments on the comfort, security, and energy efficiency of your home. A properly functioning storm door not only provides an additional layer of protection against the elements but also enhances the aesthetic appeal of your entryway. By creating a secure seal and ensuring smooth operation, your storm door contributes to a more comfortable and inviting living environment.
Furthermore, the adjustments you’ve made can lead to long-term benefits, including potential energy savings and extended longevity of the door’s components. By addressing issues promptly and taking proactive steps to maintain your storm door, you’re investing in the continued well-being of your home and the satisfaction of its occupants.
As you reflect on the process of adjusting your storm door, remember the value of regular maintenance and attentive observation. By staying attuned to the behavior of your storm door and addressing any issues promptly, you can maximize its performance and longevity, ultimately deriving greater enjoyment and utility from this essential home feature.
Should you encounter any future challenges with your storm door or other home maintenance tasks, we encourage you to refer back to this guide for comprehensive and practical solutions. With the knowledge and confidence gained from successfully adjusting your storm door, you’re well-equipped to tackle a wide range of home maintenance projects with ease and effectiveness.
Thank you for entrusting us with the guidance to optimize your storm door’s functionality. We hope this experience has empowered you to take proactive steps in maintaining and enhancing your home, ultimately contributing to a more secure, comfortable, and inviting living space for you and your loved ones.
Frequently Asked Questions about How To Adjust Storm Door Closing
Was this page helpful?
At Storables.com, we guarantee accurate and reliable information. Our content, validated by Expert Board Contributors, is crafted following stringent Editorial Policies. We're committed to providing you with well-researched, expert-backed insights for all your informational needs.


0 thoughts on “How To Adjust Storm Door Closing”