Home>Renovation & DIY>Home Renovation Guides>How To Remove A Storm Door

Home Renovation Guides
How To Remove A Storm Door
Modified: February 27, 2024
Learn how to remove a storm door with our comprehensive home renovation guide. Follow our step-by-step instructions to complete the task efficiently and safely.
(Many of the links in this article redirect to a specific reviewed product. Your purchase of these products through affiliate links helps to generate commission for Storables.com, at no extra cost. Learn more)
Introduction
Welcome to the ultimate guide on how to remove a storm door! Whether you're preparing for a new door installation, conducting maintenance, or simply want to enjoy the refreshing breeze without the hindrance of a storm door, this step-by-step tutorial will equip you with the knowledge and confidence to tackle the task.
Storm doors serve as a protective barrier against the elements, providing an additional layer of insulation and security for your home. However, there are occasions when removing a storm door becomes necessary, such as during deep cleaning, repairs, or when transitioning between seasons.
In this comprehensive guide, we'll walk through the process of removing a storm door with ease, highlighting each crucial step and offering valuable tips along the way. By the end of this tutorial, you'll have the expertise to complete the task efficiently and safely, ensuring that your home improvement endeavors are met with success.
So, gather your tools and let's embark on this journey to seamlessly remove your storm door, opening up new possibilities for your home and allowing you to bask in the natural beauty of the outdoors.
Key Takeaways:
- Removing a storm door is a manageable task with the right tools and careful steps. By following this guide, you can confidently tackle the process and open up new possibilities for your home.
- Properly cleaning and storing the storm door after removal ensures its optimal condition for future use, demonstrating care and consideration for your home’s components.
Read more: How To Remove Storm Door Lock
Gather the Necessary Tools
Before diving into the process of removing a storm door, it’s essential to gather the necessary tools to ensure a smooth and efficient experience. Here’s a list of items you’ll need:
- Phillips head screwdriver
- Flathead screwdriver
- Hammer
- Utility knife
- Work gloves
- Protective eyewear
- Assistance (optional, but helpful for larger doors)
Having these tools at your disposal will streamline the removal process and help mitigate any unforeseen challenges that may arise. Additionally, wearing work gloves and protective eyewear is crucial for safeguarding yourself against potential hazards and ensuring a secure grip while handling the door and its components.
Once you’ve gathered the necessary tools and safety gear, you’re ready to proceed with the next steps in removing your storm door.
Remove the Hinge Pins
The first step in removing a storm door is to focus on the hinge pins, which secure the door to the frame. Follow these steps to successfully remove the hinge pins:
- Open the Storm Door: Ensure the storm door is fully open to provide easy access to the hinges and hinge pins.
- Locate the Hinge Pins: Identify the hinge pins, which are typically located at the top and bottom of the door, connecting it to the frame.
- Secure the Door: To prevent the door from falling during the removal process, ask for assistance or use a sturdy object to support the door’s weight while you work on the hinges.
- Remove the Hinge Pins: Using a flathead screwdriver and a hammer, carefully tap the hinge pins upward to dislodge them from the hinges. Start with the bottom hinge pin and then proceed to the top. If the pins are stubborn, applying a small amount of lubricating oil can help loosen them.
- Set Aside the Hinge Pins: Once the hinge pins are removed, set them aside in a safe place for future use or storage.
By successfully removing the hinge pins, you’ve completed the initial step in detaching the storm door from its frame, setting the stage for the subsequent phases of the removal process.
With the hinge pins out of the way, you’re ready to proceed to the next crucial steps in removing your storm door.
Detach the Door from the Frame
With the hinge pins removed, the next step in removing a storm door involves detaching the door from the frame. Follow these steps to accomplish this task:
- Support the Door: Ensure the storm door is adequately supported to prevent it from falling or sustaining damage during the detachment process.
- Identify the Latch Side: Determine the side of the door where the latch is located. This will help you understand how the door is secured to the frame.
- Release the Latch: If the door features a latch mechanism, carefully disengage it to free the door from the frame. Depending on the type of latch, you may need to manipulate it using a screwdriver or release it by hand.
- Inspect for Additional Fasteners: Check for any additional fasteners or screws securing the door to the frame. These may be located on the top, bottom, or sides of the door frame. Use a screwdriver to remove them as needed.
- Verify Stability: Once all fasteners are removed, ensure that the door is stable and can be safely lifted from the frame. If needed, seek assistance to support the door during this process.
- Lift the Door: Carefully lift the storm door upward, disengaging it from the frame. Be mindful of its weight and size to avoid any accidents or damage to the door or surrounding area.
By successfully detaching the door from the frame, you’ve completed a significant phase of the removal process, paving the way for the final steps in removing your storm door.
With the door now separated from the frame, you’re ready to proceed to the subsequent critical steps in the removal process.
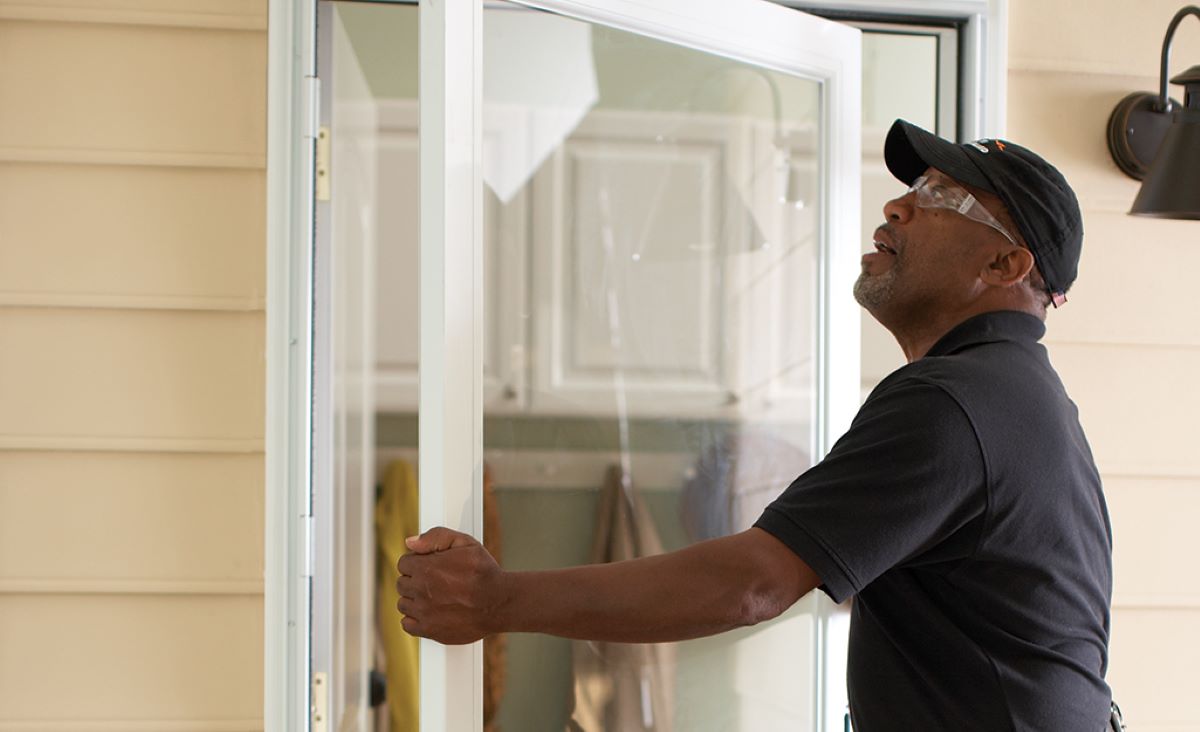
Before removing a storm door, make sure to have the necessary tools such as a screwdriver and pliers. Start by removing the screws and hardware, then lift the door off its hinges and carefully set it aside.
Remove the Door from the Hinges
Having detached the storm door from the frame, the next step is to remove the door from the hinges. Follow these steps to accomplish this task:
- Secure the Door: Ensure the door is stable and adequately supported to prevent any mishaps during the hinge removal process.
- Identify the Hinge Mechanism: Locate the hinges on the door and determine the type of mechanism they employ. Depending on the design, the hinges may have removable pins or screws securing them to the door.
- Remove the Hinge Pins or Screws: If the hinges feature removable pins, tap them upward using a hammer and flathead screwdriver to dislodge them from the hinges. For hinges secured with screws, use a screwdriver to carefully remove them from the door.
- Set Aside the Hinges: Once the hinges are disengaged from the door, set them aside in a safe location for future use or storage.
- Inspect and Clean the Door: With the hinges removed, take the opportunity to inspect the door for any signs of wear, damage, or accumulated debris. Additionally, consider cleaning the door to maintain its appearance and functionality.
By successfully removing the door from the hinges, you’ve completed a crucial phase of the storm door removal process, bringing you closer to the final steps of this home improvement endeavor.
With the door now separated from the hinges, you’re ready to proceed to the subsequent essential steps in the removal process.
Read more: How To Remove Screen From A Storm Door
Clean and Store the Storm Door
Once the storm door has been successfully removed from its hinges and frame, it’s essential to undertake proper cleaning and storage measures to preserve its condition and prepare it for future use. Follow these steps to clean and store the storm door:
- Inspect for Debris: Thoroughly examine the door for any accumulated dirt, dust, or debris, especially along the edges and corners. Use a soft-bristled brush or a vacuum with a brush attachment to remove any loose particles.
- Clean with Mild Detergent: Prepare a solution of mild detergent and water, and gently wash the entire surface of the door using a soft sponge or cloth. Pay close attention to areas with stubborn stains or grime, and avoid using abrasive cleaners that may damage the finish.
- Rinse and Dry: After cleaning, rinse the door with clean water to remove any soapy residue. Use a soft, absorbent cloth to thoroughly dry the door, ensuring that no moisture remains, which could lead to the development of rust or corrosion.
- Inspect and Address Any Issues: While cleaning the door, take the opportunity to inspect it for any signs of damage, such as dents, scratches, or chipped paint. Address any minor issues to prevent them from worsening over time.
- Store in a Safe Location: Once the door is clean and dry, store it in a secure, climate-controlled area to protect it from environmental elements. Ideally, store the door in an upright position to prevent warping or distortion.
- Consider Protective Coverings: If long-term storage is anticipated, consider using a protective covering, such as a breathable fabric or plastic sheet, to shield the door from dust and potential impacts.
By diligently cleaning and properly storing the storm door, you’ll ensure that it remains in optimal condition for future use, whether for reinstallation or as a spare for unforeseen circumstances.
With the storm door cleaned and safely stored, you’ve successfully completed the final steps in the removal process, concluding this home improvement endeavor with thoroughness and care.
Conclusion
Congratulations on successfully completing the process of removing a storm door from your home! By following the comprehensive steps outlined in this guide, you’ve gained valuable insights and practical knowledge to tackle this home improvement task with confidence and precision.
As you reflect on the journey of removing the storm door, it’s important to recognize the significance of proper preparation, attention to detail, and a methodical approach. Each step, from gathering the necessary tools to cleaning and storing the door, contributes to a seamless and successful removal process.
By taking the time to gather the essential tools, delicately remove the hinge pins, detach the door from the frame, and safely store the storm door, you’ve demonstrated a commitment to maintaining your home with care and consideration for its components.
Whether you’re preparing for a new door installation, conducting maintenance, or simply embracing a change in your home’s aesthetic, the knowledge and skills acquired from this guide empower you to navigate future home improvement projects with confidence.
As you move forward, remember that each home improvement endeavor is an opportunity to enhance your living space, express your personal style, and nurture a welcoming environment for you and your loved ones.
Thank you for embarking on this journey to remove a storm door with us. May your home be filled with warmth, comfort, and the joy of continuous improvement.
Frequently Asked Questions about How To Remove A Storm Door
Was this page helpful?
At Storables.com, we guarantee accurate and reliable information. Our content, validated by Expert Board Contributors, is crafted following stringent Editorial Policies. We're committed to providing you with well-researched, expert-backed insights for all your informational needs.


0 thoughts on “How To Remove A Storm Door”