Home>Renovation & DIY>Home Renovation Guides>How To Attach A Bathroom Vent Hose To An Attic Gable
Home Renovation Guides
How To Attach A Bathroom Vent Hose To An Attic Gable
Modified: August 28, 2024
Learn how to properly attach a bathroom vent hose to an attic gable with our comprehensive home renovation guide. Ensure proper ventilation for your bathroom.
(Many of the links in this article redirect to a specific reviewed product. Your purchase of these products through affiliate links helps to generate commission for Storables.com, at no extra cost. Learn more)
Introduction
When it comes to maintaining a healthy and comfortable home environment, proper ventilation is crucial, especially in areas prone to moisture buildup such as bathrooms. Attaching a bathroom vent hose to an attic gable is a key step in ensuring effective ventilation and preventing issues like mold and mildew. By directing moist air outside, this setup helps to maintain optimal indoor air quality and protects the structural integrity of your home.
In this comprehensive guide, we will walk you through the process of attaching a bathroom vent hose to an attic gable. Whether you're embarking on a home renovation project or addressing ventilation concerns, this step-by-step tutorial will equip you with the knowledge and confidence to tackle this essential task. From gathering the necessary materials to sealing the connection, each step is designed to help you achieve a successful and efficient installation.
By following these instructions, you can enhance the functionality of your bathroom ventilation system and contribute to a healthier living environment for you and your family. So, let's dive in and explore the process of attaching a bathroom vent hose to an attic gable, empowering you to take proactive steps in maintaining a well-ventilated and comfortable home.
Key Takeaways:
- Ensure a healthy home by attaching a bathroom vent hose to the attic gable. Follow the steps to expel moist air, prevent mold, and maintain a comfortable living environment for your family.
- By carefully selecting materials and following steps, you can create a well-ventilated bathroom. Enjoy improved air quality, reduced moisture, and a healthier living space for your family.
Read more: What Is Gable Vent?
Step 1: Gather the necessary materials
Before embarking on the task of attaching a bathroom vent hose to an attic gable, it's essential to gather all the required materials and tools. Having everything at hand will streamline the installation process and ensure a smooth and efficient workflow. Here's a comprehensive list of the necessary items you'll need for this project:
-
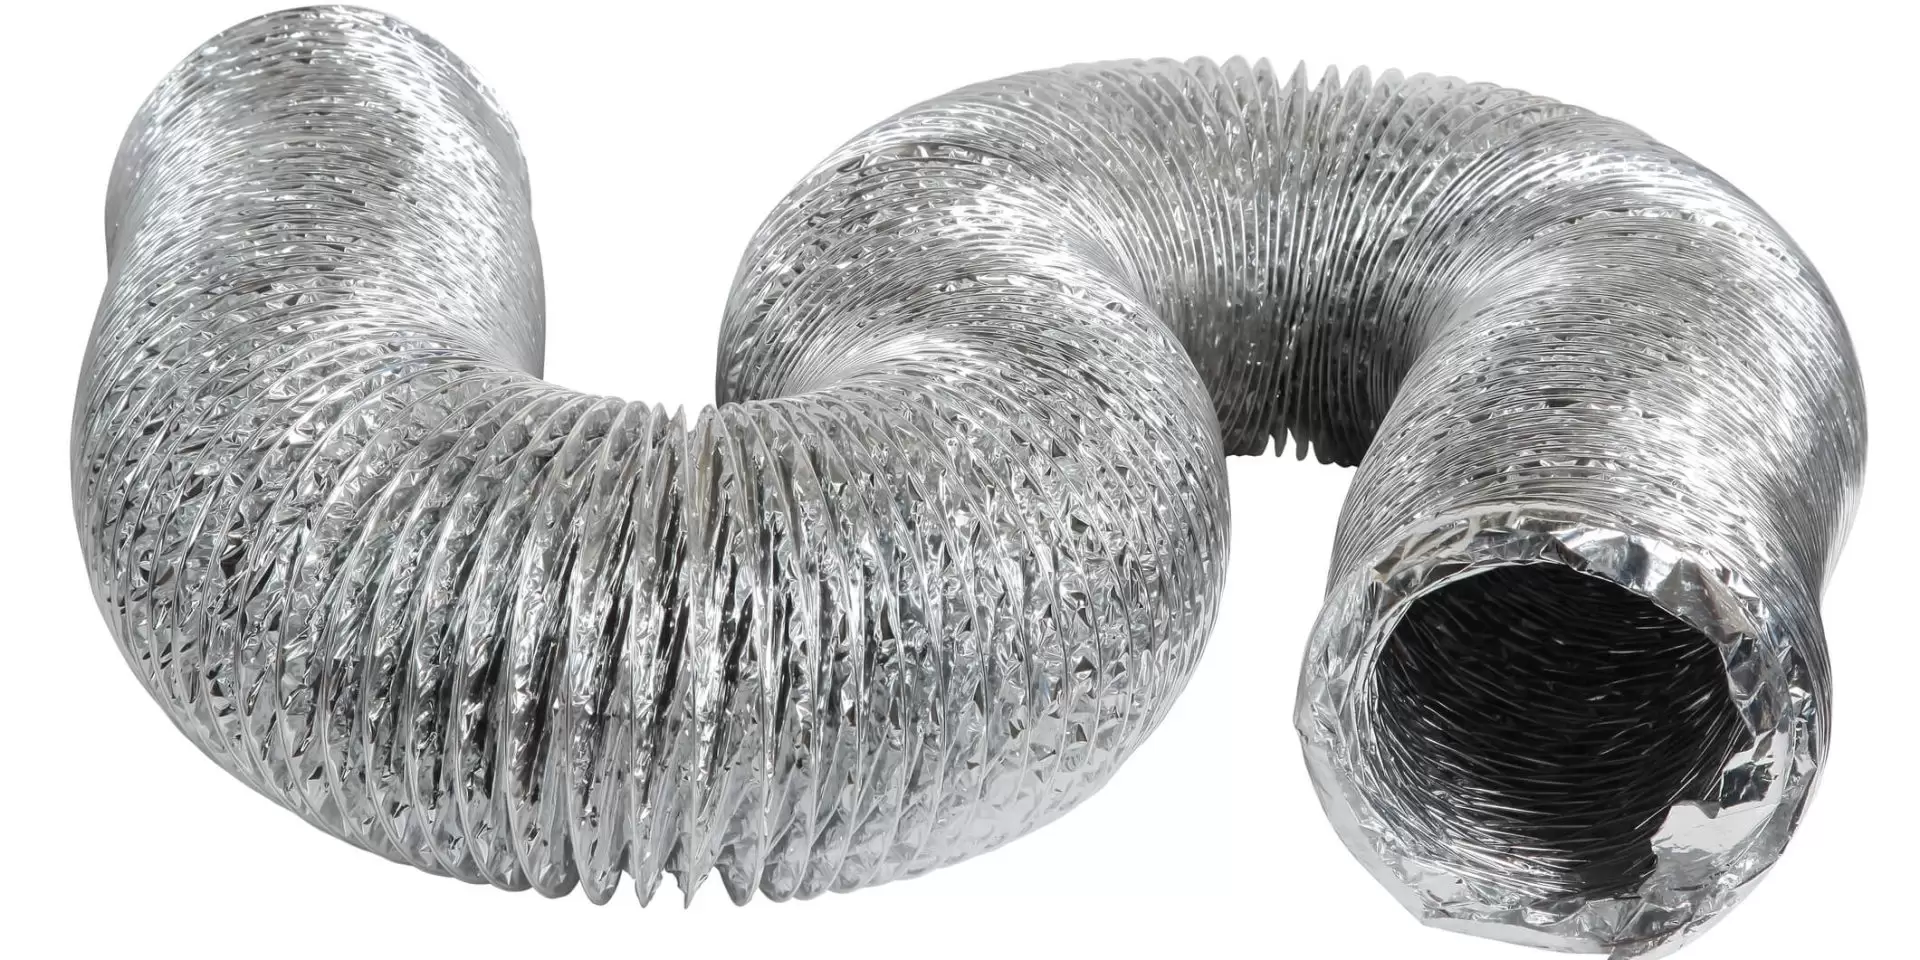
Bathroom Vent Hose: Select a high-quality vent hose that is suitable for the size and layout of your bathroom. Ensure that it is designed to withstand moisture and is compatible with the vent hood and other components of the ventilation system.
-
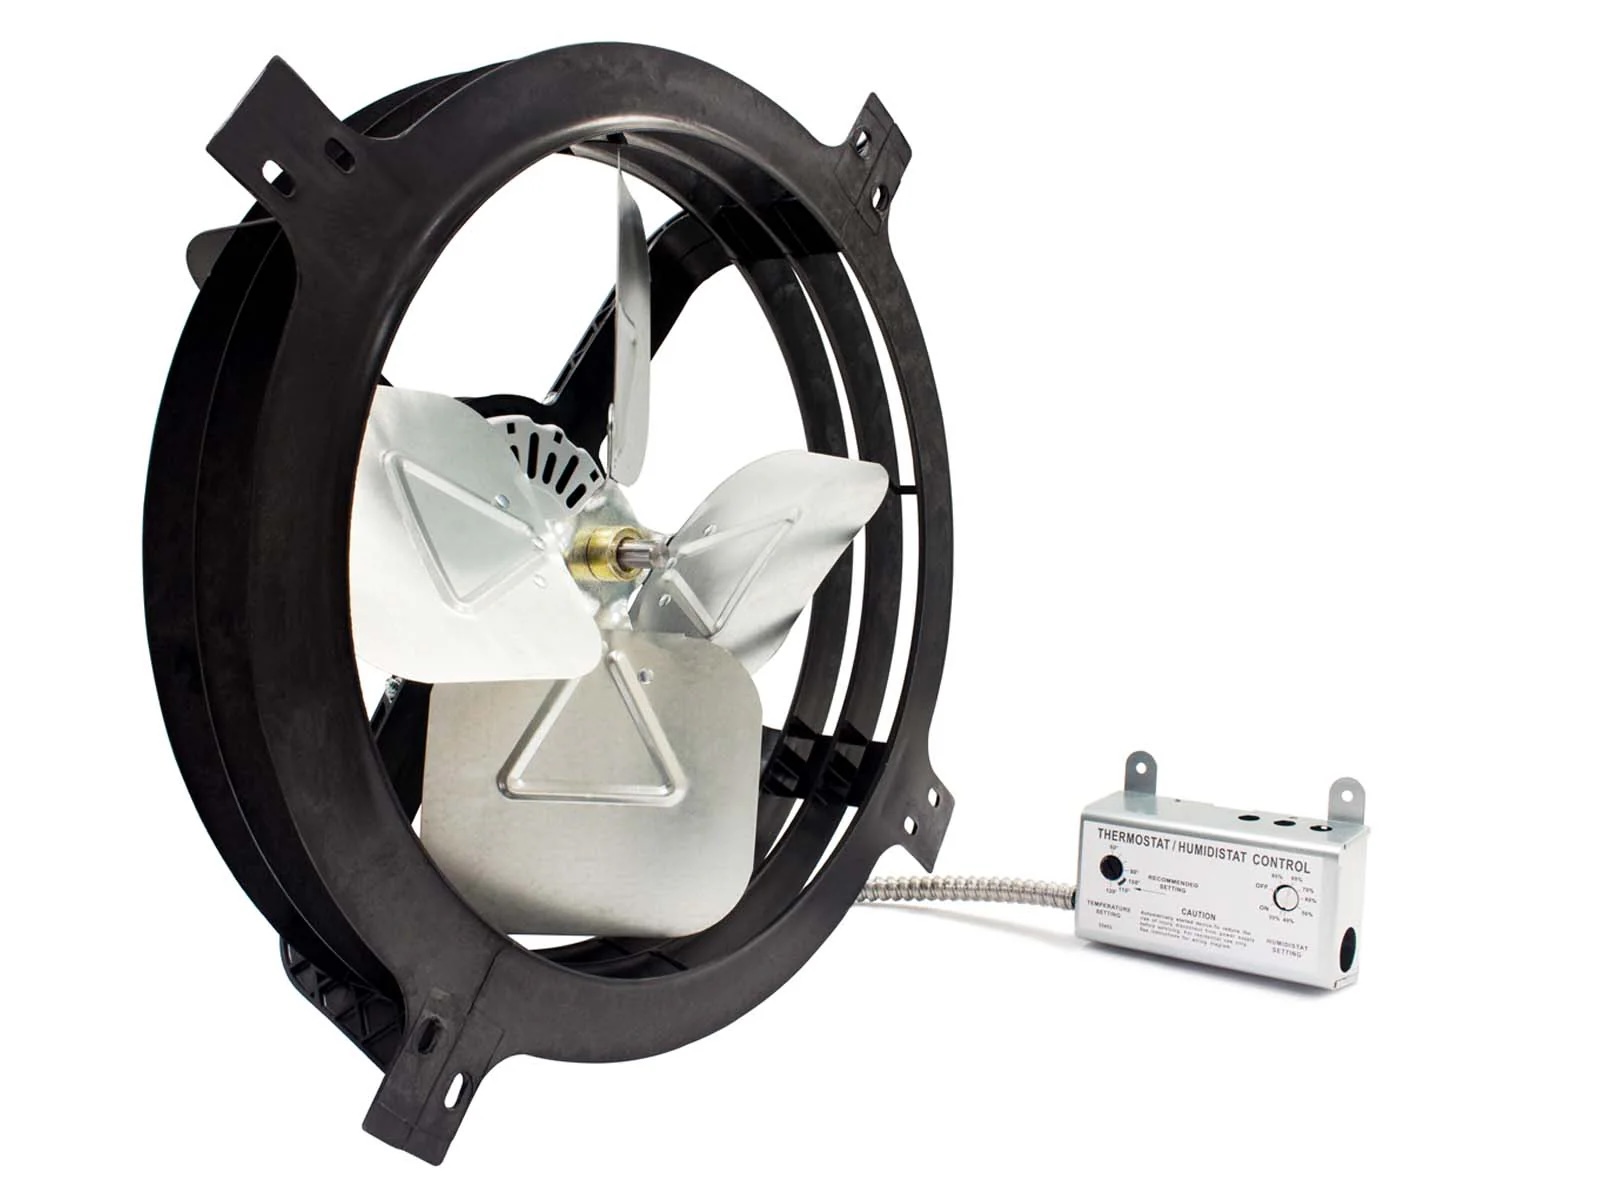
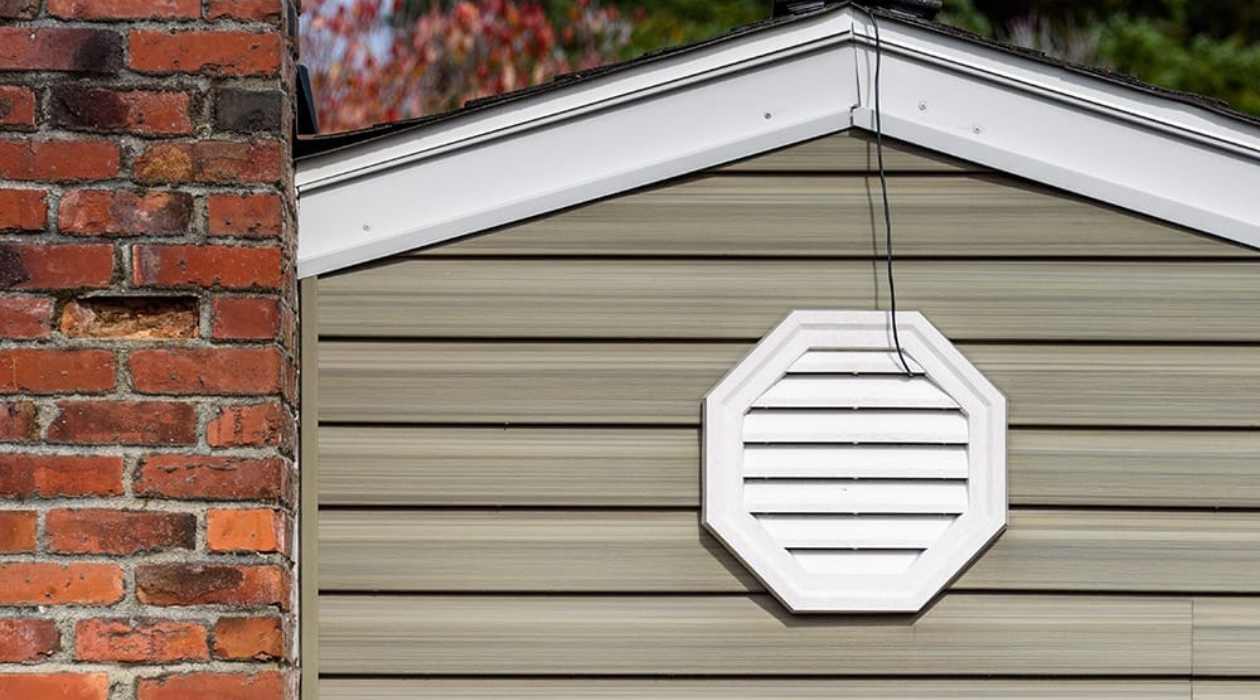
Vent Hood: Choose a durable and weather-resistant vent hood that can be securely installed on the exterior surface of the gable. The vent hood should effectively prevent backdrafts and the entry of pests while allowing for the efficient expulsion of moist air.
-
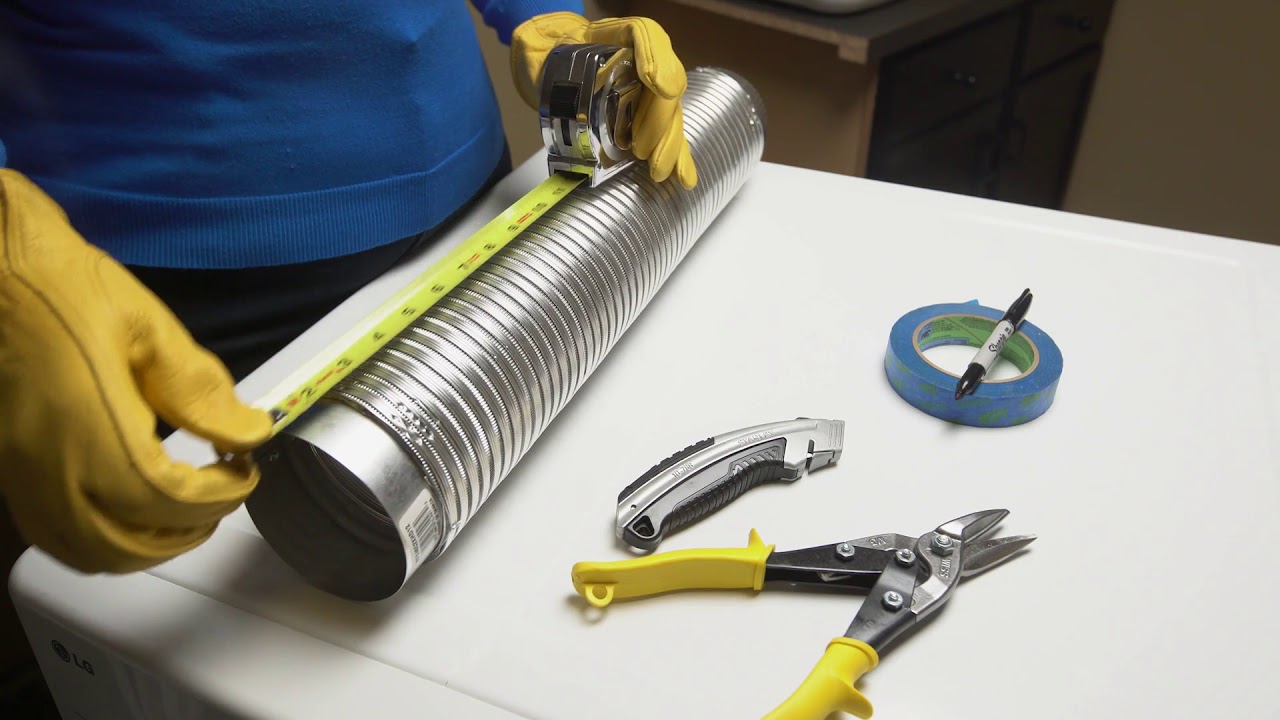
Tape Measure: A reliable tape measure is essential for accurately determining the dimensions for cutting the hole in the gable and ensuring precise placement of the vent hood.
-
Marker or Pencil: Having a marker or pencil on hand will allow you to mark the precise location for the hole in the gable, ensuring that the vent hose can be attached with optimal efficiency.
-
Safety Gear: Prioritize safety by wearing protective gear such as gloves and safety goggles. These items will safeguard you from potential hazards during the installation process.
-
Utility Knife or Saw: A utility knife or saw will be necessary for cutting the hole in the gable to accommodate the vent hose. Choose a tool that is suitable for the material of the gable and allows for clean and precise cuts.
-
Screwdriver or Drill: Depending on the type of fasteners used, you will need a screwdriver or drill to secure the vent hood in place on the gable. Ensure that you have the appropriate attachments for the screwdriver or drill.
-
Sealant: Select a high-quality sealant that is designed for outdoor use and is compatible with the materials of the gable and vent hood. The sealant will be used to create a watertight and airtight connection between the vent hood and the gable.
By gathering these essential materials and tools, you will be well-prepared to proceed with the subsequent steps of attaching the bathroom vent hose to the attic gable. This proactive approach sets the stage for a successful installation and contributes to the long-term effectiveness of your bathroom ventilation system.
Step 2: Determine the location for the vent hose
Before proceeding with the installation of the bathroom vent hose, it is crucial to carefully determine the optimal location for its placement on the attic gable. This step requires thoughtful consideration of factors such as airflow dynamics, structural integrity, and aesthetic impact.
Begin by assessing the interior layout of the bathroom to identify the most strategic position for the vent hose. Ideally, the location should allow for efficient air extraction while minimizing visual obtrusion and structural modifications. Additionally, consider the proximity to existing ductwork and the potential for obstructions within the attic space.
Once the interior considerations are taken into account, move to the exterior of the house to identify the corresponding placement on the gable. Look for a location that aligns with the selected spot inside the bathroom and ensures a direct and unobstructed path for the vent hose. It is essential to avoid areas prone to water runoff or excessive exposure to environmental elements that could compromise the integrity of the vent hose and the gable itself.
Using a tape measure and a marker, carefully mark the precise location for the vent hose on the exterior surface of the gable. Ensure that the chosen spot allows for the vent hood to be securely installed and provides ample clearance for the vent hose to extend outward without obstruction. Take into consideration any architectural features or landscaping elements that may impact the installation or visual cohesiveness of the gable.
By thoughtfully determining the location for the vent hose, you set the foundation for an effective and visually harmonious installation. This proactive approach ensures that the ventilation system not only functions optimally but also integrates seamlessly with the overall aesthetics of your home's exterior. With the location identified, you are ready to proceed to the next steps of the installation process, bringing you closer to achieving a well-ventilated and aesthetically pleasing bathroom environment.
Step 3: Cut a hole in the gable
With the location for the vent hose determined, the next crucial step is to cut a hole in the gable to accommodate the passage of the vent hose. This process requires precision and careful consideration of the gable's material and structural integrity.
Begin by measuring the diameter of the vent hose to determine the appropriate size for the hole. Using a tape measure, mark the dimensions on the exterior surface of the gable, ensuring that the placement aligns with the previously identified location for the vent hose. Take into account any clearance requirements specified by the vent hose manufacturer to allow for a proper fit.
Once the dimensions are marked, prepare the necessary tools for cutting the hole. Depending on the material of the gable, a suitable cutting tool such as a utility knife or saw should be selected to ensure clean and precise cuts. It is essential to prioritize safety during this step by wearing protective gear and exercising caution when handling cutting tools.
Carefully cut along the marked lines to create the opening for the vent hose. Take your time to maintain accuracy and avoid unnecessary damage to the gable. If the gable is made of a more robust material such as wood or metal, ensure that the cutting tool is appropriate for the specific material to achieve a smooth and controlled cutting process.
As the hole is being cut, periodically check the dimensions to ensure that the opening aligns with the specifications required for the vent hose. Once the hole is successfully created, remove any debris or protrusions to ensure a clear and unobstructed passage for the vent hose.
By meticulously cutting a hole in the gable, you pave the way for the seamless integration of the vent hose into the exterior structure of your home. This precise and methodical approach sets the stage for the subsequent steps of installing the vent hood and attaching the vent hose, bringing you closer to achieving a well-ventilated and moisture-free bathroom environment.
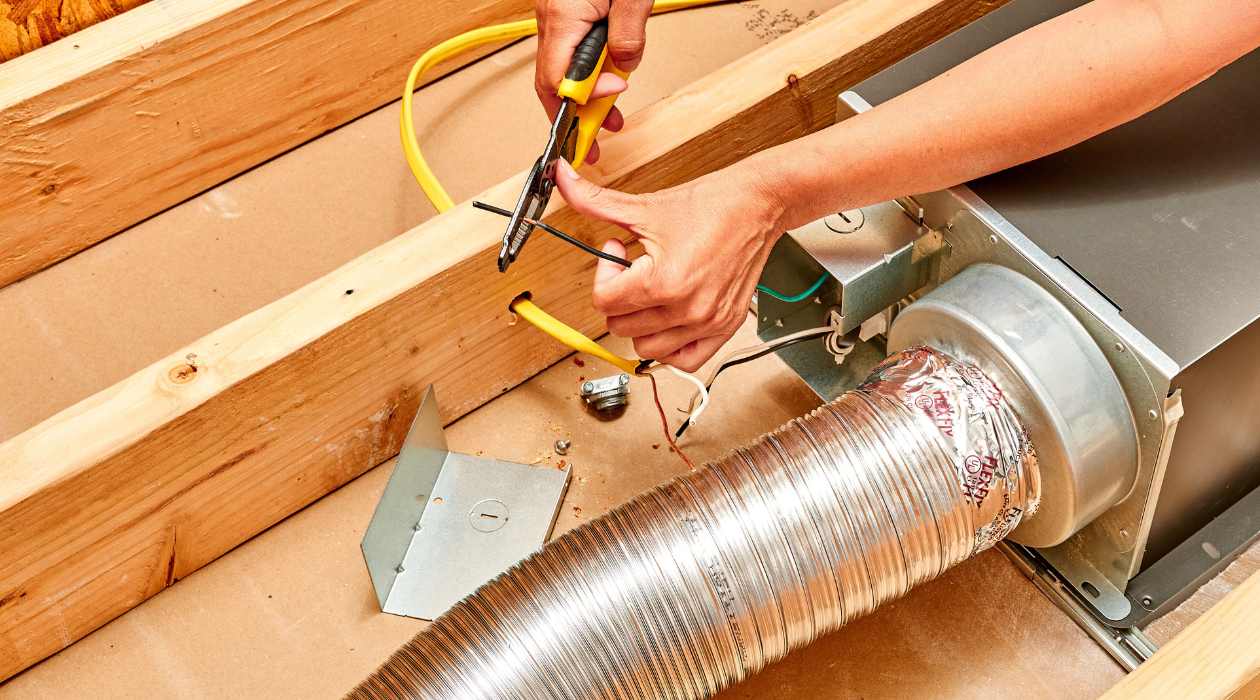
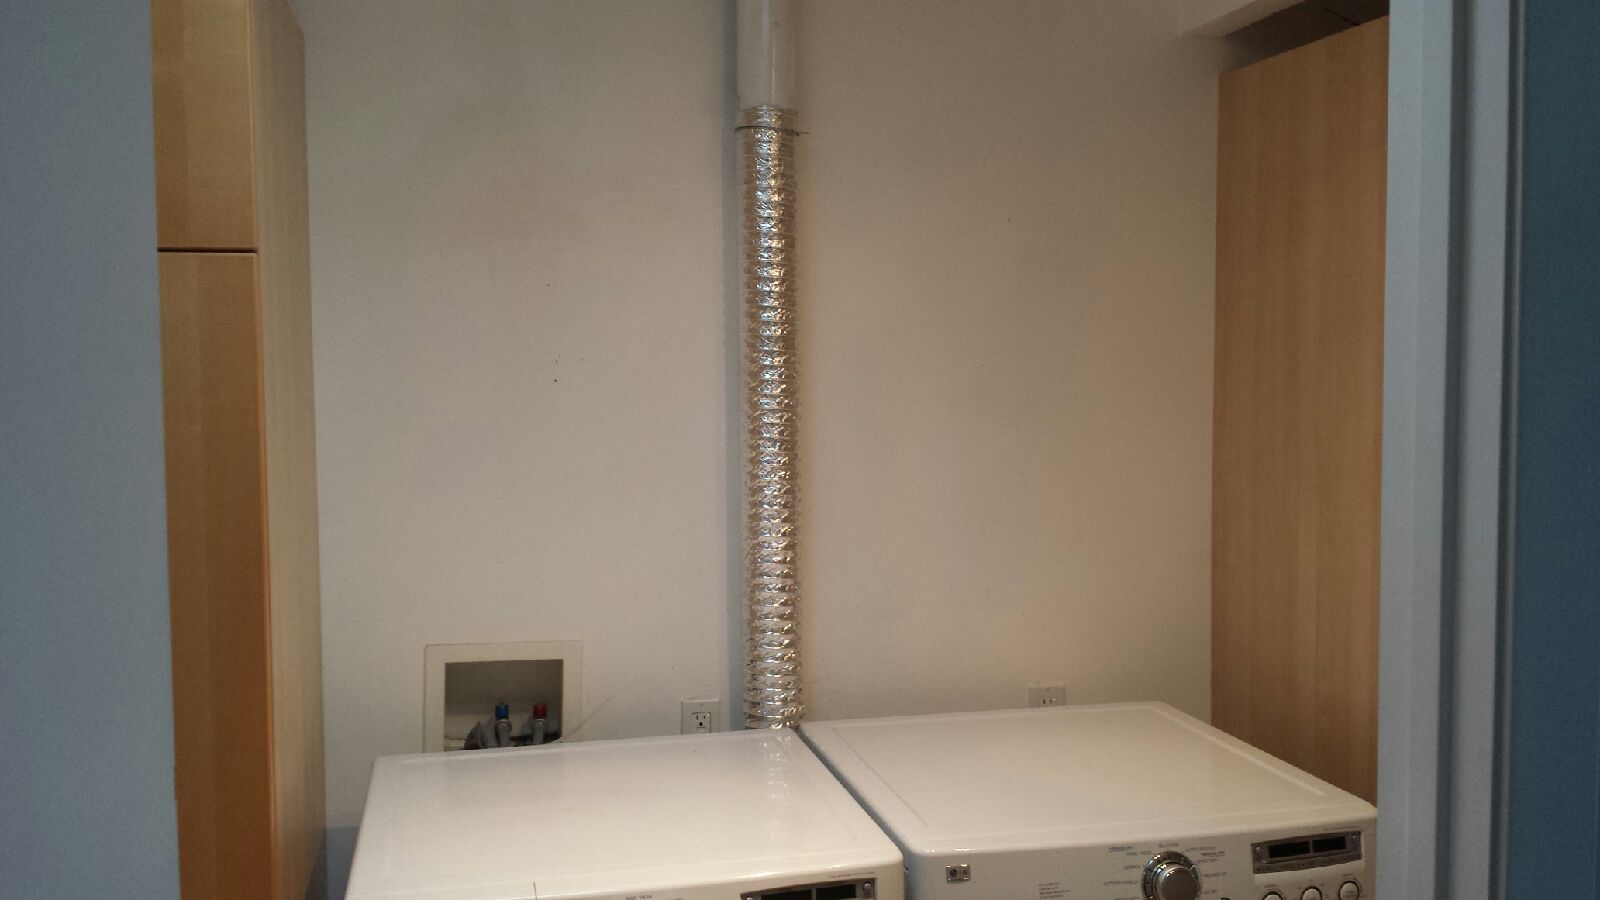
Make sure to use a vent hose that is the correct size for your bathroom fan. Attach the hose securely to the fan and run it through the attic to the gable. Use a vent hood at the gable to prevent rain and pests from entering.
Step 4: Install the vent hood
With the hole for the vent hose successfully cut into the gable, the next pivotal step is to install the vent hood. The vent hood serves as a protective and functional element, facilitating the efficient expulsion of moist air from the bathroom while preventing backdrafts and the entry of pests. Proper installation of the vent hood is essential to ensure the long-term effectiveness and durability of the ventilation system.
Begin by carefully positioning the vent hood over the newly created hole in the gable. Ensure that the hood is aligned with the opening and sits flush against the exterior surface. Depending on the design of the vent hood, it may feature pre-drilled holes or slots for fasteners. If not, mark the locations for the fasteners using a pencil or marker, ensuring that they correspond to the mounting points on the vent hood.
Once the positioning is confirmed, secure the vent hood in place using appropriate fasteners such as screws or nails. If the gable is made of a material that requires specialized fastening methods, ensure that the chosen fasteners are suitable for the specific material and provide a secure and stable attachment. Use a screwdriver or drill to drive the fasteners into place, ensuring that the vent hood is firmly and securely installed.
As the vent hood is secured, inspect the perimeter to verify that it forms a tight and weather-resistant seal against the gable. This step is crucial in preventing water infiltration and maintaining the integrity of the ventilation system. If necessary, apply a bead of outdoor-grade sealant around the edges of the vent hood to create a watertight and airtight seal, further fortifying the connection and enhancing the weather resistance of the installation.
By diligently installing the vent hood, you establish a robust and reliable foundation for the subsequent attachment of the vent hose. The secure and weather-resistant installation of the vent hood not only ensures the optimal functionality of the ventilation system but also contributes to the overall protection and longevity of your home's exterior. With the vent hood securely in place, you are ready to proceed to the next step of attaching the vent hose, bringing you closer to achieving a well-ventilated and moisture-free bathroom environment.
Read more: How To Install Gable Vent
Step 5: Attach the vent hose
With the vent hood securely installed on the attic gable, the next critical step is to attach the vent hose, establishing a direct pathway for the expulsion of moist air from the bathroom to the exterior of the home. This process requires precision and attention to detail to ensure a secure and efficient connection between the vent hose and the vent hood.
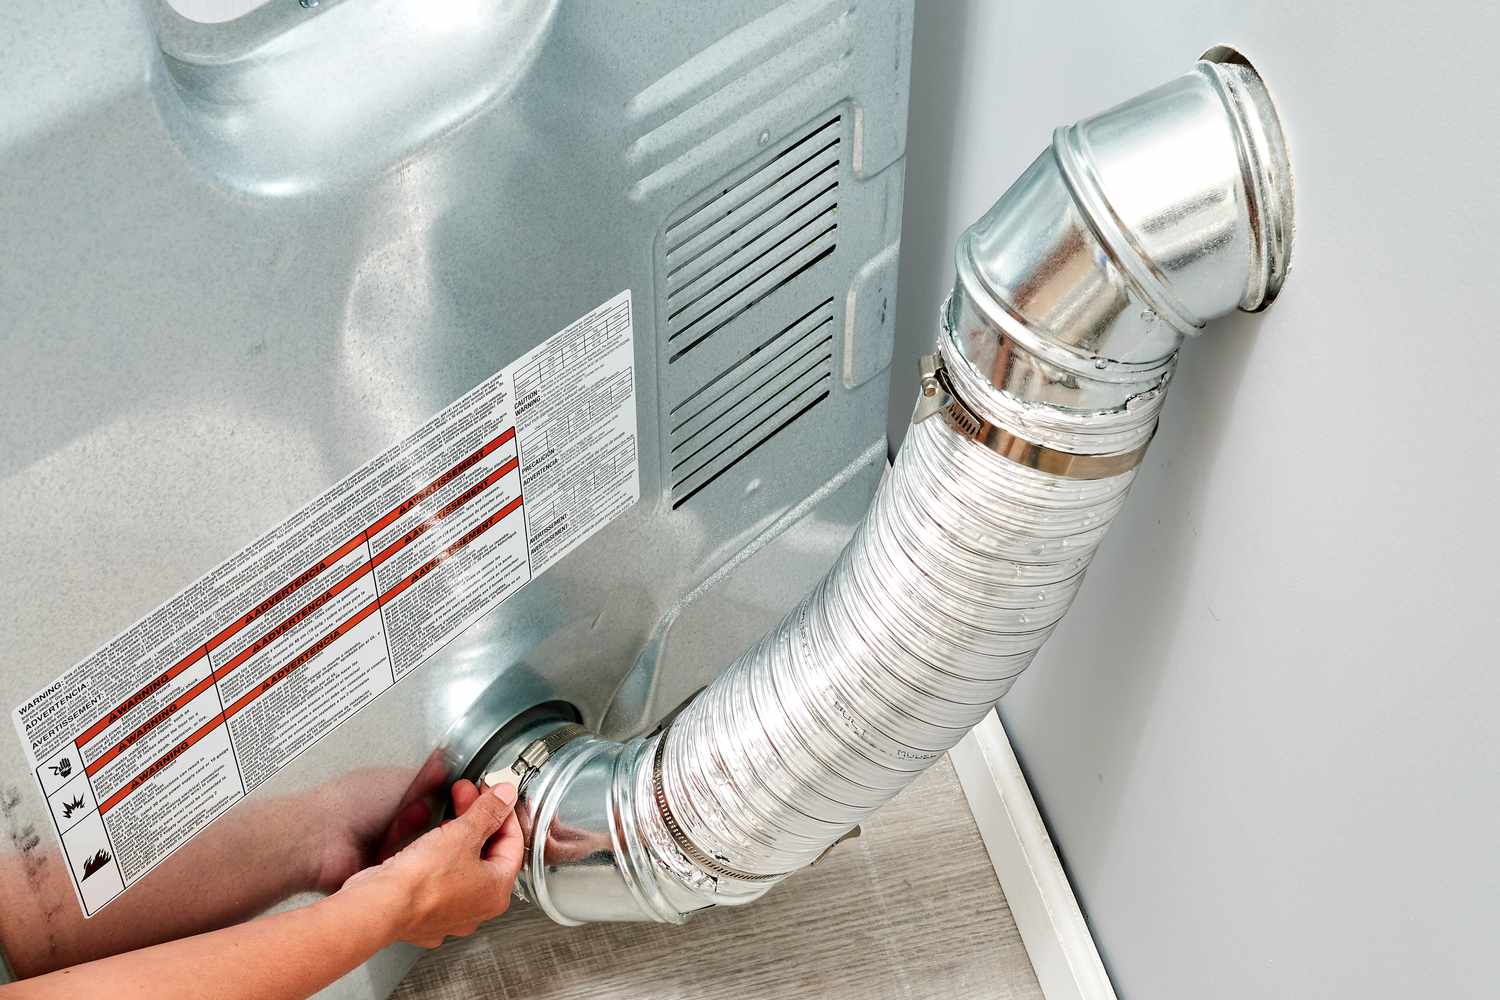
Begin by positioning one end of the vent hose over the opening of the vent hood. Ensure that the hose aligns with the outlet of the vent hood and provides a snug fit to prevent air leakage. Depending on the specific design of the vent hood and vent hose, there may be integrated mechanisms or adapters to facilitate a secure connection. If not, use a reliable fastening method such as a hose clamp to firmly attach the vent hose to the vent hood.
Once the initial end of the vent hose is securely attached to the vent hood, carefully extend the length of the hose to reach the interior of the bathroom. Avoid kinks or sharp bends in the hose that could impede the flow of air. As you position the vent hose, ensure that it follows a direct and unobstructed path from the vent hood to the interior vent opening in the bathroom.
Upon reaching the interior vent opening, secure the opposite end of the vent hose to the designated connection point. Depending on the specific configuration of the bathroom ventilation system, this may involve attaching the vent hose to a duct or vent opening using compatible fasteners or adapters. Ensure that the connection is tight and secure, minimizing the potential for air leaks or dislodgment.
As the vent hose is attached at both ends, inspect the entire length of the hose to verify that it forms a continuous and airtight pathway from the vent hood to the interior vent opening. This comprehensive inspection ensures that the ventilation system operates at optimal efficiency, effectively expelling moist air and maintaining a healthy indoor environment.
By meticulously attaching the vent hose, you establish a crucial link in the ventilation system, enabling the seamless transfer of moist air from the bathroom to the exterior of the home. This meticulous and detail-oriented approach sets the stage for the final step of sealing the connection, bringing you closer to achieving a well-ventilated and moisture-free bathroom environment.
Step 6: Seal the connection
Sealing the connection between the vent hose and the vent hood is a critical final step in ensuring the effectiveness and longevity of the bathroom ventilation system. This process involves the application of a high-quality sealant to create a watertight and airtight seal, safeguarding the connection against environmental elements and potential air leaks.
Begin by inspecting the junction where the vent hose meets the vent hood, ensuring that the attachment is secure and free from gaps or irregularities. Any gaps or areas of potential air leakage should be promptly addressed to maintain the integrity of the connection.
Select a premium outdoor-grade sealant that is specifically formulated for the materials of the vent hood and vent hose. Silicone-based sealants are often recommended for their durability and weather resistance. Carefully apply a generous bead of sealant around the entire perimeter of the connection, ensuring complete coverage and a uniform seal.
As the sealant is applied, use a caulking gun or a suitable applicator to achieve a smooth and consistent seal. Pay close attention to any areas of potential vulnerability, such as seams or irregular surfaces, to effectively fortify the connection against water infiltration and air leaks.
Once the sealant is applied, carefully inspect the entire perimeter of the connection to verify that the seal is uniform and free from gaps or inconsistencies. This meticulous inspection ensures that the connection is fully protected against the elements and potential air leaks, contributing to the long-term efficiency and reliability of the ventilation system.
Allow the sealant to cure according to the manufacturer's recommendations, ensuring that it achieves optimal adhesion and weather resistance. Once cured, the sealant forms a robust barrier, effectively safeguarding the connection and enhancing the overall durability of the ventilation system.
By diligently sealing the connection, you fortify the integrity of the entire ventilation system, ensuring that it operates at peak efficiency and remains resilient against environmental factors. This final step marks the completion of the installation process, culminating in a well-ventilated and moisture-free bathroom environment for the enhanced comfort and well-being of your home.
Conclusion
Congratulations on successfully completing the installation of the bathroom vent hose to the attic gable! By following the comprehensive steps outlined in this guide, you have taken proactive measures to enhance the ventilation system of your home, particularly in the moisture-prone environment of the bathroom. This meticulous installation process not only contributes to the well-being of your living space but also reflects your commitment to maintaining a healthy and comfortable home environment for you and your family.
The careful selection of high-quality materials and tools, coupled with thoughtful planning and precise execution, has resulted in a robust and reliable ventilation system. The strategic determination of the vent hose location, the precise cutting of the hole in the gable, the secure installation of the vent hood, the meticulous attachment of the vent hose, and the thorough sealing of the connection collectively form a cohesive and effective ventilation solution.
By attaching the bathroom vent hose to the attic gable, you have significantly improved the air quality and moisture control within your home. The expulsion of moist air directly to the exterior minimizes the risk of mold and mildew, preserving the structural integrity of your home and promoting a healthier indoor environment. Furthermore, the seamless integration of the vent hood and vent hose with the exterior of your home contributes to the overall aesthetic appeal and functionality of the property.
As you enjoy the benefits of a well-ventilated and moisture-free bathroom, take pride in the proactive steps you have taken to enhance the livability and longevity of your home. The successful completion of this installation underscores your dedication to creating a comfortable and healthy living environment, reflecting your commitment to proactive home maintenance and improvement.
Moving forward, regular maintenance and periodic inspections of the ventilation system will ensure its continued effectiveness and longevity. By staying attentive to the performance of the vent hose, vent hood, and the overall ventilation system, you can address any potential issues promptly and uphold the optimal functionality of this essential home component.
With the installation of the bathroom vent hose to the attic gable now complete, you can revel in the improved air quality, reduced moisture levels, and the overall comfort and well-being it brings to your home. Your proactive approach to home maintenance and improvement sets the stage for a healthier and more enjoyable living environment, reflecting your commitment to creating a space where your family can thrive.
Well done, and may your home be filled with fresh, clean air and a sense of comfort and well-being for years to come!
Frequently Asked Questions about How To Attach A Bathroom Vent Hose To An Attic Gable
Was this page helpful?
At Storables.com, we guarantee accurate and reliable information. Our content, validated by Expert Board Contributors, is crafted following stringent Editorial Policies. We're committed to providing you with well-researched, expert-backed insights for all your informational needs.


0 thoughts on “How To Attach A Bathroom Vent Hose To An Attic Gable”