Home>Storage Ideas>Bathroom Storage>How To Install Plumbing Vent Lines In Your Bathroom
Bathroom Storage
How To Install Plumbing Vent Lines In Your Bathroom
Modified: January 6, 2024
Learn how to properly install plumbing vent lines in your bathroom for optimum performance and avoid any issues. Find expert tips and tricks for bathroom storage.
(Many of the links in this article redirect to a specific reviewed product. Your purchase of these products through affiliate links helps to generate commission for Storables.com, at no extra cost. Learn more)
Introduction
Welcome to the world of bathroom storage! If you’re looking to optimize the space in your bathroom and keep it organized, you’ve come to the right place. A well-designed bathroom storage solution can make all the difference in creating a functional and aesthetically pleasing space.
Having ample storage in your bathroom is essential for keeping towels, toiletries, and everyday essentials at hand. From cabinets and shelves to creative storage hacks, there are numerous options to explore. In this article, we will delve into the world of bathroom storage and provide you with expert tips and tricks to make the most of your space.
Before we dive into the specifics, it’s important to assess your bathroom’s storage needs. Take note of the available space, the items you need to store, and how you want your bathroom to look and feel. This will help guide your decision-making process when it comes to selecting storage solutions.
Once you have a clear idea of what you need, it’s time to explore the various storage options. Whether you have a small powder room or a spacious master bathroom, there are solutions to accommodate every size and style.
Consider combining functionality with aesthetics by choosing storage solutions that complement your bathroom’s design. From sleek and modern to rustic and farmhouse-inspired, there are storage options available to suit every taste.
Ready to get started? Let’s explore the world of bathroom storage together and transform your bathroom into a clutter-free oasis.
Key Takeaways:
- Ensure proper airflow and drainage in your bathroom by understanding and installing plumbing vent lines. Plan, measure, and connect pipes securely to create a reliable and efficient plumbing system.
- Optimize your bathroom space with smart storage solutions. From cabinets to creative hacks, maximize functionality and aesthetics while keeping your bathroom clutter-free.
Read more: How To Vent A Bathroom Plumbing
Understanding Plumbing Vent Lines
Plumbing vent lines play a crucial role in your bathroom’s plumbing system, ensuring the proper flow of wastewater and preventing unpleasant odors. These vent lines are an essential component of any well-functioning bathroom plumbing system.
The main purpose of plumbing vent lines is to equalize pressure in the drain pipes, allowing wastewater to flow smoothly without creating any suction or resistance. Without proper venting, drain pipes can become clogged, resulting in slow drainage, gurgling sounds, and even sewer gas odor in your bathroom.
Plumbing vent lines are connected to your bathroom’s drain system and extend through the roof of your house. They allow air to enter the drainage system, balancing the pressure and preventing blockages. It’s important to understand the different types of vent lines and their specific functions:
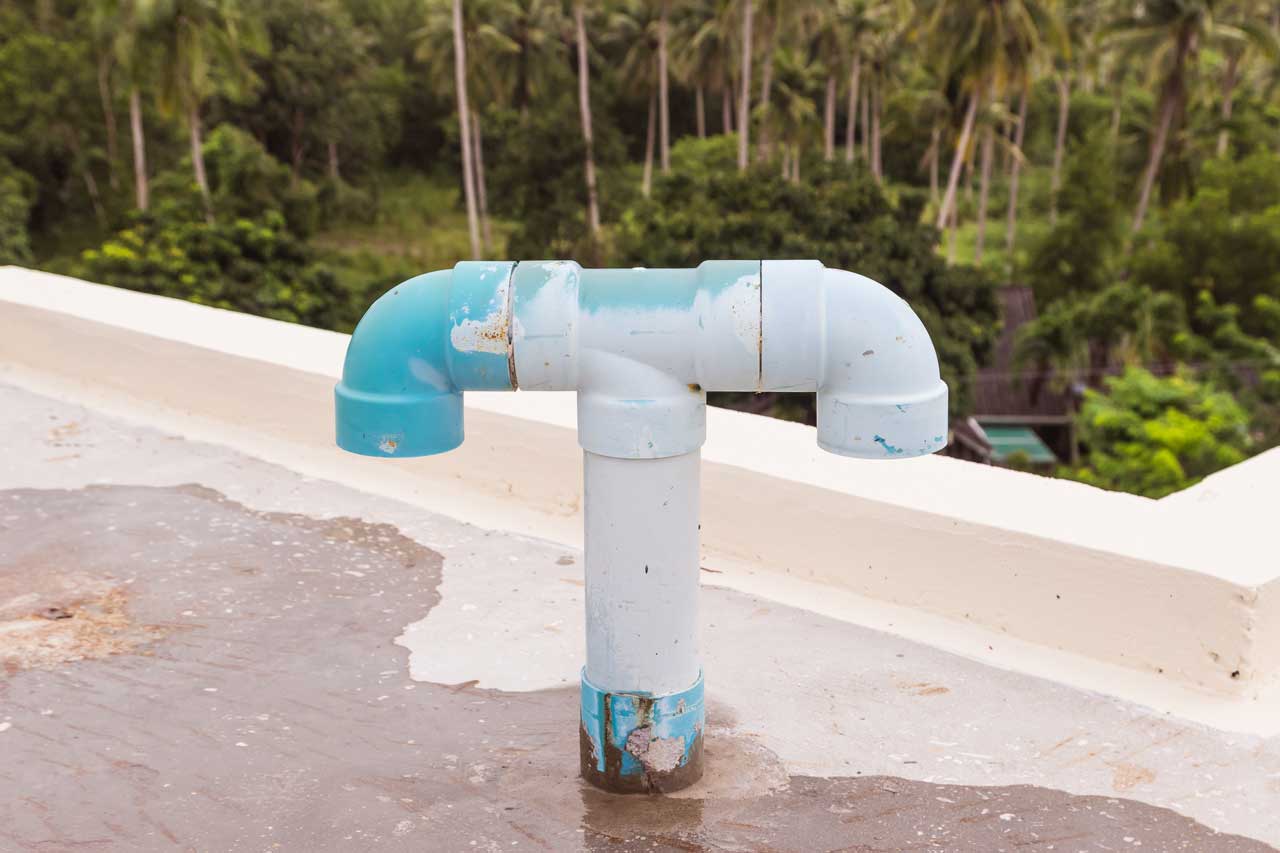
- Main Vent Stack: The main vent stack is the vertical pipe that extends through your roof. It connects to the main waste stack and serves as the main vent for your plumbing system. It allows air to enter and exit the drain system, preventing any air pressure buildup that could lead to drainage issues.
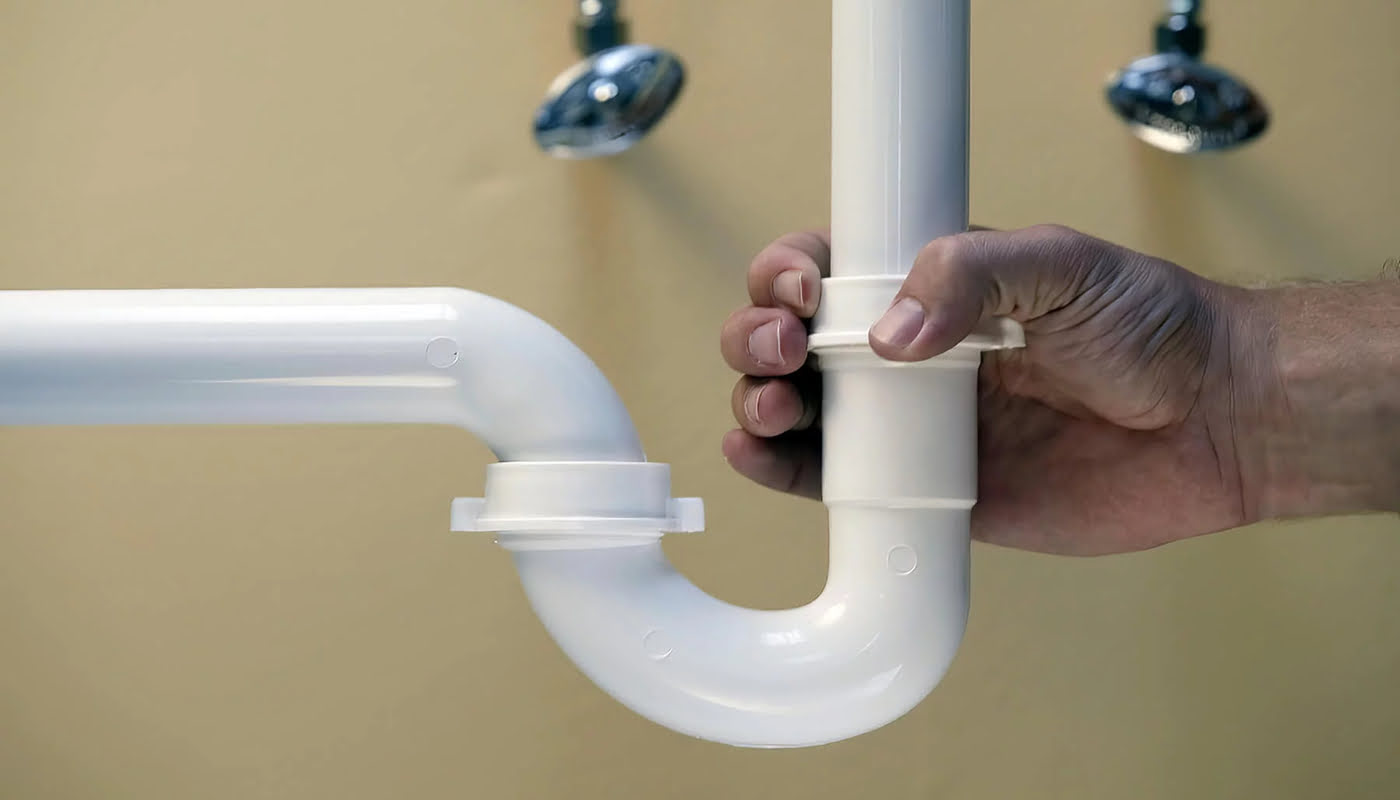
- Branch Vent Pipes: Branch vent pipes are connected to individual fixtures, such as toilets, sinks, and showers. They serve as secondary vents, allowing air to enter the drain system and facilitating proper drainage.
- Fixture Vents: Fixture vents are small pipes that connect directly to individual fixtures. They provide additional ventilation for specific fixtures, ensuring optimal drainage without creating pressure imbalances.
Properly installing plumbing vent lines requires careful planning and adherence to local building codes. In the next sections, we will explore the step-by-step process of installing plumbing vent lines in your bathroom, ensuring a well-functioning and odor-free plumbing system.
Tools and Materials Needed
Before embarking on the installation of plumbing vent lines in your bathroom, it’s important to gather all the necessary tools and materials. Being prepared with the right equipment will make the process much easier and ensure a successful installation. Here are the tools and materials you will need:
Tools:
- Measuring tape
- Pencil
- Hacksaw or pipe cutter
- PVC pipe cutter (if using PVC pipes)
- Torch or heat gun (if using copper pipes)
- Deburring tool or file
- Screwdrivers
- Adjustable wrench
- Level
- Plumbers’ tape or pipe thread sealant
- Soldering torch or pipe glue (depending on the type of pipes being used)
- Plumbers’ snake or auger
- Pipe wrench
- Drill and hole saw (if installing vent flashing)
Materials:
- Vent pipes (PVC, ABS, or copper)
- Fittings (elbows, couplings, tees, etc.)
- Vent flashing (if installing through the roof)
- Roofing cement or sealant (if installing vent flashing)
- Pipe straps or hangers
- Plumbers’ putty or silicone caulk
- Washing machine hose (if installing an auto-vent)
- Pipe insulation (optional)
It’s crucial to ensure that all materials meet local building codes and regulations. It’s recommended to check with your local building department to confirm the approved materials and installation methods for plumbing vent lines in your area.
Having these tools and materials ready before starting the installation process will save you time and prevent any delays. With everything in hand, you are now ready to move on to planning and executing the installation of plumbing vent lines in your bathroom.
Read more: How To Install A Vent Fan In Bathroom
Step 1: Plan the Plumbing Vent System
Before you begin installing the plumbing vent lines in your bathroom, it’s essential to carefully plan out the vent system. Proper planning will ensure that the vent lines are installed in the most effective and efficient way, preventing any future issues with drainage or odors. Here’s how you can plan your plumbing vent system:
1. Understand Local Building Codes:
Start by familiarizing yourself with the local building codes and regulations regarding plumbing vent lines. Each area may have specific requirements, such as the minimum size of vents, distance between vents and fixtures, and the number of fixtures that can be connected to a single vent. Understanding these regulations will help you design a compliant and functional plumbing vent system.
2. Determine vent pipe size:
Choose the appropriate vent pipe size based on the number and type of fixtures in your bathroom. Typically, 1.5 or 2-inch pipes are used for most residential applications. Larger fixtures, such as toilets, may require a 3 or 4-inch vent pipe. Consult local building codes or a plumbing professional to determine the correct size for your specific setup.
3. Design the vent routes:
Sketch out the vent routes on paper, taking into consideration the most direct and efficient path for the vent pipes. Plan to have the main vent stack run vertically through the roof, with branch vents connecting to individual fixtures. Ensure that the vents maintain a proper slope to allow for proper drainage and prevent the accumulation of water or debris.
Read more: How To Install Vanity Over Plumbing
4. Locate fixtures:
Identify the location of all the fixtures in your bathroom, including sinks, toilets, showers, and bathtubs. You will need to connect each fixture to the plumbing vent system, so it’s essential to plan accordingly and determine the best placement for the vent pipes.
5. Consider future renovations:
If you anticipate future renovations or additions to your bathroom, take them into account when planning the vent system. Leave room for expansion and ensure that the layout allows for easy connection of new fixtures without interfering with the existing vent setup.
By carefully planning your plumbing vent system, you will minimize the risk of drainage problems, odors, and potential code violations. Take the time to design a well-thought-out system that meets all the necessary requirements and ensures the proper functioning of your bathroom’s plumbing.
Step 2: Locate the Main Vent Stack
The main vent stack is a crucial component of your plumbing vent system. It is responsible for allowing air to enter and exit the drain system, preventing pressure imbalances and ensuring smooth drainage in your bathroom. Locating the main vent stack is an essential step in the installation process. Here’s how you can do it:
1. Consult Plumbing Blueprints:
If you have access to the plumbing blueprints of your house, it can provide valuable information about the location of the main vent stack. The blueprints will indicate the placement of the stack and its connection to the drainage system. Use these blueprints as a guide to help you locate the main vent stack.
2. Look for Vent Pipes:
In some cases, you may be able to visually identify the main vent stack by locating the vent pipes that extend vertically through the roof. These pipes are typically made of PVC, ABS, or copper and are larger in diameter than the other plumbing pipes. Look for multiple pipes merging into a larger stack, which indicates the presence of the main vent stack.
3. Trace Drain Lines:
If you cannot locate the main vent stack visually, you can trace the drain lines from your bathroom fixtures towards the roof. Start at the lowest fixture in your bathroom, such as a shower or tub, and follow the drain line vertically. Continue tracing the drain lines until you reach the point where they connect to a larger pipe, indicating the main vent stack.
4. Hire a Professional:
If you are unsure about the location of the main vent stack or if you encounter difficulties during the process, it’s always a good idea to consult a professional plumber. Plumbers have the expertise and specialized equipment to accurately locate the main vent stack and ensure a proper installation.
Locating the main vent stack is an essential step in the installation of plumbing vent lines. It allows for the proper connection of branch vent pipes and ensures the efficient functioning of your bathroom’s plumbing system. Take the time to find the main vent stack, or seek professional assistance, to ensure a successful installation.
Step 3: Install the Main Vent Stack
Now that you have located the main vent stack, it’s time to proceed with its installation. The main vent stack serves as the primary vent for your plumbing system, ensuring proper airflow and preventing pressure imbalances. Follow these steps to install the main vent stack in your bathroom:
1. Gather the Necessary Materials:
Before you begin, make sure you have all the required materials and tools. These may include the main vent stack pipe, fittings (such as elbows and couplings), pipe straps or hangers, a saw or pipe cutter, and plumbing adhesive or soldering equipment depending on the type of pipe you are using.
2. Measure and Cut the Vent Stack Pipe:
Measure the length needed for the vent stack pipe based on the distance between the bathroom fixtures and the point where it will extend through the roof. Use a saw or pipe cutter to cut the pipe to the desired length, ensuring a clean and straight cut.
3. Dry Fit the Sections:
Before permanently attaching the sections of the vent stack pipe, dry fit them together to ensure a proper fit. Connect the pipe sections using the appropriate fittings, such as elbows or couplings. This step allows you to make any necessary adjustments before securing the pipe in place.
4. Secure the Vent Stack Pipe:
Use pipe straps or hangers to secure the vent stack pipe to the wall or ceiling joists. Ensure the pipe is level and securely fastened, preventing any movement or sagging. Use the appropriate fasteners for your specific installation requirements.
Read more: How To Install Toilet Plumbing
5. Connect to the Drain Lines:
Once the main vent stack pipe is securely in place, connect it to the drain lines of the bathroom fixtures. Use the appropriate fittings, such as wyes or tees, to make the connections. Ensure that the connections are tight and leak-free, using plumbing adhesive or soldering equipment as necessary.
6. Extend the Vent Stack through the Roof:
If your main vent stack needs to extend through the roof, carefully measure and mark the location where it will penetrate the roof surface. Use a drill and a hole saw with the appropriate size to create an opening for the vent stack. Take precautions to avoid damaging any existing roofing material.
7. Install Vent Flashing:
Once the vent stack is in place, use vent flashing to seal the area where the vent stack penetrates the roof. Apply roofing cement or sealant around the base of the vent flashing to create a watertight seal and prevent any leaks.
Installing the main vent stack is a critical step in ensuring the functionality and efficiency of your bathroom’s plumbing system. Take the necessary precautions, measure accurately, and connect the pipes securely to create a well-designed vent stack. With the main vent stack installed, you are now ready to proceed with the next step in the installation process.
Step 4: Install Branch Vent Pipes
With the main vent stack installed, the next step is to install the branch vent pipes. These pipes connect to individual bathroom fixtures, such as sinks, toilets, and showers, and provide secondary vents to maintain proper pressure and airflow within the plumbing system. Follow these steps to install the branch vent pipes:
Read more: How To Install Roof Vent For Bathroom Fan
1. Plan the Branch Vent Routes:
Before you begin installation, plan the routes for the branch vent pipes. Determine the most direct and efficient paths from each fixture to the main vent stack. Consider the distance, required slope, and any obstacles you may encounter along the way. Ensure that the branch vents maintain a proper slope for optimal drainage.
2. Measure and Cut the Pipe Sections:
Using a saw or pipe cutter, measure and cut the branch vent pipe sections to the required lengths. Make sure to have the appropriate fittings, such as elbows and tees, on hand for making connections. Double-check your measurements before cutting to ensure accurate fits.
3. Dry Fit the Branch Vent Pipes:
Before permanently attaching the branch vent pipes, dry fit them together to ensure a proper fit and alignment with the fixtures and the main vent stack. Make any necessary adjustments or trim the pipe sections as needed to ensure a secure and optimal fit.
4. Secure the Branch Vent Pipes:
Use pipe straps or hangers to secure the branch vent pipes to the wall or ceiling joists. Ensure that the pipes are level, properly supported, and securely fastened. Use the appropriate fasteners for your specific installation requirements.
Read more: How To Clear A Plumbing Vent
5. Make Connections to the Fixtures:
Connect the branch vent pipes to the individual bathroom fixtures using the appropriate fittings. For sinks and showers, a tee fitting can be used to connect the branch vent pipe to the drain pipe. For toilets, a closet bend or flange is used to connect the branch vent pipe to the toilet’s drain pipe. Ensure all connections are tightly sealed to prevent any leaks.
6. Test the Vent System:
After installing the branch vent pipes, it’s important to test the vent system for proper airflow and drainage. Run water in each fixture and check for any signs of slow drainage or gurgling sounds. Proper airflow and drainage indicate that the branch vent pipes are functioning correctly.
Installing the branch vent pipes is a vital step in maintaining a well-functioning plumbing system in your bathroom. Take the time to plan the routes, measure accurately, and secure the pipes properly. With the branch vent pipes installed, you are ready to move on to the next step in the installation process.
Step 5: Connect Vent Pipes to Fixtures
After installing the branch vent pipes, the next step is to connect the vent pipes to the individual bathroom fixtures. This ensures that each fixture has a proper vent, allowing for optimal drainage and preventing pressure imbalances. Here’s how you can connect the vent pipes to the fixtures:
1. Plan the Vent Connections:
Before you begin, review the plumbing blueprints or assess the fixture locations in your bathroom to plan the vent connections. Ensure that each fixture has a corresponding vent pipe connecting to it. Determine the most efficient and direct route for the vent pipes from the fixtures to the main vent stack.
2. Choose the Right Fittings:
Select the appropriate fittings, such as tees, elbows, or couplings, to connect the vent pipes to the fixtures. The choice of fittings will depend on the specific layout and requirements of your bathroom. Ensure that the fittings are the correct size and compatible with the vent pipes and fixture connections.
3. Cut Vent Pipe Sections:
Using a saw or pipe cutter, measure and cut the vent pipe sections to the required lengths. Take into account the distance from the fixture to the vent stack and any necessary angles or offsets. Double-check your measurements to ensure accurate fits.
4. Dry Fit the Vent Pipes:
Prior to permanently attaching the vent pipes, dry fit them together to ensure proper alignment and fit with the fixtures and the main vent stack. Make any necessary adjustments or trim the pipe sections as needed to ensure a secure and optimal connection.
5. Secure the Vent Pipes:
Use pipe straps or hangers to secure the vent pipes to the wall or ceiling joists. Ensure that the pipes are level and securely fastened, providing proper support. Use the appropriate fasteners for your specific installation requirements.
Read more: How To Install A Bathtub Faucet
6. Make the Connections:
Connect the vent pipes to the corresponding fixtures using the chosen fittings. Ensure that the connections are tight and leak-proof. Some fixtures, such as sinks or showers, might require a tee fitting to connect the vent pipe to the drain pipe. For toilets, a closet bend or flange is used to connect the vent pipe to the toilet’s drain pipe.
7. Test the Vent System:
Once the vent pipes are securely connected to the fixtures, it is important to test the vent system. Run water in each fixture and check for proper drainage. There should be no signs of slow drainage or gurgling sounds, indicating that the vent pipes are functioning effectively.
By connecting the vent pipes to the fixtures, you ensure the proper venting and drainage of your bathroom’s plumbing system. Take the time to plan the vent connections, measure accurately, and make secure fittings. With the vent pipes connected, you are one step closer to completing the installation process.
Step 6: Install Vent Flashing
Installing vent flashing is an essential step in completing the installation of plumbing vent lines. Vent flashing helps to seal the area where the vent stack penetrates the roof, preventing any water leaks and ensuring the durability of your roof. Follow these steps to install vent flashing:
1. Determine the Location:
Before installing the vent flashing, determine the exact location where the vent stack will penetrate the roof. Use a tape measure to measure and mark the spot, ensuring it aligns with the vent stack’s vertical path.
Read more: How To Extend Faucet Supply Line
2. Gather the Required Materials:
Ensure you have all the necessary materials and tools on hand for installing the vent flashing. This typically includes the vent flashing itself, roofing nails, a hammer, a utility knife, and roofing cement or sealant.
3. Prepare the Roof Surface:
Carefully remove any roofing materials, such as shingles or tiles, from the area where the vent flashing will be installed. Use a utility knife to create a clean and precise opening that matches the size and shape of the vent flashing.
4. Install the Vent Flashing:
Place the vent flashing over the opening and position it so that the base is flush with the roof surface. Use roofing nails to secure the vent flashing into place, ensuring it is securely fastened and won’t move or lift. Make sure to drive the nails into the designated nail holes on the vent flashing.
5. Apply Roofing Cement or Sealant:
Apply roofing cement or sealant around the base of the vent flashing to create a watertight seal. Make sure to cover the entire base and any exposed nails to prevent any potential leaks. Smooth out the cement or sealant to ensure a clean and neat finish.
Read more: What Is A Water Line Plumbing
6. Reinstall Roofing Materials:
Once the vent flashing is securely installed, carefully replace the roofing materials, such as shingles or tiles, around the vent. Ensure that they fit snugly around the vent stack, maintaining a watertight seal. Nail or fasten the roofing materials back into place as necessary.
7. Inspect for Leaks:
After the installation is complete, inspect the vent flashing and the surrounding area for any signs of leaks. Run water down the drain system to test for any potential water penetration. If any leaks are detected, reapply roofing cement or sealant as needed to address the issue.
Installing vent flashing is crucial for protecting your roof and preventing water damage. Following these steps ensures a proper and secure installation, providing long-lasting protection for your plumbing vent system and your home.
Step 7: Test the Plumbing Vent System
After completing the installation of the plumbing vent lines in your bathroom, the final step is to test the vent system. Testing ensures that the system is functioning correctly, with proper airflow and drainage. Here’s how you can test the plumbing vent system:
1. Close all Drain Openings:
Begin by closing all the drain openings in your bathroom, including sinks, showers, bathtubs, and toilets. This prevents water from flowing through the drain system during testing, allowing you to assess the vent system’s performance.
Read more: How To Install A Handheld Showerhead
2. Fill Fixtures with Water:
Fill each fixture with water. Start with the lowest fixture in your bathroom, such as a shower or tub, and gradually move up to higher fixtures. Fill each fixture with water until it is almost overflowing.
3. Observe Drainage:
As you fill each fixture with water, observe the drainage. Ideally, the water should drain smoothly and quickly from each fixture. There should be no signs of slow drainage, gurgling, or bubbling. If you notice any issues, it may indicate a problem with the vent system that needs to be addressed.
4. Listen for Gurgling Sounds:
While the fixtures are draining, listen for any gurgling or unusual sounds coming from the drain pipes or vent system. Gurgling sounds could indicate air pressure imbalances or blockages in the vent system. If you hear any such sounds, it may be necessary to inspect and troubleshoot the vent lines further.
5. Check for Odors:
Throughout the testing process, keep an eye out for any unpleasant odors, especially sewer gas odor. A properly functioning vent system should prevent odors from entering the bathroom. If you detect any foul smells, it could be a sign of a vent system issue that requires attention.
Read more: How To Replace Plumbing Vent Boots
6. Inspect for Leaks:
While the fixtures are draining, closely inspect the vent lines, connections, and vent flashing for any signs of leaks. Look for dripping water, water stains, or dampness around the vent stack and the vent pipe connections. Address any leaks promptly to prevent water damage or further complications.
7. Seek Professional Assistance if Needed:
If you encounter any significant issues, such as persistent slow drainage, recurring odors, or ongoing plumbing problems, it’s advisable to seek professional assistance. A licensed plumber can provide expertise in diagnosing and resolving complex vent system issues.
Testing the plumbing vent system ensures that it is operating effectively and preventing any potential drainage or odor problems. By following these steps, you can identify and address any issues before they escalate. With a properly functioning vent system, you can enjoy a well-maintained and efficient bathroom plumbing system.
Conclusion
Congratulations! You have successfully completed the installation of plumbing vent lines in your bathroom. By following the steps outlined in this guide, you have created a well-designed and functional plumbing system that ensures proper drainage and prevents unpleasant odors. Your bathroom is now equipped with the necessary storage solutions to keep it organized and clutter-free.
With the installation of plumbing vent lines, you have taken a significant step towards maintaining a healthy and efficient bathroom. The vent lines help equalize air pressure in the drain system, allowing wastewater to flow smoothly without any blockages or backups. This ensures that your bathroom remains clean and odor-free.
Proper planning and careful execution of the vent line installation process are crucial for long-term success. By understanding local building codes, measuring accurately, using the right materials, and making secure connections, you have created a reliable and durable vent system.
Remember to periodically inspect your plumbing vent system and perform routine maintenance to ensure its continued functionality. This may include checking for any blockages or debris in the vents, ensuring proper ventilation, and addressing any leaks or issues promptly.
While the main focus of this guide has been on the installation of plumbing vent lines, it’s important to note that bathroom storage plays a vital role in maintaining an organized and functional space. Explore various storage options such as cabinets, shelves, and creative storage hacks to optimize the space in your bathroom and keep it clutter-free.
Whether you have a small powder room or a spacious master bathroom, incorporating smart storage solutions will help maximize your space and create a visually appealing environment.
We hope that this guide has provided you with valuable insights and practical tips for installing plumbing vent lines and optimizing bathroom storage. Remember to always consult local building codes and, if needed, seek professional assistance to ensure compliance and a successful installation.
Enjoy your newly installed plumbing vent lines and organized bathroom storage, and make the most of your functional and inviting bathroom space!
Frequently Asked Questions about How To Install Plumbing Vent Lines In Your Bathroom
Was this page helpful?
At Storables.com, we guarantee accurate and reliable information. Our content, validated by Expert Board Contributors, is crafted following stringent Editorial Policies. We're committed to providing you with well-researched, expert-backed insights for all your informational needs.
0 thoughts on “How To Install Plumbing Vent Lines In Your Bathroom”