Home>Renovation & DIY>Tools & Equipment>How To Clean A Spark Plug With Sandpaper

Tools & Equipment
How To Clean A Spark Plug With Sandpaper
Modified: August 28, 2024
Learn how to effectively clean a spark plug using sandpaper and other tools and equipment. Keep your engine running smoothly with these simple maintenance tips.
(Many of the links in this article redirect to a specific reviewed product. Your purchase of these products through affiliate links helps to generate commission for Storables.com, at no extra cost. Learn more)
Introduction
When it comes to maintaining your vehicle's engine, ensuring that the spark plugs are in optimal condition is paramount. Over time, spark plugs can become fouled with carbon deposits, which can lead to a decrease in engine performance and fuel efficiency. Fortunately, cleaning your spark plugs with sandpaper can help restore their functionality and prolong their lifespan. In this comprehensive guide, we will walk you through the step-by-step process of effectively cleaning your spark plugs with sandpaper, allowing you to maintain peak engine performance without the need for costly replacements. Let's dive into the materials needed for this task.
Key Takeaways:
- Regularly cleaning spark plugs with sandpaper can restore engine performance and fuel efficiency, prolonging their lifespan and saving on costly replacements.
- By following simple steps and using fine-grit sandpaper, you can effectively remove carbon deposits, ensuring reliable ignition and a smooth driving experience.
Read more: How Does A Spark Plug Break Glass
Materials Needed
Before embarking on the spark plug cleaning process, it is essential to gather the necessary materials to ensure a smooth and efficient procedure. Here are the items you will need:
- Sandpaper: Opt for fine-grit sandpaper, preferably in the range of 400 to 600 grit. This will effectively remove any carbon deposits without damaging the spark plug.
- Soft Bristle Brush: A small, soft bristle brush will aid in removing any residual debris from the spark plug after sanding.
- Cloth: Have a clean, lint-free cloth on hand to wipe the spark plug clean after sanding and brushing.
- Socket Wrench and Spark Plug Socket: These tools are necessary for safely removing and reinstalling the spark plug.
- Spark Plug Gap Gauge: This gauge will allow you to check and adjust the gap on the spark plug if necessary.
- Safety Gear: It is crucial to prioritize safety, so be sure to wear protective gloves and safety glasses throughout the cleaning process to shield yourself from any debris or contaminants.
- Cleaning Solution (Optional): While not mandatory, having a specialized cleaning solution designed for spark plugs can aid in the removal of stubborn deposits.
By having these materials at your disposal, you can confidently proceed with cleaning your spark plugs, knowing that you have everything you need to complete the task effectively and safely.
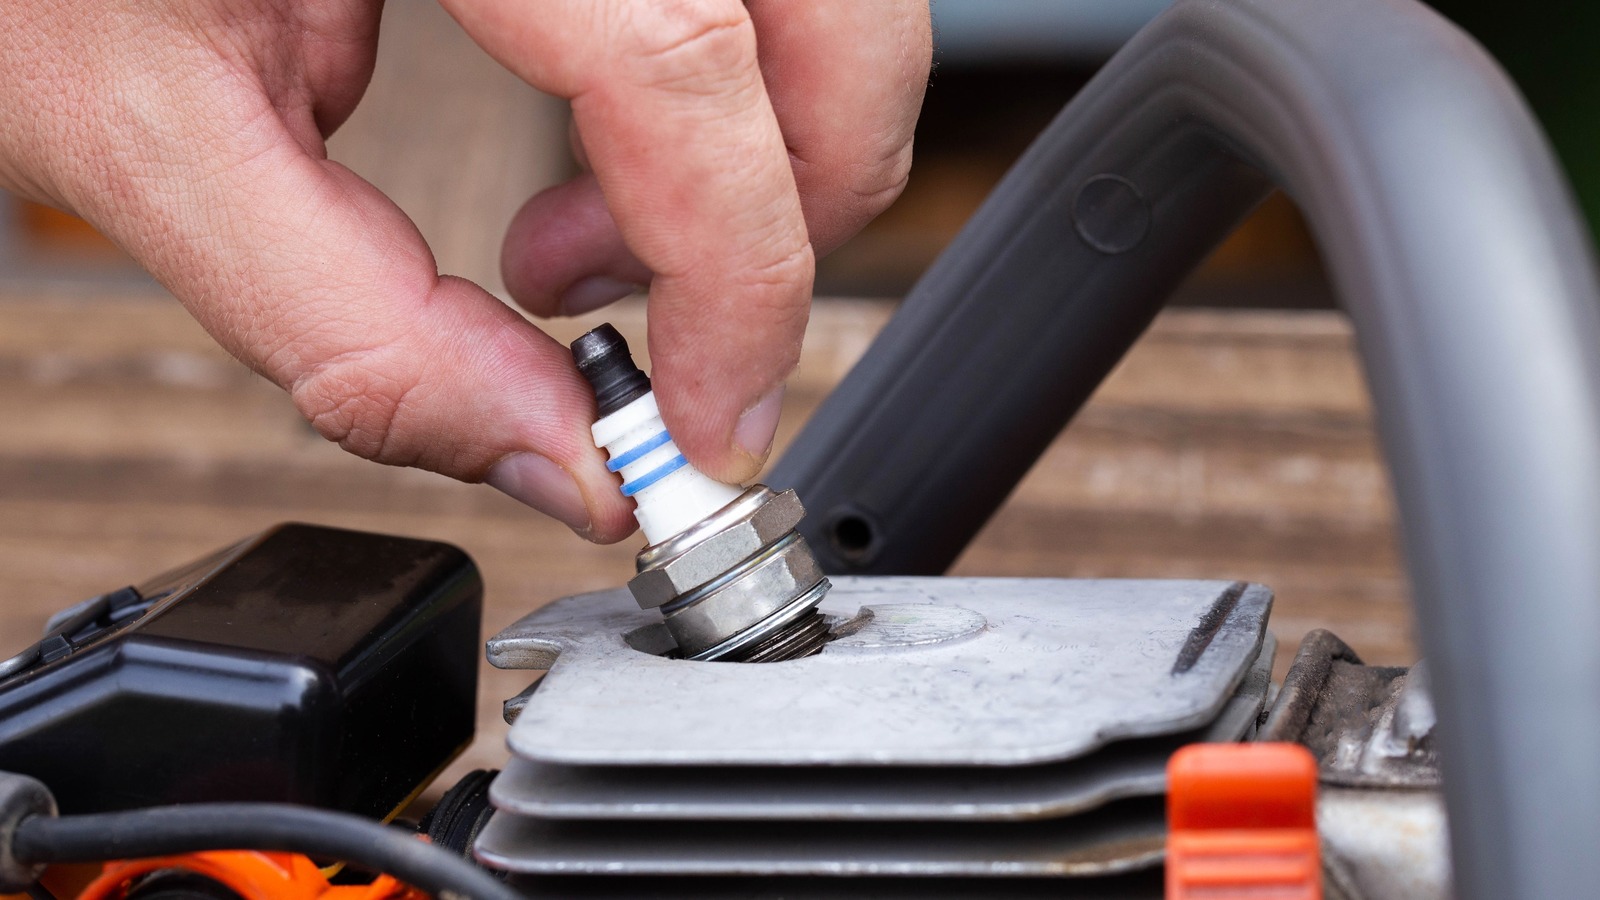
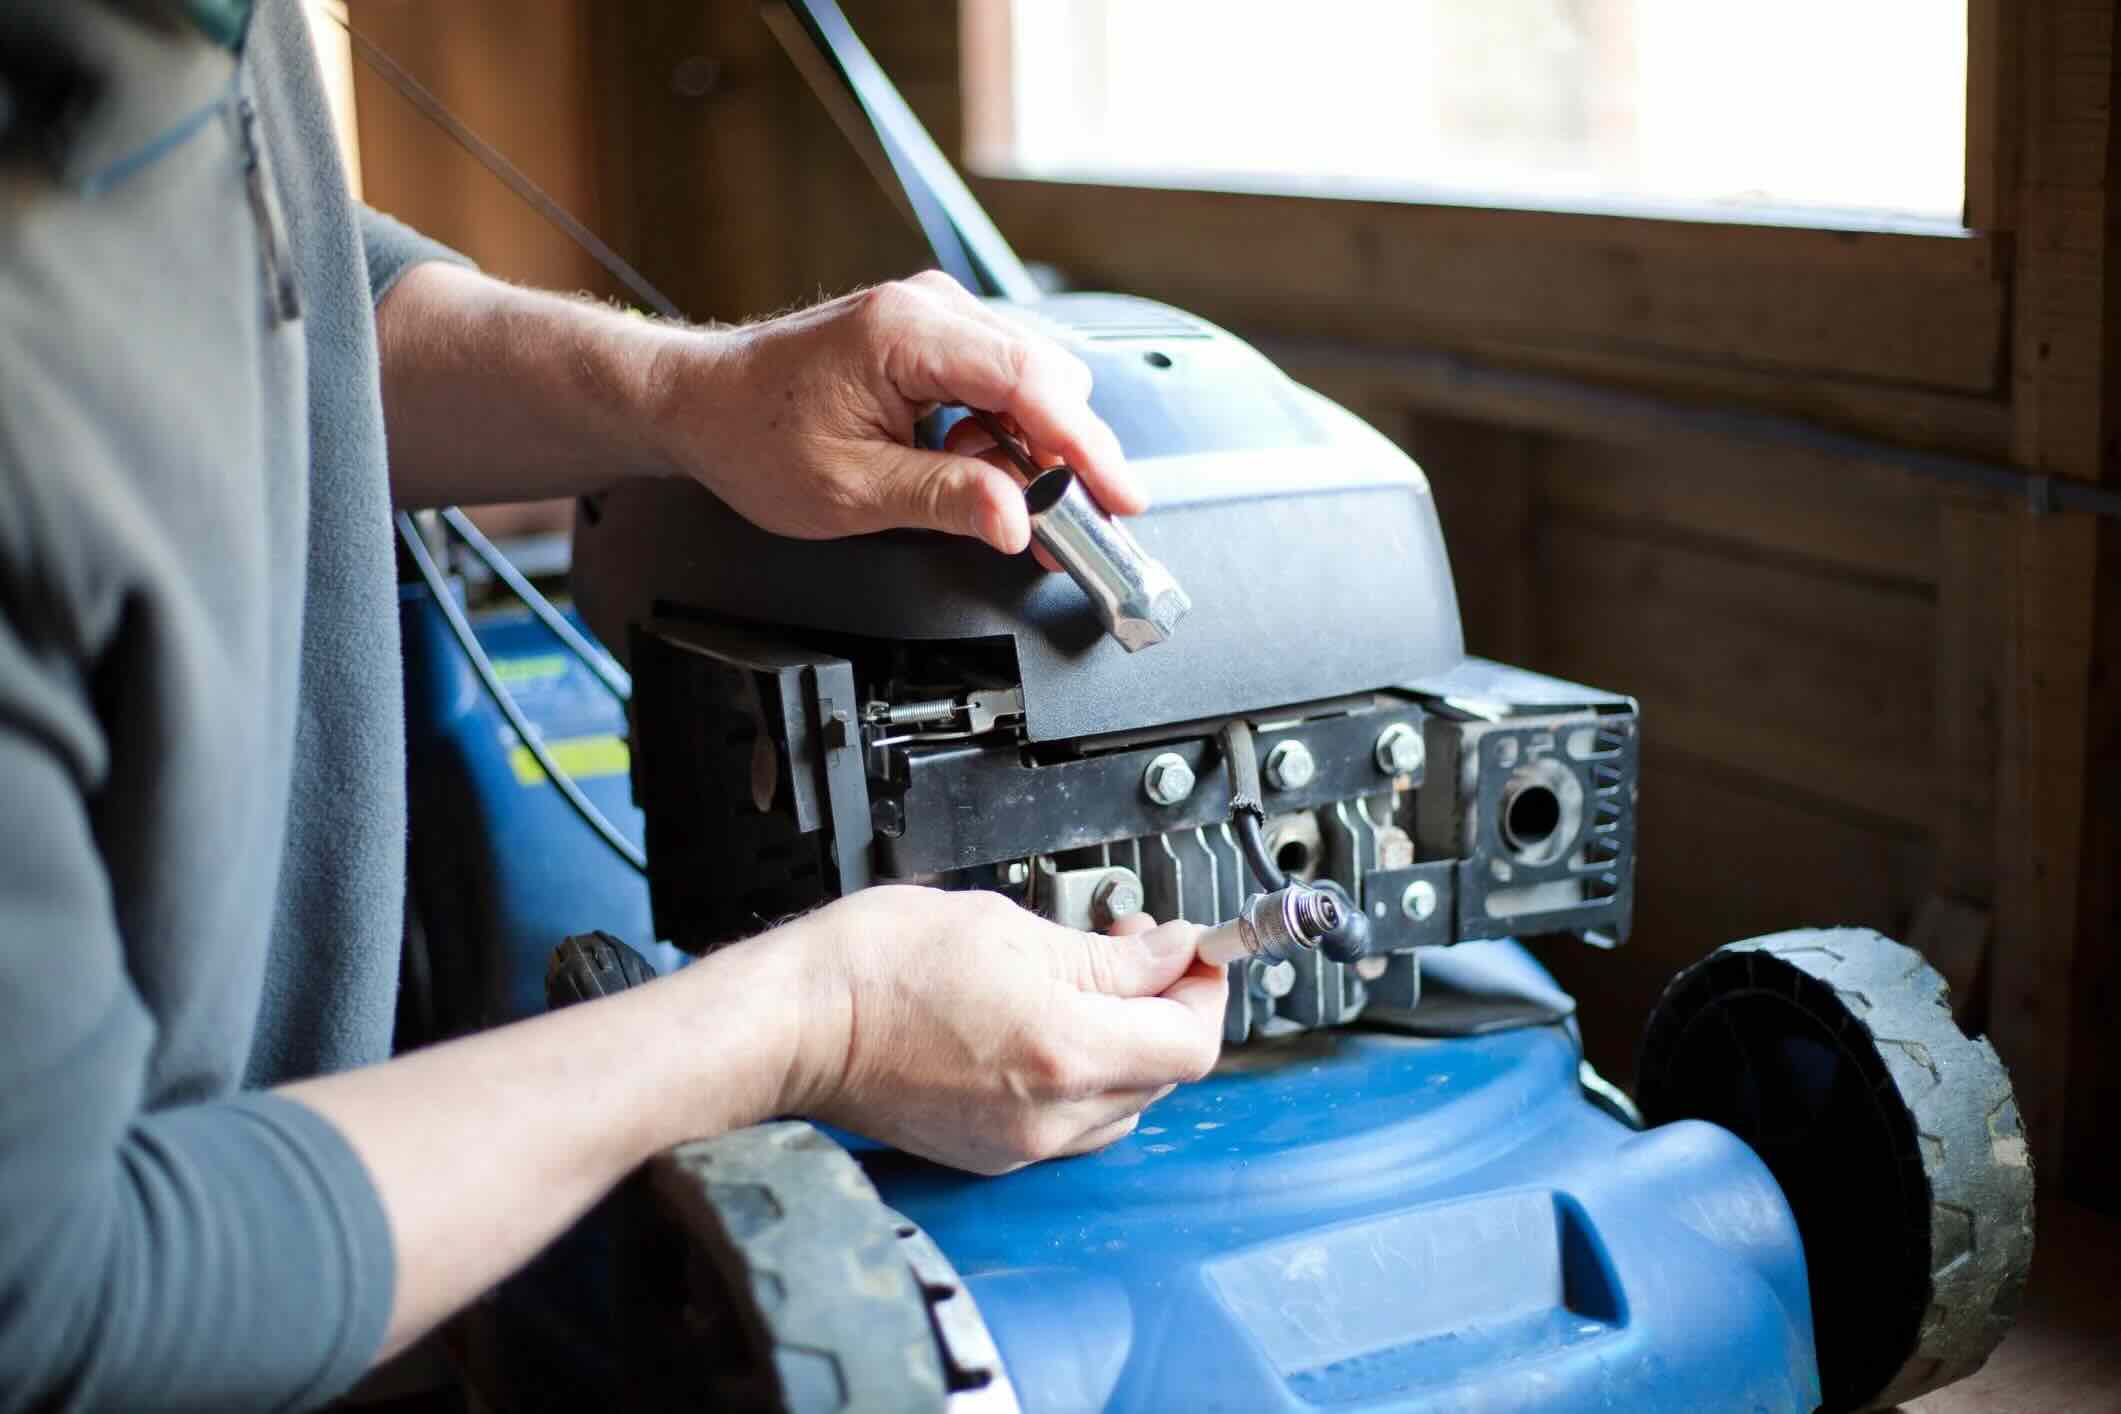
Step 1: Remove the Spark Plug
Before delving into the cleaning process, it’s crucial to start by safely removing the spark plug from the engine. Here’s a step-by-step guide to help you through this initial phase:
- Prepare the Work Area: Begin by ensuring that the engine has cooled down to prevent any accidental burns. Park the vehicle in a well-lit and ventilated area, and open the hood to access the engine compartment.
- Locate the Spark Plugs: Depending on your vehicle’s engine configuration, the spark plugs will be situated at the top or sides of the engine. Refer to your vehicle’s manual to pinpoint the exact location of the spark plugs if necessary.
- Remove the Spark Plug Wire: Gently grasp the spark plug wire boot (the thick, rubbery portion) and carefully twist it to break the seal. Avoid pulling on the wire itself to prevent damage.
- Secure the Socket Wrench: Attach the spark plug socket to the socket wrench, ensuring a secure fit. The spark plug socket is specially designed to grip the spark plug securely, allowing for safe removal and installation.
- Unscrew the Spark Plug: Carefully position the socket wrench over the spark plug and rotate it counterclockwise to loosen and remove the spark plug from its housing. Exercise caution to avoid stripping the threads or damaging the spark plug during this process.
- Inspect the Spark Plug: Once the spark plug has been removed, take a moment to inspect its condition. Look for signs of fouling, such as blackened or oily deposits, which may indicate underlying engine issues that require attention.
By following these steps, you can safely extract the spark plug from the engine, setting the stage for the subsequent cleaning process. With the spark plug in hand, you are ready to move on to the next crucial step: cleaning the spark plug with sandpaper.
When cleaning a spark plug with sandpaper, make sure to use fine grit sandpaper and gently rub the electrode to remove any carbon deposits. Be careful not to damage the electrode or insulator.
Step 2: Clean the Spark Plug with Sandpaper
Now that the spark plug has been safely removed, it’s time to employ the power of sandpaper to restore its functionality. Follow these detailed steps to effectively clean the spark plug using sandpaper:
- Inspect the Spark Plug: Before proceeding with the cleaning process, carefully examine the spark plug for any visible deposits, such as carbon buildup or corrosion. This initial assessment will guide the extent of cleaning required.
- Select the Sandpaper: Choose a piece of fine-grit sandpaper, ideally within the 400 to 600 grit range, to ensure gentle yet effective cleaning without causing damage to the spark plug’s electrodes.
- Gently Sand the Electrodes: With the spark plug held securely, use the sandpaper to gently sand the electrodes and the insulator tip. Employ light, circular motions to remove any carbon or debris, taking care not to apply excessive force that could compromise the integrity of the spark plug.
- Focus on Stubborn Deposits: If certain areas exhibit stubborn deposits, such as hardened carbon buildup, apply targeted sanding to gradually eliminate the residues. Exercise patience and avoid aggressive sanding, as the goal is to restore the electrodes to their original, unobstructed state.
- Clean the Threads: In addition to the electrodes, ensure that the threads of the spark plug are free from any contaminants. Use a soft-bristled brush to gently remove any residual debris from the threads, facilitating smooth reinstallation.
- Inspect the Cleaned Spark Plug: Once the sanding process is complete, carefully examine the spark plug to ensure that all visible deposits have been successfully removed. The electrodes should appear clean and free from obstructions, ready to deliver optimal spark performance.
By meticulously following these steps, you can effectively revitalize the spark plug using sandpaper, eliminating carbon deposits and ensuring enhanced ignition performance. With the cleaning process completed, it’s time to proceed to the next critical phase: inspecting and reinstalling the spark plug.
Step 3: Inspect and Reinstall the Spark Plug
With the spark plug now thoroughly cleaned, the next crucial steps involve inspecting its condition and securely reinstalling it into the engine. Follow these essential guidelines to seamlessly complete the inspection and reinstallation process:
- Inspect the Spark Plug Gap: Utilize a spark plug gap gauge to measure the gap between the electrodes. Refer to your vehicle’s manual for the specified gap measurement, and adjust it using the gauge if necessary to ensure precise ignition performance.
- Check for Wear and Damage: Thoroughly examine the spark plug for any signs of wear, such as eroded electrodes or compromised insulator tips. If the spark plug exhibits significant wear or damage, it may be advisable to replace it with a new one to maintain optimal engine performance.
- Apply Anti-Seize Compound (Optional): To facilitate future removal, consider applying a small amount of anti-seize compound to the spark plug’s threads before reinstalling it. This can prevent the spark plug from seizing in the engine block, simplifying future maintenance.
- Thread the Spark Plug Manually: Carefully position the cleaned spark plug at the opening in the engine block and gently thread it in by hand to prevent cross-threading. Ensure that the spark plug turns smoothly and evenly during this initial manual threading process.
- Tighten the Spark Plug: Once the spark plug is properly seated, use a torque wrench or a socket wrench to securely tighten it to the manufacturer’s specified torque setting. Avoid over-tightening, as this can lead to damage, and under-tightening may result in inadequate sealing and compromised performance.
- Reattach the Spark Plug Wire: Carefully reattach the spark plug wire to the spark plug, ensuring a snug fit. Listen for a distinct click or feel a slight resistance to confirm that the wire is securely in place.
- Repeat for Additional Spark Plugs: If your vehicle is equipped with multiple spark plugs, repeat the cleaning, inspection, and installation process for each spark plug to comprehensively maintain the engine’s ignition system.
By diligently following these steps, you can effectively inspect the spark plug’s condition and reinstall it with precision, ensuring optimal engine performance and reliability. With the spark plug securely in place, your engine is poised to deliver efficient and consistent ignition, allowing you to enjoy a smooth and responsive driving experience.
Read more: How To Tell If A Lawnmower Spark Plug Is Bad
Conclusion
Embarking on the journey of cleaning your spark plugs with sandpaper not only rejuvenates their performance but also contributes to the overall health and efficiency of your vehicle’s engine. By following the meticulous steps outlined in this guide, you have acquired the knowledge and skills to undertake this essential maintenance task with confidence and precision.
Through the careful removal, thorough cleaning, inspection, and secure reinstallation of the spark plugs, you have taken proactive measures to address carbon deposits and ensure optimal ignition performance. This proactive approach not only enhances engine efficiency and fuel economy but also contributes to the longevity of your vehicle’s vital components.
Moreover, by utilizing fine-grit sandpaper and exercising patience during the cleaning process, you have effectively removed carbon deposits and restored the spark plugs to their optimal condition. This not only promotes reliable ignition but also mitigates the risk of misfires and engine inefficiencies, ultimately enhancing the overall driving experience.
As you reflect on the rewarding process of caring for your vehicle’s spark plugs, remember that regular maintenance, including cleaning and inspection, is key to sustaining peak engine performance and reliability. By incorporating this maintenance task into your routine, you are actively preserving the heart of your vehicle, ensuring that it continues to operate at its best for miles to come.
Armed with the knowledge and expertise gained from this guide, you are well-equipped to uphold the vitality of your vehicle’s ignition system, fostering a smooth and responsive driving experience while extending the lifespan of your spark plugs. Embrace the satisfaction of knowing that your proactive approach to spark plug maintenance contributes to the enduring health and performance of your cherished vehicle.
With the spark plugs now revitalized and the engine primed for optimal performance, you can confidently embark on your next journey, knowing that you have taken proactive measures to uphold the vitality and efficiency of your vehicle’s engine.
Frequently Asked Questions about How To Clean A Spark Plug With Sandpaper
Was this page helpful?
At Storables.com, we guarantee accurate and reliable information. Our content, validated by Expert Board Contributors, is crafted following stringent Editorial Policies. We're committed to providing you with well-researched, expert-backed insights for all your informational needs.


0 thoughts on “How To Clean A Spark Plug With Sandpaper”