Home>Technology>Home Entertainment Systems>How To Hang A Projector From A Drop Ceiling

Home Entertainment Systems
How To Hang A Projector From A Drop Ceiling
Modified: February 18, 2024
Learn how to properly hang a projector from a drop ceiling to enhance your home entertainment system. Get step-by-step instructions and tips for a professional setup. Ideal for DIY enthusiasts and home theater enthusiasts.
(Many of the links in this article redirect to a specific reviewed product. Your purchase of these products through affiliate links helps to generate commission for Storables.com, at no extra cost. Learn more)
Introduction
Welcome to the exciting world of home entertainment systems! Whether you're a movie buff, a sports enthusiast, or a gaming aficionado, having a high-quality projector can elevate your viewing experience to new heights. However, the process of hanging a projector from a drop ceiling can seem daunting at first. Don't worry; I'm here to guide you through the process step by step.
Hanging a projector from a drop ceiling not only saves valuable floor space but also provides a sleek and professional look to your home theater setup. With the right tools, a bit of know-how, and a dash of creativity, you can transform your space into a captivating cinematic environment.
In this comprehensive guide, we'll cover everything you need to know to successfully hang a projector from a drop ceiling. From gathering the necessary materials to the final step of hanging the projector, each stage will be explained in detail. By the end of this journey, you'll have the confidence and expertise to complete this project with ease.
So, grab your tool kit and let's embark on this exciting venture to create the ultimate home entertainment experience. Whether it's movie nights with friends, immersive gaming sessions, or enjoying your favorite sports events, hanging a projector from a drop ceiling will take your home entertainment to the next level. Let's dive in and bring your cinematic vision to life!
Key Takeaways:
- Elevate your home entertainment experience by hanging a projector from a drop ceiling. Follow the comprehensive guide to create a captivating cinematic environment and unlock endless cinematic adventures.
- Transform your space into a captivating home theater haven with a securely installed projector. Embrace the magic it brings and cherish the extraordinary moments it facilitates.
Read more: How To Hang Things From A Drop Ceiling
Step 1: Gather the Necessary Materials
Before you begin the process of hanging a projector from a drop ceiling, it’s crucial to gather all the essential materials and tools. Having everything on hand will streamline the installation process and ensure a smooth and efficient workflow. Here’s a comprehensive list of the materials you’ll need:
- Projector Mount Kit: This kit typically includes a ceiling mount, extension columns, and mounting hardware. Ensure that the mount is compatible with your projector model and ceiling type.
- Ladder: A sturdy ladder is essential for reaching the drop ceiling and installing the mounting hardware securely.
- Power Drill: A reliable power drill with appropriate drill bits will be necessary for creating holes for the mounting hardware.
- Screwdriver Set: A set of screwdrivers, including Phillips and flathead varieties, will be used for attaching the mounting plate and projector mount.
- Stud Finder: This tool will help you locate the ceiling joists or studs to ensure secure attachment of the mounting hardware.
- Measuring Tape: Accurate measurements are crucial for determining the precise location for mounting the projector and ensuring proper alignment.
- Pencil or Marker: Marking the mounting locations on the ceiling will help guide the installation process and ensure accuracy.
- Ceiling Tiles or Panels: If your drop ceiling requires any adjustments or modifications to accommodate the projector mount, have extra ceiling tiles or panels on hand.
- Safety Gear: Always prioritize safety. Wear appropriate gear, including safety goggles and gloves, when using power tools and working at heights.
By ensuring that you have all the necessary materials and tools ready, you’ll be well-prepared to move on to the next step with confidence. With your toolkit assembled, you’re one step closer to bringing your projector installation project to fruition.
Step 2: Determine the Mounting Location
Once you have all the necessary materials assembled, the next crucial step is to determine the ideal mounting location for your projector. This decision will significantly impact the viewing experience and overall aesthetics of your home entertainment setup. Here’s how to proceed:
Begin by assessing the layout of your room and identifying the optimal placement for the projector. Consider factors such as viewing angles, distance from the screen or wall, and the desired projection size. Keep in mind that the projector should be positioned in a way that minimizes obstructions and provides a clear line of sight for everyone in the room.
When choosing the mounting location, take into account the drop ceiling’s structure and the presence of ceiling joists or studs. It’s crucial to anchor the projector mount securely to ensure stability and safety. Use a stud finder to locate the joists or studs within the drop ceiling, as these will serve as the primary anchor points for the mounting hardware.
Measure and mark the precise location for the mounting plate, ensuring that it aligns with the desired projection angle and distance. Use a measuring tape and a pencil to mark the mounting points on the ceiling tiles or panels. Double-check the measurements to guarantee accuracy before proceeding to the next step.
Additionally, consider the proximity to power outlets and audiovisual connections when determining the mounting location. Ensuring easy access to power sources and A/V inputs will simplify the setup and contribute to a clean and organized installation.
Before finalizing the mounting location, take a moment to visualize the projected image and confirm that the chosen placement aligns with your vision for the ultimate viewing experience. Once you’re satisfied with the positioning, you’re ready to move on to the next step of the installation process.
By thoughtfully determining the mounting location for your projector, you’re setting the stage for a captivating home entertainment environment that will delight and impress all who experience it.
Step 3: Install the Mounting Plate
With the mounting location determined, it’s time to proceed with installing the mounting plate that will serve as the anchor for the projector mount. This step is crucial for ensuring a secure and stable foundation for your projector setup. Follow these detailed steps to complete this stage of the installation process:
- Prepare the Mounting Plate: Begin by unpacking the mounting plate from the projector mount kit. Familiarize yourself with the components and ensure that all necessary hardware is readily accessible.
- Position the Mounting Plate: Climb the ladder and carefully position the mounting plate on the marked location of the drop ceiling. Align the plate with the ceiling tiles or panels, ensuring that it rests securely and level against the surface.
- Mark the Mounting Holes: Using a pencil or marker, mark the locations of the mounting holes on the ceiling tiles or panels. These marks will guide the drilling process and ensure precise alignment for the mounting hardware.
- Drill Pilot Holes: With the mounting plate in position, use a power drill equipped with the appropriate drill bit to create pilot holes at the marked locations. Take care to drill through the ceiling tiles or panels without applying excessive pressure.
- Secure the Mounting Plate: Once the pilot holes are drilled, attach the mounting plate to the drop ceiling using the provided screws or mounting hardware. Ensure that the plate is firmly secured and flush against the ceiling surface.
- Verify Stability: After installing the mounting plate, gently test its stability by applying light pressure. Confirm that the plate remains securely attached and does not exhibit any signs of movement or instability.
By meticulously following these steps, you’ll successfully install the mounting plate, laying the groundwork for the subsequent mounting of the projector mount. Attention to detail and precision during this phase will contribute to a reliable and durable foundation for your projector installation.
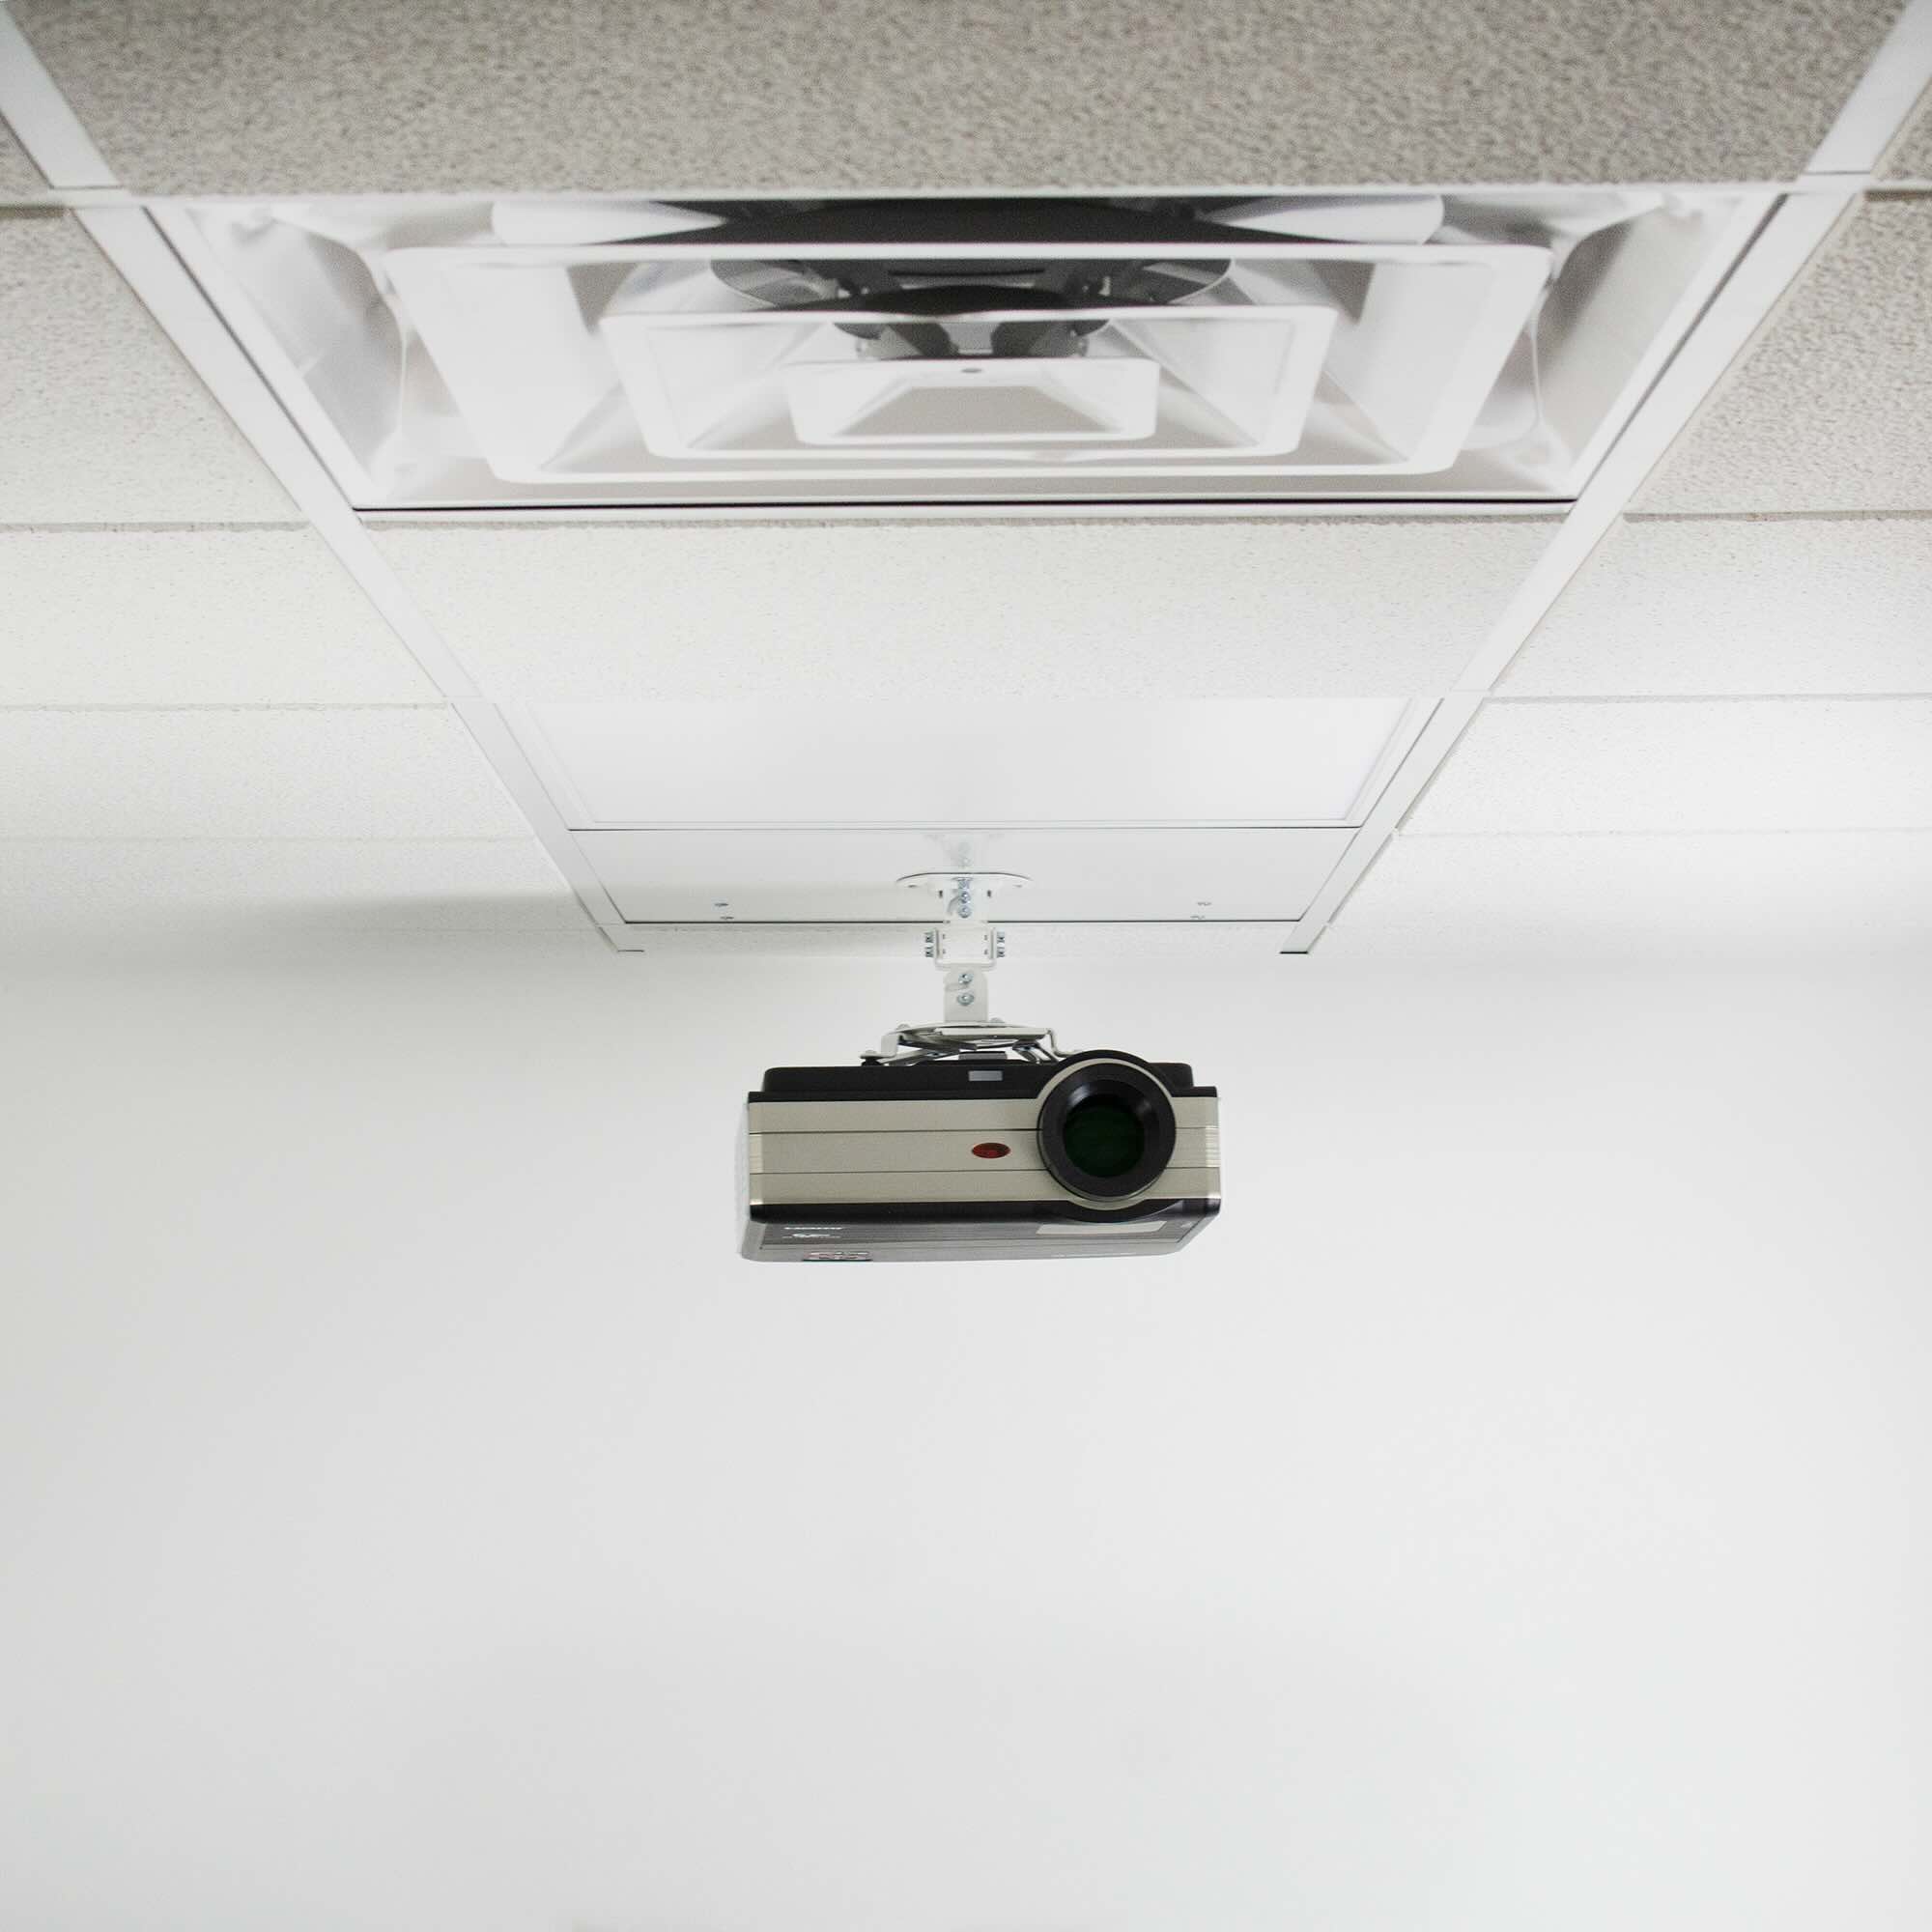
When hanging a projector from a drop ceiling, use a secure mounting kit designed for suspended ceilings. Make sure to locate a ceiling joist or use toggle bolts for added support.
Step 4: Attach the Projector Mount
With the mounting plate securely in place, the next pivotal step in hanging your projector from a drop ceiling is to attach the projector mount. This component will serve as the interface between the projector and the ceiling, facilitating a stable and adjustable connection. Follow these detailed steps to seamlessly integrate the projector mount into your installation:
- Prepare the Projector Mount: Unpack the projector mount from the kit and familiarize yourself with its components. Ensure that all necessary hardware, including mounting screws and brackets, is readily accessible.
- Position the Projector Mount: Ascend the ladder and position the projector mount over the installed mounting plate. Align the mounting holes of the projector mount with the corresponding holes on the mounting plate, ensuring a precise fit.
- Secure the Projector Mount: Using the provided screws or mounting hardware, attach the projector mount to the mounting plate. Tighten the screws securely to establish a stable connection between the mount and the ceiling.
- Adjust the Mounting Angles: Depending on your specific projector model and viewing requirements, adjust the angles and orientation of the projector mount to achieve the desired projection alignment. This step is crucial for optimizing the projected image and ensuring an immersive viewing experience.
- Verify Stability and Alignment: Once the projector mount is attached, carefully verify its stability and alignment. Gently test the mount to confirm that it remains securely fastened to the mounting plate and does not exhibit any signs of instability.
By meticulously following these steps, you’ll seamlessly integrate the projector mount into your installation, setting the stage for the final and most thrilling phase: hanging the projector. The successful attachment of the projector mount brings you one step closer to transforming your space into a captivating home entertainment haven.
Read more: How To Hang Curtains From Drop Ceiling
Step 5: Hang the Projector
Congratulations on reaching the final and most exhilarating phase of hanging your projector from a drop ceiling. With the mounting plate and projector mount securely installed, it’s time to bring your projector to its rightful place and witness your home entertainment vision come to life. Follow these detailed steps to complete this transformative stage of the installation process:
- Prepare the Projector: Ensure that your projector is powered off and safely positioned for mounting. Double-check the projector’s compatibility with the mount and verify that it is free from any obstructions or potential hazards.
- Align the Projector: Carefully position the projector on the mount, aligning it with the mounting brackets to ensure a snug and secure fit. Take your time to achieve precise alignment, as this will directly impact the projected image’s orientation and clarity.
- Secure the Projector: Once the projector is aligned with the mount, use the appropriate mounting hardware to secure it in place. Tighten the mounting screws or brackets to establish a stable connection between the projector and the mount.
- Connect Power and A/V Cables: With the projector securely hung, proceed to connect the power cord and any necessary audiovisual cables. Ensure that the cables are neatly routed and do not obstruct the projector’s ventilation or create a tripping hazard.
- Test the Projection: Power on the projector and verify that the projected image aligns with your expectations. Make any necessary adjustments to the projector’s settings or positioning to optimize the image quality and ensure an immersive viewing experience.
- Enjoy Your Home Theater: With the projector successfully hung and operational, take a moment to revel in the transformation of your space into a captivating home theater environment. Invite friends and family to experience the magic of your new setup and create unforgettable memories together.
By meticulously following these steps, you’ll complete the exhilarating process of hanging your projector from a drop ceiling, unlocking the full potential of your home entertainment system. With the projector in its rightful place, you’re poised to embark on countless cinematic adventures, gaming thrills, and immersive viewing experiences.
Conclusion
Congratulations on successfully navigating the exhilarating journey of hanging a projector from a drop ceiling. By following the comprehensive steps outlined in this guide, you’ve transformed your space into a captivating home entertainment haven that promises endless cinematic adventures and immersive viewing experiences. As you bask in the glow of your newly installed projector, it’s essential to reflect on the transformative impact of this endeavor and the boundless potential it unlocks.
Hanging a projector from a drop ceiling isn’t merely a technical feat; it’s a testament to your dedication to creating a space where entertainment, creativity, and shared experiences converge. Your home theater setup now stands as a beacon of cinematic delight, ready to host movie nights, gaming marathons, and unforgettable gatherings with friends and loved ones.
With the projector seamlessly integrated into your space, you’ve unlocked the power to transport yourself and others to distant realms, thrilling adventures, and captivating narratives. Every frame that flickers to life on the screen holds the promise of igniting imaginations, sparking conversations, and fostering cherished memories.
As you revel in the immersive wonders of your home theater, remember the meticulous attention to detail, the precision of each installation step, and the unwavering determination that brought this vision to fruition. Your commitment to creating an exceptional entertainment environment has yielded a space where stories unfold, emotions resonate, and connections are strengthened.
So, whether you’re embarking on a cinematic journey, delving into the latest gaming masterpiece, or simply savoring moments of quiet reflection, your newly installed projector stands as a conduit to boundless possibilities. Embrace the magic it brings, and cherish the experiences it facilitates, knowing that your dedication has elevated your home entertainment experience to extraordinary heights.
With your projector hanging proudly from the drop ceiling, the stage is set for awe-inspiring moments, shared laughter, and unforgettable escapades. Embrace the transformative power of your home entertainment system, and let the captivating allure of the projected image transport you to realms unknown.
Frequently Asked Questions about How To Hang A Projector From A Drop Ceiling
Was this page helpful?
At Storables.com, we guarantee accurate and reliable information. Our content, validated by Expert Board Contributors, is crafted following stringent Editorial Policies. We're committed to providing you with well-researched, expert-backed insights for all your informational needs.








0 thoughts on “How To Hang A Projector From A Drop Ceiling”