Home>Articles>How To Hang A Projector Screen From The Ceiling
Articles
How To Hang A Projector Screen From The Ceiling
Modified: October 19, 2024
Learn how to easily hang a projector screen from the ceiling with these helpful articles. Find step-by-step instructions and tips for a seamless installation.
(Many of the links in this article redirect to a specific reviewed product. Your purchase of these products through affiliate links helps to generate commission for Storables.com, at no extra cost. Learn more)
Introduction
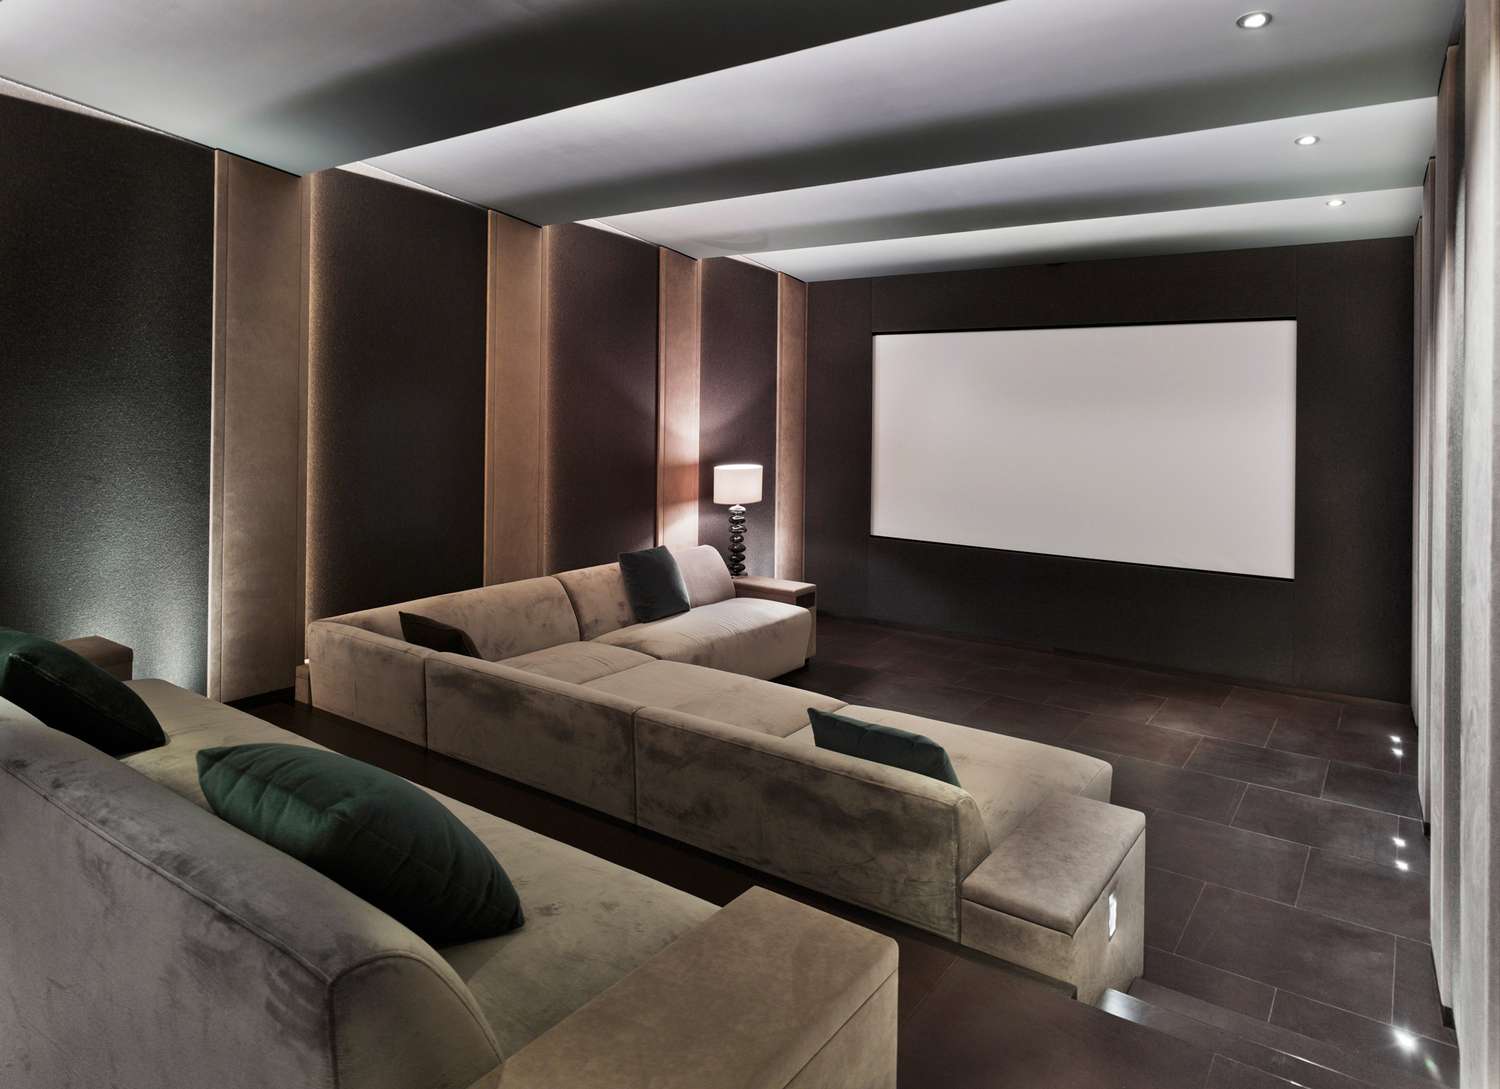
Installing a projector screen from the ceiling can be a great way to create a cinema-like experience in your home or office. Whether you’re setting up a dedicated home theater or need a projection system for a presentation room, hanging a projector screen from the ceiling can maximize space and provide optimal viewing angles.
In this article, we’ll guide you through the step-by-step process of hanging a projector screen from the ceiling. We’ll cover everything from gathering the necessary tools and materials to adjusting the height and angle of the screen for the best viewing experience.
Before we dive into the specifics, it’s important to note that the installation process may vary depending on the type and brand of the projector screen. Always refer to the manufacturer’s instructions for the exact installation guidelines. With that said, let’s get started!
Key Takeaways:
- Create a cinematic experience by hanging a projector screen from the ceiling. Gather the right tools, find the ideal location, and make precise adjustments for optimal viewing comfort and image projection.
- Transform any room into a captivating home theater or professional presentation space. Securely install and adjust your projector screen with ease, following the step-by-step process for a rewarding and immersive visual experience.
Read more: How To Hang A Projector Screen Outdoor
Step 1: Gather the necessary tools and materials
Before you begin the installation process, it’s crucial to gather all the necessary tools and materials. Here’s a list of items you’ll need:
1. Projector screen: Select a projector screen that fits your needs and space. Consider factors such as screen size, aspect ratio, and gain.
2. Ceiling brackets: Look for sturdy ceiling brackets that can support the weight of the projector screen. Ensure that the brackets are compatible with your specific model of projector screen.
3. Stud finder: A stud finder will help you locate the ceiling studs, which are essential for securely mounting the brackets. Make sure to choose a stud finder capable of detecting wood studs.
4. Measuring tape: Accurate measurements are crucial for positioning the projector screen correctly. Use a measuring tape to determine the ideal location and spacing for the brackets.
5. Screwdriver/drill: Depending on the type of brackets and ceiling, you may need a screwdriver or a drill to secure the brackets in place. Ensure that you have the appropriate size and type of screwdriver/drill bit.
6. Level: A level will help you ensure that the projector screen is installed straight and level. Choose a reliable level that is easy to use and provides accurate readings.
7. Ladder: A sturdy ladder is essential for reaching the ceiling and installing the brackets. Use a ladder that is tall enough to comfortably reach the installation area.
8. Safety equipment: It’s important to prioritize safety during the installation process. Consider wearing safety goggles, gloves, and appropriate footwear to protect yourself from any potential hazards.
Once you have gathered all the necessary tools and materials, you’ll be ready to move on to the next steps of the installation process. Make sure to double-check that you have everything you need before proceeding.
Remember, the specific tools and materials required may vary depending on the projector screen and your individual circumstances. Always refer to the manufacturer’s instructions and recommendations to ensure a successful installation.
Step 2: Determine the ideal location for the projector screen
Determining the ideal location for your projector screen is crucial to ensure a comfortable and immersive viewing experience. Consider the following factors when choosing the placement:
1. Room layout: Take into account the size and layout of the room. Aim for a location where the projector screen will have a clear line of sight and be easily visible from the seating area. Consider the placement of furniture and other items in the room that may obstruct the view.
2. Viewing angle: Determine the optimal viewing angle for your projector screen. Ideally, the screen should be positioned at eye level, allowing all viewers to have a clear view without straining their necks. Consider the height of your seating arrangement and adjust the screen position accordingly.
3. Distance from seating: Consider the distance between the seating area and the projector screen. This distance will depend on the size of the screen and the capabilities of your projector. Refer to the manufacturer’s recommendations for the optimal viewing distance based on the screen size and resolution.
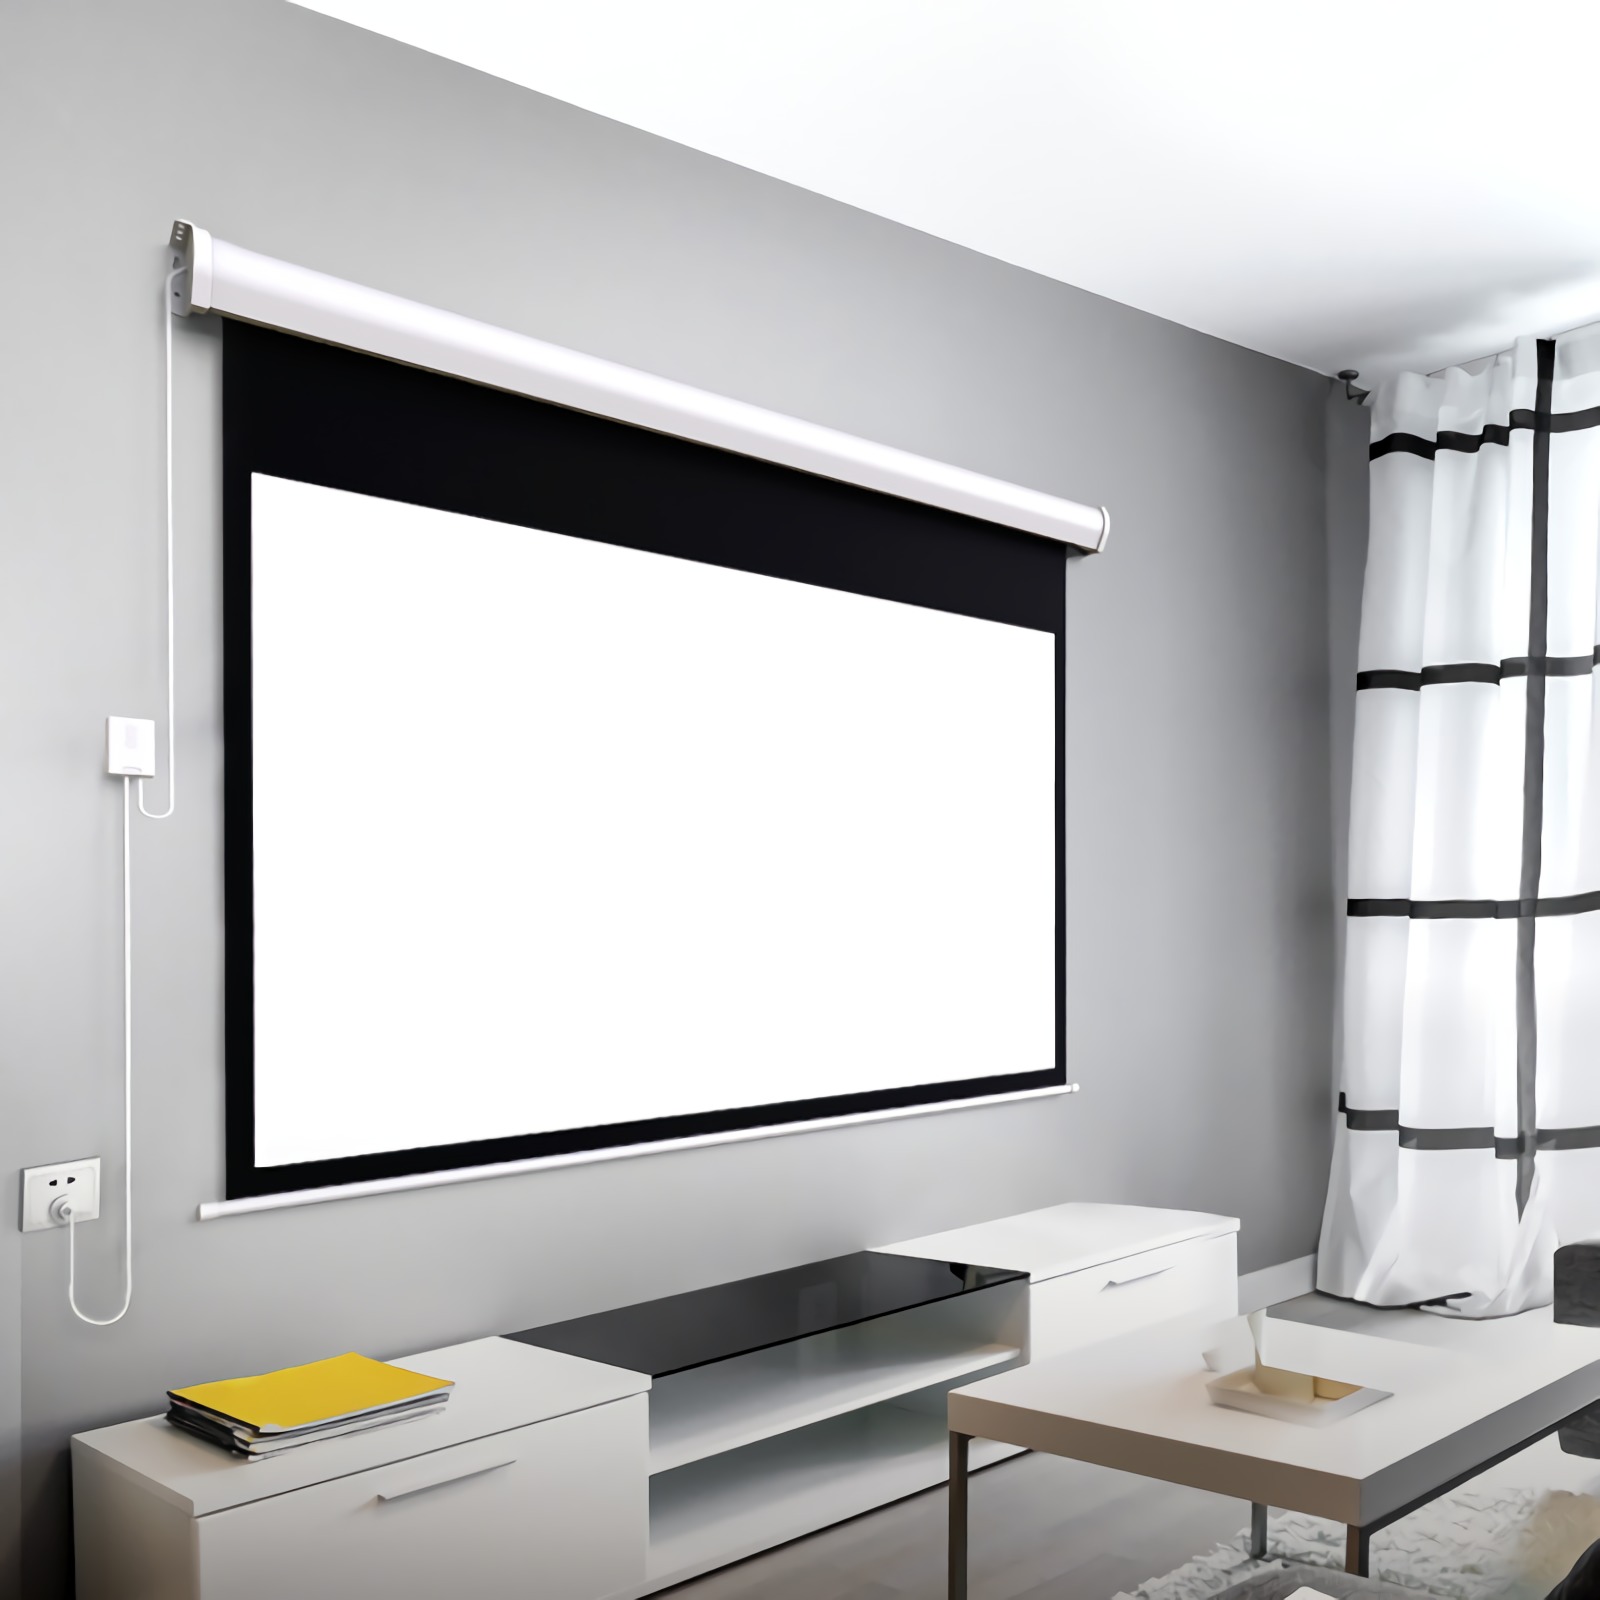
4. Ambient light: Take into account the amount of ambient light in the room. If the room is brightly lit, you may need to choose a location that minimizes glare and provides better visibility. Consider using curtains or blinds to control the amount of incoming light.
5. Wiring and connectivity: Ensure that the chosen location allows for easy access to power outlets and connectivity options. It’s essential to have a convenient and tidy setup for connecting the projector and other audiovisual equipment.
Once you have considered these factors, mark the desired location for your projector screen on the ceiling. Use a pencil or masking tape to make clear reference points for the installation process. Taking the time to determine the ideal location will result in a more satisfactory viewing experience.
Remember to refer back to the manufacturer’s instructions for any specific guidelines relating to the placement of your particular projector screen model. With the ideal location determined, you can now move on to the next step of installing the brackets on the ceiling.
Step 3: Locate the ceiling studs
Locating the ceiling studs is crucial for a secure and stable installation of the projector screen brackets. Ceiling studs provide the necessary support to hold the weight of the screen, ensuring it stays securely in place. Here’s how you can locate the ceiling studs:
1. Use a stud finder: Start by using a stud finder to locate the ceiling studs. A stud finder is a handheld device that detects the presence of wooden studs behind the ceiling surface. Move the stud finder slowly across the ceiling, following its instructions for optimal usage.
2. Mark the stud locations: When the stud finder detects a stud, it will display or indicate it in some way, usually with a beep or light. Mark the locations of the studs using a pencil or masking tape. Repeat this process for multiple locations along the desired installation area to find multiple studs.
3. Tap the ceiling: Another way to verify stud locations is by lightly tapping the ceiling with a small hammer or your knuckles. When you tap over a stud, it will produce a solid, less hollow sound compared to tapping in between the studs.
4. Measure between studs: Once you have located the first stud, measure the distance from its center to the next stud. Standard spacing between studs is usually around 16 or 24 inches (40 or 60 cm) apart. Use this measurement to mark additional stud locations along the installation area.
By locating the ceiling studs, you’ll have a clear idea of where to position the brackets for maximum stability. Ensure that the studs align with the installation points marked in the previous step. If you are unable to find suitable studs in the desired location, you may need to adjust the placement of the bracket or consider alternative installation methods such as using anchor screws.
Always remember to be cautious when working on the ceiling. If you’re unsure about locating the studs or feel uncomfortable with the process, consider seeking assistance from a professional or experienced individual.
Once you have successfully located the ceiling studs, you’re ready to move on to the next step of installing the brackets on the ceiling.
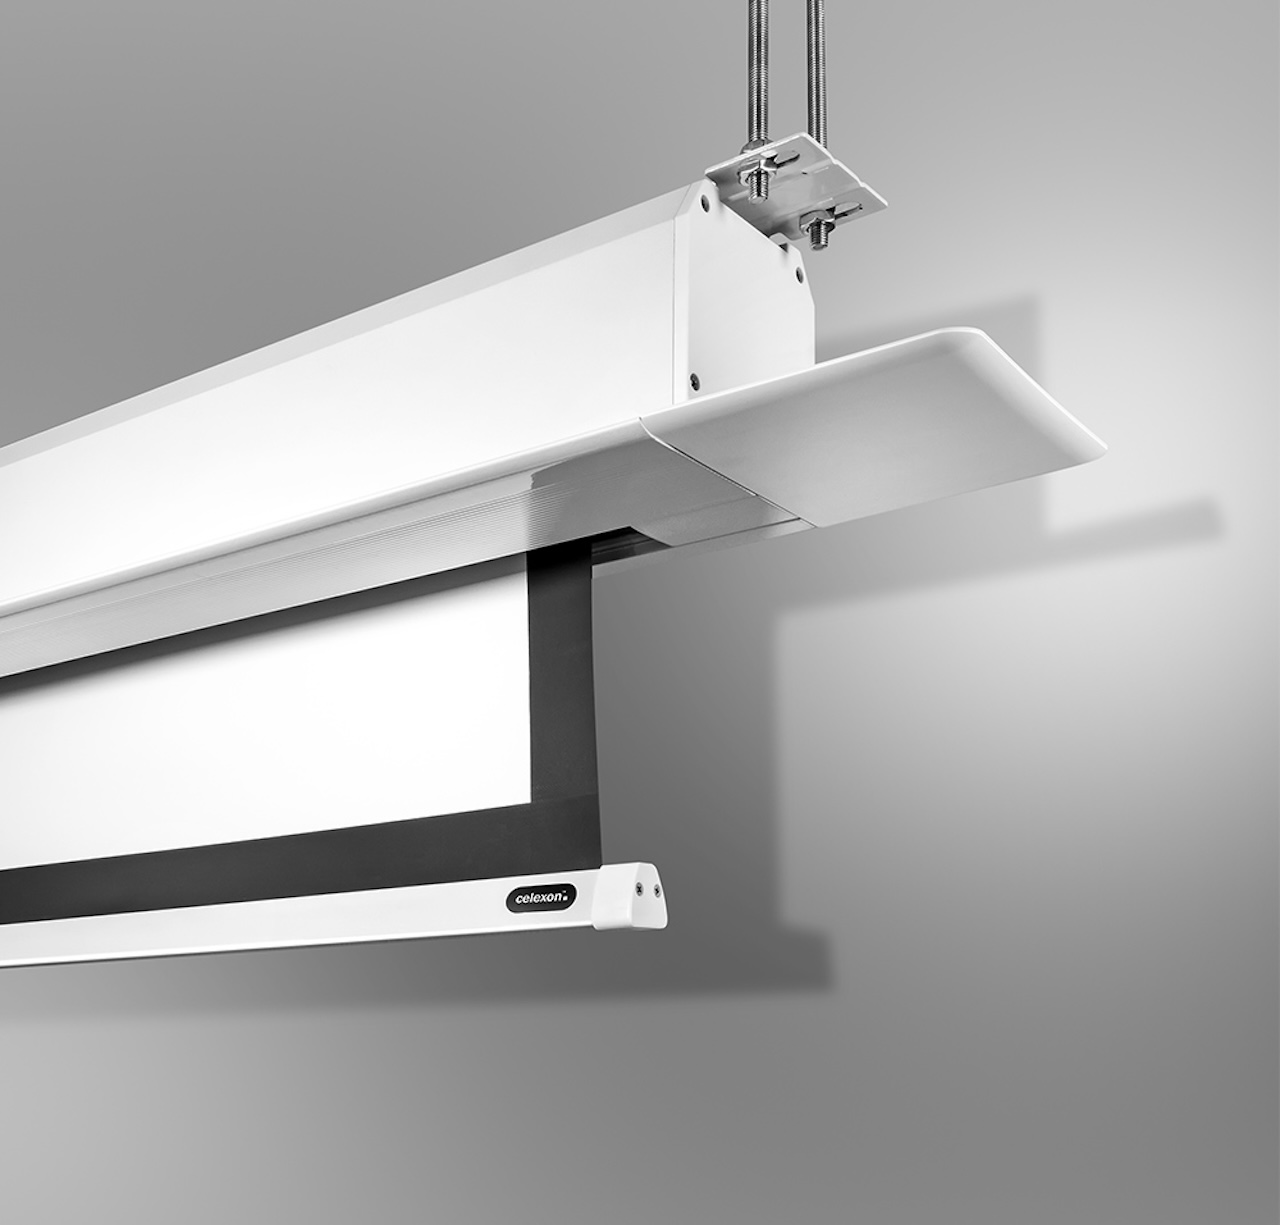
When hanging a projector screen from the ceiling, make sure to use a sturdy mounting bracket designed for the weight of the screen. Use a stud finder to locate a solid support beam in the ceiling for secure installation.
Step 4: Install the brackets on the ceiling
Now that you have located the ceiling studs, it’s time to install the brackets that will hold the projector screen in place. Follow these steps to securely install the brackets on the ceiling:
1. Position the brackets: Hold up one of the brackets against the ceiling, aligning it with the marked stud locations. Ensure that the bracket is level by using a level tool. Double-check that the bracket is positioned according to the desired location for the projector screen.
2. Mark the screw holes: Once you have the bracket in the correct position, use a pencil or marker to mark the screw holes on the ceiling. These marks will serve as guidelines for drilling holes and attaching the brackets.
3. Drill pilot holes: Using a drill with an appropriate drill bit size, carefully drill pilot holes at the marked screw hole locations. Pilot holes help prevent the ceiling from splintering or cracking when you insert the screws.
4. Attach the brackets: With the pilot holes drilled, align the bracket back with the holes and secure it to the ceiling using the provided screws. Make sure to tighten the screws firmly but avoid overtightening, as it may damage the ceiling or the bracket.
5. Repeat for additional brackets: If your projector screen requires multiple brackets, repeat the above steps to install the remaining brackets, ensuring they align with the marked stud locations.
6. Test the brackets: Once all the brackets are securely installed, give them a gentle tug or shake to ensure they are firmly attached to the ceiling. If any of the brackets feel loose, double-check the screw tightness and alignment with the stud.
By following these steps, you’ll have successfully installed the brackets on the ceiling, providing a stable and secure foundation for your projector screen. Take a moment to admire your progress and get ready for the next step of attaching the projector screen to the brackets.
Note: The specific installation process and hardware may vary depending on the type and brand of the projector screen and brackets you have. Always refer to the manufacturer’s instructions for detailed installation guidelines and recommendations.
In the next step, we’ll guide you through attaching the projector screen to the installed brackets
Step 5: Attach the projector screen to the brackets
With the brackets securely installed on the ceiling, it’s time to attach the projector screen. Follow these steps to properly mount the projector screen to the brackets:
1. Position the projector screen: Carefully position the projector screen in front of the brackets, aligning the mounting holes of the screen with the brackets.
2. Insert the mounting screws: Insert the mounting screws provided by the manufacturer through the screen’s mounting holes and into the corresponding holes on the brackets. Make sure the screws are inserted firmly, but avoid overtightening to prevent damage to the screen.
3. Verify stability: Once the screen is attached to the brackets, gently test its stability by giving it a slight shake. Ensure that the screen is securely held in place and does not wobble or shift.
4. Adjustments: Depending on the type of projector screen and brackets, you may have the option to make adjustments for height and angle. Refer to the manufacturer’s instructions to adjust the screen according to your preferences. Use the appropriate mechanisms or levers to modify the height and angle until you achieve the desired projection position.
5. Cable management: Take a moment to consider cable management. Route the necessary cables neatly from the projector screen to the corresponding audiovisual equipment. Consider using cable clips, cable coverings, or other solutions to keep the cables organized and prevent tangled wires.
Remember to refer to the manufacturer’s instructions for any specific guidelines or recommendations relating to attaching your specific model of projector screen to the brackets. Each projector screen may have slightly different mounting mechanisms and requirements.
By following these steps, you’ll have successfully attached the projector screen to the installed brackets, bringing you one step closer to enjoying your immersive viewing experience. Now, it’s time to make any necessary adjustments to the height and angle of the screen for optimal viewing. Let’s proceed to the next step to learn how to do that.
Step 6: Adjust the height and angle of the projector screen
Adjusting the height and angle of the projector screen is an important step to ensure an optimal viewing experience. Follow these steps to make the necessary adjustments:
1. Locate adjustment mechanisms: Depending on the design of your projector screen and brackets, there may be various adjustment mechanisms available. Look for levers, knobs, or other mechanisms that allow you to modify the height and angle of the screen.
2. Height adjustment: To adjust the height of the projector screen, locate the corresponding adjustment mechanism. This can often be found near the brackets or on the side of the screen casing. Follow the manufacturer’s instructions to raise or lower the screen to the desired height. Ensure that it is positioned at eye level or at a height that provides a comfortable viewing experience for all viewers.
3. Angle adjustment: If your projector screen offers angle adjustment, locate the angle adjustment mechanism. This is usually located on the side or bottom of the screen casing. Follow the manufacturer’s instructions to tilt the screen forward or backward to achieve the desired viewing angle. Adjust the angle based on the height of the seating area and the position of the projector.
4. Test the adjustments: Once you have made the necessary height and angle adjustments, step back and evaluate the positioning of the projector screen. Check for any glare, distortion, or obstruction in the projected image. Make small adjustments as needed to achieve the best possible viewing experience.
5. Secure the adjustments: Once you are satisfied with the height and angle settings, make sure to securely lock or tighten the adjustment mechanisms. This will ensure that the screen remains in the desired position and does not shift during use.
Remember to refer to the manufacturer’s instructions for any specific guidelines or recommendations related to adjusting the height and angle of your particular model of projector screen. Each screen may have slightly different adjustment mechanisms and limitations.
By following these steps, you’ll be able to fine-tune the height and angle of the projector screen to create an immersive and comfortable viewing experience. Take the time to make these adjustments to optimize your setup.
Congratulations! You have successfully installed and adjusted your projector screen. Enjoy the cinematic experience right from the comfort of your own space!
Conclusion
Hanging a projector screen from the ceiling can transform any room into a captivating home theater or professional presentation space. By following the step-by-step process outlined in this guide, you can successfully install and adjust your projector screen with ease.
In the beginning, we emphasized the importance of gathering the necessary tools and materials. Ensuring you have the right equipment from the start will help facilitate a smooth installation process. Remember to refer to the manufacturer’s instructions for any specific guidelines and recommendations pertaining to your projector screen model.
Determining the ideal location for your projector screen is critical for an enjoyable viewing experience. Consider factors such as room layout, viewing angle, distance from seating, ambient light, and connectivity options before finalizing the placement. Take your time to mark the location accurately for optimal results.
Locating the ceiling studs is an essential step in providing a secure and stable attachment for your projector screen. Use a stud finder and tap the ceiling to identify the studs’ position. Mark these locations carefully and ensure that the brackets align with the stud markings for a strong foundation.
With the brackets securely installed on the ceiling, it’s time to attach the projector screen. Follow the manufacturer’s instructions to mount the screen onto the brackets, making sure it is stable and secure. Consider cable management options to keep the area tidy and prevent any cable clutter.
Once the projector screen is attached, it’s crucial to make necessary adjustments for height and angle. This ensures optimal viewing comfort and image projection. Follow the manufacturer’s instructions to adjust the screen accordingly, making any fine-tuning until you achieve the desired viewing experience.
Remember, each projector screen model may have specific guidelines and mechanisms for adjustments, so consulting the manufacturer’s instructions is key.
In conclusion, with careful planning, the right tools, and adherence to the manufacturer’s instructions, hanging a projector screen from the ceiling can be a rewarding endeavor. Enjoy your newfound cinematic experience or enhance your professional presentations with the immersive visuals provided by your ceiling-mounted projector screen. Sit back, relax, and let the entertainment or information unfold in front of your eyes. Happy projecting!
Frequently Asked Questions about How To Hang A Projector Screen From The Ceiling
Was this page helpful?
At Storables.com, we guarantee accurate and reliable information. Our content, validated by Expert Board Contributors, is crafted following stringent Editorial Policies. We're committed to providing you with well-researched, expert-backed insights for all your informational needs.


0 thoughts on “How To Hang A Projector Screen From The Ceiling”