Home>Articles>How Do I Install Peel And Stick Vinyl Plank Flooring
Articles
How Do I Install Peel And Stick Vinyl Plank Flooring
Modified: December 7, 2023
Looking for informative articles on how to install peel and stick vinyl plank flooring? Find expert tips and step-by-step guides to simplify the process.
(Many of the links in this article redirect to a specific reviewed product. Your purchase of these products through affiliate links helps to generate commission for Storables.com, at no extra cost. Learn more)
Introduction
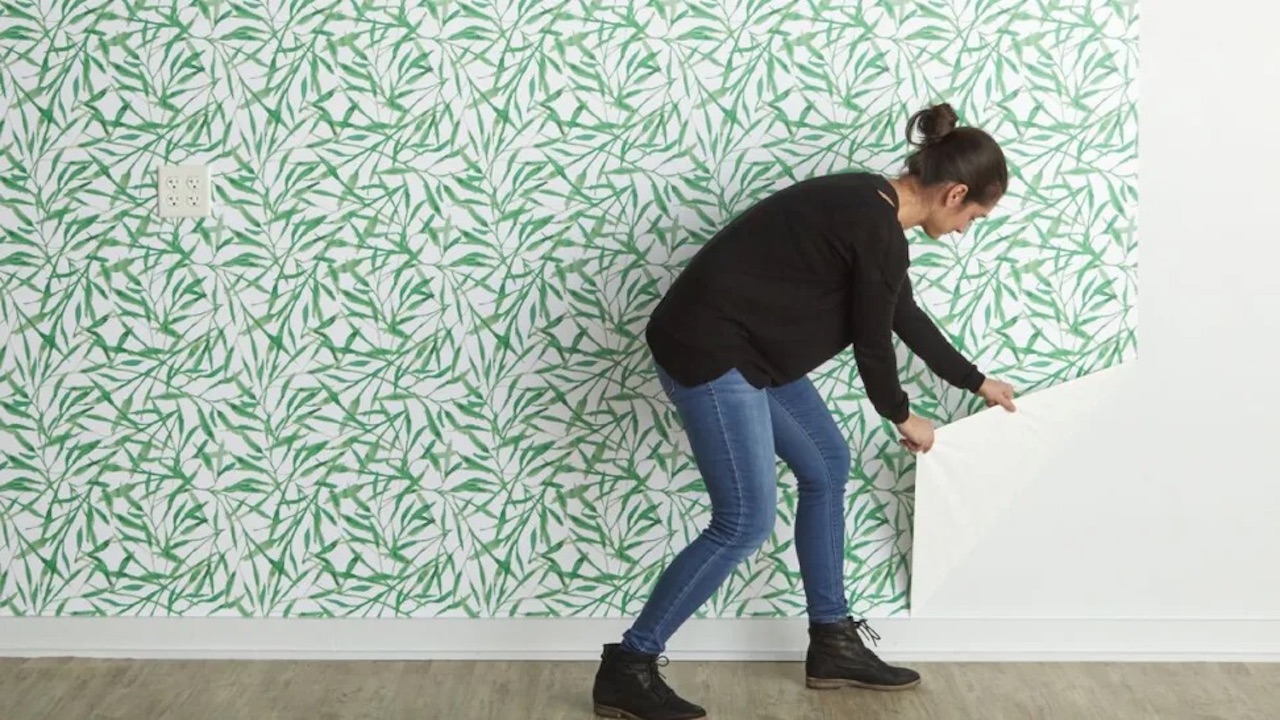
Installing peel and stick vinyl plank flooring is a great way to transform the look of your home, without the need for professional installation or costly renovations. With its easy installation process and wide range of design options, peel and stick vinyl plank flooring has become increasingly popular among homeowners.
In this article, we will guide you through the step-by-step process of installing peel and stick vinyl plank flooring. Whether you’re looking to upgrade your kitchen, bathroom, or any other room in your home, this easy-to-follow guide will help you achieve professional-looking results.
Before we dive into the installation process, let’s take a look at the materials you’ll need to get started.
Key Takeaways:
- Transform your home with DIY peel and stick vinyl plank flooring. Follow the step-by-step guide for professional-looking results and enjoy the benefits of durable and attractive flooring.
- Prioritize safety, cleanliness, and precision for a successful installation. From preparation to final touches, take pride in your DIY project and enjoy the beauty and functionality of your new floors.
Read more: How To Install Vinyl Plank Flooring
Materials Needed
Before you begin installing peel and stick vinyl plank flooring, make sure you have the following materials on hand:
- Peel and Stick Vinyl Plank Flooring: Choose the style and color that best suits your home décor.
- Tape Measure: Used to measure the dimensions of your room and the planks.
- Utility Knife: Essential for cutting the vinyl planks to fit around obstacles and edges.
- Straight Edge or T-Square: Helps to make precise cuts in the vinyl planks.
- Safety Glasses: Protect your eyes when cutting the vinyl planks.
- Rolling Pin or Laminate Roller: Used to ensure a secure bond between the planks and the subfloor.
- Level: Ensures that the subfloor is even and flat.
- Pencil or Marker: Used to mark the measurements and cut lines on the vinyl planks.
- Carpenter’s Square: Helps to ensure accurate angles and straight lines during installation.
- Caulking Gun and Silicone Caulk: Used to seal gaps and joints, if necessary.
- Subfloor Preparation Products: Such as floor patching compound or self-leveling underlayment, if needed.
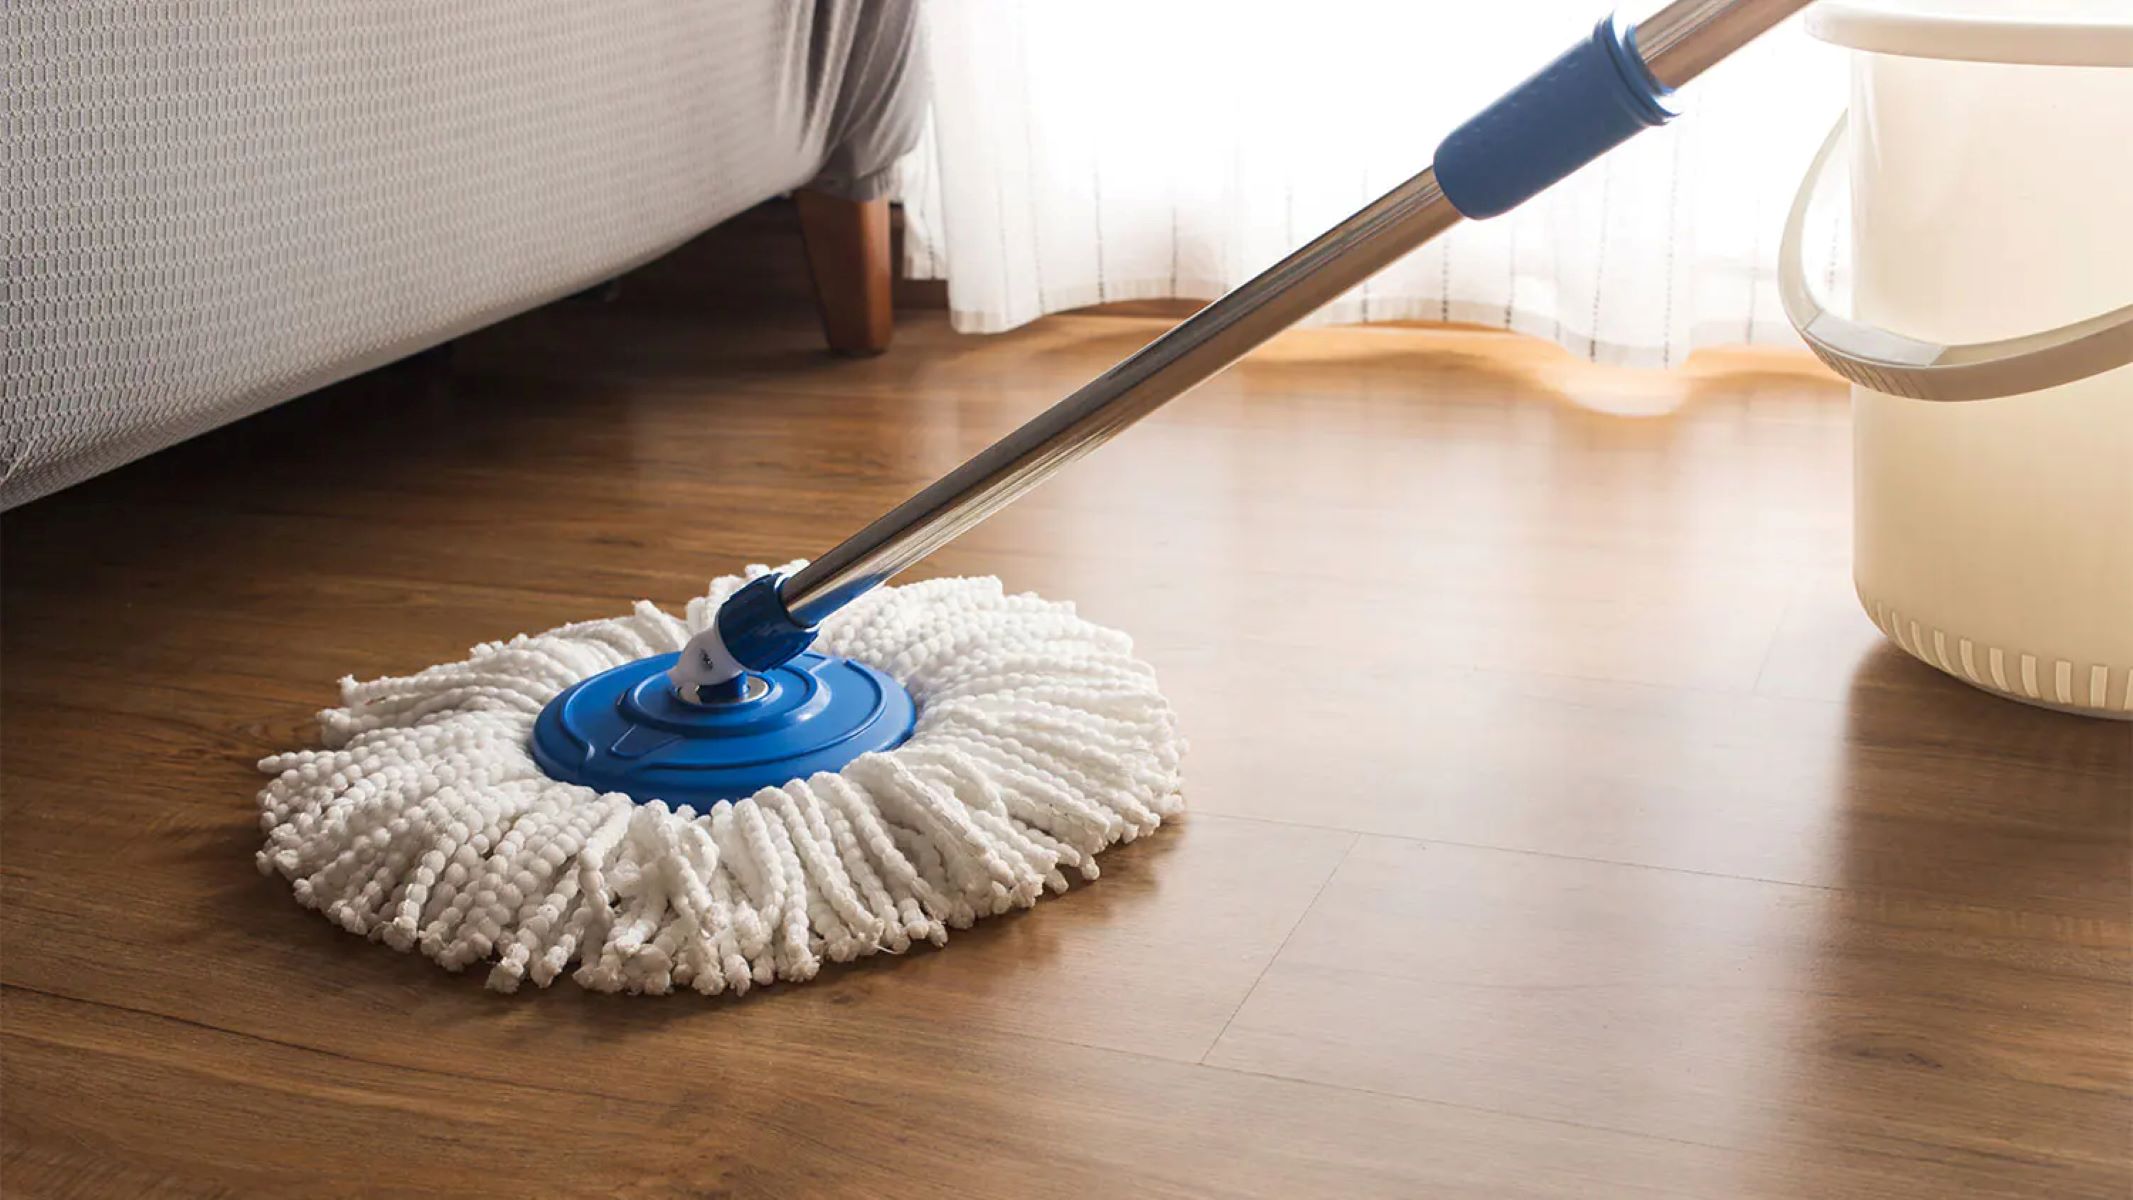
- Cleaner and Mop: Used to thoroughly clean the subfloor before installation.
- Underlayment (optional): Provides additional cushioning and sound absorption.
Having these materials ready before you begin will ensure a smooth installation process and help you achieve professional-looking results.
Preparation
Before you start installing the peel and stick vinyl plank flooring, it’s crucial to prepare the room and the subfloor properly. Here are the steps to follow:
- Clear the room: Remove all furniture, rugs, and any other objects from the room. This will give you a clear workspace and make the installation process easier.
- Clean the subfloor: Thoroughly sweep or vacuum the subfloor to remove any dirt, dust, or debris. If there are any sticky residues, use a mild cleaner to remove them. Ensure that the subfloor is completely dry before proceeding.
- Inspect the subfloor: Check the subfloor for any damage, such as cracks, uneven areas, or protruding nails. Fix any issues and ensure that the subfloor is in good condition. If necessary, you may need to use a floor patching compound or self-leveling underlayment to even out any uneven areas.
- Check the moisture levels: If you’re installing the vinyl plank flooring over a concrete subfloor, it’s important to check the moisture levels. You can use a moisture meter to ensure that the subfloor is within the acceptable range for vinyl flooring installation. Excessive moisture can cause damage to the flooring.
- Acclimate the flooring: It’s recommended to let the vinyl plank flooring acclimate to the room’s temperature and humidity for at least 24 hours. This allows the planks to adjust to the environment and minimize the risk of expansion or contraction after installation.
By properly preparing the room and the subfloor, you’ll create a solid foundation for the peel and stick vinyl plank flooring installation. This will ensure a longer lifespan for your flooring and prevent any potential issues down the road.
Step 1: Clean and Remove Old Flooring
Prior to installing the peel and stick vinyl plank flooring, it’s important to clean and remove any existing flooring. Follow these steps to ensure a smooth and even surface for the new flooring:
- Clear the room: Remove all furniture, rugs, and any other items from the room. This will give you ample space to work and prevent any obstacles during the flooring removal process.
- Remove the baseboards: If your room has baseboards or moldings along the walls, carefully remove them using a pry bar or a putty knife. This will create a clean and seamless transition between the walls and the new flooring.
- Remove the old flooring: Depending on the type of flooring you have, there are different methods to remove it. For carpet, cut it into manageable sections and roll it up for disposal. For tile or vinyl flooring, use a floor scraper to loosen and remove the adhesive or mortar underneath. If you’re removing hardwood or laminate flooring, you may need to use a crowbar or mallet to pry the planks up.
- Clean the subfloor: Once the old flooring is removed, thoroughly clean the subfloor to remove any dust, debris, or adhesive residue. Sweep or vacuum the subfloor, and if necessary, use a cleaner recommended for your specific subfloor material.
- Inspect the subfloor: While cleaning the subfloor, inspect it for any damage or uneven areas. If there are any cracks, holes, or loose boards, repair them before proceeding. A smooth and even subfloor is essential for the proper installation of the new flooring.
By taking the time to clean and remove the old flooring properly, you’ll create the ideal surface for the peel and stick vinyl plank flooring. This step ensures that the new flooring adheres securely and results in a smooth and professional-looking finish.
Step 2: Acclimate the Vinyl Plank Flooring
Before installing the peel and stick vinyl plank flooring, it’s crucial to acclimate the planks to the room’s temperature and humidity. This process allows the planks to adjust and minimize the risk of expansion or contraction after installation. Follow these steps to acclimate the vinyl plank flooring:
- Bring the planks into the room: Unbox the vinyl plank flooring and bring the planks into the room where they will be installed. Keep them stacked horizontally, with spacers between each plank.
- Ensure proper airflow: Make sure the room has proper ventilation and airflow. This helps the planks acclimate effectively to the room’s conditions.
- Allow 24-48 hours for acclimation: Leave the planks in the room for at least 24-48 hours to acclimate. This time frame allows the flooring to adjust to the temperature and humidity of the space. It is important not to rush this process, as it ensures a proper fit and stability of the planks.
- Keep the planks away from moisture: During the acclimation period, make sure the planks are kept away from any moisture sources, such as open windows or areas with excessive humidity. This can prevent any potential damage or warping of the flooring material.
- Inspect the planks: While the planks are acclimating, take the time to inspect them for any defects or damage. If you notice any issues, contact the manufacturer or the supplier to address the problem before installation.
Acclimating the vinyl plank flooring is an essential step to ensure a successful installation. It allows the flooring to adapt to the room’s environment, minimizing the risk of expansion or contraction and ensuring a stable and long-lasting floor.
Step 3: Prepare the Subfloor
Preparing the subfloor is a crucial step in installing peel and stick vinyl plank flooring. It ensures a smooth, durable, and long-lasting installation. Follow these steps to properly prepare the subfloor:
- Inspect the subfloor: Before starting the installation, thoroughly inspect the subfloor for any damage, unevenness, or protrusions. Repair any cracks, holes, or damaged areas using the appropriate repair products.
- Remove any obstacles: Clear the subfloor of any debris, dust, or loose particles. Remove any remaining adhesive or old flooring residue using a scraper or adhesive remover.
- Make the subfloor level: Use a level to check the subfloor for any uneven areas. If there are any high or low spots, you may need to use a floor patching compound or self-leveling underlayment to create a smooth, level surface. Follow the manufacturer’s instructions for applying and drying times.
- Check for moisture: If you’re installing the vinyl plank flooring over a concrete subfloor, it’s important to test the moisture levels. Excessive moisture can cause damage to the flooring. Use a moisture meter to ensure that the moisture content is within the acceptable range. If it’s too high, you may need to use a moisture barrier or take steps to address the moisture issue before proceeding.
- Clean the subfloor: Thoroughly sweep or vacuum the subfloor to remove any dust or debris. Make sure the subfloor is clean and dry before proceeding with the installation.
Properly preparing the subfloor ensures a stable and even surface for the peel and stick vinyl plank flooring. It prevents issues such as subfloor movement, uneven flooring, and premature wear and tear. Taking the time to prepare the subfloor will result in a professional-looking and long-lasting installation.
Step 4: Measure and Plan the Layout
Measuring and planning the layout is a crucial step in installing peel and stick vinyl plank flooring. Taking accurate measurements and properly planning the layout will help you achieve a seamless and aesthetically pleasing result. Follow these steps:
- Measure the room: Use a tape measure to measure the length and width of the room. Multiply the length and width measurements to determine the square footage of the room. This will help you calculate the amount of vinyl plank flooring you need to purchase.
- Allow for expansion: Keep in mind that vinyl plank flooring can expand and contract. To accommodate for this, it’s recommended to leave a small gap, typically around 1/4 inch, between the flooring and the walls. Make sure to include this extra space when measuring the dimensions of the room.
- Plan the layout: Consider the shape and size of the room when planning the layout. Decide on the direction in which you want to install the planks, keeping in mind the natural light source and the main entrance of the room. It’s usually recommended to install the planks parallel to the longest wall in the room for a visually appealing look.
- Consider the pattern: If your vinyl plank flooring has a specific pattern or design, think about how you want it to flow throughout the room. Some homeowners prefer a random pattern, while others prefer a consistent pattern. Take this into account when planning the layout and cutting the planks.
- Use chalk lines or guidelines: To ensure straight and accurate installation, use chalk lines or guidelines to mark the layout on the subfloor. This will serve as a reference point for installing the planks and help maintain an even and balanced appearance.
Taking the time to measure and plan the layout will help you optimize the use of materials and create a visually pleasing installation of peel and stick vinyl plank flooring. Careful planning ensures that the planks are properly aligned, reducing the need for adjustments and resulting in a professional-looking finish.
Make sure the subfloor is clean, dry, and level before installing peel and stick vinyl plank flooring to ensure a smooth and long-lasting finish.
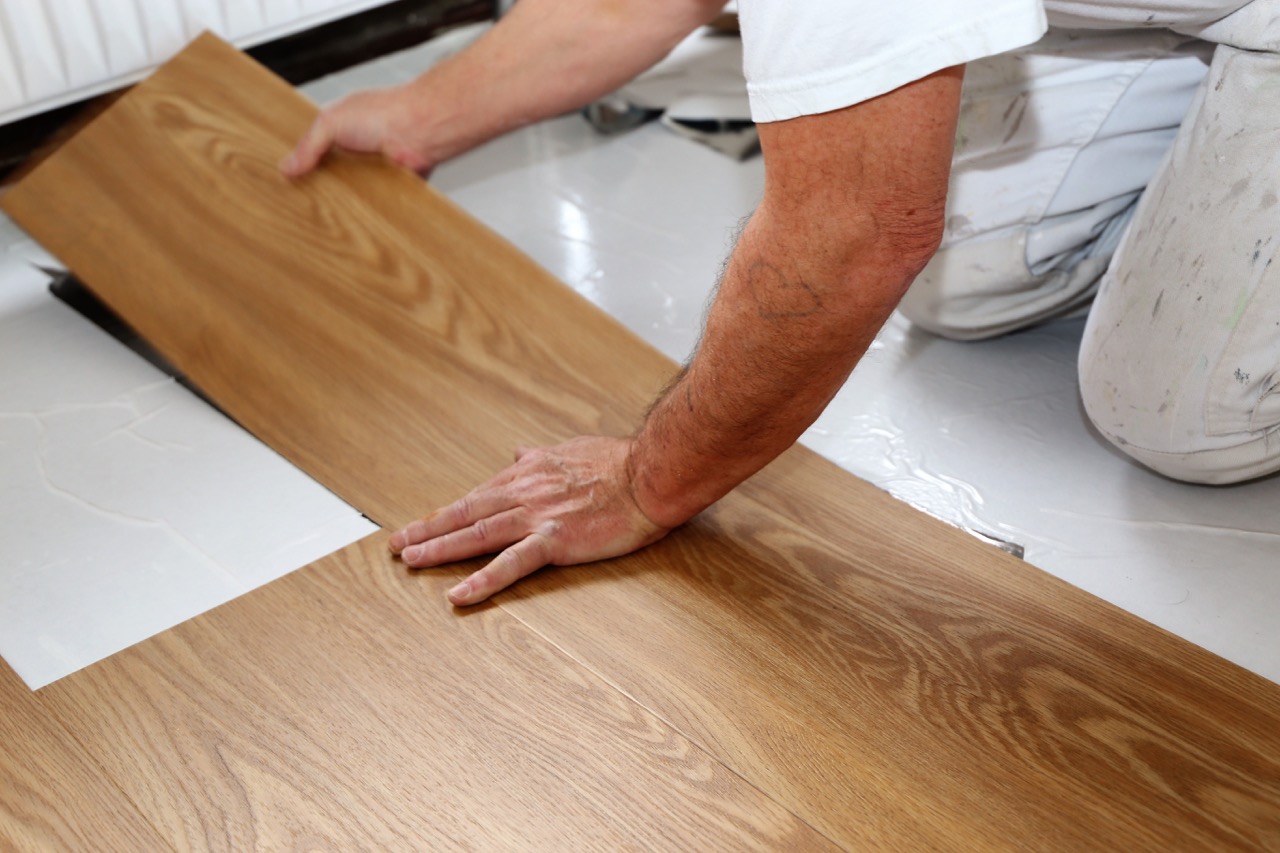
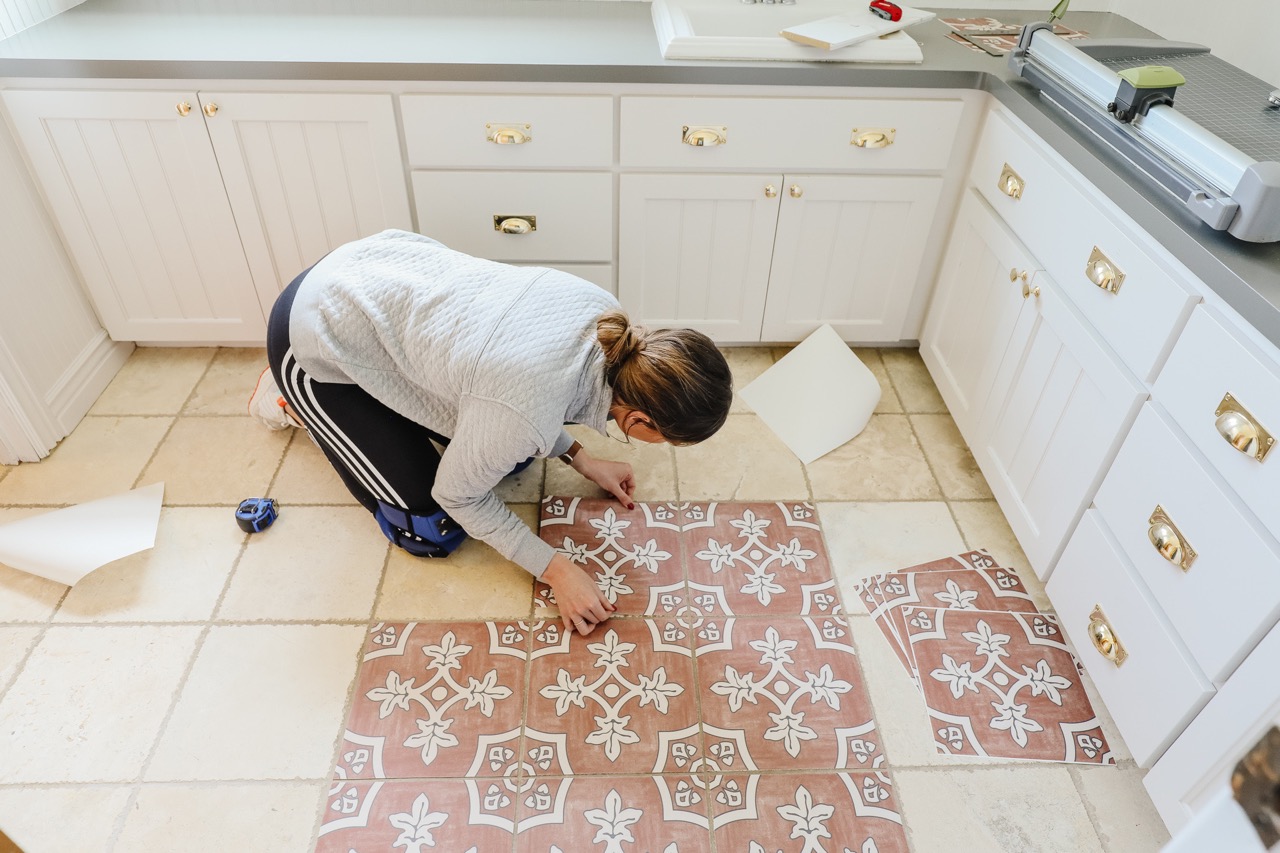
Step 5: Install the First Row
Installing the first row of peel and stick vinyl plank flooring sets the foundation for the rest of the installation process. Follow these steps to ensure a straight and secure first row:
- Start with a clean and dry subfloor: Make sure the subfloor is clear of any debris and completely dry before you start the installation. A clean and dry surface will help the adhesive on the planks adhere properly.
- Layout and cut the first plank: Measure the width of the room and the width of the plank to determine the size of the last plank in the first row. It’s important to maintain a consistent gap of around 1/4 inch between the plank and the walls. Use a utility knife and a straight edge to cut the first plank accordingly.
- Apply adhesive: Peel off the protective backing from the adhesive side of the first plank. Place the plank at the starting point of the row, but do not press it down firmly just yet. Align the plank with the chalk lines or guidelines previously marked on the subfloor.
- Secure the first plank: Once the first plank is aligned correctly, firmly press it down onto the subfloor. Use a rolling pin or a laminate roller to ensure a secure bond between the plank and the subfloor. Apply pressure along the entire length of the plank to prevent any unevenness.
- Continue with the rest of the first row: Repeat the process for the remaining planks in the first row. Remember to leave a small gap between each plank for expansion. Trim the last plank in the row to fit the space, if necessary.
Installing the first row of peel and stick vinyl plank flooring correctly is crucial for a professional-looking and secure installation. Take your time to measure, cut, and align the planks accurately to ensure a straight and level first row.
Step 6: Continue Installing the Vinyl Plank Flooring
Now that the first row of peel and stick vinyl plank flooring is in place, it’s time to continue with the installation of the remaining rows. Follow these steps to ensure a smooth and successful installation:
- Prepare the next plank: Measure the length needed for the first plank in the second row. Remember to leave a small gap, approximately 1/4 inch, between the walls and planks for expansion. Use a utility knife and a straight edge to cut the plank to the correct size.
- Apply adhesive: Peel off the protective backing from the adhesive side of the plank. Align it with the previous row, making sure the short ends are staggered for a more natural look. Press the plank firmly onto the subfloor, ensuring a secure bond.
- Continue installing the planks: Repeat the process for the rest of the second row, always aligning and staggering the planks with the previous row. Use a rolling pin or laminate roller to ensure a secure bond between the planks and the subfloor.
- Trim and fit planks as needed: When reaching the end of a row or installing around obstacles, you may need to trim or cut planks to fit. Use a utility knife and a straight edge to make precise cuts. Take accurate measurements and ensure a proper fit before installing these trimmed planks.
- Continue with subsequent rows: Repeat the process for the remaining rows of the peel and stick vinyl plank flooring, overlapping each row slightly for a secure and seamless installation. Remember to stagger the planks for a natural and visually appealing result.
- Inspect and clean as you go: Regularly inspect the installed planks for any visible gaps or imperfections. If necessary, gently lift a plank and reposition it to achieve a more even and consistent appearance. Clean up any adhesive residue or excess adhesive as you progress with the installation.
Continuing the installation of the vinyl plank flooring requires attention to detail, precision, and patience. Take your time to measure, align, and fit each plank correctly to ensure a seamless and professional-looking finish.
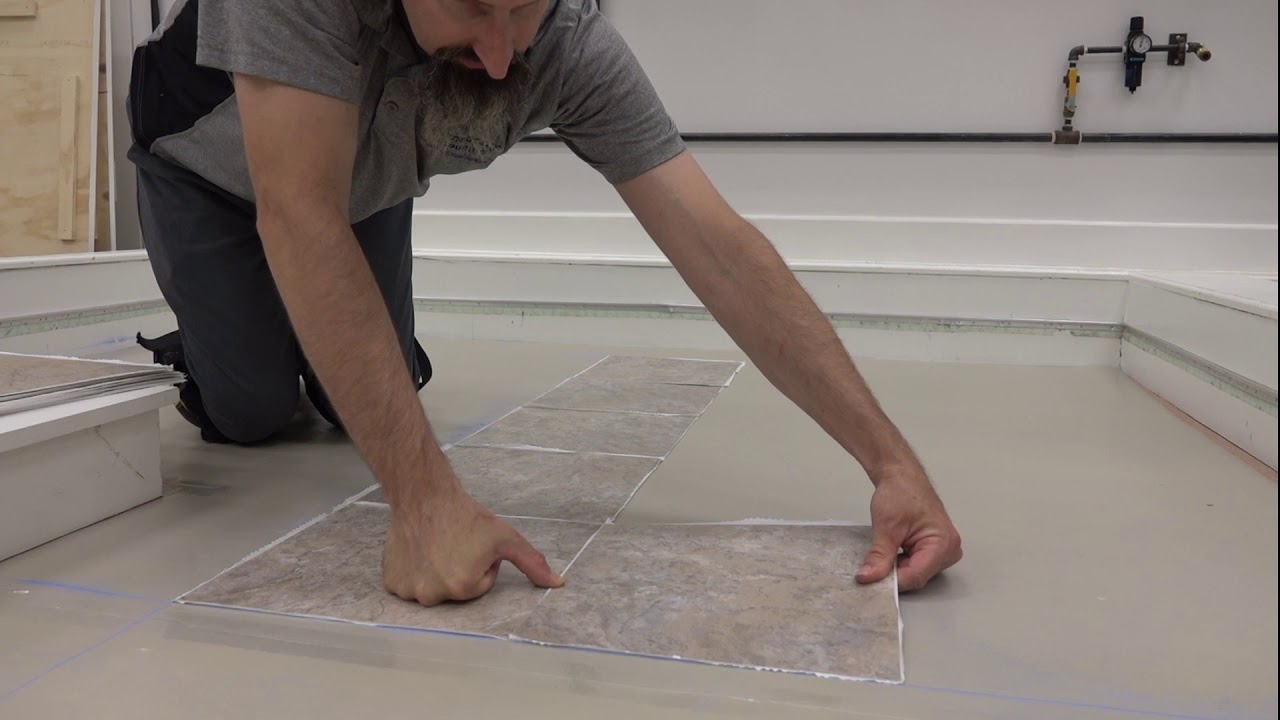
Step 7: Cut and Fit Planks as Needed
During the installation of peel and stick vinyl plank flooring, you may encounter areas that require custom fitting and cutting. Follow these steps to cut and fit planks as needed:
- Measure the space: Use a tape measure to measure the length and width of the area where the plank needs to be fitted. Take accurate measurements to ensure a precise fit.
- Transfer the measurements to the plank: Use a straight edge or a carpenter’s square to mark the measurements on the plank. Double-check the measurements before making any cuts.
- Make the cut: Use a utility knife or a vinyl plank cutter to make the cut on the marked line. Apply firm and even pressure to ensure a clean and accurate cut. Make multiple passes if necessary, but avoid cutting too deeply to avoid damaging the subfloor.
- Test the fit: Place the cut plank in the designated area to test the fit. Make any necessary adjustments or additional trimming if the plank doesn’t fit properly. Remember to leave a small gap around the edges for expansion.
- Install the fitted plank: Once the plank fits correctly, apply adhesive and press it firmly onto the subfloor. Use a rolling pin or laminate roller to ensure a secure bond.
- Continue with the rest of the installation: Repeat the process for any other areas that require custom fitting and cutting. Take your time to ensure precise measurements and clean cuts for a professional-looking installation.
Custom fitting and cutting planks as needed may be necessary to achieve a seamless and professional installation of peel and stick vinyl plank flooring. Take your time, double-check measurements, and make precise cuts to ensure a perfect fit in any challenging areas.
Step 8: Install Moldings and Trim
Installing moldings and trim is the final step to complete the installation of peel and stick vinyl plank flooring. Follow these steps to add the finishing touches to your project:
- Choose the appropriate moldings: Select the right type of moldings and trim that complements your vinyl plank flooring and suits the style of your space. Common options include baseboards, quarter rounds, thresholds, and transition strips.
- Measure and cut the moldings: Use a tape measure to measure the length needed for each molding or trim piece. Use a miter saw or a miter box to make precision cuts at the appropriate angles.
- Clean and prep the installation area: Ensure that the areas where the moldings will be installed are clean and free from dust or debris. Carefully remove any adhesive residue from the flooring surface to ensure a smooth installation.
- Apply adhesive: Apply a suitable adhesive or construction adhesive onto the backside of the molding or trim piece, following the manufacturer’s instructions. Alternatively, you can use finishing nails or brads to secure the moldings in place.
- Install the moldings: Place the moldings or trim pieces in their appropriate locations and press firmly against the wall or baseboard. Make any adjustments or slight repositioning to ensure a proper fit and a seamless transition between the flooring and the walls.
- Secure the moldings: Use a hammer or nail gun to gently drive finishing nails or brads into the molding or trim, taking care not to damage the flooring. Alternatively, place heavy objects temporarily along the length of the moldings to hold them in place until the adhesive dries.
- Fill any gaps: If there are any small gaps or imperfections between the moldings and the walls, use a small amount of caulk or putty to fill them in. Smooth out the filler material with a putty knife for a clean and seamless appearance.
Installing moldings and trim adds a polished and professional look to your peel and stick vinyl plank flooring. It creates a smooth transition between the flooring and the walls, giving the room a finished and uniform appearance.
Step 9: Clean Up and Final Touches
Cleaning up and adding final touches is the last step in the installation of peel and stick vinyl plank flooring. Follow these steps to ensure a tidy and finished look:
- Remove any adhesive residue: Use a damp cloth or sponge to clean off any excess adhesive on the surface of the vinyl plank flooring. Be careful not to use too much water, as it can damage the flooring. Dry the area thoroughly after cleaning.
- Inspect the installation: Take a moment to inspect the entire installation for any visible gaps, lifted edges, or imperfections. If you notice any issues, gently press down on the affected areas to ensure a secure bond between the planks and the subfloor.
- Replace the furniture: Once the adhesive has fully dried and the flooring is secure, carefully move the furniture back into place. Use furniture pads or felt pads on the legs of the furniture to prevent scratching or damaging the newly installed flooring.
- Care and maintenance: Familiarize yourself with the manufacturer’s recommendations for care and maintenance of the peel and stick vinyl plank flooring. Follow these instructions to ensure the longevity and appearance of your new floor.
- Enjoy your new flooring: Take a moment to appreciate the transformation of your space. Your freshly installed peel and stick vinyl plank flooring has not only enhanced the look of your room but also added durability and convenience.
By properly cleaning up and adding final touches, you will achieve a clean and polished look for your peel and stick vinyl plank flooring. Take pride in your work and enjoy the beauty and functionality of your newly installed floor.
Conclusion
Installing peel and stick vinyl plank flooring is a rewarding DIY project that can transform the look and feel of your home. It offers a cost-effective and convenient solution to upgrade your floors without the need for professional installation or extensive renovations. By following the step-by-step guide outlined in this article, you can achieve professional-looking results and enjoy the benefits of durable and attractive vinyl flooring.
From the initial preparation of the subfloor to the final touches of installing moldings and trim, each step is essential for a successful installation. Cleaning the area, measuring and planning the layout, and cutting and fitting planks as needed ensure a precise and aesthetically pleasing result. Taking the time to acclimate the vinyl plank flooring and properly install the first row are crucial for a stable and seamless installation.
Throughout the installation process, it’s important to prioritize safety and cleanliness. Use proper tools, wear protective eyewear, and keep the workspace clear of debris. Regularly clean the subfloor, remove any adhesive residue, and inspect the installation for any imperfections. These diligent efforts will ensure the longevity and appearance of your new peel and stick vinyl plank flooring.
Remember to take care of your new flooring by following the manufacturer’s guidelines for maintenance and cleaning. With proper care, your vinyl plank flooring will provide years of beauty and durability, enhancing the overall value and comfort of your home.
By following the steps and tips outlined in this article, you can confidently install peel and stick vinyl plank flooring and enjoy the satisfaction of a successful DIY project. Embrace the transformation and enjoy your beautiful new floors for many years to come.
Frequently Asked Questions about How Do I Install Peel And Stick Vinyl Plank Flooring
Was this page helpful?
At Storables.com, we guarantee accurate and reliable information. Our content, validated by Expert Board Contributors, is crafted following stringent Editorial Policies. We're committed to providing you with well-researched, expert-backed insights for all your informational needs.


0 thoughts on “How Do I Install Peel And Stick Vinyl Plank Flooring”