Articles
How To Prep Floor For Peel And Stick Tile
Modified: November 1, 2024
Learn how to properly prep your floor for peel and stick tile with our informative articles. Achieve smooth and long-lasting results effortlessly.
(Many of the links in this article redirect to a specific reviewed product. Your purchase of these products through affiliate links helps to generate commission for Storables.com, at no extra cost. Learn more)
Introduction
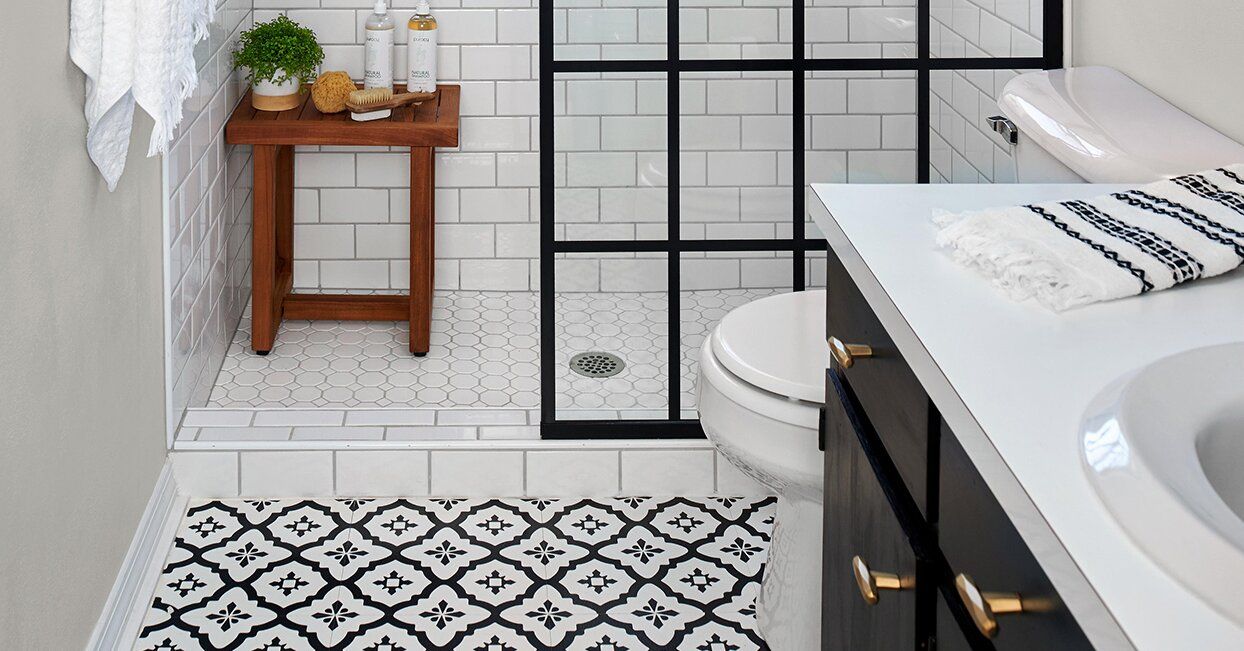
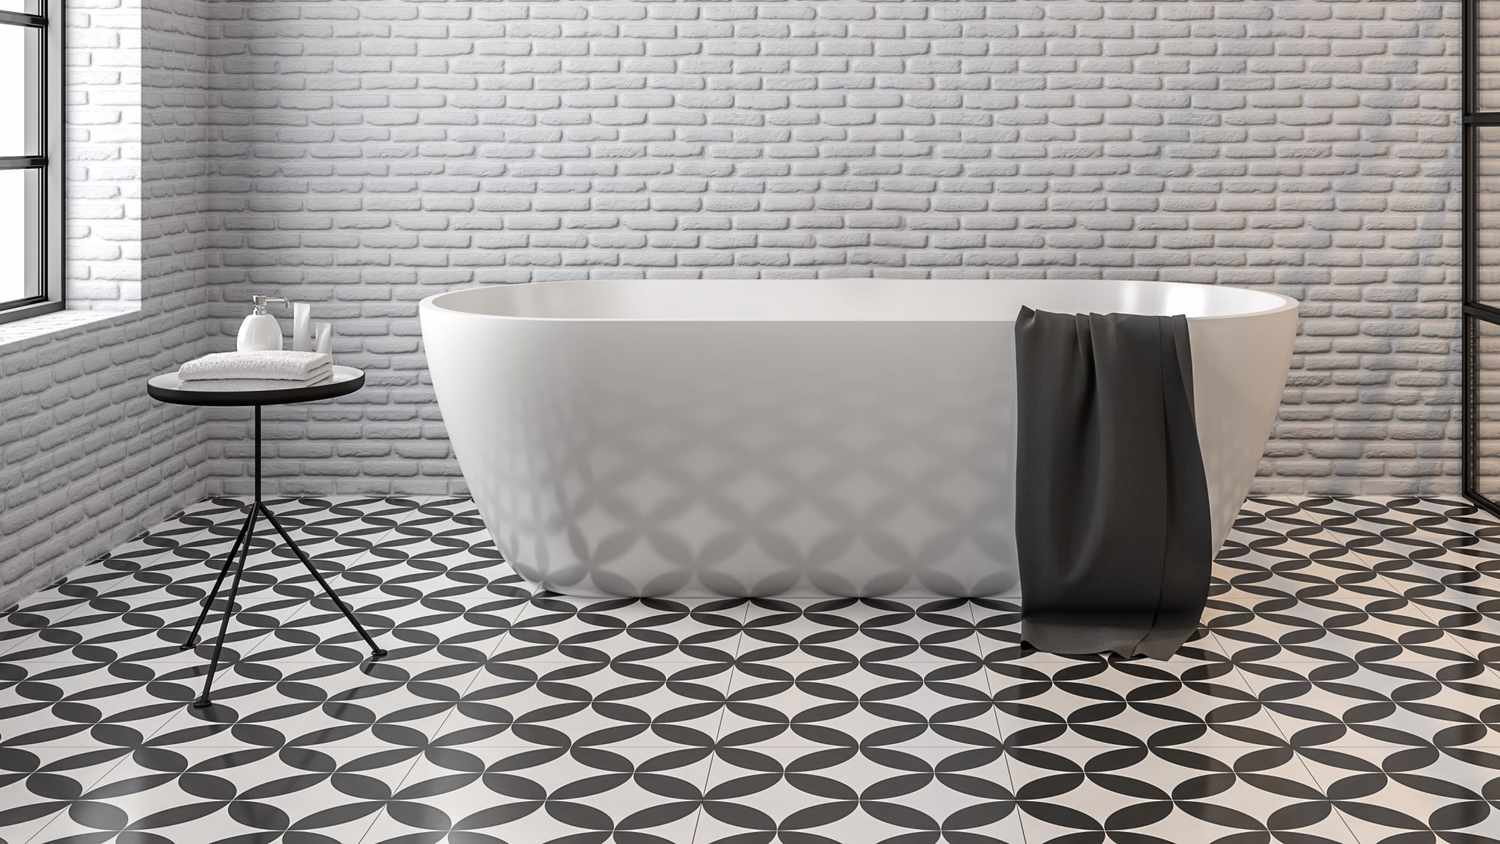
Installing peel and stick tiles is a cost-effective and convenient way to update the look of your floors. Whether you’re renovating a bathroom, kitchen, or any other room in your home, prepping the floor properly is crucial for ensuring a successful installation. By following the right steps, you can create a smooth and durable surface that will make your peel and stick tiles look their best.
In this article, we will guide you through the process of prepping your floor for peel and stick tile installation. From clearing and cleaning the floor to applying the tiles, we will cover each step in detail, providing you with all the information you need to achieve professional-looking results.
So, let’s get started with step one: clearing and cleaning the floor.
Key Takeaways:
- Proper floor preparation is essential for successful peel and stick tile installation. From clearing and cleaning the floor to applying pressure and rolling the tiles, attention to detail and patience are key for professional-looking results.
- Prioritize safety, accuracy, and patience throughout the installation process. By following the step-by-step guide and taking the time to prep the floor, you can achieve a cost-effective and visually appealing transformation for your space.
Read more: How To Lay Peel And Stick Tile Floors
Step 1: Clear and Clean the Floor
The first step in prepping your floor for peel and stick tile installation is to clear the area of any furniture, rugs, or other items. This will give you a clear workspace and allow you to move freely while working on the floor.
Once the floor is clear, it’s time to thoroughly clean it. Start by sweeping the floor to remove any loose dirt, dust, or debris. Use a broom or a vacuum cleaner with a brush attachment to ensure you get into all the corners and crevices.
Next, you’ll want to give the floor a good scrub to remove any stains, grease, or adhesive residues. Use a suitable floor cleaner and a mop or a scrub brush to clean the floor. Follow the instructions on the cleaner’s packaging for the best results.
After cleaning, rinse the floor with clean water to remove any remaining cleaning solution. Use a mop or a clean sponge to wipe away the excess water. Ensure the floor is completely dry before moving on to the next step.
Cleaning the floor thoroughly is essential as any dirt or debris left behind can interfere with the adhesive bond of the peel and stick tiles. So take your time and make sure the floor is spotless before proceeding.
With step one complete, you now have a clean and clear floor ready for the next phase of prepping. Let’s move on to step two: checking for moisture and leveling the floor.
Step 2: Check for Moisture and Level the Floor
Before proceeding with the installation of peel and stick tiles, it’s important to check for moisture and ensure that the floor is level. Moisture can cause damage to the adhesive backing of the tiles, while an uneven floor can result in an uneven surface and compromised tile adhesion.
To check for moisture, you can conduct a simple moisture test. Tape a plastic sheet onto the floor in several areas and leave it overnight. If you notice condensation or moisture buildup underneath the plastic, it’s an indication of a moisture issue. In such cases, it’s best to address the source of the moisture problem before proceeding with the installation.
To level the floor, start by examining it for any noticeable dips or high spots. Use a straightedge or a level to identify any uneven areas. Small imperfections can often be addressed by applying a floor leveling compound. This compound fills in low areas and smooths out bumps, creating a level surface for the peel and stick tiles.
Prior to applying the floor leveling compound, make sure to clean the floor once again to remove any dust or debris. Follow the manufacturer’s instructions for mixing and applying the leveling compound, ensuring that you apply it evenly across the floor. Allow the compound to fully cure and dry according to the manufacturer’s recommendations before proceeding.
By checking for moisture and leveling the floor, you are setting the foundation for a successful peel and stick tile installation. With steps one and two complete, you’re ready to move on to step three: repairing any damage or irregularities.
Step 3: Repair Any Damage or Irregularities
Before proceeding with the installation of peel and stick tile, it’s essential to address any damage or irregularities on the floor. This step will help ensure a smooth and seamless surface for the tiles, preventing any issues down the line.
Start by inspecting the floor for any cracks, holes, or damage. If you come across any, you’ll need to repair them accordingly. Small cracks can be filled using a suitable floor patching compound. Follow the manufacturer’s instructions for mixing and applying the compound, making sure to fill the cracks completely. Allow the compound to dry and cure properly before moving on.
If there are any large holes or damaged areas, you may need to replace the affected section of the floor. This could involve removing the damaged portion and replacing it with new flooring material. Make sure to measure and cut the replacement piece accurately to ensure a seamless fit.
In addition to addressing damage, you’ll also want to address any irregularities on the floor. This includes any uneven surfaces, raised edges, or rough patches. Use a floor sanding tool or sandpaper to smooth out these areas and create a consistent surface. Once the floor is smooth, make sure to clean away any dust or debris before proceeding.
Repairing any damage or irregularities on the floor is crucial for achieving a professional-looking finish with peel and stick tiles. By taking the time to properly address these issues, you’re setting yourself up for a successful installation. With step three complete, let’s move on to step four: removing baseboards and trim.
Step 4: Remove Baseboards and Trim
When installing peel and stick tiles, it’s important to remove the baseboards and trim along the edges of the floor. This step will allow for a clean and seamless installation, ensuring that the tiles fit snugly against the walls.
Start by carefully removing the baseboards using a pry bar or a putty knife. Insert the tool between the baseboard and the wall, then gently pry it away. Take your time to avoid damaging the baseboard or the wall. If necessary, use a small block of wood as leverage to help ease the baseboard away from the wall.
After removing the baseboards, set them aside in a safe place. If you plan to reuse them after the tile installation, make sure to label each piece to easily identify its original location. Alternatively, if you prefer a fresh look, you may choose to install new baseboards once the tiles are in place.
In addition to removing the baseboards, you’ll also want to remove any door trim or other trim pieces near the floor. Follow the same process as you did for the baseboards, gently prying them away from the wall. Take care not to damage the trim or the surrounding area.
Removing the baseboards and trim will provide a clean and unobstructed area for the installation of the peel and stick tiles. It will also allow for a proper fit, ensuring that the tiles can be installed flush against the walls. With step four complete, let’s move on to step five: sweep and vacuum the subfloor.
Read more: How To Lay Peel And Stick Floor Tile
Step 5: Sweep and Vacuum the Subfloor
Before laying down the peel and stick tiles, it’s important to thoroughly clean the subfloor. This step will ensure that the tiles adhere properly and provide a smooth and even surface for installation.
Start by sweeping the subfloor to remove any loose dirt, dust, or debris. Use a broom or a dust mop to sweep the entire area, making sure to reach into corners and along the edges. Sweep in one direction to collect the debris and dispose of it properly.
Next, vacuum the subfloor to remove any remaining particles that may have been missed during sweeping. Use a vacuum cleaner with a brush attachment to effectively clean the surface. Pay special attention to edges and corners, as these are often areas where debris can accumulate.
When vacuuming, it’s important to choose a setting that is appropriate for the type of subfloor material you have. Some high-powered vacuums may be too aggressive and could damage certain flooring surfaces. If you’re unsure, consult the manufacturer’s guidelines or consult with a professional.
By sweeping and vacuuming the subfloor, you’re creating a clean and debris-free surface for the peel and stick tiles. This will ensure a strong adhesive bond and a smooth installation process. With step five complete, let’s move on to step six: prime the subfloor.
Before installing peel and stick tiles, make sure the floor is clean, smooth, and free of any debris. Use a primer or floor leveler if necessary to ensure a flat surface for the tiles to adhere to.
Step 6: Prime the Subfloor
Priming the subfloor is an important step in prepping for peel and stick tile installation. Applying a primer creates a barrier between the subfloor and the adhesive, ensuring a strong bond and a longer-lasting installation.
Before starting, make sure the subfloor is clean and free of any dust or debris. If there are any remaining stains or residue, clean the subfloor using a suitable cleaner and allow it to dry completely.
Choose a primer specifically designed for your type of subfloor and follow the manufacturer’s instructions for application. Typically, you’ll use a paint roller or a brush to apply the primer evenly across the entire surface. Make sure to work in small, manageable sections to ensure thorough coverage.
Allow the primer to dry according to the manufacturer’s recommended drying time. This is typically between 1 to 2 hours, but it may vary depending on the specific product used. Avoid walking on the primed surface until it is completely dry.
Priming the subfloor provides a smooth and adhesive-friendly surface for the peel and stick tiles. It helps improve the bond strength and prevents any potential issues such as tile lifting or shifting over time.
With step six complete, you are now ready to move on to the next phase of the installation process. In step seven, we’ll cover how to lay out the peel and stick tiles.
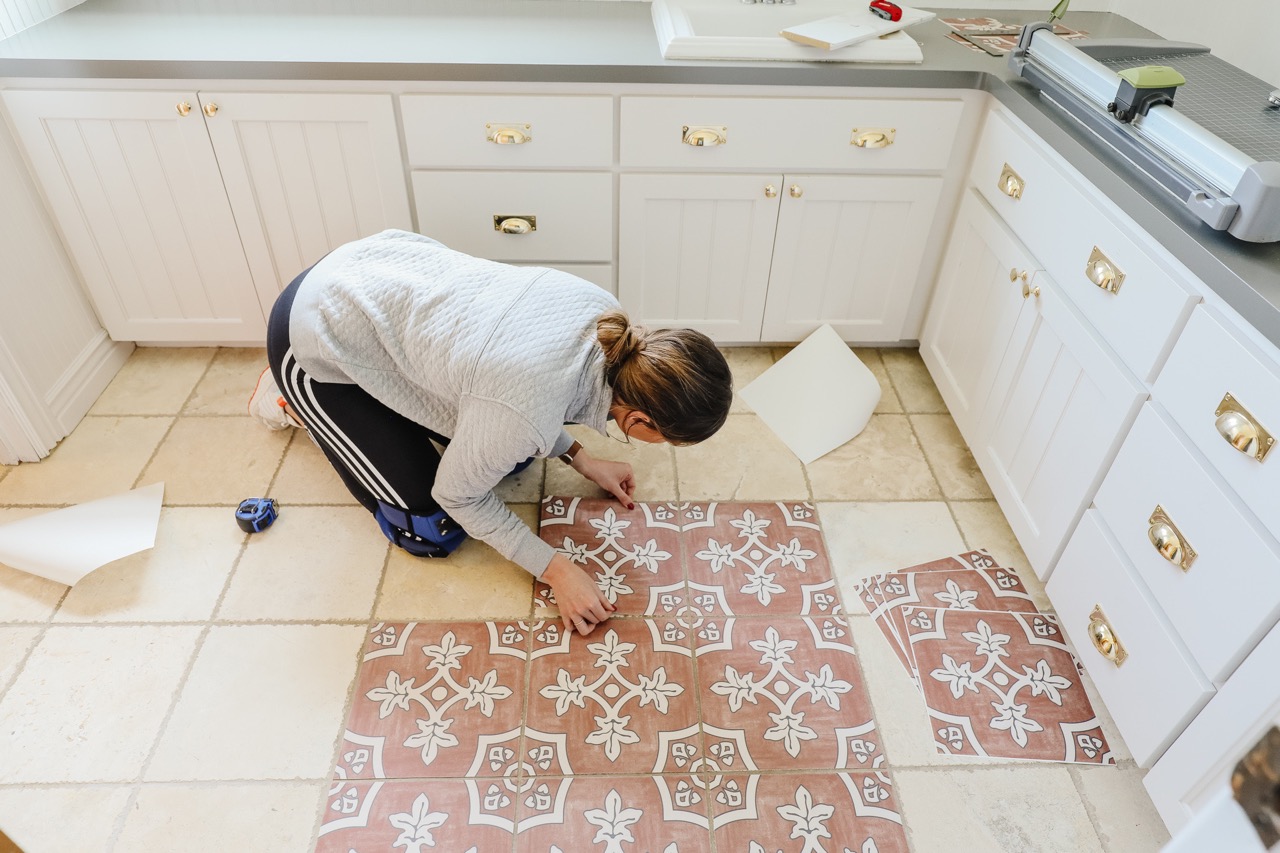
Step 7: Lay Out the Peel and Stick Tiles
Once the subfloor has been prepped and primed, it’s time to start laying out the peel and stick tiles. This step is crucial for ensuring a balanced and visually appealing installation.
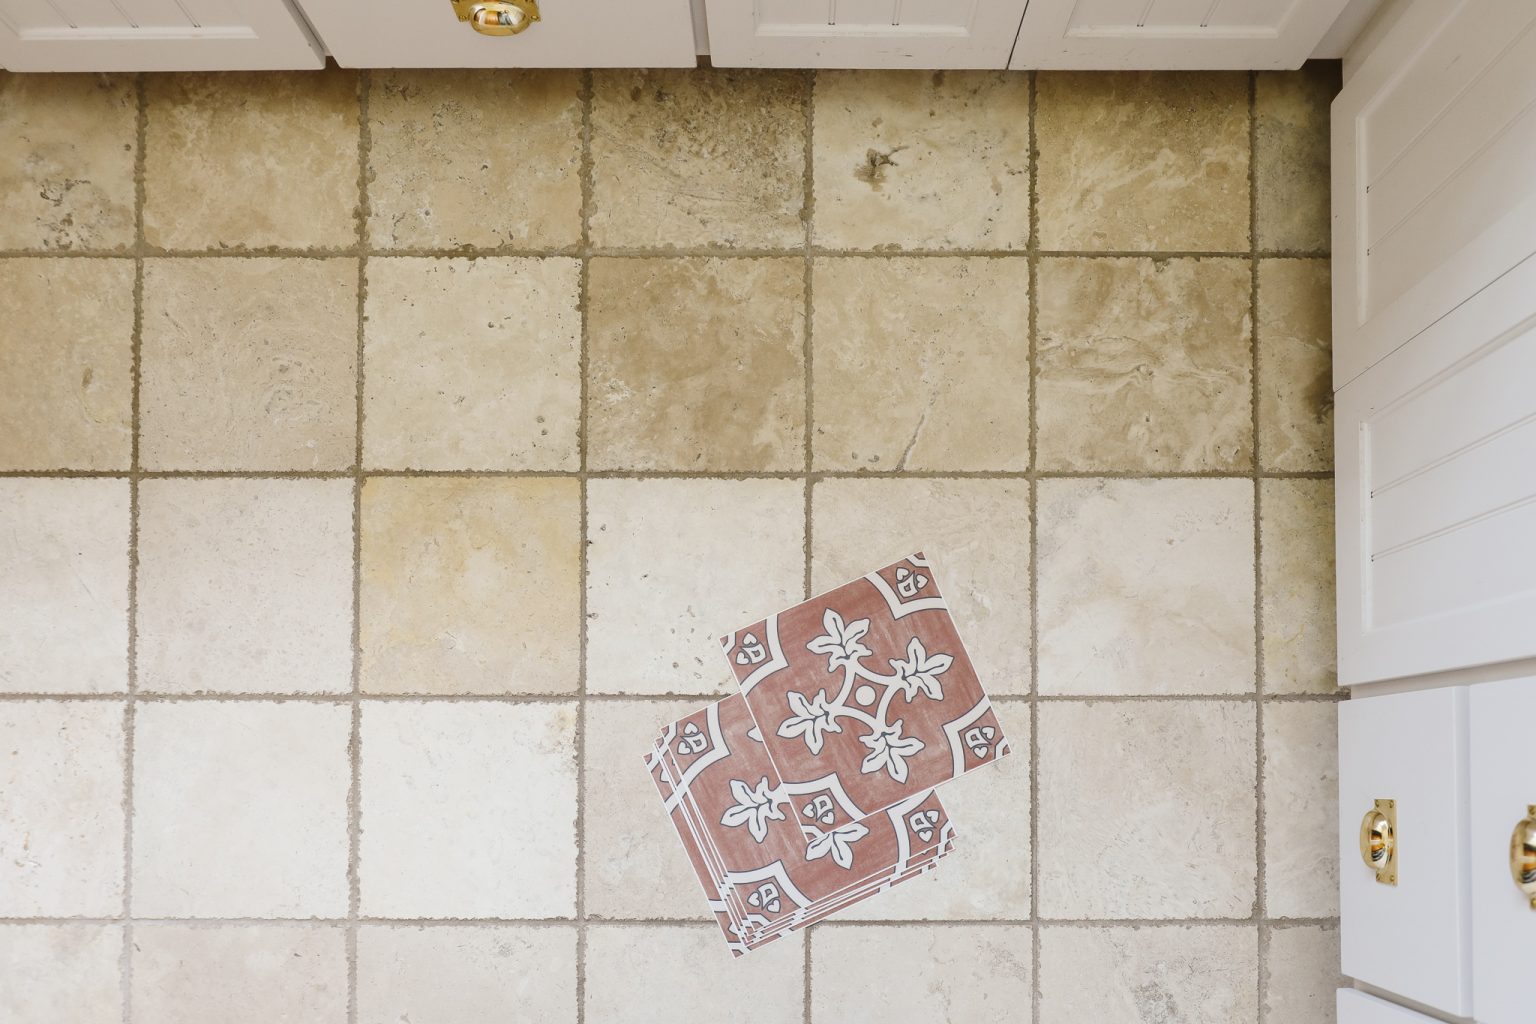
Begin by determining the layout pattern you want to achieve with your tiles. There are various options, such as a classic straight pattern, a diagonal pattern, or a herringbone pattern. Measure the dimensions of the room and use a pencil and a straight edge to create guidelines on the subfloor, marking where the tiles will be placed.
Before sticking the tiles down, it’s recommended to do a dry run by placing the tiles on the subfloor without removing the backing. This will allow you to visualize the layout, make any necessary adjustments, and ensure that the pattern is symmetrical and balanced.
During the dry run, pay attention to the positioning of the tiles near walls, corners, and obstacles such as cabinets or fixtures. You may need to make slight adjustments or cut tiles to fit properly. Use a utility knife or a tile cutter to trim the tiles as needed.
Once you’re satisfied with the layout, it’s time to start sticking down the tiles. Begin at one corner of the room and peel off the backing of the first tile. Align it with the guidelines you’ve created and press it firmly onto the subfloor, working from the center outward to remove any air bubbles.
Continue placing the tiles one by one, following the layout pattern you’ve established. Make sure each tile is positioned correctly and press it firmly into place. You can use a rolling pin or a tile roller to ensure proper adhesion.
As you work, periodically step back and assess the overall appearance of the tiles. Make any necessary adjustments to maintain a uniform and visually pleasing installation.
With step seven complete, you have now successfully laid out your peel and stick tiles. Next, we’ll cover step eight: cutting and trimming tiles for edges and corners.
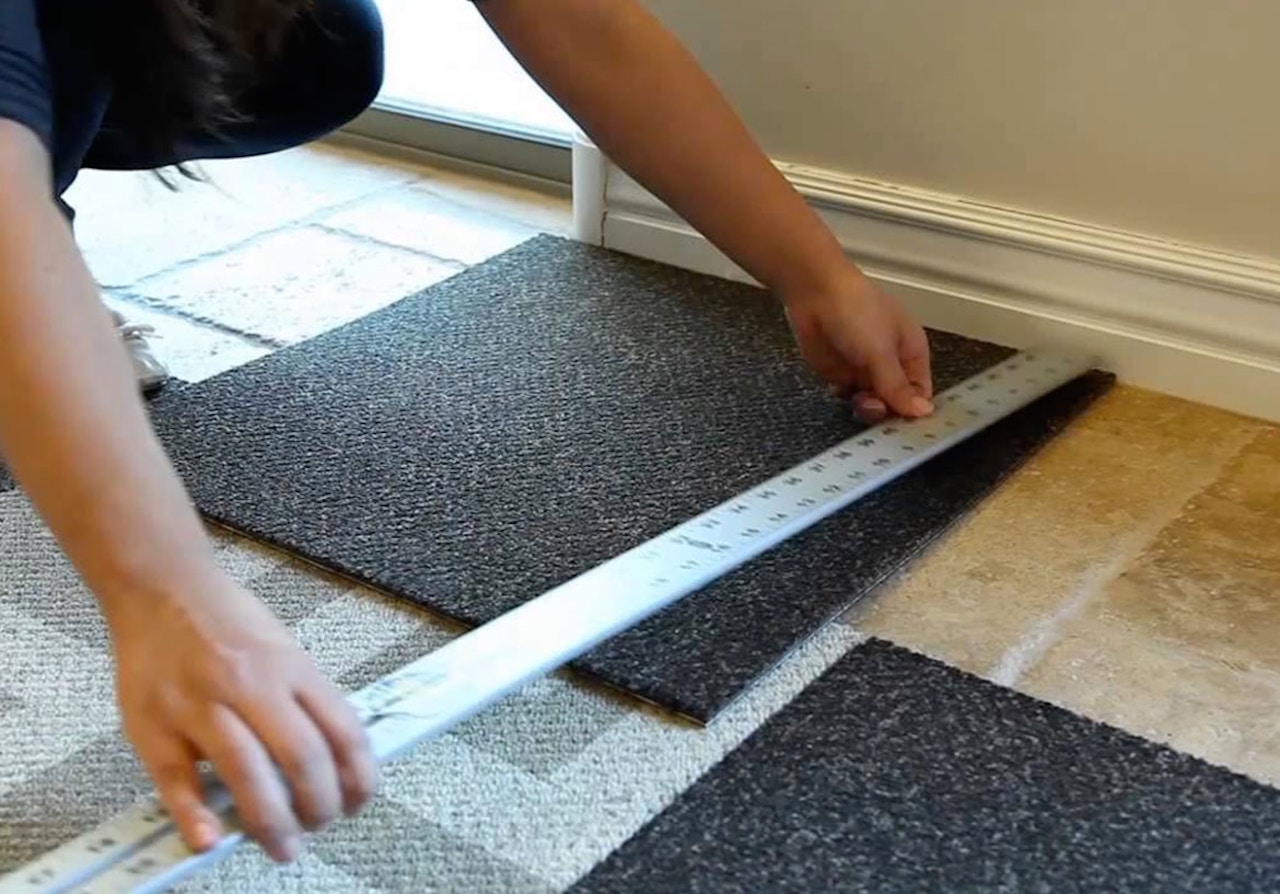
Step 8: Cut and Trim Tiles for Edges and Corners
When installing peel and stick tiles, it’s common to encounter edges and corners that require custom fitting. In step eight, we will explore the process of cutting and trimming tiles to ensure a seamless and professional-looking finish.
Start by measuring the space where a tile needs to be cut. Use a measuring tape to determine the exact dimensions and transfer those measurements onto the tile. It’s essential to measure accurately and account for any necessary overlap or spacing.
Once the measurements are marked on the tile, use a straight edge and a utility knife to score along the lines. Apply firm and consistent pressure to create a clean and precise cut. For curved cuts or intricate designs, you may need to use tile nippers or a jigsaw with a fine-tooth blade.
After scoring the tile, gently snap it along the scored line. Hold the tile with both hands and apply pressure to the marked area until it breaks cleanly. Use sandpaper or a tile file to smooth any rough edges or sharp corners.
When dealing with corners, it’s often necessary to make diagonal cuts to ensure a perfect fit. Measure the corner and mark the tiles accordingly, ensuring they overlap properly for a seamless transition. Repeat the cutting process as described above to achieve precise and neatly matched tiles.
Throughout the cutting and trimming process, always prioritize safety. Wear gloves to protect your hands from sharp edges and use caution when handling tools such as utility knives or tile nippers.
By cutting and trimming tiles for edges and corners, you are ensuring a clean and professional finish to your peel and stick tile installation. With step eight complete, we are ready to move on to step nine: peeling and sticking the tiles in place.
Read more: How To Remove Peel And Stick Floor Tile
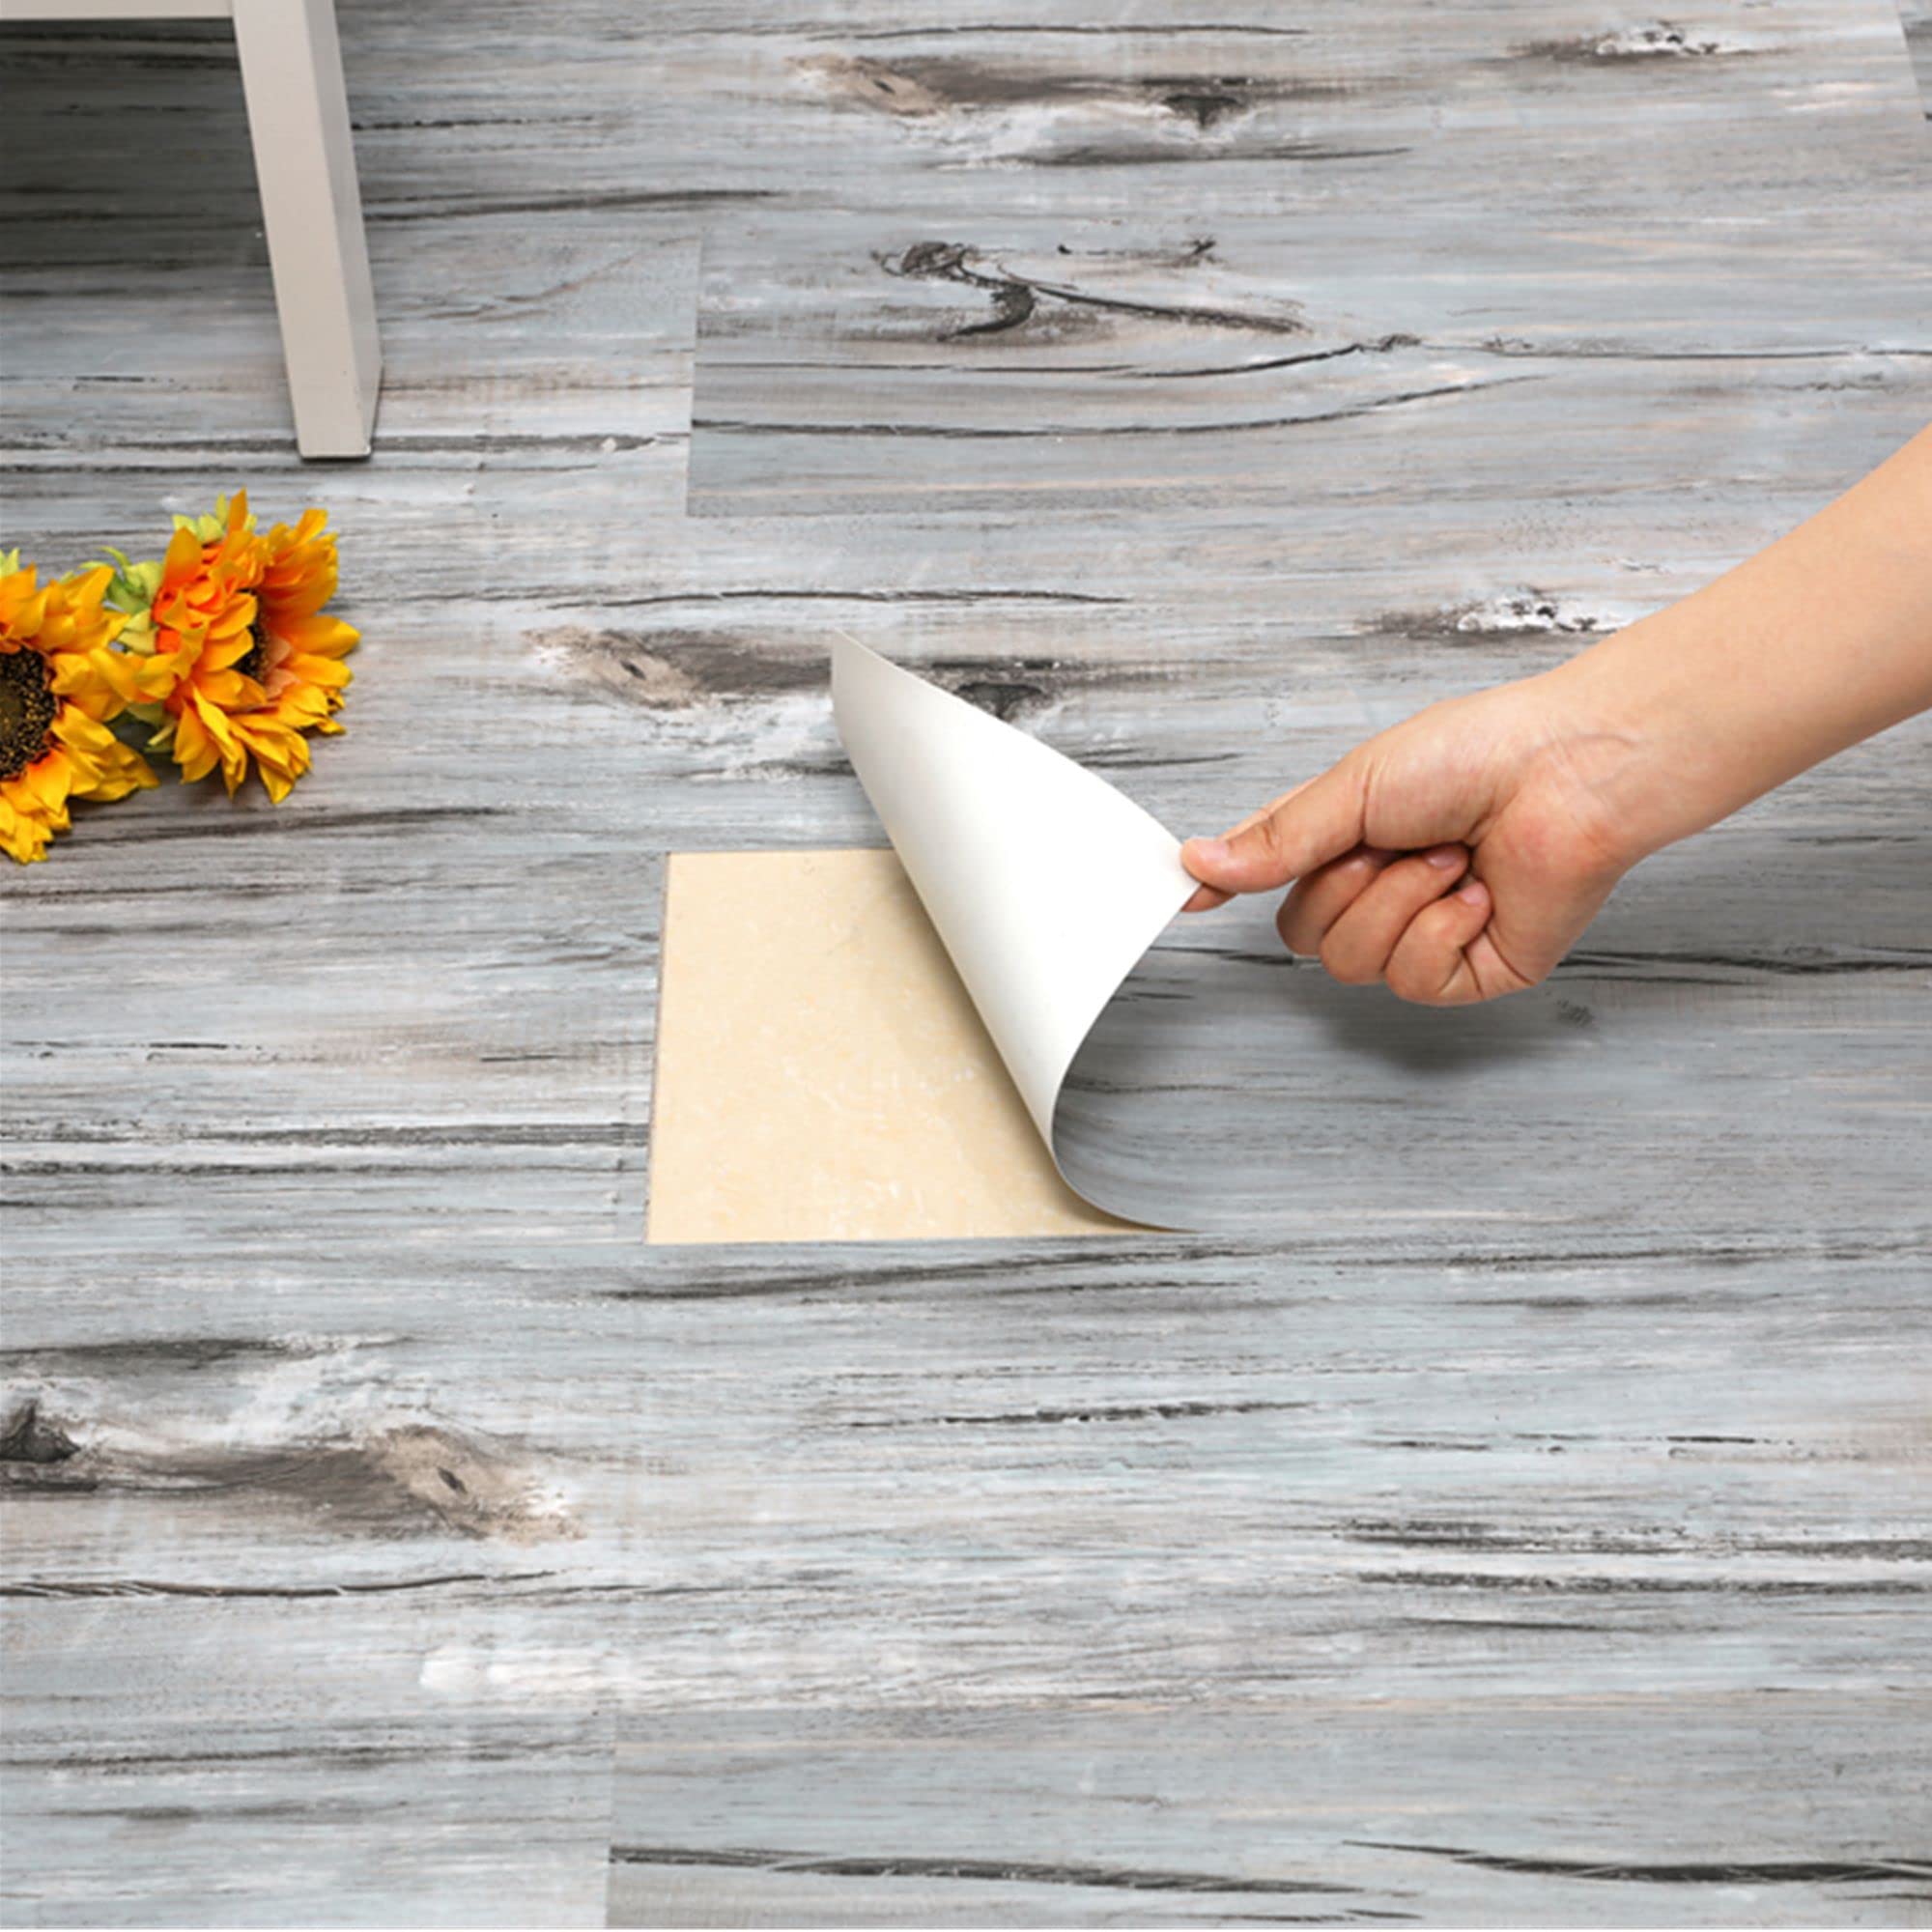
Step 9: Peel and Stick the Tiles
With the tiles cut and trimmed to fit the edges and corners, it’s time to move on to the exciting step of actually peeling and sticking them in place. This is where you will see your new floor taking shape.
Starting from the corner where you completed the dry run, carefully peel off the backing paper from the first tile. Hold the tile at a slight angle and align it with the marked guidelines or adjacent tiles. Slowly lower the tile onto the subfloor, making sure it is positioned correctly.
Once the tile is in position, press it firmly onto the subfloor, applying even pressure across the entire surface. Use your hands or a clean cloth to smooth out any air bubbles or wrinkles. Repeat this process for each tile, working your way across the room according to your layout pattern.
As you progress, periodically step back and check the alignment and spacing between the tiles. Adjust as necessary to maintain a consistent pattern and a visually pleasing result. Take your time and be attentive to detail to ensure a professional-looking installation.
Remember to maintain a straight course and work methodically to avoid any unnecessary gaps or overlaps. Keep the tiles snug against each other, but avoid pushing them together too tightly as this can cause the tiles to buckle or warp.
If you come across obstacles such as door frames or fixtures, cut and trim the tiles accordingly to ensure a seamless fit. Refer back to the cutting and trimming process in Step 8 to create custom-tailored tiles for these areas.
Continue peeling and sticking the tiles until you’ve covered the entire floor surface. Take breaks if needed, but try to complete the installation process as efficiently as possible to maintain a consistent adhesive bond.
Step 9 brings you one step closer to a fully transformed floor. With the tiles securely in place, it’s time to move on to the final step: applying pressure and rolling the tiles.
Step 10: Apply Pressure and Roll the Tiles
Once you have successfully peeled and stuck the tiles in place, the final step is to apply pressure and roll them to ensure a strong bond and a flat, smooth surface. This step will help eliminate any air pockets and ensure that the tiles adhere securely to the subfloor.
Begin by using a flooring roller or a rolling pin to apply even pressure across the entirety of the installed tiles. Start at one corner of the room and work your way across in a systematic manner. Apply firm pressure as you roll, focusing on the seams between the tiles.
The rolling action helps to activate the adhesive and ensures that the tiles are fully bonded to the subfloor. It also helps to eliminate any air bubbles or imperfections that may have formed during the installation process.
When using a flooring roller, make sure to follow the manufacturer’s recommendations for the specific type of peel and stick tiles you have installed. If using a rolling pin, apply sufficient pressure to create a smooth and level surface.
Pay extra attention to the edges of the tiles and the corners, as these areas may be more susceptible to lifting or peeling over time. Apply additional pressure to these areas to ensure a secure bond.
Take your time and thoroughly roll the entire floor surface. By doing so, you are ensuring that the peel and stick tiles are properly adhered and will withstand regular foot traffic and other stresses.
With step 10 complete, you have successfully completed the installation process for peel and stick tiles. Take a moment to admire your newly transformed floor. It’s important to allow the adhesive to set and cure according to the manufacturer’s instructions before walking or placing furniture on the tiles.
Congratulations! You have now learned how to prep a floor for peel and stick tile installation. By following these steps and paying attention to detail, you can achieve a beautiful and long-lasting result that will enhance the aesthetic appeal of your space.
Conclusion
Prepping a floor for peel and stick tile installation is a crucial step in ensuring a successful and visually appealing outcome. From clearing and cleaning the floor to applying pressure and rolling the tiles, each step plays a vital role in the overall process.
By following the step-by-step guide outlined in this article, you can confidently tackle the task of prepping your floor for peel and stick tiles. Taking the time to clear and clean the floor, check for moisture, repair any damage or irregularities, remove baseboards and trim, sweep and vacuum the subfloor, prime the surface, lay out the tiles, cut and trim tiles for edges and corners, and finally, apply pressure and roll the tiles, will yield professional-looking results.
Throughout the entire process, it’s important to maintain attention to detail, accuracy in measurements, and patience. This will ensure that the tiles are properly aligned, adhere securely to the subfloor, and create a seamless look that enhances the overall aesthetic of the room.
Remember, in addition to following the steps, it is crucial to prioritize safety. Wear appropriate protective gear such as gloves and goggles and use tools and equipment correctly to minimize any risks or injuries.
With proper floor preparation, peel and stick tiles can be a cost-effective and convenient way to revitalize your space. Whether you’re updating a bathroom, kitchen, or any other room, the steps outlined in this article will guide you towards a successful installation.
So, roll up your sleeves, gather your tools, and start prepping your floor for peel and stick tile installation. Enjoy the process, take pride in your work, and soon enough, you’ll be enjoying a beautiful and transformed floor that adds charm and appeal to your home.
Frequently Asked Questions about How To Prep Floor For Peel And Stick Tile
Was this page helpful?
At Storables.com, we guarantee accurate and reliable information. Our content, validated by Expert Board Contributors, is crafted following stringent Editorial Policies. We're committed to providing you with well-researched, expert-backed insights for all your informational needs.


0 thoughts on “How To Prep Floor For Peel And Stick Tile”