
Articles
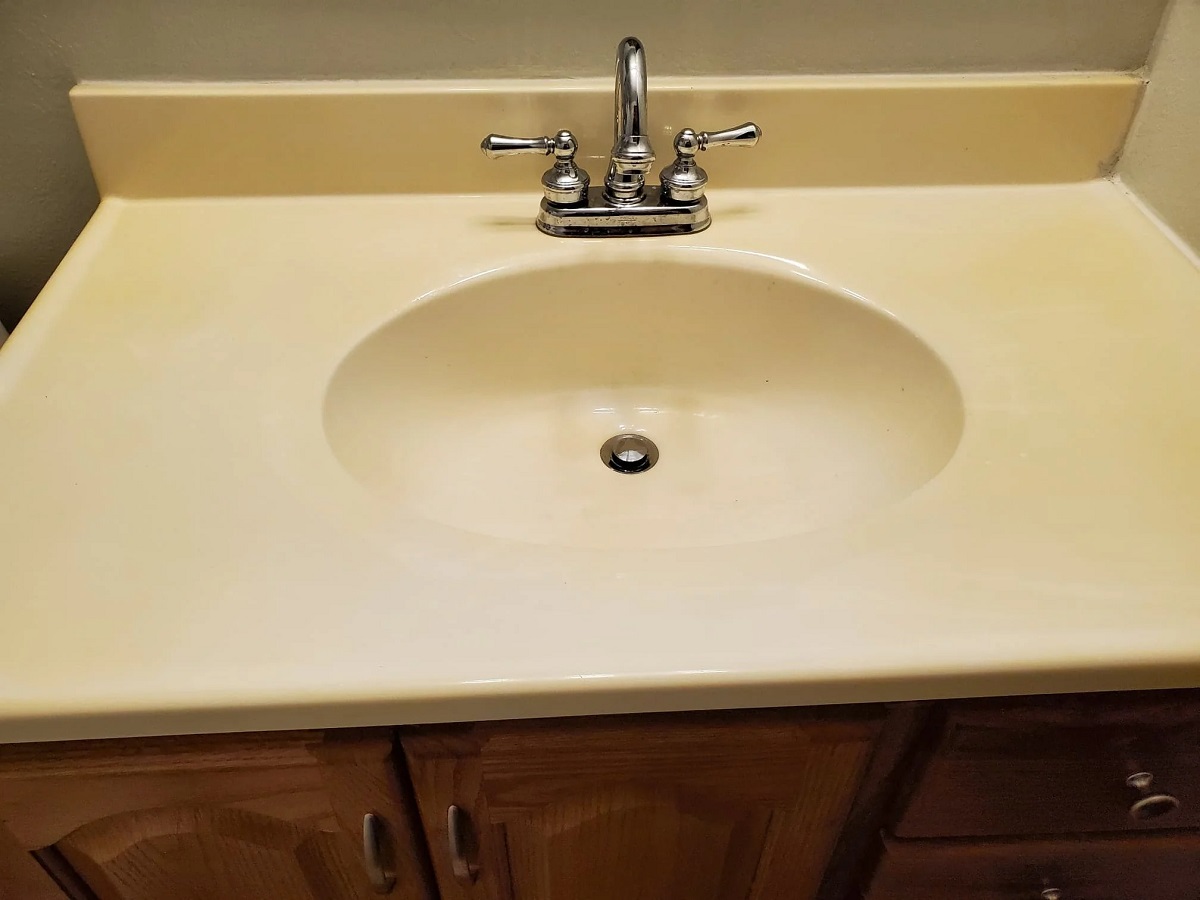
How Do You Whiten A Yellowed Vanity Top
Modified: August 28, 2024
Discover effective methods to whiten a yellowed vanity top in this informative article. Explore helpful tips and tricks to restore the original beauty.
(Many of the links in this article redirect to a specific reviewed product. Your purchase of these products through affiliate links helps to generate commission for Storables.com, at no extra cost. Learn more)
Introduction
Having a pristine and spotless vanity top is often one of the main focal points in a bathroom. However, over time, the once gleaming surface can start to develop a yellowish hue, diminishing the overall aesthetic appeal. The yellowing effect can be caused by a variety of factors, including age, exposure to sunlight, and the accumulation of dirt and mineral deposits.
In this article, we will explore different methods and techniques to whiten a yellowed vanity top. From natural remedies to commercial cleaning products, and even DIY whitening solutions, we will cover a range of options to suit your needs and preferences. So, whether you’re dealing with a marble, granite, or laminate vanity top, we have you covered!
Before we dive into the various solutions, it’s important to understand the material of your vanity top. Different materials may require different approaches to achieve optimal results. Additionally, we’ll share preventive measures to help you maintain your vanity top’s pristine appearance in the future.
So, if you’re tired of looking at a discolored vanity top every time you enter your bathroom, read on to learn how to restore its natural brightness and radiance!
Key Takeaways:
- Restore the radiance of your yellowed vanity top by understanding the causes of discoloration, assessing the material, and utilizing natural remedies, commercial products, DIY solutions, or professional assistance.
- Prevent future yellowing by implementing regular cleaning, using coasters, avoiding harsh cleaners, protecting from sunlight, and promptly wiping up spills to maintain the pristine condition of your vanity top.
Read more: How To Attach A Vanity Top
Understanding the Yellowing Effect
The yellowing effect on a vanity top can be quite frustrating, especially when you’ve invested time and effort in maintaining a clean and elegant bathroom. Understanding the causes of this discoloration can help you address the issue effectively.
One of the primary reasons for yellowing is the natural aging process of the materials used in vanity tops. Over time, exposure to sunlight, moisture, and other environmental factors can cause the surface to degrade and develop a yellowish tint.
In addition to age, another common cause of yellowing is the buildup of dirt, soap scum, and mineral deposits. These substances can accumulate on the surface, gradually altering its original color.
The type of material your vanity top is made of also plays a role in the yellowing process. For example, marble and other natural stones are susceptible to yellowing due to their porous nature. On the other hand, laminate surfaces can become discolored as a result of exposure to heat or harsh cleaning agents.
Understanding the underlying causes behind the yellowing of your vanity top can help you choose the most appropriate method for whitening it. Depending on the severity of the discoloration and the type of material, you may need to combine different techniques or even seek professional assistance for optimal results.
Now that we’ve gained some insight into the yellowing effect, let’s move on to the next step – assessing the material of your vanity top.
Assessing the Material of Your Vanity Top
Before you embark on your journey to whiten a yellowed vanity top, it’s crucial to identify the material it is made of. Different materials require varying treatment methods to achieve the best results without causing any damage. Here are some common types of vanity top materials and how to assess them:
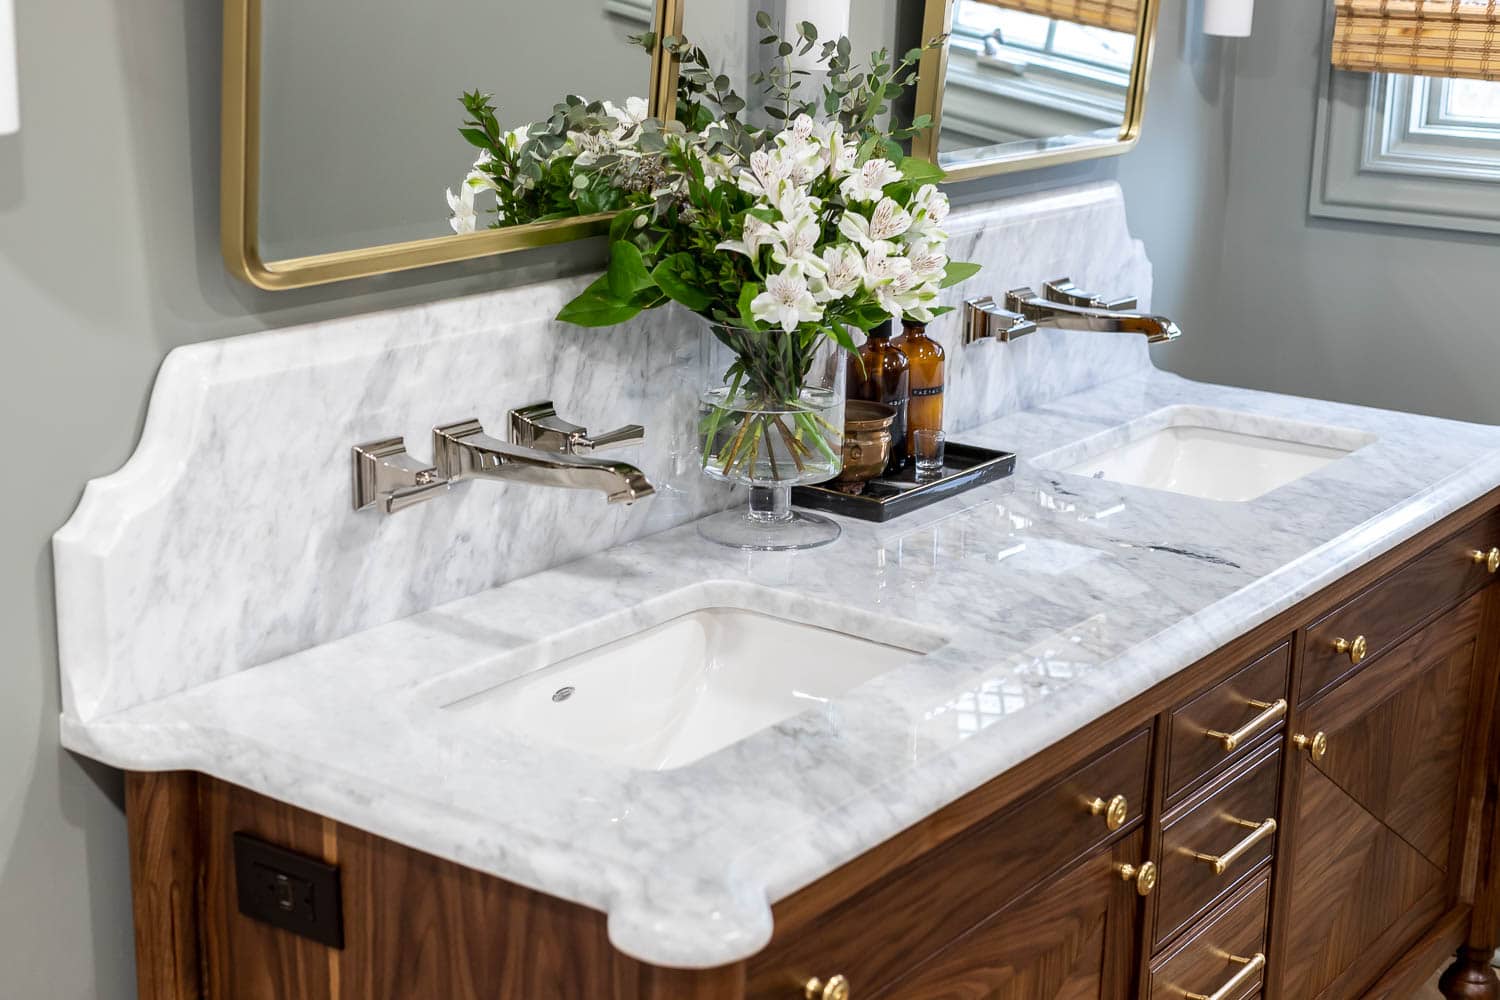
- Marble: Marble is a popular choice for vanity tops due to its luxurious appearance. However, it is porous and can be sensitive to acidic substances. To check if your vanity top is made of marble, observe the surface for veining patterns and a smooth, polished texture.
- Granite: Granite is highly durable and resistant to heat and scratches. It has a unique speckled appearance and a polished finish. If your vanity top has a natural stone-like appearance but is not as porous as marble, it is likely granite.
- Laminate: Laminate vanity tops are composed of multiple layers of material, with a protective melamine coating on top. These surfaces are typically smooth and have a wide range of colors and patterns. Laminate is less susceptible to discoloration from sunlight and moisture.
- Solid Surface: Solid surface vanity tops, such as Corian, are made from a blend of acrylics and resins. They are non-porous, low-maintenance, and have a uniform appearance. These tops are less prone to yellowing but can still accumulate stains and discolorations over time.
By accurately identifying the material of your vanity top, you can choose the most suitable cleaning and whitening methods to prevent any damage to the surface. Keep in mind that methods applicable to one material may not yield the same results for others. If you’re unsure about the type of material, consult the manufacturer’s specifications or seek professional advice.
Now that you’ve assessed the material of your vanity top, it’s time to gather the necessary supplies for the whitening process.
Gathering the Necessary Supplies
Before you begin the process of whitening your yellowed vanity top, it’s essential to gather the right supplies to ensure effective and safe results. Here’s a list of commonly used supplies that will come in handy:
- Mild dish soap: A gentle dish soap will be used for basic cleaning and removal of surface dirt and grime.
- Soft microfiber cloths: Microfiber cloths are lint-free and gentle on various surfaces. They are perfect for wiping and buffing the vanity top without scratching it.
- Baking soda: Baking soda is a versatile and natural cleaning agent that can be used for many household cleaning tasks, including whitening your vanity top.
- Hydrogen peroxide: Hydrogen peroxide is commonly used as a mild bleaching agent. It can help break down stains and brighten the surface of your vanity top.
- White vinegar: White vinegar is an effective and natural cleaner that can help remove mineral deposits and soap scum from your vanity top.
- Lemon juice: Lemon juice contains natural acids that can aid in removing stains and brightening the surface of your vanity top.
- Commercial cleaning products: There are various commercial cleaning products available specifically designed to whiten and brighten vanity tops. Look for products that are suitable for your specific material.
- Protective gloves and goggles: When using certain cleaning agents or chemicals, it’s important to protect your hands and eyes by wearing gloves and goggles.
Ensure that you have all the necessary supplies before you start the whitening process to avoid any interruptions. Having these items readily available will make the entire process more convenient and efficient.
Now that you’ve gathered the necessary supplies, it’s time to move on to the next step – preparing your vanity top for treatment.
Preparing the Vanity Top for Treatment
Before you begin the whitening process, it’s important to properly prepare your vanity top to ensure optimal results. Here are some steps to follow in order to prepare your vanity top:
- Clean the surface: Start by giving your vanity top a thorough cleaning using a mild dish soap and warm water. This will help remove any surface dirt, grime, and residue, allowing the whitening treatment to penetrate effectively.
- Dry the surface: After cleaning, make sure to completely dry the surface of the vanity top using a soft microfiber cloth. This will prevent water spots or streaks from forming during the whitening process.
- Remove any items: Clear off any personal items, toiletries, or decorations from the vanity top. This will provide you with a clean and unobstructed surface to work on.
- Protect surrounding areas: If you are using commercial cleaning products or DIY solutions that may have strong chemicals or bleaching agents, it’s important to protect the surrounding areas. You can do this by covering nearby fixtures, walls, or flooring with towels or plastic sheets.
- Test on a small area: Before applying any cleaning or whitening solution to the entire vanity top, it’s wise to test it on a small, inconspicuous area first. This will help you determine the suitability of the product or solution for your specific vanity top material, as well as any potential adverse reactions.
By taking these preparatory steps, you are setting the foundation for a successful whitening process. It ensures that the treatment can work effectively and reduces the risk of any damage to your vanity top or surrounding areas.
Now that your vanity top is prepped and ready, it’s time to explore various methods to whiten your yellowed vanity top. We’ll start with natural remedies.
Read more: How To Seal Vanity Top
Trying Natural Remedies
If you prefer a more natural approach to whitening your yellowed vanity top, there are several ingredients you can use that are commonly found in your kitchen or pantry. These natural remedies can help remove stains, brighten the surface, and restore the original color of your vanity top. Here are some effective options:
- Baking soda paste: Create a paste using baking soda and water. Apply the paste to the yellowed areas of your vanity top and let it sit for about 15-20 minutes. Gently scrub the surface with a soft cloth or sponge and rinse thoroughly. Baking soda helps remove stains and brighten the surface.
- Lemon juice: Squeeze fresh lemon juice onto the yellowed areas of the vanity top and let it sit for a few minutes. Use a soft cloth or sponge to scrub the surface gently. Lemon juice contains natural acids that can assist in removing stains and brightening the surface.
- Vinegar solution: Mix equal parts white vinegar and water in a spray bottle. Spray the solution onto the yellowed areas and leave it for a few minutes. Scrub the surface gently with a soft cloth and rinse thoroughly. Vinegar helps remove mineral deposits and soap scum.
- Hydrogen peroxide: Dip a clean cloth or sponge into hydrogen peroxide and apply it to the yellowed areas. Let it sit for a few minutes and then wipe the surface clean. Hydrogen peroxide acts as a mild bleaching agent and can help brighten the vanity top.
- Coconut oil: Apply a thin layer of coconut oil to the yellowed areas and let it sit for about 10 minutes. Wipe off the excess oil and buff the surface with a clean cloth. Coconut oil can help restore the shine and luster of your vanity top.
When using natural remedies, it’s important to test them on a small, inconspicuous area of your vanity top first to ensure compatibility and to avoid any potential damage. Additionally, follow the instructions and recommended ratios for each remedy to achieve the best results.
If natural remedies don’t produce the desired outcome or if the yellowing is more severe, it may be necessary to consider using commercial cleaning products specifically designed for whitening vanity tops. We’ll explore this option in the next section.
Use a mixture of baking soda and hydrogen peroxide to create a paste. Apply the paste to the yellowed areas of the vanity top and let it sit for 15-20 minutes before scrubbing with a soft brush. Rinse thoroughly with water.
Using Commercial Cleaning Products
If natural remedies haven’t provided the desired results or if you prefer a more targeted and convenient approach, commercial cleaning products designed specifically for whitening vanity tops can be effective. These products are formulated with powerful cleaning agents and bleaching agents to tackle stubborn stains and yellowing. Here are some steps to follow when using commercial cleaning products:
- Read the instructions: Before using any commercial cleaning product, carefully read and follow the instructions provided by the manufacturer. This ensures proper usage and minimizes the risk of damaging your vanity top.
- Choose the right product: Select a commercial cleaning product that is suitable for your specific vanity top material. Look for products specifically designed for whitening, brightening, or removing stains from bathroom surfaces.
- Apply the product: Apply the commercial cleaning product to the yellowed areas of your vanity top according to the instructions. Use a soft cloth or sponge to spread the product evenly. Allow it to sit for the recommended duration.
- Scrub and rinse: After the designated time, gently scrub the surface with a soft cloth or sponge to help remove stains and discoloration. Rinse the vanity top thoroughly with clean water to remove any residue.
- Buff and dry: After rinsing, use a soft cloth to buff the surface of the vanity top, restoring its natural shine. Ensure the surface is completely dry to prevent water spots or streaks.
When using commercial cleaning products, always follow the manufacturer’s instructions and exercise caution to avoid any damage. It’s also a good practice to test the product on a small, inconspicuous area of your vanity top before applying it to the entire surface.
If the yellowing persists or if you prefer a more customized or cost-effective approach, you may consider trying DIY whitening solutions. Let’s explore these options in the next section.
Applying DIY Whitening Solutions
DIY whitening solutions can be a cost-effective and customizable option for treating yellowed vanity tops. These solutions often utilize common household ingredients and can be tailored to suit your specific needs. Here are a few DIY whitening solutions you can try:
- Baking soda and hydrogen peroxide: Create a paste by mixing baking soda and hydrogen peroxide. Apply the paste to the yellowed areas of your vanity top and let it sit for about 15-20 minutes. Gently scrub the surface with a soft brush or sponge and rinse thoroughly.
- Vinegar and baking soda: Make a paste by combining vinegar and baking soda. Apply the paste to the yellowed areas and let it sit for a few minutes. Scrub the surface gently with a soft brush or sponge and rinse thoroughly.
- Cream of tartar and lemon juice: Create a paste with cream of tartar and lemon juice. Apply the paste to the yellowed areas and let it sit for 15-20 minutes. Scrub the surface gently with a soft brush or sponge and rinse thoroughly.
- Hydrogen peroxide and cornstarch: Mix hydrogen peroxide and cornstarch to make a paste. Apply the paste to the yellowed areas and let it sit for about 30 minutes. Gently scrub the surface with a soft brush or sponge and rinse thoroughly.
When using DIY whitening solutions, it’s important to test them on a small, inconspicuous area of your vanity top first to ensure compatibility and to avoid any potential damage. Adjust the ratios of the ingredients and the duration of application based on the severity of the yellowing and your desired results.
After applying a DIY whitening solution, rinse the surface thoroughly with clean water and dry it completely. In some cases, multiple applications may be needed to achieve the desired level of whitening. Remember to follow proper safety precautions, such as wearing gloves and goggles, when working with these solutions.
If the yellowing persists or if you prefer professional expertise, it may be time to seek professional help. Let’s explore this option in the next section.
Seeking Professional Help
If you’ve tried various DIY methods and commercial cleaning products without satisfactory results, or if you have a valuable or delicate vanity top that requires special care, seeking professional help is a wise choice. Professional restoration and cleaning services offer expertise, experience, and specialized equipment to effectively treat yellowed vanity tops. Here are a few reasons why you might consider seeking professional help:
- Expertise and experience: Professionals who specialize in vanity top restoration possess the knowledge and skills to assess the specific needs of your vanity top material. They understand the best techniques and products to use for optimal results.
- Specialized equipment: Professional restoration services often have access to specialized equipment and tools that can effectively treat yellowing, remove stains, and return your vanity top to its original beauty.
- Customized solutions: Professionals can customize their approach based on the material, condition, and extent of yellowing of your vanity top. They can provide tailored solutions that address your specific concerns and deliver the best possible outcome.
- Time and convenience: Engaging a professional saves you time and effort. They are equipped to efficiently and effectively restore your vanity top, allowing you to enjoy the results without the hassle of extensive DIY efforts.
- Preserves the integrity of your vanity top: Professionals understand the delicacy of different vanity top materials and can ensure that the restoration process does not damage or compromise the integrity of your vanity top.
When selecting a professional service, do thorough research, read reviews, and consider their experience and reputation in vanity top restoration. Request quotes and ask for references if needed. Remember to communicate your concerns, expectations, and any specific requirements you may have to ensure a successful partnership.
Prevention is always better than cure when it comes to maintaining the appearance of your vanity top. Let’s explore some preventive measures in the next section to help you avoid future yellowing.
Read more: How Do You Remove A Bathroom Vanity
Preventing Future Yellowing
While it’s important to know how to whiten a yellowed vanity top, it’s equally crucial to take preventive measures to avoid future discoloration. By following a few simple steps, you can maintain the pristine condition of your vanity top and extend its lifespan. Here are some preventive measures to consider:
- Regular cleaning: Establish a regular cleaning routine for your vanity top by wiping it down with a mild dish soap and warm water solution. This will help remove dirt, grime, and any potential stain-causing agents before they have a chance to accumulate.
- Use coasters and trays: Place coasters or trays under toiletries, cosmetics, or any items that could potentially stain or damage the surface of your vanity top. This will help protect it from spills, scratches, and discoloration.
- Avoid harsh cleaners: Steer clear of abrasive cleaners, bleach, ammonia, or any acidic substances that can damage the surface of your vanity top. Stick to mild, non-acidic cleaning agents that are safe for the specific material of your vanity top.
- Protect from direct sunlight: Prolonged exposure to direct sunlight can accelerate the yellowing process of some vanity top materials. Use curtains, blinds, or UV-protective films on windows to minimize the amount of sunlight reaching your vanity top.
- Regular maintenance: Depending on the material of your vanity top, consider periodic sealing or polishing to maintain its luster and protect it from discoloration. Follow the manufacturer’s guidelines or consult with a professional to determine the appropriate maintenance routine.
- Wipe up spills promptly: Accidental spills can happen, so it’s important to wipe them up immediately to prevent any potential staining or damage to your vanity top. This applies to liquids such as water, makeup, toiletries, or any other substances that could potentially discolor the surface.
By implementing these preventive measures, you can significantly reduce the risk of yellowing and maintain the appearance of your vanity top for years to come. Remember, regular care and maintenance are key to preserving its beauty.
Now that you are equipped with the knowledge of how to whiten a yellowed vanity top and prevent future discoloration, you can confidently tackle any yellowing issues that arise and maintain the stunning appeal of your bathroom.
I hope this article has provided you with helpful insights and solutions. Enjoy your beautifully restored vanity top!
Conclusion
Whitening a yellowed vanity top is a common concern for homeowners who want to maintain the pristine appearance of their bathroom. Whether you opt for natural remedies, commercial cleaning products, DIY solutions, or seek professional assistance, there are various methods available to help restore the original brightness and beauty of your vanity top.
Understanding the yellowing effect and assessing the material of your vanity top are essential first steps in determining the most suitable treatment methods. Gathering the necessary supplies, preparing the vanity top for treatment, and applying the chosen methods thoroughly are crucial for achieving optimal results.
If you prefer a more natural approach, natural remedies like baking soda, lemon juice, and vinegar can be effective in minimizing yellowing. Commercial cleaning products offer convenience and targeted solutions for stubborn stains and discoloration. DIY whitening solutions allow you to customize the treatment to your specific needs and preferences.
In some cases, seeking professional help may be necessary, especially if you have delicate or valuable vanity top materials or if previous methods have not yielded satisfactory results. Professionals possess the expertise, experience, and specialized equipment to restore and beautify your vanity top effectively.
To prevent future yellowing, establish a regular cleaning routine, use coasters and trays, avoid harsh cleaners, protect your vanity top from direct sunlight, and promptly wipe up spills. These preventive measures will help maintain the pristine condition of your vanity top and prolong its lifespan.
Remember, maintaining the appearance of your vanity top goes beyond whitening. Regular care, maintenance, and preventive measures are key to preserving its beauty in the long run.
By following the guidelines and techniques outlined in this article, you can confidently address and overcome yellowing issues, ensuring your vanity top remains a focal point of beauty and elegance in your bathroom.
Now that you are armed with the knowledge and solutions, go ahead and transform your yellowed vanity top into a radiant centerpiece you’ll be proud of!
Now that you've mastered whitening your vanity top, why not tackle more home projects? For those eager to roll up their sleeves, our guide on DIY home improvement offers practical advice for transforming any space with ease. If you're wondering about regular upkeep, our detailed insights on home maintenance are perfect for keeping your living space in tip-top condition. And don't forget, a clean home feels fresher—check out our smart cleaning tips for your refrigerator and beyond!
Frequently Asked Questions about How Do You Whiten A Yellowed Vanity Top
Was this page helpful?
At Storables.com, we guarantee accurate and reliable information. Our content, validated by Expert Board Contributors, is crafted following stringent Editorial Policies. We're committed to providing you with well-researched, expert-backed insights for all your informational needs.

0 thoughts on “How Do You Whiten A Yellowed Vanity Top”