Articles
How To Refinish Bathroom Vanity Top
Modified: October 20, 2024
Learn the step-by-step process of refinishing your bathroom vanity top with our informative articles. Achieve a beautiful, updated look for your space with expert tips and guidance.
(Many of the links in this article redirect to a specific reviewed product. Your purchase of these products through affiliate links helps to generate commission for Storables.com, at no extra cost. Learn more)
Introduction
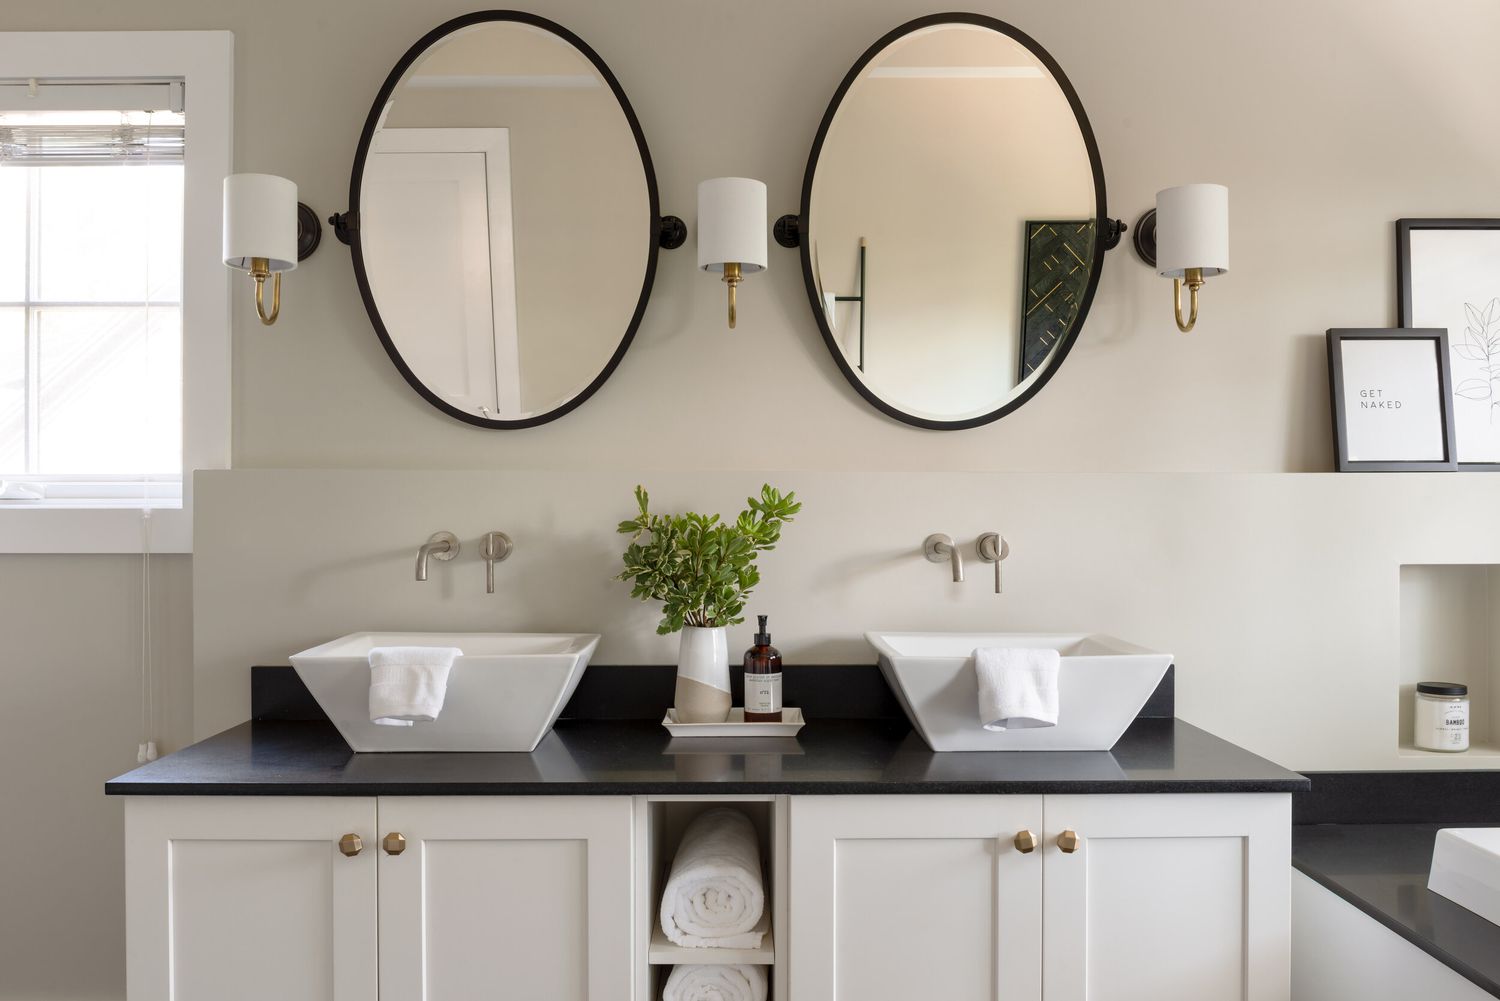
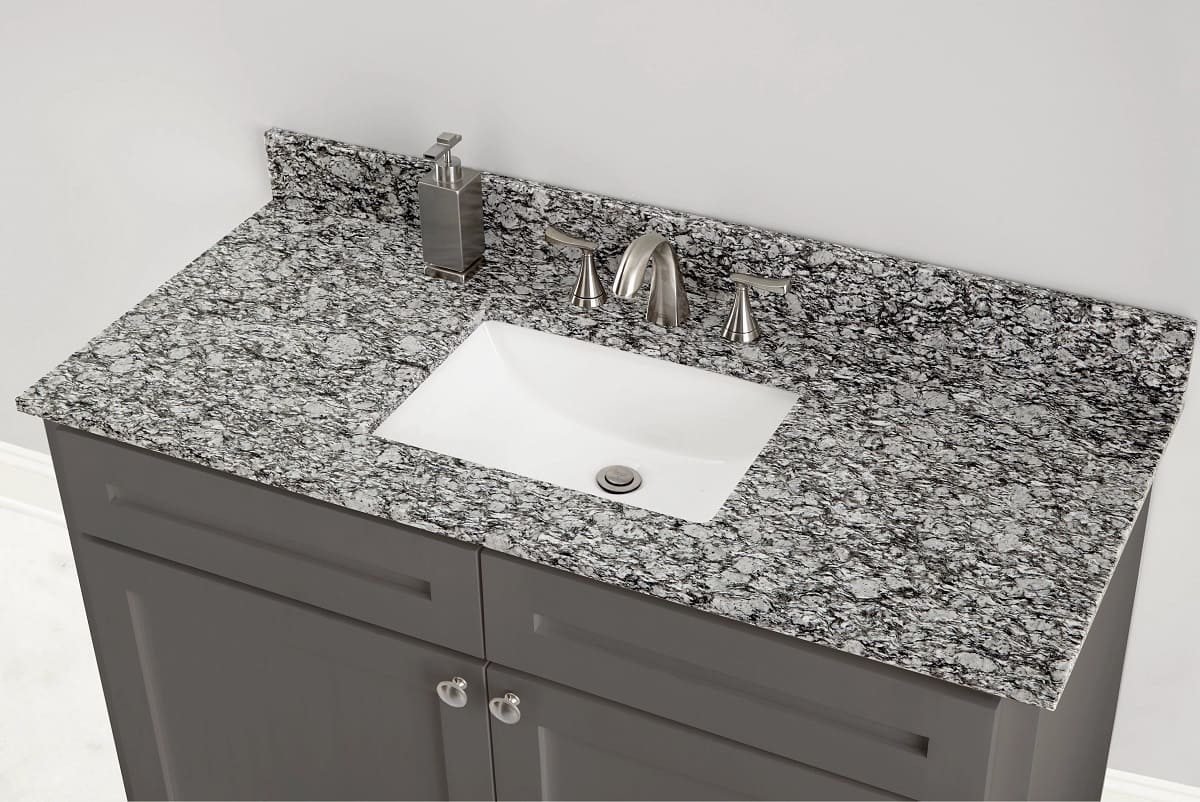
Are you tired of looking at your old and worn-out bathroom vanity top? Do you want to give it a fresh and updated look without breaking the bank? Refinishing your bathroom vanity top is a great option that can make a big impact on the overall appearance of your bathroom.
Refinishing a bathroom vanity top involves the process of cleaning, sanding, and applying a new finish to the surface. It allows you to transform your outdated vanity top into a beautiful and modern piece that complements your bathroom decor. The best part is that you can achieve this transformation without the need for a full replacement, saving you time and money.
In this comprehensive guide, we will walk you through the step-by-step process of refinishing your bathroom vanity top. From gathering materials to reinstalling the refinished top, you’ll learn everything you need to know to successfully undertake this project.
Before we dive into the details, it’s important to note that the specific steps and techniques may vary depending on the material and condition of your vanity top. It’s always a good idea to read and follow the manufacturer’s instructions for any refinishing products you choose to use.
So, if you’re ready to give your bathroom vanity top a facelift and bring new life to your bathroom, let’s get started!
Key Takeaways:
- Refinishing your bathroom vanity top is a cost-effective and rewarding way to achieve a fresh and updated look without the need for a full replacement. Follow the step-by-step process for a stunning transformation.
- By gathering the right materials, following proper steps for removal, cleaning, sanding, and applying primer, paint, and sealer, you can achieve a professional-looking finish that enhances the appearance of your bathroom vanity top.
Read more: How To Refinish Cultured Marble Vanity Top
Step 1: Gather Materials
Before you begin refinishing your bathroom vanity top, it’s essential to gather all the necessary materials. By having everything you need on hand, you can streamline the process and avoid unnecessary delays. Here’s a list of the essential items you should gather:
- Safety Equipment: Start by ensuring you have the proper safety equipment, including gloves, safety goggles, and a mask or respirator. These items will protect you from any chemicals or fumes.
- Cleaning Supplies: You’ll need a mild cleaner or degreaser, scrub brush or sponge, and clean rags or towels to thoroughly clean the vanity top.
- Sanding Materials: Depending on the condition of your vanity top, you might need sandpaper or a sanding block in various grits (typically ranging from 120 to 220) to remove any old finish or imperfections.
- Primer: Choose a primer specifically designed for your vanity top material. Make sure to check the manufacturer’s instructions for compatibility and application guidelines.
- Paint or Refinishing Kit: Consider the look you want to achieve and choose a paint or refinishing kit that suits your style. There are various options available, including specific products for laminate, wood, or stone surfaces.
- Sealer: Depending on the type of finish you choose, you may need a clear sealer to protect the newly refinished surface and enhance its durability.
- Paintbrushes or Rollers: Select high-quality brushes or rollers suitable for the type of paint or refinishing product you’re using. Ensure they are clean and in good condition for smooth application.
- Tape and Drop Cloths: Use painter’s tape to protect surrounding areas, such as walls or cabinets, from accidental paint or primer splatters. Lay down drop cloths to protect your flooring or any other surfaces.
- Optional Accessories: Depending on your preferences, you may want to consider additional accessories, such as new cabinet hardware or a new faucet, to complete the updated look of your vanity.
By having all of these materials readily available, you’ll be well-prepared to tackle the refinishing process smoothly and efficiently. Take the time to gather everything you need, ensuring that you have the correct products for your specific vanity top material. Once you’ve gathered your materials, you’re ready to move on to the next step: removing the vanity top.
Step 2: Remove the Vanity Top
Now that you have gathered all the necessary materials, it’s time to remove the vanity top. This step is crucial as it allows you to work on the surface without any obstructions and ensures a thorough refinishing job. Follow these steps to safely remove the vanity top:
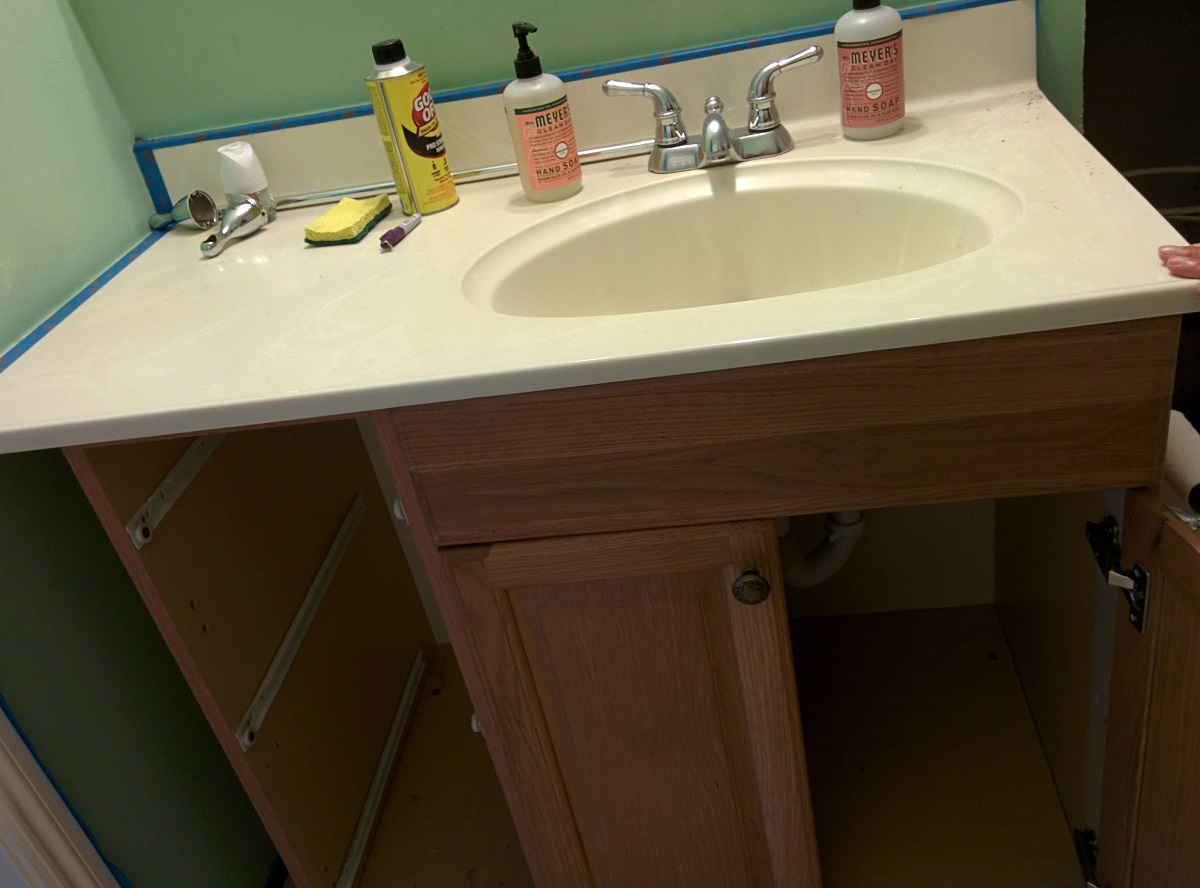
- Prepare the Area: Clear out any items from the vanity top and the surrounding area. Keep in mind that the vanity top can be heavy, so it’s a good idea to have a helper assist you during this process.
- Turn Off the Water Supply: If your vanity has a sink, shut off the water supply valves located beneath the sink. This step is important to prevent any leaks or water damage during the removal process.
- Disconnect the Plumbing: Use a wrench to disconnect the plumbing connections, including the supply lines and the drain pipe. Place a bucket or towel underneath to catch any water that may be in the lines.
- Loosen the Vanity Top: Look for clips or brackets that secure the top to the base of the vanity. Carefully unscrew or remove these fasteners to loosen the vanity top. If there are no visible fasteners, it’s likely that the top is glued to the vanity base. In this case, use a putty knife or a pry bar to gently separate the vanity top from the base.
- Lift and Remove: Once the vanity top is loosened, lift it carefully from the vanity base. It may be helpful to have your helper assist you with this step, especially if the top is heavy or large in size.
- Inspect and Prep the Vanity Base: With the vanity top removed, take the opportunity to inspect the base for any damage or repairs that may be needed. Clean the base with a mild cleaner or degreaser to remove any dirt or residue.
Remember to approach the removal process with caution and take your time to ensure the vanity top is safely detached from the base. It’s important to handle the top with care to avoid any damage or accidents. Once you have successfully removed the vanity top, you can move on to the next step: cleaning and prepping the surface.
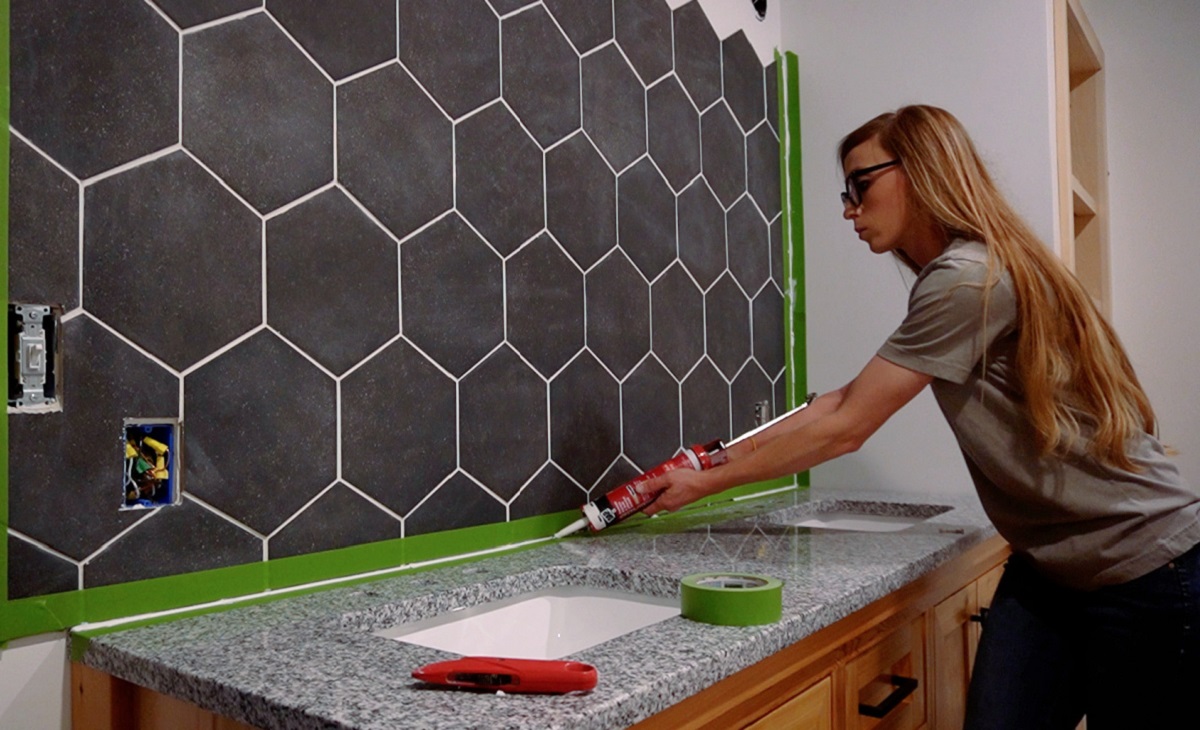
Step 3: Clean and Prep the Surface
After removing the vanity top, it’s time to focus on cleaning and prepping the surface. This step is essential to ensure that the refinishing materials adhere properly and provide a smooth and professional-looking finish. Follow these steps to clean and prep the surface:
- Remove any Residue: Use a mild cleaner or degreaser to remove any dirt, grime, or residue from the surface of the vanity top. Pay special attention to areas around the sink and edges where build-up may occur.
- Scrub the Surface: Use a scrub brush or sponge to gently scrub the surface. This will help remove any stubborn stains or remaining residue. Rinse the surface thoroughly with clean water to remove any cleaning product residue.
- Dry the Surface: Use clean, dry rags or towels to thoroughly dry the surface of the vanity top. Moisture can affect the adhesion of the refinishing materials, so make sure the surface is completely dry before proceeding.
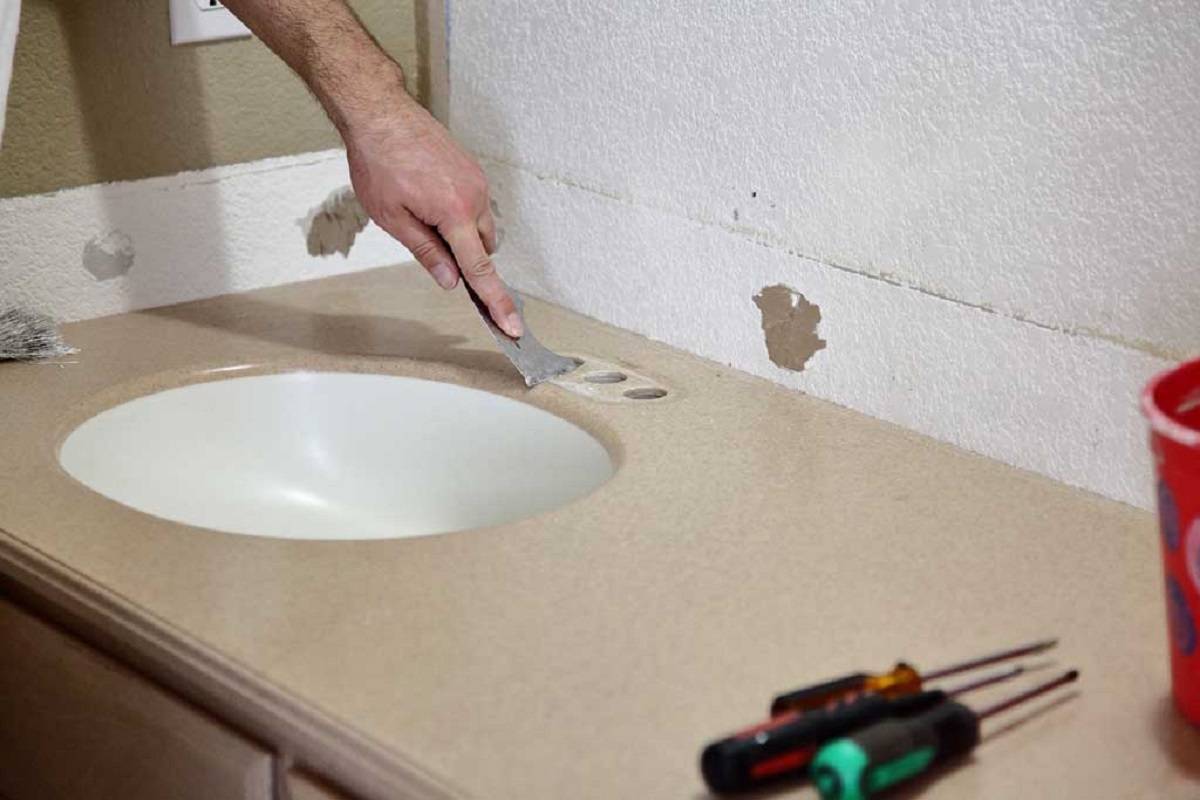
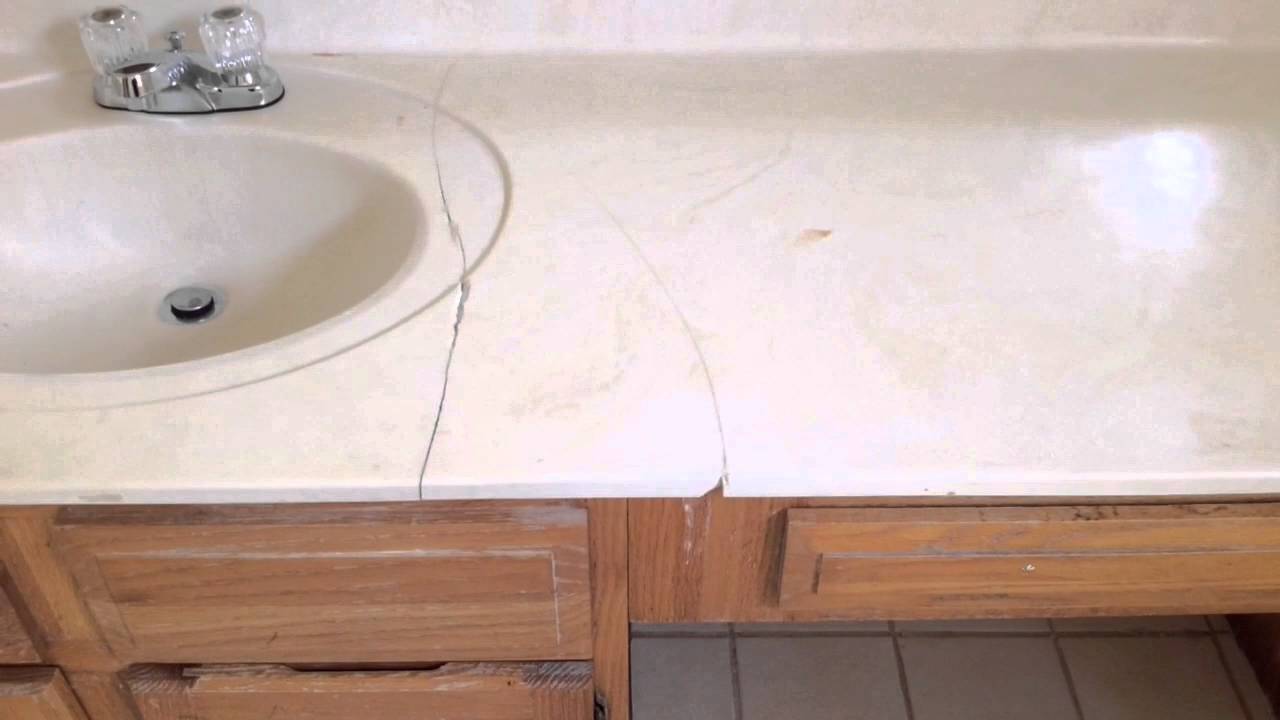
- Inspect for Damage: Take the time to inspect the surface for any chips, cracks, or imperfections that may require repair. If you find any, use an appropriate filler or epoxy to fix them, following the manufacturer’s instructions.
- Smooth the Surface: If the surface has any rough areas or uneven spots, use sandpaper or a sanding block with a fine grit to smooth them out. This step will help create a consistent surface for the primer and paint to adhere to.
- Wipe Down the Surface: Use a tack cloth or a clean, lint-free cloth to wipe down the entire surface of the vanity top. This will remove any dust or particles that may have accumulated during the cleaning and sanding process.
Cleaning and prepping the surface is a crucial step to ensure a successful refinishing job. By taking the time to thoroughly clean the surface and address any repairs or imperfections, you’ll create an ideal foundation for the primer and paint or refinishing product. Once the surface is clean and prepped, you’re ready to move on to the next step: sanding the vanity top.
Step 4: Sand the Vanity Top
Sanding the vanity top is an important step in the refinishing process. It helps to create a smooth and even surface by removing the old finish, roughening the surface, and providing better adhesion for the primer and paint or refinishing product. Follow these steps to effectively sand the vanity top:
- Choose the Right Grit: Select the appropriate grit sandpaper or sanding block for your vanity top material. For most vanity tops, a medium to fine grit, ranging from 120 to 220, should be sufficient. Use a coarser grit only if there are stubborn stains or imperfections that require more aggressive sanding.
- Sand in a Circular Motion: Begin sanding by using a circular motion. Apply gentle pressure and move the sandpaper or sanding block across the entire surface of the vanity top. This motion helps to evenly remove the old finish and smooth out the surface.
- Focus on Problem Areas: Pay extra attention to areas that have stains, chips, or rough spots. Spend more time sanding these areas to ensure they are properly smoothed out.
- Change Sandpaper as Needed: As the sandpaper becomes worn or clogged with debris, replace it with a fresh piece. This will ensure optimal sanding performance and prevent any scratches or inconsistencies in the surface.
- Check Your Progress: Regularly stop and check your progress as you sand. Look for uniformity in the surface texture and the removal of the old finish. If needed, continue sanding until you achieve a smooth and even surface.
- Remove Sanding Residue: Once you have finished sanding, use a tack cloth or a clean, lint-free cloth to wipe away any sanding residue. This will prepare the surface for the next step in the refinishing process.
Sanding the vanity top may be a time-consuming process, but it is crucial for achieving a professional-looking finish. Proper sanding ensures that the primer and paint or refinishing product adhere well to the surface, resulting in a durable and long-lasting outcome. With the vanity top now sanded, you’re ready to move on to the next step: applying the primer.
When refinishing a bathroom vanity top, be sure to thoroughly clean and sand the surface before applying a new finish. This will help the new finish adhere properly and result in a smooth, professional-looking outcome.
Read more: How To Refinish Bathroom Vanity Cabinets
Step 5: Apply Primer
Applying primer is an important step in the refinishing process as it creates a smooth and consistent surface for the paint or refinishing product to adhere to. The primer also helps to prevent any stains or discoloration from bleeding through the topcoat. Follow these steps to effectively apply primer to your vanity top:
- Select the Right Primer: Choose a primer that is specifically designed for your vanity top material. Look for a product that offers good adhesion and is compatible with the paint or refinishing product you plan to use. Read and follow the manufacturer’s instructions for application and drying times.
- Prepare the Primer: If using a primer that requires mixing, follow the instructions provided to prepare the primer. Ensure that it is well-mixed and free of any lumps or clumps.
- Apply the Primer: Start by applying a thin and even coat of primer to the entire surface of the vanity top. Use a brush or roller specifically designed for the type of primer you are using. Work in small sections to ensure proper coverage and smooth application.
- Smooth Out the Primer: After applying the primer, use a smooth brush or roller to lightly remove any brush strokes or roller marks. This will help create a more seamless and professional-looking finish.
- Allow the Primer to Dry: Follow the drying time specified by the manufacturer before proceeding. Ensure that the primer is completely dry to the touch before moving on to the next step.
- Inspect for Coverage: Once the primer is dry, carefully inspect the surface for any areas that may require additional primer. If any spots are missed or appear uneven, apply another thin coat of primer to ensure full coverage.
- Smooth the Surface (Optional): If desired, you can lightly sand the surface with a fine grit sandpaper or sanding pad after the primer has dried. This step helps to create an even smoother surface for the paint or refinishing product.
- Remove any Primer Residue: Wipe down the entire surface of the vanity top with a tack cloth or a clean, lint-free cloth to remove any primer residue. This will ensure a clean and debris-free surface for the next step in the refinishing process.
Applying primer is an important step to ensure a successful refinishing job. It helps create a strong foundation for the paint or refinishing product and enhances the durability and longevity of the finish. Once the primer is applied and dried, you’re ready to move on to the next step: applying the paint or refinishing product.
Step 6: Apply Paint or Refinishing Kit
Now that you have applied the primer, it’s time to apply the paint or refinishing product to your vanity top. This step will give the surface a fresh and updated look, transforming the overall appearance of your bathroom. Follow these steps to effectively apply the paint or refinishing product:
- Choose the Right Paint or Refinishing Kit: Select a paint or refinishing kit that is specifically designed for your vanity top material. Consider the color and finish you desire, ensuring that it complements your bathroom decor. Read the manufacturer’s instructions for application, drying times, and any additional steps specific to the product.
- Prepare the Paint or Refinishing Kit: If using a paint that requires mixing or a refinishing kit that includes multiple components, thoroughly mix and prepare the product according to the manufacturer’s instructions. Ensure that it is well-mixed and ready for application.
- Apply the Paint or Refinishing Product: Begin by applying a thin and even coat of paint or refinishing product to the entire surface of the vanity top. Use a brush or roller specifically designed for the type of product you are using. Work in small sections, ensuring proper coverage and smooth application.
- Follow the Manufacturer’s Instructions: Pay close attention to the manufacturer’s recommended drying times between coats. Typically, you’ll need to wait for each coat to dry before applying additional coats. Ensure proper ventilation in the area during the drying process.
- Apply Additional Coats (if needed): Depending on the desired level of coverage or color intensity, you may need to apply additional coats of paint or refinishing product. Follow the manufacturer’s instructions regarding the number of recommended coats for optimal results.
- Smooth Out the Finish (Optional): If desired, you can lightly sand the surface between coats using a fine-grit sandpaper or sanding pad. This step helps to create a smoother finish and remove any imperfections. Be sure to wipe away any sanding residue before applying the next coat.
- Allow the Finish to Cure: After applying the final coat, allow the paint or refinishing product to cure according to the manufacturer’s instructions. This typically involves a waiting period of several days to ensure the finish is fully dry and hardened.
Applying the paint or refinishing product is a crucial step in achieving the desired look for your bathroom vanity top. Take your time and follow the manufacturer’s instructions carefully to ensure proper application and drying. With the paint or refinishing product applied, you are one step closer to completing the refinishing process!
Step 7: Apply Sealer
After applying the paint or refinishing product to your vanity top, it’s important to apply a sealer to protect the finish and enhance its durability. The sealer creates a protective barrier that helps to prevent stains, moisture, and daily wear and tear. Follow these steps to effectively apply a sealer to your refinished vanity top:
- Choose the Right Sealer: Select a sealer that is compatible with the type of paint or refinishing product you’ve used on your vanity top. Consider whether you prefer a glossy or matte finish, and choose a sealer that matches your preference.
- Prepare the Sealer: Read the manufacturer’s instructions for the sealer and follow any preparation steps if needed. Some sealers may require shaking or stirring before use.
- Apply the Sealer: Using a clean brush or roller, apply a thin and even coat of sealer to the entire surface of the vanity top. Work in small sections to ensure proper coverage and avoid excess pooling or drips.
- Follow the Manufacturer’s Instructions: Pay close attention to the recommended drying and curing times provided by the sealer manufacturer. This ensures that the sealer has enough time to fully dry and harden, providing maximum protection for your refinished vanity top.
- Apply Additional Coats (if needed): Depending on the type of sealer and the desired level of protection, you may want to apply multiple coats. Follow the manufacturer’s instructions regarding the recommended number of coats and the drying time between each application.
- Clean Up any Excess Sealer: If you notice any excess sealer pooling or dripping, use a clean cloth or brush to carefully remove it before it dries. Excess sealer can leave marks or streaks if not addressed promptly.
- Allow the Sealer to Cure: Once the sealer is applied, allow it to cure according to the manufacturer’s instructions. This usually involves a waiting period of several days before the vanity top is fully ready for use.
Applying a sealer to your refinished vanity top is a crucial step in preserving the integrity and appearance of the finish. The sealer adds a protective layer that keeps your vanity top looking fresh and new for years to come. With the sealer applied and cured, you’re almost ready to reinstall the vanity top in your bathroom!
Step 8: Reinstall the Vanity Top
After completing the refinishing process for your bathroom vanity top, it’s time to reinstall it and admire the stunning transformation. Follow these steps to effectively reinstall your refinished vanity top:
- Prepare the Vanity Base: Ensure that the vanity base is clean and free from any debris. Use a mild cleaner to wipe down the base and remove any dust or residue.
- Position the Vanity Top: Carefully place the refinished vanity top onto the base. Ensure that it is properly aligned and centered. The sink, if applicable, should also be properly positioned and secured.
- Reattach the Plumbing: Reconnect the plumbing, including the supply lines and the drain pipe. Use a wrench to tighten the connections securely, ensuring that there are no leaks.
- Secure the Vanity Top: If your vanity top has clips or brackets, reattach them to secure the top to the base. Follow the manufacturer’s instructions for proper installation. If the top was originally glued, use a suitable adhesive to secure it to the base.
- Test for Stability: Once the vanity top is secured, give it a gentle shake or push to ensure that it is stable and properly attached to the base. Confirm that there are no loose or wobbly areas.
- Reconnect the Water Supply: Turn on the water supply valves beneath the sink to restore the water flow. Check for any leaks or drips and tighten any connections if necessary.
- Final Touches: Take the time to clean the vanity top and surrounding area, removing any dust or debris that may have accumulated during the installation process. Install any new cabinet hardware or accessories, such as faucets or towel bars, to complete the updated look of your bathroom.
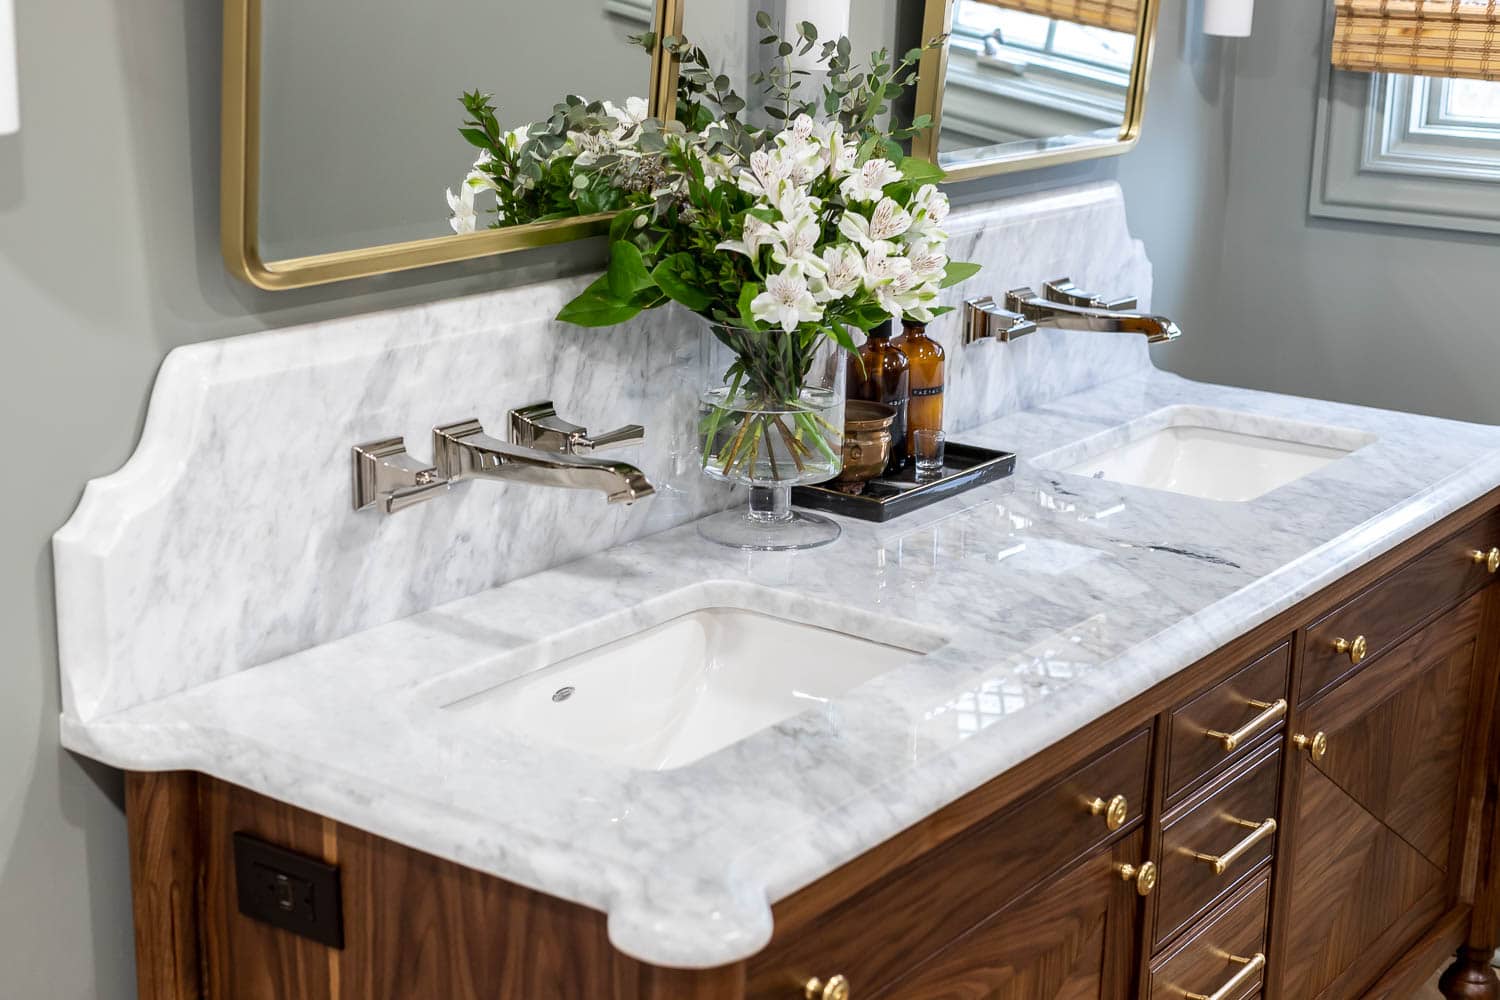
With the vanity top successfully reinstalled, step back and admire your newly refinished bathroom vanity. You’ve achieved a remarkable transformation that not only enhances the appearance of your bathroom but also adds value to your home. Enjoy your refreshed vanity top for many years to come!
Remember, the specific steps and techniques may vary depending on the type and condition of your vanity top and the products you’ve used. Always refer to the manufacturer’s instructions for proper installation and safety precautions.
Read more: How To Attach A Vanity Top
Conclusion
Refinishing your bathroom vanity top is a rewarding and cost-effective way to breathe new life into your bathroom space. By following the step-by-step process outlined in this guide, you can achieve a professional-looking finish that transforms the appearance of your vanity top without the need for a full replacement.
Throughout this guide, we have covered everything you need to know to successfully refinish your bathroom vanity top. From gathering materials and removing the vanity top to cleaning and prepping the surface, sanding, applying primer, paint or refinishing product, sealing, and finally, reinstalling the vanity top – each step plays a crucial role in creating a stunning and long-lasting transformation.
Remember to choose the appropriate materials and products for your specific vanity top material, following the manufacturer’s instructions for compatibility and application. Take your time with each step, ensuring proper drying and curing times, and addressing any imperfections along the way.
By refinishing your bathroom vanity top, you not only enhance the aesthetics of your bathroom but also add value to your home. It’s a cost-effective way to achieve a fresh and updated look without the expense and hassle of a full replacement.
So, whether you’re looking to modernize a worn-out vanity top or simply want a change in your bathroom decor, refinishing your bathroom vanity top is a project well worth undertaking. Enjoy the process, unleash your creativity, and revel in the satisfaction of transforming your bathroom one step at a time.
Frequently Asked Questions about How To Refinish Bathroom Vanity Top
Was this page helpful?
At Storables.com, we guarantee accurate and reliable information. Our content, validated by Expert Board Contributors, is crafted following stringent Editorial Policies. We're committed to providing you with well-researched, expert-backed insights for all your informational needs.


0 thoughts on “How To Refinish Bathroom Vanity Top”