Articles
How To Air Seal An Attic
Modified: August 28, 2024
Learn the step-by-step process of effectively air sealing your attic with our informative articles. Enhance energy efficiency and prevent heat loss.
(Many of the links in this article redirect to a specific reviewed product. Your purchase of these products through affiliate links helps to generate commission for Storables.com, at no extra cost. Learn more)
Introduction
Welcome to our comprehensive guide on how to air seal an attic. When it comes to improving the energy efficiency of your home, properly air sealing your attic is a crucial step. Not only does it help you reduce energy consumption and lower utility bills, but it also enhances the overall comfort and indoor air quality of your living space. In this article, we will walk you through the process of air sealing an attic, providing you with all the information you need to successfully complete the task.
Before we dive into the details, let’s first understand why air sealing your attic is so important. Attics are notorious for being a significant source of air leaks and energy loss in a home. Poorly sealed attics allow warm air to escape during the winter and enter during the summer, leading to an increase in energy usage and an uncomfortable indoor environment. By effectively air sealing your attic, you can create a barrier that prevents air leakage, resulting in improved energy efficiency and a more comfortable living space.
Assessing your attic for air leaks is the first step in the air sealing process. It’s important to identify areas where air may be escaping or entering your home. These areas can include gaps around pipes, vents, chimneys, recessed lighting fixtures, and any other penetrations in the attic floor or ceiling. Additionally, check for gaps around attic hatches or access doors. Once you have identified the leaks, you can then proceed with the necessary preparation and materials for air sealing.
Choosing the right materials for air sealing is crucial to ensure a proper and long-lasting seal. There are various options available, including caulk, spray foam insulation, weatherstripping, and insulation baffles. Each material has its own unique properties and applications, so it’s important to select the most suitable ones for your specific needs.
In the following sections, we will provide you with a step-by-step guide to effectively air seal your attic. We will also highlight some common mistakes to avoid during the process. Finally, we will discuss the benefits of proper attic air sealing, which go beyond just energy efficiency.
We hope that this guide will empower you to take the necessary steps to improve the energy efficiency and comfort of your home by air sealing your attic. So without further ado, let’s jump into the details and get started with the process of air sealing an attic.
Key Takeaways:
- Properly air sealing your attic is crucial for reducing energy consumption, improving indoor comfort, and enhancing indoor air quality, ultimately leading to significant cost savings and a healthier living environment.
- By understanding the importance of air sealing, assessing your attic for air leaks, and following a step-by-step guide, you can create a tight and efficient barrier against air leaks, leading to improved energy efficiency, comfort, and overall quality of life.
Read more: How To Seal Attic Hatch
Understanding the Importance of Air Sealing
When it comes to creating an energy-efficient and comfortable living space, air sealing is a critical step. The attic, in particular, is a notorious area for air leaks and energy loss. By understanding the importance of air sealing, you can take proactive measures to improve the energy efficiency and comfort of your home.
One of the primary benefits of air sealing an attic is the reduction of energy consumption. A poorly sealed attic allows warm air to escape during the colder months and enter during the warmer months. This constant exchange of air strains your heating and cooling systems, leading to increased energy usage and higher utility bills. By effectively sealing air leaks in your attic, you can significantly reduce energy waste and save money.
Air sealing your attic also helps to create a more comfortable indoor environment. Air leaks allow drafts to enter your home, making it difficult to maintain a consistent temperature and leading to hot or cold spots. Additionally, air leaks can introduce outdoor pollutants and allergens into your home, negatively affecting indoor air quality. By sealing these leaks, you can create a barrier that prevents the infiltration of unwanted air and pollutants, resulting in a healthier and more comfortable living space.
Beyond energy savings and comfort, air sealing your attic can offer other benefits as well. One such benefit is the prevention of moisture-related issues. Air leaks can allow moisture to enter your attic space, leading to the growth of mold and mildew, as well as potential damage to insulation and structural components. By sealing these leaks, you can effectively reduce the risk of moisture problems, safeguarding the integrity of your attic.
In addition, proper attic air sealing can enhance the overall lifespan of your HVAC system. Leaky attics force your heating and cooling systems to constantly work harder to compensate for temperature fluctuations. This increased strain can lead to premature wear and tear, resulting in frequent breakdowns and the need for costly repairs. By creating a tight, sealed barrier in your attic, you can reduce the workload on your HVAC system and extend its lifespan.
Overall, by understanding and prioritizing the importance of air sealing, you can enjoy a wide range of benefits, including energy savings, improved comfort, enhanced indoor air quality, moisture prevention, and increased HVAC system longevity. Now that you are aware of why air sealing your attic is crucial, let’s move on to the next step: assessing your attic for air leaks.
Assessing Your Attic for Air Leaks
Before you can begin the process of air sealing your attic, it’s important to assess the space for any potential air leaks. Identifying these areas will help you determine the extent of the problem and effectively plan your air sealing efforts.
Start by conducting a thorough visual inspection of your attic. Look for any visible signs of air leaks, such as gaps, cracks, or holes in the attic floor or ceiling. Pay close attention to areas where different building materials meet, such as around vents, chimneys, electrical boxes, and plumbing penetrations. These are common areas where air leaks can occur.
Next, conduct a tactile inspection by running your hand along potential air leak areas. You may feel drafts or changes in temperature, indicating the presence of an air leak. It’s essential to perform this inspection on a windy day, as the airflow can make it easier to detect air leaks.
In addition to the visual and tactile inspections, you can also use a smoke pencil or an infrared camera to assist in locating air leaks. A smoke pencil emits a thin stream of smoke, which can help visualize drafts and air movement. An infrared camera, on the other hand, detects temperature differences and can help identify areas with thermal variations, indicating potential air leaks.
As you assess your attic for air leaks, make sure to pay attention to the following areas:
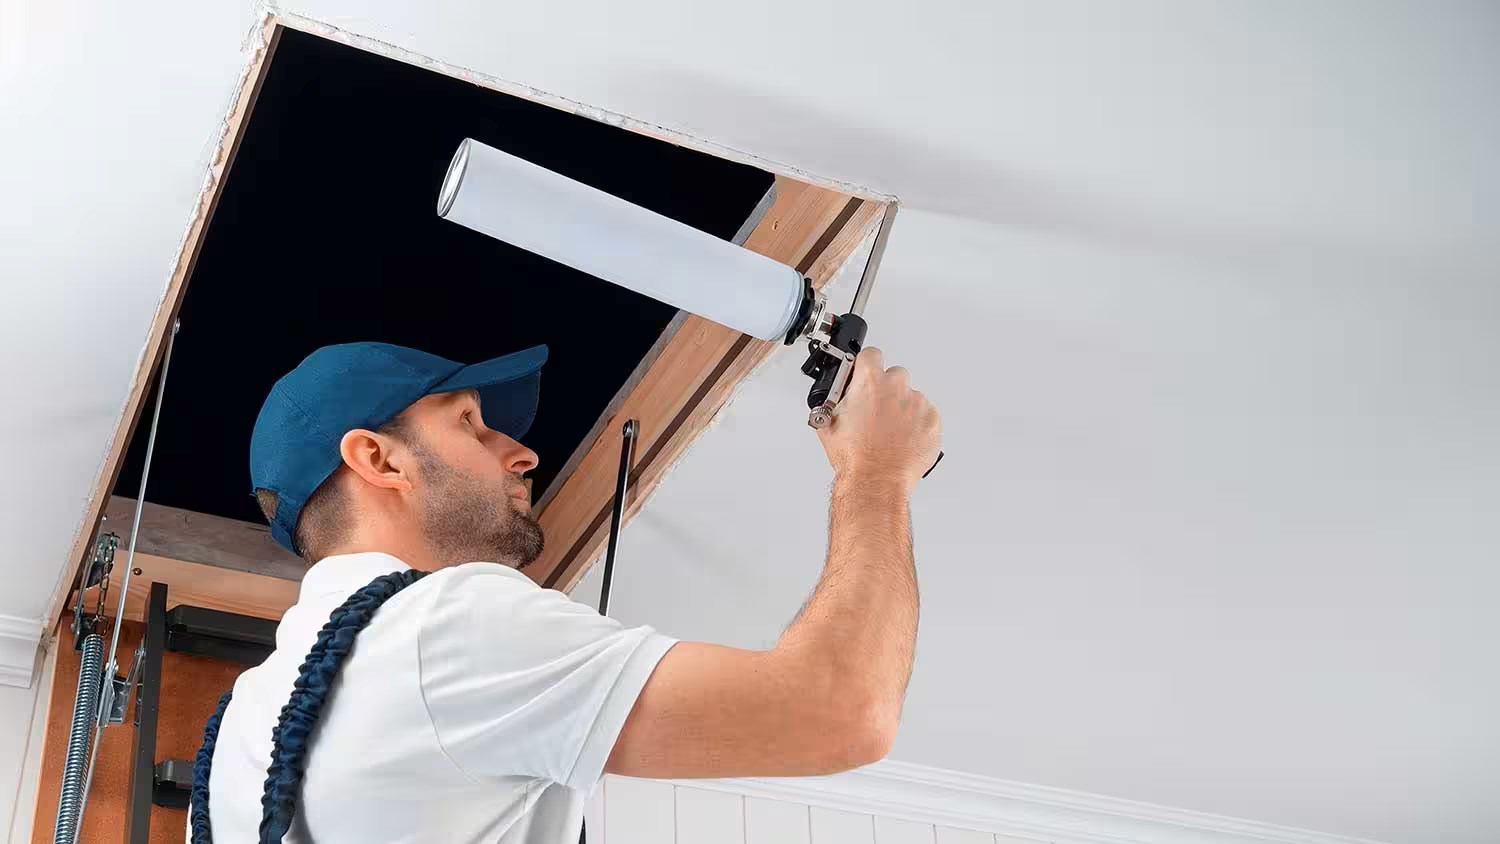
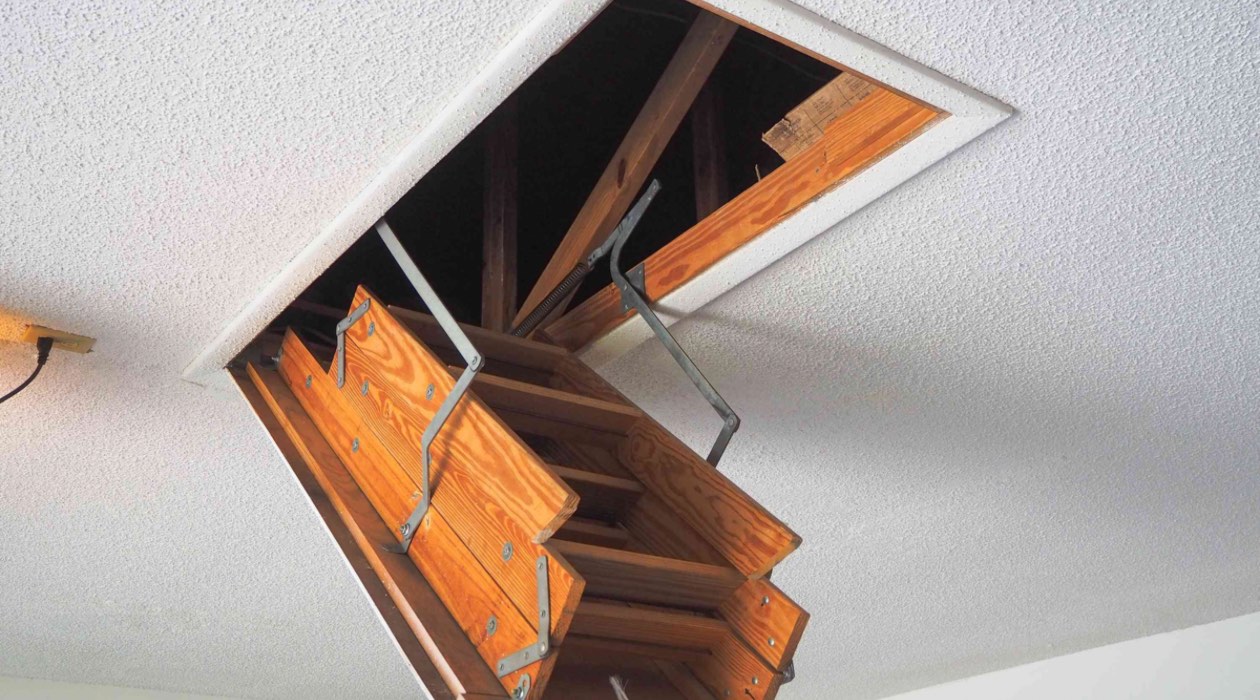
- Attic access hatch or door: Check for gaps or poorly sealed areas around the hatch or door. Use weatherstripping or caulk to seal any leaks.
- Pipe penetrations: Look for openings around pipes that pass through the attic floor or ceiling. Apply caulk or spray foam insulation to seal these gaps.
- Vents and chimneys: Inspect the area around vents and chimneys for gaps or cracks. Use appropriate materials like flashing, caulk, or high-temperature sealant to seal these areas.
- Recessed lighting fixtures: Determine if your recessed lighting fixtures are properly sealed and insulated. If not, consider using insulation covers or upgrading to airtight fixtures.
- Wiring and electrical boxes: Check for gaps or holes around electrical wiring and boxes. Seal these openings with caulk or expanding foam.
Keep in mind that air leaks may not be limited to these specific areas. It’s important to be thorough and inspect the entire attic space to ensure all potential leaks are identified.
By assessing your attic for air leaks, you will have a clear understanding of where the problem lies and be able to proceed with the necessary air sealing preparations. In the next section, we will guide you on how to effectively prepare for air sealing your attic.
Preparing for Air Sealing
Before you begin the process of air sealing your attic, it’s important to properly prepare the space. Taking the time to prepare ensures that you have a clean and accessible working area, and that you have all the necessary tools and materials at hand.
Here are the key steps to follow when preparing for air sealing:
- Clean the attic: Remove any debris or clutter from the attic space. This will make it easier to navigate and access all areas that require air sealing. Consider wearing protective clothing, such as a dust mask and gloves, to minimize exposure to dust and insulation fibers.
- Assess the insulation: Take a close look at the condition of your attic insulation. If the insulation is old, damaged, or insufficient, you may need to consider adding or replacing it. Adequate insulation plays a crucial role in improving energy efficiency and preventing air leaks.
- Seal large gaps and holes: Before applying any sealant or insulation, it’s important to address larger gaps and holes in the attic. Use materials like plywood, drywall, or foam board to cover and seal these openings. This will help create a solid foundation for the air sealing process.
- Seal ductwork leaks: If your HVAC system has ductwork running through the attic, it’s essential to inspect it for leaks. Leaky ducts can contribute to significant energy loss and reduce the effectiveness of your heating and cooling system. Seal any visible gaps or disconnects using duct tape or mastic sealant.
- Gather the necessary tools and materials: Before you start air sealing, make sure you have all the tools and materials you’ll need. This may include caulk, spray foam insulation, weatherstripping, insulation baffles, a caulking gun, a utility knife, a foam gun, a ladder, and a flashlight. Having everything ready and easily accessible will make the process smoother and more efficient.
- Plan your work: Create a plan of action for the air sealing process. Prioritize areas with the most significant air leaks or where the insulation is lacking. Consider breaking the work into manageable sections to prevent becoming overwhelmed and ensure thorough coverage.
By following these preparatory steps, you will be ready to effectively air seal your attic. Proper preparation is crucial to ensure a successful air sealing project and maximize energy-saving benefits.
Now that you have prepared your attic for air sealing, the next step is to choose the right materials for the task. In the following section, we will guide you in selecting the appropriate materials to effectively seal air leaks in your attic.
Choosing the Right Materials for Air Sealing
When it comes to air sealing your attic, choosing the right materials is essential for achieving a proper and long-lasting seal. There are several options available, each with its own unique properties and applications. By selecting the appropriate materials, you can effectively seal air leaks and enhance the energy efficiency of your home.
Here are some commonly used materials for air sealing an attic:
- Caulk: Caulk is a versatile material used to seal small gaps and cracks. It comes in different types, such as silicone, latex, and polyurethane. Silicone caulk is ideal for areas exposed to moisture, while latex and polyurethane caulk can be used for general sealing purposes.
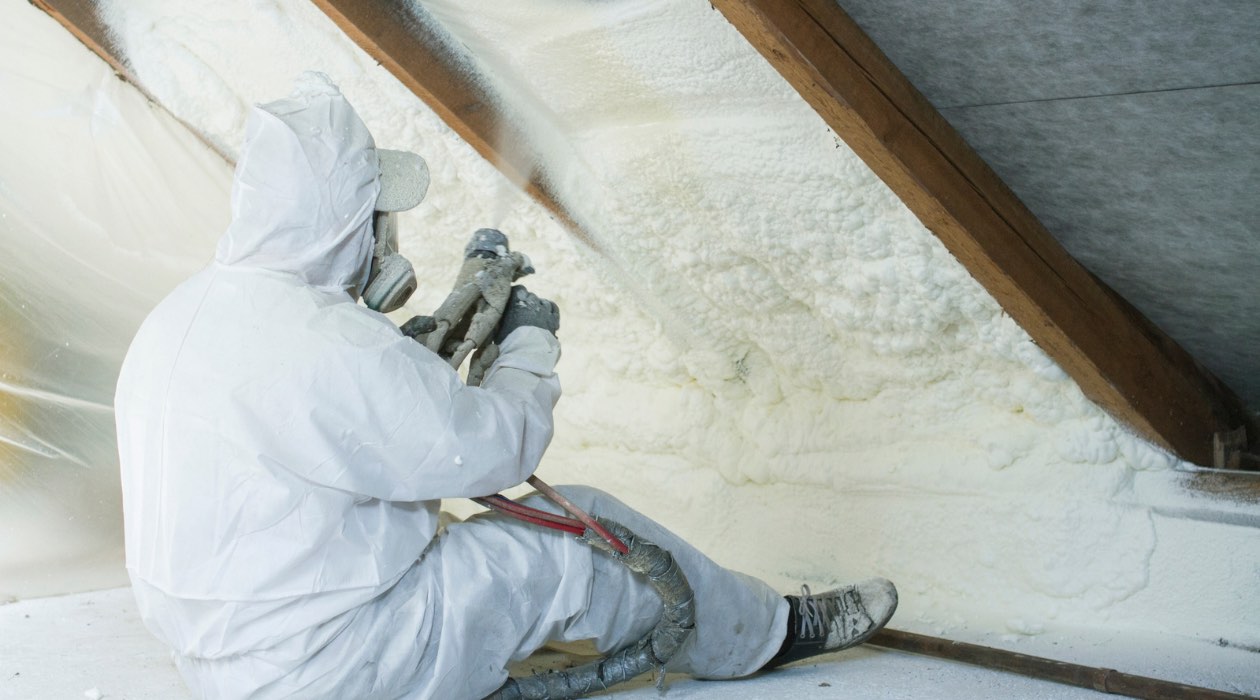
- Spray foam insulation: Spray foam insulation expands to fill gaps and cavities, providing an effective air and moisture barrier. There are two types of spray foam insulation: closed-cell and open-cell. Closed-cell spray foam is rigid and provides a higher R-value, while open-cell foam is more flexible and acts as an air barrier.
- Weatherstripping: Weatherstripping is used to seal gaps around doors, windows, and other movable components. It comes in various forms, such as adhesive-backed tape, V-strip, and door sweeps. Choose weatherstripping materials that are appropriate for the specific area and provide a tight seal against drafts.
- Insulation baffles: Insulation baffles help maintain proper attic ventilation while preventing insulation from blocking soffit vents. They are typically made from plastic or foam and are installed between rafters or trusses to create an airflow channel.
- Gasket materials: Gaskets are used to create a tight seal around electrical boxes, outlets, and switches. They help prevent air leaks and improve energy efficiency. Rubber or foam gaskets can be used, depending on the specific application.
When choosing materials, consider factors such as the location of the air leak, the type of surface you’re sealing, and the compatibility with other materials in your attic. It’s also important to select materials that are appropriate for the climate and conditions in your area.
Before you start air sealing, ensure you have all the necessary tools for applying the materials. This may include a caulking gun, a foam gun, a utility knife, a ladder, and other equipment specific to the materials you’re using.
Remember, the goal is to create a tight and effective air seal that prevents air leakage. Take the time to carefully select the right materials for each specific application, as this will ensure the success of your air sealing project.
Now that you have a good understanding of the materials required for air sealing, it’s time to move on to the practical steps involved in air sealing an attic. In the next section, we will provide you with a step-by-step guide to help you effectively seal air leaks in your attic.
Use spray foam or caulk to seal any gaps or cracks around pipes, wires, and vents in the attic. This will help prevent air leakage and improve energy efficiency.
Read more: How To Replace Air Ducts In The Attic
Step-by-Step Guide to Air Sealing an Attic
Now that you have assessed your attic, prepared the space, and chosen the right materials, it’s time to dive into the step-by-step process of air sealing your attic. Follow these guidelines to effectively seal air leaks and improve the energy efficiency of your home:
- Start with safety precautions: Before you begin, ensure you are wearing appropriate safety gear, including gloves, goggles, and a dust mask. Attics can be dusty and may have exposed nails or sharp objects, so it’s important to prioritize safety.
- Seal large gaps and holes: Begin by sealing any obvious gaps or holes in the attic. Use materials like plywood, drywall, or foam board to cover and seal larger openings. Secure them in place with screws or nails.
- Seal attic access points: Pay attention to the access points in your attic, such as hatches or doors. Apply weatherstripping or caulk around these openings to create an airtight seal.
- Address recessed lighting fixtures: If you have recessed lighting fixtures in the attic floor, ensure they are properly sealed and insulated. Use insulation covers or upgrade to airtight fixtures if necessary. Avoid placing insulation directly on top of non-insulated fixtures.
- Inspect plumbing and electrical penetrations: Take the time to seal gaps around plumbing pipes, electrical wires, and outlets. Use caulking or spray foam insulation to seal these penetrations and prevent air leakage.
- Apply weatherstripping to doors and windows: If your attic has windows or doors, apply weatherstripping to create a tight seal around these openings. Use adhesive-backed tape or other suitable weatherstripping materials.
- Seal gaps around vents and chimneys: Use appropriate materials like flashing, caulk, or high-temperature sealant to seal any gaps or cracks around vents, chimneys, or exhaust fans. Ensure a proper seal to prevent air leakage.
- Address ductwork leaks: Inspect your HVAC ductwork for any leaks or gaps. Use duct tape or mastic sealant to seal these areas and improve the efficiency of your heating and cooling system.
- Install insulation baffles: If your attic has soffit vents, install insulation baffles between rafters or trusses to ensure proper attic ventilation. This helps prevent insulation from blocking the vents and maintains airflow.
- Inspect and seal other potential leak areas: Take a final walk-through of your attic and inspect for any other areas where air leaks may occur. This can include gaps in insulation, attic fans, or any other penetrations in the attic floor or ceiling. Seal these areas as needed.
As you work through the process, pay attention to the manufacturer’s instructions for the materials you are using and follow proper application techniques. Use a caulking gun, foam gun, or other appropriate tools to ensure accurate and effective application of the sealants.
Remember, the goal is to create a tight and continuous air barrier to prevent air leakage and improve energy efficiency. Thoroughly inspect each sealed area to ensure there are no gaps or leaks that may compromise the effectiveness of your efforts.
Once you have completed the air sealing process, take the time to clean up the attic space and dispose of any leftover materials properly. This will leave you with a clean and organized attic that is ready to provide improved energy efficiency and comfort for your home.
Now that you have successfully air sealed your attic, let’s take a look at some common mistakes to avoid to ensure your efforts are fully optimized.
Common Mistakes to Avoid
When air sealing an attic, it’s important to be aware of some common mistakes that can hinder the effectiveness of your efforts. By avoiding these mistakes, you can ensure that your air sealing project is successful and maximizes energy savings. Here are some common mistakes to avoid:
- Not identifying all air leak areas: One of the most crucial steps in air sealing is identifying all potential air leak areas. Be thorough in your assessment, checking for gaps, cracks, and holes in the attic floor or ceiling, as well as around penetrations, recessed light fixtures, and access doors.
- Using the wrong materials: It’s essential to use the appropriate materials for each specific application. Make sure you choose sealants, weatherstripping, and insulation that are compatible with the surfaces you are sealing. Using the wrong materials can lead to ineffective seals and compromised energy efficiency.
- Applying insufficient insulation: Inadequate insulation can negate the benefits of air sealing. Make sure you have sufficient insulation in your attic to provide optimal thermal efficiency. Insulation should be installed uniformly and cover all areas, without any gaps or compressions.
- Overlooking gaps around electrical boxes: Electrical boxes can be a major source of air leaks if not properly sealed. Take the time to inspect and seal any gaps or holes around electrical boxes using caulk or foam insulation.
- Forgetting to seal ductwork: Failing to address leaks in your HVAC ductwork can significantly undermine the effectiveness of your air sealing efforts. Inspect the ducts thoroughly and ensure that any gaps or connections are sealed with appropriate materials, such as duct tape or mastic sealant.
- Ignoring safety precautions: Attic spaces can pose safety risks, such as exposed nails, sharp objects, or dusty environments. Always prioritize your safety by wearing protective gear, such as gloves, goggles, and dust masks. Additionally, use caution when navigating the attic to avoid accidents or falls.
- Not considering attic ventilation: Proper attic ventilation is essential for maintaining the health of your home and preventing moisture-related issues. Avoid blocking soffit vents with insulation and ensure that insulation baffles or chutes are properly installed to facilitate airflow.
- Rushing the process: Air sealing an attic requires patience and attention to detail. Rushing through the project can result in incomplete seals and missed air leak areas. Take your time to thoroughly seal each identified area and ensure a tight barrier against air leakage.
- Skipping regular maintenance: Once you have air sealed your attic, it’s important to perform regular maintenance to ensure the effectiveness of your efforts. Inspect your seals regularly and address any signs of damage or deterioration promptly to maintain the energy efficiency of your home.
By avoiding these common mistakes, you can optimize your air sealing project and enjoy the full benefits of improved energy efficiency, comfort, and indoor air quality in your home.
Now that you are aware of the mistakes to avoid, let’s explore the numerous benefits of properly air sealing your attic in the next section.
Benefits of Proper Attic Air Sealing
Properly air sealing your attic offers numerous benefits that go beyond just energy savings. By creating a tight and efficient barrier against air leakage, you can enjoy the following advantages:
Improved energy efficiency: Air sealing your attic helps to reduce energy waste by preventing the escape of conditioned air during the winter and the entry of hot air during the summer. This translates to lower energy consumption and reduced utility bills. Properly sealed attics can result in significant savings on heating and cooling costs.
Enhanced comfort: Air leaks can create drafts and temperature inconsistencies in your home. By air sealing your attic, you can eliminate drafts and create a more comfortable indoor environment. Rooms will be better balanced, and you can say goodbye to hot or cold spots that make it difficult to maintain a consistent and pleasant temperature throughout your living space.
Improved indoor air quality: Air leaks in your attic can allow pollutants, dust, and allergens to enter your home. By sealing these leaks, you can prevent the infiltration of outdoor contaminants, significantly improving indoor air quality. This is particularly beneficial for individuals with allergies, asthma, or respiratory conditions.
Moisture prevention: Air leaks can also allow moisture to enter your attic, leading to the growth of mold and mildew. By creating a tight seal, you can minimize the risk of moisture-related issues, protecting your attic structure, insulation, and preventing potential health hazards associated with mold growth.
Extended lifespan of HVAC systems: Leaky attics place additional strain on your heating and cooling systems as they work harder to compensate for temperature fluctuations. By air sealing your attic, you can reduce the workload on your HVAC system, leading to less wear and tear and extending its lifespan. This can save you money on maintenance and replacement costs in the long run.
Environmental benefits: Energy-efficient homes contribute to a reduced carbon footprint, as they require less energy to heat and cool. By properly air sealing your attic, you can make a positive impact on the environment by reducing greenhouse gas emissions and conserving natural resources.
Increased home value: A properly sealed attic is an attractive feature for potential homebuyers. Improved energy efficiency and indoor comfort can enhance the value of your property. Additionally, energy-efficient homes tend to have higher resale values and attract eco-conscious buyers.
By taking the time and effort to properly air seal your attic, you can enjoy these benefits and create a more energy-efficient, comfortable, and healthier living space for you and your family.
Now that you are familiar with the numerous advantages of attic air sealing, let’s wrap up this guide.
Conclusion
Congratulations on completing our comprehensive guide on how to air seal an attic. By understanding the importance of air sealing, assessing your attic for air leaks, and properly preparing the space, you have taken significant steps towards improving the energy efficiency and comfort of your home.
Choosing the right materials and following our step-by-step guide to air sealing ensures that you create a tight and efficient barrier against air leaks. By avoiding common mistakes and emphasizing regular maintenance, you can maximize the benefits of your efforts and enjoy a more energy-efficient and comfortable living space.
A properly air sealed attic offers numerous advantages, including improved energy efficiency, enhanced indoor comfort, better indoor air quality, prevention of moisture-related issues, extended HVAC system lifespan, environmental benefits, and increased home value. These benefits go beyond just energy savings and positively impact your overall quality of life.
We hope that this guide has empowered you with the knowledge and confidence to take on the task of air sealing your attic. Remember, while the process may require time and effort, the long-term benefits make it well worth it.
If you have any further questions or need additional guidance, don’t hesitate to consult with a professional or reach out to your local energy efficiency programs for assistance. They can provide valuable insights and recommendations tailored to your specific needs and requirements.
Thank you for joining us on this air sealing journey, and we wish you success in creating a more energy-efficient and comfortable home!
Frequently Asked Questions about How To Air Seal An Attic
Was this page helpful?
At Storables.com, we guarantee accurate and reliable information. Our content, validated by Expert Board Contributors, is crafted following stringent Editorial Policies. We're committed to providing you with well-researched, expert-backed insights for all your informational needs.


0 thoughts on “How To Air Seal An Attic”