Home>Construction & Tools>Building Materials>How To Seal A Brick Chimney
Building Materials
How To Seal A Brick Chimney
Modified: August 17, 2024
Learn how to properly seal a brick chimney using high-quality building materials. Protect your chimney from the elements and extend its lifespan. Expert tips and techniques included.
(Many of the links in this article redirect to a specific reviewed product. Your purchase of these products through affiliate links helps to generate commission for Storables.com, at no extra cost. Learn more)
Introduction
Sealing a brick chimney is a crucial maintenance task that can enhance the longevity and structural integrity of your chimney. Over time, exposure to the elements can cause wear and tear on the bricks, leading to potential water damage and deterioration. By applying a high-quality sealant, you can protect the bricks from moisture, prevent cracks, and maintain the overall aesthetics of your chimney.
In this comprehensive guide, we will walk you through the step-by-step process of sealing your brick chimney, providing you with valuable insights and expert tips to ensure a successful outcome. Whether you're a seasoned DIY enthusiast or a homeowner looking to tackle this project for the first time, this article will equip you with the knowledge and confidence to effectively seal your chimney and safeguard it against environmental factors.
By following the detailed instructions and recommendations outlined in this guide, you'll be able to preserve the beauty and functionality of your chimney, creating a more secure and durable structure for years to come. Let's dive into the essential steps required to seal a brick chimney and protect it from potential damage.
Key Takeaways:
- Protect Your Chimney
Sealing your brick chimney with the right materials and thorough cleaning can protect it from water damage and environmental wear, ensuring its longevity and structural integrity for years to come. - Attention to Detail Matters
Inspecting for damage and applying the sealant carefully, then allowing it to dry properly, are crucial steps in preserving your chimney. This proactive approach ensures a resilient and visually appealing home exterior.
Read more: How To Seal Off A Chimney
Step 1: Gather the necessary materials
Before embarking on the process of sealing your brick chimney, it's essential to gather all the required materials and tools to ensure a smooth and efficient workflow. By having everything at your disposal, you can minimize interruptions and complete the project with precision. Here's a comprehensive list of the necessary materials for sealing a brick chimney:
Materials:
-
Chimney Sealant: Invest in a high-quality chimney sealant specifically designed for brick surfaces. Look for a product that offers excellent waterproofing properties and UV resistance to provide long-lasting protection.
-
Protective Gear: Prioritize safety by acquiring protective gear, including gloves, safety goggles, and a dust mask. These items will shield you from potential skin irritation and respiratory issues when working with sealants and cleaning solutions.
-
Cleaning Solution: Choose a suitable cleaning solution or detergent formulated for masonry surfaces. This will facilitate the removal of dirt, grime, and other contaminants from the brick chimney before applying the sealant.
-
Brushes and Rollers: Depending on the size and accessibility of your chimney, gather a variety of brushes and rollers to apply the sealant evenly. Stiff-bristled brushes are effective for cleaning, while rollers can ensure a smooth and uniform sealant application.
-
Ladder: Ensure you have a sturdy and secure ladder that provides safe access to the chimney. Safety should always be a top priority when working at elevated heights.
-
Scrubbing Tools: In addition to brushes, consider using scrubbing tools such as wire brushes or scrub pads to eliminate stubborn stains and debris from the brick surface.
-
Tarp or Drop Cloth: Protect the surrounding area from potential drips or spills by laying down a tarp or drop cloth. This will safeguard your property and landscaping from accidental sealant splatters.
-
Repair Materials: If you identify any minor cracks or damage during the inspection phase, gather appropriate repair materials such as mortar or caulk to address these issues before applying the sealant.
By assembling these essential materials and tools, you'll be well-prepared to initiate the process of sealing your brick chimney effectively. This proactive approach sets the stage for a successful and rewarding home maintenance project, ensuring that your chimney receives the care and protection it deserves.
Step 2: Clean the chimney
Cleaning the chimney is a crucial preparatory step that sets the foundation for a successful sealing process. Over time, brick chimneys can accumulate dirt, soot, mold, and other contaminants, which can compromise the adhesion and effectiveness of the sealant. Therefore, thorough cleaning is essential to ensure that the sealant can bond effectively with the brick surface, providing long-lasting protection against moisture and environmental elements.
To begin the cleaning process, start by inspecting the exterior of the chimney for any visible debris, such as leaves, bird nests, or loose mortar. Use a stiff-bristled brush or a chimney sweep's brush to remove these obstructions carefully. It's important to exercise caution and avoid dislodging any loose bricks or causing damage to the chimney structure during this initial cleaning phase.
Once the exterior is clear of debris, it's time to address the accumulated dirt and grime on the brick surface. Prepare a cleaning solution by mixing a mild detergent or specialized masonry cleaner with water in a bucket. Dip a stiff-bristled brush or scrubbing tool into the solution and begin scrubbing the brick surface in small sections. Work methodically from the top of the chimney downwards, ensuring thorough coverage and attention to areas with visible stains or discoloration.
For stubborn stains or soot buildup, consider using a wire brush or scrub pad to gently agitate the surface and loosen the contaminants. Take care not to apply excessive force, as aggressive scrubbing can potentially damage the bricks. Additionally, pay close attention to the mortar joints, as they may also require cleaning and inspection for any signs of deterioration or cracking.
After scrubbing the entire chimney surface, rinse it thoroughly with clean water using a garden hose or a bucket of water and a sponge. This step is crucial to remove any residual cleaning solution and ensure that the surface is free from soap or detergent residue, which can interfere with the adhesion of the sealant.
Once the chimney is clean and free from dirt and contaminants, allow an adequate drying period before proceeding to the next step. Depending on the weather conditions, it may take a day or two for the chimney to dry completely. Patience during this phase is essential to ensure that the sealant can adhere effectively to the clean and dry brick surface, maximizing its protective capabilities.
By meticulously cleaning the chimney, you're laying the groundwork for a successful sealing process, setting the stage for optimal adhesion and long-term protection against moisture and environmental factors. This diligent approach to cleaning is a fundamental aspect of chimney maintenance, contributing to the overall durability and aesthetic appeal of your home's exterior.
Step 3: Inspect for any damage
Before proceeding with the application of the sealant, it is crucial to conduct a thorough inspection of the brick chimney to identify any signs of damage or deterioration. This meticulous assessment will enable you to address potential issues and ensure that the chimney is structurally sound before sealing it. Here's a detailed overview of the inspection process:
Read more: How To Seal Chimney Pipe
Visual Examination:
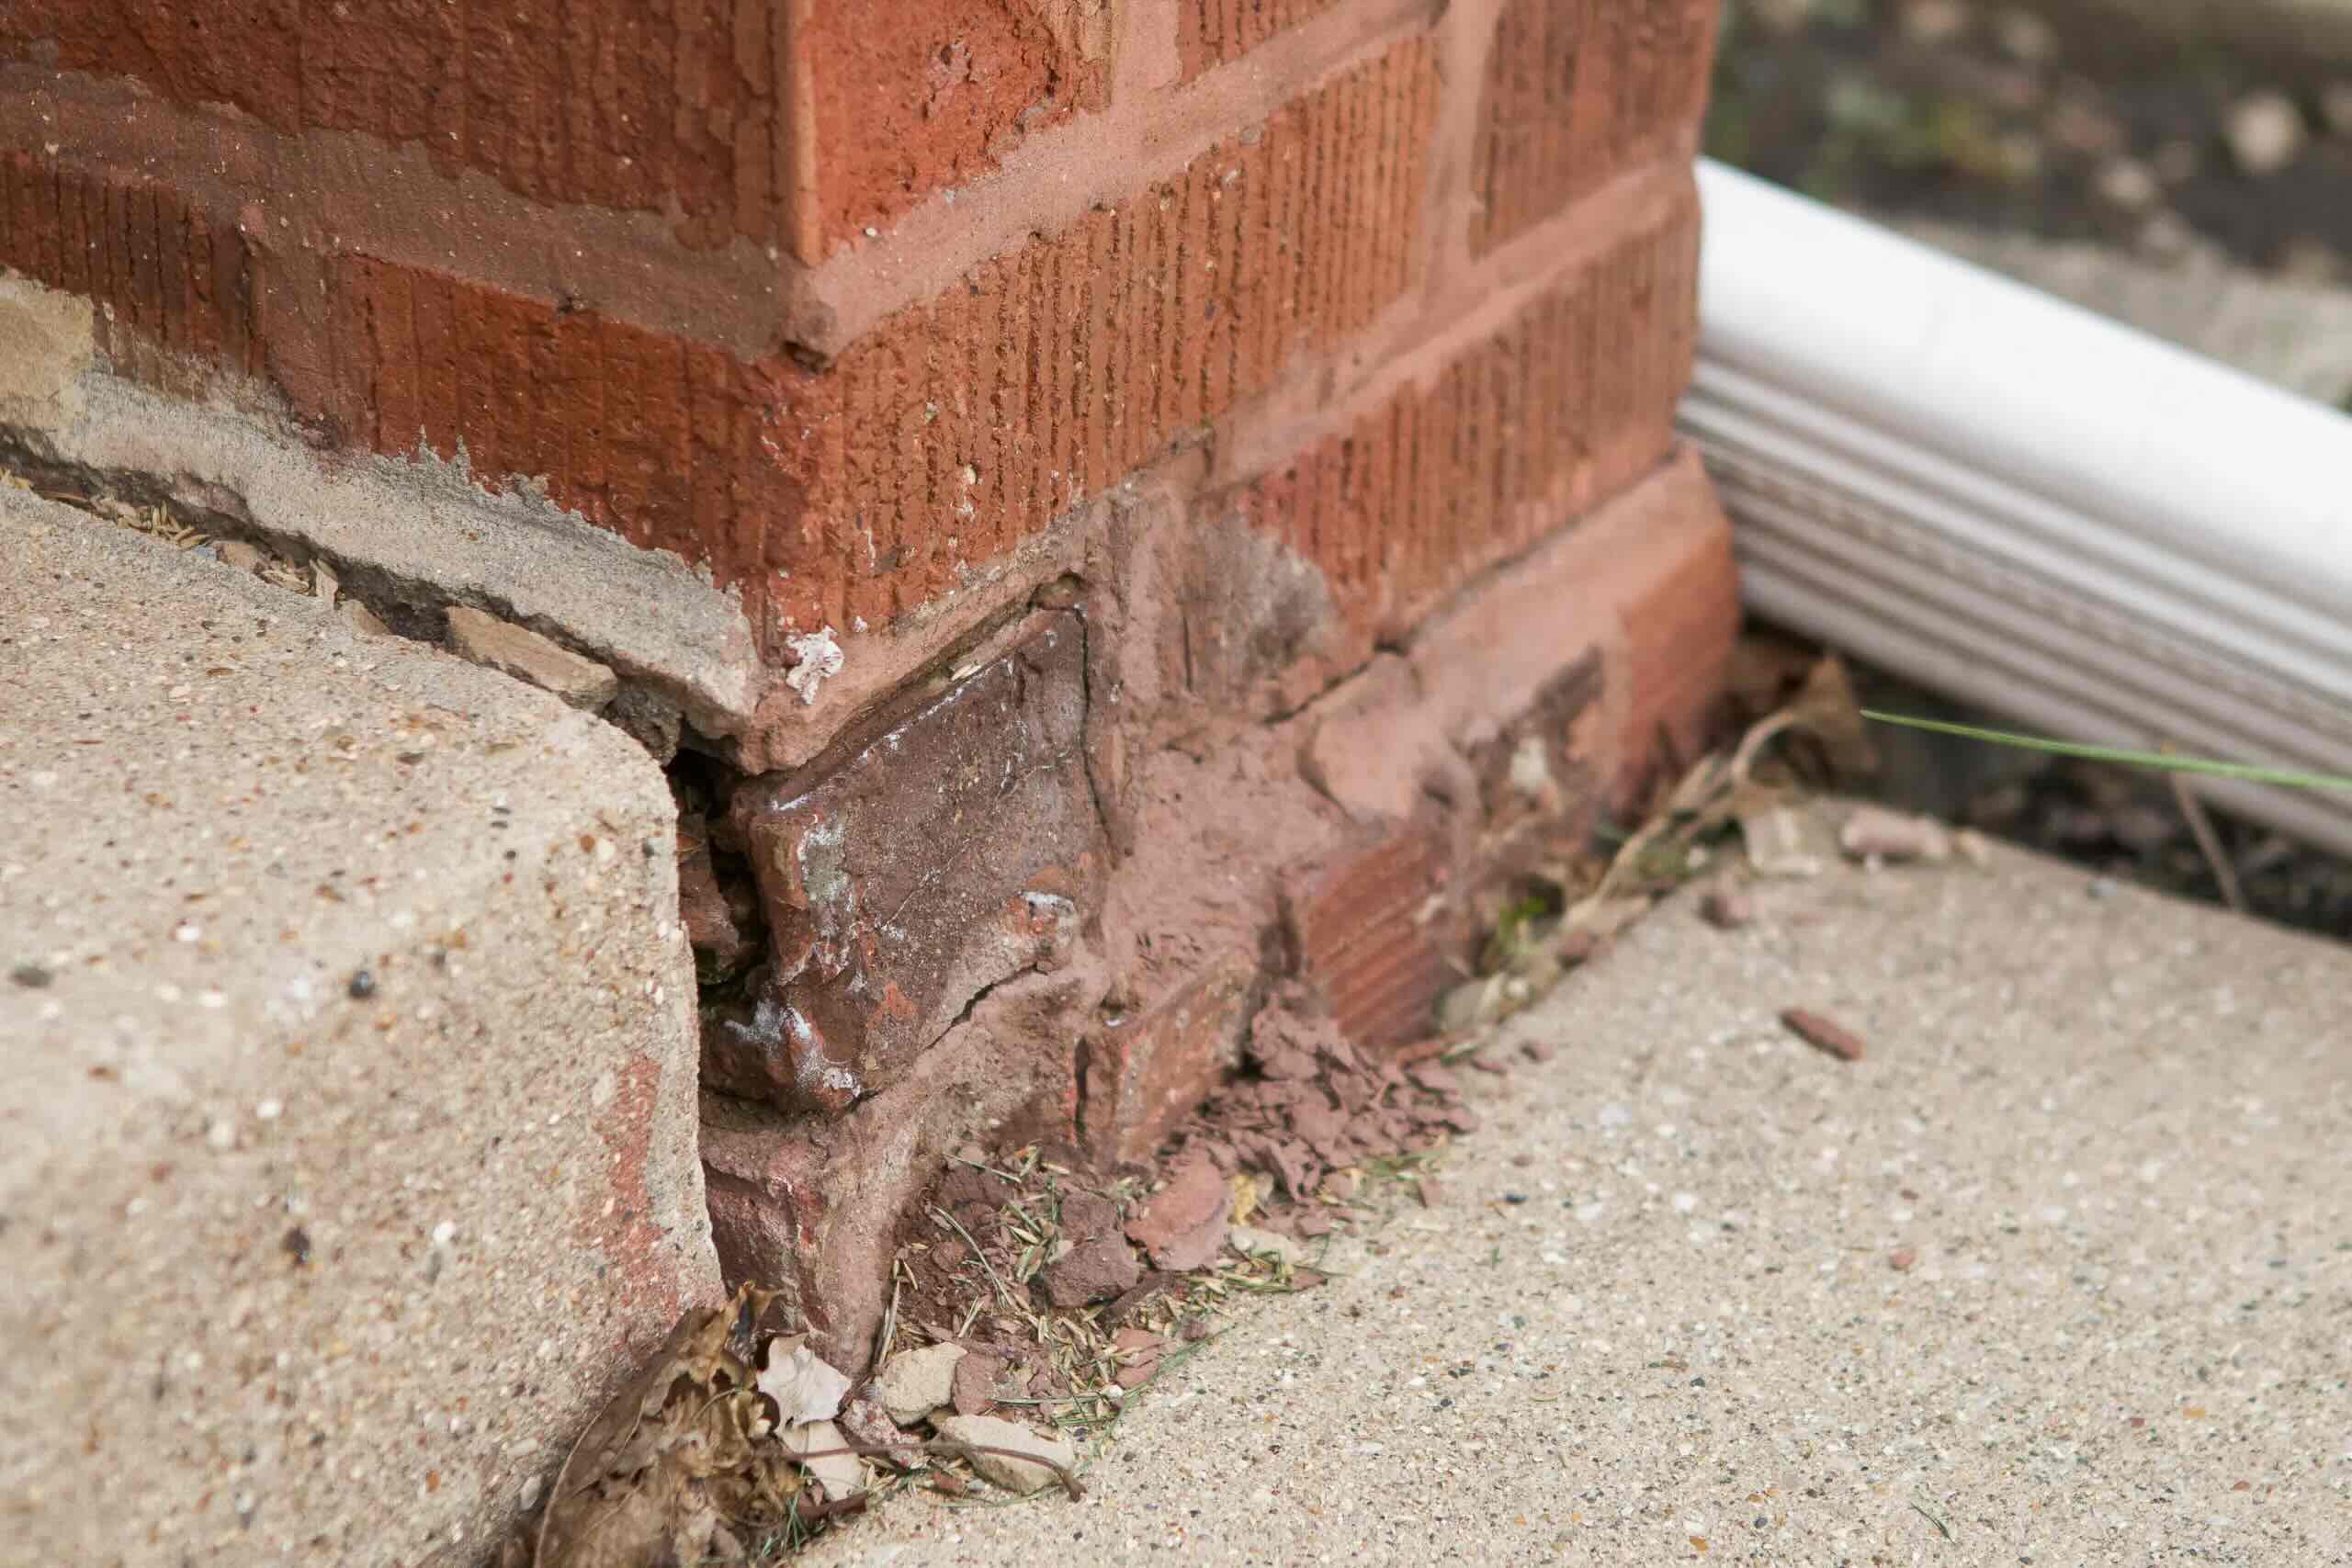
Begin the inspection by visually examining the entire exterior surface of the chimney. Look for any visible cracks, spalling (flaking or chipping of the bricks), or areas where the mortar joints appear to be deteriorating. Pay close attention to the base of the chimney, as this area is particularly susceptible to water damage and may exhibit signs of efflorescence, a white powdery residue caused by salt deposits.
Mortar Joints:
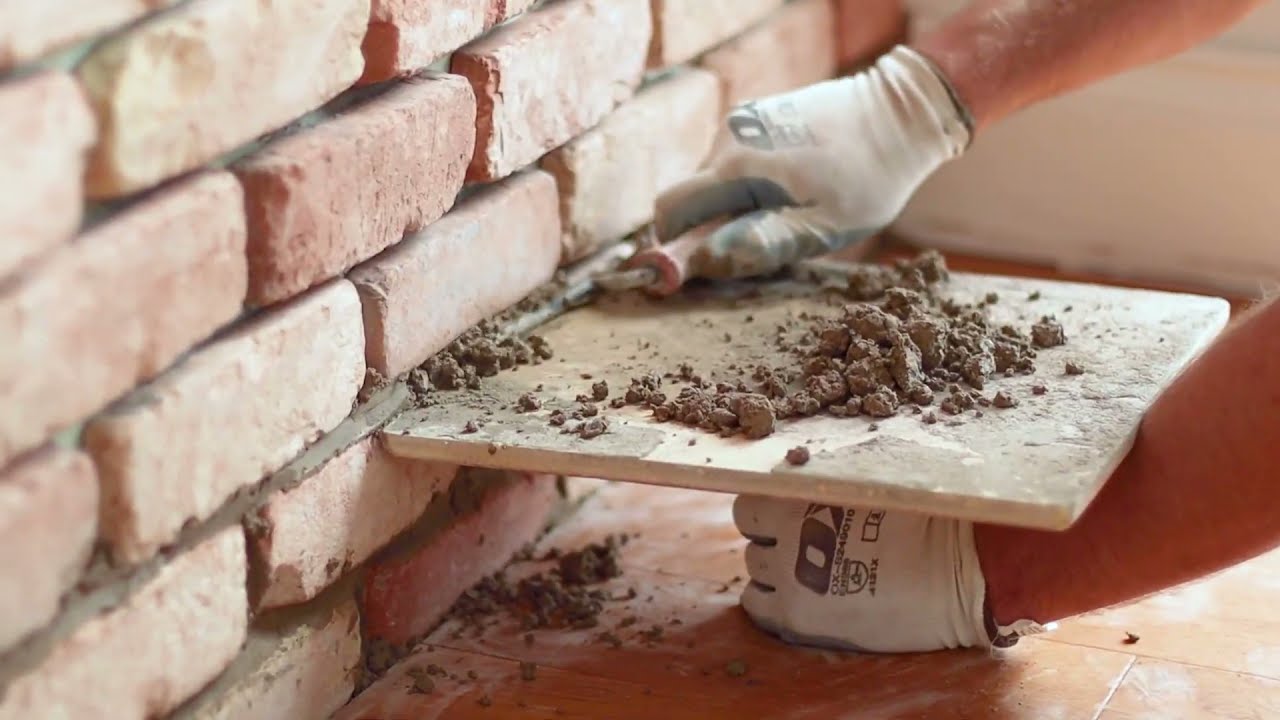
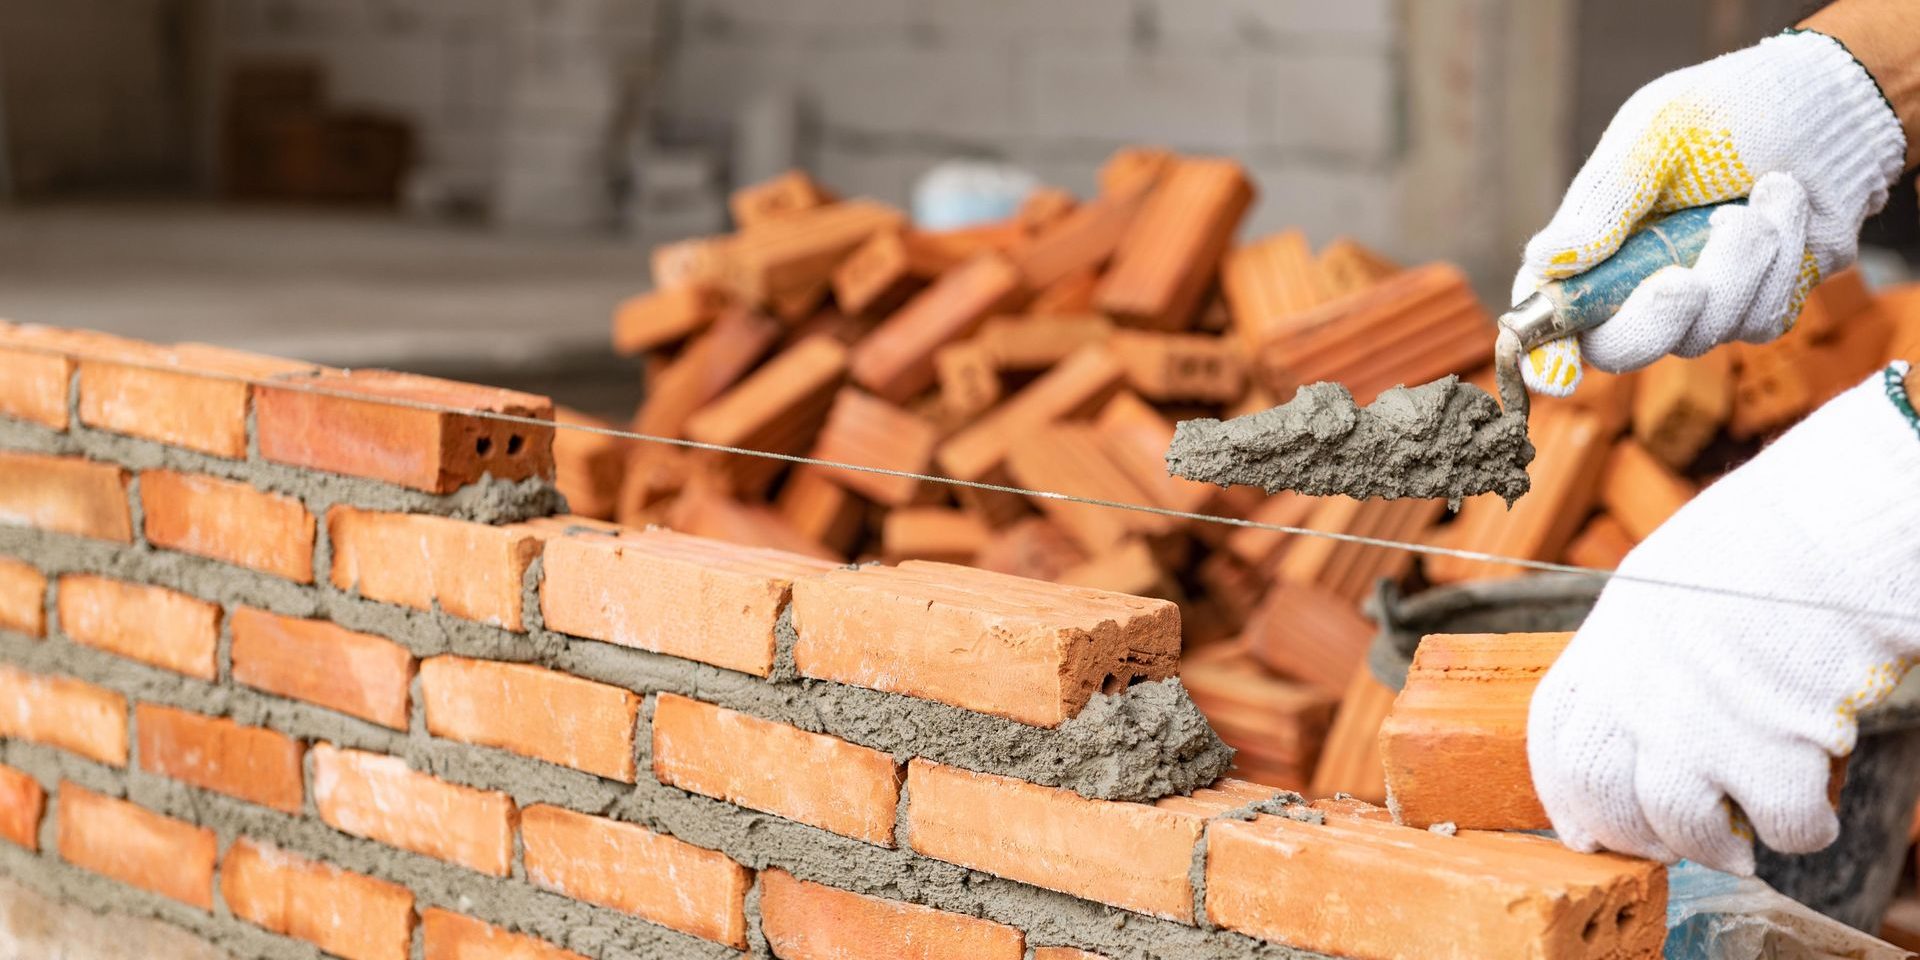
Inspect the mortar joints between the bricks for any gaps, crumbling, or signs of erosion. Damaged mortar can compromise the structural integrity of the chimney and allow moisture to penetrate the masonry, leading to further deterioration over time. If you notice deteriorating mortar, it may be necessary to repoint these areas before applying the sealant.
Chimney Crown and Cap:
Examine the chimney crown and cap for any cracks, chips, or signs of wear. The crown, located at the very top of the chimney, plays a critical role in preventing water from seeping into the masonry below. Any damage to the crown or cap should be addressed promptly to prevent water infiltration and potential structural issues.
Flashing and Seals:
Check the flashing, which is the metal or waterproof material installed to prevent water from entering the joint between the chimney and the roof. Ensure that the flashing is intact and properly sealed to prevent leaks. Additionally, inspect any seals around vents or other protrusions on the chimney for signs of wear or damage.
Read more: How To Build A Brick Chimney
Interior Inspection:
If accessible, inspect the interior of the chimney for any signs of water damage, such as staining or efflorescence. Use a flashlight to illuminate the interior and carefully examine the walls for cracks, spalling, or other indications of structural compromise.
By conducting a comprehensive inspection of the chimney, you can identify and address any existing damage or vulnerabilities before proceeding with the sealing process. This proactive approach will help mitigate potential issues and ensure that the sealant can effectively protect the chimney, preserving its structural integrity and aesthetic appeal for years to come.
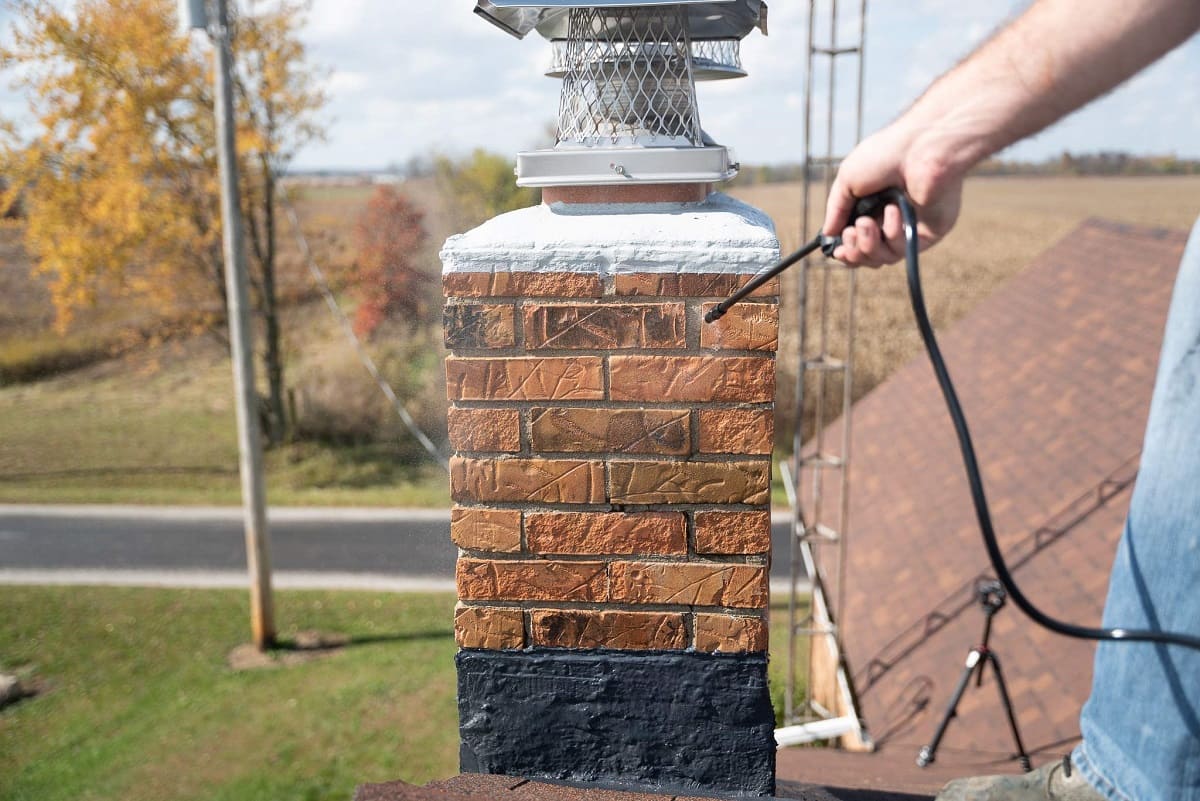
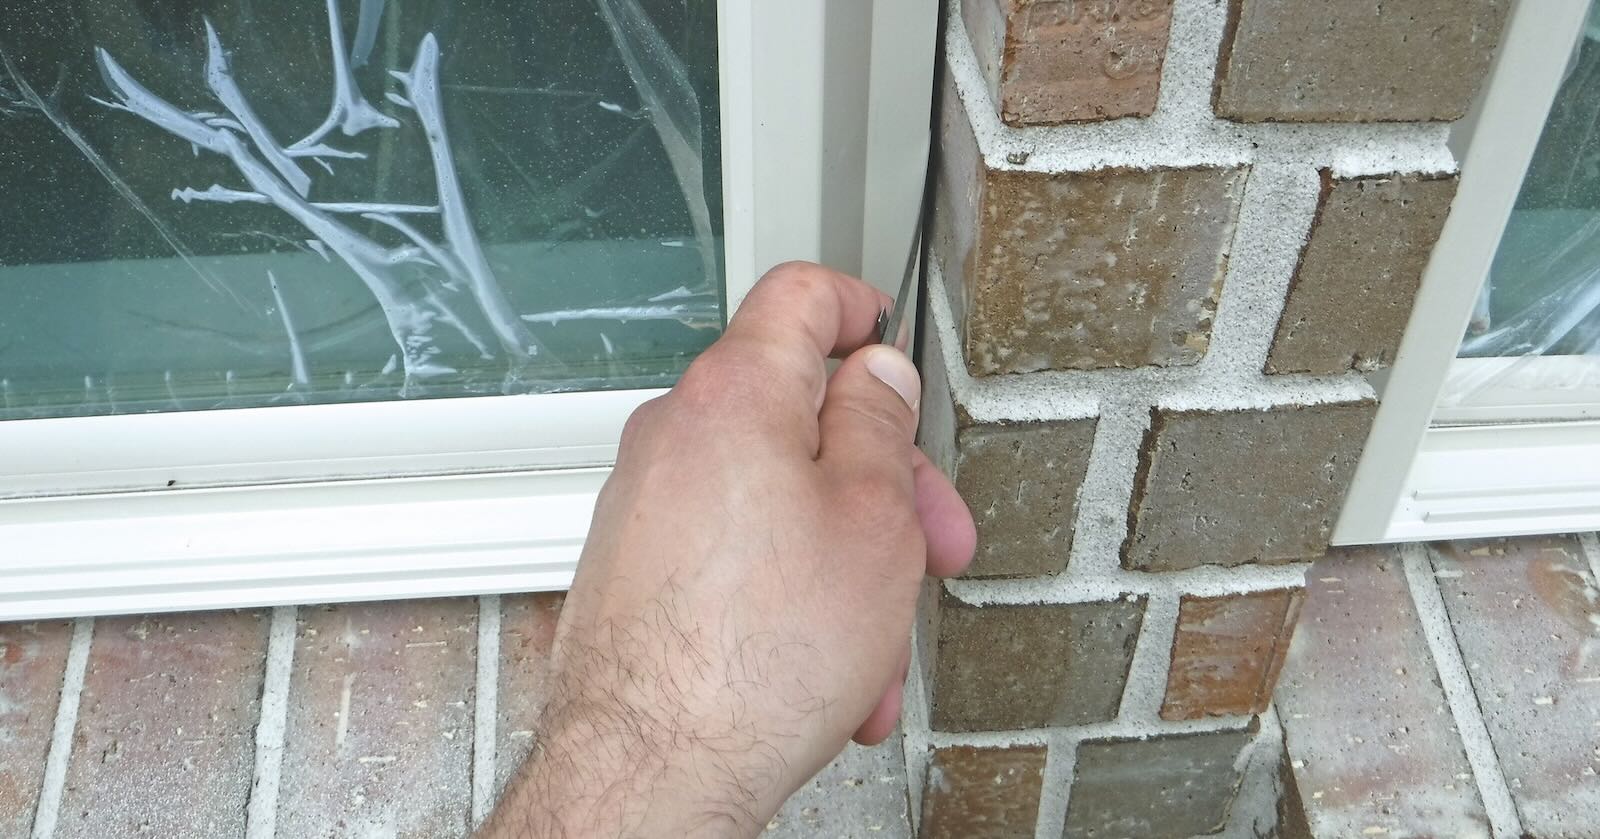
Step 4: Apply the sealant
With the chimney cleaned and any necessary repairs completed, it's time to apply the sealant to protect the brick surface from moisture and environmental damage. Before starting the application process, ensure that the weather conditions are suitable for sealing, avoiding extreme temperatures and precipitation. Here's a detailed guide on how to effectively apply the sealant to your brick chimney:
Select the Appropriate Sealant:
Choose a high-quality chimney sealant that is specifically formulated for masonry surfaces. Consider factors such as waterproofing capabilities, UV resistance, and breathability to ensure long-lasting protection. It's advisable to opt for a breathable sealant that allows moisture to escape from the bricks while preventing water penetration from the exterior.
Prepare the Sealant and Tools:
Carefully read and follow the manufacturer's instructions for preparing the sealant. Use a stir stick to thoroughly mix the sealant in its container, ensuring uniform consistency. Depending on the type of sealant, you may need a brush, roller, or sprayer for application. Select the appropriate tools based on the size and accessibility of your chimney.
Read more: How To Seal A Brick Patio
Begin the Application:
Start by applying the sealant to the mortar joints using a brush or small roller, ensuring even coverage and penetration into the porous mortar. Pay close attention to areas where the mortar shows signs of deterioration or cracking, as these areas require additional protection. Work methodically from the top of the chimney downwards, maintaining a consistent application rate.
Coat the Brick Surface:
Once the mortar joints are sealed, proceed to coat the entire brick surface with the sealant. Use a brush or roller to apply the sealant in overlapping strokes, ensuring comprehensive coverage. Work in manageable sections to maintain control over the application process and prevent the sealant from drying prematurely.
Address Excess Sealant:
Be mindful of excess sealant that may accumulate in crevices or on the chimney surface. Use a clean brush or roller to distribute any pooled sealant evenly, preventing unsightly drips or runs. Thoroughly inspect the chimney as you work to identify and address any areas where excess sealant may compromise the aesthetics or functionality of the seal.
Allow Sufficient Drying Time:
After completing the sealant application, allow the chimney to dry according to the manufacturer's recommendations. This drying period is essential for the sealant to cure and form a protective barrier against moisture and environmental elements. Avoid any contact with the sealed surface during the drying process to prevent disruptions or blemishes.
By following these detailed steps, you can effectively apply the sealant to your brick chimney, fortifying it against the damaging effects of water and weathering. This proactive measure ensures that your chimney remains resilient and visually appealing, contributing to the overall integrity and beauty of your home's exterior.
Read more: How To Seal Brick Pavers
Step 5: Allow the sealant to dry
Once the sealant has been meticulously applied to the brick chimney, it is imperative to allow for a sufficient drying period to ensure optimal adhesion and long-term effectiveness. The drying process is a critical phase that directly impacts the sealant's ability to form a durable protective barrier against moisture and environmental elements. Here's a detailed overview of the essential considerations and best practices for allowing the sealant to dry effectively:
Follow Manufacturer's Recommendations:
Refer to the manufacturer's guidelines and product specifications to determine the recommended drying time for the sealant. Different sealants may have varying curing periods, influenced by factors such as temperature, humidity, and application thickness. Adhering to the manufacturer's instructions is crucial to achieve the desired protective properties and durability of the sealant.
Weather Conditions:
Take into account the prevailing weather conditions when allowing the sealant to dry. Ideally, choose a period with mild temperatures and low humidity to facilitate optimal drying. Avoid scheduling the sealing process during periods of extreme heat, direct sunlight, or inclement weather, as these conditions can impede the proper curing of the sealant.
Prevent Contact and Disturbance:
During the drying period, it is essential to prevent any contact with the sealed chimney surface. Avoid leaning ladders against the chimney, touching the sealant, or allowing debris to come into contact with the freshly applied coating. Additionally, refrain from any activities that may cause disturbances, such as nearby construction work or landscaping activities that could generate dust or debris.
Read more: How To Repair Brick Chimney
Monitor Drying Progress:
Regularly inspect the sealed chimney surface to monitor the drying progress. Look for any areas where the sealant appears wet or tacky, as these sections may require additional time to cure. Patience is key during this phase, as rushing the drying process can compromise the integrity of the sealant and its ability to provide long-lasting protection.
Post-Drying Inspection:
Once the sealant has fully dried according to the manufacturer's recommendations, conduct a thorough inspection of the chimney surface. Verify that the sealant has formed a uniform and durable coating, free from any imperfections or areas of incomplete coverage. Address any concerns promptly to ensure the integrity and effectiveness of the sealed surface.
By allowing the sealant to dry methodically and attentively, you are safeguarding your brick chimney against moisture intrusion and environmental degradation. This patient and meticulous approach contributes to the overall resilience and longevity of your chimney, ensuring that it remains a steadfast and visually appealing element of your home's exterior.
Conclusion
In conclusion, the process of sealing a brick chimney is a vital aspect of home maintenance that offers numerous benefits, ranging from structural protection to aesthetic enhancement. By following the comprehensive steps outlined in this guide, homeowners can effectively safeguard their chimneys against moisture intrusion, weathering, and deterioration, ultimately prolonging the lifespan of this prominent architectural feature.
Sealing a brick chimney begins with the meticulous gathering of necessary materials, ensuring that the project proceeds smoothly without interruptions. The subsequent step of cleaning the chimney is essential for preparing the surface, removing dirt, grime, and contaminants that could compromise the adhesion of the sealant. Thorough inspection for any damage is a critical phase that allows homeowners to identify and address potential vulnerabilities before applying the sealant, ensuring the structural integrity of the chimney.
The application of the sealant itself is a pivotal stage, requiring careful consideration of the type of sealant, proper preparation, and methodical application to achieve comprehensive coverage. Allowing the sealant to dry thoroughly is equally crucial, as it directly impacts the effectiveness and durability of the protective barrier formed on the chimney surface.
By diligently following these steps and best practices, homeowners can fortify their brick chimneys against the detrimental effects of moisture, environmental elements, and aging. This proactive approach not only contributes to the longevity and resilience of the chimney but also enhances the overall visual appeal of the home's exterior, creating a lasting impression.
In essence, the process of sealing a brick chimney is a testament to the commitment to home maintenance and preservation. By investing time and effort into this essential task, homeowners can enjoy the peace of mind that comes with knowing their chimney is well-protected and poised to withstand the test of time. Whether it's preserving the structural integrity, preventing water damage, or enhancing the curb appeal, sealing a brick chimney is a worthwhile endeavor that pays dividends in the form of a secure, durable, and visually appealing home feature.
Frequently Asked Questions about How To Seal A Brick Chimney
Was this page helpful?
At Storables.com, we guarantee accurate and reliable information. Our content, validated by Expert Board Contributors, is crafted following stringent Editorial Policies. We're committed to providing you with well-researched, expert-backed insights for all your informational needs.


0 thoughts on “How To Seal A Brick Chimney”