Home>Articles>How To Balance Your Ceiling Fan So It Doesn’t Rattle And Wobble
Articles
How To Balance Your Ceiling Fan So It Doesn’t Rattle And Wobble
Modified: December 7, 2023
Learn how to balance your ceiling fan to eliminate rattling and wobbling with these helpful articles and easy DIY tips.
(Many of the links in this article redirect to a specific reviewed product. Your purchase of these products through affiliate links helps to generate commission for Storables.com, at no extra cost. Learn more)
Introduction
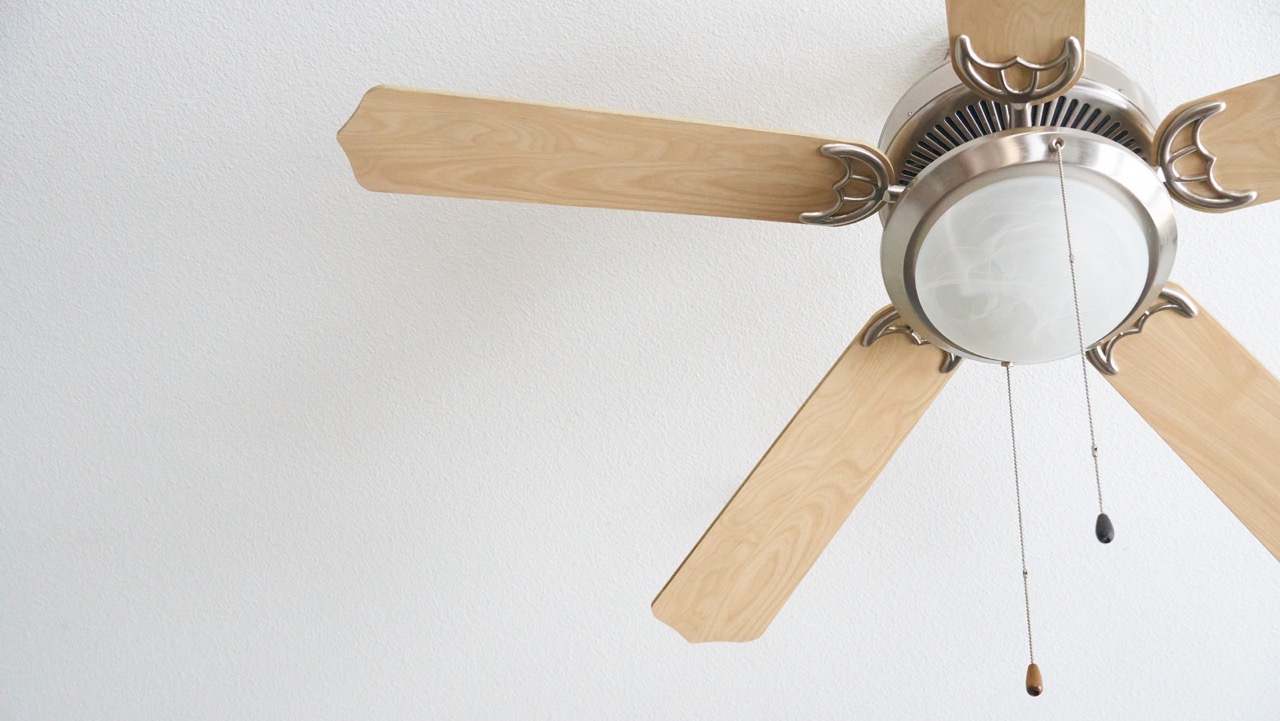
Ceiling fans are a valuable addition to any home, offering both comfort and energy efficiency. However, if your ceiling fan starts to rattle and wobble, it can quickly become an annoyance. Not only is the noise distracting, but the shaking motion can also be a safety hazard. A properly balanced ceiling fan not only ensures smooth and silent operation but also prolongs the lifespan of your fan.
In this article, we will guide you through the process of balancing your ceiling fan to eliminate any rattling or wobbling. You don’t need to be an expert handyman to accomplish this task; with a few simple tools and steps, you can easily restore harmony to your fan.
Before we dive into the practical steps, let’s take a closer look at why it’s important to balance your ceiling fan.
Key Takeaways:
- Balancing your ceiling fan is crucial for energy efficiency, prolonged fan life, safety, and noise reduction. Follow the simple steps outlined to eliminate rattling and wobbling, creating a peaceful and comfortable environment in your home.
- By using a ceiling fan balancing kit and conducting thorough testing, you can achieve optimal fan performance. Regular maintenance and periodic checks will ensure continued smooth operation, maximizing comfort throughout the seasons.
Read more: How To Fix A Wobbly Ceiling Fan
Understanding the Importance of Balancing Your Ceiling Fan
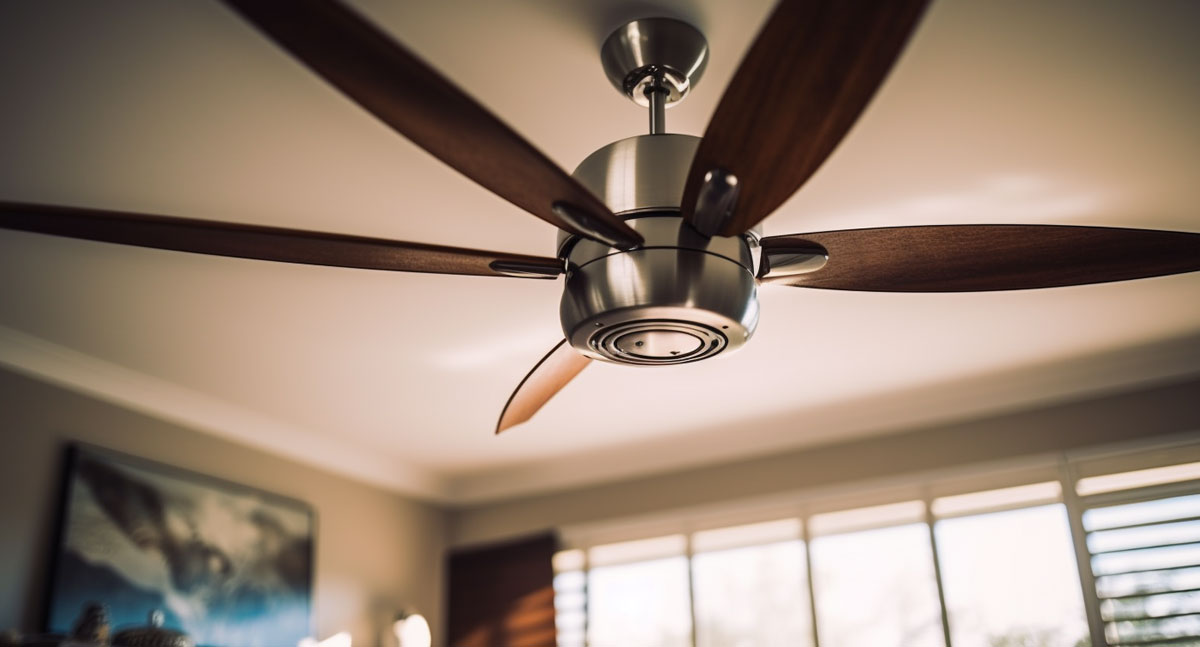
When a ceiling fan is properly balanced, it operates smoothly and quietly, creating a comfortable and peaceful environment in your home. On the other hand, an unbalanced fan can create annoying rattling noises and excessive vibrations that can be quite disruptive.
But beyond the annoyance factor, there are several other reasons why balancing your ceiling fan is important:
- Energy Efficiency: An imbalanced fan can lead to increased energy consumption. When the blades are not properly aligned, they do not move air efficiently, requiring the fan to work harder to achieve the desired airflow. By balancing your fan, you optimize its performance and reduce energy waste.
- Prolonged Fan Life: Excessive vibrations can put strain on the motor and other internal components of your ceiling fan, leading to premature wear and tear. Balancing the fan reduces stress on these components, helping to extend the lifespan of your fan.
- Safety: A wobbling fan is a safety hazard. If left unattended, it can potentially detach from the ceiling or cause the blades to collide with other objects. Balancing the fan ensures that it operates securely and eliminates any potential risks.
- Noise Reduction: A balanced ceiling fan operates silently, allowing you to enjoy the gentle breeze without any distracting rattling or humming sounds. This is especially important if you use your fan in bedrooms or other quiet areas of your home.
Now that you understand the importance of balancing your ceiling fan, let’s move on to the tools and materials you’ll need for the task.
Tools and Materials Needed
Before you begin the process of balancing your ceiling fan, gather the necessary tools and materials to ensure a smooth and efficient task completion. Here’s a list of what you will need:
- Screwdriver: A screwdriver is essential for removing and tightening screws that hold the fan blades in place. Make sure you have both a flathead and a Phillips-head screwdriver to accommodate different types of screws.
- Ceiling Fan Balancing Kit: This kit typically includes a balancing clip and self-adhesive weights. It is specifically designed to balance ceiling fans and can be easily found at hardware or home improvement stores. The clip attaches to the fan blades, while the weights can be adjusted to counterbalance any unevenness.
- Cleaning Supplies: Before you start balancing, it’s a good idea to clean the fan blades and housing to remove any dust or debris. Grab a microfiber cloth or a soft sponge, along with some mild soap or a cleaning solution suitable for your fan’s material.
- Ladder or Step Stool: Depending on the height of your ceiling, you may need a ladder or step stool to safely access the fan. Ensure that the ladder or step stool is sturdy and secure before climbing.
- Level: A small bubble level will come in handy to ensure proper alignment and balance of the fan. This will help you determine if the adjustments you make are effective.
With these tools and materials ready, you are well-prepared to tackle the task of balancing your ceiling fan. In the next section, we’ll guide you through the step-by-step process of balancing your fan for optimal performance.
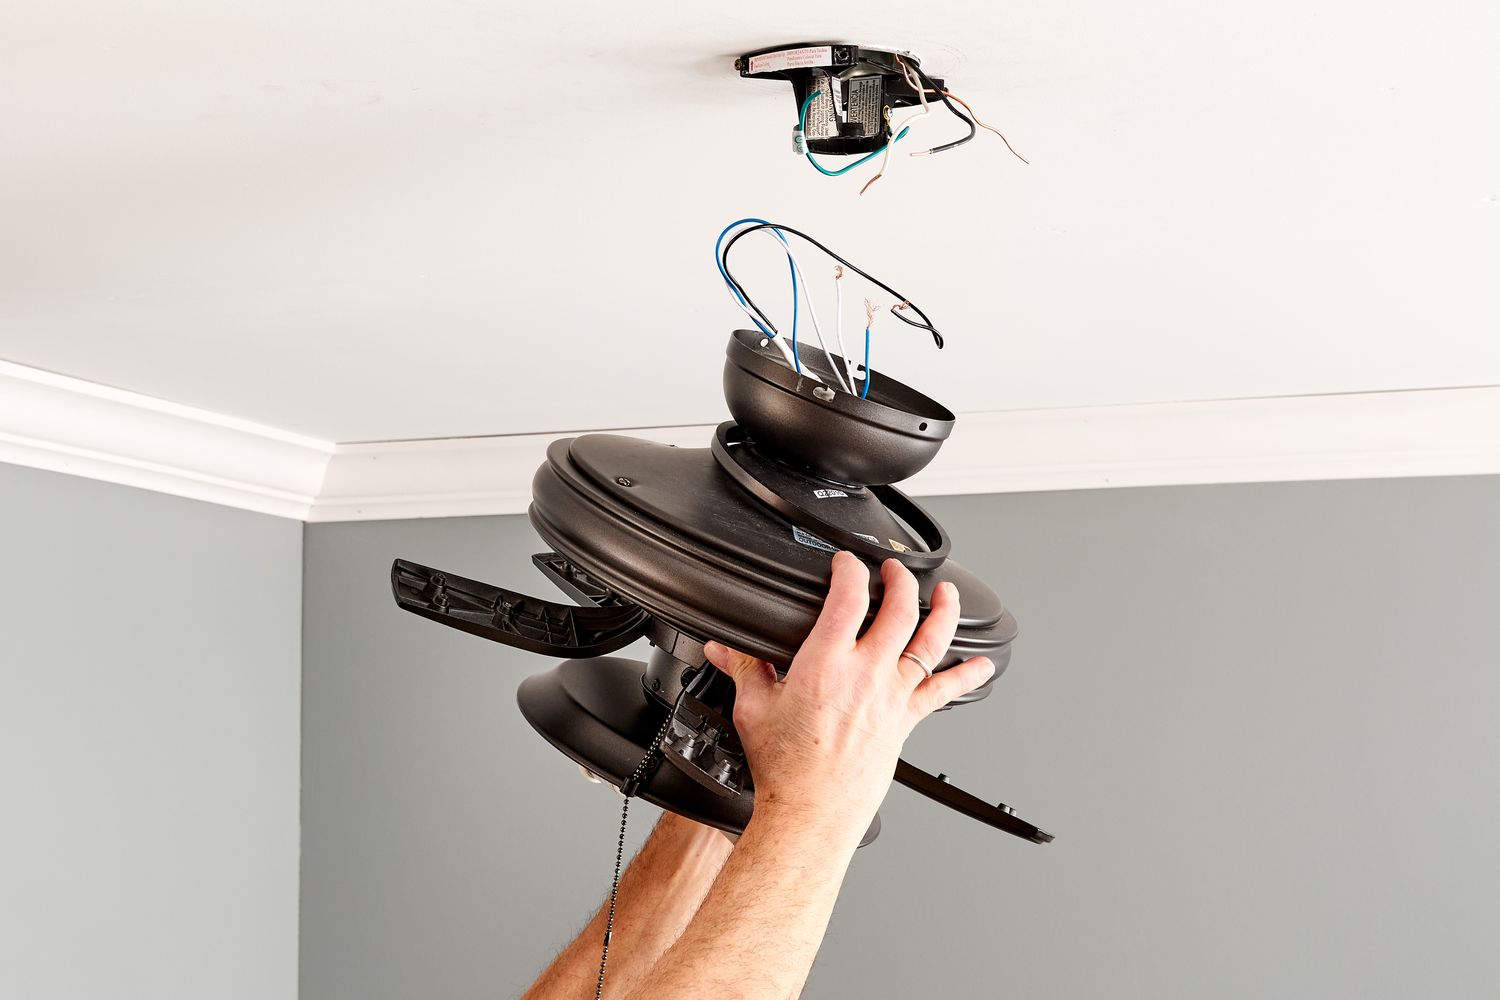
Step 1: Turn Off the Fan and Remove the Blades
Before you begin the process of balancing your ceiling fan, it is crucial to ensure your safety by turning off the fan completely. Locate the fan’s wall switch or use the remote control to power it off. Additionally, switch off the circuit breaker that supplies electricity to the fan to eliminate any risk of accidental activation.
Once the fan is turned off and you’ve confirmed that it is no longer receiving power, you can proceed to remove the blades. Most ceiling fans have blade attachments that can be easily undone using a screwdriver. Carefully unscrew each blade, keeping track of the screws to avoid misplacing them.
As you remove the blades, take note of their positioning and orientation. It’s important to reinstall them in the correct order later on. To ease the process, you can mark each blade with a small piece of tape and label it accordingly.
With all the blades removed, set them aside in a safe and secure location. This will allow you to clean them properly and make any necessary adjustments without obstruction.
Once you have completed these steps, you are ready to move on to the next phase: cleaning the blades and fan housing.
Step 2: Clean the Blades and Fan Housing
Now that the blades have been removed, it’s a good opportunity to give them a thorough cleaning. Over time, dust and debris can accumulate on the blades, affecting their balance and performance. Cleaning them will not only improve their appearance but also ensure optimal airflow.
Start by preparing a solution of mild soap or a suitable cleaning solution and warm water in a bucket or sink. Dip a microfiber cloth or a soft sponge into the solution, wring out any excess liquid, and gently wipe down each blade. Make sure to clean both sides of the blades and pay attention to any stubborn stains or dirt buildup. Avoid using harsh abrasive cleaners or soaking the blades, as this may damage the finish or weaken the material.
Once you’ve cleaned the fan blades, it’s time to focus on the fan housing. Use the same cleaning solution to wipe down the motor housing, canopy, and any other visible surfaces. Be cautious not to wet any electrical components and ensure that everything is completely dry before proceeding to the next step.
By cleaning the blades and fan housing, you eliminate any potential sources of imbalance caused by dirt or debris. This step not only helps with the overall performance of the fan but also ensures a cleaner and healthier environment in your home.
With the blades and fan housing now sparkling clean, you’re ready to move on to the next step: checking for loose screws and tightening them.
Use a balancing kit to adjust the weight of the fan blades. Start by turning off the fan and cleaning the blades. Then, use the balancing clips or weights provided in the kit to adjust the balance of each blade until the fan runs smoothly.
Read more: How To Stop A Fan From Wobbling
Step 3: Check for Loose Screws and Tighten Them
Once the blades and fan housing are cleaned, it’s important to inspect the fan for any loose screws or fittings. Over time, the constant vibration and movement of the fan can cause screws to become loose, which can contribute to imbalance and noise.
To start, visually inspect the fan’s motor housing, blade brackets, and any other visible components. Look for any screws that appear loose or visibly out of place. Take note of their location so you can focus on them during the tightening process.
Using a screwdriver, carefully tighten any loose screws or fittings that you identified during the visual inspection. Make sure not to overtighten, as this can cause damage to the fan or strip the screws. Use a gentle and steady hand to secure the screws firmly in place.
Some fans have a decorative cap or cover that hides the screws connecting the blade brackets to the motor housing. If your fan has such a cover, carefully remove it to access the screws. Once tightened, reattach the decorative cover.
After tightening all the screws and fittings, give the fan a gentle shake to see if there is any remaining looseness. If you notice any wobbling or rattling, revisit the areas where you tightened the screws and ensure they are snugly secured.
With the screws tightened, you have taken an important step in correcting any potential imbalances in your ceiling fan. Next, we will move on to using a balancing kit to further improve the fan’s equilibrium.
Step 4: Use a Balancing Kit
To achieve optimal balance, you can utilize a ceiling fan balancing kit. These kits are readily available at hardware or home improvement stores and are specifically designed to help eliminate any remaining wobbling or rattling in your fan.
Begin by attaching the balancing clip provided in the kit to one of the fan blades. Position the clip on the top side of the blade, close to the base but not directly on it. Ensure that the clip is securely attached.
Once the balancing clip is in place, turn on the fan to its lowest setting. Observe the fan blades as they rotate and note if the clip causes any additional imbalance. If the fan becomes more unbalanced, adjust the position of the clip slightly until you find the optimal placement that reduces wobbling.
If the clip alone does not fully resolve the imbalance, you can opt to use the self-adhesive weights included in the kit. These small weights can be applied to the blade opposite to the balancing clip. Attach the weight near the center of the blade, ensuring that it is firmly secured.
Once the weight is attached, turn on the fan and observe if the wobbling and rattling have significantly reduced. If necessary, you can experiment by adding or removing weights and adjusting their position until the fan operates smoothly and quietly.
Remember, the aim is to achieve an even distribution of weight among the blades, which will help eliminate any imbalances and minimize vibrations. Take your time to make small adjustments and test the fan’s performance after each modification.
Now that you have used the balancing kit to improve the fan’s equilibrium, it’s time to move on to testing the fan for any remaining issues.
Step 5: Test the Fan for Any Remaining Issues
After balancing the fan blades and making necessary adjustments, it’s important to thoroughly test the fan to ensure that all the steps you’ve taken have successfully resolved the rattling and wobbling issues.
Begin by turning on the fan to its lowest setting. Observe the fan’s operation closely, paying attention to any signs of wobbling or unusual noises. If the fan remains stable without any rattling sounds, gradually increase the speed to higher settings, taking note of any changes in its performance.
If you notice any persistent wobbling or hear unusual noises, it may indicate that further adjustments are needed. You can repeat the steps in the previous sections, checking for loose screws, tightening connections, and readjusting the balancing clip or weights as necessary.
It’s also a good idea to use a level during the testing process. Place the level on top of the fan housing to ensure that it is perfectly horizontal. If the level indicates any tilt or imbalance, make additional adjustments until the fan is properly aligned.
Continue testing and making minor tweaks until you are satisfied with the fan’s operation. Remember, achieving perfect balance may require some patience and experimentation.
Once you are confident that the fan is operating smoothly, quietly, and without any wobbling or rattling, you can proceed to the final step: reinstalling the blades.
Step 6: Reinstall the Blades and Test Again
Now that you have successfully balanced and tested the fan, it’s time to reattach the blades to their original positions. Follow the markings or labels you made earlier to ensure that each blade is installed in the correct orientation.
Using a screwdriver, carefully attach each blade to its corresponding bracket, making sure to tighten the screws securely. Check each blade individually to ensure that it is firmly attached and does not wobble when gently pulled or pushed.
Once all the blades are reinstalled, give the fan a final inspection. Check for any visible signs of misalignment or loose screws. Make any necessary adjustments to ensure that everything is secure and properly aligned.
After reattaching the blades, it’s essential to test the fan one more time to ensure that the balancing and installation procedures were successful. Turn on the fan and observe its operation at different speeds. Listen for any unusual noises or vibrations and monitor for any signs of wobbling or imbalance.
If you notice any persisting issues, double-check the tightness of the screws, reposition the balancing clip or weights if needed, and make any other necessary adjustments.
By retesting the fan after reinstalling the blades, you can confirm that the balancing efforts have been effective and that the fan is now operating smoothly and quietly.
Congratulations! You have successfully balanced your ceiling fan, eliminating any rattling and wobbling issues. Not only will this provide a more comfortable and enjoyable airflow in your space, but it will also enhance the overall lifespan and performance of your fan.
Remember to occasionally check and maintain the balance of your ceiling fan as part of regular home maintenance. This will ensure that it continues to operate optimally and provide you with years of comfort.
With the completion of these steps, you can now enjoy the benefits of a perfectly balanced ceiling fan in your home!
Thank you for following this guide, and we hope it has been helpful in balancing your ceiling fan.
Read more: How A Ceiling Fan Works
Conclusion
Having a well-balanced ceiling fan is essential for optimal performance, energy efficiency, and a peaceful environment in your home. By following the steps outlined in this guide, you can easily eliminate any rattling or wobbling issues that may be plaguing your fan.
Start by turning off the fan and removing the blades to access the necessary components. Clean the blades and fan housing to remove any dirt or debris that may be affecting the balance. Check for loose screws and tighten them to ensure the fan is secure.
Next, use a ceiling fan balancing kit to further improve equilibrium. Attach the balancing clip and adjust its position until the wobbling is minimized. If needed, apply self-adhesive weights to counterbalance any remaining unevenness.
After making these adjustments, thoroughly test the fan for any remaining issues. Gradually increase the speed and observe the fan’s operation for any signs of wobbling, rattling, or unusual noises. Make additional tweaks if necessary to achieve smooth and quiet operation.
Once you’re satisfied with the fan’s performance, carefully reinstall the blades and ensure they are securely tightened. Test the fan once again to confirm that the balancing and installation procedures were successful.
By taking the time to balance your ceiling fan, you not only improve its functionality and energy efficiency but also enhance its longevity. A balanced fan operates silently, providing a soothing breeze without any distractions or safety concerns.
Remember to periodically check and maintain the balance of your ceiling fan as part of your regular home maintenance routine. This will help ensure its continued smooth operation and maximize your comfort throughout the seasons.
Thank you for following this guide on how to balance your ceiling fan. We hope it has been helpful and that you can now enjoy the benefits of a perfectly balanced fan in your home!
Frequently Asked Questions about How To Balance Your Ceiling Fan So It Doesn't Rattle And Wobble
Was this page helpful?
At Storables.com, we guarantee accurate and reliable information. Our content, validated by Expert Board Contributors, is crafted following stringent Editorial Policies. We're committed to providing you with well-researched, expert-backed insights for all your informational needs.


0 thoughts on “How To Balance Your Ceiling Fan So It Doesn’t Rattle And Wobble”