Articles
How To Lubricate A Ceiling Fan
Modified: September 2, 2024
Learn how to properly lubricate your ceiling fan with this step-by-step guide. Find expert articles and tips for a smooth and quiet fan operation.
(Many of the links in this article redirect to a specific reviewed product. Your purchase of these products through affiliate links helps to generate commission for Storables.com, at no extra cost. Learn more)
How To Lubricate A Ceiling Fan
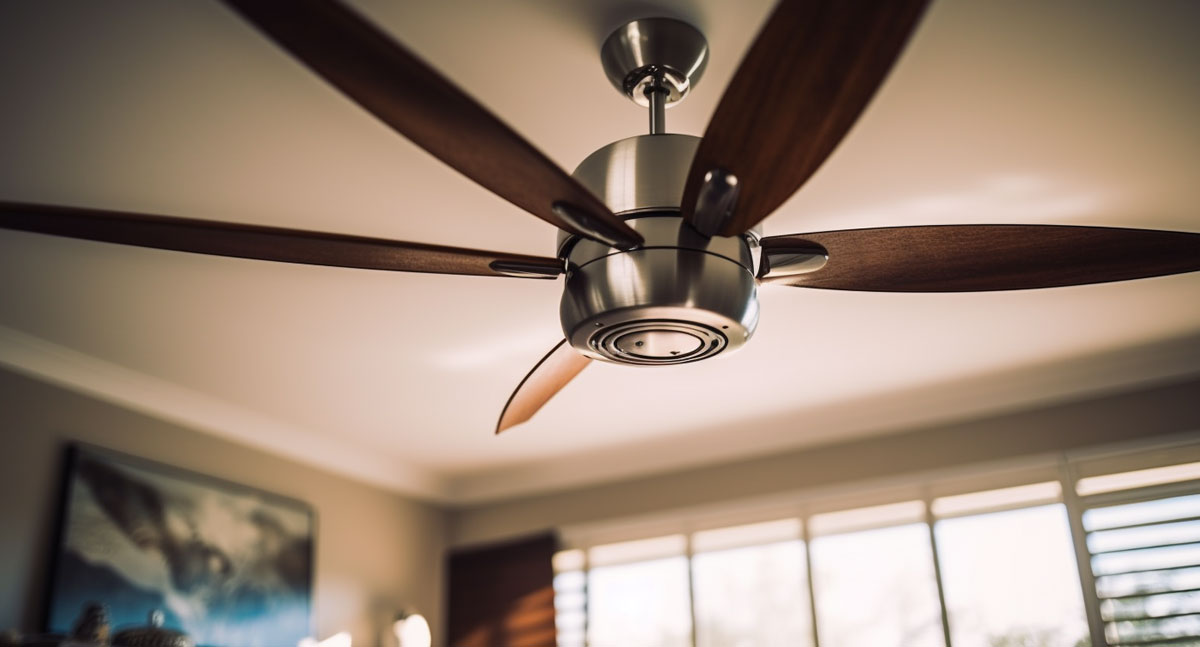
Ceiling fans are a common fixture in many homes and provide much-needed relief during hot summer months. However, over time, the moving parts of a ceiling fan can become stiff and noisy due to lack of lubrication. Regular lubrication not only helps to keep the fan operating smoothly and quietly but also prolongs its lifespan. In this article, we will guide you through the process of lubricating a ceiling fan to ensure optimal performance.
Read more: How To Lubricate Fan Motor
Step 1: Gathering Supplies
Before you begin, gather the necessary supplies for the job. You will need a ladder or step stool, a screwdriver or Allen wrench (depending on your fan’s design), and the appropriate lubricant. It is important to use the correct lubricant to prevent damage to the fan and ensure effective lubrication. You can purchase ceiling fan lubricant at your local home improvement store or online.
Step 2: Turning Off the Power
Safety should always be a priority when working with electrical appliances. Before starting the lubrication process, turn off the power to the fan at the circuit breaker. This will prevent any accidental movement of the fan during the lubrication process and reduce the risk of electric shock.
Step 3: Accessing the Fan
To access the fan’s moving parts, remove any light fixtures or decorative elements that may be blocking your way. Depending on the design of your ceiling fan, you may need to unscrew a cap or remove a decorative cover. Take note of the fan’s construction and the location of the motor housing, as this is where the lubrication points are usually found.
Step 4: Applying the Lubricant
Once you have accessed the motor housing, locate the lubrication points. These are small openings typically labeled “oil” or “lubrication.” Follow the manufacturer’s instructions on the type and amount of lubricant to use. Some fans require a few drops of oil, while others may require a specific lubrication spray. Apply the lubricant to each lubrication point, being careful not to over-lubricate.
Read more: How To Lubricate A Bathroom Exhaust Fan
Step 5: Testing the Fan
After you have applied the lubricant, manually spin the fan blades a few times to distribute the lubricant evenly. Listen for any unusual noises or resistance, as this could indicate that additional lubrication is needed or that there is another issue with the fan. Adjust the fan’s speed and settings as necessary to ensure smooth operation.
Step 6: Cleaning Up
Before finishing, remove any excess lubricant from the fan’s surfaces using a soft cloth or paper towel. It is also a good idea to clean the fan blades to remove dust or debris that may have accumulated. Once the fan is clean, reattach any fixtures or decorative elements that were removed earlier.
Regular maintenance of your ceiling fan, including lubrication, can help prolong its lifespan and ensure optimal performance. It is recommended to lubricate your fan at least once a year or more frequently if the fan is heavily used. By following these steps and taking the necessary precautions, you can keep your ceiling fan running smoothly and quietly for years to come.
Remember to always refer to the manufacturer’s instructions for your specific ceiling fan model and consult a professional if you encounter any issues or difficulties during the lubrication process. Stay safe and enjoy the cool breeze provided by your well-maintained ceiling fan!
Key Takeaways:
- Regular lubrication of your ceiling fan is essential for smooth, quiet operation and prolonged lifespan. Follow safety precautions, use the correct lubricant, and test the fan after lubrication for optimal performance.
- Proper maintenance and lubrication of your ceiling fan contribute to energy savings, efficient airflow, and a longer lifespan. Remember to schedule regular maintenance, select the right lubricant, and keep the fan clean for optimal performance.
Introduction: Importance of Lubricating a Ceiling Fan
Ceiling fans are a staple in many households, providing both relief from the sweltering heat and a stylish addition to any room. However, as with any mechanical device, ceiling fans require regular maintenance to ensure optimal performance and longevity. One crucial aspect of maintenance is lubricating the moving parts of the fan.
The importance of lubricating a ceiling fan cannot be overstated. Over time, dust, dirt, and humidity can accumulate in the bearings and other moving components, causing friction and reducing efficiency. This friction not only puts unwanted strain on the motor but can also result in annoying squeaks, wobbles, and vibrations.
Regular lubrication has several benefits. Firstly, it helps to reduce noise levels, restoring the whisper-quiet operation that ceiling fans are known for. By minimizing friction between the moving parts, lubrication allows the fan to rotate smoothly and without resistance, ensuring a peaceful and comfortable environment.
Secondly, lubricating your ceiling fan helps to maintain its overall performance. Lubrication prevents overheating of the motor and allows it to operate at its intended speed. A properly lubricated fan can circulate air more effectively, improving the ventilation in your space and providing a steady, cooling breeze.
Thirdly, lubrication plays a vital role in extending the lifespan of your ceiling fan. By reducing friction and wear on the moving parts, lubrication helps to prevent premature damage and breakdowns. A well-maintained fan can last for many years, saving you money on replacements and repairs.
Of course, as with any maintenance task, safety should be a top priority. Before starting the lubrication process, make sure to follow these safety precautions:
1. Turn off the power: Before working on your ceiling fan, always turn off the power at the circuit breaker to avoid the risk of electric shock.
2. Use proper equipment: Ensure you have a stable ladder or step stool to safely reach the fan. Use the appropriate tools, such as a screwdriver or Allen wrench, to remove any necessary parts.
3. Follow manufacturer guidelines: Each ceiling fan may have different lubrication points and requirements. Consult the user manual or manufacturer’s instructions to ensure you are using the correct lubricant and applying it in the right places.
4. Allow time for the fan to stop: After shutting off the power, wait for the fan to come to a complete stop before starting the lubrication process. This will prevent any accidental movement or injury.
By following these safety precautions and regularly lubricating your ceiling fan, you can enjoy its optimal performance, quiet operation, and extended lifespan. So, set aside some time for this simple maintenance task and reap the benefits of a well-lubricated, efficient, and long-lasting ceiling fan.
Step 1: Gathering Supplies
To properly lubricate your ceiling fan, you will need a few supplies. Gather the following items before you begin the lubrication process:
1. Ladder or Step Stool: A stable and sturdy ladder or step stool is essential for safely accessing your ceiling fan. Make sure it is the appropriate size and height for your ceiling and reach.
2. Screwdriver or Allen Wrench: Depending on the design of your ceiling fan, you may need a screwdriver or Allen wrench to remove any necessary parts, such as decorative covers or motor housing.
3. Lubricant: Choosing the correct lubricant is crucial for effective and safe lubrication. Use a lubricant specifically designed for ceiling fans or motors. Avoid using general-purpose oils or greases, as they may not be suitable for ceiling fan components. Look for lubricants that are labeled as safe for use on ceiling fans and offer long-lasting performance.
Using the correct lubricant is important for a few reasons. First, it ensures proper lubrication of the fan’s moving parts, reducing friction and maintaining smooth operation. Second, it helps to prevent damage to the fan by providing the necessary lubrication without causing excessive wear or buildup.
Where can you purchase the right lubricant for your ceiling fan? You can find specialized ceiling fan lubricants at your local home improvement stores, appliance stores, or electrical supply stores. Additionally, many online retailers offer a wide range of lubricants specifically designed for ceiling fans. When purchasing, check the product description or ask a sales representative to ensure that the lubricant is suitable for your particular fan model.
Remember, choosing the correct lubricant and using the right amount are essential for the maintenance and longevity of your ceiling fan. Investing in a high-quality lubricant will ensure that your fan operates smoothly and quietly while preventing unnecessary damage.
By gathering the necessary supplies, including a ladder or step stool, a screwdriver or Allen wrench, and the appropriate lubricant, you are ready to proceed with the lubrication process. Following the manufacturer’s guidelines and properly applying the lubricant will help keep your ceiling fan in optimal condition for continued enjoyment.
Read more: How A Ceiling Fan Works
Step 2: Turning Off the Power
Before you begin the lubrication process, it is crucial to ensure your safety by turning off the power to the ceiling fan. This step is essential and should never be skipped or taken lightly.
Turning off the power serves two important purposes. First and foremost, it eliminates the risk of electric shock while you work on the fan. Even though you may not be directly handling any wiring, accidents can happen, and it’s better to be safe than sorry. By disconnecting the power, you create a safe work environment for yourself.
Secondly, turning off the power prevents any accidental movement of the fan during the lubrication process. A spinning fan can pose a safety hazard, especially if you need to access the motor housing or other parts. By shutting off the power, you eliminate this risk and can work on the fan without any obstructions or potential injuries.
To turn off the power to the fan, follow these safety precautions:
1. Locate the correct circuit breaker: In your home’s electrical panel, identify the circuit breaker that controls the power supply to the ceiling fan. Look for labels or consult an electrician if needed. It is important to know that some fans may have their own dedicated circuit, while others may share a circuit with other lights or outlets.
2. Switch off the circuit breaker: Once you have identified the correct circuit breaker, switch it off by flipping it to the “off” position. You may need to turn off multiple breakers if the fan shares a circuit with other components.
3. Confirm power is off: Double-check that the power to the fan is truly off. Use a non-contact voltage tester or turn on the fan’s switches to ensure it doesn’t start moving. It’s always better to be cautious and verify that there is no electricity flowing to the fan.
Remember, safety should always be your top priority when working with electrical appliances. By turning off the power, you eliminate the risk of electric shock and prevent any accidental movement of the fan. Take the time to identify the correct circuit breaker and confirm that the power is off before proceeding with the lubrication process.
In the next step, we will learn how to access the fan safely and effectively for lubrication.
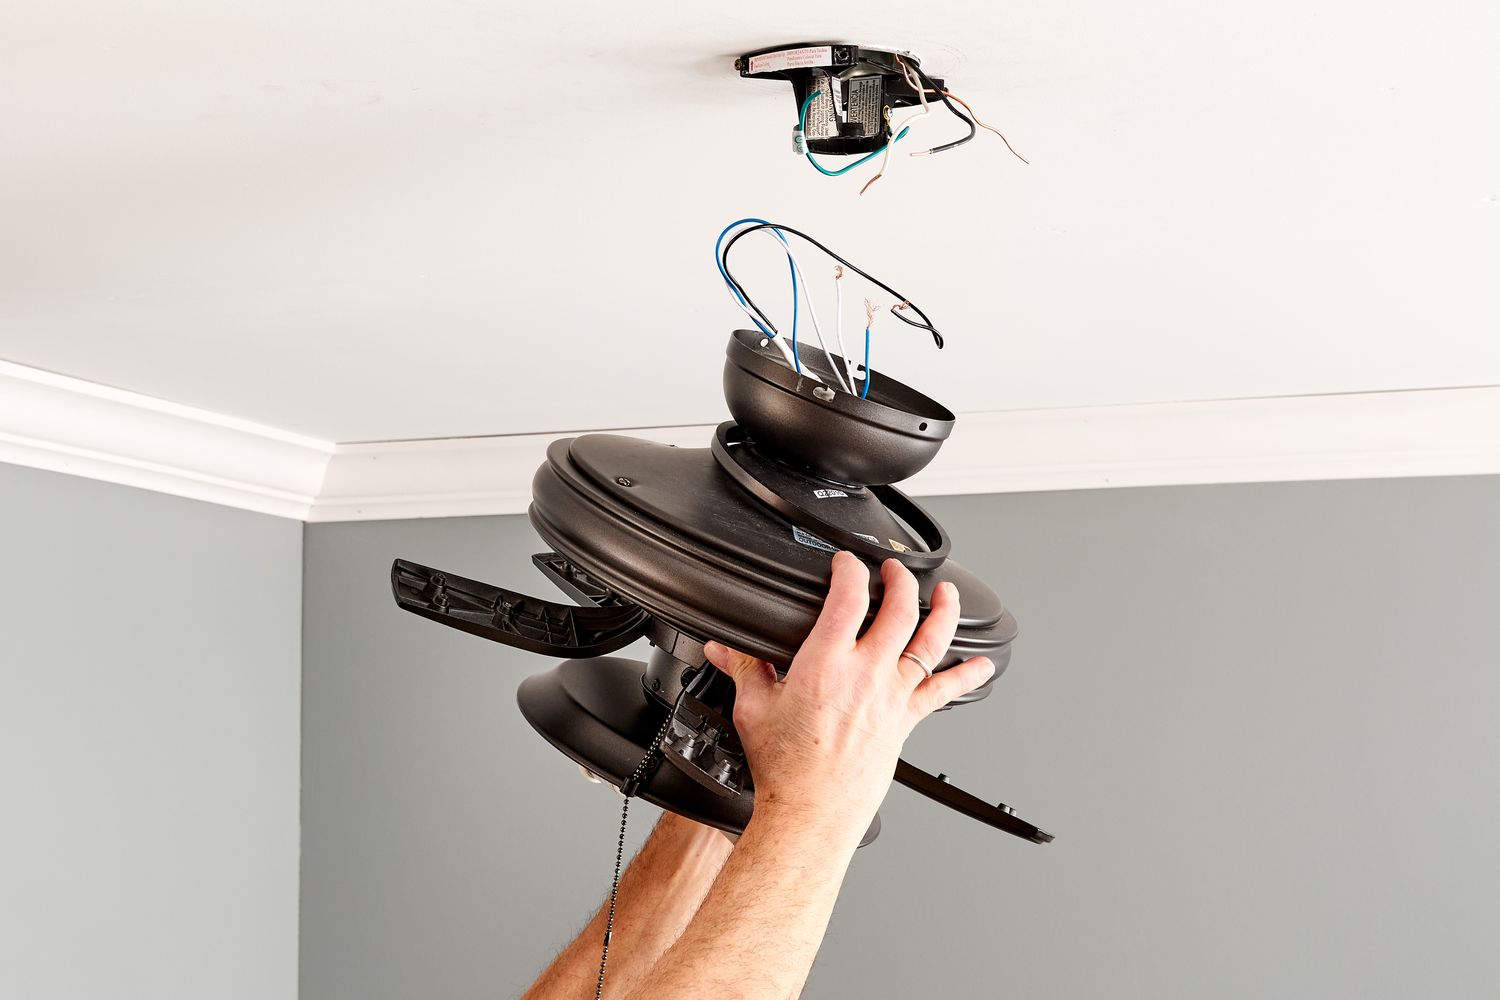
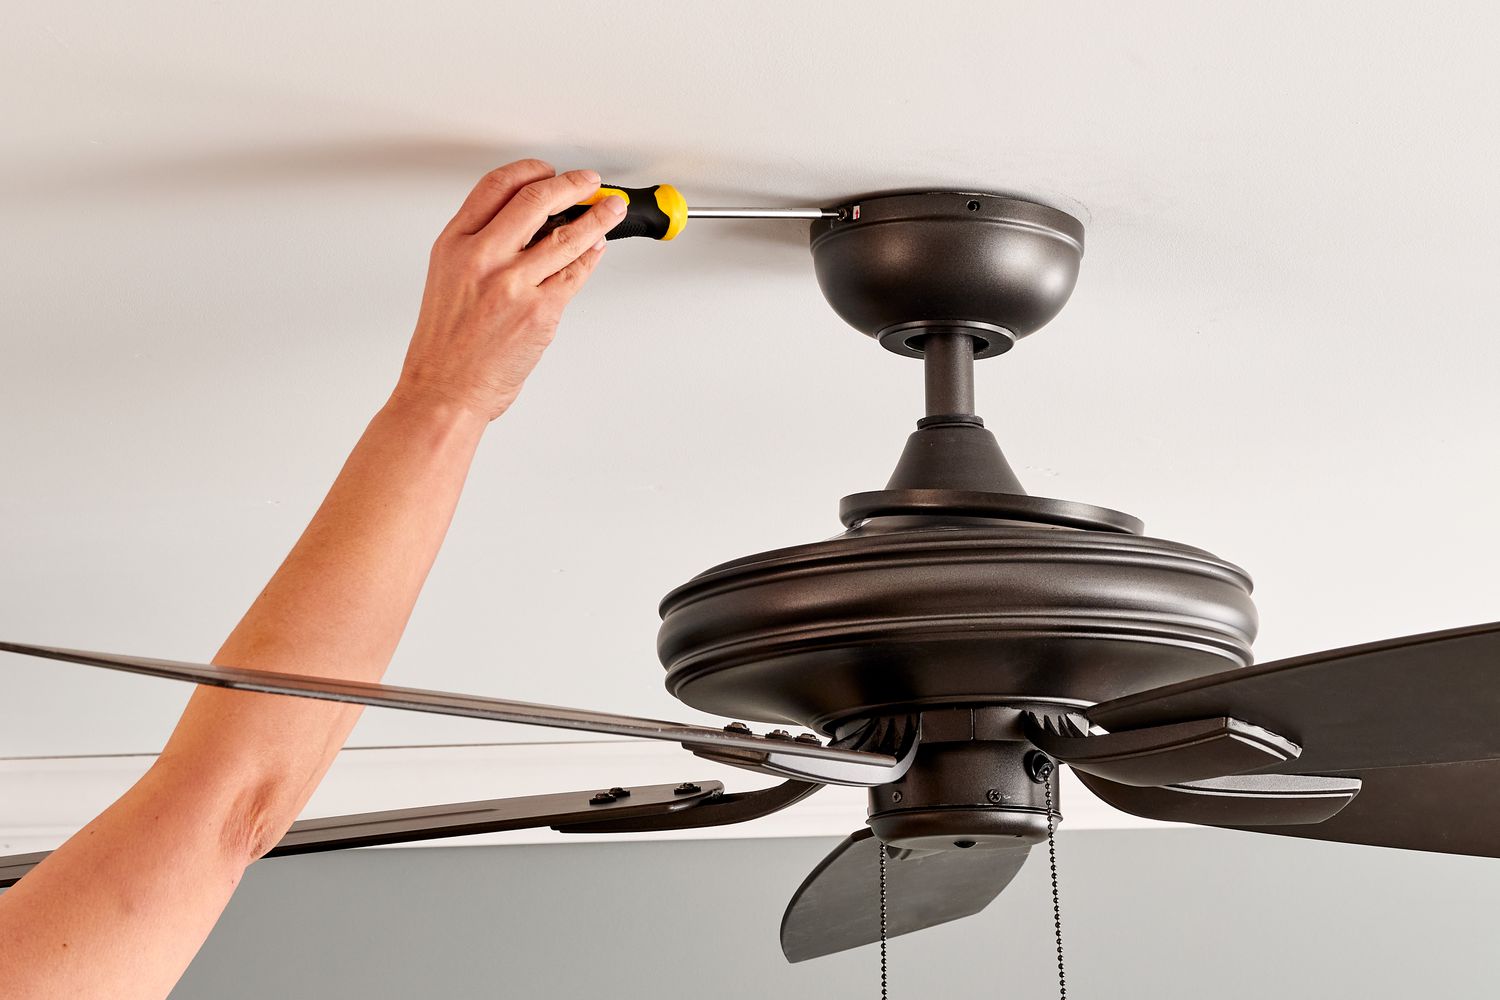
Step 3: Accessing the Fan
To properly lubricate your ceiling fan, you’ll need to gain access to its moving parts. This step involves removing any light fixtures or decorative elements, determining the type of ceiling fan you have, and understanding its construction.
1. Removing any light fixtures or decorative elements: Many ceiling fans come with additional features such as light fixtures or decorative covers. Before you can access the fan’s motor housing and lubrication points, you need to remove these elements. Follow the manufacturer’s instructions or use a screwdriver or Allen wrench to unscrew and detach any fixtures or covers in your way. Be sure to set aside any small parts or screws in a safe place to avoid losing them.
2. Determining the type of ceiling fan: Ceiling fans come in various designs and configurations, so it’s important to identify the type you have. This will help you understand how to access the motor housing and locate the lubrication points. Common types include standard ceiling fans, hugger or flush-mount fans, and fans with downrods. Knowing the specifics of your fan will ensure that you can proceed with the lubrication process correctly.
3. Understanding the fan’s construction: Take a brief moment to familiarize yourself with the construction of your ceiling fan. Look for any noticeable screws, clips, or other fasteners that hold the motor housing or other parts in place. Refer to the fan’s user manual or online resources if you need additional guidance. Understanding how the fan is assembled will make it easier to access the motor housing and locate the lubrication points.
By removing any light fixtures or decorative elements, determining the type of ceiling fan you have, and understanding its construction, you are now ready to proceed to the next step. Properly accessing the fan is crucial for effective lubrication and ensuring optimal performance of your ceiling fan.
Step 4: Applying the Lubricant
Now that you have accessed the motor housing of your ceiling fan, it’s time to apply the lubricant to the appropriate lubrication points. This step involves locating the lubrication points, understanding the different types of lubricants and their uses, and applying the lubricant correctly for optimal performance.
1. Locating the lubrication points: Take a close look at the motor housing and observe any marked or designated lubrication points. These points may be labeled with “Oil” or “Lubricate” indicators. If you’re unsure, refer to the fan’s user manual or consult the manufacturer’s website for guidance. Identify these points, as they are where you will apply the lubricant.
2. Different types of lubricants and their uses: There are various types of lubricants available for ceiling fans. It’s essential to research and choose the one that is specifically formulated for use on ceiling fan motors. Common lubricants include light machine oil, silicone-based lubricants, and dry lubricants. Each type has its own benefits and recommended uses. For example, light machine oil is commonly used for ball bearings, while silicone-based lubricants are ideal for bushings or sleeves. Dry lubricants are often recommended for reducing dust accumulation. Make sure to read the labels and select a lubricant that is safe for use on ceiling fan components.
3. Applying the lubricant correctly: Once you have obtained the appropriate lubricant, it’s time to apply it to the lubrication points. Follow these steps for a successful application:
– Start by applying a small amount of lubricant to each lubrication point. Be mindful not to over-lubricate, as excess oil or grease can attract dust and debris, leading to potential issues.
– Use a cotton swab or a small, clean brush to apply the lubricant to each point. This method allows for precise application and minimizes the risk of spillage or mess.
– Ensure that the lubricant reaches the bearings or other moving parts inside the motor housing. This will help to reduce friction and ensure smooth operation.
– Avoid applying lubricant directly to electrical connections or exposed wires. Keep the lubricant confined to the designated lubrication points only.
– Follow the manufacturer’s instructions for the recommended amount of lubricant to apply. Over-lubrication can be as problematic as under-lubrication, so strike a balance for optimal performance.
By locating the lubrication points, selecting the correct lubricant, and applying it correctly, you are taking steps to optimize the performance and longevity of your ceiling fan. Proper lubrication helps to reduce friction, minimize noise, and ensure smooth and efficient operation.
In the next step, we will learn how to test the fan after lubrication to ensure that it is working properly.
Step 5: Testing the Fan
After applying the lubricant to your ceiling fan, it’s important to test the fan and ensure it’s working optimally. This step involves spinning the fan manually, checking for smooth operation, and adjusting the fan’s settings if necessary.
1. Spinning the fan manually: With the power still turned off, carefully give the blades of the fan a gentle push to start the spinning motion. Observe how easily and smoothly the fan rotates. A properly lubricated fan should glide effortlessly with minimal resistance. If you encounter any stiffness or roughness, it may indicate the need for additional lubrication or another underlying issue.
2. Checking for smooth operation: As the fan spins, listen for any unusual sounds such as grinding or squeaking noises. A well-lubricated fan should operate silently or produce minimal noise. Any irregular sounds can indicate that further lubrication or maintenance is necessary. Additionally, visually inspect the fan for any wobbling or imbalance. If you notice any significant wobbling, it may require adjustments or balancing.
3. Adjusting the fan’s settings if necessary: Once you’ve observed the fan’s operation, you may need to make adjustments to optimize its performance. Check the fan’s speed and settings to ensure they are properly adjusted for your comfort and the room’s requirements. Most ceiling fans have multiple speed options and reversible functionality to suit different seasons. Make any necessary changes, such as adjusting the speed or changing the direction of the blades, to accommodate your preferences.
Ensuring that your ceiling fan spins smoothly and silently after lubrication is crucial for its optimal performance. If you encounter any issues during the testing phase, consider seeking professional assistance or consulting the manufacturer’s guidance for further troubleshooting.
Properly testing the fan after lubrication allows you to identify and address any issues early on, ensuring that your ceiling fan operates efficiently and effectively. Remember, periodic maintenance and lubrication will help extend the lifespan of your ceiling fan and provide you with years of cooling comfort.
In the final step, we will cover the process of cleaning up after lubricating your ceiling fan.
Read more: How To Update A Ceiling Fan
Step 6: Cleaning Up
After successfully lubricating your ceiling fan, it’s important to properly clean up the area to leave your fan in pristine condition. This step involves removing any excess lubricant, cleaning the fan blades, and reinstalling any fixtures or decorative elements that were previously removed.
1. Removing any excess lubricant: Carefully inspect the motor housing and surrounding areas for any excess lubricant. While it’s essential to ensure proper lubrication, too much oil or grease can attract dust and debris over time. Use a clean, lint-free cloth or a paper towel to gently wipe away any excess lubricant, focusing on the lubrication points and the surrounding surfaces. Be thorough but gentle to avoid spreading the excess lubricant further.
2. Cleaning the fan blades: While you’re in the process of cleaning up, take the opportunity to clean the fan blades as well. Fan blades can accumulate dust and dirt over time, which can affect their performance and cleanliness. Use a soft cloth or a duster to carefully wipe down each blade, removing any visible dust or debris. If necessary, you can also lightly dampen the cloth with a mild cleaning solution to tackle stubborn stains or buildup. However, make sure the blades are completely dry before reassembling the fan.
3. Reinstalling any fixtures or decorative elements: Finally, it’s time to reinstall any fixtures or decorative elements that were previously removed. This could include light fixtures, decorative covers, or other attachments. Refer to the manufacturer’s instructions or follow the reverse order of the removal process. Take care to tighten any screws or fasteners securely, ensuring that everything is properly aligned and in place.
By properly cleaning up after lubrication, you not only maintain the aesthetics of your ceiling fan but also ensure that it functions optimally. Removing excess lubricant helps prevent dust buildup, while cleaning the fan blades improves the quality of the circulated air.
With the cleaning process complete, your ceiling fan should be back to its optimal condition – smoothly running, quietly operating, and providing a refreshing breeze. Remember to schedule regular maintenance and lubrication to keep your fan in excellent working condition for years to come.
As a final note, always refer to the manufacturer’s instructions for your specific ceiling fan model and consult a professional if you encounter any difficulties or issues during the lubrication process.
Enjoy the comfort and efficiency of your freshly lubricated and cleaned ceiling fan!
Use a silicone-based lubricant to lubricate the bearings of your ceiling fan. Apply a few drops to each bearing and wipe off any excess to ensure smooth and quiet operation.
Conclusion
Regular maintenance and lubrication play a crucial role in ensuring the longevity and optimal performance of your ceiling fan. By following the steps outlined in this guide, you can keep your fan running smoothly and efficiently for years to come.
The importance of regular maintenance and lubrication cannot be emphasized enough. By staying proactive with your ceiling fan care, you can prevent potential issues such as noise, wobbling, and reduced airflow. Regular lubrication helps to reduce friction and wear on the moving parts, ensuring smooth operation and extending the lifespan of your fan.
Enhancing the lifespan and performance of your ceiling fan is just one of the benefits of regular maintenance. Proper lubrication minimizes noise, keeps the fan running quietly, and promotes efficient airflow in your space. A well-maintained fan can also contribute to energy savings by allowing you to rely less on air conditioning.
As a final reminder, here are some additional tips and reminders for maintaining and lubricating your ceiling fan:
1. Schedule regular maintenance: Make it a habit to inspect and lubricate your ceiling fan at least once a year or more frequently if it is used extensively. Regular maintenance prevents issues before they occur and helps to keep your fan operating at its best.
2. Select the right lubricant: Always use a manufacturer-recommended lubricant or one specifically designed for ceiling fan motors. Using the correct lubricant ensures long-lasting performance and prevents damage to the fan.
3. Be mindful of safety: Remember to turn off the power at the circuit breaker before starting any maintenance or lubrication task. This precaution eliminates the risk of electric shock and accidental movement of the fan.
4. Keep the fan clean: Regularly dust and clean the fan blades to maintain optimal performance and prevent excessive buildup of dust and debris.
5. Consult a professional if needed: If you encounter any difficulties or are unsure about the maintenance or lubrication process, don’t hesitate to seek professional assistance. A certified electrician or ceiling fan technician can provide expert guidance and ensure all tasks are carried out safely and effectively.
By making regular maintenance and lubrication a part of your home maintenance routine, you can enjoy the full potential of your ceiling fan’s performance, energy efficiency, and longevity.
Taking the time to care for your ceiling fan will reward you with a comfortable and efficient cooling experience that lasts for years to come. So, keep your fan well-maintained, properly lubricated, and enjoy the refreshing breeze it brings to your home.
Frequently Asked Questions about How To Lubricate A Ceiling Fan
Was this page helpful?
At Storables.com, we guarantee accurate and reliable information. Our content, validated by Expert Board Contributors, is crafted following stringent Editorial Policies. We're committed to providing you with well-researched, expert-backed insights for all your informational needs.


0 thoughts on “How To Lubricate A Ceiling Fan”