
Articles
How Are Ceiling Fans Mounted
Modified: September 2, 2024
Discover how ceiling fans are mounted in this informative article. Learn about different methods and find the best option for your home.
(Many of the links in this article redirect to a specific reviewed product. Your purchase of these products through affiliate links helps to generate commission for Storables.com, at no extra cost. Learn more)
Introduction
Ceiling fans are a popular and practical addition to any home. They not only provide a refreshing breeze in the summer months but also help to circulate warm air during the winter, making them energy-efficient and cost-effective. However, before you can enjoy the benefits of a ceiling fan, you need to know how to properly mount it.
In this article, we will explore the different types of ceiling fan mounts and provide step-by-step instructions for each type. Whether you are looking to install a standard mount, a flush mount, or an angled mount, we’ve got you covered.
By the end of this article, you will have a clear understanding of how to mount a ceiling fan and be well on your way to enjoying the comfort and style it brings to your home.
Key Takeaways:
- Choose the Right Mount
Whether it’s a standard, flush, or angled mount, selecting the right type of ceiling fan mount is crucial for optimal airflow and efficiency. Consider your room’s size and ceiling height to make the best choice. - Follow Instructions Carefully
Proper installation is key to enjoying the benefits of a ceiling fan. Always follow the manufacturer’s instructions for wiring, blade attachment, and testing to ensure a safe and effective installation.
Read more: What Is A Flush Mount Ceiling Fan
Types of Ceiling Fan Mounts
When it comes to mounting a ceiling fan, there are three main types to choose from: standard mount, flush mount, and angled mount. Each mount offers its own benefits and considerations, so let’s take a closer look at each one.
Standard Mount
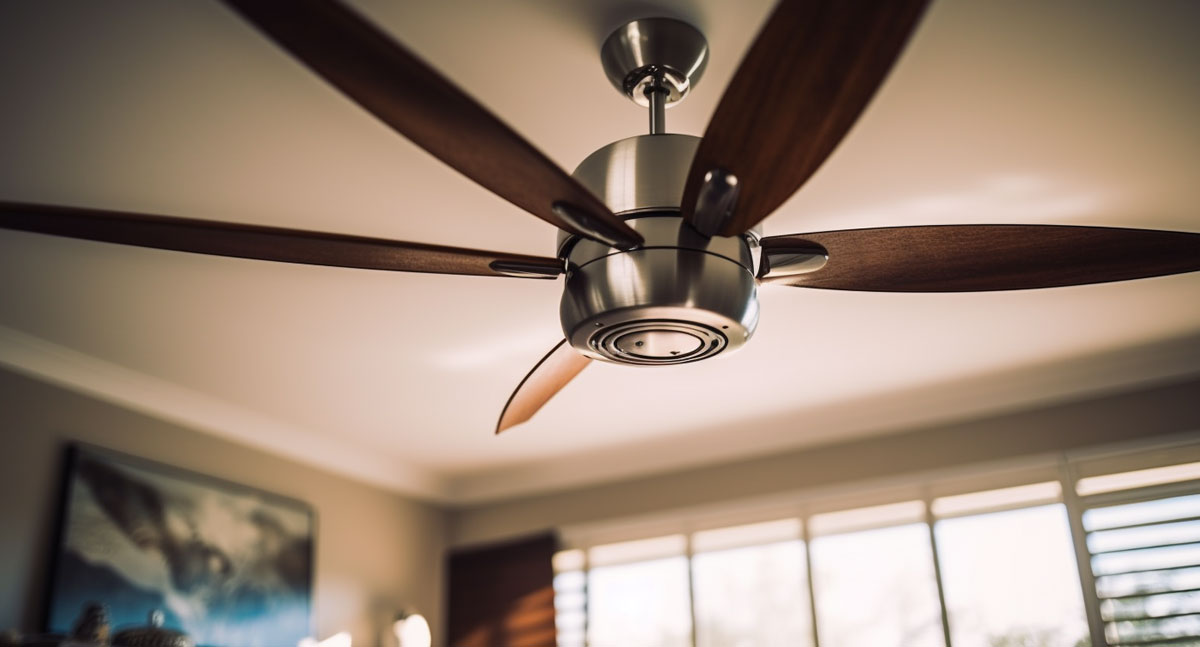
A standard mount is the most common and traditional way to install a ceiling fan. With this mount, the fan is attached directly to a ceiling junction box. The fan is mounted with a downrod, which allows it to hang a certain distance from the ceiling. This provides ample room for air circulation and allows the fan to operate efficiently.
One advantage of a standard mount is that it offers flexibility in terms of the fan’s distance from the ceiling. You can choose the length of the downrod based on your preference and the height of your ceiling. This allows you to customize the installation to suit your needs.
Flush Mount
A flush mount, also known as a low-profile or hugger mount, is ideal for rooms with low ceilings. This type of mount brings the fan closer to the ceiling, eliminating the need for a downrod. The fan is mounted directly against the ceiling, which creates a sleek and compact profile.
Flush mounts are a great option for small rooms or spaces with low clearance. They offer a clean and unobtrusive look while still providing optimal airflow. However, it’s important to note that the closer proximity to the ceiling may reduce the efficiency of the fan slightly, as there is less room for air circulation.
Angled Mount
An angled mount, also referred to as a sloped ceiling mount or a vaulted ceiling mount, is designed for ceilings with slopes or angles. This type of mount allows the fan to be installed on ceilings that are not flat or horizontal.
An angled mount typically consists of a special canopy and/or downrod that can be adjusted to accommodate the angle of the ceiling. This ensures that the fan hangs straight and operates correctly, even on sloped surfaces.
It’s important to note that installing an angled mount requires extra attention and precision. Proper installation is crucial to ensure the fan’s stability and safe operation.
Now that we have explored the different types of ceiling fan mounts, it’s time to dive into the installation process for each one. Let’s get started!
Read more: How To Install A Flush Mount Ceiling Fan
Standard Ceiling Fan Mounting
Tools Required
- Screwdriver (Phillips and flathead)
- Wire cutters/strippers
- Wire connectors
- Adjustable wrench
- Ladder or step stool
Steps for Installation
1. Mounting the Ceiling Plate
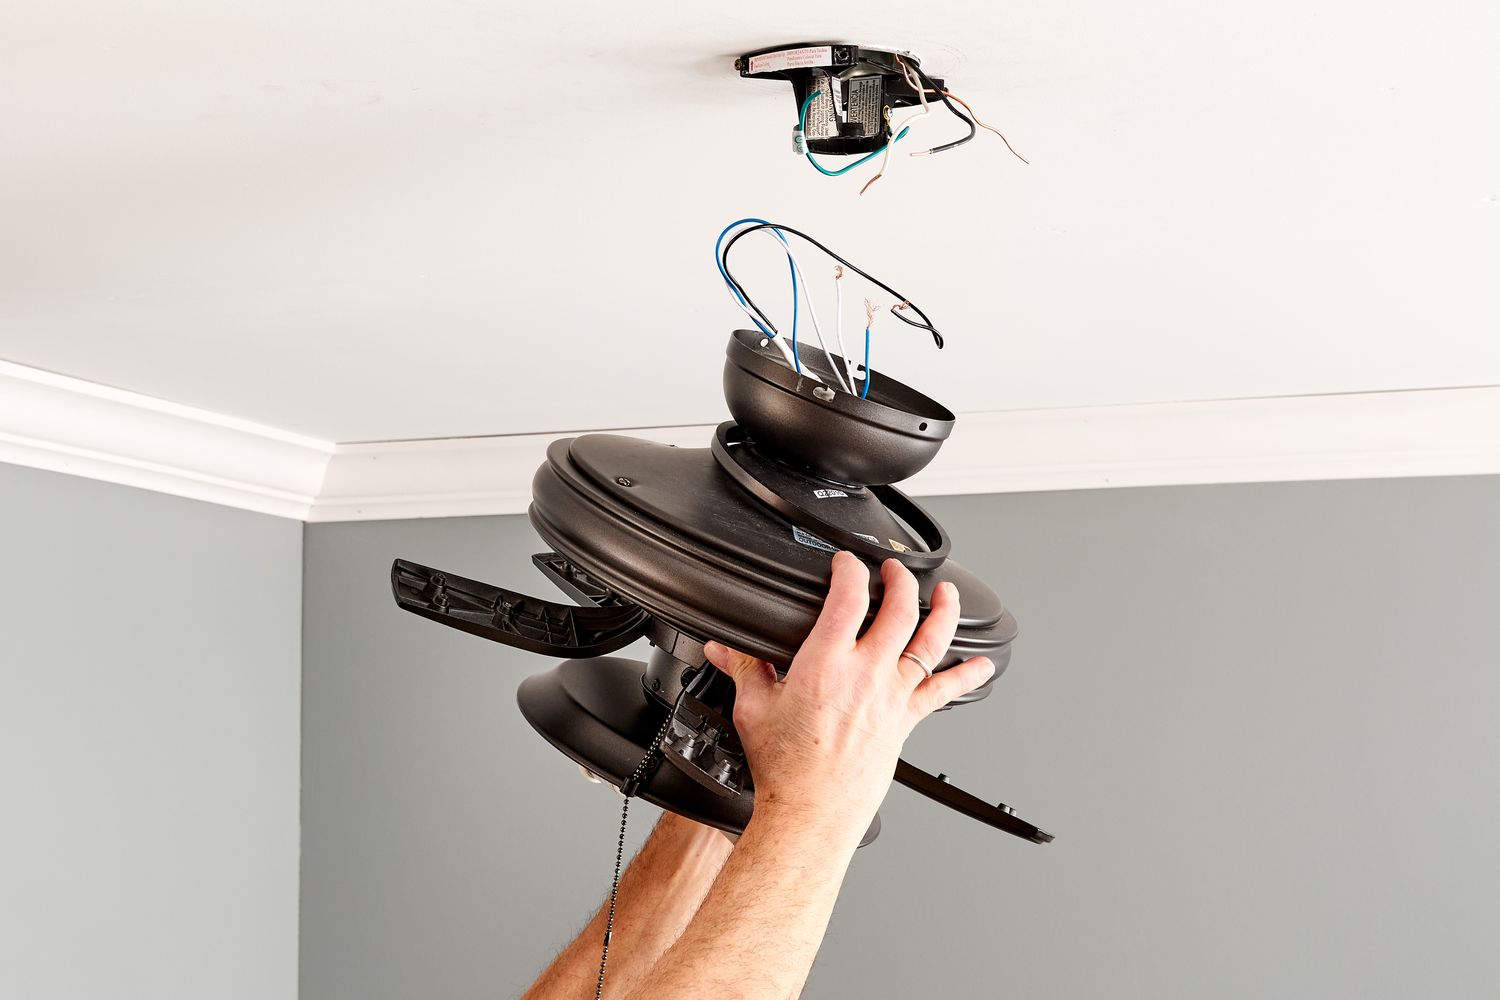
The first step in mounting a standard ceiling fan is to install the ceiling plate. Start by turning off the power to the room at the circuit breaker. Remove the existing light fixture, if applicable, and locate the electrical box in the ceiling. The ceiling plate provided with the fan should align with the electrical box. Secure the plate to the electrical box using the screws provided.
2. Wiring the Fan
Before wiring the fan, consult the manufacturer’s instructions for specific wiring details. Generally, you will have three sets of wires: the fan’s motor wires, the light fixture wires (if applicable), and the house wiring. Connect the corresponding wires by twisting them together and securing them with wire connectors. Use wire cutters to trim any excess wire.
3. Attaching the Blades
With the electrical connections in place, it’s time to attach the fan blades. Align each blade with its corresponding bracket on the motor housing. Secure each blade to the bracket using the provided screws or hardware. Make sure all the blades are properly balanced and aligned.
4. Installing the Light Fixture (if applicable)
If your ceiling fan includes a light fixture, follow the manufacturer’s instructions for installing it. Generally, this involves attaching the light fixture to the fan’s motor housing and connecting the wires. Secure the light fixture with screws and adjust it to the desired position.
5. Testing and Finishing Up
Before turning on the power, double-check all electrical connections to ensure they are secure. Once you are confident in the installation, turn the power back on at the circuit breaker. Test the fan and light (if applicable) to ensure they are functioning properly. Make any necessary adjustments to the fan’s speed and direction settings. Finally, secure any decorative covers or trim provided with the fan to complete the installation.
With the standard ceiling fan properly mounted and installed, you can now enjoy its cooling breeze and improved air circulation in your space.
Flush Ceiling Fan Mounting
Tools Required
- Screwdriver (Phillips and flathead)
- Wire cutters/strippers
- Wire connectors
- Adjustable wrench
- Ladder or step stool
Steps for Installation
1. Preparing the Mounting Bracket
Begin by turning off the power to the room at the circuit breaker. Remove the existing light fixture, if applicable. Next, assemble the flush mount bracket according to the manufacturer’s instructions. Place the bracket over the electrical box in the ceiling, aligning the screw holes. Secure the bracket to the electrical box using the provided screws.
2. Wiring the Fan
Consult the manufacturer’s instructions for specific wiring details. Generally, you will have three sets of wires: the fan’s motor wires, the light fixture wires (if applicable), and the house wiring. Connect the corresponding wires by twisting them together and securing them with wire connectors. Use wire cutters to trim any excess wire.
3. Attaching the Blades
Align each fan blade with its corresponding bracket on the motor housing. Secure each blade to the bracket using the provided screws or hardware. Make sure all the blades are properly balanced and aligned.
4. Installing the Light Fixture (if applicable)
If your flush mount ceiling fan includes a light fixture, follow the manufacturer’s instructions for installing it. This may involve attaching the light fixture to the fan’s motor housing and connecting the wires. Secure the light fixture with screws and adjust it to the desired position.
5. Testing and Finishing Up
Before turning on the power, double-check all electrical connections to ensure they are secure. Once you are confident in the installation, turn the power back on at the circuit breaker. Test the fan and light (if applicable) to ensure they are functioning properly. Make any necessary adjustments to the fan’s speed and direction settings. Finally, secure any decorative covers or trim provided with the fan to complete the installation.
With the flush ceiling fan properly mounted and installed, you can now enjoy its sleek and compact design while enjoying a comfortable airflow in your space.
Angled Ceiling Fan Mounting
Tools Required
- Screwdriver (Phillips and flathead)
- Wire cutters/strippers
- Wire connectors
- Adjustable wrench
- Ladder or step stool
Steps for Installation
1. Preparing the Mounting Bracket
First, turn off the power to the room at the circuit breaker. Remove any existing light fixtures from the ceiling, if applicable. Depending on the ceiling’s slope or angle, you may need to install a special mounting bracket designed for angled ceilings. Follow the manufacturer’s instructions to attach the bracket securely to the ceiling.
2. Adjusting the Angled Mount
If your ceiling fan comes with an adjustable angled mount, customize it to match the slope of your ceiling. Loosen the screws on the mount and adjust it until it aligns with the angle of the ceiling. Tighten the screws to secure the mount in place.
3. Wiring the Fan
Refer to the manufacturer’s instructions for specific wiring details. Connect the fan’s motor wires, the light fixture wires (if applicable), and the house wiring. Twist the corresponding wires together and use wire connectors to secure them. Trim any excess wire using wire cutters.
4. Attaching the Blades
Align each fan blade with its corresponding bracket on the motor housing. Secure each blade using the provided screws or hardware. Ensure that all the blades are balanced and aligned properly.
5. Installing the Light Fixture (if applicable)
If your angled ceiling fan includes a light fixture, follow the manufacturer’s instructions for installation. Attach the light fixture to the fan’s motor housing and connect the wires accordingly. Secure the light fixture with screws and adjust its position as desired.
6. Testing and Finishing Up
Before restoring power, double-check all electrical connections to ensure they are secure. Once satisfied, turn on the power at the circuit breaker. Test the fan and light (if applicable) to ensure proper operation. Make any necessary adjustments to the fan’s speed and direction settings. Finally, affix any decorative covers or trim provided with the fan to complete the installation.
With the angled ceiling fan mount properly installed, you can now enjoy optimal airflow and comfort in rooms with sloped or vaulted ceilings.
Conclusion
Mounting a ceiling fan is a rewarding project that can enhance the comfort and aesthetics of your living space. With the right tools and a step-by-step approach, you can successfully install a ceiling fan using one of the three main types of mounts: standard mount, flush mount, or angled mount.
A standard mount offers flexibility in terms of the fan’s distance from the ceiling, providing optimal airflow and efficiency. A flush mount is ideal for rooms with low ceilings, maintaining a sleek and compact profile while still providing adequate air circulation. An angled mount is designed for sloped or vaulted ceilings, allowing the fan to hang straight and operate correctly.
Regardless of the type of mount you choose, it’s important to carefully follow the manufacturer’s instructions for installation. This includes properly wiring the fan, attaching the blades, and, if applicable, installing a light fixture. Always double-check the electrical connections and secure all components before testing the fan and restoring power.
By successfully mounting a ceiling fan, you can enjoy the benefits of improved air circulation, energy efficiency, and enhanced comfort in your home. Additionally, a well-installed and properly functioning fan can also add style and charm to any room.
If you’re unsure about any step of the installation process or encounter difficulties during the project, it’s recommended to consult a qualified professional electrician to ensure a safe and accurate installation.
Now that you have a solid understanding of different ceiling fan mounts and how to install them, it’s time to get started on your own ceiling fan project. Enjoy the breeze and energy savings that come with a properly installed ceiling fan!
Frequently Asked Questions about How Are Ceiling Fans Mounted
Was this page helpful?
At Storables.com, we guarantee accurate and reliable information. Our content, validated by Expert Board Contributors, is crafted following stringent Editorial Policies. We're committed to providing you with well-researched, expert-backed insights for all your informational needs.


0 thoughts on “How Are Ceiling Fans Mounted”