Articles
How To Build A Curved Range Hood
Modified: October 20, 2024
Learn how to build a beautifully curved range hood with our step-by-step articles. Expert tips and tricks for a stunning kitchen renovation.
(Many of the links in this article redirect to a specific reviewed product. Your purchase of these products through affiliate links helps to generate commission for Storables.com, at no extra cost. Learn more)
Introduction
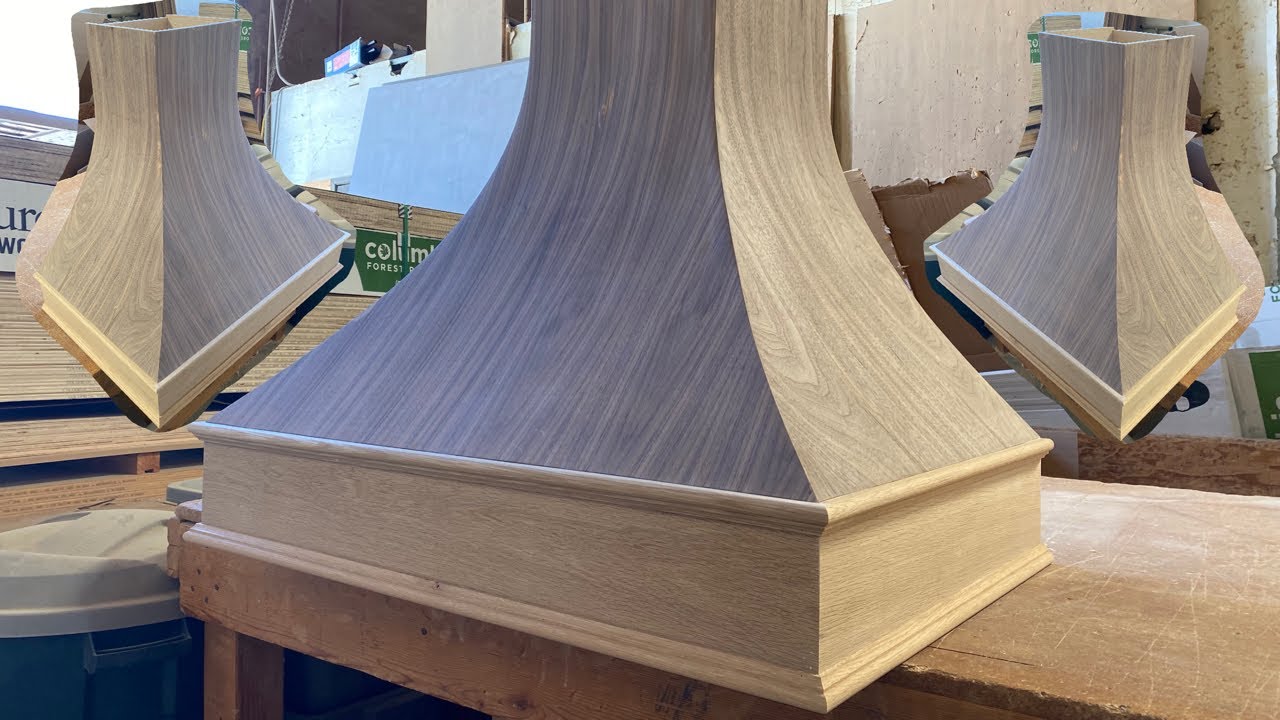
Welcome to the world of curved range hoods! A curved range hood is not only a functional appliance for your kitchen, but it can also add a touch of elegance and sophistication to the space. Whether you are a DIY enthusiast or a professional builder, building a curved range hood can be a rewarding project that allows you to customize your kitchen and create a stunning focal point.
In this article, we will guide you through the step-by-step process of building a curved range hood. From planning and design to installation and finishing touches, we will cover all the essential aspects to ensure a successful project.
Before we dive into the details, it’s important to note that this project requires intermediate to advanced DIY skills, as well as access to some specialized tools and materials. If you are a beginner or unsure of your abilities, it may be best to seek the assistance of a professional.
Now, let’s get started on this exciting journey of building your very own curved range hood!
Key Takeaways:
- Building a curved range hood is a rewarding DIY project that adds elegance and functionality to your kitchen. From planning and design to installation and finishing touches, this guide provides a comprehensive roadmap for success.
- Attention to detail, proper tools, and safety are crucial when constructing a curved range hood. Embrace creativity, enjoy the process, and admire the stunning focal point you’ve created for your kitchen!
Read more: How To Build A Range Hood
Tools and Materials Required
Before you begin building your curved range hood, it’s important to gather all the necessary tools and materials. Here’s a comprehensive list to help you get started:
Tools:
- Measuring tape
- Pencil
- Saw (circular saw or jigsaw)
- Drill
- Screwdriver
- Clamps
- Sanding block or sandpaper
- Paintbrush or paint sprayer
- Level
Materials:
- Plywood (preferably ¾ inch thick)
- 2×4 lumber
- Wood screws
- Construction adhesive
- Ductwork (metal or flexible ducts)
- Range hood kit (including blower, fan, and filters)
- Wood putty
- Primer and paint
In addition to these basic tools and materials, you may also need specific hardware or accessories depending on the design and functionality of your range hood. This could include decorative trim, molding, or additional ventilation components.
It’s essential to gather all the tools and materials before you begin the project to ensure a smooth and uninterrupted workflow. Double-check the list to make sure you have everything you need, or make a trip to your local home improvement store to stock up on any missing items.
Now that you have all the necessary tools and materials at hand, it’s time to start planning and designing your curved range hood!
Planning and Design
Planning and designing your curved range hood is a crucial step that sets the foundation for a successful project. Consider the following factors to ensure your range hood complements your kitchen layout and meets your functional requirements:
Read more: What Is A Range Hood
1. Kitchen Layout:
Examine your kitchen space and determine the ideal location for your curved range hood. Consider factors such as the proximity to your cooktop or stove, the availability of an exterior vent, and the overall aesthetics of your kitchen. Ensure there is enough space to accommodate the size and shape of the range hood.
2. Size and Shape:
Determine the dimensions of your curved range hood based on your kitchen layout and personal preferences. Consider the standard dimensions for range hoods and customize them to achieve the desired curved shape. Sketch out the design on paper or use design software to visualize the final look.
3. Ventilation System:
Decide on the type of ventilation system you want for your range hood. There are two main options: ducted and ductless. Ducted range hoods vent air to the outside through ductwork, while ductless range hoods recirculate air through filters. Choose the system that suits your kitchen setup and ventilation needs.
4. Materials and Finishes:
Select the materials and finishes that will enhance the visual appeal of your curved range hood. Consider using plywood for the main structure and choose a paint or stain that complements your kitchen décor. You can also add decorative elements such as trim or molding to give your range hood a unique and stylish look.
Once you have finalized your design and gathered all the necessary information, it’s time to start building the frame for your curved range hood. In the next section, we will guide you through the step-by-step process of building the frame.
Read more: How To Paint Range Hood
Building the Frame
Building the frame is a critical step in constructing your curved range hood. The frame provides structural support and serves as the foundation for the rest of the construction process. Follow these steps to build the frame for your curved range hood:
1. Measure and Cut:
Start by measuring the dimensions of your range hood and transfer those measurements onto the plywood. Use a circular saw or jigsaw to cut out the pieces according to your design. Cut additional pieces from the 2×4 lumber to create bracing and support for the frame.
2. Assemble the Base:
Begin by assembling the base of the range hood frame. Attach the side panels to the bottom panel using wood screws and construction adhesive. Make sure the corners are square and the panels are flush. Use clamps to hold the pieces together until the adhesive dries.
3. Add Support Bracing:
Attach the support bracing pieces inside the frame to strengthen the structure. These pieces will help ensure the frame remains sturdy and secure. Use wood screws and adhesive to secure the bracing in place.
Read more: How To Replace A Range Hood
4. Attach the Top Panel:
Place the top panel onto the frame and secure it with wood screws and adhesive. The top panel should fit snugly and be flush with the sides of the frame.
5. Reinforce the Joints:
To ensure the frame is solid and durable, reinforce the joints with additional wood screws or dowels. This will help strengthen the connections and prevent any movement or wobbling.
6. Sand and Finish:
Sand the frame to smooth any rough edges or imperfections. Fill any gaps or holes with wood putty and sand again for a seamless finish. Finally, apply a primer and paint of your choice to protect and enhance the appearance of the frame.
With the frame built and ready, you are now one step closer to completing your curved range hood. Next, we will guide you through the process of attaching the hood to the frame.
Attaching the Hood
Attaching the hood to the frame is the next step in constructing your curved range hood. The hood contains the blower, fan, and filters that provide ventilation and remove cooking odors from your kitchen. Follow these steps to attach the hood:
Read more: How To Install ZLINE Range Hood
1. Position the Hood:
Place the hood inside the frame, ensuring that it fits securely and aligns with the opening at the top. Make sure there is enough clearance for the blower, fan, and filters to function properly.
2. Secure the Hood:
Use screws or brackets to secure the hood to the frame. Refer to the manufacturer’s instructions for the recommended attachment method. Ensure that the hood is securely fastened to prevent any movement or vibrations during operation.
3. Connect the Wiring:
If your hood requires electrical wiring, carefully connect the wires according to the manufacturer’s instructions. Follow proper safety precautions and consult a licensed electrician if necessary.
4. Test the Hood:
Before proceeding further, test the hood to make sure it is functioning properly. Turn on the fan and check for any unusual noises or vibrations. Ensure that the airflow is strong and that the filters are capturing grease and odors effectively.
Read more: How To Tile Around Range Hood
5. Make Adjustments:
If necessary, make any adjustments to the hood’s position or alignment. Ensure that it is level and centered within the frame. Use a level to check and make any necessary modifications.
Once the hood is securely attached and functioning correctly, it’s time to move on to the next step: adding ductwork to your curved range hood. We will guide you through this process in the following section.
Adding Ductwork
Adding ductwork is an important step in the construction of your curved range hood as it allows for proper ventilation and air flow. The ductwork ensures that cooking odors, smoke, and excess heat are efficiently expelled from your kitchen. Follow these steps to add ductwork to your curved range hood:
1. Determine the Route:
First, decide on the most suitable route for the ductwork to connect the range hood to the outside of your home. Ideally, the ductwork should follow the shortest and most direct path to achieve optimal ventilation efficiency. Take into consideration any existing structures, like cabinets or walls, that the ductwork needs to traverse.
2. Measure and Cut:
Using a measuring tape, carefully measure the required length for your ductwork. Use a saw or tin snips to cut the ductwork to the appropriate size. Make sure to wear appropriate safety gear, such as gloves and goggles, when working with sharp tools.
Read more: How To Install Range Hood Insert
3. Attach Ductwork Sections:
Connect the different sections of ductwork by inserting one end of each section into the other. Secure the connection using metal duct tape or sheet metal screws. Ensure the connections are tight and secure to avoid any leaks or airflow disruption.
4. Attach the Ductwork to the Range Hood:
Attach one end of the ductwork to the exhaust opening of the range hood. Secure it firmly using metal duct tape or clamps, ensuring a tight seal to prevent air leakage. Check the manufacturer’s instructions for any specific guidelines on attaching the ductwork to the range hood.
5. Route the Ductwork:
Carefully route the ductwork through the designated path, avoiding any sharp bends or obstructions. Use hangers or brackets to support and secure the ductwork along the way. Make sure to maintain the appropriate clearance from any flammable materials as specified by local building codes.
6. Connect to the Exterior Vent:
Finally, connect the other end of the ductwork to the exterior vent. If there isn’t a vent already installed, you may need to cut a hole in the wall or ceiling to accommodate the vent. Secure the connection using metal duct tape or clamps, ensuring a tight seal.
Once the ductwork is properly installed, it’s crucial to test the ventilation system to ensure it is functioning correctly. Test the range hood and check for proper air flow and venting. Make any necessary adjustments or repairs to ensure optimal performance.
With the ductwork in place, you are now ready to proceed with the installation of the ventilation system for your curved range hood. We will guide you through this process in the following section.
Read more: How To Clean A Zephyr Range Hood
Installing the Ventilation System
The ventilation system is a critical component of your curved range hood as it ensures proper air circulation and the removal of cooking contaminants. Installing the ventilation system requires careful attention to ensure efficient and effective operation. Follow these steps to install the ventilation system for your curved range hood:
1. Determine Ventilation Type:
Depending on the type of range hood you have chosen, determine whether it requires a ducted or ductless ventilation system. If ducted, the ventilation system will require connection to the previously installed ductwork. If ductless, the system will incorporate charcoal filters to purify and recirculate the air.
2. Position the Ventilation System:
Place the ventilation system in the designated location within the range hood frame. Ensure it aligns with the corresponding ductwork or filter opening. Follow the manufacturer’s instructions for proper positioning and orientation of the system.
3. Connect the Ductwork:
If using a ducted ventilation system, connect the ventilation system to the existing ductwork. Use metal duct tape or sheet metal screws to securely attach the ductwork to the ventilation system. Ensure a tight seal to prevent air leakage.
Read more: How To Make A Range Hood Cover
4. Install the Filters:
If using a ductless ventilation system, insert the charcoal filters into the designated slots within the ventilation system. Make sure to follow the manufacturer’s instructions for proper filter installation and replacement.
5. Test the Ventilation System:
Before proceeding, test the ventilation system to ensure it is functioning correctly. Turn on the range hood and check for proper air flow and extraction. Ensure that the ducted system is expelling air outside effectively or that the ductless system is recirculating purified air.
6. Make Adjustments and Secure:
If necessary, make any adjustments to the positioning or alignment of the ventilation system. Ensure that it is securely fastened to the range hood frame, minimizing vibrations or movement during operation.
Once the ventilation system is successfully installed and tested, it’s time to move on to the finishing touches that will complete your curved range hood. We will guide you through these final steps in the following section.
Finishing Touches
With the major components of your curved range hood in place, it’s time to add the finishing touches that will enhance its functionality and aesthetic appeal. These final steps will help make your range hood a standout feature in your kitchen. Follow these tips to complete the finishing touches:
Read more: How To Clean Range Hood Motor
1. Trim and Molding:
Add decorative trim or molding to the edges of the range hood to give it a polished and customized look. Choose a style that complements your kitchen decor and follow proper installation techniques to ensure a professional finish.
2. Paint or Stain:
Apply a coat of paint or stain to the range hood frame, including any added trim or molding. Select a color or finish that matches or complements your kitchen decor. Ensure that you use a high-quality paint or stain that is appropriate for the materials used in your range hood.
3. Clean and Polish:
Before installing the range hood in its final position, give it a thorough cleaning and polish. Remove any dust, fingerprints, or smudges to ensure a flawless finish. Use appropriate cleaning products and materials that are safe for the range hood surface.
4. Test Again:
After completing the finishing touches, it’s important to test the range hood one final time. Turn on the fan and check for proper air flow, noise levels, and overall functionality. Make any necessary adjustments or repairs to ensure optimal performance.
Read more: How To Clean Fotile Range Hood
5. Install the Range Hood:
Once you are satisfied with the construction and testing, it’s time to install the range hood in its final position. Follow the manufacturer’s instructions for proper installation, ensuring that it is securely attached and well aligned with the surrounding cabinetry or wall.
6. Step Back and Admire:
Finally, step back and admire your completed curved range hood. Take pride in the hard work and attention to detail that went into building and finishing it. Your range hood is now ready to add beauty, function, and charm to your kitchen space!
Congratulations on successfully completing your curved range hood project! By following these steps, you have created an impressive and functional centerpiece for your kitchen. Enjoy the benefits of enhanced ventilation and a visually stunning focal point that truly stands out.
Conclusion
Building a curved range hood is a rewarding and fulfilling project that allows you to customize your kitchen while improving its functionality. By following the steps outlined in this guide, you have learned how to plan, design, and construct your very own curved range hood.
Throughout the process, you gathered the necessary tools and materials, measured and cut the components, built the frame, attached the hood, added ductwork, installed the ventilation system, and applied the finishing touches to create a stunning and efficient range hood.
Remember, safety is paramount throughout the construction process. Always follow proper safety precautions, wear appropriate protective gear, and consult professionals if needed. Your well-being is just as important as the final result.
Now, as you enjoy the benefits of your newly built curved range hood, take a moment to appreciate the aesthetics and functionality it brings to your kitchen. The range hood not only adds a touch of sophistication but also effectively removes cooking odors, smoke, and heat from your cooking space.
We hope that this guide has provided you with the knowledge and inspiration to embark on your curved range hood project. Embrace your creativity, make design choices that reflect your personal style, and elevate your kitchen to a whole new level.
Thank you for joining us on this journey of building a curved range hood. We wish you success and enjoyment as you experience the benefits of a beautifully designed and fully functional range hood in your kitchen!
Frequently Asked Questions about How To Build A Curved Range Hood
Was this page helpful?
At Storables.com, we guarantee accurate and reliable information. Our content, validated by Expert Board Contributors, is crafted following stringent Editorial Policies. We're committed to providing you with well-researched, expert-backed insights for all your informational needs.
0 thoughts on “How To Build A Curved Range Hood”