
Articles
How To Build A Custom Mailbox
Modified: October 19, 2024
Learn step-by-step instructions and expert tips on how to build a custom mailbox with our informative articles. Enhance your curb appeal and express your unique style.
(Many of the links in this article redirect to a specific reviewed product. Your purchase of these products through affiliate links helps to generate commission for Storables.com, at no extra cost. Learn more)
Introduction
Welcome to the world of custom mailboxes! If you’re tired of the generic mailboxes available at the local hardware store and want to add a personal touch to your curb appeal, then building a custom mailbox is the perfect project for you. Not only will it showcase your creativity and craftsmanship, but it will also become a focal point of your home’s exterior.
Building a custom mailbox may seem like a daunting task, but fear not! With the right materials, tools, and a little bit of patience, you can create a unique and eye-catching mailbox that will make your neighbors envious. In this article, we will guide you through the step-by-step process of building your very own custom mailbox.
Before we delve into the details, let’s talk about the benefits of a custom mailbox. First and foremost, it allows you to express your personal style and preferences. You can choose a design that complements your home’s architecture or reflects your hobbies and interests. Additionally, a custom mailbox adds a touch of individuality to your property, making it stand out from the crowd.
Moreover, building your own mailbox can be a fun and fulfilling DIY project. It gives you the opportunity to work with your hands, unleash your creativity, and see the tangible result of your efforts. It’s a great way to spend a weekend and engage in a rewarding hands-on activity.
Now, let’s get started on your custom mailbox-building journey. In the following steps, we will guide you through the process, from gathering materials to adding the finishing touches.
Key Takeaways:
- Building a custom mailbox is a rewarding DIY project that allows you to express your creativity, showcase your craftsmanship, and add a personal touch to your home’s exterior, making it stand out from the crowd.
- From gathering materials to adding finishing touches, the process of building a custom mailbox is not just about the end result, but also about the joy of immersing yourself in a hands-on project and seeing your unique creation come to life.
Read more: How To Build A Brick Mailbox
Step 1: Gathering Materials
The first step in building a custom mailbox is gathering all the necessary materials. Here is a list of items you will need:
- Wood or metal for the frame and sides
- Plywood or metal sheet for the roof
- Hinges for the mailbox door
- Mailbox lock and keys
- Nails or screws for assembly
- Paint or stain for finishing
- Paintbrushes or rollers
- Sandpaper or a sander
- Drill and drill bits
- Saw or jigsaw
- Measuring tape
You can find most of these materials at your local hardware store or home improvement center. Make sure to select materials that are durable and weather-resistant, as your mailbox will be exposed to the elements.
When choosing the wood for your custom mailbox, opt for a type that is suitable for outdoor use, such as cedar or pressure-treated lumber. If you prefer a metal mailbox, consider stainless steel or galvanized steel, as they are rust-resistant and sturdy.
As for the mailbox lock, it’s important to choose a durable and secure lock that will protect your mail. Look for locks specifically designed for mailboxes, as they are designed to withstand tampering and provide added security.
Additionally, think about the size and shape of your mailbox. Consider the amount of mail you typically receive and the dimensions of your property. You want your custom mailbox to be spacious enough to accommodate your mail, but not overly large that it becomes an eyesore.
Once you have gathered all the materials, it’s time to move on to the next step: designing your custom mailbox.
Step 2: Designing the Mailbox
Now that you’ve gathered all the necessary materials, it’s time to let your creativity flow and design your custom mailbox. The design of your mailbox will ultimately depend on your personal style and preferences, as well as the materials you have chosen.
Start by considering the overall shape and structure of your mailbox. Do you want a classic rectangular shape, or perhaps something more unique like a house-shaped mailbox? Sketch out your ideas on paper and visualize how it will look in your yard.
Next, think about the details and embellishments you want to incorporate. Are you a fan of intricate woodwork? Consider adding decorative trim or carvings to the sides of your mailbox. If you prefer a more minimalist look, you can opt for clean lines and smooth surfaces.
When designing your mailbox, also keep in mind the functionality and practicality. Ensure that the size and shape can accommodate all standard mail sizes and packages. You may want to include a newspaper holder or additional compartments for outgoing mail or small parcels.
It’s also important to consider your local regulations and guidelines regarding mailbox design. Some neighborhoods or homeowners associations have specific rules regarding mailbox size, location, and design. Make sure you comply with any regulations to avoid any potential issues.
Once you have finalized your design, take precise measurements of the dimensions needed for each component of the mailbox. This will ensure accuracy during the construction process. Be sure to account for the thickness of the material you are working with to ensure a snug fit.
Now that you have a well-thought-out design for your custom mailbox, it’s time to move on to the next step: preparing the base.
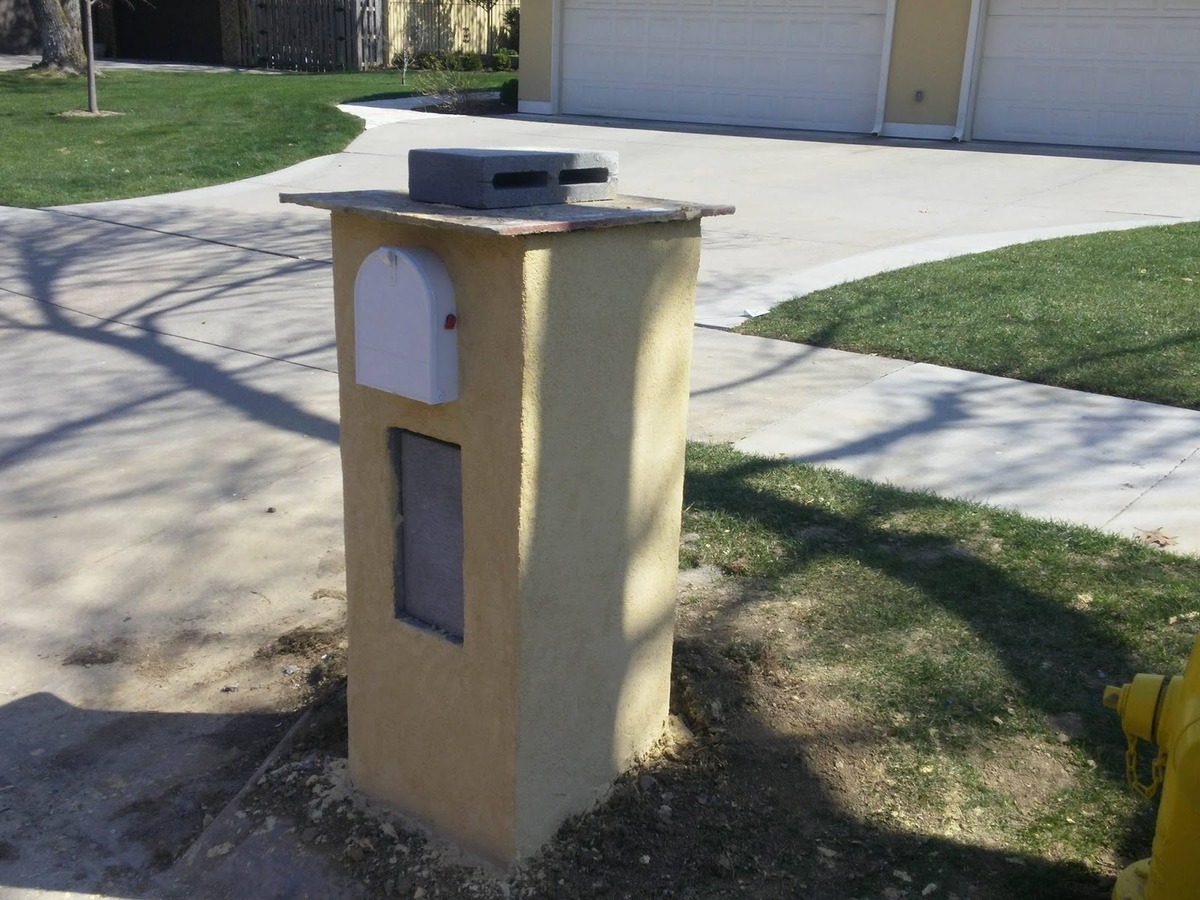
Step 3: Preparing the Base
With your mailbox design in hand, it’s time to start building! The first step in the construction process is preparing the base of your custom mailbox. This foundation will provide stability and support for the rest of the structure.
Begin by selecting a suitable location for your mailbox. Typically, mailboxes are installed near the curb, but make sure to check with your local postal service for any specific requirements regarding placement. Once you have chosen the location, mark the spot with stakes or flags for reference.
Next, dig a hole that is approximately 18-24 inches deep and wide enough to accommodate the size of your mailbox base. You can use a shovel or a post hole digger for this step. Make sure the hole is level and free of any debris or obstructions.
Once the hole is prepared, pour a layer of gravel or crushed stones into the bottom. This will provide drainage and prevent water from pooling around the base of the mailbox. Level the gravel to ensure a stable surface.
Now it’s time to install the mailbox post. Choose a sturdy and durable material for the post, such as pressure-treated wood or metal. Make sure it is long enough to extend several feet above ground level to provide stability.
Place the post in the hole and check for plumb using a level. Fill the hole with quick-setting cement or concrete mix, following the manufacturer’s instructions. Make sure the post remains in a plumb position until the cement sets.
Allow the cement to dry completely before proceeding with the rest of the construction. This may take a couple of days, depending on the type of cement used. Once the cement is fully cured, you are ready to move on to the next step: building the frame of your custom mailbox.
Now that your mailbox base is installed and secure, you can continue with confidence knowing that your custom mailbox will have a sturdy foundation. The next step involves constructing the frame, which will give your mailbox its shape and structure. Stay tuned!
Step 4: Building the Frame
Now that the base of your custom mailbox is secure, it’s time to build the frame. The frame serves as the structural support for the sides, roof, and other components of your mailbox. By constructing a sturdy frame, you will ensure the durability and stability of your custom mailbox.
Begin by measuring and cutting the wood or metal pieces for the frame. Use a saw or a jigsaw to achieve precise cuts according to your design specifications. Remember to follow all safety guidelines and wear protective gear when operating power tools.
If you’re using wood, it’s essential to choose a suitable type that can withstand outdoor conditions. Cedar or pressure-treated lumber are popular choices due to their natural resistance to decay and insects. For metal frames, stainless steel or galvanized steel are durable and corrosion-resistant options.
Start by constructing the base of the frame by attaching two longer pieces of wood or metal as the sides, and two shorter pieces as the front and back. Use nails or screws to secure the joints, ensuring they are flush and sturdy.
Next, add support beams to reinforce the frame structure. These beams can be placed vertically or horizontally depending on your design preferences. They provide extra strength and stability to the mailbox.
As you assemble the frame, periodically check for levelness and squareness using a level and a square. This step is crucial to ensure that your mailbox stands straight and looks well-proportioned.
If you prefer a more decorative look, you can incorporate additional elements, such as trim or molding, to the frame. This will add visual interest and enhance the overall aesthetics of your custom mailbox.
Lastly, sand the frame to remove any rough edges or splinters, creating a smooth and polished surface. This step will also prepare the frame for painting or staining in the next phase of the construction process.
With the frame built, your custom mailbox is starting to take shape. In the next step, we will focus on attaching the sides to complete the enclosure. Stay tuned for the next installment of the guide!
When building a custom mailbox, make sure to use weather-resistant materials such as cedar or pressure-treated wood to ensure durability and longevity.
Read more: How To Build Custom Closet
Step 5: Attaching the Sides
With the frame of your custom mailbox constructed, it’s time to move on to the next step: attaching the sides. The sides enclose the mailbox and give it a defined shape, turning it into a functional and visually appealing structure.
Begin by measuring and cutting the wood or metal pieces for the sides of your mailbox. These pieces should fit snugly within the frame, ensuring a secure and seamless enclosure. Use a saw or jigsaw to achieve precise cuts according to your design specifications.
Before attaching the sides, it’s a good idea to pre-drill holes for the screws or nails. This will prevent the wood from splitting and make the assembly process easier and more efficient. Use a drill with an appropriate drill bit size for the task.
Start by positioning one side piece against the frame, ensuring it aligns with the edges and corners. Use clamps or a helping hand to hold the piece in place while you secure it. Then, drive screws or insert nails through the pre-drilled holes to fasten the side to the frame.
Repeat this process for the remaining sides, making sure they are aligned and symmetrical. Double-check the levelness and squareness of the sides as you go along to maintain the desired proportions and stability of the mailbox.
If you prefer a more decorative touch, you can add additional elements to the sides, such as decorative trim or cut-outs. These can be applied before attaching the sides to the frame or as separate pieces that are attached afterward.
Once all the sides are securely fastened, take a step back and admire your progress. Your custom mailbox is now taking shape and becoming a reflection of your personal style and creativity.
Before moving on to the next step, it’s important to ensure that the sides are firmly attached and there are no loose or weak joints. Give the sides a gentle shake and make any necessary adjustments to ensure a solid and stable construction.
In the next step, we will focus on adding the roof, which will not only protect your mail from the elements but also enhance the overall design of your custom mailbox. Stay tuned for the next installment of the guide!
Step 6: Adding the Roof
As you near the completion of your custom mailbox, it’s time to move on to the next step: adding the roof. The roof serves both a functional and aesthetic purpose, providing protection for your mail while adding an additional layer of visual appeal to your custom creation.
Start by measuring and cutting the material for the roof. Whether you choose plywood or a metal sheet, make sure it is durable and weather-resistant. Measure the dimensions to fit the top of your mailbox frame, allowing for overhang if desired.
If you’re using plywood, you may want to consider adding a layer of waterproofing to protect it from moisture. Apply a waterproof sealant or paint to the surface and edges of the plywood, following the manufacturer’s instructions. This will help prolong the lifespan of the roof.
Once you have prepared the roof material, position it on top of the frame. Ensure that it is centered and aligns with the edges of the frame. You can use clamps or temporary braces to hold the roof in place while you secure it.
To attach the roof, use screws or nails to fasten it to the frame. Make sure to drive the fasteners at regular intervals along the edges to ensure a secure fit. If you prefer a more decorative look, you can use decorative roofing nails or screws.
Take a step back and inspect the roof to ensure it is level and properly aligned. Adjust as necessary to achieve the desired look and functionality. The roof should provide adequate coverage, protecting your mail from rain and other elements.
Now that you have added the roof to your custom mailbox, you can appreciate how it enhances the overall design and provides a finishing touch to your creation. It’s starting to resemble a fully functional mailbox that will make a statement in your front yard.
In the next step, we will focus on installing the mailbox door, allowing access to your mail while maintaining the security of your custom mailbox. Stay tuned for the next installment of the guide!
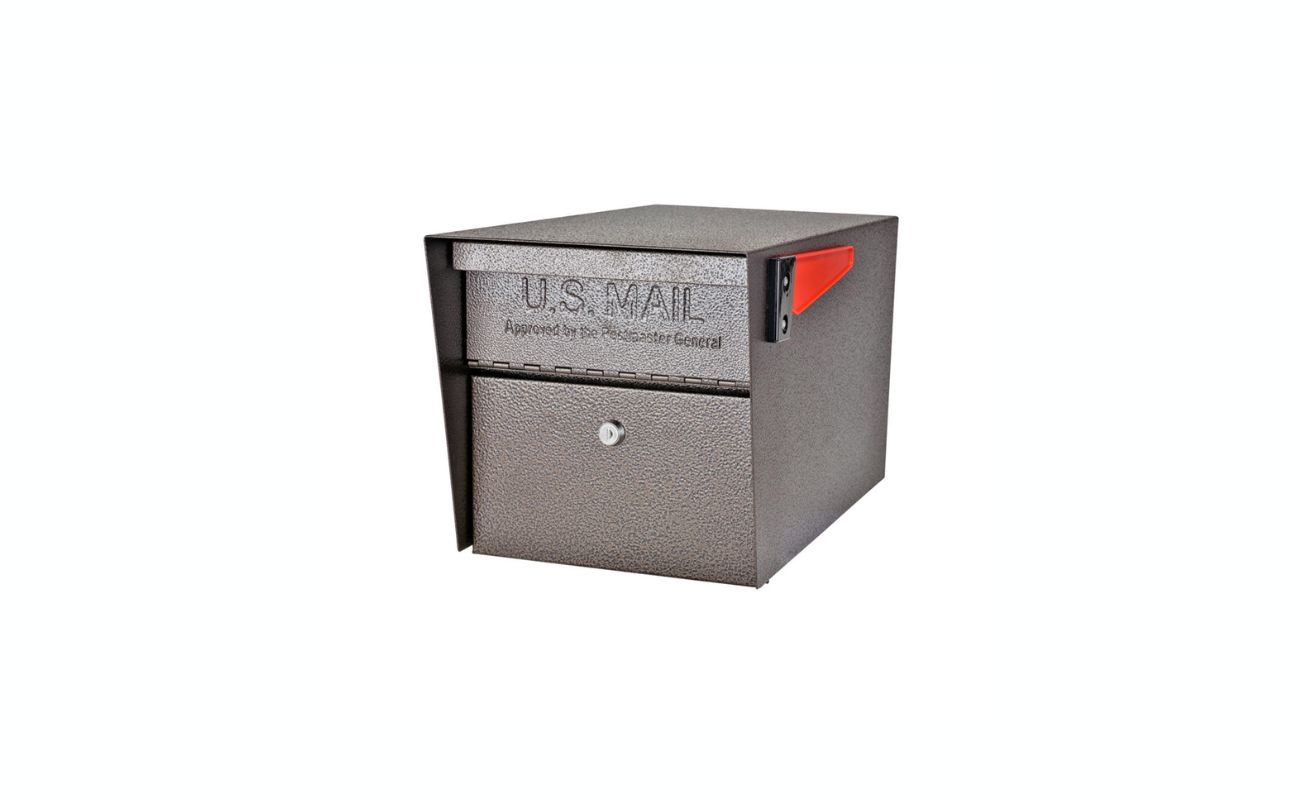
Step 7: Installing the Mailbox Door
As you approach the final stages of building your custom mailbox, it’s time to move on to step 7: installing the mailbox door. The mailbox door not only provides access to your mail but also adds a functional and aesthetic element to your custom creation.
Start by selecting a mailbox door that suits your design preferences and meets any local regulations or requirements. There are various styles and materials to choose from, including metal, plastic, or wooden doors.
Measure the opening for the mailbox door on your custom mailbox. Double-check the dimensions to ensure a proper fit for the selected mailbox door. If necessary, use a saw or jigsaw to make any adjustments to the opening.
Attach the hinges to the mailbox door following the manufacturer’s instructions. Ensure that they are aligned evenly and securely fastened. The hinges should allow the door to open and close smoothly without any obstructions.
Position the mailbox door in the designated opening and mark the placement of the hinges on the mailbox frame. Use a pencil or marker to make the markings clearly visible.
Pre-drill holes for the screws that will secure the hinges to the mailbox frame. Make sure the holes are slightly smaller than the screws to ensure a tight and secure fit. Carefully attach the hinges to the frame using the pre-drilled holes.
Test the mailbox door to ensure it opens and closes properly. Make any necessary adjustments to the placement of the hinges to achieve a smooth operation. The door should be securely attached, providing convenient access to retrieve your mail.
To complete the installation, you may need to add a latch or lock mechanism to ensure the mailbox door remains closed and secure. Choose a lock or latch that suits your needs and provides the desired level of security. Follow the manufacturer’s instructions for installation.
Step back and admire your custom mailbox with its newly installed door. It’s starting to look like a functional and personalized mailbox that will make a statement in your neighborhood.
In the final step, we will focus on painting and adding finishing touches to your custom mailbox, giving it the final polish and a touch of personalization. Stay tuned for the last installment of the guide!
Step 8: Painting and Finishing Touches
Congratulations! You’ve reached the final step of building your custom mailbox – adding the finishing touches. This step involves painting your mailbox and adding any additional decorative elements that will truly make it stand out.
First, start by preparing the surface of your mailbox for painting. If you’re working with wood, sand any rough edges or imperfections to create a smooth surface. If you’re using metal, clean it thoroughly using a mild detergent to remove any dirt or debris.
Choose a weather-resistant paint or stain that matches your desired aesthetic. Consider the color scheme of your home’s exterior or opt for a bold, eye-catching hue to make a statement. Use a brush or roller to apply the paint evenly, making sure to cover all surfaces.
If you want to add a personal touch, consider adding decorative elements such as stencils, decals, or hand-painted designs. You can incorporate your house number, a welcoming message, or any other design that speaks to your style and personality.
Before applying any decorative elements, ensure the mailbox is completely dry. Use stencils or freehand techniques to paint your desired design. If using decals, carefully adhere them to the mailbox following the instructions provided.
Once the paint is dry and any decorative elements are in place, it’s time to protect your mailbox from the elements. Apply a clear protective sealant or varnish to ensure the longevity and durability of the paint job. This will provide an added layer of protection against sun, rain, and other environmental factors.
In addition to painting, consider adding any final touches to enhance the functionality and aesthetics of your custom mailbox. This may include a newspaper holder, a flag, or even a small planter to add a touch of greenery.
Step back and admire your completed custom mailbox. It’s a beautiful and unique addition to your home’s exterior, showcasing your creativity and personal style. As you receive your first batch of mail, you’ll feel a sense of pride knowing it’s being delivered to a one-of-a-kind creation.
So there you have it – a step-by-step guide to building a custom mailbox. From gathering materials to painting and adding finishing touches, you’ve created a mailbox that’s sure to be admired by all who pass by. Enjoy the process and revel in the joy of showcasing your craftsmanship!
If you would like more tips and inspiration for other DIY projects, don’t hesitate to explore our website. Happy crafting!
Read more: How To Build Custom Cedar Shutters
Conclusion
Congratulations on completing your journey to build a custom mailbox! You’ve embarked on a rewarding project that allowed you to showcase your creativity, craftsmanship, and personal style. Your custom mailbox is not only a functional and practical addition to your home but also a unique piece of art that sets your property apart.
Throughout the process, you gathered materials, designed the mailbox, prepared the base, built the frame, attached the sides, added the roof, installed the mailbox door, and finally, painted and added finishing touches. With each step, you made deliberate choices to create a mailbox that reflects your personality and complements your home’s exterior.
By opting for a custom mailbox, you have the opportunity to express your creativity and individuality. Instead of settling for a generic mailbox that blends in with the crowd, you have crafted a statement piece that catches the eyes of neighbors and passersby. Your custom mailbox is sure to spark conversations and elicit admiration.
Not only does a custom mailbox enhance the visual appeal of your property, but it also adds a personal touch. It reflects your taste, interests, and style, making it a true representation of who you are. Every time you retrieve your mail, you’ll be reminded of the time and effort you put into building your unique mailbox.
Remember, the process of building a custom mailbox is not just about the end result. It’s about the sense of fulfillment and satisfaction that comes with creating something with your own hands. It’s about the joy of immersing yourself in a hands-on project and seeing it come to life.
Whether you tackled this project alone or enlisted the help of friends or family, building a custom mailbox is an achievement to be proud of. You’ve honed your DIY skills, embraced creativity, and made a lasting impression on your home’s curb appeal.
Thank you for joining us on this journey to build a custom mailbox. We hope this guide has been informative and inspiring, providing you with the knowledge and confidence to create a mailbox that is truly one-of-a-kind. Continue to explore and unleash your creativity in other DIY projects, and remember that the possibilities are endless when you use your imagination and put your skills to work.
Happy crafting!
After mastering your mailbox construction, why stop there? Dive into more creative projects with our guide on the most exciting woodworking projects. This collection not only showcases a variety of designs but also provides handy tips to enhance your craftsmanship. Whether you're a novice or a seasoned woodworker, this article offers something for everyone looking to refine their skills and create stunning pieces.
Frequently Asked Questions about How To Build A Custom Mailbox
Was this page helpful?
At Storables.com, we guarantee accurate and reliable information. Our content, validated by Expert Board Contributors, is crafted following stringent Editorial Policies. We're committed to providing you with well-researched, expert-backed insights for all your informational needs.


0 thoughts on “How To Build A Custom Mailbox”