
Articles
How To Build Storage Under Stairs
Modified: August 30, 2024
Discover innovative storage ideas and learn how to build storage under your stairs. Maximize the space in your home with these creative solutions.
(Many of the links in this article redirect to a specific reviewed product. Your purchase of these products through affiliate links helps to generate commission for Storables.com, at no extra cost. Learn more)
Introduction
In today’s modern homes, maximizing every inch of available space is essential. One often overlooked area that can provide valuable storage is the space underneath the stairs. Whether you have a small hallway, a cozy living room, or even a grand staircase, utilizing the area under the stairs can help declutter and create a more organized living environment.
Building storage under the stairs not only adds functionality but also enhances the overall aesthetics of your home. It provides a clever solution for storing items such as shoes, books, toys, or even household essentials. With some careful planning and a little bit of DIY know-how, you can transform this often neglected space into a practical and stylish storage solution.
In this step-by-step guide, we will walk you through the process of building storage under the stairs. We will cover everything from measuring the space and selecting the right storage type to designing the layout and adding the finishing touches. Whether you are a seasoned DIY enthusiast or a beginner with limited experience, we will provide you with the guidance and tips you need to successfully complete this project.
Before you begin, it’s important to assess the space under your stairs and determine its potential. The size and shape of the area will play a role in the design and type of storage you can incorporate. Additionally, consider any obstructions, such as pipes or electrical wiring, that may need to be worked around.
Now that we have an overview of what lies ahead, let’s dive into the details of each step in building storage under the stairs. By the end, you’ll be equipped with the knowledge and skills to transform your under-stair space into a functional and beautiful storage area for your home.
Key Takeaways:
- Transform under-stair space into stylish, functional storage with careful planning, accurate measurements, and attention to detail. Maximize vertical space and choose the right storage type to suit your needs and home aesthetics.
- Build a sturdy storage framework and install shelves or drawers to create a custom under-stair storage solution. Add finishing touches, such as paint, molding, and hardware, to enhance the overall appearance and functionality of the storage unit.
Read more: How To Organize Under Stairs Closet
Step 1: Measure the Space Under the Stairs
The first and most crucial step in building storage under the stairs is to accurately measure the available space. This step will determine the dimensions and layout of your storage design, ensuring a perfect fit. Here’s how to get started:
- Gather your tools: You will need a tape measure, pencil, and paper to record your measurements.
- Start at the top: Begin by measuring the width and height of the space at the top of the stairs. Measure from the wall to the nearest obstacle, such as a railing or banister. This will determine the maximum dimensions of your storage unit.
- Measure the depth: From the spot where the stairs start to the back wall, measure the depth of the space. This measurement will determine how deep your storage unit can be without encroaching on walkways or creating any safety hazards.
- Consider irregularities: If there are any irregularities in the space, such as uneven floors or angled walls, take additional measurements to ensure your storage unit can accommodate these variations.
- Sketch a diagram: To better visualize your measurements and keep track of all the dimensions, consider sketching a simple diagram of the space under the stairs. This will serve as a reference throughout the project.
Once you have collected all the necessary measurements, it’s time to move on to the next step: determining the storage type that will best suit your needs and the available space.
Remember, accuracy is key during this measuring process. Even a slight discrepancy can lead to ill-fitting storage units or wasted space. Take your time and double-check your measurements to ensure a successful outcome.
Step 2: Determine the Storage Type
After measuring the space under the stairs, the next step in building storage is to determine the type of storage that will best utilize the available space. The type of storage you choose will depend on your specific needs, the dimensions of the area, and your personal preferences. Here are some popular storage options:
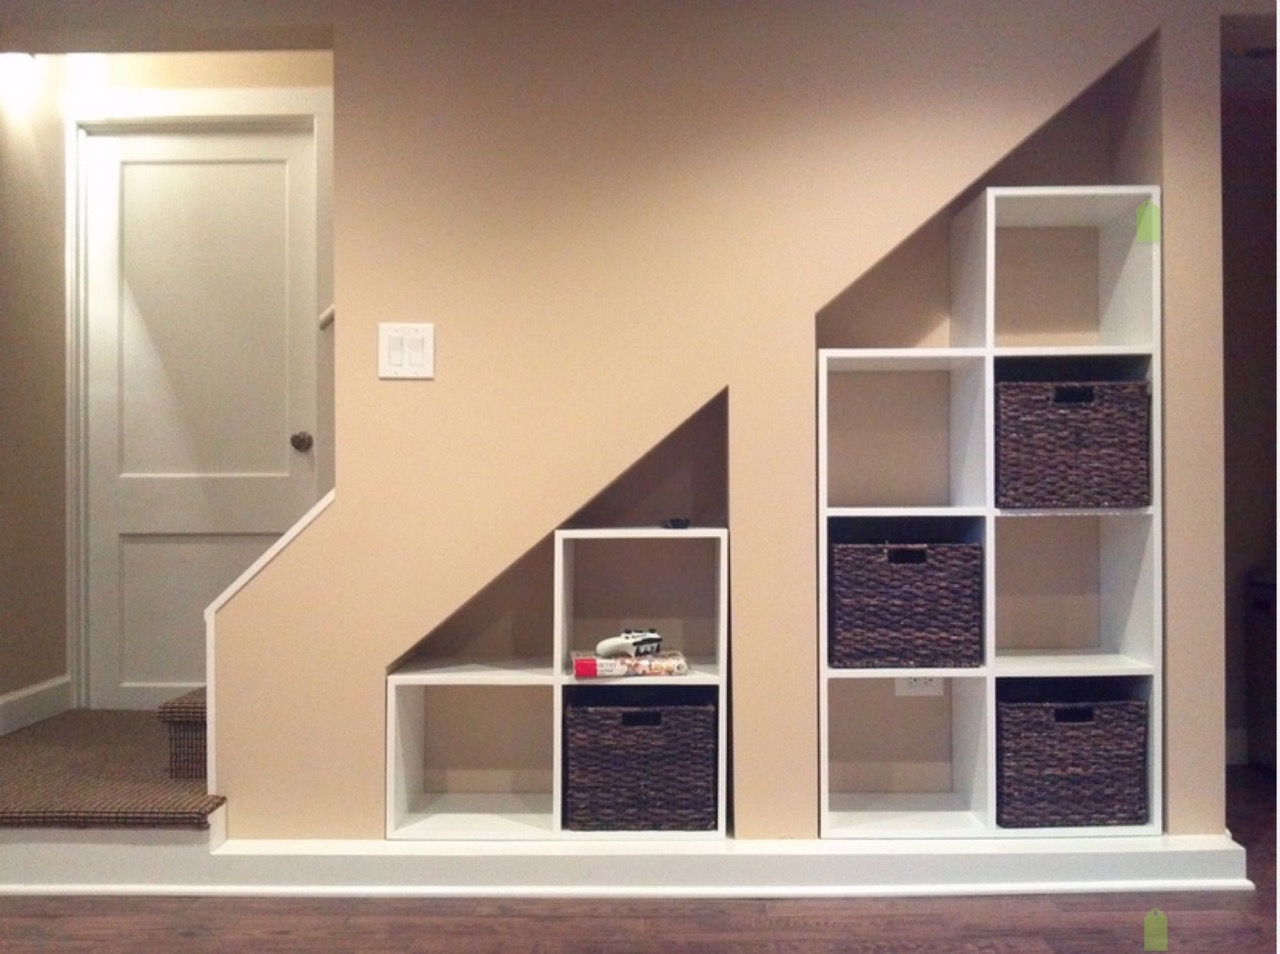
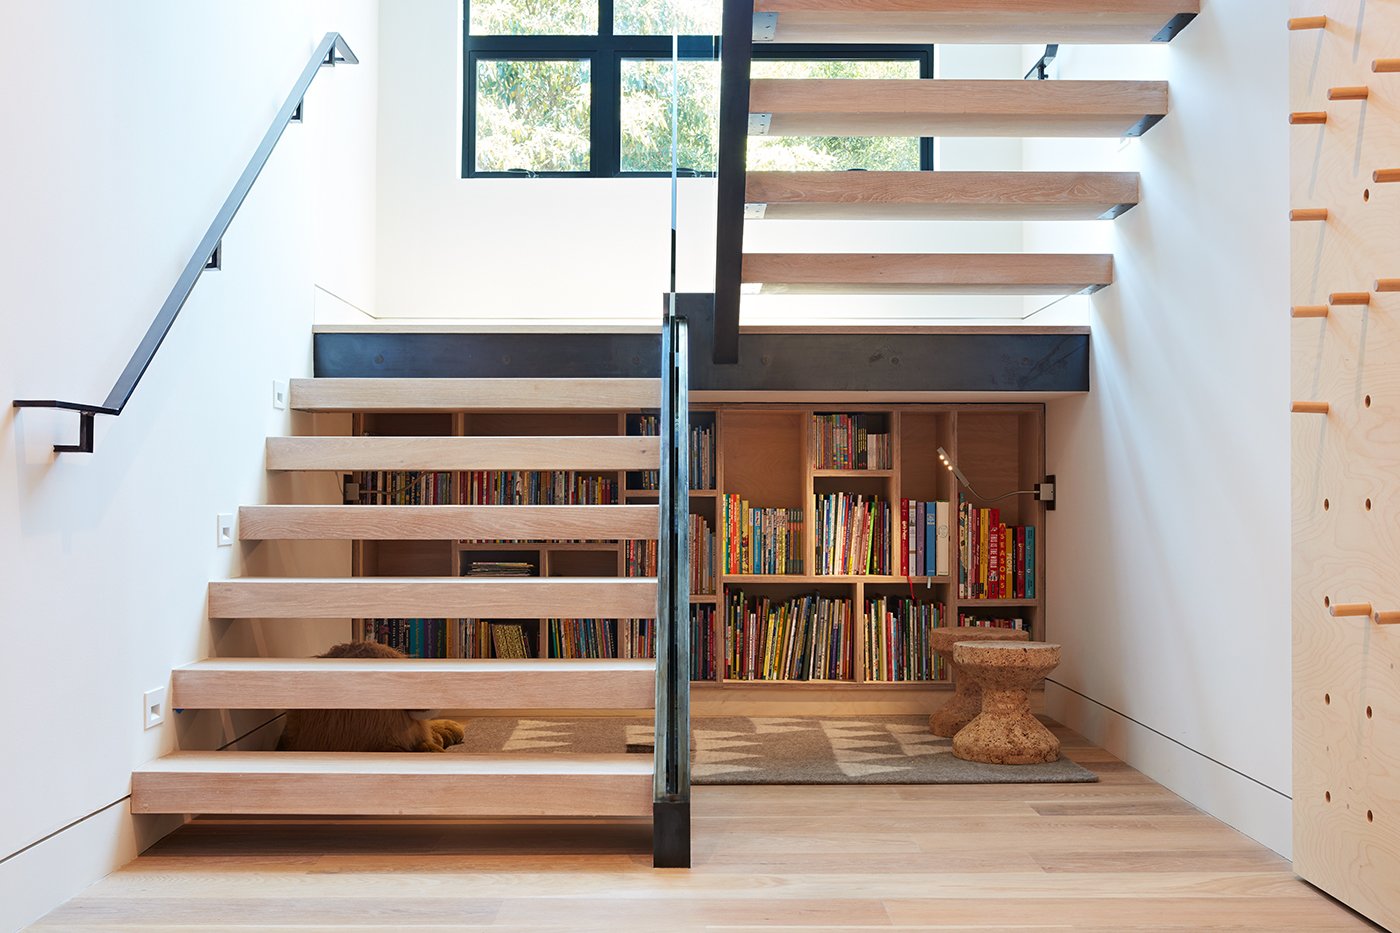
- Open Shelves: Open shelves are a versatile and visually appealing option. They allow you to showcase decorative items, books, or baskets for easy access. Open shelves can be installed at varying heights and depths to accommodate different items and maximize storage space.
- Closed Cabinets: Closed cabinets provide a clean and clutter-free appearance. They are ideal for storing items that you don’t want to display, such as cleaning supplies, electronics, or seasonal decorations. Cabinets can be installed with doors that swing open or with pull-out drawers.
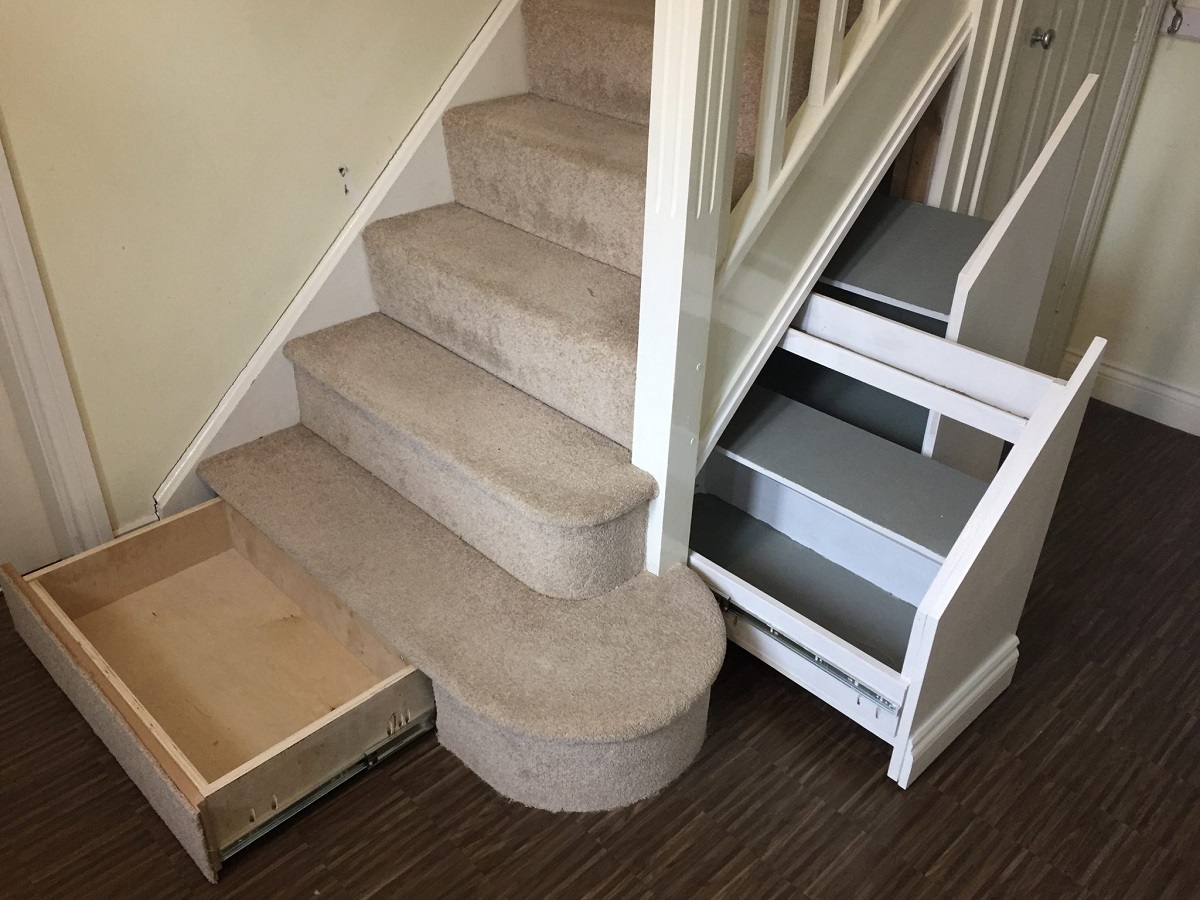
- Drawers: Installing drawers under the stairs provides easy access to stored items. Drawers are an efficient storage solution for smaller items or items that you want to keep neatly organized. They can be customized to fit different widths and depths, making them a flexible option.
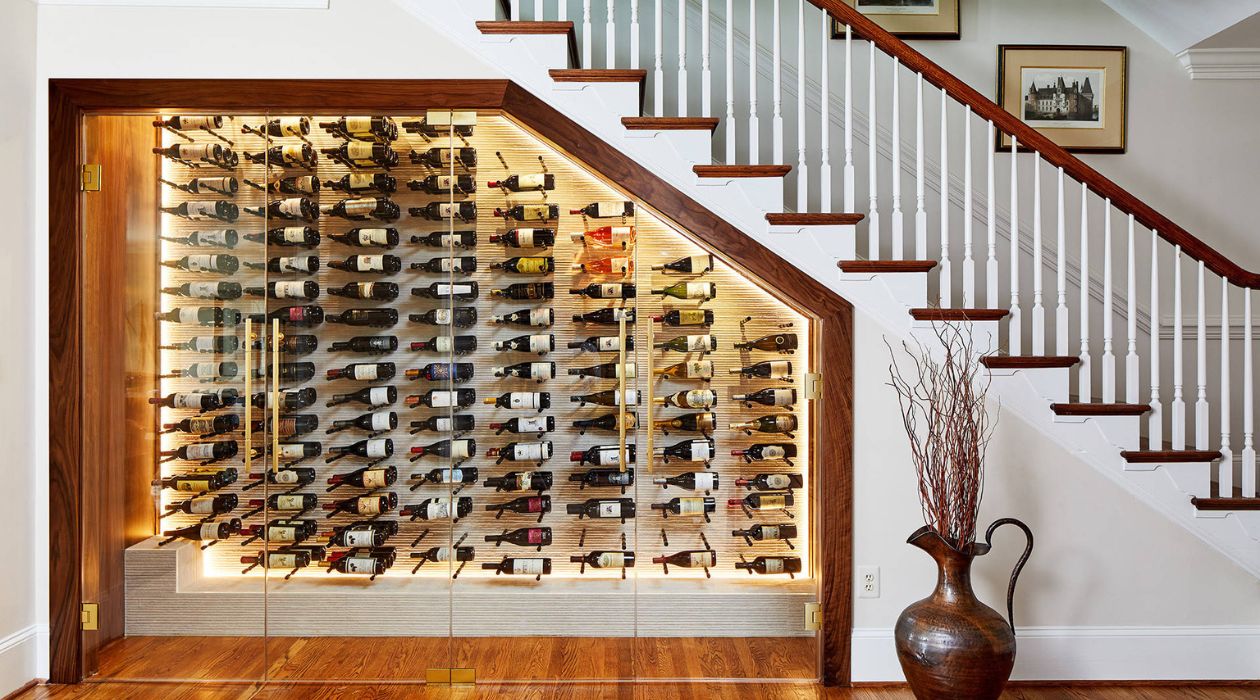
- Wine or Beverage Bar: If you enjoy hosting gatherings or have a passion for wine, consider turning the space under the stairs into a wine or beverage bar. Install wine racks, shelves for glassware, and a countertop for serving drinks.
- Closet or Coat Rack: If you need extra storage for coats, shoes, or outdoor gear, turning the space under the stairs into a closet or coat rack area is a practical move. Add hooks, hangers, and shelves to keep everything organized.
Consider your storage needs and the overall style of your home when selecting the storage type. You may also want to think about future uses for the space and how the storage can adapt to changing needs. It’s essential to choose a storage option that not only maximizes the available space but also complements the aesthetics of your home.
With the storage type decided, you can move on to the next step: planning and designing the layout of your storage under the stairs.
Step 3: Plan and Design the Storage Layout
Now that you have determined the type of storage that will best suit your needs, it’s time to plan and design the layout of your under-stair storage. This step is crucial as it ensures that the storage solution is not only functional but also well-organized and visually appealing. Here are some steps to help you in the planning and design process:
- Consider the available space: Take into account the measurements you gathered in Step 1 and consider any existing obstacles or irregularities. Think about how much vertical and horizontal space you have to work with and how that will affect the layout.
- Think about accessibility: Consider how easy it will be to access the items in your storage. If you choose closed cabinets or drawers, make sure they can be easily opened and closed without any hindrance.
- Maximize vertical space: Use the height of the under-stair area to your advantage. Incorporate tall shelves or cabinets that reach the ceiling to make the most of the available space.
- Plan for different storage needs: Divide the under-stair area into sections to accommodate different storage needs. For example, you could have shelves for books or display items, drawers for smaller items, and a cabinet for bulkier items.
- Consider lighting: Add lighting solutions to make the storage area more practical and visually appealing. Install LED strip lights or recessed lighting to illuminate the space and make it easier to find items.
- Balance functionality and aesthetics: Ensure that the design of the storage layout aligns with the overall style of your home. Choose materials, colors, and finishes that complement the existing decor.
- Sketch the layout: Create a rough sketch or use a software tool to visualize the layout of your under-stair storage. This will help you see how different elements will fit together and make any necessary adjustments before starting the construction phase.
Remember, a well-planned and thoughtfully designed storage layout will make a significant difference in the overall functionality and aesthetics of your under-stair storage. Once you have finalized the design, you can proceed to the next step: gathering the necessary materials and tools.
Step 4: Prepare the Necessary Materials and Tools
Before you can start building your storage under the stairs, it’s important to gather all the necessary materials and tools. Having everything ready and within reach will ensure a smooth and efficient construction process. Here’s a list of commonly used materials and tools:
Materials:
- Wood or plywood: Depending on your design and preference, you will need wooden boards or plywood for constructing shelves, cabinets, or drawers.
- Trim and molding: Trim and molding can add a polished look to your storage unit. It’s used to cover joints, edges, and corners, providing a professional finish.
- Hardware: Consider the type and size of hardware you need, such as screws, nails, hinges, handles, and drawer slides. Choose high-quality hardware that is durable and suits the overall design.
- Paint or stain: If you plan on painting or staining the storage unit, gather the appropriate paint or stain and any necessary brushes or rollers. Make sure to choose a finish that complements your home’s decor.
- Lighting fixtures: If you decided to incorporate lighting into your under-stair storage, gather the necessary lighting fixtures, wires, and connectors.
- Optional accessories: Depending on your storage type, you may need additional accessories like wine racks, hooks, hangers, or shoe racks. Consider these items in your material list if they are part of your design plan.
Tools:
- Tape measure: A reliable tape measure is crucial for accurately measuring and marking the dimensions of the storage unit.
- Saw: Depending on the materials you are using, you may need a handsaw or a circular saw to cut the wood or plywood to the desired sizes.
- Drill: A power drill is necessary for drilling holes and driving screws into the wood or plywood.
- Screwdriver: In addition to the drill, a screwdriver will be needed for attaching hinges, handles, and other hardware.
- Sanding tools: Sanding tools like sandpaper or a sanding block will help smooth out any rough edges or surfaces before painting or staining.
- Level: A level is essential for ensuring that your storage unit is straight and level during installation.
- Paintbrushes or rollers: If you plan on painting or staining the storage unit, gather paintbrushes or rollers for a smooth and even finish.
- Safety equipment: It’s important to prioritize safety, so make sure to have safety goggles, gloves, and a dust mask on hand to protect yourself during the construction process.
Ensure that you have all the necessary materials and tools before you begin construction. This will save you time and allow for a more efficient and enjoyable process. With everything prepared, you can now move on to the next step: building the storage framework.
Consider installing custom-built drawers or shelves to maximize the space under your stairs. Use the area for storing shoes, books, or seasonal items to keep your home organized and clutter-free.
Read more: How To Drywall Under Stairs
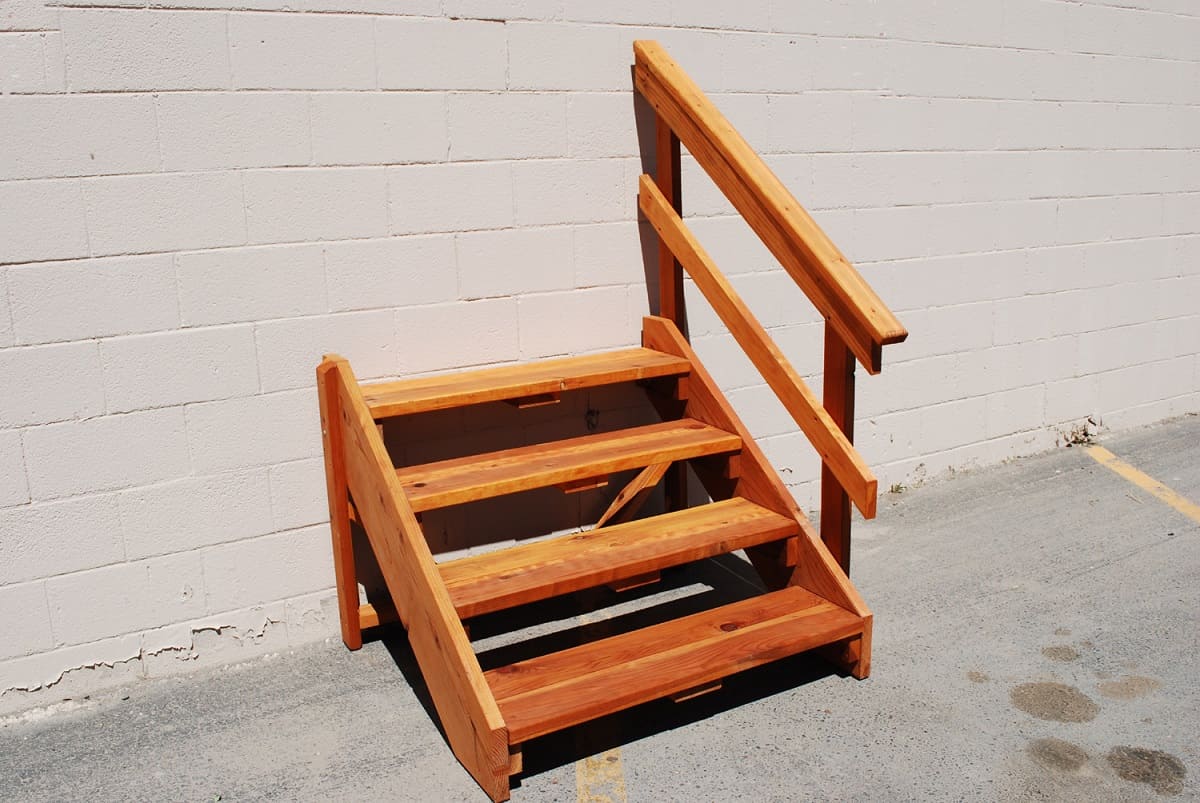
Step 5: Build the Storage Framework
With your materials and tools ready, it’s time to start building the storage framework for your under-stair storage. The framework will provide the structure and support for your shelves, cabinets, or drawers. Follow these steps to create a strong and stable storage foundation:
- Measure and mark: Using your measurements from Step 1, mark the dimensions of the storage framework on the walls and floor beneath the stairs. This will serve as a guide for building the frame.
- Cut your materials: Using a saw, cut the wood or plywood according to your measurements. Make sure to measure twice and cut once to ensure accuracy.
- Assemble the frame: Begin by attaching the vertical supports to the walls using screws or nails. Then, attach the horizontal supports to connect the vertical supports and form the framework. Use a level to ensure everything is straight and even.
- Secure the frame: Once the frame is assembled, securely attach it to the walls using screws or brackets. This will provide stability and prevent any movement or wobbling.
- Adjust for any obstacles: If there are any existing obstacles or irregularities in the under-stair space, make necessary adjustments to the frame to accommodate them. This may involve cutting notches or shaping the wood to fit around obstacles.
- Reinforce the frame: Depending on the size and weight of your storage unit, adding additional bracing or supports may be necessary. This will enhance the strength and durability of the overall structure.
- Sand and smooth the framework: Use sandpaper or a sanding block to smooth out any rough edges or surfaces of the storage frame. This will prepare it for the next step: installing shelves or drawers.
By building a solid storage framework, you are laying the foundation for a sturdy and functional under-stair storage unit. Once your framework is complete, you can move on to the next step: installing shelves or drawers, depending on your chosen storage type.
Step 6: Install Shelves or Drawers
Now that you have built the storage framework, it’s time to install the shelves or drawers to complete your under-stair storage. The installation process will depend on the type of storage you have chosen. Follow these steps to properly install your shelves or drawers:
For Shelves:
- Measure and cut: Measure the dimensions of your shelves and mark them on the wood or plywood. Use a saw to cut the shelves to the desired size.
- Install supports: Determine the desired spacing between the shelves and attach support brackets or cleats to the storage framework. Make sure the supports are level and secure.
- Place the shelves: Carefully place the shelves on top of the support brackets or cleats. Ensure they are level and adjust as necessary.
- Secure the shelves: To prevent the shelves from moving or sliding, use screws or nails to secure them to the support brackets or cleats. Make sure they are firmly attached.
- Repeat for additional shelves: If you have multiple shelves, repeat the process for each one. Ensure proper spacing and alignment between the shelves for a clean and organized look.
For Drawers:
- Measure and cut: Measure the dimensions of your drawers and mark them on the wood or plywood. Use a saw to cut the pieces to the desired size.
- Assemble the drawer boxes: Follow the instructions provided with your drawer hardware to assemble the drawer boxes. This typically involves connecting the sides, front, and back pieces of the drawer using screws or dowels.
- Install drawer slides: Attach the drawer slides to the interior sides of the storage framework, following the manufacturer’s instructions. These slides will allow the drawers to open and close smoothly.
- Attach drawer faces: Once the drawer boxes and slides are in place, attach the drawer faces to the front of the drawers using screws or other hardware. Make sure they are aligned and level.
- Test the drawers: Open and close the drawers multiple times to ensure they glide smoothly on the slides and that they are well-aligned within the storage framework.
Properly installing the shelves or drawers is essential for a functional and efficient under-stair storage solution. Take your time during the installation process to ensure everything is aligned and securely in place. With your shelves or drawers installed, you can move on to the final step: adding the finishing touches to complete your under-stair storage.
Step 7: Add Finishing Touches
Congratulations! You’re now in the final step of building your under-stair storage. Adding the finishing touches will enhance the overall appearance and functionality of your storage space. Follow these steps to complete the project:
- Fill nail holes and seams: Use wood filler to fill in any nail holes or seams on the storage framework, shelves, or drawers. Once the filler dries, sand it down to create a smooth surface.
- Sand and prepare for painting or staining: If you plan on painting or staining your under-stair storage, lightly sand the entire surface to create a clean and smooth finish. Remove any dust with a damp cloth before applying paint or stain.
- Paint or stain: Apply your desired paint or stain color to the storage unit. Use a brush or roller to achieve an even and consistent coat. Allow the paint or stain to dry completely according to the manufacturer’s instructions.
- Install molding and trim: For a polished and finished look, install molding or trim along the edges and corners of your under-stair storage. This will cover any gaps and add a decorative touch to the unit. Attach the molding or trim using nails or adhesive, ensuring it is securely in place.
- Add hardware: Install any additional hardware, such as handles, hinges, or knobs, to the shelves, cabinets, or drawers. Choose hardware that complements the overall design and style of your storage unit.
- Organize and decorate: Once the finishing touches are in place, organize your items on the shelves or in the drawers. Consider adding baskets or bins to further organize smaller items. Decorate the storage unit with plants, art pieces, or decorative accessories to make it visually appealing.
- Step back and admire: Take a moment to step back and appreciate your hard work. Admire your newly built under-stair storage, knowing that it not only serves a practical purpose but also adds value and style to your home.
By adding these finishing touches, you’re putting the final touches on your under-stair storage project. Enjoy the functional and organized space you have created, and take pride in your DIY accomplishment!
As a final note, remember to validate the HTML encoding of your article to ensure it is valid and error-free. This will ensure that your article is properly displayed and accessible to readers.
Conclusion
Congratulations on successfully completing your under-stair storage project! You’ve transformed an often overlooked and underutilized space into a functional and organized storage solution. By following the step-by-step guide provided, you have created a custom storage unit that fits your needs and enhances the aesthetics of your home.
Building storage under the stairs not only maximizes space but also adds value to your home. It allows you to declutter and keep your belongings neatly organized, simplifying your daily life. Whether you’ve created open shelves to showcase decorative items or installed drawers to keep smaller items out of sight, your under-stair storage will undoubtedly make a difference in how you utilize your living space.
Remember, the key to a successful under-stair storage project is thorough planning, accurate measurements, and attention to detail during the construction process. By carefully considering the available space, choosing the right storage type, and designing a functional layout, you’ve created a storage solution tailored to your unique needs.
Now that your under-stair storage is complete, take the time to appreciate your hard work and enjoy the benefits it brings. Organize your belongings, keep the area tidy, and make the most of this valuable storage space. Remember to regularly reassess and organize your items to ensure the storage unit remains functional and efficient.
If you found this step-by-step guide helpful, feel free to share it with others who may be interested in building storage under their stairs. Encourage them to embark on their own DIY journey and transform their homes with personalized and practical storage solutions.
Thank you for following along on this under-stair storage adventure. We hope this guide has been informative and inspiring, and we wish you continued success in all your future DIY projects!
Frequently Asked Questions about How To Build Storage Under Stairs
Was this page helpful?
At Storables.com, we guarantee accurate and reliable information. Our content, validated by Expert Board Contributors, is crafted following stringent Editorial Policies. We're committed to providing you with well-researched, expert-backed insights for all your informational needs.


0 thoughts on “How To Build Storage Under Stairs”