Articles
How To Caulk Exterior Siding
Modified: August 31, 2024
Learn how to properly caulk exterior siding with our informative articles. Find step-by-step guides and expert tips for a flawless finish.
(Many of the links in this article redirect to a specific reviewed product. Your purchase of these products through affiliate links helps to generate commission for Storables.com, at no extra cost. Learn more)
Introduction
Welcome to our comprehensive guide on how to caulk exterior siding. Caulking is an essential maintenance task for homeowners, as it helps to seal gaps and cracks in the exterior siding of your home. By properly caulking your siding, you can prevent water damage, improve energy efficiency, and enhance the overall appearance of your property.
In this article, we will walk you through the step-by-step process of caulking exterior siding, from gathering the necessary tools and materials to cleaning up and maintaining the caulked areas. Whether you are a seasoned DIY enthusiast or a beginner looking to tackle a home improvement project, our guide will provide you with the knowledge and confidence to successfully complete the task.
Before we dive into the steps, it is important to understand the importance of regular siding maintenance. Over time, exposure to the elements can cause your siding to deteriorate, leading to gaps and cracks that allow water, pests, and drafts to enter your home. By regularly inspecting and caulking your siding, you can protect your home and extend its lifespan.
So, let’s get started on your journey to becoming a caulk master! But first, let’s gather the necessary tools and materials.
Key Takeaways:
- Properly caulking exterior siding is crucial for protecting your home from water damage, improving energy efficiency, and enhancing its overall appearance.
- Choosing the right caulk, preparing the siding, and maintaining the caulked areas are essential steps for a successful caulking project. Regular inspection and maintenance ensure long-term effectiveness.
Read more: How To Remove Caulk From Vinyl Siding
Step 1: Gather the necessary tools and materials
Before you begin caulking your exterior siding, it is important to gather all the essential tools and materials. Having everything you need at your fingertips will make the process smoother and more efficient. Here’s a list of items you will need:
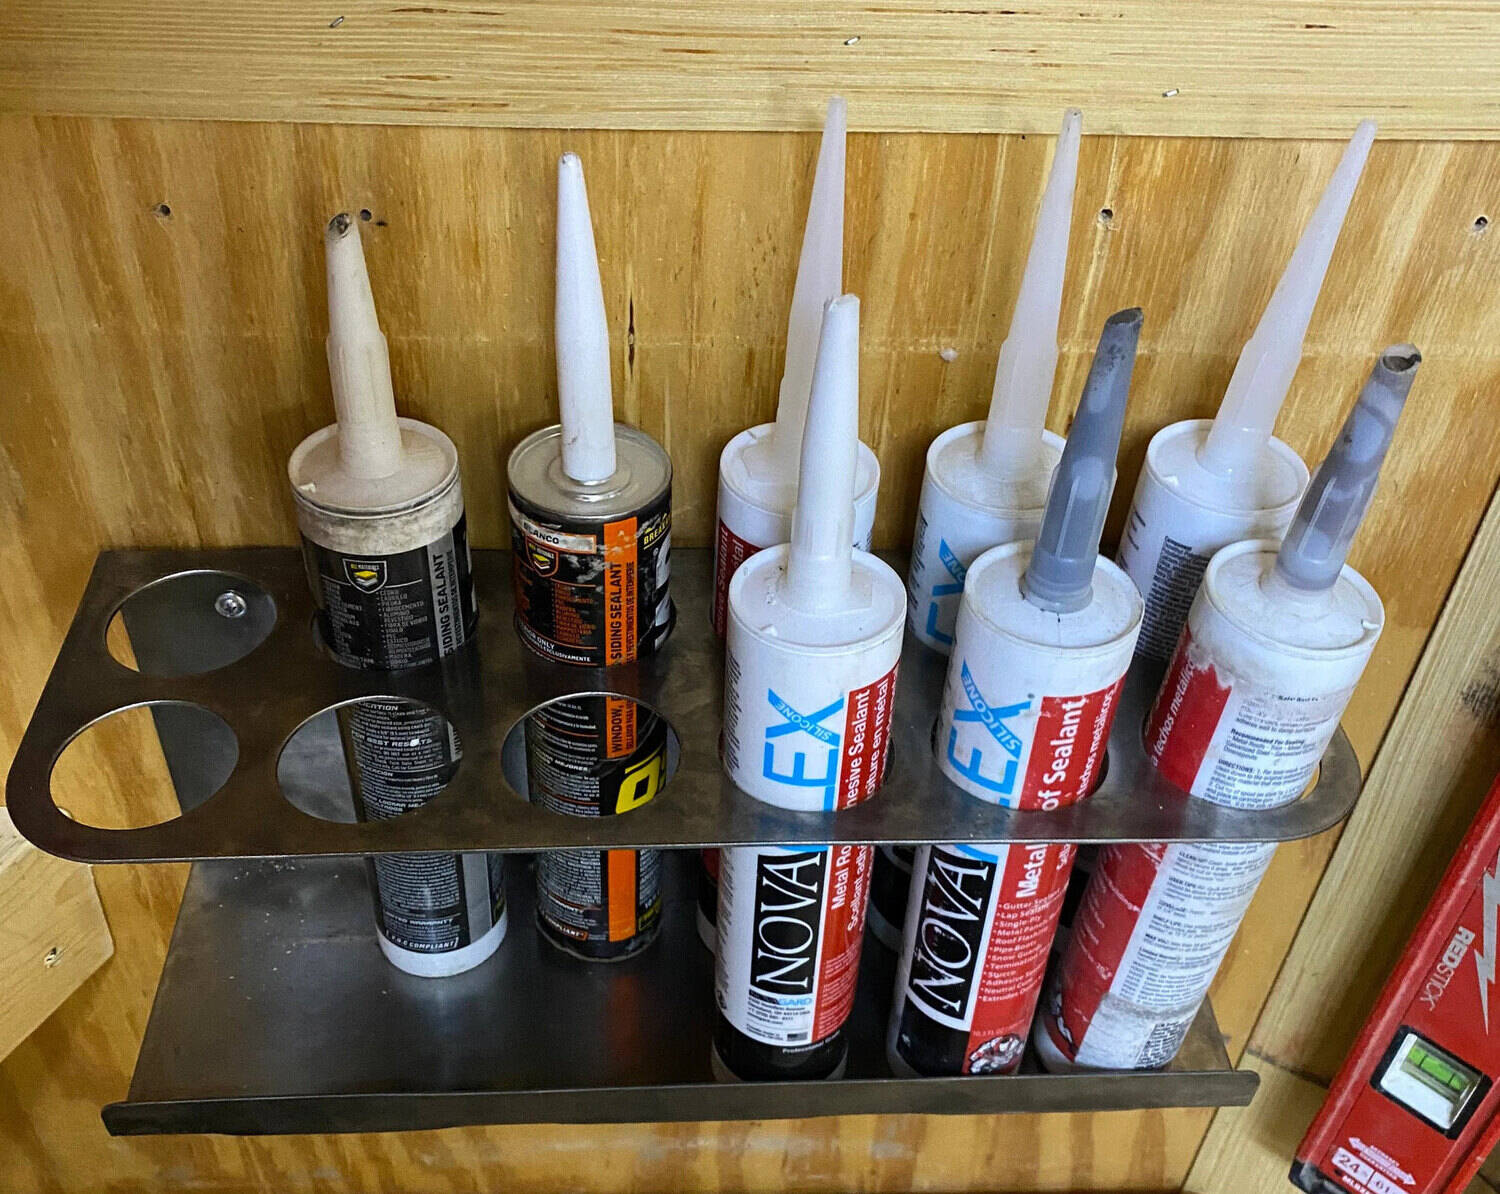
- Caulk gun: This tool is used to apply the caulk onto the siding. Make sure you choose a caulk gun that fits comfortably in your hand and is easy to control.
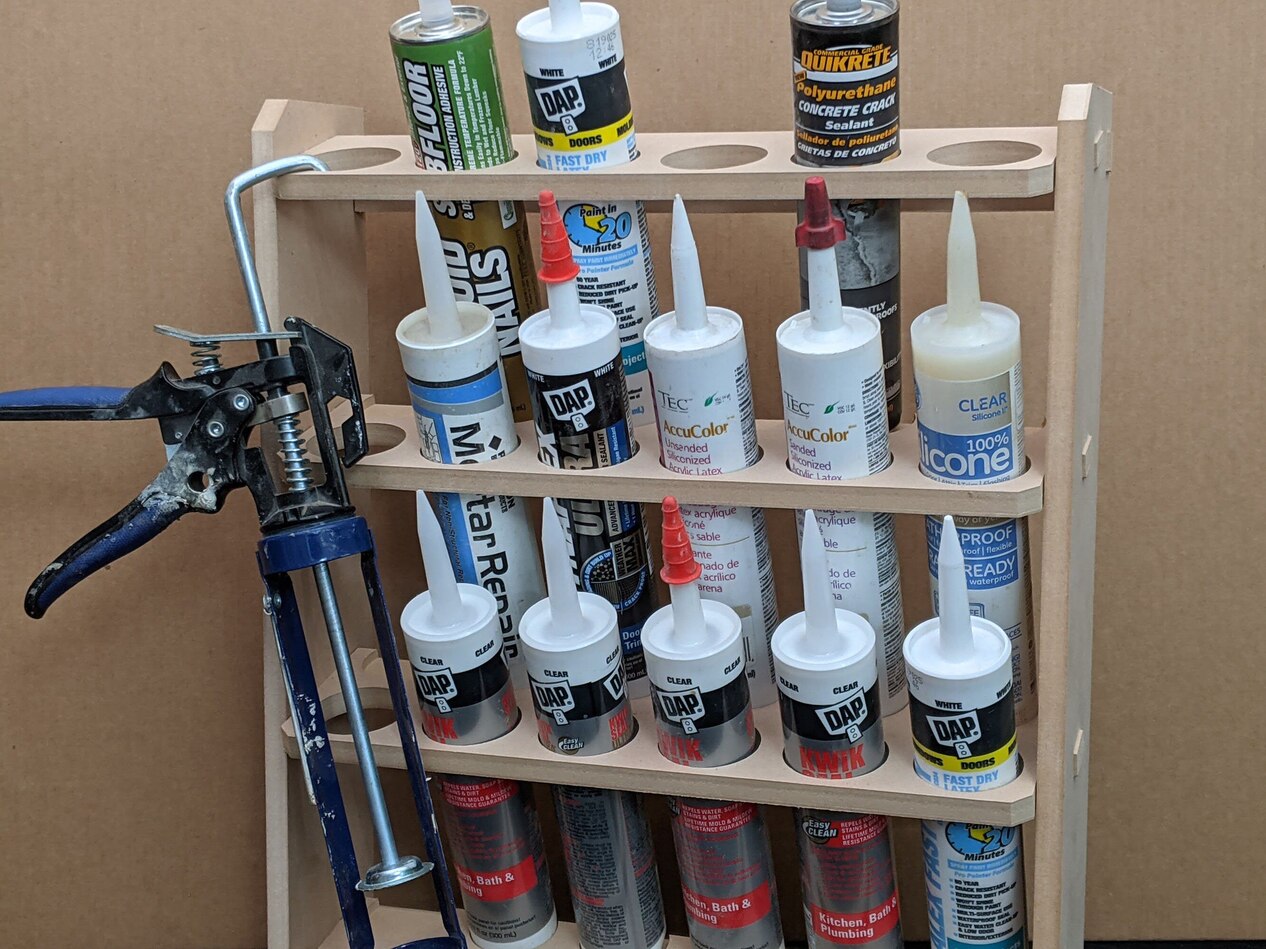
- Caulking tubes: These are the containers that hold the caulk. Look for high-quality exterior caulk that is suitable for the type of siding you have.
- Caulk smoothing tool: This tool helps you achieve a smooth and professional finish. It can be a putty knife, a wet finger, or a specialized caulk smoothing tool.
- Utility knife: You will need a sharp utility knife to cut the tip of the caulk tube at the desired angle.
- Protective gear: To ensure your safety, wear gloves, safety glasses, and a dust mask, especially if you are working with wood or fiber cement siding.
- Clean cloth or sponge: You will use this to wipe away excess caulk and clean up any mess.
It is essential to choose high-quality caulking materials that are specifically designed for exterior use. Look for a caulk that is waterproof, flexible, and can withstand weather conditions. Consider the type of siding you have – whether it’s vinyl, wood, or fiber cement – and choose a caulk that is compatible with that material.
Once you have gathered all the necessary tools and materials, you are ready to move on to the next step – preparing the exterior siding.
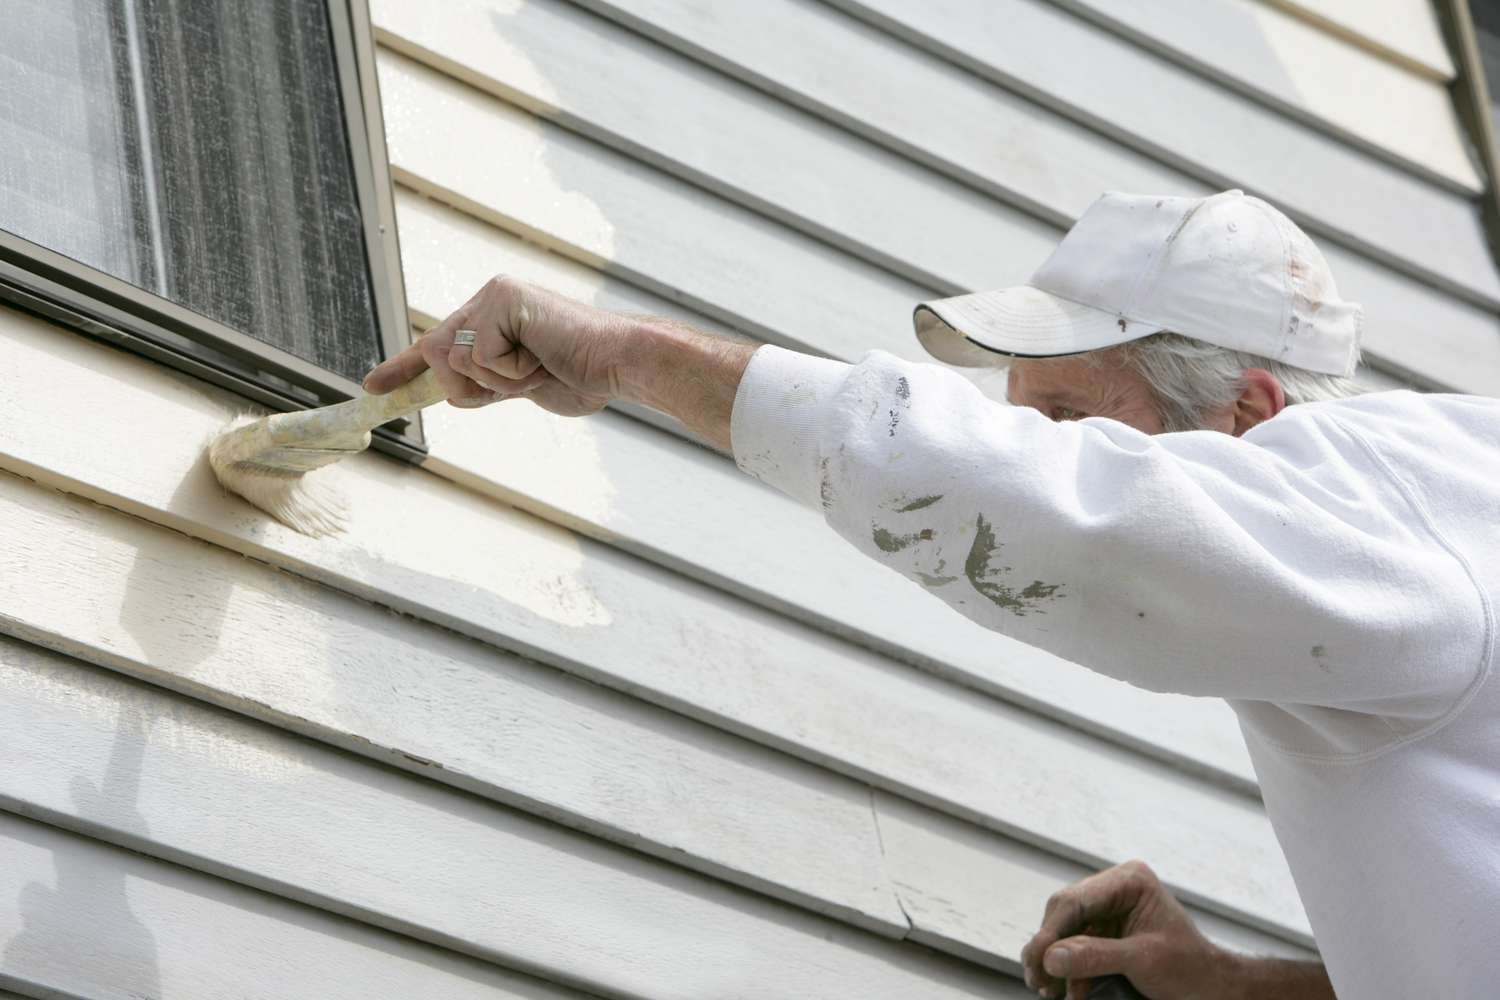
Step 2: Prepare the exterior siding
Preparing the exterior siding before caulking is crucial to ensure proper adhesion and a long-lasting seal. Here are the steps to follow:
- Inspect the siding: Start by carefully examining your siding for any signs of damage, such as cracks, rot, or loose boards. If you notice any issues, address them before caulking.
- Clean the siding: Use a pressure washer or a scrub brush with a mixture of mild detergent and water to clean the surface of the siding. Remove dirt, debris, and any loose paint. Allow the siding to dry completely before proceeding.
- Remove old caulk: If there is old caulk present, use a utility knife or a caulk removal tool to carefully scrape it away. Make sure to remove any loose or damaged caulk to ensure a clean surface for the new caulk to adhere to.
- Fill larger gaps: If you have any larger gaps in the siding, consider filling them with foam backer rod before caulking. This will provide additional support and prevent the caulk from sinking into the gap.
By properly preparing the exterior siding, you create a clean and solid foundation for the caulking process. This will help to ensure a watertight seal and optimize the effectiveness of the caulk.
Now that your siding is prepped and ready, it’s time to move on to the next step – choosing the right caulk for your project.
Step 3: Choose the right caulk
Choosing the right caulk for your exterior siding is crucial for achieving a durable and long-lasting seal. With numerous options available on the market, it’s important to select a caulk that is specifically designed for outdoor use and compatible with your siding material. Here are some factors to consider:
- Weather resistance: Look for a caulk that is designed to withstand extreme weather conditions, such as heat, cold, rain, and UV exposure. This will ensure that the caulk remains intact and provides an effective barrier against moisture.
- Flexibility: Siding expands and contracts with temperature fluctuations, so it’s essential to choose a caulk that has good flexibility. This will allow the caulk to move with the siding without cracking or breaking.
- Adhesion: The caulk should have excellent adhesion to your specific siding material. For example, if you have vinyl siding, choose a caulk formulated for vinyl siding. This will help to prevent any peeling or detachment over time.
- Drying time: Consider the drying time of the caulk. Some products require a longer drying time, which may prolong the completion of your project. Opt for a caulk that dries relatively quickly but allows sufficient time for you to work with it.
- Color and finish: Select a caulk color that matches or complements your siding color. This will ensure a visually appealing result. Additionally, determine whether you prefer a glossy or matte finish for the caulk.
Consult with a professional at your local hardware store or read the manufacturer’s instructions to find the best caulk for your specific siding and climate. They may also be able to recommend specialty caulks for unique siding materials or challenging situations.
Once you have chosen the right caulk, it’s time to move on to the next step – loading the caulk gun.
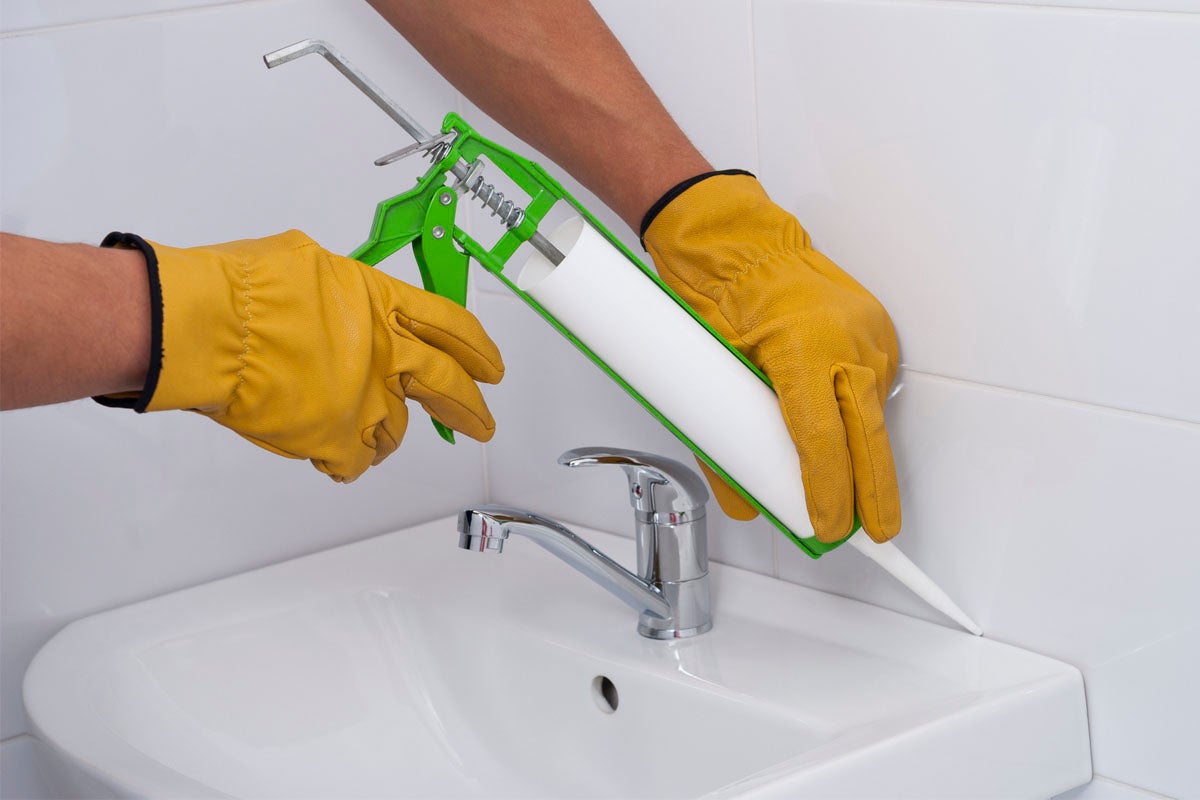
Step 4: Load the caulk gun
Now that you have chosen the right caulk for your exterior siding, it’s time to load the caulk gun. The caulk gun is the tool used to dispense the caulk and apply it to the gaps and cracks in the siding. Here’s how to load the caulk gun:
- Remove the plastic cap: Start by unscrewing or pulling off the plastic cap at the back of the caulk tube. This cap protects the seal of the caulk and ensures its freshness.
- Insert the caulk tube into the gun: Insert the caulk tube into the open slot at the back of the caulk gun. Make sure that the nozzle end of the caulk tube is facing towards the front of the gun.
- Secure the caulk tube: Some caulk guns have a rotating rod that latches onto the bottom of the caulk tube to keep it secure. If your caulk gun has this feature, rotate the rod to secure the tube in place.
- Cut the tip of the caulk tube: Use a utility knife to cut the tip of the caulk tube at a 45-degree angle. Cut the tip just enough for a small opening. The size of the opening will depend on the size of the gaps you are filling. Start with a small opening and cut more if needed.
- Load the plunger: Many caulk guns have a plunger mechanism that pushes the caulk towards the nozzle. To load the plunger, pull back on the rod or handle at the back of the gun until the plunger is fully retracted.
- Test the caulk gun: Squeeze the trigger of the caulk gun to test the flow of caulk. If the caulk begins to flow smoothly from the nozzle, then you have successfully loaded the caulk gun.
It’s important to note that different caulk guns may have slightly different loading mechanisms. Always refer to the manufacturer’s instructions for the specific caulk gun you are using, as they may have specific loading instructions.
Now that your caulk gun is loaded and ready, it’s time to move on to the next step – applying caulk to the gaps and cracks in the siding.
Make sure to clean the area thoroughly before applying caulk to exterior siding. Use a caulk that is specifically designed for outdoor use and can withstand the elements. Apply the caulk in a smooth, continuous bead for best results.
Read more: How To Install Exterior Shiplap Siding
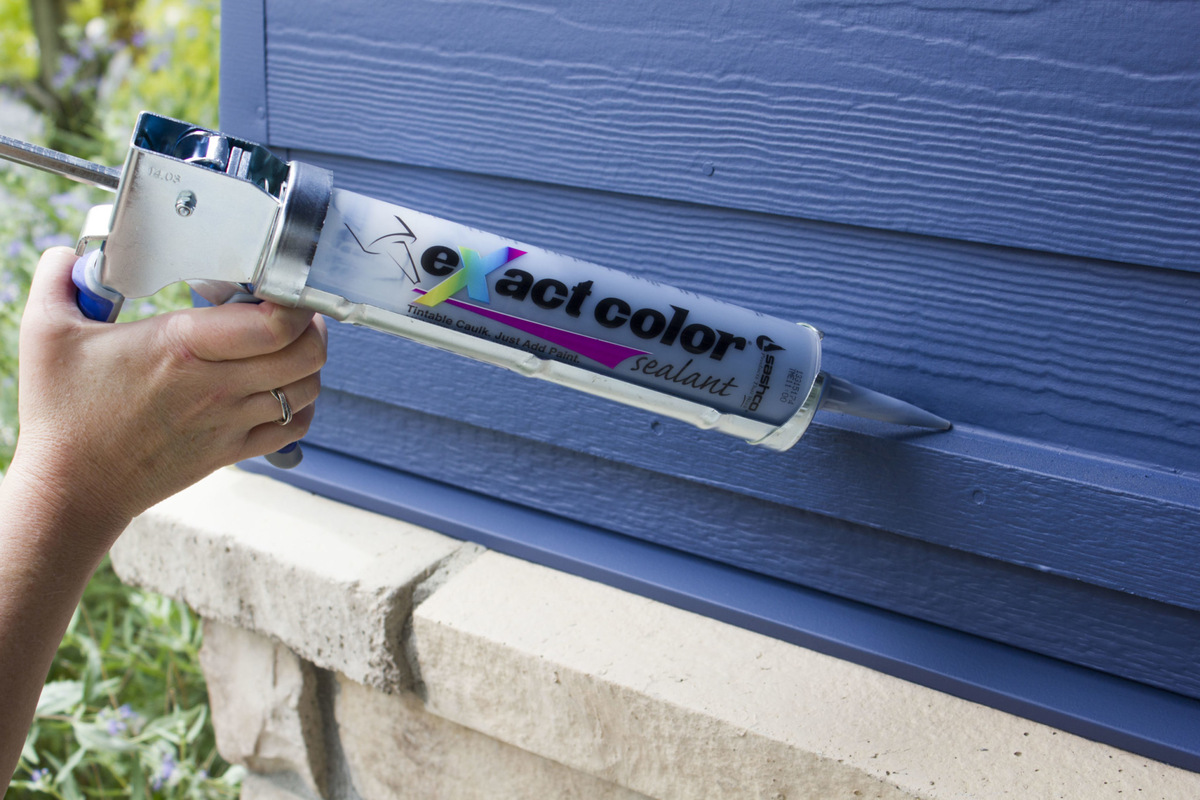
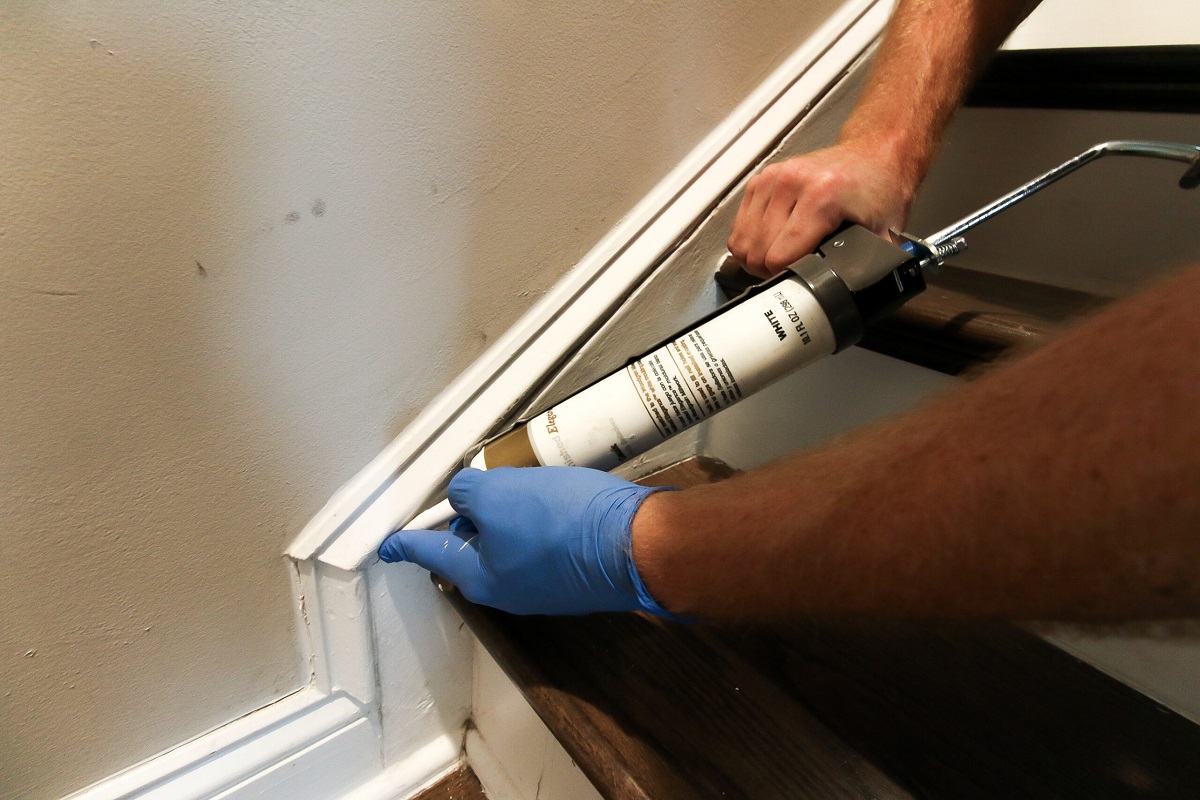
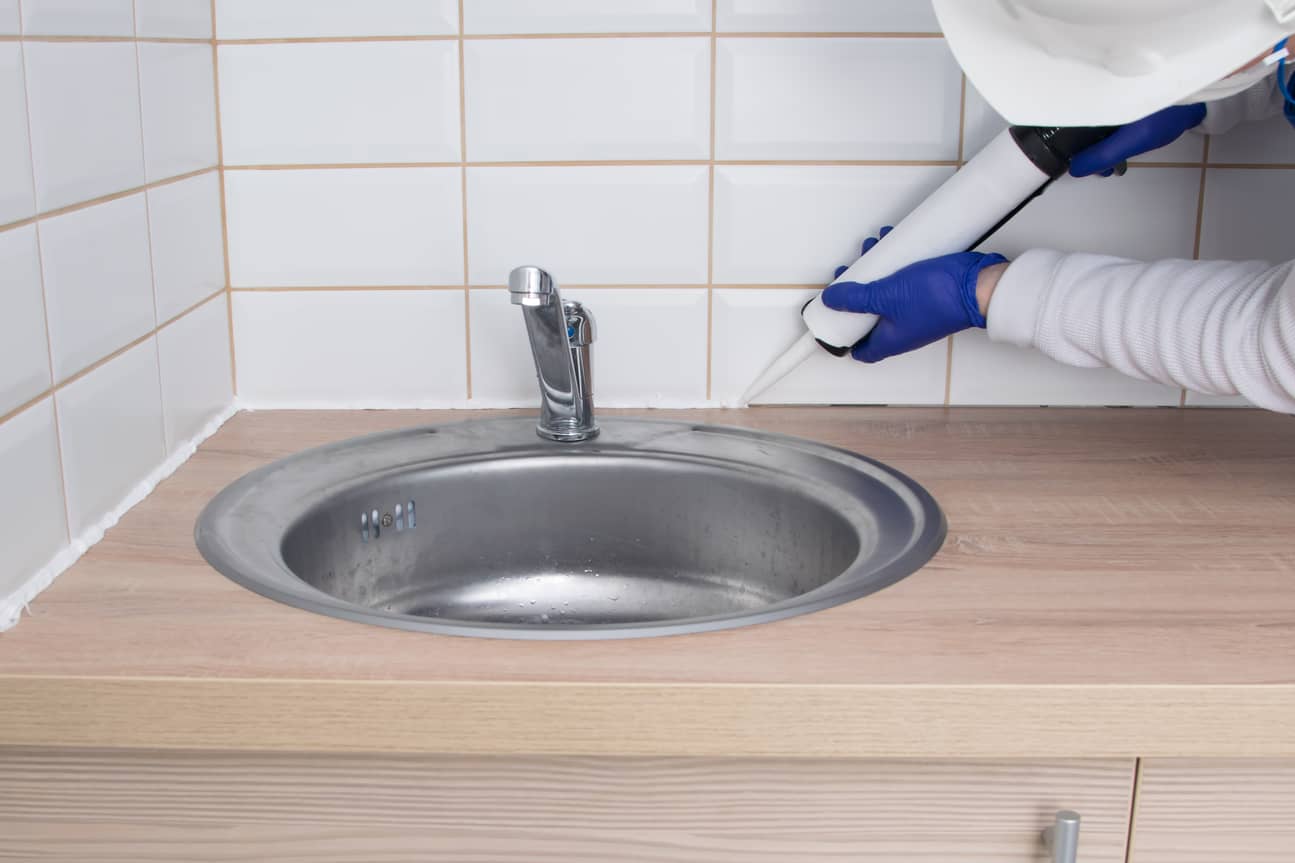
Step 5: Apply caulk to gaps and cracks
With your caulk gun loaded and ready, it’s time to start applying the caulk to the gaps and cracks in the exterior siding. Follow these steps to ensure a smooth and effective application:
- Position the caulk gun: Hold the caulk gun at a 45-degree angle, with the nozzle touching the gap or crack you want to fill. Make sure to position the gun in a way that allows you to easily move along the gap or crack without interruption.
- Squeeze the trigger: Slowly squeeze the trigger of the caulk gun to start dispensing the caulk. Apply a steady and even amount of pressure as you move the caulk gun along the gap or crack in a continuous motion.
- Filling gaps and cracks: Keep the nozzle of the caulk gun in contact with the gap or crack as you squeeze the trigger. Move the caulk gun steadily along the gap or crack, ensuring that the caulk fills the entire space and forms a complete seal.
- Control the amount of caulk: Depending on the size of the gap or crack, you may need to adjust the speed and pressure of the caulk gun to control the amount of caulk being dispensed. Apply enough caulk to fill the gap or crack without overflowing or creating excess waste.
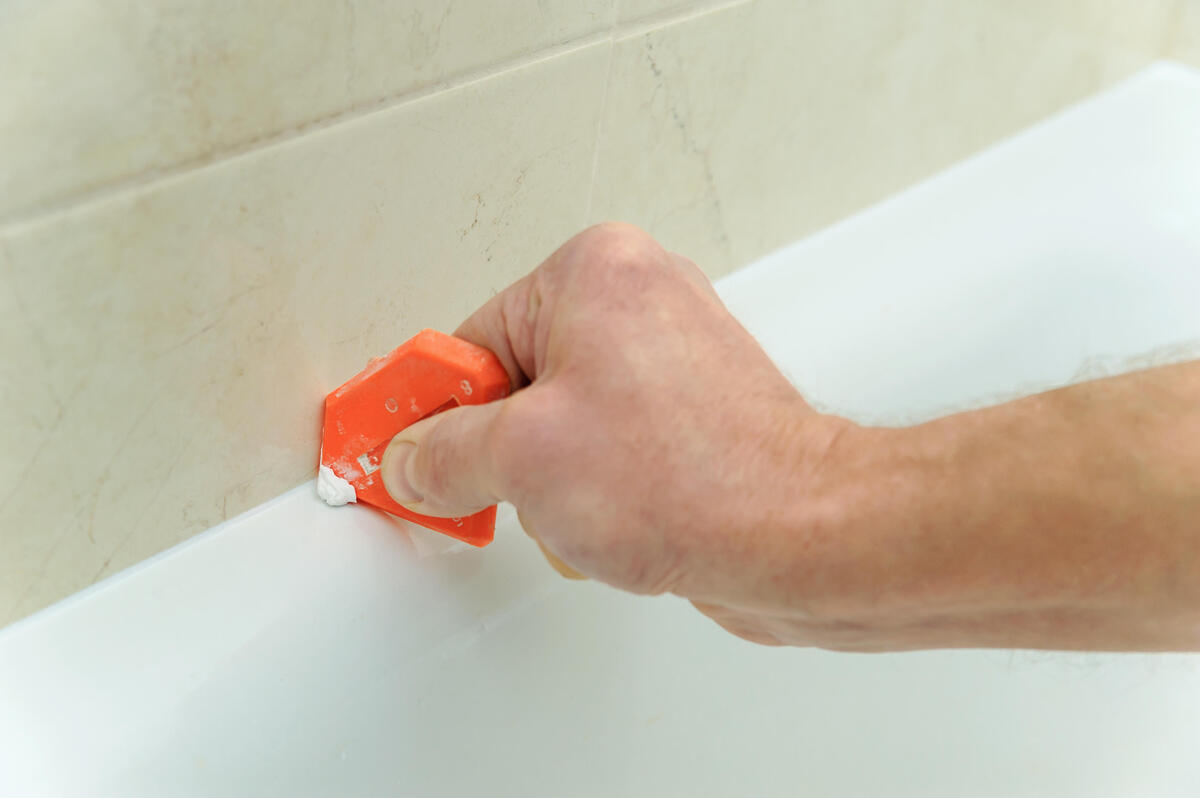
- Smooth the caulk: Immediately after applying the caulk, use a caulk smoothing tool, a putty knife, or a wet finger to smooth out the surface of the caulk. This will help create a neat and professional finish while ensuring proper adhesion.
- Continue the process: Repeat the above steps for each gap or crack in the siding that requires caulking. Work systematically to ensure that you cover all areas and leave no gaps unprotected.
Remember to work in small sections at a time, as caulk tends to dry quickly. It’s also important to clean off any excess caulk before it dries to achieve a clean and polished look.
Once you have applied caulk to all the gaps and cracks in the siding, it’s time to move on to the next step – smoothing out the caulk.
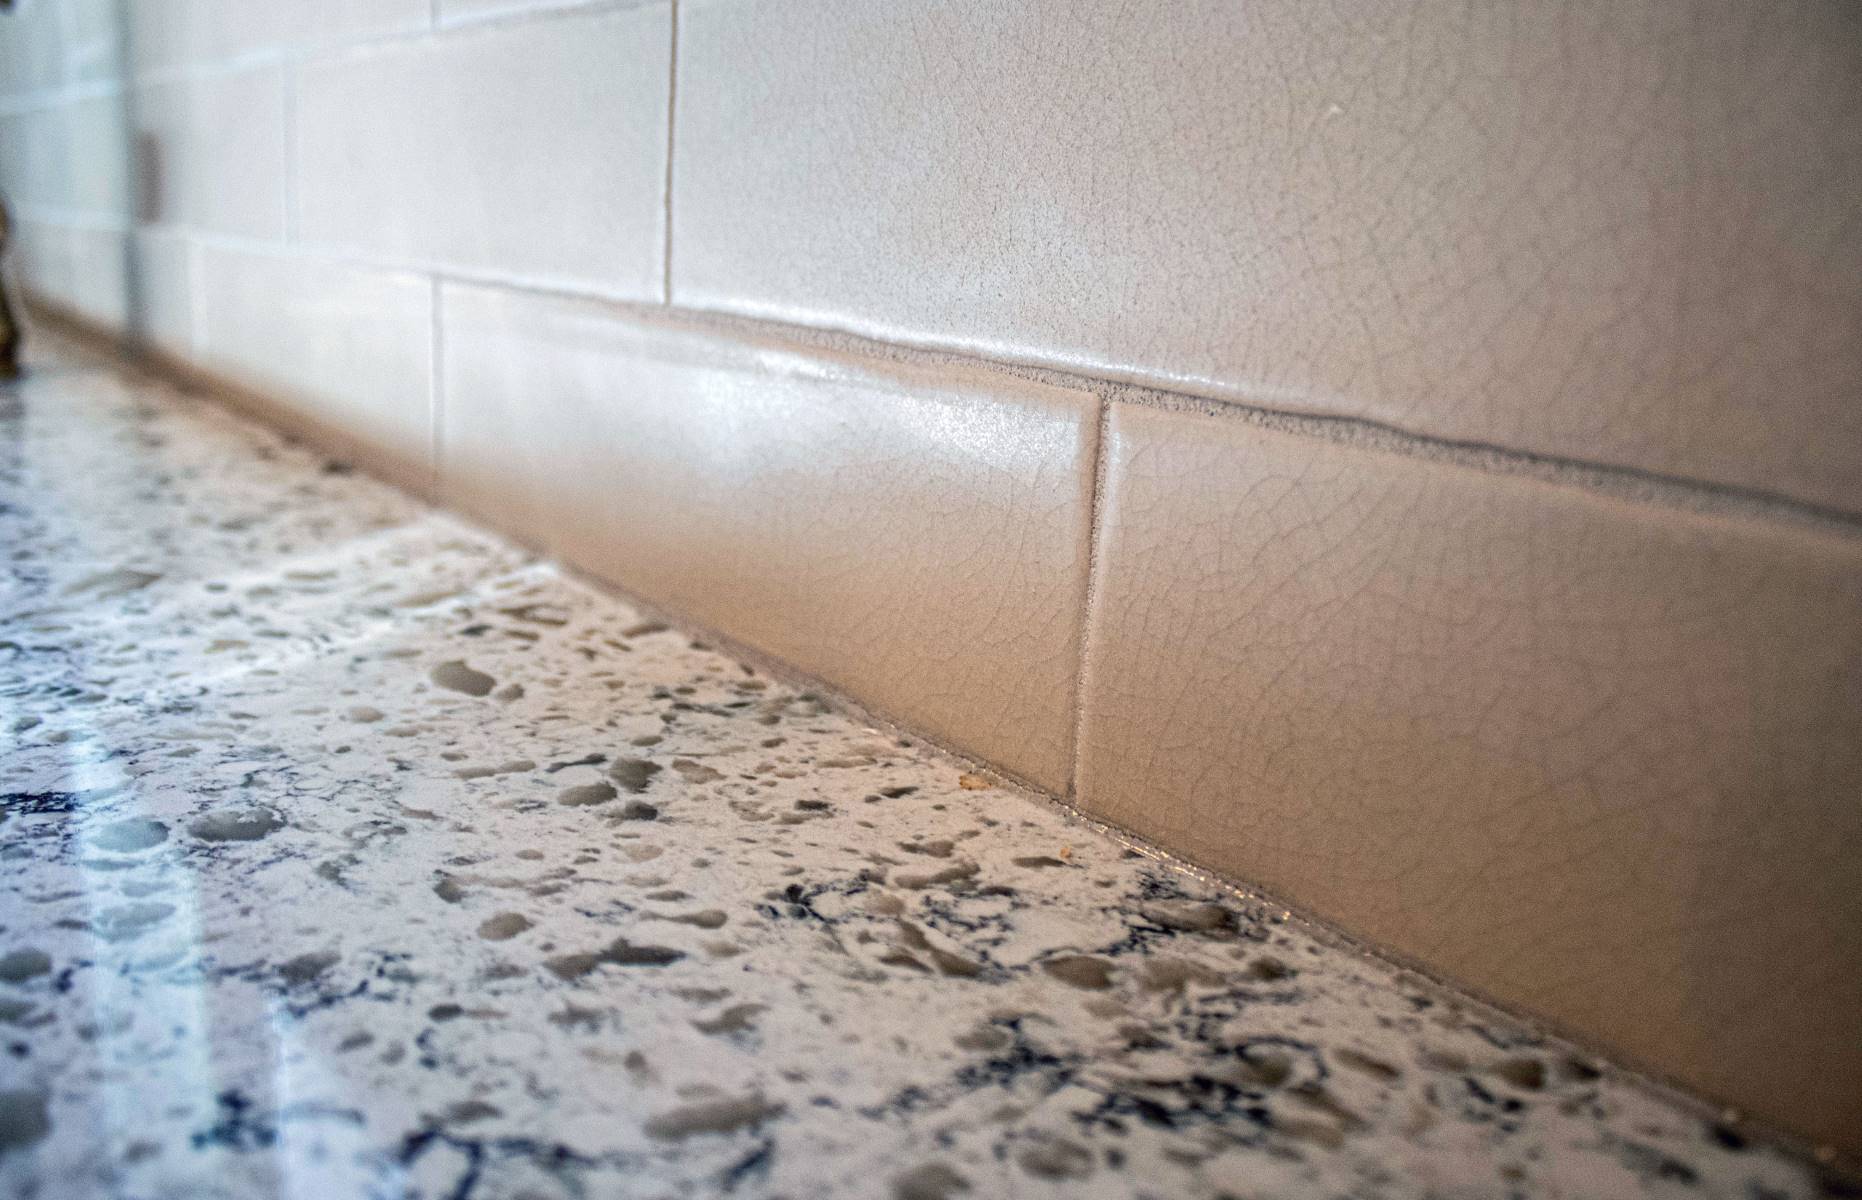
Step 6: Smooth out the caulk
After applying the caulk to the gaps and cracks in the exterior siding, it’s important to smooth out the caulk to achieve a clean and professional-looking finish. Follow these steps to effectively smooth out the caulk:
- Dip your finger in water: Wet your finger with water to prevent it from sticking to the caulk as you smooth it out. This will help you glide over the surface of the caulk more easily.
- Start smoothing from one end: Begin at one end of the caulk line and place your wet finger against the caulk at a slight angle. Apply gentle pressure as you move your finger along the caulk line, smoothing it out in a continuous motion.
- Keep your finger wet: Periodically dip your finger in water to keep it wet and prevent it from dragging or sticking to the caulk.
- Maintain an even pressure: As you smooth out the caulk, ensure that you maintain a consistent and even pressure. This will help achieve a uniform finish across the entire caulked area.
- Remove excess caulk: If you notice any excess caulk or smudges, use a clean cloth or sponge to wipe them away. Dampen the cloth or sponge with water and gently rub over the surface to remove any unwanted caulk.
- Check for any missed spots: After smoothing out the caulk, carefully inspect the caulked area to ensure that you haven’t missed any gaps or cracks. If you spot any, fill them in with additional caulk and smooth them out.
Smoother caulk lines not only enhance the appearance of your siding but also help improve the durability of the seal. Taking the time to smooth out the caulk will result in a professional-looking finish that adds value to your home.
Once you have smoothed out the caulk to your satisfaction, it’s time to move on to the next step – allowing the caulk to dry.
Step 7: Allow caulk to dry
After applying and smoothing out the caulk, it is important to allow it sufficient time to dry and cure. The drying time can vary depending on the type of caulk and the environmental conditions. Here are some tips to ensure proper drying:
- Refer to the manufacturer’s instructions: Different types of caulk have different drying times. Consult the manufacturer’s instructions to determine the recommended drying time for the specific caulk you are using.
- Be mindful of environmental conditions: Factors such as temperature, humidity, and ventilation can affect the drying time of caulk. Warmer temperatures and good air circulation can help speed up the drying process.
- Avoid contact or disturbance: While the caulk is drying, try to avoid any contact or disturbance. This includes touching, leaning against, or allowing objects to come in contact with the caulked areas. It is best to let the caulk set undisturbed.
- Check for color change: Some caulk products change color or become transparent when they are fully dried. Keep an eye on the caulked areas and note any changes in appearance to determine if the caulk has completely dried.
It is generally recommended to allow caulk to dry for at least 24 to 48 hours before exposing it to water or other elements. However, drying times can vary, and it is best to follow the specific recommendations given by the caulk manufacturer.
Once the caulk has fully dried and cured, you can move on to the final step – cleaning up and maintaining the caulked areas.
Step 8: Clean up and maintain caulked areas
After the caulk has dried and the project is complete, it’s important to clean up the area and maintain the caulked surfaces to ensure their longevity. Follow these essential steps for cleaning and maintaining the caulked areas:
- Remove tape or protective materials: If you used any painter’s tape or protective materials during the caulking process, carefully remove them. Pull the tape away at a 45-degree angle to avoid damaging the caulk.
- Clean the caulked areas: Use a damp cloth or sponge to gently clean the caulked areas. Remove any dirt, dust, or debris that may have accumulated during the caulking process.
- Inspect for damage or wear: Regularly inspect the caulked areas for any signs of damage or wear. Look for cracks, peeling, or gaps in the caulk. If you notice any issues, plan to recaulk those areas as soon as possible.
- Address maintenance needs: Keep an eye on the caulked areas and address any maintenance needs promptly. This may include cleaning off mildew or mold growth, applying touch-up caulk where necessary, or performing any repairs to the siding itself.
- Monitor for water intrusion: After rainfall or other water exposure, monitor the caulked areas for any signs of water intrusion. Check for leaks or moisture seepage and take necessary steps to address the issue immediately.
- Maintain the surrounding environment: Take steps to protect the caulked areas by maintaining the surrounding environment. For example, trim tree branches that may rub against the siding, clean gutters regularly to prevent overflow, and address any drainage issues that may lead to excessive water exposure.
Regular maintenance and timely repairs are essential for preserving the integrity of the caulked areas. By taking proactive measures and addressing any issues promptly, you can extend the lifespan of your caulk and ensure the long-term effectiveness of the seal.
Congratulations! You have successfully caulked your exterior siding and learned how to clean and maintain the caulked areas. With proper care, your caulked surfaces will provide protection and enhance the beauty of your home for years to come.
Now that you have completed all the steps, you can sit back, relax, and enjoy the benefits of a well-caulked exterior.
Conclusion
Caulking exterior siding is a vital maintenance task that helps to protect your home from water damage, improve energy efficiency, and maintain its overall appearance. By following the step-by-step guide we have provided, you can confidently take on this DIY project and ensure a professional result.
Starting with gathering the necessary tools and materials, preparing the exterior siding, choosing the right caulk, and loading the caulk gun, you are well on your way to achieving a successful caulking job. Applying caulk to the gaps and cracks, smoothing it out, allowing it to dry, and then cleaning and maintaining the caulked areas are crucial steps for optimal results.
Remember to choose a high-quality caulk suited for exterior use, consider the specific requirements of your siding material, and pay attention to drying times and environmental conditions. Regularly inspect and maintain the caulked areas to detect any issues early and address them promptly.
By properly caulking your exterior siding, you can protect your home from water intrusion, enhance its energy efficiency, and extend the lifespan of your siding. Additionally, a well-sealed exterior provides a polished and visually appealing look to your home’s exterior.
We hope that this comprehensive guide has equipped you with the knowledge and confidence to tackle your exterior siding caulking project. Remember to prioritize safety, follow the manufacturer’s instructions, and exercise patience throughout the process.
So, go ahead and take the necessary steps to maintain and protect your home by caulking your exterior siding. Your efforts will pay off in the form of a beautiful, well-protected, and energy-efficient home.
Happy caulking!
Frequently Asked Questions about How To Caulk Exterior Siding
Was this page helpful?
At Storables.com, we guarantee accurate and reliable information. Our content, validated by Expert Board Contributors, is crafted following stringent Editorial Policies. We're committed to providing you with well-researched, expert-backed insights for all your informational needs.


0 thoughts on “How To Caulk Exterior Siding”